
Related Manuals for Oricom SECURE 310


Summary of Contents for Oricom SECURE 310
- Page 1 DECT Digital Baby Monitor Secure 310 User Guide SC310 user manual.indd 2 2011-10-25 15:09:04...
- Page 2 SC310 user manual.indd 3 2011-10-25 15:09:05...
-
Page 3: Table Of Contents
USING YOUR DIGITAL BABY MONITOR ........... 17 TROUBLESHOOTING ................25 CUSTOMER SUPPORT ................27 WARRANTY ....................28 Need Help? If you need assistance setting up or using your Oricom product now or in the future, call Oricom Support. Australia 1300 889 785 www.oricom.com.au Mon-Fri 8am –... -
Page 4: Important Safety Information
IMPORTANT SAFETY INFORMATION Important Safety Information information you will need to get the most from your Oricom Baby Monitor. If you Customer support team. Our dedicated local team are more likely to be able to help you than the retailer where you made your purchase. - Page 5 IMPORTANT SAFETY INFORMATION Therefore, maintain a distance of at least one meter from other electronic become warm to the touch. This is normal and should not be a concern. Warning frayed or compromised cord. Battery safety If a battery leaks, do not let the battery liquid touch skin or eyes. If this happens, immediately flush the affected areas with water, and seek medical assistance.
- Page 6 IMPORTANT SAFETY INFORMATION battery. Disposal Always dispose of your products at the end of their life in accordance with your local waste disposal requirements. Packaging materials all cardboard and paper packaging should be recycled in accordance with your local council waste regulations.
-
Page 7: Getting Started
GETTING STARTED This User Guide provides you with all the information you need to get the most from your Oricom Digital Baby Monitor. Please read this guide carefully and keep rechargeable batteries for it for future reference. Parent unit (pre-installed) -
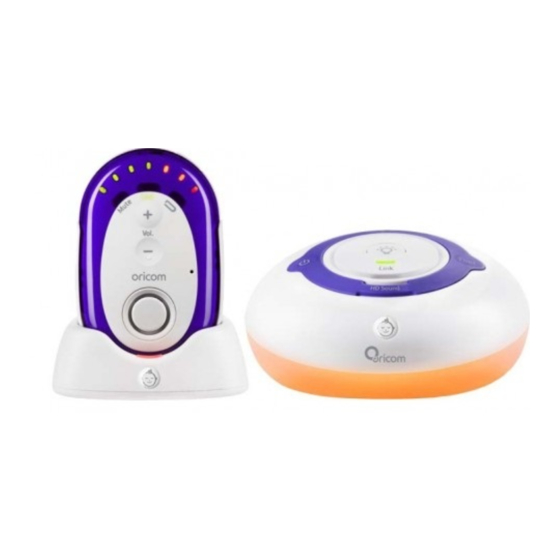
Page 8: Oricom Digital Baby Monitor
ORICOM DIGITAL BABY MONITOR Parent unit Power on/off (on top of unit) Press and hold to switch the power on or off. Lanyard attach point (top of unit) Baby sound level LEDs (not supplied) through here. Mute All (on top of unit) increases. -
Page 9: Parent Unit Charger
ORICOM DIGITAL BABY MONITOR Parent unit charger Front Charging light Red when the Parent unit is correctly placed on the charger. Back Power socket For connection to the mains adaptor cable supplied. SC310 user manual.indd 9 2011-10-25 15:09:09... -
Page 10: Baby Unit
ORICOM DIGITAL BABY MONITOR Baby unit Microphone Nightlight Press to switch the Nightlight on or off. Power on/off Press and hold to switch the power on or off. Find Press to emit an alert beep from the Parent unit –... - Page 11 ORICOM DIGITAL BABY MONITOR Back of Baby unit Power socket For connection to the mains power supplied. SC310 user manual.indd 11 2011-10-25 15:09:10...
-
Page 12: Setting Up
SETTING UP Parent unit 1. Plug one of the power adaptor cables into the socket marked on the back of the Parent unit charger and plug the other end into the mains power wall socket and switch the power on. unit. - Page 13 3. Place the Parent unit into the charger. The red charging light will illuminate on the charger and the battery icon will start scrolling on the Parent until display to indicate that the batteries are being charged. oricom Charging light Warning damage your product.
- Page 14 SETTING UP Battery performance Rechargeable batteries in the Parent unit will last up to 20 hours in normal use. Please note that new The charge capacity of rechargeable batteries will reduce with time as they wear out, so reducing the Battery low warning –...
- Page 15 SETTING UP Switch on and link the Parent and Baby units 1. Press and hold the button on the Baby unit for 1 second. The nightlight will briefly illuminate and then the green Link indicator will flash. 2. Press and hold the illuminate.
- Page 16 SETTING UP If the link is broken: conditions the range is up to 300 metres outdoors and 50m indoors) Positioning your units The Baby unit should ideally be within 1m-2m of your baby for best performance. If you place the Parent and Baby units too close together you will hear a high pitched noise, this is normal.
-
Page 17: Using Your Digital Baby Monitor
USING YOUR DIGITAL BABY MONITOR Switching on/off Switch the Baby unit on 1. Press and hold the button for 1 second. The nightlight will briefly illuminate and then the green Link indicator will flash until it links with the Parent unit. Once linked the green Link indicator will remain on. - Page 18 USING YOUR DIGITAL BABY MONITOR Baby sound level LED indicators LEDs 1-2 = Green LEDs 3-4 = Green LEDs 5-7 = Red (or Amber if Mute Low is on) the sound increases. LEDs 1-2 LEDs 3-4 LEDs 5-7 Equivalent sound level examples: SC310 user manual.indd 18 2011-10-25 15:09:16...
-
Page 19: Adjust The Parent Unit Loudspeaker Volume
USING YOUR DIGITAL BABY MONITOR Adjust the Parent unit loudspeaker volume 1. Press as you keep pressing the button(s). red (Mute All) or press the button. error tone. 20 for more information on Mute All. SC310 user manual.indd 19 2011-10-25 15:09:17... -
Page 20: Crying Alert
USING YOUR DIGITAL BABY MONITOR Mute All feature – Parent unit only loudspeaker. With Mute All on you can still monitor your baby using the Baby 1. To switch Mute All on, press the button located on the top of the unit. The Mute indicator will illuminated red. -
Page 21: Talk Back
USING YOUR DIGITAL BABY MONITOR When Mute Low is switched on, any sounds from the Baby unit to the Parent If the buttons are pressed whilst Mute All or Mute Low has been set then Mute All or Low then the unit will un-mute so you can hear the sounds. 1. - Page 22 USING YOUR DIGITAL BABY MONITOR like Music playback or Nightlight on. button when the Baby unit and Parent unit are positioned in the same room. High-pitch noise will be generated if the button is pressed when Baby unit and Parent unit are close to each other or within 3 metres distance.
-
Page 23: List Of Tones
USING YOUR DIGITAL BABY MONITOR List of tones meaning: Tone Meaning Single tone Triple tone (fast) System alert e.g. link lost, battery low etc. System Alerts can be silenced for a 5 minute period by pressing any button on the Parent unit. Reset the units Resetting either units will return the settings at that unit back to its default settings. - Page 24 USING YOUR DIGITAL BABY MONITOR Reset the Parent unit 1. Within 3 seconds of the Parent unit being switched on, press and hold the button for at least 10 seconds. The display will show Reset for 2 seconds during been performed.
-
Page 25: Troubleshooting
TROUBLESHOOTING Should you experience difficulties operating the SC310 please refer to the Customer Support on 1300 889 785 for assistance. Troubleshooting Problems Solutions Link light does not Check that both the Baby and Parent units are come on switched on. Check that the batteries in the Parent unit are correctly installed and that they are charged. - Page 26 TROUBLESHOOTING Battery low on Put the Parent unit back on the charger to charge. Parent unit Place Parent unit back on the charger as frequently the batteries remain charged. To shorten the charging time you can turn the Parent unit off if it is not being used while it is charging. Parent unit remains 20-21.
-
Page 27: Customer Support
Customer Support information in the Troubleshooting section of this user guide as well as “Frequently Asked Questions” on our website www.oricom.com.au. would like to purchase replacement parts or accessories please call our Customer Support Team. Our dedicated local support team are more likely to be able to help you than the retailer where you made your purchase. -
Page 28: Warranty
Oricom has a simple warranty process for you to follow: number. qualify for return, this warranty does not apply to your product. Products that are authorised to be returned to Oricom in Australia must include all of the following: Oricom International Pty Ltd... - Page 29 Any implied warranties that may be imposed by law are limited in duration to the Warranty Period. Oricom warrants that the product is free from defects in materials or workmanship during the Warranty Period. This Warranty does not extend to any product from which the serial number This warranty in no way affects your statutory warranty rights under the Competition and Consumer Act 2010 or any other similar legislation.
- Page 30 Oricom does not warrant that the operation of the product will be uninterrupted or error free. Oricom is not responsible for damage that occurs as a result of your failure to follow the terms and conditions contained in the user guide to the product purchased constitute the SC310 user manual.indd 30...
- Page 31 Oricom will not be liable for any damages caused by the product or the failure of the product damages. Oricom is not liable for any claim made by a third party or made by you on behalf of a third party. This limitation of liability applies whether damages are sought, or a claim...
- Page 32 Phone: 1300 889 785 (Monday to Friday 8am to 6pm AEST) Web: www.oricom.com.au Fax: (02) 4574 8898 Contact details for Oricom support and warranty claims in New Zealand Email: support@oricom.co.nz Phone: 0800 674 266 (Monday to Friday 10am to 8pm NZST) Web: www.oricom.co.nz...
Need help?
Do you have a question about the SECURE 310 and is the answer not in the manual?
Questions and answers