Table of Contents
Advertisement
Advertisement
Table of Contents

Related Manuals for Oricom ECO7100-1


Summary of Contents for Oricom ECO7100-1
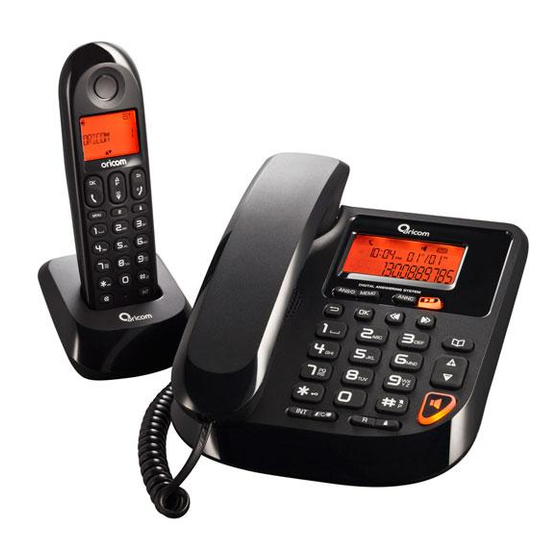
- Page 1 Corded Phone with Answering System USER GUIDE eco7100-1 DECT Digital Corded Phone with Answering System Keep this user guide for future reference. Always retain your proof of purchase in case of warranty service and register your product on line at: AUSTRALIA: www.oricom.com.au...
-
Page 2: Table Of Contents
TABLE OF CONTENTS SAFETY INFORMATION GETTING STARTEd CORdLESS HANdSET LAYOUT CORdLESS HANdSET LCd dISpLAY CORdEd BASE kEY LAYOUT CORdEd BASE LCd LAYOUT CORdLESS HANdSET OpERATIONS USING YOUR pHONEBOOk USING THE CALL LOG USING THE REdIAL LIST SET CLOCk & ALARM AdvANCEd USE OF YOUR TELEpHONE USING THE INTERCOM/ MAkE CONFERENCE CALL ANSWERING SYSTEM... -
Page 3: Safety Information
SAFETY INFORMATION IMPORTANT • Clean with a dry, soft, lint-free cloth. Never use cleaning agents, particularly aggressive solvents. • Because the phone works by sending radio • Avoid exposure of this telephone to moisture or signals between base station and handset, liquid. - Page 4 SAFETY INFORMATION • Do not use your telephone during an electrical storm or thunderstorm as it is possible to get an electric shock. Refer to information contained in White pages directory. • This phone is designed for connection to a PSTN telephone line or an analogue extension port of a PBX system.
-
Page 5: Getting Started
GETTING STARTEd Read first before getting started Mains power connection IMPORTANT - The base unit and charger pod must be used with the power adaptors that supplied with this Location product as using other power adaptors might damage The base unit needs to be placed within 2 metres of the product. -
Page 6: Packing Contents
GETTING STARTEd Charging the batteries In a home with broadband, every telephone must have a micro-filter connected, not just the one at the Before the handset is used for the first time, place telephone point that your modem is connected to. If it into the charging station for at least 14hours. The you need more broadband micro-filters, contact your charging status is indicated in the handset display. -
Page 7: Cordless Handset Layout
CORdLESS HANdSET LAYOUT Cordless Handset layout Earpiece OK button - Select a menu entry NAVIGATION button - Up to increase volume and view CID - D o w n t o d e c r e a s e v o l u m e a n d a c c e s s Phonebook TALK button - Make or Accept a call... - Page 8 CORdLESS HANdSET LAYOUT 11 Redial button - Enter redial list to view the last dialed number 12 R (Recall) button 13 [#] button - Insert a pause. - Long press to turn the ringer on/off 14 INT button - Make the intercom call - Make the conference call 15 Microphone...
-
Page 9: Cordless Handset Lcd Display
pACk CONTENTS CORdLESS HANdSET LCd dISpLAY Cordless Handset LCD display 1 Display icons 4 Display during the MENU mode 2 Displays during the MENU mode to confirm the Press BACK to return to the pervious menu level. selection Press BACK to delete the last entered digit or 3 Indicates more options available Use Up/Down character key to scroll up/down... -
Page 10: Cordless Handset Lcd Display
CORdLESS HANdSET LCd dISpLAY Icon Definition Icon Name Description Battery Level Indication Indicates the battery charge level Indicates that an external call is connected or held. Call Icon blinks when receiving an incoming call. Message Indicates you have a new Voice Mail message. Indicates you have new missed calls, or the call log is being Caller display viewed. -
Page 11: Corded Base Key Layout
CORdEd BASE kEY LAYOUT Corded base key layout... - Page 12 CORdEd BASE kEY LAYOUT Hook lock 11 Ring Off/ Pause/ # button - fix the corded handset on the corded base - Long press to turn the ringer on/off while the corded base is hung against the wall - Insert a pause Speaker 12 Speaker button BACK button...
-
Page 13: Corded Base Lcd Layout
CORdEd BASE LCd LAYOUT... - Page 14 CORdEd BASE LCd LAYOUT Icons Definition Icon Name Description Mute Indicates the mic is turned off Indicates that an external call is connected or held. Call Icon blinks when receiving an incoming call. Message Indicates you have a new Voice Mail message. Indicates you have new missed calls, or the call log is being Caller display viewed.
- Page 15 CORdEd BASE LCd LAYOUT Recorded number in Indicates the recorded number for Phonebook or CID entry Phonebook or CID list Displays when there is more digit(s) available on the right for Digits on the right displaying Displays when there is more digit(s) available on the left for Digits on the left displaying 88:88AM...
-
Page 16: Menu Tree
COREdE BASE LCd LAYOUT Menu Tree Main Menu Sub-menu 1 NEW ENTRY PHONEBOOK LIST EDIT ENTRY DELETE DELETE ALL DIRECT MEM HANDSET NAME PERSONAL SET HANDSET TONE LANGUAGE AUTO HANG-UP DATE/ TIME CLOCK & ALARM SET FORMAT ALARM ALARM TONE CHANGE PIN ADVANCED SET REGISTRATION... -
Page 17: Cordless Handset Operations
CORdLESS HANdSET OpERATIONS Cordless Handset Operations Note: You won’t be able to erase and correct the entered digits in direct dialing mode. Switching ON/ OFF Press and hold the END button for more than 2 You can also call from Call log/Redial seconds to switch on/off the handset in standby mode. - Page 18 CORdLESS HANdSET OpERATIONS Volume control Note: During a call, you can increase/ decrease the Incoming calls can still be answered even when earpiece volume by pressing Navigation up/down the keypad is locked. button Mute Call waiting The Mute function allows you to turn off the microphone If you have subscribed to Call Waiting service, the during a call, so that the caller can’t hear you.
-
Page 19: Using Your Phonebook
USING YOUR pHONEBOOk Using your Phonebook View a Phonebook entry 1. Press Phonebook (Navigation down) button in standby mode to access Phonebook directly You can store up to 30 phonebook memories with a maximum of 24 digits for the phone number and 12 2. - Page 20 USING YOUR pHONEBOOk Long press the corresponding key in standby mode Note: will automatically dial the stored number. You can erase the entered content by pressing BACK button if you make an error.. Add a direct memory 1. Press MENU button and select PHONEBOOK by using Navigation Up/Down button, press OK Delete a Phonebook entry button to confirm...
- Page 21 USING YOUR pHONEBOOk 4. The current stored name will be displayed, press MENU button to display EDIT NUMBER 5. Press OK button to confirm, edit the name and press OK to confirm 6. The current stored number will be displayed, edit the number and press OK to confirm Delete a direct memory 1.
-
Page 22: Using The Call Log
USING THE CALL LOG Using the call log Delete a call log entry 1. Press Call Log (Navigation Up button) in standby mode and press Up/Down button to Caller ID enables you to see the your callers’ phone select an entry number on the handset display before you answer and also in your Call Log afterwards, but you have 2. -
Page 23: Using The Redial List
USING THE REdIAL LIST Using the Redial list Delete all redial entries 1. Press Redial button in standby mode The last 5 dialed numbers will be stored in the Redial 2. Press MENU button and select DELETE ALL by list. using Up/Down button, press OK button to confirm 3. - Page 24 USING THE REdIAL LIST 4. Press Up/Down button to select RING VOLUME 5. Press Up/Down button to select ON or OFF and and press OK button to confirm then press OK button to confirm 5. Press Up/Down button to select your desired Change the display language volume and then press OK button to confirm 1.
-
Page 25: Set Clock & Alarm
SET CLOCk & ALARM Set Clock & Alarm Set date format 1. Press MENU button in standby mode 2. Press Up/Down button to select CLOCK & Set Date and time ALARM and press OK button to confirm 1. Press MENU button in standby mode 3. - Page 26 SET CLOCk & ALARM Set the Alarm tone There are 3 alarm melodies available. 1. Press MENU button in standby mode 2. Press Up/Down button to select CLOCK & ALARM and press OK button to confirm 3. Press Up/Down button to select ALARM TONE and press OK button to confirm 4.
-
Page 27: Advanced Use Of Your Telephone
AdvANCEd USE OF YOUR TELEpHONE Advanced use of your telephone 2. Press MENU button on the handset in standby mode 3. Press Up/Down button to select ADVANCED SET Change PIN and press OK button to confirm The master PIN is used for registering/ unregistering 4. - Page 28 AdvANCEd USE OF YOUR TELEpHONE Recall time After reset, all your personal settings including the entries in call log and redial list will be deleted. This feature allows you to choose the different Recall time to accommodate the setting of your telephone But, the entries in your Phonebook will remain service provider for using customer calling service, unchanged and the recorded messages (answering...
-
Page 29: Using The Intercom/ Make Conference Call
USING THE INTERCOM/ MAkE CONFERENCE CALL Using the intercom/Make Transfer an external call to another handset 1. Press INT button to put the external call on hold conference call (the caller won’t be able to hear you) 2. Handset will display INT with the relevant handset Initiate an intercom call numbers that are available for intercom. - Page 30 ANSWERING SYSTEM Answering system 4. Press Up/Down button to select RING DELAY and press OK button to confirm 5. Press Up/Down button to select 2-7 rings or Turn On/ off the answering system ECONOMY and then press OK to confirm 1. Press MENU button in standby mode Note: 2.
-
Page 31: Answering System
ANSWERING SYSTEM 4. CONFIRM? will be displayed on the handset, 3. Press Up/Down button to select RECORD OGM press OK button to confirm Or you can simply and press OK button to confirm. press and hold the Mute/C/Delete button on the 4. Press Up/Down button to select ANSW.&RECORD base unit to delete all recorded messages. - Page 32 ANSWERING SYSTEM If the answering system is turned off, you must Note: change your master PIN from its default 0000, before If the answering system is off, and the master you can use the remote access feature. PIN has been changed from its default 0000, it 1.
- Page 33 CORdEd BASE OpERATIONS Corded Base Operations Volume control During the call, you can adjust the handset receiver/ base speaker volume by pressing Volume up/down Set Date and Time button. Press and hold OK/CLK button, the LCD will be There are 5 ringer volume levels available: L1, L2, displayed: L3, L4, L5.
- Page 34 HANdSET TONE CORdEd BASE OpERATIONS Activate/deactivate Key Lock function Press OK/CLK button to confirm. A confirmation tone will be emitted and the base will return to standby In standby mode, press and hold * button to activate/ mode. deactivate key lock. The key lock icon will be displayed on the LCD when Delete all redial entries this function is activated.
- Page 35 CORdEd BASE OpERATIONS HANdSET TONE Press OK/CLK button to confirm. A confirmation tone LCD will be displayed: will be emitted and the base will return to standby Press OK/CLK button to confirm. A confirmation tone mode. will be emitted and the base will return to standby mode. Edit a Phonebook entry Press Phonebook button in standby mode and Caller ID on the corded base select an entry by pressing CID up/down button This is a call log that shows the phone numbers of the...
- Page 36 CORdEd BASE OpERATIONS A confirmation tone will be emitted and the base will Press TALK button on any handsets to establish the return to Standby mode. intercom. Note: Delete a CID record if you want to cancel the intercom before being Press CID up/down button in standby mode to select answered by the registered handsets, simply an entry press the INT/PAGE button again to stop...
-
Page 37: Corded Base Operations
CORdEd BASE OpERATIONS Make a Conference call Your phone can make a conference call between the corded base, 1 registered handset and 1 external line, or between 2 registered handsets and 1 external line. When the corded base is connected with an external line, press INT/PAGE button to page all registered cordless handsets. -
Page 38: Answering System On The Base
ANSWERING SYSTEM ON THE BASE Answering system on the base Press Play/Stop button in standby mode Press and hold Mute/C/Delete button for about 5 seconds to delete all the recorded messages. Turn on/off the answering system A confirmation tone will be emitted and the base will return to standby mode. You can press ANS button to turn on/off the answering machine. -
Page 39: Customer Support
Troubleshooting section of this user guide as well as “Frequently Asked Questions” on our website www.oricom.com.au. If you have further questions about using the product after reviewing the resources above or would like to purchase replacement parts or accessories please call our Customer Support Team. - Page 40 Warranty in Australia You must arrange and pay any expenses incurred (including postage, delivery, freight, transportation or Oricom has a simple warranty process for you to follow: insurance of the product) to return the faulty product to • P lease call or email our Customer Support Team, us, however, we will arrange delivery of the repaired contact details follow.
-
Page 41: Warranty
Oricom branded product in which they are installed, Warranty Period. whichever is longer. During the Warranty Period, Oricom warrants that the product is free from defects Oricom will where possible repair and if not replace in materials or workmanship during the Warranty the faulty product or part thereof. - Page 42 Oricom. limitation of liability will not apply to claims for Oricom will not be in breach of a warranty expressly personal injury. Nothing in this Warranty excludes, set out in this User Guide or under the Competition...
- Page 44 Contact details for Oricom Support and Warranty Claims in Australia Oricom International Pty Ltd Locked Bag 658 South Windsor, NSW 2756 Australia Email: support@oricom.com.au Phone: 1300 889 785 (Monday to Friday 8am to 6pm AEST) Web: www.oricom.com.au Fax: (02) 4574 8898...
Need help?
Do you have a question about the ECO7100-1 and is the answer not in the manual?
Questions and answers