Sign In
Upload
Manuals
Brands
Roland Manuals
Electronic Keyboard
Fantom-Xa
Roland Fantom-Xa Manuals
Manuals and User Guides for Roland Fantom-Xa. We have
9
Roland Fantom-Xa manuals available for free PDF download: Owner's Manual, User Manual, Features Manual, Overview, Workshop Manual, Feature Manual, Information Sheet
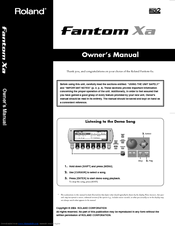
Roland Fantom-Xa Owner's Manual (264 pages)
High - Quality Workstation Synthesizer
Brand:
Roland
| Category:
Electronic Keyboard
| Size: 10.3 MB
Table of Contents
Listening to the Demo Song
1
Using the Unit Safely
2
Important Notes
4
Using Memory Cards
5
Table of Contents
6
Main Features
11
Panel Descriptions
12
Front Panel
12
Rear Panel
14
Getting Ready
15
Connections
15
Turning On/Off the Power
16
Adjusting the Display Contrast (LCD Contrast)
16
Listening to the Demo Songs
17
Various Performance Features
18
Overview of the Fantom-Xa
19
How the Fantom-Xa Is Organized
19
About Memory
21
About the Onboard Effects
22
About the Sequencer
23
Tempo Track
24
Positions for Storing a Song
24
About the Sampling Section
25
Basic Operation of the Fantom-Xa
26
Switching the Sound Generator Mode
26
About the Function Buttons
26
Moving the Cursor
27
Changing a Value
27
Assigning a Name
28
Playing in Patch Mode
29
About the PATCH PLAY Screen
29
Selecting a Patch
30
Selecting Patches from the List
30
Selecting Favorite Patches/Rhythm Sets (Favorite Patch)
31
Selecting Patches by Category
32
Transposing the Keyboard in Octave Units (Octave Shift)
33
Transposing the Keyboard in Semitone Steps (Transpose)
33
Selecting the Tones that will Sound (Tone On/Off)
33
Playing Single Notes (Monophonic)
34
Creating Smooth Pitch Changes (Portamento)
34
Playing Percussion Instruments
34
Selecting the Parameter Controlled by the Realtime Controllers or D Beam Controller (Control Setting)
34
Creating a Patch
35
How to Make Patch Settings
35
The Compare Function
36
Saving Patches You've Created (Write)
37
Functions of Patch Parameters
38
Ring Modulator
39
Settings Common to the Entire Patch
40
Creating a Rhythm Set
55
How to Make Rhythm Set Settings
55
Saving Rhythm Sets You've Created (Write)
57
Functions of Rhythm Set Parameters
58
Playing in Performance Mode
66
Displaying PERFORM LAYER Screen
66
Displaying PERFORM MIXER Screen
66
Functions in the PERFORMANCE LAYER/MIXER Screen
66
Selecting a Performance
67
Using the LAYER Screen
68
Combining and Playing Sounds Together (Layer)
69
Playing Different Sounds in Different Areas of the Keyboard (Split)
69
Using the MIXER Screen
70
Silencing the Playback of a Specific Part (Mute)
71
Creating a Performance
72
Adjusting the Parameters of each Part
72
Changing the Settings of the Patch Assigned to a Part
72
Saving a Performance You've Created (Write)
72
Functions of Parameters of each Part (Performance Parameters)
73
Equal Temperament
76
Settings for the Realtime Controllers and D Beam Controller
78
MIDI Settings
79
Modifying the Sound in Real Time
80
D Beam Controller
80
Solo Synth
81
Realtime Controller
83
Control Pedal
85
Playing Arpeggios
86
About Arpeggio
86
Arpeggio Settings
87
Creating an Arpeggio Style (Arpeggio Style Edit)
90
Saving the Styles You Have Created (Write)
91
Using the Chord Memory Function
92
About the Chord Memory Function
92
Performing with the Chord Memory Function
92
Creating Your Own Chord Forms
93
Saving the Chord Forms You Have Created
93
Playing Rhythms
94
About Rhythm Patterns
94
Using Rhythm Groups
94
Playing Rhythm
94
Rhythm Pattern Settings
96
Creating a Rhythm Pattern (Rhythm Pattern Edit)
97
Saving the Rhythm Pattern You Have Created (Write)
98
Creating a Rhythm Group (Rhythm Group Edit)
99
Saving the Rhythm Group You Have Created (Write)
99
Sampling
100
Sampling Procedure
100
External Input Settings
101
Skip Back Sampling
103
Editing a Sample
104
Sample List
104
Deleting a Sample
105
Sample Edit
106
Time Stretch
110
Procedure for Dividing a Sample
110
Auditioning the Divided Samples
111
Assigning Samples to a Pad (Assign to Pad)
112
Assigning a Sample as a Patch to a Part (Assign to Keyboard)
113
Create a Rhythm Set (Create Rhythm)
114
Creating a Multisample (Create Multisample)
114
Saving a Sample (Write)
116
Using the Pads
117
Using the Hold Function to Sustain a Sound
117
Making Settings for the Pads (Pad Setting)
117
Assigning a Pattern to a Pad (RPS Function)
118
Using the Pads to Play Rhythms
118
Playing Back a Song
119
Playing a Song Immediately (Quick Play)
119
Playing Back Songs Consecutively (Chain Play)
119
Various Playback Methods
120
Recording Songs
122
Before You Record a New Song
122
Setting the Tempo
123
Recording Your Performance as You Play It (Realtime Recording)
124
Inputting Data One Step at a Time (Step Recording)
128
Editing Songs
131
Loading the Song You Want to Edit
131
Track Mute
132
Editing Sequencer Data over the Specified Range (Track Edit)
133
Preview Function
134
Changing the MIDI Channel
139
Data Thin
143
Editing Individual Items of Sequencer Data (Micro Edit)
144
Program Change
145
Editing a System Exclusive Message
145
Control Change
145
Pitch Bend
145
Pattern Call
146
Tempo Change
146
Assigning a Name to a Song (Song Name)
149
Saving/Loading a Song (Save/Load)
150
Saving a Song (Save)
150
Saving a Song as an SMF File (Save as SMF)
152
Loading a Song (Load)
153
Playing a Phrase at the Touch of a Finger (RPS)
154
Before You Use the RPS Function
154
Using the RPS Function While You Perform
156
Adding Effects
157
Turning Effects on and off
157
Making Effect Settings
157
Applying Effects in Patch Mode
158
Applying Effects in Performance Mode
160
Making Multi-Effects Settings (MFX1-3)
162
Making Multi-Effects Settings (MFX Control)
162
Specifying the Multi-Effects Structure (MFX Structure)
163
Multi-Effects Parameters
164
Making Chorus Settings
189
Making Reverb Settings
190
Mastering Effect
191
Settings Common to All Modes (System Function)
192
How to Make System Function Settings
192
Saving the System Settings (System Write)
192
System Information
192
Functions of System Parameters
193
Local off
197
Data Management Functions/Reset to Factory Settings (Factory Reset)
203
Backing up User Data (User Backup)
203
Restoring User Data that You Backed up (User Restore)
203
Factory Reset
203
Initializing a Memory Card (Card Format)
203
File-Related Functions (File Utility)
204
Basic Procedure
204
Copying a File (Copy)
205
Deleting a File (Delete)
205
Moving a File (Move)
205
Initializing a Memory Card (Card Format)
205
Connecting to Your Computer Via USB
206
About USB Functions
206
Switching the USB Storage Mode and the MIDI Mode
206
Transferring Files to or from Your Computer (Storage Mode)
207
Exiting Storage Mode
208
Canceling Usb Communication
208
Exchanging MIDI Messages with Your Computer (MIDI Mode)
209
Using Fantom-X Editor
210
Installing Fantom-X Editor into Your Computer
210
Making Connections
210
Using Fantom-X Librarian
210
Fantom-X Editor System Requirements
211
About V-LINK
212
What Is V-LINK
212
Connection Example
212
Turning the V-LINK ON/OFF
212
V-LINK Settings
212
Resetting the Image
213
Installing the Wave Expansion Board
214
Cautions When Installing a Wave Expansion Board
214
How to Install a Wave Expansion Board
214
Checking the Installed Wave Expansion Board
215
Expanding the Memory
216
Precautions for Expanding Memory
216
How to Expand the Memory
216
Checking that Memory Is Installed Correctly
217
Using a Memory Card
218
Before Using the Memory Card
218
Writing Data to the Card
218
Installing the PC Card Protector
218
Troubleshooting
219
Error Messages
225
Performance List
226
Patch List
227
Rhythm Set List
232
Waveform List
241
Arpeggio Style List/Chord Form List
244
Arpeggio Style List
244
Chord Form List
244
Rhythm Group List
245
Rhythm Pattern List
246
About MIDI
248
MIDI Implementation Chart
249
Sequencer Section
250
Specifications
251
Rhythm Pattern
252
Chord Memory
252
Index
253
Advertisement
Roland Fantom-Xa User Manual (60 pages)
Fantom Series Audio Track expansion
Brand:
Roland
| Category:
Electronic Keyboard
| Size: 1.52 MB
Table of Contents
Important Notes
4
Table of Contents
5
Check the Contents of the Package
8
Updating the Fantom-X
9
What Is the FANTOM-X Audio Track Expansion Kit
9
Items Required for Performing the Update
9
Cautions When Performing the Update (Important)
9
Update Procedure
10
Verifying the Update
11
Main Features
12
Using Audio Tracks
13
What Are Audio Tracks
13
To Access the Audio Track Edit Screen
14
To Access the Audio Track Mixer Screen
14
Items in the Audio Track Edit Screen
15
Editing Audio Tracks (Audio Track Edit Screen)
16
Moving a Sample Event (Move)
16
Selecting and Auditioning a Sample Event (Preview)
16
Using the Pads to Mute Audio Tracks (Mute/Solo)
16
Viewing a List of Markers (Marker List)
17
Opening the Loop/Locate Window (Loop/Locate)
17
Inserting a Sample Event at a Specified Location (Insert)
17
Deleting the Selected Sample Event from an Audio Track (Delete)
18
Copying a Sample Event (Copy)
18
Unloading a Sample (Unload Sample)
18
Combining the Contents of the Tracks into One Audio Track (Mixdown)
18
Erasing Audio Tracks (Clear)
19
Naming an Audio Track (Track Name)
20
Switching the Display Mode
20
Zooming in and Zooming out in the Display
20
Editing MIDI Tracks
20
Items in the Audio Track Mixer Screen
21
Controlling the Audio Tracks (Audio Track Mixer Screen)
22
Controlling the Audio Track Settings
22
Using the Knobs to Control the Mixer
23
Opening the Loop/Locate Window (Loop/Locate)
23
Using the Pads to Mute Audio Tracks (Mute)
23
Recording an Audio Track
24
Recording an Audio Track (SOLO/RE-SAMPLING)
24
Combining Multiple Audio Tracks into One Track (AUDIO MERGE)
25
Saving Your Audio Tracks
26
Using the Skip Back Sampling Function
27
What Is Skip Back Sampling
27
Using Skip Back Sampling
27
Editing the Data Created by Skip Back Sampling
28
Isolating the Desired Portion of the Sampled Data (Start Beat/End Beat)
28
Cancelling the Sample (Skip Back Cancel)
28
Assigning the Sampled Waveform to the Keyboard or a Pad (Assign to Keyboard/Pad)
28
Assigning the Sampled Waveform to an Audio Track (Assign to Audio Track)
29
Multisample Editing Functions
30
Creating a Multisample
30
Creating a Multisample in the Patch Edit Screen
31
Creating a Multisample in the Create Multisample Screen
31
Editing a Multisample
33
About the Multisample Edit Screen
33
Selecting the Notes to Edit
34
Changing the Multisample Assigned to a Tone (List)
34
Erasing the Data from the Selected Region of Notes (Erase)
34
Assigning a Sample to the Selected Region (Assign)
34
Copying a Sample from a Key to Another Key (Copy)
35
Opening the Tone Switch/Select Window (Tone Sw/Sel)
35
Moving the Split Point (Split Point)
35
Returning a Multisample to the Last-Written State (Reload)
36
Erasing All Notes (Erase All)
36
Replacing the Sample of the Current Zone (Sample Select)
36
Specify the Original Key (Org Key) of the Sample
37
Sorting Samples in the Order of Their Original Key (Sort)
37
Moving All Samples to Left or Right (Shift)
37
Moving the Data of the Current Zone to Left or Right (Move)
37
Saving a Multisample
38
Sample-Related Changes
39
Extended Patch Groups
39
Saving a Sample Auto Patch
39
Bank Select and Program Change Correspondence Chart
39
Newly Added Sample Parameters
40
Sample BPM Calculator (BPM Calc)
40
Selecting a Sample (Sample Number)
40
Changes in the Saved Sample Content (Save All Samples)
40
Changes in the Patch/Rhythm Edit Screen
41
Newly Added Patch Overview Screen
41
Changes Due to the Upgraded Editor Software
42
Newly Added PC Mode Screen
42
Cautions When Using S-700 Series Sounds with the Fantom-X
42
Before You Connect the Fantom-X to Your Computer
42
Importing Patches and Rhythm Sets
43
Fantom-X Editor System Requirements
45
System Requirements (Windows)
45
System Requirements (Mac OS)
45
About the Included USB MIDI Driver
45
Other Changes
46
Changes in the Patch Edit Screen
46
Changes in the Performance Mixer Screen
47
Changes in the Performance Layer Screen
47
Newly Added Layer List Window
47
Changes in the Key Range Window
48
Playing Different Sounds Across the Keyboard (Split)
48
Changes in the Song Edit Screen
48
Changes in the Song List Screen
49
Deleting a Song
49
Using the Pads for Realtime Erase
49
CC Filter Added to the Microscope
50
Improved Functionality for Step Recording
50
Changes in the Demo Song Loaded When You Start up the Fantom-X
50
Improved Functionality in Live Setting
51
Registering a Song File in a Live Setting
51
Recalling a Song File You Registered
52
Switching the Font
52
Removing the Text
52
Improvements in Arpeggio Functionality
52
Using the Pads to Switch Arpeggio Styles
52
Changing the Arpeggio Styles Assigned to the Pads
53
Improvements in Chord Memory Functionality
53
Using the Pads to Switch Chord Forms
53
Changing the Chord Forms Assigned to the Pads
54
Changes in the Librarian
54
New Shortcut from the Input Setting Screen to MFX Edit
55
New Parameters Available for the Assignable Switches
55
Newly Added DIMM Check Function
56
Index
57
Roland Fantom-Xa Features Manual (14 pages)
Working with Standard MIDI Files
Brand:
Roland
| Category:
Electronic Keyboard
| Size: 3.63 MB
Advertisement
Roland Fantom-Xa Overview (10 pages)
Exploring the Fantom-Xa
Brand:
Roland
| Category:
Electronic Keyboard
| Size: 3.76 MB
Table of Contents
About this Booklet
2
Getting Ready
2
Patch Mode
3
Skip Back Sampling
9
Roland Fantom-Xa Features Manual (11 pages)
Importing and Using Loops
Brand:
Roland
| Category:
Electronic Keyboard
| Size: 2.98 MB
Roland Fantom-Xa Features Manual (7 pages)
Speed Sequencing
Brand:
Roland
| Category:
Electronic Keyboard
| Size: 2.59 MB
Roland Fantom-Xa Workshop Manual (5 pages)
Brand:
Roland
| Category:
Electronic Keyboard
| Size: 1.84 MB
Roland Fantom-Xa Feature Manual (4 pages)
Sequencing with Rhythms
Brand:
Roland
| Category:
Electronic Keyboard
| Size: 2.04 MB
Roland Fantom-Xa Information Sheet (3 pages)
Fantom Xa
Brand:
Roland
| Category:
Synthesizer
| Size: 0.43 MB
Advertisement
Related Products
Roland Fantom-X6
Roland Fantom-X7
Roland Fantom-X8
Roland Fantom-X
Roland Fantom-X Workshop
Roland Fantom-S88
Roland Fantom-S
Roland FANTOM-06
Roland FANTOM-07
Roland FANTOM-08
Roland Categories
Musical Instrument
Synthesizer
Recording Equipment
Drums
Electronic Keyboard
More Roland Manuals
Login
Sign In
OR
Sign in with Facebook
Sign in with Google
Upload manual
Upload from disk
Upload from URL