Lexmark X544DTN Manuals
Manuals and User Guides for Lexmark X544DTN. We have 8 Lexmark X544DTN manuals available for free PDF download: User Manual, Product Study Manual, Setup Manual, Quick Manual, Supplementary Manual
Advertisement
Lexmark X544DTN User Manual (258 pages)
X54x Series
Brand: Lexmark
|
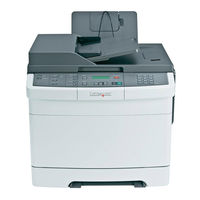
Category: All in One Printer
|
Size: 3.32 MB
Table of Contents
Lexmark X544DTN User Manual (257 pages)
X54x Series
Brand: Lexmark
|
Category: All in One Printer
|
Size: 7.4 MB
Table of Contents
Advertisement
Lexmark X544DTN User Manual (245 pages)
Lexmark X543DN: User Guide
Brand: Lexmark
|
Category: All in One Printer
|
Size: 4.35 MB
Table of Contents

Lexmark X544DTN Product Study Manual (75 pages)
C54x/X54x Series
Brand: Lexmark
|
Category: All in One Printer
|
Size: 9.44 MB
Table of Contents

Lexmark X544DTN Setup Manual (32 pages)
Lexmark X543DN: Install Guide
Brand: Lexmark
|
Category: All in One Printer
|
Size: 5.32 MB

Lexmark X544DTN Quick Manual (4 pages)
Color Multifunction Laser Printers

Lexmark X544DTN Supplementary Manual (1 page)
Print defects guide
Brand: Lexmark
|
Category: All in One Printer
|
Size: 0.01 MB