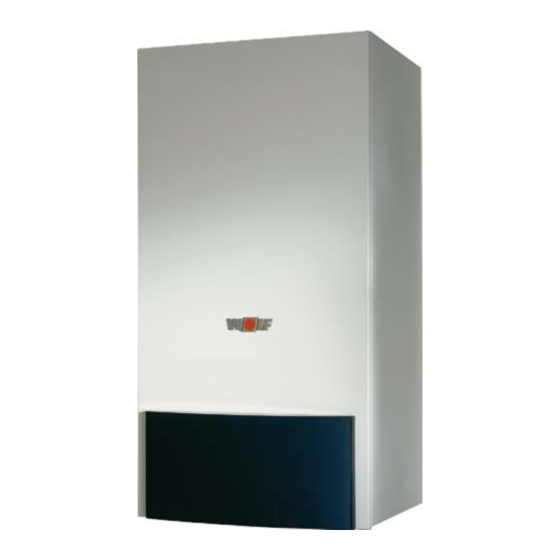
Wolf CGB-11 Installation Instructions Manual
Gas fired condensing boilers
Hide thumbs
Also See for CGB-11:
- Operating instructions manual (8 pages) ,
- Service manual (56 pages) ,
- Service manual (52 pages)
Table of Contents
Advertisement
Installation instructions
Gas fired condensing boilers
CGB-11
CGB-20
CGB-K-20 Combi boiler
CGB-24
CGB-K-24 Combi boiler
Wolf GmbH · Postfach 1380 · 84048 Mainburg · Tel. 08751/74-0 · Fax 08751/741600 · Internet: www.wolf-heiztechnik.de
Art.-Nr. 3061344_201509
Boiler
Boiler
Boiler
Subject to technical modifications
GB
Advertisement
Table of Contents

Related Manuals for Wolf CGB-11


Summary of Contents for Wolf CGB-11
-
Page 1: Installation Instructions
Installation instructions Gas fired condensing boilers CGB-11 Boiler CGB-20 Boiler CGB-K-20 Combi boiler CGB-24 Boiler CGB-K-24 Combi boiler Wolf GmbH · Postfach 1380 · 84048 Mainburg · Tel. 08751/74-0 · Fax 08751/741600 · Internet: www.wolf-heiztechnik.de Art.-Nr. 3061344_201509 Subject to technical modifications... -
Page 2: Table Of Contents
Index Safety instructions ......................3 Standards and regulations..................4-5 Control unit / Function / Operation................6-7 Dimensions / Transport dimensions ................. 8-9 Layout ........................10-11 Positioning ........................12 Assembly ........................13 Installation ......................14-17 Installation of a balanced flue system ............18 Power supply ..................19-22 Filling the system ..................23 Commissioning .................. -
Page 3: Safety Instructions
Safety instructions The following symbols are used in conjunction with these important instructions concerning personal safety as well as technical reliability. „Safety instructions“ are instructions with which you must comply exactly, to prevent injury and material losses. Fig.: Terminal box: Danger from electric power Danger through ‚live‘... -
Page 4: Standards And Regulations
Regulations) and the Water Supply (Water Fitting) Regula- tions 1999, or The Water Bylaws 2000 (Scotland). It should Wolf gas fired boilers must only be installed by a recognis- also be in accordance with the relevant requirements of the ed heating contractor. This heating contractor will also be... - Page 5 DHW production in heating systems with flow temperatures up to 95 °C and 3 bar design pressure according to DIN EN 12828 part 3. The Wolf gas fired boiler is also approved for installation in garages. Open flue gas fired condensing boilers must only be installed in a room which complies with the appropriate ventilation requirements.
-
Page 6: Control Unit / Function / Operation
Control unit / Function / Operation ON/OFF switch Reset DHW temperatu- Thermometer button re selector Pressure gauge Heating water tem- Illuminated ring perature selector ON/OFF switch The gas fired boiler is OFF in position 0. Reset A fault is reset by pressing the reset button which will also restart the system. Pressing the reset button reactivates the system, if there was no fault. - Page 7 Control unit / Function / Operation Setting Winter mode (position 2 to 8) In winter mode, the boiler heats to the temperature selected at the heating water thermo- stat. According to the pump operating mode, the circulation pump operates constantly (factory setting) or only in parallel with the burner activation/run-on time.
-
Page 8: Dimensions / Transport Dimensions
Dimensions / Transport dimensions Fig.: Connections DHW flow Heating flow Heating return Heating return DHW return Condensate drain Fig.: Dimensions CGB combined with CSW-120 Fig.: Dimensions Fig.: Dimensions 3061344_201509... -
Page 9: Dimensions / Transport Dimensions
Dimensions / Transport dimensions CGB-K Fig.: Dimensions Fig.: Dimensions Heating flow DHW connection (on site) DHW connection Gas connection Cold water inlet Cold water inlet (on site) Heating return Condensate drain Fig.: Connections Fig.: Dimensions 3061344_201509... -
Page 10: Layout
Layout Manual air-vent valve Fan motor Flue pipe Gas fan Limit thermostat Gas restrictor (only for CGB-24) Gas:air mixing chamber Limit thermostat Burner Expansion vessel Heating water heat exch. TBV/flow sensor Return sensor Inlet pipe Flue gas temperature limiter Gas combination valve Condensate siphon Three-way diverter valve Heating circuit pump... -
Page 11: Layout
Layout CGB-K Manual air-vent valve Fan motor Flue pipe Gas fan Limit thermostat Gas restrictor (only for CGB-K-24) Gas:air mixing chamber Limit thermostat Burner Heating water heat exch. Expansion vessel TBV/flow sensor Return sensor Inlet pipe Flue gas temperature limiter Gas combination valve Condensate siphon Three-way diverter valve... -
Page 12: Positioning
Furthermore, all gas boiler components must be freely acces- sible from the front, and flue gas measurements must be able to be taken. If minimum dimensions and accessibility are not maintained/given, Wolf may require accessibility to be provided during a service visit. Clearance between the boiler and combustible... -
Page 13: Assembly
Assembly Opening the casing lid We recommend you remove the casing lid during installation. Pivot the control unit lid down. Unlock the casing lid with the l.h. and r.h. rotating bolts. rotating lock Release the lower part of the casing lid and unhook at the top. -
Page 14: Installation
Installation Supply line – subsurface version You may determine the connections for cold water and DHW, for the central heating and gas supply pipe and safety valve drain using the subsurface installation template, if these ser- vices are laid under the surface. Route the supply lines for gas, central heating and DHW underneath the surface in accordance with the enclosed installation template. - Page 15 Installation Heating circuit We recommend the installation of a maintenance valve into the central heating flow and return – angled version for installations below the surface, straight version for surface mounting. Fig.: Fig.: Maintenance valve, angled Maintenance valve with safety version (accessories) valve connection, angled ver- sion (accessories)
- Page 16 If a DHW cylinder is connected to the gas fired boiler, replace the pipe bends in the central heating flow with a three-way diverter valve from the Wolf accessory range, and remove the dummy plug from the junction of the heating return. A detailed description is included with the connection set (accessories).
-
Page 17: Installation
Installation Connection of a 200 litre Wolf DHW cylinder or third party cylinder Connect the DHW flow and return with a three-way diverter valve or the return of the gas fired boiler. Use a DHW sensor from the Wolf accessory range when connecting a DHW cy- linder made by third parties. -
Page 18: Installation Of A Balanced Flue System
Installation of a balanced flue system For concentric air/flue pipes (balanced flue systems), use only original Wolf components. Please observe the technical information regarding balanced flue systems prior to installing the flue pipe or the ventilation air connection. Different countries have different regulations. We would therefore recommend you contact the appro- priate authorities to check local requirements. -
Page 19: Power Supply
Power supply General notes The installation must be carried out by a licensed The power supply terminals are ‚live‘ even when electrical contractor. Observe local regulations the ON/OFF switch has been switched OFF. and those of the power supply company. Terminal box The control, regulating and safety equipment are fully wired and tested. - Page 20 Netz Connect the DHW circulation pump 230 V AC, which is part of the Wolf accessory range, to terminals L1, N and Fig.: Connection DHW circulation pump/external accesso- ries Connection output A1 (230 V AC; 200 VA) Insert the cable glands into the terminal box.
- Page 21 Power supply The functions of output A1 can be scanned and adjusted with Wolf control accessories with eBUS capability. The following functions can be allocated to output A1: Code Explanation No activation of output A1 DHW circulation pump 100% Controller (e.g. BM) activate output A1 when DHW is enabled.
-
Page 22: Power Supply
No function Input E1 is not taken into consideration by the control unit. Room thermostat With open input E1, heating operation will be blocked (summer mode), independent of any digital Wolf control acces- sories. Maximum thermostat or system pressure switch Optional connection for a maximum thermostat or system pressure switch. -
Page 23: Filling The System
Filling the system Fill the system and vent it properly, to safeguard the perfect function of the gas fired condensing boiler. Before connecting the gas fired condensing boiler to the heating system, flush the entire system to remove residues such as welding pearls, hemp, putty, etc. -
Page 24: Commissioning
Commissioning The initial start-up and operation of the boiler as Natural gas H 15.0: well as the user instruction must only be carried = 11.4 -15.2 kWh/m³ = 40.9 - 54.7 MJ/m³ out by a qualified contractor. LPG P = 20.2 -24.3 kWh/m³ = 72.9 -87.3 MJ/m³ Table: Wobbe index subject to type of gas - Prior to installation, ensure that the boiler matches the type of available gas. -
Page 25: Commissioning
Commissioning - The illuminated ring shows a green colour, if the boiler starts correctly. - Instruct the customer in the operation of the boiler. Complete the commissioning report and hand over the instructions to the customer. Illuminated ring Fig.: Control unit overview Saving energy - Instruct the customer about energy-saving options. -
Page 26: Checking The Gas Supply Pressure
Checking the gas supply pressure Checking the gas supply pressure Work on gas components MUST ONLY be pre- formed by a registered gas fitter. Work which is rotating lock carried out incorrectly may lead to gas escaping, resulting in a risk of explosion, asphyxiation or poisoning. -
Page 27: Filling The Siphon / Checking The Gas Supply Pressure
Filling the siphon / Checking the gas supply pressure Filling the siphon - Remove the siphon. - Fill the siphon with water. - Install the siphon. Siphon Fig.: Siphon Checking the gas supply pressure • Switch OFF the ON/OFF switch. Close the gas shut-off valve. -
Page 28: Displaying / Modifying Control Parameters
The control parameter can be modified or displayed via controller with eBUS capability. For procedures, check the operating in- structions of the relevant accessories. Settings of column 1 are suitable for control accessories ART and AWT. Settings of column 2 are suitable for Wolf control systems with BM (programming unit) Parameter Unit... -
Page 29: Limiting The Maximum Output
Output setting (parameter GB04) The output setting can be modified with Wolf control accessories with eBUS capability. The heating output will be determined by the gas fan speed. By reducing the gas fan speed in accordance with the table, the maximum output will be matched (at 80/60 °C) to natural gas H and LPG. -
Page 30: Selecting The Pump Stage
Selecting the pump stage The gas fired condensing boiler is either equipped with a three-stage pump or with a modulating pump. If a modulating pump is installed, see chapter „Modulating pump“. In the delivered condition, the three-stage pump is set to stage 2 (centre position). -
Page 31: Testing The Combustion Parameters
Testing the combustion parameters Test the combustion parameters with the boiler closed. Testing the combustion air - Remove the screw from the r.h. test port. - Open the gas shut-off valve. - Insert the test probe. Test port „Flue gas“ Test port „Air supply“... -
Page 32: Co2 Settings
settings Adjusting the gas:air mixture Carry out the adjustments in the following sequence: At the factory, the gas combination valve has been adjusted for the gas type stated on the type plate. Only adjust the gas combination valve after the system has been changed to a different gas type. - Page 33 settings B) CO adjustment at the lower load (soft start) - Restart the boiler by pressing the „Reset button“. Zero point adju- - Check and correct (if required) the CO content approx. 20 sting screw s after burner start with the CO meter, by fine adjusting the zero point adjusting screw in accordance with the table below.
-
Page 34: Commissioning Report
Commissioning report Commissioning steps Test values or confirmation Gas type Natural gas H kWh/m³ Wobbe index kWh/m³ Net calorific value Gas supply pressure checked? Gas soundness test carried out? Balanced flue system checked? Water connections checked for leaks? Fill the siphon Vented boiler and system? System pressure 1.5 - 2.5 bar? Entered type of gas and output onto label? -
Page 35: Technical Conversion Options For Gas Fired Condensing Boiler Cgb
Technical conversion options for gas fired condensing boiler CGB Via conversion sets, Wolf offer you the option of matching your gas fired condensing boiler to changing conditions. Conversion to other gas types: from CGB-11 CGB-(K)-20 CGB-(K)-24 Natural gas H LPG P... -
Page 36: Conversion Of Combi Boilers To Boilers With Cylinder
„Cylinder connections“. For this, use the connection set for Wolf cylinders from the range of Wolf accessories. • Connect the cylinder sensor from the range of Wolf acces- sories with the blue plug, which has become vacant. • Install the filled siphon. -
Page 37: Maintenance
Maintenance work must only be carried out by a qualified heating contractor. Regular maintenance and the exclusive use of ori- ginal Wolf spare parts are necessary preconditions for trouble-free operation and a long service life. We therefore recommend you arrange a mainte- nance contract with a local heating contractor. - Page 38 Maintenance - Pivot the control unit lid down. Switch OFF the boiler at the ON/OFF switch. The mains terminals are ‚live‘ even when the ON/ OFF switch has been switched OFF. - Disconnect the system from the power supply. Close the gas shut-off valve. - Unlock the casing lid with the l.h.
- Page 39 Maintenance Danger of burning Several components may be hot. Let these cool down or wear gloves. - Pull the control hose off the mixing chamber. - Crack open the gas supply connection. - Pull out the locking clip. - Lift the combustion chamber. 3061344_201509...
- Page 40 Maintenance - Fit the cleaning tray. - Pivot the combustion chamber out. - Pull the plug off the gas fan. - Pull the plugs off the ionisation and the ignition electrodes. 3061344_201509...
- Page 41 Maintenance - Open the retaining tabs. - Remove the combustion chamber lid upwards. - Rotate the combustion chamber pot and remove down- wards. Visual burner gasket check Lubricate the burner gasket with Wolf silicone grease or replace and lubricate. 3061344_201509...
- Page 42 Maintenance - Clean the heat exchanger with a brush. Versions with coated heat exchanger must only be cleaned with a plastic brush. - Clean the condensate pan. - When you notice a loss of water, check the expansion vessel inlet pressure and increase it, if required, to 0.75 bar. The heating circuit must be at zero pressure.
- Page 43 Maintenance - Replace the upper and lower combustion chamber gasket; lubricate the new gaskets with silicone grease. - Lubricate the combustion chamber seat. - Replace the monitoring electrode. Check and replace the ignition electrode, if necessary. Visual insulation check replace, if broken 3061344_201509...
- Page 44 Maintenance Assembly - Replace the combustion chamber lid on the combustion chamber and secure with locking tabs. - Install the combustion chamber pot. - Push the plugs back onto the ionisation and the ignition electrodes. - Push the plug back onto the gas fan. 3061344_201509...
- Page 45 Maintenance - Pivot the combustion chamber unit back into place. - Push the combustion chamber down into the condensate pan. Secure the locking clip. - Check the gas restrictor. Boiler output Gas type Gas restrictor 11 kW * Green 430 17 20 523 20 kW Orange 580...
- Page 46 Maintenance - Remove the cleaning container. - Check the balanced flue system. Checking the siphon If required, clean and re-fill. Check for tight fit, prevent flue gas from escaping. - Shut off the cold water supply. - Clean the cold water strainer. 3061344_201509...
- Page 47 Maintenance - If the DHW output is too low, descale the DHW heat ex- changer and the non-return valve. - Reopen the cold water tap. Fig.: Non-return valve 3061344_201509...
- Page 48 Maintenance Completing the adjustments - Switch the boiler OFF and close the test ports and hose nipples; check for leaks. - Fit the casing. Test run - Reset the MCBs. - pen the gas tap. - Switch ON the boiler. - Set the program selector to emissions test mode.
- Page 49 Maintenance Checking control accessories Fig.: BM Fig.: AWT - The display must show BUS connection BUS connection Maintenance requires the following: Maintenance set CGB-11/20/24 Art.-Nr. 86 03 017 Cleaning set Art.-Nr. 86 03 194 Test equipment for BImSchV test [Germany]...
- Page 50 Maintenance Overview of the steps to be taken and the maintenance report Step Report item Report item Switch OFF the boiler, switch OFF the emergency stop switch Close the gas supply valve, Remove the casing and the combustion chamber housing Pull the electrical connections off fan, sensors and electrodes Remove the combustion chamber lid upwards Clean the burner, if required...
-
Page 51: Maintenance
Maintenance Report item Report item Report item Report item Report item Report item °C °C °C °C °C °C °C °C °C °C °C °C °C °C °C °C °C °C 3061344_201509... -
Page 52: Modulating Pump (Class A)
The heating circuit pump operated with the selected „Standby mode“ pump speed. Factory settings Heating mode Boiler Standby „Pump speed“ Max. Min. CGB-11 56 % 27 % 56 % 20 % CGB-(K)-20 77 % 48 % 74 % 20 %... -
Page 53: 3-Stage-Pump
3-stage-pump Residual height of the three-stage pump ... -
Page 54: Design Information
Design information Balanced flue system C13x C33x C43x C33x C13x C53x C93x C43x C83x C83x C93x C33x 3061344_201509... - Page 55 Connection to a moisture-resistant flue gas chimney with horizontal concentric connection DIN EN 13384 pipe (open flue) (MRC manufacturer) Horizontal roof outlet through a pitched roof, not for CGB-11 with DN 60/100 (balanced flue C13x - on-site dormer) C13x External wall outlet (balanced flue) (for DE < 11 kW)
- Page 56 Design information General notes Particularly for safety reasons, use only original Wolf If fire resistance is not required for the ceiling, components for concentric balanced flues and flues. route the lines for the combustion air supply and the flue gas from the top edge of the ceiling to the...
- Page 57 Design information Flue gas temperature limiter The electronic flue gas temperature limiter switches the gas fired condensing boiler off when the flue gas temperature exceeds 110 °C. The boiler restarts when the reset button is pressed. The rated boiler output in heating mode must be reduced to below 11 kW, if the gas fired condensing boiler is installed with a balanced flue routed over an external wall (for appropriate measures, see chapter „matching the maximum output“...
- Page 58 Original Wolf components are designed for long-term use, are designated with the DVGW quality seal and are matched for use with Wolf gas fired condensing boilers. When using third party equipment that is only DIBT certified or CD-designated, the installer will be responsible for the correct Connection to a moisture-resistant flue gas chimney of a sizing and perfect function of such systems.
- Page 59 Design information Vertical balanced flue routing (examples) system DN60/100 1 Gas fired condensing boiler 2 Balanced flue incl. inspection aperture (250 mm long) 3 Separator DN60/100 (slide coupling) if required 4 Balanced flue DN60/100 500 mm 1000 mm 2000 mm 5 Balanced flue, vertical DN60/100 (roof outlet for flat or pitched roofs)
- Page 60 Design information Horizontal balanced flue / connection to balanced flue chimney (examples) system DN60/100 1 Gas fired condensing Dormer boiler Not in connection with 2 Separator DN60/100 CGB-11! (slide coupling) if required 4 Balanced flu DN60/100 500 mm 1000 mm...
- Page 61 Design information Balanced flue inside a duct with horizontal connection line DN60/100 Sample installation, balanced flue / duct 1 Gas fired condensing boiler Install the horizontal line 3 Separator DN60/100 with > 3° slope (slide coupling) towards the if required boiler 4 Balanced flu DN60/100 500 mm...
- Page 62 All metal cowl from the on the flue gas chimney in accordance with the diagram shown, fuel or liquid fuels at least Wolf product range so that all components of the flue gas path are surrounded by to the height of the plastic combustion air.
- Page 63 Design information Vertical concentric balanced flue C33x (examples) system DN80/125 1 Gas fired condensing boiler 2 Adaptor from DN60/100 to DN80/125 3 Balanced flue incl. inspection aperture DN 80/125 (250 mm long) 4 Balanced flue DN80/125 500 mm 1000 mm 2000 mm 5 Spacer clip 6 Fixing bracket DN125...
- Page 64 Design information Horizontal concentric balanced flue C13x, C83x and B33 and flue on an external wall C53x (examples) DN 80/125 Dormer 1 Gas fired condensing boiler 2 Adaptor from DN60/100 to DN80/125 Horizontal balanced flue routing through a pitched roof 3 Balanced flue incl.
- Page 65 Design information Connection to a concentric balanced flue inside a duct (example) DN80/125, C33x Connection to the flue inside a duct, C93x 1 Gas fired condensing boiler 2 Adaptor from DN60/100 to DN80/125 4 Balanced flue DN80/125 500 mm 1000 mm 2000 mm 5 Spacer clip 8 Separator...
- Page 66 Design information Eccentric balanced flue Install the balanced flue distributor 80/80 mm eccentric (31) for separate air supply/ flue gas routing acc. to (2) downstream of the connection adaptor DN 80/125 with a test connector. When connecting a balanced flue certified acc. to Building Regulations, observe the permit of the relevant body.
-
Page 67: Design Information
Design information Supplementary installation instructions for balanced flue DN 80/125 Install all horizontal balanced Flat roof: Affix the ceiling outlet approx. Ø 130 mm (14) to the flues with > 3° slope (5 roof cover. cm//>m) towards the boiler. Any Pitched roof: At (12), observe the installation instructions on the condensate must be returned cowl, regarding roof pitches. -
Page 68: Underfloor Heating System
Design information Underfloor heating system When using pipes which are impermeable to oxygen, the un- derfloor heating system can be directly connected to a heating system with a rated output of up to 13 kW, subject to system pressure drop. Generally install a thermostat for underfloor heating systems, to protect the pipes from overheating. -
Page 69: Technical Maintenance And Engineering Details
40°C 2662 Ω 70°C 876 Ω 10°C 9952 Ω 25°C 5000 Ω 50°C 1800 Ω 80°C 628 Ω Category Boiler CGB-11 CGB-(K)-20 CGB-(K)-24 Category 2H3P 2H3P Types of connection Boiler Type Operating mode To be connected to.. Open Balanced moisture-resistant... -
Page 70: Wiring Diagram
Wiring diagram 3061344_201509... -
Page 71: Specification
Specification Type CGB-11 CGB-20 CGB-K-20 CGB-24 CGB-K-24 Nominal output at 80/60 °C 10,0/14,6 19,0/22,9 19,0/22,9 23,1/27,6 23,1/27,6 Nominal output at 50/30 °C 10,9 20,5 20,5/- 24,8/- 24,8/- Rated thermal load 10,3/15,0 19,5/23,5 19,5/23,5 23,8/28,5 23,8/28 Lowest output (modulating) at 80/60... -
Page 72: Troubleshooting
Troubleshooting All faults will be displayed as a fault code by Wolf controllers with eBUS capability. To these faults, cause and remedy may be allo- cated by means of the following table. This table is designed to allow your local heating contractor to trace the fault more easily. -
Page 73: Product Fiche According To Regulation (Eu) No. 811/2013
Any specific precautions that shall be taken See installation See installation See installation when the space heater is assembled, installed instruction instruction instruction or maintained 3061344_201509 Wolf GmbH, Postfach 1380, D-84048 Mainburg, Tel. +49-8751/74-0, Fax +49-8751/741600, Internet: www.wolf-heiztechnik.de Material number: 3021052 03/2015... - Page 74 Sound power level, indoors Any specific precautions that shall be taken See installation See installation when the space heater is assembled, installed instruction instruction or maintained 3061344_201509 Wolf GmbH, Postfach 1380, D-84048 Mainburg, Tel. +49-8751/74-0, Fax +49-8751/741600, Internet: www.wolf-heiztechnik.de Material number: 3021099 03/2015...
-
Page 75: Technical Parameters According To Eu Regulation No. 813/2013
23,844 Contact details Wolf GmbH, Industriestraße 1, D-84048 Mainburg (*) High-temperature regime means 60°C return temperature at heater inlet and 80°C feed temperature at heater outlet. (**) Low temperature means for condensing boilers 30°C, for low-temperature boilers 37°C and for other heaters 50°C return temperature (at heater inlet). -
Page 76: Ec-Declaration Of Conformity To Type
Address: Industriestraße 1, D-84048 Mainburg Product: Gas fired condensing boilers CGB-11, CGB-20, CGB-K-20, CGB-24, CGB-K-24 The product described above conforms to the requirements specified in the following documents: § 6, 1.BImSchV, 26.01.2010 DIN EN 297, 10/2005 DIN EN 437, 09/2009...