Wolf CGB-75 Installation And Operating Instructions Manual
Wall mounted gas condensing boiler
Hide thumbs
Also See for CGB-75:
- Instructions manual (100 pages) ,
- Installation and technical manual (64 pages) ,
- Assembly and operating instructions manual (56 pages)
Table of Contents
Advertisement
Advertisement
Table of Contents

Related Manuals for Wolf CGB-75


Summary of Contents for Wolf CGB-75
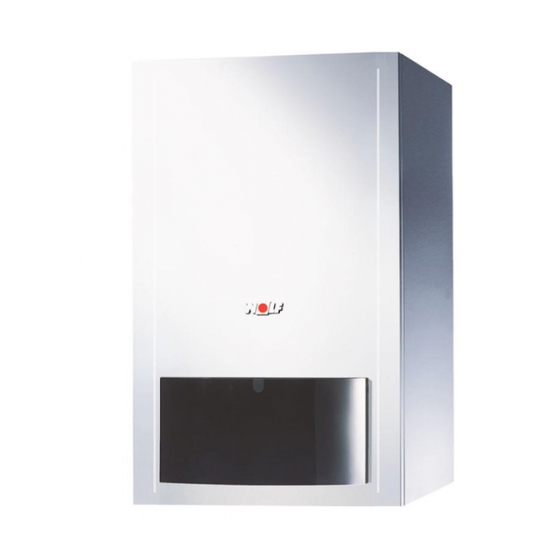
- Page 1 Wall mounted gas condensing boiler CGB wall mounted gas condensing boiler CGB-75 CGB-100 WOLF GMBH / POSTFACH 1380 / D-84048 MAINBURG / TEL. +49.0.87 51 74- 0 / FAX +49.0.87 51 74- 16 00 / www.WOLF.eu Doc. no.: 3062555_201804 Subject to modifications...
-
Page 2: Table Of Contents
Table of contents Documentation information ..............3 Safety information ................4 Standards and regulations ..............7 Control / Function / Operation ............10 Delivered condition / standard delivery ..........12 Layout ....................13 Siting instructions ................14 Installation ..................15 Dimensions/installation dimensions ..........16 Installation 10. -
Page 3: Documentation Information
- Instruct the system user how to operate the heating system. 1.4 Applicability of these instructions These installation instructions apply to CGB-75/100 gas condensing boilers. 1.5 Acceptance Within four weeks of commissioning of the burner the operator must notify the local flue gas inspector accordingly. -
Page 4: Safety Information
Only operate the gas condensing boiler within the output range, which is stated in the technical documentation Danger: if you smell flue gas supplied by WOLF. Intended use of the boiler includes - Switch OFF the appliance. exclusive use for hot water heating systems in accordance with DIN EN 12828. - Open windows and doors. - Page 5 We recommend arranging a suitable maintenance con- tract. - The operator is responsible for the safety, environmental compatibility and energy quality of the heating system (German Immission Control Act/Energy Saving Ordi- nance) [Germany]. - Use only genuine WOLF spare parts. 3062555_201804...
- Page 6 2. Safety information Fig.: Terminal box: Danger from electrical voltage Fig.: Gas connection Escaping gas may cause poisoning or an explosion Fig.: Ignition transformer, high voltage ignition electrode, heat Fig.: Gas combination valve exchanger Danger from electrical voltage Danger from electrical voltage Escaping gas may cause poisoning or an explosion Risk of burning through hot components 3062555_201804...
-
Page 7: Standards And Regulations
3. Standards and regulations Observe all standards and guidelines applicable to the installation and opera- tion of this heating system in your country. Observe the information on the boiler type plate. The following local regulations must be complied with during installation and operation of the heating system: • Siting conditions • Ventilation and extract air facilities and connection to a chimney • Electrical connection to the power supply • Technical regulations of the gas supply utility company regarding the connection of the gas appliance to the local gas mains •... - Page 8 3. Standards and regulations Requirements The installation of the boiler must be in accordance with the relevant requirements of Gas Safety (Installation and Use) Regulations 1998, Health and Safety Document No. 635 (The Electricity at Work Regulations 1989), BS 7671 (IEE Wiring Regulations) and the Water Supply (Water Fitting) Regulations 1999, or The Water Bylaws 2000 (Scotland).
- Page 9 90°C and 3 bar permissible operating pressure in accordance with DIN EN 12828. This WOLF gas condensing boiler is also approved for installation in garages. Open flue gas condensing boilers must only be installed in a room which complies with the appropriate ventilation requirements. Otherwise...
-
Page 10: Control / Function / Operation
4. Control / Function / Operation ON/OFF switch Reset DHW tempera- Thermometer ON/OFF button ture selector Illuminated ring Heating water temperature selector ON/OFF switch The condensing boiler is OFF in position 0. Reset A fault is reset by pressing the reset button which will also restart the system. Press- ing the reset button re-activates the system, if there was no fault. - Page 11 4. Control / Function / Operation Setting Winter mode (positions 2 to 8) In winter mode, the boiler heats to the temperature selected at the heating water temper- ature controller. According to the pump operating mode, the circulation pump operates constantly (factory setting) or only in parallel with the burner activation / run-on period. Summer mode Winter mode is disabled by rotating the heating water temperature selector into posi- tion...
-
Page 12: Delivered Condition / Standard Delivery
5. Delivered condition / standard delivery Delivered condition Accessories Gas condensing boiler The standard delivery includes: The following accessories are required for installation of the 1 Gas condensing boiler ready to connect with the casing fitted gas condensing centre: 1 Mounting bracket for mounting on the wall, with installation - Balanced flue accessories (see technical information) accessories - Room temperature-dependent or weather-compensated 1 Installation instructions control 1 Operating instructions... -
Page 13: Layout
6. Layout CGB-75 / CGB-100 Ventilation air test point Flue gas test point Non-return valve Flue Ignition electrode Combustion chamber casing Monitoring electrode Gas fan Quick-action air vent valve Combustion chamber cover temperature limiter Gas:air mixing chamber Flash trap Gas restrictor... -
Page 14: Siting Instructions
7. Siting instructions General information Electrical connection must be made on site. Min. Please maintain the 350 mm clearance to the ceiling to enable 350 mm inspection and maintenance work on the boiler to be carried out, otherwise the necessary inspection and function tests on components cannot be ensured during maintenance. -
Page 15: Installation
8. Installation Opening the casing cover We recommend you remove the casing cover during the installation. Release the casing cover with the l.h. and r.h. screw. Release the bottom of the casing cover and unhook at the top. After completing servicing, close the front casing again and fasten the screws tightly. There is a risk of carbon monoxide poisoning if the flue Screws system is faulty. Fig.: Undoing screws Securing the appliance with the suspension bracket During installation of the gas condensing boiler,... -
Page 16: Dimensions/Installation Dimensions
9. Dimensions/installation dimensions Ø 160/110 132,5 125 112,5 105 1 Heating flow 2 Heating return 3 Condensate drain 4 Gas connection Overpressure cascade DN 160 with low loss header set 3062555_201804... -
Page 17: Installation
Note: Fig.: Heating circuit connection set (accessory) Provide a drain & fill valve at the lowest point in the system. Safety equipment The CGB-75 and CGB-100 have not been fitted with an ex- pansion vessel at the factory. This must be fitted externally (available from the Wolf accessories range). The expansion vessel must be sized sufficiently, in accordance with DIN 4807. There must be no shut-off valve between the expansion vessel and the condensing boiler, otherwise the pressure build-up would perma- nently damage the boiler during heating. There is a risk of system components rupturing, giving rise to a risk of scalding. - Page 18 Note: Additional requirements for operation without a low loss header Provide a drain & fill valve at the lowest point in the system. - Systems with only one CGB-75/100 - Sludge separator in the boiler return of the CGB-75/100 - Desalination of the heating water to 2 - 3 °dH - Control of cylinder charging only via the MM module (con- figurations 1 and 10) Safety equipment - Cylinder charging pump at least DN 25 with at least 6 m head The minimum system pressure is 1.0 bar.
- Page 19 10. Installation Condensate drain connection Connect the trap supplied to the connector on the combustion chamber pan. Note: Fill the trap with water prior to commissioning. If condensate is directly routed to the drain pipe, ensure ventila- tion, so that the drain pipe cannot affect the condensing boiler. Trap Fig.: Trap The trap must be filled with water prior to...
- Page 20 Fig.: Straight-through gas ball valve (accessory) components or assemblies may lead to gas escaping, which results in a risk of poisoning and explosion. Install a gas ball valve with fire protection in the gas supply line upstream of the Wolf condensing boiler. Otherwise explosions may occur if there is a fire. Size the gas supply pipe in accordance with DVGW-TRGI regulations [Germany].
-
Page 21: Installation Of The Air/Flue Gas Routing
11. Installation of the air/flue gas routing For concentric air/flues (balanced flue systems), Note use only original Wolf components. Observe the technical information regarding ventilation air supply / flue systems prior to installing the flue or making the balanced flue connection. As regulations in the individual German Federal States differ, we recommend consulting the rele- vant authorities and local flue gas inspector prior to installation. The flue gas test ports must remain accessible Note for the local flue gas inspector, even after fitting the ceiling bezels. -
Page 22: Electrical Connection
12. Electrical connection General information The installation may be carried out only by Danger through 'live' electrical compo- an approved electrical contractor. Observe nents. VDE regulations [Germany] and all local Please note: Turn off the ON/OFF switch regulations of your power supply utility. before removing the casing. For installation in Austria: The ÖVE reg- Never touch electrical components or con- ulations and requirements and those of tacts when the ON/OFF switch is in the ON your local power supply utility must be position. There is a danger of electrocution, observed. - Page 23 230 V AC/50Hz Power supply, ext. Accessories 2-wire eBUS 230VAC/50Hz/max. 300VA Connecting digital WOLF control accessories Installation information – electrical connection Isolate the system from the power supply before opening. Check that the appliance is isolated from the power supply Swivel the control unit to one side.
- Page 24 12. Electrical connection Changing the fuse Isolate the condensing boiler from the power supply prior to changing a fuse. The ON/OFF switch on the appliance does not provide iso- lation from the power supply. Danger through 'live' electrical components. Never touch electrical components or contacts if the condensing boiler has not been isolated Fuse from the power supply. Danger to life! Fig.: Terminal box cover open Cylinder sensor connection - If a cylinder is to be connected, the blue socket of the cylinder sensor must be connected to the blue plug of the control unit.
- Page 25 12. Electrical connection The functions of output A1 can be scanned and adjusted with eBUS-enabled Wolf control accessories. The following functions can be allocated to output A1: Code Meaning No function Output A1 is not controlled DHW circulation pump 100% Output A1 is activated by control accessories (timed) if DHW has been enabled. Output A1 is constantly switched if no accessory controller is installed.
- Page 26 No external voltage may be connected to in- Note put E1, as this could destroy the component. Fig.: Connection, room thermostat The functions of input E1 can be scanned and adjusted with eBUS-enabled Wolf control accessories. The following functions can be allocated to input E1: Code Meaning...
- Page 27 12. Electrical connection Connection, digital Wolf control accessories (e.g. BM, MM, KM, SM1, SM2) Only controllers from the Wolf range of accessories may be connected. Each accessory is supplied with its own connection diagram. Use a two-core cable (cross-section > 0.5 mm²) as the con- necting cable between the control unit accessory and the condensing boiler. Fig.: Connecting digital Wolf control accessories (eBUS interface)
-
Page 28: Filling The System
13. Filling the system Fill the system and vent it properly to safeguard the perfect functioning of the condensing boiler. Before connecting the gas condensing boiler, Note flush the heating system to remove residues such as welding pearls, hemp, putty, etc. from the pipework. Check the dirt filter. ON/OFF switch Reset button Thermometer - The gas tap must be shut - The locking cap on the quick-acting air vent valve should not be unscrewed - Open all radiator valves... -
Page 29: Conversion To Natural Gas E/Ll (G20/G25) (If Necessary)
14. Conversion to natural gas E/LL (G20/G25) (if necessary) As delivered, the gas condensing boilers CGB-75/CGB-100 are equipped for operation with natural gas E/H (G20). For operation with natural gas LL (G25), the gas restrictor must be replaced. The necessary gas restrictor with the code number “1260” for operation with natural gas LL (G25) is included in the scope of delivery and is attached to the gas pipe for use. -
Page 30: Conversion To Lpg P (G31) (If Necessary)
15. Conversion to LPG P (G31) (if necessary) Mixing cham- Gas restrictor Unplug the connector (first unscrew the Phillips head screws) Gas connection fitting 4 x SW8 screw Remove the four SW8 screws at the gas connection fitting and remove the fitting from the gas combination valve. Remove the gas combination valve and gas restrictor. Place the protective labels at the valve inlet and valve outlet of the new gas combination valve at the apertures of the removed valve. -
Page 31: Conversion To Other Gas Types (If Required)
Slide the balanced flue locking mechanism in the direction of the arrow. Pull the flue pipe up out of the condensate pan. Conversion type plate Fig.: Updating the type plate Conversion sets for CGB-75/100 for conversion to other gas types: (Please state the corresponding part number when ordering) Conversion to natural gas E/H (G20) ID 1000* Conversion to natural gas LL** (G25) ID 1260* Conversion to LPG P*** (G31) ID 6.7*... -
Page 32: Checking The Gas Supply Pressure
17. Checking the gas supply pressure Checking the gas supply pressure (gas flow pressure) Work on gas components must only be performed by a licensed gas fitter. Work that is carried out incorrectly may lead to gas escaping, resulting in a risk of explosion, asphyxiation or poisoning. Screws Fig.: Undoing screws - The condensing boiler must be switched OFF;... -
Page 33: Commissioning / Setting The Bus Address
18. Commissioning / setting the BUS address Only qualified personnel must carry out the commissioning and initial start-up of the boiler and instruction of the user. ON/OFF Reset button Thermometer - Check the boiler and system for leaks; Note ON/OFF Illuminated ring Normal operating pressure when system is cold switch 1.5 - 2.0 bar; prevent water leaks Fig.: Control unit overview - Check the location and seating of fitted com- ponents - Check all connections and component unions Energy savings for leaks. -
Page 34: Displaying / Modifying Control Parameters
The control parameters can be modified or displayed via control accessories with eBUS capability. For procedures, check the operating instructions of the relevant accessories. The settings in column 1 apply to control accessories ART, AWT The settings in column 2 apply to Wolf control systems with BM programming unit Parameter Unit Factory setting Max. GB01... -
Page 35: Adjusting The Modulating Pump (Accessory)
The speed limits for heating mode can be changed with the BM programming unit. The settings in column 1 apply to control accessories ART, AWT The settings in column 2 apply to Wolf control systems with BM programming unit Parameter... -
Page 36: Limiting The Maximum Output
21. Limiting the maximum output CGB-75/100 Output setting (parameter GB04 or HG04) The output setting can be modified with Wolf control accessories with eBUS capability. The heating output is determined by the gas fan speed. By reducing the gas fan speed in accordance with the table, the maximum output will be matched at 80/60 °C to natural gas E/H/LL and LPG. Natural gas LL is not applicable for Austria / Switzerland. LNG is not applicable for Switzerland. CGB-75 Heating output (kW) Display value CGB-100 Heating output... -
Page 37: Testing The Combustion Parameters
22. Testing the combustion parameters Test the combustion parameters with the boiler closed! Testing the intake air - Remove the screw from the l.h. test port Test port Test port "Inlet air" "Flue gas" - Open the gas shut-off valve - Insert the test probe - Start the gas condensing boiler and turn the heating water temperature selector to the emissions test symbol (illumi- nated ring of the status display flashes yellow) - Measure the temperature and CO... -
Page 38: Co Adjustments
23. CO adjustments Setting the gas/air mixture Carry out the adjustments in the order described below. The gas combination valve has been set at the factory Note to the gas type specified on the type plate. Only adjust the gas combination valve after the system has been changed to a different gas type or when servicing. If too little heat is drawn off, open some radiator valves. A) CO setting for upper load (emissions test mode) Release the casing cover with the l.h. and r.h. screw. Release the bottom of the casing cover and unhook at the top. - Remove the screw from the l.h. "Flue gas" test port. - Insert the test probe of the CO test instrument into the "flue gas"... - Page 39 23. CO adjustments B) CO setting for lower load (soft start) - Remove the protective screw over the zero point adjusting Zero point screw with a Torx screwdriver. screw - Restart the condensing boiler by pressing the "Reset button". - Check and correct (if required) the CO content approx.
-
Page 40: Commissioning Report
24. Commissioning report Commissioning steps Test values or confirmation 1.) Gas type Natural gas E/H Natural gas LL Wobbe Index kWh/m³ ________________ Operational calorific value kWh/m³ ________________ 2.) Gas supply pressure checked? 3.) Gas tightness test carried out? 4.) Air/flue system checked? 5.) Water connections checked for tightness? 6.) Filling the trap 7.) Boiler and system vented? 8.) System pressure 1.5 - 2.5 bar? 9.) System flushed? -
Page 41: Maintenance And Design Data
25. Maintenance and design data Residual head of the heating circuit pump (accessory) The pump modulates subject to burner load. The residual head can be obtained from the diagrams. CGB-75/100 residual head with pump assembly (accessory) Water volume [l/h] Hydraulic pressure drop in the boiler excluding pump CGB-75/100 pressure drop Maximum Water volume CGB-100 20° spread CGB-75 20° spread 1000 1500 2000 2500 3000 3500... - Page 42 50°C 1800 80 °C Max. spread A heat exchanger protective function is integrated into the CGB-75/100. This prevents stresses in the material by limiting the maximum temperature differential between flow and return. The output is restricted at 28 K and above. If 38 K is nevertheless reached, the burner shuts down briefly without a fault message. This characteristic must be taken into account when selecting the components (e.g. pumps, heat exchangers and cylinders).
-
Page 43: Technical Information For Water Treatment
26. Technical information for water treatment The system must be thoroughly cleaned / flushed before commissioning and a sludge filter/dirt trap (<5 μm) e.g. Wolf CGB-75 accessory installed in the return line. This must be in close Water treatment CGB-100 proximity to the boiler. required The fill and top-up water must only be treated with a desalina- tion process. The “Water treatment diagram” and the "Maxi- mum permissible total hardness"... - Page 44 26. Technical information for water treatment Example: Example: System with a 170 kW boiler; System output = 170 kW; system volume V = 4000 l; system volume V = 4000 l; System System = 4000 l / 170 kW = 23.5 l/kW Volume of top-up water A, specific = 1000 l Top-up This is greater than 10 l/kW, therefore stage 3 must be se- Total hardness of drinking water C = 18.5 °dH;...
-
Page 45: System Log
27. System log Engineering Location Boiler output Lowest boiler output Lowest boiler output for the system Bmin System output = Q B,tot B,tot System volume system Maximum expected Total volume expected during the top-up water volume system service life top-up Fill and top-up water volume system top-up Total hardness of the potable water C... -
Page 46: Technical Information
28. Technical information Air/flue gas routing C13x C33x C43x C33x C53x C93x C43x C83x C83x C93x 3062555_201804... - Page 47 C93x Vertical flue for installation in a duct rigid/flexible DN 110 with horizontal concentric connection line DN110/160 Available fan draught: CGB-75 12-145 Pa, CGB-100 12-200 Pa (The maximum length corresponds to the total length from the appliance to the flue terminal) Expansion in the duct from DN 110 to DN 160 Note: Systems C 33x and C 83x are also suitable for installation in garages. Where necessary, adapt the installation examples to the relevant building regulations and requirements in your country/region.
- Page 48 28. Technical information Minimum duct sizes applicable to open flue and room sealed operation >30 >20 C93x room sealed in a duct C33x balanced flue B33 open flue DN 110 in a duct DN 110/160 in a duct DN 110 C93x room sealed System DN 110/160 horizontal and DN 110 vertical Air/flue gas routing, rigid in a shaft Min. duct sizes Circular Ø Rectangular DN 110 190 mm 170 mm...
- Page 49 28. Technical information General information If fire resistance is not required for the ceiling, route the ducts for combustion air supply and For reasons of operational safety, use only original Wolf flue gas expulsion between the top edge of the components for balanced flues and standard flues. ceiling and the roof skin inside a duct made from non-combustible, rigid materials or inside Where necessary, adapt the installation examples to the rel- a protective metal pipe (mechanical protection). evant building regulations and requirements in your country/ There is a risk of fire spreading if these require- region. Discuss any questions relating to the installation of ments are not observed.
- Page 50 28. Technical information Flue gas temperature limiter Calculating the balanced flue length The electronic flue gas temperature limiter switches the oil The calculated length of the air/flue gas routing system or condensing boiler off when the flue gas temperature exceeds standard flue is derived from the straight pipe length and 110 °C. the length of any pipe bends. In this calculation, a 87° bend or a 87°...
- Page 51 28. Technical information Balanced flue route, vertical and concentric (examples) Gas condensing boiler Gas condensing boiler connections DN110/160 Inspection piece Inspection piece, 87° tee Pipe clip DN 160 Balanced flue DN 110/160 500 mm 1000 mm 2000 mm Mounting bracket DN 160 for roof outlet Universal tile for pitched roof 25-45° 7a "Klöber" adapter 20-50° Flat roof collar Balanced flue routing vertical (roof outlet) for flat or pitched roof L=2000 mm Bend 45° DN 110/160 Bend 87° DN 110/160 12 87° bend for duct installation DN 110/160 13 External wall support bend F87°...
- Page 52 28. Technical information Concentric balanced flue, horizontal C13x, C83x and B33 and flue on an external wall C53x (examples) Dormer (on site) Horizontal balanced flue routed through pitched roof Flue routed along external wall (only where required) Recess Ø 120 mm in chimney side. Install the flue in the side of the chimney and ensure it is airtight. C13x C53 x without internal pipe 21 Flue pipe DN110 Install the horizontal flue with a fall of approx.
- Page 53 28. Technical information Eccentric balanced flue C53, B23 Install the balanced flue distributor 110/110 mm eccentrically Downstream of the support bend (19), the flue can be routed (26) for a separate balanced flue. in DN 110 inside the duct. When connecting a balanced flue certified according to Building Regulations, observe the permit of the relevant body. Install the horizontal flue with a fall of ap- prox. 3° (6 cm/m) towards the boiler. Route the horizontal air supply with a 3° slope towards the outside – install the air inlet with a cowl; permissible wind pressure at the air inlet 90 Pa.
- Page 54 28. Technical information Supplementary installation information Flat roof: Affix the ceiling outlet approx. Ø 170 mm (8) Install all horizontal balanced deep into the roof cover. flues with > 3° fall (6 cm/m) Pitched roof: At (7, 7a), observe the installation instructions towards the boiler. Any con- on the cowl regarding roof pitches. densate must be returned to the appliance.
- Page 55 DVGW quality seal and are designed ing the system in a balanced flue chimney. In addition to the for use with Wolf gas condensing boilers. If using third party boiler connection bend, up to two 87° bends may be installed. equipment that is only DIBT or CE certified, the installer is...
-
Page 56: Wiring Diagram
29. Wiring diagram 3062555_201804... -
Page 57: Specification
30. Specification Type CGB-75 CGB-100 Rated heating output at 80/60°C 70.1 91.9 Rated heating output at 50/30 °C 75.8 98.8 Rated heat input 71.5 Lowest output (modulating at 80/60) 18.2 18.2 Lowest output (modulating at 50/30) 19.6 19.6 Lowest heat input (modulating) 18.5... -
Page 58: Troubleshooting
31. Troubleshooting Any faults will be displayed as fault codes by Wolf controllers with eBUS capability. To these faults, cause and remedy may be allocated using the following table. This table is designed to allow your local heating contractor to trace the fault more easily. - Page 59 31. Troubleshooting Fault Fault Cause Remedy code BCC no. invalid Boiler coding card fault Replace boiler coding card BCC system error Boiler coding card fault Replace boiler coding card Flow monitoring Return temperature > Flow + 25 K Vent the heating system, check the system pressure. Check heating circuit pump. Burner starts > 20 per Heat exchanger flow rate too low or for cascades, the Check flow rate...
-
Page 60: Product Datasheet To Eu Regulation No. 811/2013
Annual central heating energy consumption 39183 Interior sound power level All special precautions to be taken for See installation assembly, installation or maintenance instructions Wolf GmbH, Postfach 1380, D-84048 Mainburg, Tel. +49-8751/74-0, Fax +49-8751/741600, Internet: www.wolf-heiztechnik.de Item number: 3020293 03/2015 3062555_201804... -
Page 61: Technical Parameters To Eu Regulation No. 813/2013
33. Technical parameters to EU Regulation No. 813/2013 Type CGB-75 CGB-100 Condensing boiler (Yes/No) Low temperature boiler (**) (Yes/No) B11 boiler (Yes/No) Space heater with CHP (Yes/No) If yes, with booster heater (Yes/No) Combi heating appliance (Yes/No) Information Symbol Unit Rated heating output rated Usable heat at rated heating 70.1... -
Page 62: Notes
34. Notes 3062555_201804... -
Page 63: Eu Declaration Of Conformity
Issued by: Wolf GmbH Address: Industriestrasse 1, D-84048 Mainburg Product: Gas condensing boiler CGB-75 CGB-100 The product described above conforms to the requirements specified in the following documents: §6, 1. BImSchV, 26.01.2010 DIN EN 437 : 2009 (EN 437 : 2003 + A1 : 2009) DIN EN 13203-1 : 2015 (EN 13203-1 : 2015) - Page 64 WOLF GMBH POSTFACH 1380 / D-84048 MAINBURG / TEL. +49.0.87 51 74- 0 / FAX +49.0.87 51 74- 16 00 www.WOLF.eu Doc. no.: 3062555_201804 Subject to modifications...