
Related Manuals for Douwe Egberts Cafitesse 100


Summary of Contents for Douwe Egberts Cafitesse 100
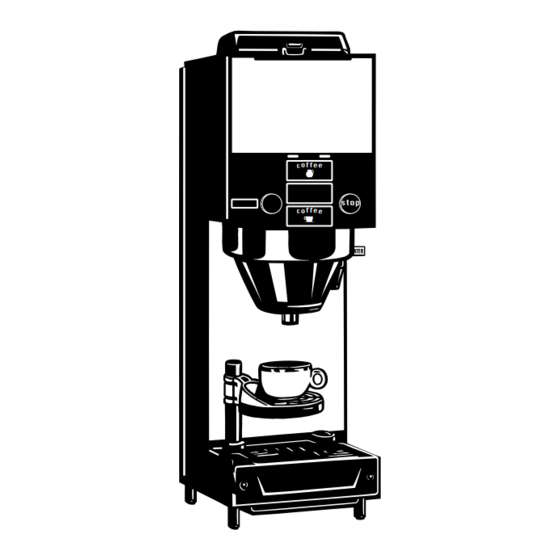
- Page 1 Cafitesse 100 SERVICE MANUAL stop stop © 2004 Douwe Egberts Coffee Systems International, Utrecht, The Netherlands 35260400 July 2004...
- Page 2 Copyright © All Rights Reserved. This manual may not be translated or copied or reproduced in any form or by any means in whole or in part without the prior written consent of Douwe Egberts Coffee Systems, Utrecht, the Netherlands.
- Page 3 Service Manual Cafitesse 100 • This Service Manual includes all Service Information sheets until SI CFT 100/139. 07.2004...
-
Page 5: Preventive Maintenance
Water System Brewing System Dosing System Product Delivery Cooling System Housing Power Supply and Control System External Options Payment Systems Preventive Maintenance Service Procedures Service Information Modification Instructions Spare Parts List © 2004 Douwe Egberts Coffee Systems International, Utrecht, The Netherlands... -
Page 7: Table Of Contents
Service Manual Cafitesse 100 Preface and Safety Instructions Table of Contents Preface and Safety Instructions Preface/ How to use the manual General 1.1.1 Structure of the Manual 1.1.2 Definition of Options and Accessories 1.1.3 Safety Instructions 1 - 1 07.2004... -
Page 8: Preface And Safety Instructions
Service Manual Cafitesse 100 Preface and Safety Instructions Preface and Safety Instructions 1.1 Preface/ How to use the Manual 1.1.1 General • This service manual is intended for trained • This service manual is not a study book service technicians within the D.E.C.S. -
Page 9: Structure Of The Manual
Service Manual Cafitesse 100 Preface and Safety Instructions 1.1.2 Structure of the Manual • Chapter The service manual is divided into 10 sections numbered from 1 to 10. • Subsections Sections can be divided into subsections. Section 5 is therefore divided into 9 subsections, each describing a special function of the dispenser. -
Page 10: Definition Of Options And Accessories
Service Manual Cafitesse 100 Preface and Safety Instructions • When the dispenser was subject to General information: changes, consecutively numbered Service Information sheets will inform you on these • This manual is only valid for dispensers changes. These are then to be filed as with the Facelift Design or which have been chapter 8 in the Service Manual. -
Page 11: Safety Instructions
Service Manual Cafitesse 100 Preface and Safety Instructions 1.2 Safety Instructions • This subsection is intended as an overview Hazard intensity levels of the warnings and instructions used in this manual, that must always be observed. • There are three different levels of hazard intensity, identified by signal words –... - Page 12 Service Manual Cafitesse 100 Preface and Safety Instructions DANGER: Never insert the power supply WARNING: The dispenser must be plug of the dispenser into a connected to the drinking wet or damp socket. The plug water supply and to the...
- Page 13 Service Manual Cafitesse 100 Preface and Safety Instructions WARNING: If the dispenser is equipped CAUTION: The dispenser must not be with a heating plate, do not used when the water supply is touch the heating plate. Dan- interrupted because the boiler ger of being burnt.
- Page 14 Service Manual Cafitesse 100 Preface and Safety Instructions 1 - 8 07.2004...
- Page 15 Service Manual Cafitesse 100 Installation / Putting into Operation Table of Contents Installation / Putting into Operation Transport/Handling Installation Requirements Tools 2.2.1 Water Supply 2.2.2 Electric Power Supply 2.2.3 Space Requirements 2.2.4 External Options 2.2.5 Unpacking Unpacking the Dispenser 2.3.1 List of all Items that are supplied with the Dispenser 2.3.2...
-
Page 16: Installation / Putting Into Operation
Service Manual Cafitesse 100 Installation / Putting into Operation Installation / Putting into Operation 2.1 Transport / Handling • Dimensions of the dispenser incl. packaging: Height 690 mm (27.17 in) Depth 535 mm (21.06 in) Width 275 mm (10.83 in) - Page 17 Service Manual Cafitesse 100 Installation / Putting into Operation Transport due to location change When transporting single dispensers, use the handles supplied in the stop stop package. When transporting a used dispenser to a new location: stop stop • Switch the main switch off and disconnect the power supply plug.
-
Page 18: Installation Requirements
Service Manual Cafitesse 100 Installation / Putting into Operation 2.2 Installation Requirements 2.2.1 Tools • The following tools are required for installation. Tool: required for: 1. Service device Programming Part number see spare parts list 2. Pressure gauge Measuring the... -
Page 19: Water Supply
Service Manual Cafitesse 100 Installation / Putting into Operation 2.2.2 Water Supply Customer Dispenser Recommendation: Connections for hoses: Water supply line with stop valve and non- R3/4''-3/8UNF USA/CAN return valve. R3/4-R3/4 (Europe) Connection to hot water line only with R3/4-R3/8 (The Netherlands) suitable supply lines. - Page 20 Service Manual Cafitesse 100 Installation / Putting into Operation 2.2.3 Electrical Supply Customer Dispenser Recommended: Fault current safety switch National plug on power supply cable. and an all poles controlling contact breaking Length of the power supply cable approx. device.
- Page 21 230 Volt, 3.0 kW B-53-F(B) Germany VDE, CE The additional letter B (e. g.: SATA07FB) indicates dispensers with 'Douwe Egberts' branding stickers. (see chap. 10) The additional letter U (e. g.: SATB39FU) indicates dispensers with 'Universal' branding stickers. (see chap. 10) 2 - 7 07.2004...
-
Page 22: Space Requirements
Service Manual Cafitesse 100 Installation / Putting into Operation 2.2.4 Space Requirements Space requirements when the cooling compartment lid is closed: 50mm 455mm (17,91 in) (1.97 in) Space requirements when the cooling compartment lid is open: Flexi- pack 455mm(17.91 in) -
Page 23: External Options
Service Manual Cafitesse 100 Installation / Putting into Operation 2.2.5 External Options (to be used by Opcos and distributers for national information (e.g. via external filters)) 2 - 9 07.2004... -
Page 24: Unpacking
Service Manual Cafitesse 100 Installation / Putting into Operation 2.3 Unpacking 2.3.1 Unpacking the Dispenser • Remove the fastener from the cardboard box carefully. Do not use sharp utensiles to avoid scratching the dispenser. • Remove the cardboard box clamps. -
Page 25: Disposal Of Packaging And Dispenser At The End Of Their Service Life
Service Manual Cafitesse 100 Installation / Putting into Operation 2.3.3 Disposal of Packaging and Dispenser at the End of their Service Life Used packaging: Packaging Material* Outer cardboard box Cardboard ** Inner packaging EPS*** Disposal of material must always be done in accordance with... -
Page 26: Installation / Putting Into Operation
Service Manual Cafitesse 100 Installation / Putting into Operation 2.4 Installation / Putting into Operation • Before starting the installation: - Observe the specifications on the rating plate (on the left side of the housing) SAT A08F 109711113882185 WITTENBORG WITTENBORG... - Page 27 Service Manual Cafitesse 100 Installation / Putting into Operation • The dispenser may be installed on a flat, even counter, table, base stand or on a wall-mounted table. • If there are no even installation surfaces, the dispenser must be aligned.
- Page 28 Service Manual Cafitesse 100 Installation / Putting into Operation • Ensure that the thermostat (1) is turned counterclockwise to zero (until stop) (Fig. 5). CAUTION: If the thermostat is not turned to zero, the dispenser will heat and the capillary tube limiter will be released.
- Page 29 Service Manual Cafitesse 100 Installation / Putting into Operation • Insert both lower buttons (1) (Fig. 7). • Leave the upper button (2) free for programming (Fig. 7). Set the key to ON with dispensers equipped with a key switch.
- Page 30 Service Manual Cafitesse 100 Installation / Putting into Operation • Turn the thermostat regulator (7) clockwise up to the stop, to the maximum temperature of 95 °C (171 °F). (Fig. 10) • Ensure that the dispenser heats up and is switched off.
- Page 31 Service Manual Cafitesse 100 Installation / Putting into Operation The bush (1) for the service device is located behind the upper button. Insert the upper button (Fig. 12). • Place a container below the hot water delivery tap. • Let at least 6 l (1.32 UK gal/1.58 US gal)
- Page 32 Service Manual Cafitesse 100 Installation / Putting into Operation Putting the dispenser into operation on ferries • Dismount the overflow hose (1) provided by the manufacturer. (Fig. 1) • Cut 365 mm (14.37 in) off from the hose (piece goods).
-
Page 33: Checklist: Instructions For The Customer
Service Manual Cafitesse 100 Installation / Putting into Operation 2.5 Checklist: Instructions for the Customer 2 - 19 07.2004... -
Page 34: Transfer Of The Dispenser To The Customer (Incl. Haccp= Hazard And Critical Control Points)
Service Manual Cafitesse 100 Installation / Putting into Operation 2.6 Transfer of the Dispenser to the Customer (incl. HACCP= Hazard and Critical Control Points) 2 - 20 07.2004... -
Page 35: Technical Data (Total Overview)
Service Manual Cafitesse 100 Installation / Putting into Operation 2.7 Technical Data (Total Overview) Dimensions: Height: 645 mm (25.39 in) (C110/C120) Width: 210 mm (8.27 in) Depth: 455 mm (17.91 in) Weight: 21 kg (46.3 lbs) (empty) Water connection*: 3/4'' connection to inlet valve Drinking water line with stop valve. - Page 36 Service Manual Cafitesse 100 Installation / Putting into Operation Boiler: Open system, filling capacity 6.5 l (1.43 UK gal/1.72 US gal) electromechanical water temperature regulator, dry running protection (supervision by means of heating element temperature limiter, electronic low temperature indicator/boil over sensor,...
- Page 37 Service Manual Cafitesse 100 Faults Table of Contents Faults Support for Fault Diagnosis Fault Diagnosis General Malfunctions 3.2.1 Water System Malfunctions 3.2.2 Cooling System Malfunctions 3.2.3 Dosing System Malfunctions 3.2.4 Heating Plate Malfunctions (Option) 3.2.5 Key Switch/Counter Malfunctions (Option) 3.2.6 Indicated Malfunctions 3.2.7...
-
Page 38: Faults
Service Manual Cafitesse 100 Faults Faults 3.1 Support for Fault Diagnosis Step if yes if no 1 Ask customer for detailed information about malfunction and backgrounds 2 Are the malfunctions displayed on the see 3.2 see 3.2 or dispenser? Which displays? perform step 3 3 Is the problem described in 3.3? -
Page 39: Fault Diagnosis
Service Manual Cafitesse 100 Faults 3.2 Fault Diagnosis General: DANGER: Never insert the power supply plug of the dispenser into a • The list of possible faults and the appropriate wet or damp socket. The plug trouble shooting is divided into two main groups: itself must not be wet or damp either. -
Page 40: General Malfunctions
Service Manual Cafitesse 100 Faults 3.2.1 General Malfunctions Fault Possible cause Remedy The dispenser does 1. Connections to the power 1. Check connections. not operate supply or power supply If not ok: Connect supply lines plug are unplugged correctly. 2. Mains fuse blown 2. -
Page 41: Water System Malfunctions
Service Manual Cafitesse 100 Faults 3.2.2 Water System Malfunctions Fault Possible cause Remedy Water runs from 1. Float guide is blocked due 1. Decalcify the boiler. overflow when to calcification dispenser is switched on 2. Float switch defective 2. Check the water inlet valve for 25 V alternating voltage when the float switch arm is completely lifted. - Page 42 Service Manual Cafitesse 100 Faults Fault Possible cause Remedy The dispenser 1. Main valve in the water 1. Open the main valve. delivers concentrate pipe is closed but no water. Boiler empty 2. Pipe is blocked or supply 2. Check the pipe pressure with water insufficient pressure measuring device.
- Page 43 Service Manual Cafitesse 100 Faults Fault Possible cause Remedy The dispenser does 4. Defective thermostat 4. Check the connection with maximum not heat up the adjustments. If no connection: water Replace the thermostat (see chap. 5A.2). 5. Contacts of temperature 5.
-
Page 44: Cooling System Malfunctions
Service Manual Cafitesse 100 Faults 3.2.3 Cooling System Malfunctions Fault Possible cause Remedy Yellow LED on 1. Power supply interrupted 1. Check the power supply. The flashing operating panel is or dispenser disonnected stops as soon as the correct flashing (short... - Page 45 Service Manual Cafitesse 100 Faults Fault Possible cause Remedy 1. Control unit or Yellow LED at 1. Replace the sensor. If not remedied, operating panel temperature sensor replace the control unit (see chap. flashes (short defective, detached (no 5K.2). flashing frequency), contact) or short circuit excessive cooling.
- Page 46 Service Manual Cafitesse 100 Faults Fault Possible cause Remedy Beverage strength 1. Ventilation hose in the 1. Decalcify or adjust the hose. varies, irregular outlet elbow is blocked or concentrate dosing bent 2. Dosing system of flexy- 2. Replace the flexy-pack.
- Page 47 Service Manual Cafitesse 100 Faults 3.2.5 Malfunctions Heating Plate (option) Fault Possible cause Remedy Heating plates 1. Defective heating plate 1. Check connections. Replace switch. (option) do not work switch 2. Defective heating element 2. Replace the heating element (see chap.
-
Page 48: Indicated Malfunctions
Service Manual Cafitesse 100 Faults 3.2.7 Indicated Malfunctions Fault Possible cause Remedy Red LED: Flashing Error in water coil circuit (safety circuit interrupts supply after 5 sec.) Delivery: No Cooling: Yes • Open coil circuit: Defective • Replace the control unit (see chap. - Page 49 Service Manual Cafitesse 100 Faults Fault Possible cause Remedy Red LED: Flashing Error of the Peltier circuit Yellow LED: Flash- ing (short • Peltier element continually • Replace the control unit (see chap. frequency), when powered 5K2). temperature 0°C (32°F).
-
Page 50: Faults Occurred In The Market And Their Solutions
Service Manual Cafitesse 100 Faults 3.3 Faults occurred in the Market and their Solutions 3 - 14 07.2004... - Page 51 Service Manual Cafitesse 100 Programming Table of Contents Programme Structure Flow Charts 4.1.1 Programming Description 4.1.2 Programming for the Customer Reading and Resetting Counters 4.2.1 Reading further Data 4 - 1 07.2004...
-
Page 52: Programme Structure
Service Manual Cafitesse 100 Programming 4.1 Programme Structure 4.1.1 Flow Charts Cafitesse 110 service device programming mode – no I2C Espresso interface board installed SATELLITE V2.9 # XXXXXXXXXXXX XXXXXXXXXXXXX = Serial number All keys 'Machine = 110/120' - programming for facelift dispensers... - Page 53 Service Manual Cafitesse 100 Programming Down Cup ratio=1:## Concentrate/Water ratio for lower push button Min:12 Max:99 Down Cup volume=#### Min:40 Max:500 Down cnt = continuous dosing until the push button is released Cup dosing=#### rp = delivery of repeated complete cup volumes until the...
- Page 54 Service Manual Cafitesse 100 Programming Cafitesse 110 with Café Cool – with I2C Espresso interface board installed for Café Cool (both bridges on interface board are closed) ICE/JAPAN V2.9 XXXXXXXXXXXXX = Serial number # XXXXXXXXXXXX All keys 'Machine = 110/120' - programming for facelift dispensers...
- Page 55 Service Manual Cafitesse 100 Programming Ice ratio=1:## Min:8 Max 25 Down Ice vol. =####cc Min:40 Max:2000 Down Cup ratio=1:## Concentrate/Water ratio for lower push button Min:12 Max:99 Down Cup volume=#### Min:40 Max:500 Down cnt = continuous dosing until the push button is released...
- Page 56 Service Manual Cafitesse 100 Programming Cafitesse 120 service device Programming Mode – with I2C Espresso interface board installed (both bridges on interface board are open) PRESTO V2.9 # XXXXXXXXXXXX XXXXXXXXXXX = serial number All keys 'Machine = 110/120' - programming for facelift dispensers...
- Page 57 Service Manual Cafitesse 100 Programming Only if 'Prod.(2) = normal' Down cnt = continuous dosing until the push button is released Dosing(2)=##### rp = delivery of repeated complete cup volumes until the 1=cnt,2=rp,3=por push button is released por = delivery of a single cup volume upon pressing the...
- Page 58 Service Manual Cafitesse 100 Programming Cafitesse 110 with FRAPPE – with I2C Espresso interface board for Frappe (one bridge is open, one is closed) When the Frappé interface has been installed successfully, the FRAPPE V2.9 message display will show: # XXXXXXXXXXXX "FRAPPE V2.9"...
- Page 59 Service Manual Cafitesse 100 Programming Down cnt = continuous dosing until the push button is released rp = delivery of repeated complete frappe volumes until the push Frappe dosing=#### button is released 1=cnt 2=rp 3=por por = delivery of a single frappe volume upon pressing the push...
-
Page 60: Programming Description
Service Manual Cafitesse 100 Programming 4.1.2 Programming Description • Ratios for cups and pots can be set • The dispenser types Cafitesse 110/120 and individually. café cool are equipped with the same EPROM (Software). The software automatically identifies the dispenser type The delivery mode setting (portion, and indicates it in the service device. - Page 61 Service Manual Cafitesse 100 Programming The service device 2 service device 2: CAUTION: The service device is equipped with a 9V alkaline block battery. - - - - - - - - - - - - - - - -...
- Page 62 Service Manual Cafitesse 100 Programming Setting the clock of the service device • To switch on the service device, press the activating • Enter the correct minute. button. Press "Input" repeatedly to check or Display on service device 2 Input correct the data.
- Page 63 Service Manual Cafitesse 100 Programming Activating the programming mode • Remove the push button cover towards the front by means of the dismounting tool. • Connect the Cafitesse programming adapter to the service device and plug it into the jack behind the upper push button on the dispenser.
- Page 64 Service Manual Cafitesse 100 Programming Programming of Cafitesse 110 Cafitesse 110 (Pot delivery) • Activate the programming mode. SATELLITE V2.9 #123456789012 • Press any button on the service device to STOP start the first programme step. xxxxx Setting New dispenser (Facelift) / old dispenser Fig.
- Page 65 Service Manual Cafitesse 100 Programming Pot volume Programming steps for 'Frappé' (only when pot delivery is activated) Frappé volume ↓ Pot volume=1500cc Input ↓ Min=40 Max:2000 Frappe vol=###.cc/s Input Min: 1,0 Max: 50,0 • The pot volume can now be changed (see above).
- Page 66 Service Manual Cafitesse 100 Programming Programming steps for café cool Cup delivery mode ↓ Water flow café cool ( Cup dosing=port. Input (only with option café cool) 1=cnt, 2=rp, 3=por ↓ Ice flow=20cc/s Delivery mode Input Min=15 Max:30 Cup dosing = cont. (continuous) Continuous delivery as long as the cup delivery button is pressed.
- Page 67 Service Manual Cafitesse 100 Programming Counter display mode Storing Values ↓ ↓ Display norm on Save values ? Input Input 1=off 2=on 1 = yes 2 = no Display mode: • Press "1" to save all programmed values: Display norm on: The display is switched on during dispenser operation.
- Page 68 Service Manual Cafitesse 100 Programming Product settings for Cafitesse 120 • The settings of the following programme • Prod (1)=espresso only allows "portioned" de- steps are identical to those for Cafitesse 110 livery mode Facelift: Machine=110/120 • Product: button 2 1=110/120,2=old ↓...
- Page 69 Service Manual Cafitesse 100 Programming General settings Cafitesse 110/120 Display Standard settings Possible settings Machine (CFT 100 F/ CFT 100) 1 = 110/120 1 = 110/120, 2 = old Flow (water flow) 75 cc/sec 50 cc/sec - 75 cc/sec Product*...
- Page 70 Service Manual Cafitesse 100 Programming Programming the buttons Cafitesse 110/120 Facelift 4 - 20 07.2004...
-
Page 71: Programming For The Customer
Service Manual Cafitesse 100 Programming 4.2 Programming for the Customer 4.2.1 Reading and Resetting the Counters for Cafitesse 120 Cafitesse 110 Position OFF delivery disabled, buttons locked Position ON delivery enabled xxxxx Position 0000 allows counter reset xxxxx STOP Display Mode ON... -
Page 72: Reading And Resetting Counters
Service Manual Cafitesse 100 Programming Reading and resetting the counters for Cafitesse 120 Position OFF delivery disabled, button locked xxxxx Position ON delivery enabled xxxxx Position 0000 allows counter reset STOP xxxxx The counter registers the respective number of button activations. -
Page 73: Reading Further Data
Service Manual Cafitesse 100 Programming 4.3 Reading further Data Not included 4 - 23 07.2004... - Page 74 Service Manual Cafitesse 100 Programming 4 - 24 07.2004...
- Page 75 Service Manual Cafitesse 100 Functions Contents Functions Total Overview - Components of the Dispenser General Safety Instructions Water System Adjustments Disassemblies General Remarks A.2.0 Disassembly of the Inlet Valve A.2.1 Disassembly of the Outlet Valve A.2.2 Disassembly of the Boiler Cover A.2.3...
- Page 76 Service Manual Cafitesse 100 Functions Dosing System (incl. Components of the Product) Adjustments Not required Diassemblies Disassembly of the B2 Coil and the Diode Carrier C.2.1 Disassembly of the Mixer and the Mixer Motor C.2.2 Functional Descriptions Total Overview of the Dosing System C.3.1...
- Page 77 Service Manual Cafitesse 100 Functions Cooling System Adjustments Not required Disassemblies Disassembly of the Fan F.2.1 Disassembly of the Cooling Compartment Insulation F.2.2 Disassembly of the Peltier Element F.2.3 Functional Descriptions Total Overview of the Cooling System F.3.1 Function: Cooling System F.3.2...
- Page 78 External Options Depending on the different Nationalities, to be completed by the OPCOs and the Distributors Payment Systems Adjustments Installation Installation of the Kit 'Coin Module Cafitesse 100/Facelift' P.2.1 Functional Descriptions Total Overview of the Coin Modules P.3.1 Function: Coin Modules P.3.2...
-
Page 79: Functions
Service Manual Cafitesse 100 Functions 5.1 Total Overview - Components of the Dispenser • Legend for fig. 1a (Cafitesse 110): 1 Housing 16 Drip tray 2 Front part 17 Drip grid 3 Housing cover 18 Cup carrier 4 Cooling compartment lid... - Page 80 Service Manual Cafitesse 100 Functions • Legend for fig. 1b (Cafitesse 120): 14 Metal air supply 26 Tension rod 1 Housing channel 27 Front cover 2 Front part 15 Shielding cover 28 Advertising panel 3 Housing cover 16 Drip tray...
- Page 81 Service Manual Cafitesse 100 Functions 5.2 General Safetry Instructions for Ground Connection/ Safety Circuit DANGER: The work described in this chapter must only be carried out by trained service technicians. DANGER: Safety devices must not be changed or bridged. DANGER:...
- Page 82 Service Manual Cafitesse 100 Functions 5 - 8 07.2004...
-
Page 83: Adjustments
Service Manual Cafitesse 100 Functions - Water System Water System Adjustments Thermostat A capillary tube thermostat filled with liquid (approved by the food industry) in a protective tube switches off when a fault occurs Adjustment of the Standard adjustment up to the stop of the regulator approx. 95 °C thermostat (203 °F) - Page 84 Service Manual Cafitesse 100 Functions - Water System A.2 Disassemblies A.2.0 General Information Drain water from the boiler • Switch off the dispenser and disconnect it from the mains supply. • Disconnect the dispenser from the water supply. • Loosen the screw (2) and remove the operating panel cover (1).
-
Page 85: Disassembly Of The Inlet Valve
Service Manual Cafitesse 100 Functions - Water System A.2.1 Disassembly of the Inlet Valve Preparation: • Switch off the dispenser and disconnect it from the mains supply. • Disconnect the dispenser from the water supply. • Loosen the screw (2) and remove the operating panel cover (1). -
Page 86: Disassembly Of The Outlet Valve
Service Manual Cafitesse 100 Functions - Water System A.2.2 Disassembly of the Outlet Valve STOP xxxxx Preparation: • Switch off the dispenser and disconnect it from the mains supply. • Disconnect the dispenser from the water supply. • Remove the flexi-pack from the cooling compartment. - Page 87 Service Manual Cafitesse 100 Functions - Water System Disassembly: CAUTION: Place a cloth underneath the outlet valve in order to prevent water contained in the valve dripping onto the power supply during the disassembly. • Turn the support ring (3) counterclockwise...
- Page 88 Service Manual Cafitesse 100 Functions - Water System A.2.3 Disassembly of the Housing Cover Preparation: • Switch off the dispenser and disconnect it from the mains supply. • Disconnect the dispenser from the water supply. • Loosen the screw (2) and remove the operating panel cover (1).
- Page 89 Service Manual Cafitesse 100 Functions - Water System Fig. 2 Fig. 3 Disassembly: Assembly: • Remove the sensor of the overflow safety • Assembly is done in the reverse order. thermostat (13): Loosen screw and washer and remove the sensor. (Fig. 2) •...
-
Page 90: Disassembly Of The Boiler Cover
Service Manual Cafitesse 100 Functions - Water System Fig. 1 Thermostat Assembly: Disassembly: • Assembly is done in the reverse order. • Carry out the preparations for the disassembly of the boiler cover (1). (Fig. 1) • When mounting the thermostat, wind the (refer to the previous page) sensor wire from the sensor side approx. - Page 91 Service Manual Cafitesse 100 Functions - Water System Fig. 2 Fig. 1 Float switch Disassembly: • Carry out the preparations for the disassembly of the boiler cover (1). (Fig. 1) (see chap. 5A.2) • Suspend the floater wire (4) over the float switch (2).
- Page 92 Service Manual Cafitesse 100 Functions - Water System Fig. 1 Floater washer and floater wire Disassembly: Assembly: • Dismount the boiler cover (1). (Fig. 1) • Assembly is done in the reverse order. (see chap. 5A.2) When mounting the floater washer (3) •...
- Page 93 Service Manual Cafitesse 100 Functions - Water System Low temperature sensor Disassembly: • Carry out the preparations for dismounting the boiler cover. (see chap. 5A.2) • Disconnect the cable harness of the low temperature sensor (1) from the control (2).
- Page 94 Service Manual Cafitesse 100 Functions - Water System Overflow safety thermostat Disassembly: • Carry out the preparations for dismounting the boiler cover (1). (Fig. 1) (see chap. 5A.2) • Dismount the control (see corresponding chapter) and remove the insulating foils (8).
- Page 95 Service Manual Cafitesse 100 Functions - Water System Heating element Disassembly: • Carry out the preparations for dismounting the boiler cover. (see chap. 5A.2) • Dismount the boiler cover (1). (Fig. 1) (see chap. 5A.2) • Withdraw the insulating hoses from the heating element contacts (2).
- Page 96 Service Manual Cafitesse 100 Functions - Water System When replacing the seals, the corresponding spare parts included in the kit 'seal for heating' must be mounted in the correct order in accordance with fig. 3 or 4. • The seals can be distinguished by their different colours.
-
Page 97: Disassembly Of The Boiler
Service Manual Cafitesse 100 Functions - Water System A.2.4 Disassembly of the Boiler Preparation: • Carry out the preparations for dismounting the boiler cover. (see chap. 5A.2) • Disconnect all electrical connections. • Remove the front part. (see chap. 5G.2) •... - Page 98 Service Manual Cafitesse 100 Functions - Water System Dry running protection • Carry out the preparations for dismounting the boiler cover (1). (Fig. 1) (see chap. 5A.2) • Dismount the boiler cover. (see chap. 5A.2) • Unwind the sensor wire (2) from the heating element (3).
- Page 99 Service Manual Cafitesse 100 Functions - Water System A.2.5 Disassembly of the Hot Water Delivery Tap Preparation: STOP xxxxx • Switch off the dispenser and disconnect it from the mains supply. • Disconnect the dispenser from the water supply. •...
-
Page 100: Functional Descriptions
Service Manual Cafitesse 100 Functions - Water System A.3 Functional Descriptions A.3.1 Total Overview - Water System Fig. 1 Total overview standard dispenser 5A - 18 07.2004... -
Page 101: Function: Inlet Valve
Service Manual Cafitesse 100 Functions - Water System A.3.2 Function: Inlet Valve • The essential parts of the inlet valve are (fig. 1): the diaphragm with cleaning wire (1) the tappet (2) the coil the valve housing (3) with sieve, flow rate controller and outlet spout. - Page 102 Service Manual Cafitesse 100 Functions - Water System Opening and closing the valve • Water pressure is on both sides of the • The pressure on the upper side of the diaphragm. A compensation of the pressure diaphragm decreases in contrast to the is affected by a very small opening in the water pressure on the lower side.
- Page 103 Service Manual Cafitesse 100 Functions - Water System Flow rate controller • The flow rate controller is installed on the inlet side of the valve. • It reduces the flow rate of the incoming water to approx. 5 l/min. •...
-
Page 104: Function: Boiler
Service Manual Cafitesse 100 Functions - Water System A.3.3 Function: Boiler • The boiler (1) with a capacity of 6.5 l has been designed as an open system (fig. 1): • The water inlet system prevents the boiler from overflowing. -
Page 105: Function: Water Inlet Into The Boiler
Service Manual Cafitesse 100 Functions - Water System A.3.4 Function: Water Inlet into the Boiler • The water inlet into the boiler is regulated by means of a floater washer (1) (fig. 1): • The floater washer is suspended above the spring supported float switch lever (2) by means of a stainless steel wire. -
Page 106: Function: Heating And Temperature Regulation
Service Manual Cafitesse 100 Functions - Water System A.3.5 Function: Heating and Temperature Regulation • The thermostat sensor with protective tube (1) reaches into the water. A low temperature causes a pressure decrease in the thermostat capillary which results in the connection of the thermostat contacts. -
Page 107: Function: Water Outlet System And Outlet Valve
Service Manual Cafitesse 100 Functions - Water System A.3.6 Function: Water Outlet System and Outlet Valve • The valve tappet (1) made from stainless steel is situated in the outlet spout (2) of the boiler (3) and closes the valve by tight fitting at the outlet elbow (4). - Page 108 Service Manual Cafitesse 100 Functions - Water System Hot water delivery tap • Hot water is delivered via the hot water delivery tap. • The hot water delivery tap is connected to an individual outlet spout in the boiler by means of a hose.
-
Page 109: Electrical Diagrams
Service Manual Cafitesse 100 Functions - Water System Electrical Diagrams A.4.1 Circuit - Water Inlet Valve • The water inlet valve and the float microswitch are connected in series in the secondary circuit of the transformer T 02. main 25 V~... -
Page 110: Circuit - Water Coil
Service Manual Cafitesse 100 Functions - Water System A.4.2 Circuit - Water Coil • For the operation of the water coil, the • Standard/delivery: rectified secondary voltage of a transformer When no delivery button is actuated, there is used. must be no voltage applied at 'A'. -
Page 111: Circuit - Heating And Temperature Regulation
Service Manual Cafitesse 100 Functions - Water System A.4.3 Circuit - Heating and Temperature Regulation • The heating circuit is now connected and the mains voltage is applied at the heating element. Electric current runs via the main switch, the closed contacts of the dry running... -
Page 112: Technical Specifications
Service Manual Cafitesse 100 Functions - Water System Technical Specifications WHAT: HOW: Inlet valve Voltage: 24 V AC / 50 Hz Flow rate: 5 l/min Temperature: 90 °C (194 °F) Pressure: 0.2–10 bar (2.9-145 psi) Inlet valve with café cool Pressure: 0.2–10 bar (2.9-145 psi) -
Page 113: Options
Delivery of cold beverages Kit café cool In different countries: external dosing unit Overflow safety thermostat Installation of the Cafitesse 100 Kit for the application of 85 °C (185 °F) at > 2000 m over Cafitesse 100 at altitudes mean sea level... -
Page 114: Café Cool
Service Manual Cafitesse 100 Functions - Water System A.6.1 Café cool Fig. 1 5A - 32 07.2004... - Page 115 Service Manual Cafitesse 100 Functions - Water System • The dosing unit consists of two pressure • The Cafitesse 110 dispensers can additionally reducers, which adjust the pressure in two be equipped with the kit 'café cool'. steps. The first pressure reducer is set to •...
- Page 116 Service Manual Cafitesse 100 Functions - Water System Installation of the kit 'café cool' Preparation: • Switch off the dispenser and disconnect it from the mains supply. • Disconnect the dispenser from the water supply. • Drain the water. (see chap A.2) •...
- Page 117 Service Manual Cafitesse 100 Functions - Water System for screened coil (5), connect the outlet hose (1) and the hose (4) by means of the fastening clip (3). (Fig. 5) • Remove the control. (see corresponding chapter) • Drill a bore into the rear wall, which has a diameter of 28 mm as shown in fig.
- Page 118 Service Manual Cafitesse 100 Functions - Water System • It must be observed that the bridges (1) on the I C espresso/café cool interface board are closed. (Fig. 7) • Connect the I C espresso/café cool interface board (3) to the control (2) as shown in fig. 8.
- Page 119 Service Manual Cafitesse 100 Functions - Water System 11 12 20 19 Fig. 10 • Connect the plug ST05 (9) of the 24 V I • Connect the plug (14) to the 2-pole contact interface (10) cable harness to the 3-pole bush (15) of the adapter cable harness.
- Page 120 Service Manual Cafitesse 100 Functions - Water System • Insert the café cool button (1) into the operating panel. (Fig. 11) • Mount the external dosing unit. In different countries the external dosing unit is not included in the kit.
-
Page 121: Accessories
Service Manual Cafitesse 100 Functions - Water System A.7 Accessories Overview water system accessories WHAT: FOR: REQUIRED FOR: Water stop valve Securing the water supply Tank top Manual filling of the Kit 'tank top' - Europe Kit 'tank top' - USA... -
Page 122: Tank Top
Service Manual Cafitesse 100 Functions - Water System A.7.1 Tank Top • When no water supply connection is Water system provided or the drinking water quality is bad, the dispenser can be retrofitted with a • The function of the water system is identical tank to fill in the water manually. - Page 123 Service Manual Cafitesse 100 Functions - Water System General remarks: • When filling the boiler for the first time, the • The boiler is filled with water from the tank via a hose connection at the rear wall of heating must be switched off. This prevents the dry running protection being activated as the the dispenser and a special inlet valve.
- Page 124 Service Manual Cafitesse 100 Functions - Water System Installation: • Disconnect the plug connection S05/A (8) from the main cable harness of the dry running protection. (Fig. 3) • Remove the cable binder from the main cable harness and pull the plug connection S05/A to the rear of the dispenser.
- Page 125 Service Manual Cafitesse 100 Functions - Water System • Remove the water outlet hose from the boiler base. • Mount the shorter hose (1) included in the kit 'tank top' to the boiler base outlet to empty the boiler. (Fig. 4) •...
- Page 126 Service Manual Cafitesse 100 Functions - Water System • Close the boiler drainage hose by means of the hose clamp and the plug (1). (Fig. 5) • Mount the tank support (included in kit 'tank top') (2) to the rear wall as shown in fig.5.
-
Page 127: Kit Water Tank
Service Manual Cafitesse 100 Functions - Water System A.7.2 Installation of the Kit Water Tank General Notes: • The kit must only be installed by qualified service technicians. • The parts must be cleaned before the installation of the kit. - Page 128 Service Manual Cafitesse 100 Functions - Water System Installation: This description provides that the dispenser was connected to the water supply and ready for operation. Preparation: • Switch off the dispenser and unplug the power supply. • Disconnect the dispenser from the water supply.
- Page 129 Service Manual Cafitesse 100 Functions - Water System • As water can be left in the drain tube, hold xxxxx the container underneath the hot water STOP xxxxx delivery cock (1). (Fig. 4) • Open the hot water delivery cock (1) and drain the remaining water.
- Page 130 Service Manual Cafitesse 100 Functions - Water System • Push a clip onto the hose of the inlet valve (do not fasten it). • Insert the pre-mounted hose coupling (1) together with the cable harness into the opening of the housing, and connect the hose coupling (1) –...
- Page 131 Service Manual Cafitesse 100 Functions - Water System • Slightly loosen the screws (1) of the thermostat holder. (Fig. 11) • Slide the pre-mounted support of the rectifier (2) underneath the lock washers, and fasten the screws (1). (Fig. 12) •...
- Page 132 Service Manual Cafitesse 100 Functions - Water System • Mount the air duct. • Mount the housing cover . CAUTION: Make sure to connect the ground connection to the housing cover. • Guide the plug connections S05/A (1) of the main cable harness (former dry running...
- Page 133 Service Manual Cafitesse 100 Functions - Water System • Fill drinking water into the water tank (approx. 19 ltr.). • Tightly fasten the helical ring (1). (Fig. 16) ATTENTION: The pump unit may only slightly but not totally rest on the bottom of the water tank.
-
Page 134: Kit Overflow Protection
Service Manual Cafitesse 100 Functions - Water System A.7.3 Kit Overflow protection • The overflowing of the boiler can be • The time switch is used to measure the prevented, in cases where the float switch period of time during which the inlet valve is faulty, by installing the new "Overflow... - Page 135 (Fig. 3) See also the positioning diagram on the previous page. For Cafitesse 100 dispensers with an already built-in I C-bus circuit board (Cafitesse 120 or with café cool option), the circuit board is installed the same way.
- Page 136 Service Manual Cafitesse 100 Functions - Water System 5A - 54 07.2004...
-
Page 137: Brewing System B
Service Manual Cafitesse 100 Functions - Brewing System Brewing System Not available 5B - 1 07.2004... - Page 138 Service Manual Cafitesse 100 Functions - Brewing System 5B - 2 07.2004...
-
Page 139: Not Required
Service Manual Cafitesse 100 Functions - Dosing System Dosing System C.1 Adjustments Not required 5C - 1 07.2004... -
Page 140: Disassembly Of The B2 Coil And The Diode Carrier
Service Manual Cafitesse 100 Functions - Dosing System Disassemblies C.2.1 Disassembly of the B2 Coil and the Diode Carrier Fig. 1 5C - 2 07.2004... - Page 141 Service Manual Cafitesse 100 Functions - Dosing System Preparation: Disassembly of the empty detection • Disconnect the dispenser from the mains • Remove the insulation ring (10). (Fig. 1) supply and close the water tap. • Remove the 3 screws (12). (Fig. 1) •...
- Page 142 Service Manual Cafitesse 100 Functions - Dosing System C.2.2 Disassembly of the Mixer and Mixer Motor Preparation: • Disconnect the dispenser from the mains supply and from the water supply. • Drain the water from the boiler. • Place a container underneath the outlet for hot water and empty the residual water from the tap.
- Page 143 Service Manual Cafitesse 100 Functions - Dosing System Disassembly of the mixer motor CAUTION: Never loosen the two screws (1) first! (Fig. 3) • Remove the two nuts (2) as well as the lock washers and the washers. (Fig. 3) •...
-
Page 144: Functional Descriptions
Service Manual Cafitesse 100 Functions - Dosing System Functional Descriptions C.3.1 Total Overview of the Dosing System bag with concentrate triggered tappet ring empty concentrate control coil <––– coil 0.3 sec. pulses bellows delay <––– trough water coil water flow residual 0.3 sec. -
Page 145: Function: Flexi Dosing System
Service Manual Cafitesse 100 Functions - Dosing System C.3.2 Function: Flexi Dosing System • Every flexi-pack is a non-returnable pack. It consists of a cardboard box (1) and a unit containing the concentrate bag ( 2) and the dosing pump (3) (fig. 1). - Page 146 Service Manual Cafitesse 100 Functions - Dosing System Steps during the dosing process A delivery button is actuated. • Water volume: The microprocessor calculates the volume The water outlet valve opens. of the delivered water: Water volume per delivery = volume of the...
-
Page 147: Overview: Flexi-Packs For Cafitesse 110/120
Service Manual Cafitesse 100 Functions - Dosing System C.3.2.1 Overview: Flexi-Packs for Cafitesse 110/120 CAUTION: The instructions for storage and handling indicated on the flexi-packs must always be observed! The manufacturer cannot be held liable for malfunctions of the dispenser which result from incorrect handling of the flexi-packs. -
Page 148: Electrical Diagrams
Service Manual Cafitesse 100 Functions - Dosing System Electrical Diagrams C.4.1 Circuit of the concentrate coil voltage regulator fuse diode 20.5 V concentrate main condensator coil switch trans- mains switching formator bridge rectifier transistor switching transistor measuring resistor 0.22 Ω... -
Page 149: Technical Specifications
Service Manual Cafitesse 100 Functions - Dosing System Technical Specifications WHAT: HOW: B2 coil Voltage: 20.5 V DC Motor support Material: polystyrene, black* Mixing funnel Material: polypropylene, natural * Mixing funnel cover Material: polypropylene, natural * Mixing container Material: polypropylene, natural *... -
Page 150: Frappé
Service Manual Cafitesse 100 Functions - Dosing System C.6.1 Frappé • The installation of the kit "Frappé" into a • The delivery of coffee concentrate without dispenser type Cafitesse 110 enables the hot water cannot be performed on delivery of coffee concentrate without hot dispensers which are equipped for the water. - Page 151 Service Manual Cafitesse 100 Functions - Dosing System Fig. 1 • Open the water tap, connect the power Setting the concentrate volume: supply plug and switch on the dispenser. Minimum: 1.0 cc, Maximum: 50.0 cc in steps of 0.1 cc •...
-
Page 152: Accessories
Service Manual Cafitesse 100 Functions - Dosing System C.7 Accessories Not available 5C - 14 07.2004... -
Page 153: Adjustments
Service Manual Cafitesse 100 Functions - Product Delivery Product Delivery Adjustments WHAT Cup/pot delivery Programming via Service Device see chap. 4 Volumes Programming via Service Device see chap. 4 Ratio Programming via Service Device see chap. 4 Product Cafitesse 110: coffee / tea... -
Page 154: Disassemblies
Service Manual Cafitesse 100 Functions - Product Delivery D.2 Disassemblies D.2.1 Installation and Disassembly of the Buttons Preparation: • Switch off the dispenser and disconnect it from the mains supply. • Disconnect the dispenser from the water supply. Installation: •... - Page 155 Service Manual Cafitesse 100 Functions - Product Delivery D.2.2 Disassembly of the Pot Carrier and the Main Switch Preparation: • Switch off the dispenser and disconnect it from the mains supply. • Disconnect the dispenser from the water supply. Diassembly: •...
- Page 156 Service Manual Cafitesse 100 Functions - Product Delivery • Pull the pot carrier (4) towards the front and turn it around. (Fig. 4) • Press the locking mechanisms (5) of the main switch downwards by using a screwdriver. (Fig. 4) •...
-
Page 157: Functional Descriptions
Service Manual Cafitesse 100 Functions - Product Delivery Functional Descriptions D.3.1 Total Overview - Product Delivery Cafitesse 110 Cafitesse 120 xxxxx xxxxx xxxxx xxxxx xxxxx STOP STOP xxxxx xxxxx xxxxx POWER POWER Fig. 1 • Legend for fig. 1: 1 Push button... - Page 158 Service Manual Cafitesse 100 Functions - Product Delivery D.3.2 Function: Push Buttons • Depending on the dispenser adjustments made by the service technician during the installation, after actuating a push button, the beverages can be delivered as follows: xxxxx Portioned delivery...
-
Page 159: Function: Cup Carrier, Drip Grid And Pot Carrier
Service Manual Cafitesse 100 Functions - Product Delivery D.3.3 Function: Cup Carrier, Drip Grid and Pot Carrier • A glass, cup or mug for the beverage to be delivered will be positioned on the cup carrier. • The height of the cup carrier (1) can be adjusted. -
Page 160: Electrical Diagrams
Service Manual Cafitesse 100 Functions - Product Delivery D.4 Electrical Diagrams Not required here Technical Specifications WHAT: HOW: Drip grid Material: acrylonitrile-butadiene-styrene (-polymer) * Pot carrier Material: acrylonitrile-butadiene-styrene (-polymer) * Drip tray Material: acrylonitrile-butadiene-styrene (-polymer) * Cup carrier Material: acrylonitrile-butadiene-styrene (-polymer) *... -
Page 161: Drainage For The Drip Tray
Service Manual Cafitesse 100 Functions - Product Delivery D.7.1 Drainage for the Drip Tray Installation of the kit 'drainage for the drip tray': Preparation: • Switch off the dispenser and disconnect it from the mains supply. • Disconnect the dispenser from the water supply. - Page 162 Service Manual Cafitesse 100 Functions - Product Delivery 5D - 10 07.2004...
-
Page 163: Disassemblies
Service Manual Cafitesse 100 Functions - Cooling System Cooling System F.1 Adjustments Not necessary here Disassemblies F.2.1 Disassembly of the fan Preparation: • Disconnect the dispenser from the mains supply and unplug the connection. • Remove the operating panel cover (1) with screw (2). -
Page 164: Disassembly Of The Cooling Compartment Insulation
Service Manual Cafitesse 100 Functions - Cooling System F.2.2 Disassembly of the Cooling Compartment Insulation Preparation: • Disconnect the dispenser from the mains supply and close the water tap. • Remove the front cover. CAUTION: When the front cover is made... -
Page 165: Disassembly Of The Peltier Element
Service Manual Cafitesse 100 Functions - Cooling System F.2.3 Disassembly of the black wire Peltier Element • Disconnect the dispenser from the mains supply and close the water tap. • Remove the front cover. CAUTION: When the front cover is made... - Page 166 Service Manual Cafitesse 100 Functions - Cooling System • Place the cable harness (1) of the Peltier element in the recess of the insulation (2). Position the cooling compartment in such a way that the holes for the screws are placed exactly opposite the holes of the cooling compartment.
-
Page 167: Functional Descriptions
Service Manual Cafitesse 100 Functions - Cooling System Functional Descriptions F.3.1 Total Overview Cooling System Fig. 1 • Legend for fig. 1 1 Fan 2 Flexi-pack 3 Cooling compartment 4 Temperature sensor 5 Control 6 Peltier element 7 Heat sink 5F - 5 07.2004... -
Page 168: Function: Cooling System
Service Manual Cafitesse 100 Functions - Cooling System F.3.2 Function: Cooling System Fig. 1 The principle of thermoelectric cooling • For cooling the flexi-packs, the dispenser is • Cells are electrically connected in series in equipped with a thermoelectric cooling the Peltier element. - Page 169 Service Manual Cafitesse 100 Functions - Cooling System Fig. 2 Design of the cooling system Peltier element (3) • The design of the system is shown in fig. 1: • The Peltier element is made from ceramic plates. The cooling elements are situated between these plates.
- Page 170 Service Manual Cafitesse 100 Functions - Cooling System Peltier element • The development of condensation water on the cold side in the Peltier element could lead to corrosion which could drastically reduce the durability of the element. As a protection, the inner parts of the element are coated with a thin layer of epoxy resin.
- Page 171 Service Manual Cafitesse 100 Functions - Cooling System Temperature regulation Ambient temperature • The electronic temperature sensor is • When the ambient temperature exceeds attached on the outside to the cooling 32 °C sufficient cooling cannot be compartment base. guaranteed any more.
- Page 172 Service Manual Cafitesse 100 Functions - Cooling System Temperature sensor • The function of the temperature sensor in • Alternatively, one of the following combination with the microprocessor is procedures can be applied: similar to that of a thermostat. a) Comparative measurement old - new, at •...
- Page 173 Service Manual Cafitesse 100 Functions - Cooling System Supervision Peltier current • The value of the Peltier current is detected by the control due to a voltage drop. It can be measured by means of a measuring resistor (0.1 Ohm; on the control board).
-
Page 174: Electrical Diagrams
Service Manual Cafitesse 100 Functions - Cooling System Electrical Diagrams F.4.1 Cooling Circuit fuse conden- Peltier 11-13 V ≈ voltage sator regulator trans- mains formator bridge tran- rectifier sistor empty LED high/low temperature measuring resistor 0.1 Ω temperature sensor Fig. 1 •... -
Page 175: Technical Specifications
Service Manual Cafitesse 100 Functions - Cooling System Technical Specifications WHAT: HOW: Temperature sensor Triggering temperature cooling compartment: 2.8°C Triggering temperature sensor: 1.7°C Temperature indicator LED High temperature: 12.7°C Low temperature: 2.4°C Capacity: 220/240 V 50 Hz VDE (national) 115 V 60 Hz UL/CSA... - Page 176 Service Manual Cafitesse 100 Functions - Cooling System 5F - 14 07.2004...
-
Page 177: Adjustments
Service Manual Cafitesse 100 Functions - Housing G Housing G.1 Adjustments – G.2 Disassemblies G.2.1 Disassembly of the Front Part Preparation: • Switch off the dispenser and disconnect the mains supply. • Disconnect the dispenser from the water supply. Disassembly: •... -
Page 178: Disassembly Of The Operating Panel
Service Manual Cafitesse 100 Functions - Housing G.2.2 Disassembly of the Operating Panel Preparation: • Switch off the dispenser and disconnect it from the mains supply. • Disconnect the dispenser from the water supply. Disassembly: • Remove the operating panel cover (1) with screw (2). -
Page 179: Functional Descriptions
Service Manual Cafitesse 100 Functions - Housing Functional Descriptions G.3.1 Total Overview Housing • Legend for fig. 1: 1 Rear wall 2 Housing 3 Cooling compartment lid 4 Operating panel cover 5 Operating panel 6 Shielding cover Fig. 1 G.3.2... -
Page 180: Electrical Diagrams
Service Manual Cafitesse 100 Functions - Housing G.4 Electrical Diagrams – G.5 Technical Specifications WHAT: HOW: Housing/front part Material: metal Coating: RAL 9005, black, mat Glass cover Material: glass *, hardened plexiglass * - GS Operating panel Material: ABS *, black... -
Page 181: Cover With Heating Plate
Service Manual Cafitesse 100 Functions - Housing G.7.1 Cover with Heating Plate Installation of the kit 'cover with heating plate' Preparation: • Switch off the dispenser and disconnect it from the mains supply. • Disconnect the dispenser from the water supply. - Page 182 Service Manual Cafitesse 100 Functions - Housing Installation: • Remove the adhesive tapes from the plug connections S03/1, S03/2 and S03/3 (13), which are placed in the right side plate (12). (Fig. 2) • Remove the dummy cap on the right side of the cup carrier.
-
Page 183: Key Switch
Service Manual Cafitesse 100 Functions - Housing G.7.2 Key Switch Preparation: • Remove the pc board (3) with 4 screws. (Fig. 1) • Switch off the dispenser and disconnect it • Remove the stop button from the operating from the mains supply. - Page 184 Service Manual Cafitesse 100 Functions - Housing 5G - 8 07.2004...
-
Page 185: Adjustments
Service Manual Cafitesse 100 Functions - Power Supply and Control Power Supply and Control Adjustments Voltage selector 208 V, 220 V, 240 V (dispensers for the USA) 5K - 1 07.2004... -
Page 186: Disassemblies
Service Manual Cafitesse 100 Functions - Power Supply and Control Disassemblies K.2.1 Disassembly of the Power Supply Preparation: • Switch off the dispenser and disconnect it from ther mains supply. • Disconnect the dispenser from the water supply. • Loosen the screw (2) and remove the operating panel cover (1). - Page 187 Service Manual Cafitesse 100 Functions - Power Supply and Control Disassembly of the power supply cable • Loosen the plug (1) of the main cable harness. (Fig. 3) Disassembly: • Loosen the torx-locking screws (2) at the • Disassemble the power supply.
-
Page 188: Disassembly Of The Control
Service Manual Cafitesse 100 Functions - Power Supply and Control K.2.2 Disassembly of the Control Preparation: • Switch off the dispenser and disconnect it from the mains supply. • Disconnect the dispenser from the water supply. • Loosen the screw (2) and remove the operating panel cover (1). - Page 189 Service Manual Cafitesse 100 Functions - Power Supply and Control Assembly: • Assembly is done in the reversed order. When mounting the control, it must be observed that the insulating foil (1) is suspended between the control (2) and the boiler (3). (Fig. 4)
-
Page 190: Disassembly Of The Operating Panel Board
Service Manual Cafitesse 100 Functions - Power Supply and Control K.2.3 Disassembly of the Operating Panel Board Disassembly: Preparation: • Hold the operating panel at the cross- • Switch off the dispenser and disconnect it shaped part (3) pull it towards the front and from the mains supply. - Page 191 Service Manual Cafitesse 100 Functions - Power Supply and Control Disassembly of the low temperature and empty LEDs: Disassembly: CAUTION: In order to prevent damaging of boards their components due to electrostatic charge, first touch a metal table or a metal cupboard before touching the pc boards.
- Page 192 Service Manual Cafitesse 100 Functions - Power Supply and Control K.3 Fonal Descriptions K.3.1 Total Overview Cable Harnesses option Overview main cable harness 5K - 8 07.2004...
- Page 193 Service Manual Cafitesse 100 Functions - Power Supply and Control 5K - 9 07.2004...
- Page 194 Service Manual Cafitesse 100 Functions - Power Supply and Control Overview control cable harnesses Legend: 1 Cable harness temperature sensor 2 Cable harness B2 coil/photodiodes 3 Cable harness Display 4 Cable harness operating panel 5 Cable harness empty/low temperature 6 Cable harness I...
- Page 195 Service Manual Cafitesse 100 Functions - Power Supply and Control Legend: 9 Cable harness low temperature sensor 12 Cable harness inlet valve/float switch 10 Cable harness Peltier element 13 Cable harness water coil 11 Cable harness voltage supply 14 Peltier element interface...
-
Page 196: Function: Power Supply
Service Manual Cafitesse 100 Functions - Power Supply and Control K.3.2 Function: Power Supply Overview power supply Power supply Japan, Power supply Europe, 100 V, 200 V GB, Switzerland, Australia Legend: 11 Main cable harness 6 Power supply cable 1 T01 transformator Peltier... - Page 197 Service Manual Cafitesse 100 Functions - Power Supply and Control Power Transformator Transformator Power supply Fuse Fuse supply cable (Fig. 1) (6, Fig. 1) (8, Fig. 1) (9, Fig. 1) (1, Fig. 1) (2, Fig. 1) 220 V 208–240 V/ 208-220 - 240 V/ 220 V Europe 0.315 AT...
-
Page 198: Function: Control
Service Manual Cafitesse 100 Functions - Power Supply and Control K.3.3 Function: Control • The control is supplied by means of the transformator T 01. The secondary voltage is rectified by the bridge rectifier V4020, smoothened by the condensator C6010 and stabilised at 5 V by the voltage regulator N2030. -
Page 199: Function: Operating Panel Board
Service Manual Cafitesse 100 Functions - Power Supply and Control K.3.4 Function: Operating Panel Board • The operating panel board (2) is connected to the control via the operating panel cable harness (1) and the counter cable harness (10). (Fig. 1) -
Page 200: Function: I C-Bus Extension Board
Service Manual Cafitesse 100 Functions - Power Supply and Control K.3.5 Function: I C-Bus Extension Board • Via the I C-bus extension board (1, Fig. 1) it is possible to connect the following: payment systems café cool espresso • The following components are situated on the I C-bus extension board (1) (Fig. -
Page 209: Not Available
Service Manual Cafitesse 100 Functions - Power Supply and Control Technical Specifications WHAT: HOW: Transformator T01 Primary voltage: national Secondary voltage: 13 V Transformator T02 Primary voltage: national Secondary voltage: 25 V Control / operating panel Operating voltage: 12 V / 24 V / 5 V... - Page 210 Service Manual Cafitesse 100 Functions - Power Supply and Control 5K - 18 07.2004...