Table of Contents
Advertisement
Advertisement
Table of Contents

Related Manuals for Douwe Egberts Cafitesse Excellence


Summary of Contents for Douwe Egberts Cafitesse Excellence
- Page 1 Cafitesse Excellence Operator Manual EXCLLNC / 2012-07...
- Page 2 Manufacturer: Copyright 2012 © D.E Master Blenders 1753, the Netherlands N&W Global Vending SpA Via Roma 24 The English version is the original version of the operator manual. 24030 Valbrembo (BG) Other languages are translations of the original operator manual. Italy...
-
Page 3: Table Of Contents
TABLE OF CONTENTS 1 - INTRODUCTION 5 - CLEANING About the dispenser Cleaning procedures Important When to clean the dispenser Symbols used in this manual Exterior cleaning Flush 2 - SAFETY INSTRUCTIONS Clean & Flush General safety 6 - PROGRAMMING Transport and storage Installation Starting the operator mode... -
Page 4: Introduction
The following symbols are used throughout this manual in combination with a statement to emphasize important and critical The Cafitesse Excellence is a high quality dispenser specifically information. Observe the statements to ensure safety and prevent designed to deliver hot and cold* coffee, coffee based specialties, injury and product damage. -
Page 5: Safety Instructions
2 - SAFETY INSTRUCTIONS General safety The equipment is not intended for use by persons (including containers fall down. children) with limited psychological or physical abilities or Warning: deficiencies. To warrant their safety, they should be supervised Keep sufficient space around the dispenser to get away and instructed by a competent person regarding the usage of the easily in case of hot liquid splashes. -
Page 6: Transport And Storage
Transport and storage Always store and transport the dispenser in the original packaging. The dispenser must be connected to the drinking water line in Before storing or transporting the dispenser: compliance with local regulations. In case of cold drink options, the quality of the water supply must be checked to ensure delivery of •... -
Page 7: Food Safety Instructions (Haccp)
Food safety instructions (HACCP) The machine is designed to comply with food safety regulations, Danger: DO NOT SPRAY OR SPLASH THE DISPENSER WITH WATER. including HACCP, as required in the food service industry. DO NOT USE A WATER JET FOR CLEANING. The operator is responsible to observe basic food safety and hygiene. -
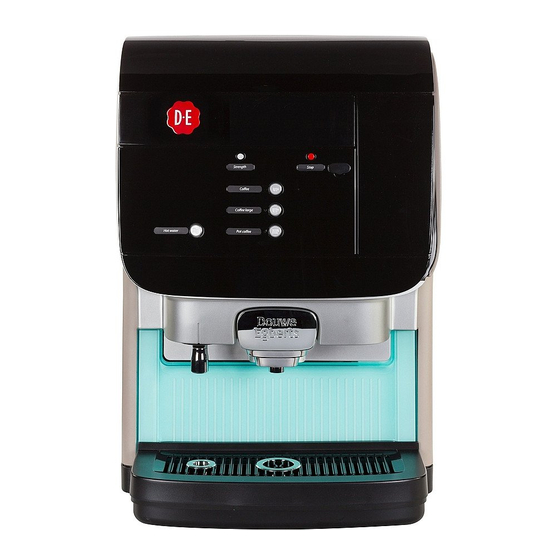
Page 8: Overview
3 - OVERVIEW Dispenser overview 1. Dispenser interface 5. LOCK/Clear-Error button 12. Condensate grid 2. Door handle (lock optional) 6. Dispenser door 13. Water connection 3. Cup tray 7. Cooling compartment 14. Power cord 4. Drip tray 8. Release bar 9. -
Page 9: Dispenser Interface Overview
Dispenser interface overview 1. Display 2. Preselection slider STRENGTH 3. Preselection COLD (option) 4. Preselection VOLUME 5. Operator Mode: (up) 6. Operator Mode: (down) 7. Operator Mode: (enter) 8. Operator Mode: (back) 9. Port for USB key 10. STOP 11. Drink selection: Left: Milk, Cocoa, Coffee or Tea* Middle: Coffee or Tea*... -
Page 10: Dispenser Display Overview
Dispenser display overview 1. OPERATOR MODE 8. TEMPERATURE 15. MESSAGE -line the USB operator stick is inserted and the water temperature in the boiler is messages are displayed to guide you the Operator Mode is active too low and the dispenser is heating up through the cleaning, programming 2. -
Page 11: Operating
4 - OPERATING Fig. 4.1 - Place product pack Fig. 4.2 - Empty product pack icon Fig. 4.3 - Cup placement Placing a product pack Empty product packs Cup/pot placement If a product pack is empty, the The dispenser has three product outlets: Caution: Never use a frozen or damaged corresponding drink selection labels will •... -
Page 12: Drink Delivery
Fig. 4.4 - Buttons correspond to outlets Drink delivery Portioned or continuous drink delivery During installation, the service technician Continuous delivery (free flow) Warning: The liquids dispensed by the programs the dispenser to operate with one Press the drink button until the cup or pot dispenser are hot! Avoid scalding! of the following delivery options: is full. -
Page 13: Drink Delivery With Preselections
Fig. 4.5 - Volume preselection Drink delivery with preselections Cold preselection Volume preselection Your dispenser supports preselection 1. Place your cup. 1. Place your cup. 2. Press the preselection button COLD to 2. Press the preselection button VOLUME options. The service technician may activate preselection options during installation. -
Page 14: Strength Preselection
Fig. 4.6 - Strength preselection Fig. 4.7 - LOCK/Clear-Error button Fig. 4.8 - Lock icon Strength preselection Locking/unlocking the dispenser Drink delivery in locked mode (option) 1. Place your cup. 1. Open the dispenser door. Insert the USB release key into the USB port 2. Slide your finger over the STRENGTH - 2. -
Page 15: Switching Off The Dispenser
Fig. 4.9 - Heating up/Delivery blocked icons Switching off the dispenser Switching on the dispenser Please take the following preparations 1. Open the water tap. Note: when the machine is not to be used for a 2. Insert the power plug. Depending on the dispenser model long period, e.g. -
Page 16: Cleaning
5 - CLEANING Fig. 5.1 - Cleaning & Delivery blocked icons Fig. 5.2 - Lock the dispenser Fig. 5.3 - Remove cup & drip trays Cleaning procedures When to clean the dispenser Exterior cleaning There are two different cleaning programs: Run the cleaning program when the Note: It is advised to clean the exterior of cleaning icon appears in the display (fig. •... -
Page 17: Flush
Fig. 5.4 - Enter cleaning mode Fig. 5.5 - Pull red release bar Fig. 5.6 - Insert Rinza tablets Flush 6. Put the parts back in place. Follow the instruction on the display: Note: 7. Clean the exterior of the dispenser with You can flush the dispenser at INSERT RINZA CLEANING a damp, clean cloth. any time by using the procedure TABLETS. -
Page 18: Clean & Flush
Fig. 5.7 - Place container Fig. 5.8 - Remove packs Fig. 5.9 - Clean cooling compartment Clean & Flush Follow the instruction on the display: 1. Press first STOP and then and hold Follow the instruction on the display: them pressed simultaneously for 3-4 PLEASE PLACE FLUSH BIN (MIN. PLEASE CLEAN THE COOLING seconds to enter the cleaning mode (fig. - Page 19 Fig. 5.10 - Remove mixing bowls Fig. 5.11 - Remove internal drip tray Fig. 5.12 - Mixing bowl sealing ring 6. Clean the mixing bowls: Caution: Note: Check if the blue sealing rings are a. Pull the red release bar to open the Comply with the safety instructions firmly attached to the mixing bowls outlet compartment (fig. 5.5). and cleaning instructions on the b.
- Page 20 7. Press to confirm the insertion of the cleaning tablets. Follow the instruction on the display: PLEASE PLACE FLUSH BIN (MIN. 4L.). PRESS TO FLUSH 8. Place the container (fig. 5.7) under the product outlets and press to start flushing. Warning: The liquids dispensed by the dispenser are hot! Avoid scalding!
-
Page 21: Programming
6 - PROGRAMMING Fig. 6.1 - Insert operator USB key Starting the operator mode Insert the supplied operator USB key (fig. Please note that menu items might be 6.1). This immediately starts the operator disabled by the service technician. Contact mode. The first menu item ( COUNTERS ) is your Cafitesse systems supplier if you want displayed this altered. -
Page 22: Counters
Fig. 6.3 - VOLUME icons (small selected) Fig. 6.4 - HOT (left) and COLD (right) icons COUNTERS Drink counters Preselection counters In the COUNTERS menu, you have various 1. Select the COUNTERS menu by using Press the preselection buttons VOLUME and/or COLD* for more detailed counter possibilities to read out the drink counters: and press to access it. -
Page 23: Volume
VOLUME STRENGTH • Press the preselection button COLD * In the VOLUME menu, you can change In the STRENGTH menu, you can change the drink volumes for all available drinks at the drink strength for all available drinks at COLD icon (fig. -
Page 24: Date/Time
DATE/TIME CLEANING DAYS Determine cleaning days You can set the date and time in the DATE/ You can set the weekdays that you want If you have a Coffee-Coffee version, the TIME menu. to clean or flush the dispenser in the dispenser only needs to run the "Clean &... -
Page 25: Set Days For "Clean & Flush
Set days for "Clean & Flush" Set days for "Flush" to select the CLEAN to select the FLUSH 1. Use 1. Use Note: "Clean & Flush" is required at least submenu. submenu. once a week. icon indicates the active weekday(s) icon indicates the active weekday(s) for cleaning: for flushing:... -
Page 26: Eco Settings
ECO ENABLE/ 1. Use using the menu ECO SETTING . DISABLE submenu and press Cafitesse Excellence has a self-learning ECO mode. When ECO mode is enabled, the access it. These settings only apply to periods during dispenser will automatically adjust the ECO which the dispenser is not used. -
Page 27: Setting The Eco Start And End Time
Setting the ECO start and end time Setting the ECO boiler temperature TELEPHONE # You can set the telephone numbers of Note: Note: ECO mode needs to be enabled for ECO mode needs to be enabled for operator and service in this menu. the next submenus to show. -
Page 28: Enable/Disable Telephone Numbers
Enable/disable telephone numbers Set telephone numbers to select the SHOW to select the OPERATOR 1. Use 1. Use OPERATOR NR or SHOW SERVICE NR or SERVICE NR submenu and NR submenu and press press The display shows: Y (yes) or N (no). The display shows the telephone number. -
Page 30: Troubleshooting
7 - TROUBLESHOOTING Display message Cause Action The product pack is: 1. Replace the empty product pack, see page 11. 2. Check whether the product pack is inserted correctly, see page 1. empty 2. incorrectly positioned 3. Insert a product pack. 3. - Page 31 Display message Cause Action The drink delivery is blocked because • The energy saving mode will end automatically at the set time, the energy saving mode is switched see page 27. • (option) Press a drink button. The boiler temperature increases and the drink is dispensed as soon as the correct temperature is reached.
-
Page 32: Specifications
8 - SPECIFICATIONS Coffee-Coffee Milk-Coffee Versions* Coffee-Coffee with Cold Milk-Coffee with Cold Coffee-Coffee with Light Guidance Milk-Coffee with Light Guidance Coffee-Coffee with Cold & Light Guidance Milk-Coffee with Cold & Light Guidance Dimensions Height Door closed: 692 mm / 27.24 in (Door open: 920 mm / 36.2 in) Width 380 mm / 14.96 in Depth... - Page 33 Standard water connection 1/2" or 3/8" supply line with 3/4" BSP connecting piece Drinking water line with stop valve Max. water inlet temperature 60°C / 140°F Dynamic pressure Min. 0.08 MPa at 10 l/min - 11 psi at 2.6 gal/min Static pressure Max.
- Page 34 A+B: 3-4 sec FLUSH ONLY (OPTIONAL)