
Related Manuals for Extron electronics MPX 866 A


Summary of Contents for Extron electronics MPX 866 A
- Page 1 User Guide Matrix Switchers MPX 866 A Media Presentation Matrix Switcher 68-1270-01 Rev. C 01 11...
- Page 2 Safety Instructions • English Warning Power sources • This equipment should be operated only from the power source indicated on the product. This This symbol is intended to alert the user of important operating and mainte- equipment is intended to be used with a main power system with a grounded (neutral) conductor. The third nance (servicing) instructions in the literature provided with the equipment.
- Page 3 CAUTION: A caution warns of things or actions that might damage the equipment. WARNING: A warning warns of things or actions that might cause injury, death, or other severe consequences. Copyright © 2011 Extron Electronics. All rights reserved. Trademarks All trademarks mentioned in this guide are the properties of their respective owners.
-
Page 4: Table Of Contents
SIS Commands ........64 Viewing and Adjusting Command and Response Table for IP-Specific SIS Commands ....... 72 the Input Audio Level ........41 Viewing and Adjusting Special Characters..........73 the Output Volume ........44 MPX 866 A Media Presentation Matrix Switcher • Contents... - Page 5 MPX 866 A Part Numbers ......123 Optional Accessories ........123 Cables ............124 Mounting the Switcher ........126 UL Requirements ......... 126 Mounting Instructions ......... 126 Button Labels ..........127 Printing Instructions ........127 MPX 866 A Media Presentation Matrix Switcher • Contents...
-
Page 6: Introduction
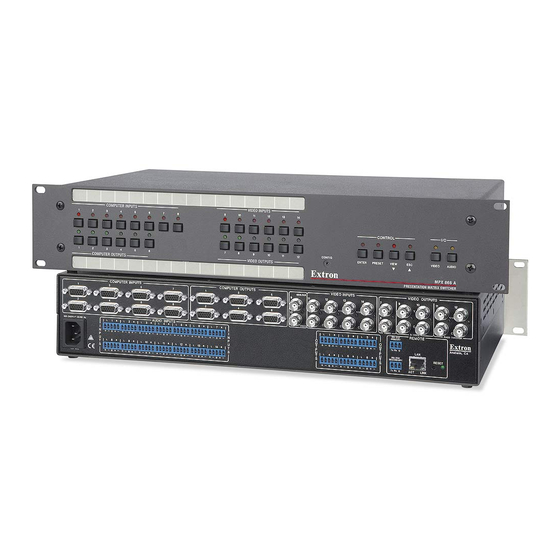
This guide contains installation, configuration, and operating information for the Extron MPX 866 A media presentation matrix switcher (see figure 1). In this guide, the MPX 866 A may be referred to as “the MPX” or “the switcher”. Extron Projector... -
Page 7: About The Media Presentation Matrix Switcher
A matrix switcher distributes any input to any combination of outputs and can route multiple input/output configurations simultaneously. The MPX 866 A media presentation matrix switcher combines three matrix switchers with the following switching capabilities in a single product: An 8-input by 6-output VGA matrix switcher, comprising the computer video group... -
Page 8: Definitions
Computer video group — The switcher provides a minimum of 300 MHz (-3 dB) video bandwidth, fully loaded. Low resolution video group — The switcher provides a minimum of 150 MHz (-3 dB) video bandwidth, fully loaded. MPX 866 A Media Presentation Matrix Switcher • Introduction... - Page 9 I/O buttons, with names, alphanumeric characters, or color bitmaps for easy and intuitive input and output selection. Alternatively, labels can be made with any Brother ® P-Touch ® or comparable labeler. MPX 866 A Media Presentation Matrix Switcher • Introduction...
- Page 10 This feature is useful if a switcher is installed in an open area, where operation by unauthorized personnel may be a problem. Power — The 100 VAC to 240 VAC, internal power supply provides worldwide power compatibility. MPX 866 A Media Presentation Matrix Switcher • Introduction...
-
Page 11: Installation
Installation This sections details the installation of the MPX 866 A switchers, including: Setup and Installation Checklist Rear Panel Cabling and Features Front Panel Configuration Port Setup and Installation Checklist Get Ready Familiarize yourself with the matrix switcher. Obtain IP setting information for the matrix switcher from the local network administrator. -
Page 12: Computer Video Group
Extron for a list of common laptop keyboard commands. RGB video outputs — Connect RGBHV video displays to the Computer Output 1 through 6 15-pin HD female connectors. MPX 866 A Media Presentation Matrix Switcher • Installation... -
Page 13: Low Resolution Video Group
NOTE: The switcher passes the tied input to these outputs with no video signal processing; an S-video input is output as S-video, a composite video input is output as composite video. MPX 866 A Media Presentation Matrix Switcher • Installation... -
Page 14: Audio Input And Output
RS-232 control to ensure that the level on the output does not vary from input to input. See the “Operation” section, the “Programming Guide” section, the “Matrix Software” section, and the Operation” section for details. “HTML MPX 866 A Media Presentation Matrix Switcher • Installation... - Page 15 The volume level for each output can be individually set via the front panel or Ethernet or RS-232 control. See the “Operation” section, the “Programming Guide” section, Software” section, and the Operation” section for details. “Matrix “HTML MPX 866 A Media Presentation Matrix Switcher • Installation...
-
Page 16: Serial Ports
If desired, connect an MKP 2000 or MKP 3000 remote control panel to the RS-232 connector of the switcher. See the MKP 2000 Remote Control Panel User Guide or the MKP 3000 Remote Control Panel User Guide for details. MPX 866 A Media Presentation Matrix Switcher • Installation... -
Page 17: Ethernet Connection
T568B at the other (Tx and Rx pairs called a "straight-through" cable, because Connector reversed) is a "crossover" cable. no pin/pair assignments are swapped. Figure 7. RJ-45 Connector and Pinout Tables MPX 866 A Media Presentation Matrix Switcher • Installation... -
Page 18: Reset Button And Led
Power AC power connector — Plug a standard IEC power cord into this connector to connect the switcher to a 100 VAC to 240 VAC, 50 or 60 Hz power source. MPX 866 A Media Presentation Matrix Switcher • Installation... -
Page 19: Front Panel Configuration Port
Distances of about 50 feet (15 m) are typically not a problem. In some cases the matrix switcher may be capable of serial communications via RS-232 up to 250 feet (76 m) away. MPX 866 A Media Presentation Matrix Switcher • Installation... -
Page 20: Operation
Operation This section describes the monitoring and operation of the MPX 866 A matrix switcher using the front panel controls and indicators, including: Front Panel Controls and Indicators Front Panel Operations Rear Panel Operations Optimizing the Audio Troubleshooting Configuration Worksheets Front Panel Controls and Indicators The front panel controls (see figure 10) are grouped into two sets. -
Page 21: Input And Output Buttons And Leds
Lit LED: An output is selected for audio adjustment. outputs Indication: Indicate the output volume level. inputs Output Action/ Press a button: Press and hold to mute the output. mutes Indication Blinking LED: Output is muted. outputs MPX 866 A Media Presentation Matrix Switcher • Operation... - Page 22 (Output 7 and Output 8 buttons only) Select and identify the video format (composite [Output 7] or S-video [Output 8]) for configurable inputs 11 through 14. • Display the audio level of the selected input. MPX 866 A Media Presentation Matrix Switcher • Operation...
-
Page 23: Control Buttons And Leds
Select Lock mode 2 or toggle between mode 0 and mode 2. Audio Action: In Audio mode, In Audio mode, press: Decrease press: Increase input level or input level or output volume. output volume. MPX 866 A Media Presentation Matrix Switcher • Operation... - Page 24 • With the Enter, View, and Esc buttons, select Serial Port Configuration mode • Select 19200 baud for the RS-232 Primary port in Serial Port Configuration mode and indicate its selection. MPX 866 A Media Presentation Matrix Switcher • Operation...
- Page 25 • With the Enter, Preset, and View buttons, select Serial Port Configuration mode. • Select 115200 baud for the RS-232 Primary port in Serial Port Configuration mode and indicate its selection. MPX 866 A Media Presentation Matrix Switcher • Operation...
-
Page 26: I/O Controls
• • With the Video button, commands the front panel system reset. • Selects the Audio mode, in which you can adjust the input audio level and the output audio volume. MPX 866 A Media Presentation Matrix Switcher • Operation... -
Page 27: Input And Output Label Panels
Reading and setting the RS-232 Primary port settings Throughout this section, the following symbols are used: = lit = unlit = not applicable in the example in which it appears = blinking. MPX 866 A Media Presentation Matrix Switcher • Operation... -
Page 28: Front Panel Security Lockouts
If an error occurs during the self-test, the switcher locks up and does not operate. If your switcher locks up on power-up, call the Extron S3 Sales & Technical Support Hotline (see the contact numbers on the rear of this manual for the Extron office nearest you.) MPX 866 A Media Presentation Matrix Switcher • Operation... -
Page 29: Creating A Configuration
LEDs for outputs that were already tied to the input light steadily. Outputs that are already tied can be left on, along with new blinking selections, or toggled off by pressing the associated output button. MPX 866 A Media Presentation Matrix Switcher • Operation... - Page 30 Confirm the change: Press and release the Enter button. Press the Enter button to confirm the configuration change. The Enter LED and all input LEDs and output LEDs return to the unlit state. ENTER MPX 866 A Media Presentation Matrix Switcher • Operation...
- Page 31 The LED blinks to indicate that the selected computer video input will be tied to this output. ENTER PRESET The Enter LED blinks to indicate the need to confirm the change. COMPUTER/AUDIO OUTPUTS MPX 866 A Media Presentation Matrix Switcher • Operation...
- Page 32 LEDs light to indicate the audio ties created in example 1. The LED lights. The output 1 LED does not light to indicate the tie created COMPUTER INPUTS in example 2 because that tie is computer video only. COMPUTER/AUDIO OUTPUTS MPX 866 A Media Presentation Matrix Switcher • Operation...
- Page 33 Video — Input 5 video tied to output 1, output 3, output 4, and output 6 Audio — Input 5 audio tied to output 3 and output 6 Input Output Video Audio Figure 14. Example 3, final configuration, audio switcher MPX 866 A Media Presentation Matrix Switcher • Operation...
- Page 34 The LED lights when selected. The LED lights when selected. Select an input: Press and release the low resolution Input 12 button. Press and release the Video Input 12 button. VIDEO INPUTS The LED lights. MPX 866 A Media Presentation Matrix Switcher • Operation...
- Page 35 The current configuration (see figure 15) is now: Input 12 video tied to output 7 and output 8 Input 12 audio tied to output 1 and output 2 Input Output Video Audio Figure 15. Example 4, final configuration MPX 866 A Media Presentation Matrix Switcher • Operation...
-
Page 36: Viewing A Configuration
• In View-only mode, you can view video and audio, video-only, or audio- only ties. Pressing and releasing the Video button and the Audio button toggles each on and off. • After 30 seconds of inactivity, View-only mode automatically deselects. MPX 866 A Media Presentation Matrix Switcher • Operation... - Page 37 3. Then press the output button that you noted previously. 4. Observe that the selected output button, the tied input button (input 5), and the output buttons light for all of the outputs that are tied to the input. MPX 866 A Media Presentation Matrix Switcher • Operation...
- Page 38 Exit View-only mode: Press and release the View button to exit View-only mode. Press the View button. CONTROL The View LED returns to the unlit state. All input LEDs and output LEDs return to the unlit state. PRESET VIEW MPX 866 A Media Presentation Matrix Switcher • Operation...
-
Page 39: Muting And Unmuting Video And Audio Outputs
• In the low resolution video group, the video mute function mutes all composite video or S-video planes. • Mutes are saved to non-volatile memory. When power is removed and restored, the mute settings are retained. MPX 866 A Media Presentation Matrix Switcher • Operation... - Page 40 Press and hold the Computer/Audio Output 3 and Computer Output 4 button. COMPUTER/AUDIO OUTPUTS 2 seconds COMPUTER/AUDIO OUTPUTS The LEDs blink to indicate that the computer video outputs are muted. Release the button. MPX 866 A Media Presentation Matrix Switcher • Operation...
-
Page 41: Using Global Presets
• When a preset is recalled, it replaces the current configuration, which is lost unless it is also stored as a preset. The recalled preset overwrites all of the current configuration ties in favor of the preset configuration ties. MPX 866 A Media Presentation Matrix Switcher • Operation... - Page 42 Press the Enter button to save the preset. CONTROL ENTER PRESET VIEW All input LEDs return to the The Enter and Preset LEDs unlit state. return to the unlit state. MPX 866 A Media Presentation Matrix Switcher • Operation...
- Page 43 Press the Enter button to recall the preset. CONTROL ENTER PRESET VIEW All input LEDs return to the The Enter and Preset LEDs unlit state. return to the unlit state. MPX 866 A Media Presentation Matrix Switcher • Operation...
-
Page 44: Selecting Composite Video Or S-Video
The Video Input 13 LED blinks. VIDEO INPUTS VIDE Either the Video Output 7 LED or the Output 8 LED lights to indicate the video format as follows: 7 — Composite 8 — S-video (default) MPX 866 A Media Presentation Matrix Switcher • Operation... - Page 45 The Audio button lights. NOTE: For the switcher to recognize the change and create a new configuration map, you must create a new tie for the input whose format was changed. MPX 866 A Media Presentation Matrix Switcher • Operation...
-
Page 46: Viewing And Adjusting The Input Audio Level
PRESENTATION MATRIX SWITCHER MPX 866 A Audio System Media Presentation Switcher No noticeable volume differences between sources Audio Inputs High Audio Output Level CD Jukebox Figure 16. Audio gain and attenuation MPX 866 A Media Presentation Matrix Switcher • Operation... - Page 47 • Exiting Audio mode by pressing the Audio button always returns the I/O LEDs to Video and Audio lit (video and audio selected for configuration). = on, = blinking fast, = blinking slowly, = off MPX 866 A Media Presentation Matrix Switcher • Operation...
- Page 48 (gain or attenuation). In this example, the output buttons and View and Esc buttons display an audio gain level of -1 dB. Figure 17. Adjust the Input Audio Level MPX 866 A Media Presentation Matrix Switcher • Operation...
-
Page 49: Viewing And Adjusting The Output Volume
At no attenuation, all input LEDs are lit and the output volume is equal to the input signal plus any applied gain or attenuation using the input audio level adjustment (see “Viewing and Adjusting the Input Audio Level”). MPX 866 A Media Presentation Matrix Switcher • Operation... - Page 50 = blinking fast, = blinking slowly, = off slowly, blink quickly, and then light steadily. At full volume, no attenuation is applied to the output and all input LEDs are lit steadily. MPX 866 A Media Presentation Matrix Switcher • Operation...
- Page 51 3 dB per second to the high or low limit. Figure 18 show the result of pressing the Esc ( > ) button a total of 13 times. MPX 866 A Media Presentation Matrix Switcher • Operation...
-
Page 52: Setting The Front Panel Locks (Executive Modes)
Selecting S-video or composite video Setting video and audio output mutes Setting audio output volume Setting the rear panel remote port baud rate NOTE: The switcher is shipped from the factory in Lock mode 2. MPX 866 A Media Presentation Matrix Switcher • Operation... -
Page 53: Selecting Lock Mode 2 Or Toggling Between Mode 2 And Mode 0
The Video and Audio LEDs blink twice to 2 seconds indicate the mode change. Release the buttons. VIDEO AUDIO VIDEO AUDIO Figure 20. Toggle Front Panel Lock Between Mode 2 and Mode 1 MPX 866 A Media Presentation Matrix Switcher • Operation... -
Page 54: Performing A System Reset From The Front Panel
Continue to hold the Video and Audio buttons until all input and output LEDs return to the unlit state and the Video and Audio LEDs turn on. Release the Video and Audio buttons. Figure 21. System Reset MPX 866 A Media Presentation Matrix Switcher • Operation... -
Page 55: Selecting The Baud Rate Of The Rs-232 Primary Port
All Control LEDs return to the unlit state. NOTE: The switcher requires some time to save the new serial port settings. Wait at least 5 minutes before removing power from the switcher or the settings may be lost. MPX 866 A Media Presentation Matrix Switcher • Operation... -
Page 56: Rear Panel Operations
This mode is the same E ZQQQ} • 1 second. Resets all IP options. • Removes/clears all files for the switcher. command. The reset LED flashes three times in quick succession during the reset. MPX 866 A Media Presentation Matrix Switcher • Operation... -
Page 57: Performing Soft System Resets (Modes 3, 4, And 5)
Reset button. Absolute 9 seconds Reset Reset LED Reset LED flashes three flashes three CT LINK times. times. Press and hold the Reset button. Figure 22. Soft System Resets MPX 866 A Media Presentation Matrix Switcher • Operation... -
Page 58: Performing A Hard Reset
Level,” in this chapter) so that the approximate output level is the same for all selected inputs. “Viewing and Adjusting As necessary, adjust the output audio level of each input (see the Output Volume,” in this chapter). MPX 866 A Media Presentation Matrix Switcher • Operation... -
Page 59: Troubleshooting
Fill in the preset number and use colors, or dashes, and the like to make connecting lines. Indicate if the configuration is for video, audio, or both. Figure 24. Worksheet Example 1: System Equipment MPX 866 A Media Presentation Matrix Switcher • Operation... -
Page 60: Worksheet Example 2: Daily Configuration
Fill in the preset number and use colors, or dashes, etc. to make connecting lines. Indicate if the configuration is for video, audio, or both. Figure 25. Worksheet Example 2: Daily Configuration MPX 866 A Media Presentation Matrix Switcher • Operation... -
Page 61: Worksheet Example 3: Test Configuration
Fill in the preset number and use colors, or dashes, etc. to make connecting lines. Indicate if the configuration is for video, audio, or both. Figure 26. Worksheet Example 3: Test Configuration MPX 866 A Media Presentation Matrix Switcher • Operation... -
Page 62: Blank Configuration Worksheet
MPX 866 A Media Presentation Matrix Switcher • Operation... -
Page 63: Programming Guide
Programming Guide This section describes the operation of the MPX 866 A switcher using the Simple Instruction Set, including: RS-232 Ports Ethernet (LAN) Port Host-to-Switcher Instructions Switcher-Initiated Messages Switcher Error Responses Using the Command and Response Tables Special Characters RS-232 Ports The switcher has three serial ports that make serial control of the switcher possible. -
Page 64: Rear Panel Remote Ports
Sleeve (Gnd) 9-pin D Connection TRS Plug Pin 2 Computer Rx line Pin 3 Computer Tx line Ring Pin 5 Computer signal ground Sleeve Figure 28. Optional 9-pin TRS RS-232 Cable MPX 866 A Media Presentation Matrix Switcher • Programming Guide... -
Page 65: Ethernet (Lan) Port
RJ-45 Ethernet Connector Pin Assignments Default IP Addresses To access the MPX 866 A switcher via the LAN port, you need the Extron IP address, and may need the subnet mask and the gateway address. If the IP address has been changed to an... -
Page 66: Establishing A Connection
Number of Connections A MPX 866 A switcher can have up to 200 simultaneous TCP connections, including all HTTP sockets and Telnet connections. When the connection limit is reached, the switcher accepts no new connections until some have been closed. -
Page 67: Host-To-Switcher Instructions
When a local event, such as an equipment power-up, occurs, the unit responds by sending a message to the host. The unit-initiated messages are listed below: (c) Copyright 2006, Extron Electronics, MPX 866 A, Vx.xx, 60-825-01 <date/time> ] The switcher issues the message (above) when it first powers on. -
Page 68: Switcher Error Responses
Command and response examples are shown throughout the table. The ASCII to HEX conversion table below is for use with the command and response table. ASCII to Hex Conversion Table Space • MPX 866 A Media Presentation Matrix Switcher • Programming Guide... -
Page 69: Command And Response Table For Sis Commands
= Voltage Positive or negative voltage and magnitude X1& = Temperature Degrees Fahrenheit = Front panel locks (Executive modes) 0 = Mode 0 1 = Mode 1 2 = Mode 2 MPX 866 A Media Presentation Matrix Switcher • Programming Guide... - Page 70 01 – 08 for the computer video group 09 – 14 for the low resolution video group = Output number 01 – 12 for video 01 – 06 for audio MPX 866 A Media Presentation Matrix Switcher • Programming Guide...
- Page 71 11 – 14 (the only valid inputs for the “/“ command) = Input signal format 1 = composite video 2 = S-video = Mute status 0 = off 1 = on MPX 866 A Media Presentation Matrix Switcher • Programming Guide...
- Page 72 92.5% 29.5% 62.5% 95.5% 32.5% 65.5% 98.5% 100% 35.5% 68.5% NOTE: = Output number 01 – 06 for audio = Volume adjustment range 00 – 64 (see the table above) MPX 866 A Media Presentation Matrix Switcher • Programming Guide...
- Page 73 –18 to +24 (45 steps of gain or attenuation) (default = 0) = Audio gain 0 – 24 (1 dB per step) = Audio attenuation 1 – 18 (1 dB per step) = Global preset # 32 maximum MPX 866 A Media Presentation Matrix Switcher • Programming Guide...
- Page 74 32 maximum = Video and audio mute: 0 = no mutes 1 = video mute 2 = audio mute 3 = video and audio mute = Name 12 characters maximum MPX 866 A Media Presentation Matrix Switcher • Programming Guide...
- Page 75 = Output number 01 – 12 for video 01 – 06 for audio = Global preset # 32 maximum = Signal detection 0 = no input detected 1 = input detected MPX 866 A Media Presentation Matrix Switcher • Programming Guide...
- Page 76 = Voltage Positive or negative voltage and magnitude X1& = Temperature Degrees Fahrenheit = Front panel locks (Executive modes) 0 = Mode 0 1 = Mode 1 2 = Mode 2 MPX 866 A Media Presentation Matrix Switcher • Programming Guide...
-
Page 77: Command And Response Table For Ip-Specific Sis Commands
11 = User 10 = Extended security levels 1 through 10 12 = Administrator = Port timeout interval 1 (= 10 seconds) – 65000 (default is 30 = 300 seconds = 5 minutes) MPX 866 A Media Presentation Matrix Switcher • Operation... -
Page 78: Special Characters
The switcher rejects the following characters or they are not recommended: {space (spaces are ok for names)} + ~ , @ = ‘ [ ] { } < > ’ “ semicolon (;) colon (:) | \ and ?. MPX 866 A Media Presentation Matrix Switcher • Operation... -
Page 79: Matrix Software
Matrix Software This section introduces the Extron Matrix Switchers Control Program software that is included with the MPX 866 A Media Presentation Matrix Switcher switchers, including: Matrix Switchers Control Program Button Label Generator Matrix Switchers Control Program The Matrix Switchers Control Program communicates with the switcher via the Ethernet LAN port or either serial port to provide an easy way to set up ties and sets of ties. -
Page 80: Software Operation Via A Serial Port
Check for Matrix Updates Uninstall MATRIX Switcher Software operation via a serial port The MPX 866 A matrix switcher can support remote control via any of three RS-232 serial ports: Two (Primary and Secondary) rear panel RS-232 ports on 3-pin captive screw connectors front panel Configuration (RS-232) port, a 2.5 mm mini stereo jack... -
Page 81: Using The Matrix Switcher Control Software
Proceed to step 4. If you selected , click and proceed to step 3. IP [LAN] If you selected , click and see “Using Emulation Mode” on page 93. Emulate MPX 866 A Media Presentation Matrix Switcher • HTML Operation... - Page 82 If you logged on using the user password, the program connects you to the matrix switcher with only user capabilities. If an incorrect password was entered, the computer beeps and the program returns to the password entry display. MPX 866 A Media Presentation Matrix Switcher • HTML Operation...
- Page 83 Figure 34. Extron Matrix Switchers Control Program Window (Blank) Figure 35. Sample Program Window (Complete) MPX 866 A Media Presentation Matrix Switcher • HTML Operation...
-
Page 84: Address And Name Fields
Subnet Mask subnet as the controlling PC when you are subnetting (see “Subnetting — A Primer”). MPX 866 A Media Presentation Matrix Switcher • HTML Operation... -
Page 85: Hardware Address Field
NOTES: • The address fields are grayed out and uneditable when DHCP is selected. • Editing the addresses while connected via the Ethernet port can immediately disconnect the user from the MPX 866 A matrix switcher. Extron recommends editing this field using one of the serial ports and protecting the Ethernet access by assigning an administrator password to qualified and knowledgeable personnel only. -
Page 86: Sync Time To Pc Button
When Daylight Saving Time is turned off, the switcher does not adjust its time reference. NOTE: For Daylight Saving Time in Europe and Brazil, see the Set Daylight Saving Time SIS command on page 73. MPX 866 A Media Presentation Matrix Switcher • HTML Operation... -
Page 87: Administrator Password And User Password Fields
Edit the case-sensitive password as desired. Press the < > key on the keyboard or click in another field to exit the field. Password Click the Take button to make the password change take effect. MPX 866 A Media Presentation Matrix Switcher • HTML Operation... -
Page 88: Updating Firmware
Figure 37. Location of Firmware Upgrade Files Select the appropriate firmware file (MPX 866 A) to download and click Download Enter the requested personal information and then click to copy the firmware Download to your computer. - Page 89 Figure 38. Downloading Firmware Upgrade Files Connect a computer that runs the Windows operating system to either switcher serial port or the switcher LAN port. See “Installation” for more details. MPX 866 A Media Presentation Matrix Switcher • HTML Operation...
- Page 90 • The original factory-installed firmware is permanently available on the MPX 866 A matrix switcher. If the attempted firmware upload fails for any reason, the switcher reverts to the factory-installed firmware. Ethernet-connected firmware upload Figure 39.
- Page 91 Once the status bars have progressed from 100% , and Status is listed as Completed , the firmware loader utility resets the switcher. Figure 42. Firmware Loader Screen Click Exit to close the Firmware Loader. MPX 866 A Media Presentation Matrix Switcher • HTML Operation...
-
Page 92: Uploading Html Files
Connect the PC to the matrix switcher via any of the serial ports or the Ethernet port of the switcher. Start the Matrix Switchers Control Program and connect to the MPX 866 A matrix “Using the Matrix Switcher Control Software,” steps 1 through 4, switcher. -
Page 93: Windows Menus
The buttons, drop boxes, and trash can on the right side of the window perform the following Matrix Switchers Control Program functions: — Unavailable for MPX 866 A switchers, because the switcher power Power cannot be controlled via software. — Allows you to lock out front panel operations, except Executive Mode for the view-only mode functions. - Page 94 S-video or composite video, for the four configurable inputs in the low resolution video group, input 11 through input 14. Figure 46. Video Input Format Dialog Box MPX 866 A Media Presentation Matrix Switcher • HTML Operation...
- Page 95 Show RS-232 Strings configuration. You can see these for SIS programming. — Initializes and clears any or all of the following: ties, presets, audio Initialize configuration, preset names, icon names, and icons. MPX 866 A Media Presentation Matrix Switcher • HTML Operation...
-
Page 96: Preferences Menu
— Delays implementation of configuration Hold/verify Changes changes until the Changes – Take button is pressed. — Displays ties as lines (see figure 49). Ties as Lines Figure 49. Ties Shown as Lines MPX 866 A Media Presentation Matrix Switcher • HTML Operation... - Page 97 These reports allow the Matrix Switchers Control Program to track the changes that occur in the configuration and settings of the switcher, whether commanded via the front panel, either serial port, or the Ethernet port. MPX 866 A Media Presentation Matrix Switcher • HTML Operation...
-
Page 98: Using Emulation Mode
MPX 866 14 x 12 14 x 6 Audio Planes (see figure 51). Click Figure 51. Emulate Configuration Dialog Box page Continue using the program as described on MPX 866 A Media Presentation Matrix Switcher • HTML Operation... -
Page 99: Using The Help System
Products Disk that accompanied the switcher. By default, the Windows installation creates a C:\Program Files Extron directory and places the Button Label Generator icon into a group ButtonLabelGenerator or folder named “ .” Extron Electronics MPX 866 A Media Presentation Matrix Switcher • HTML Operation... -
Page 100: Using The Button-Label Generator Software
Clear All Buttons necessary to make all of the button labels that you need. To access the help program, click the menu. Help MPX 866 A Media Presentation Matrix Switcher • HTML Operation... -
Page 101: Html Operation
HTML Operation This section describes the operation of the MPX 866 A matrix switcher, including: Opening the Embedded Web Pages Status Tab Configuration Tab File Management Tab Control Tab Special Characters The switcher can be controlled and operated through its LAN port, connected via a LAN or WAN, using a web browser such as Microsoft®... - Page 102 If so, the switcher downloads “index.html” as the default startup page. If neither of the above conditions is true, the switcher downloads the factory- installed default startup page, “nortxe_index.html” (see figure 55), also known as the System Status page. MPX 866 A Media Presentation Matrix Switcher • HTML Operation...
-
Page 103: Status Tab
The status web page periodically updates itself to reflect the latest status of the switcher components. If a variable changes, the display shows the change the next time it updates. MPX 866 A Media Presentation Matrix Switcher • HTML Operation... -
Page 104: Configuration Tab
Configuration Tab System Settings Page The MPX 866 A matrix switcher downloads the System Settings page (see figure 56) when you click the tab. The screen consists of fields in which you can view and Configuration edit IP administration and system settings. You can access the Passwords pages by clicking the appropriate link. -
Page 105: Dhcp Radio Buttons
The Media Access Control (MAC) Address is hardcoded in the switcher and cannot be changed. Firmware field Firmware field identifies the installed firmware version. This field is hardcoded in the switcher and cannot be changed. MPX 866 A Media Presentation Matrix Switcher • HTML Operation... - Page 106 When Daylight Saving Time is turned off, the switcher does not adjust its time reference. Click the button at the bottom of the Date/Time Settings area. Submit MPX 866 A Media Presentation Matrix Switcher • HTML Operation...
-
Page 107: Video Input Settings Page
(*****). If you do not want to password protect an access level, leave field and the field blank. After entering the desired Password Re-Enter Password password in both fields, click the button. Submit MPX 866 A Media Presentation Matrix Switcher • HTML Operation... -
Page 108: Firmware Upgrade Page
Note the folder to which you save the firmware file. Run the executable (*.exe) file to decompress the firmware file. Connect the PC to the MPX 866 A matrix switcher via the LAN port of the switcher. Access the MPX 866 A matrix switcher using HTML pages. - Page 109 NOTES: • Valid firmware files must have the file extension “.S19.” A file with any other extension is not a firmware upgrade. • The original factory-installed firmware is permanently available on the MPX 866 A matrix switcher. If the attempted firmware upload fails for any reason, the switcher automatically reverts to the factory-installed firmware.
-
Page 110: File Management Tab
If you want one of the pages that you create and upload to be the default startup page, name that file “index.html”. Click the Upload File button. The file or files that you selected appear in the list. MPX 866 A Media Presentation Matrix Switcher • HTML Operation... -
Page 111: Control Tab
The amber buttons indicate video and audio ties. The green buttons indicate video only ties. The red buttons indicate audio only ties. The gray buttons indicate no ties. MPX 866 A Media Presentation Matrix Switcher • HTML Operation... -
Page 112: Creating Or Deleting A Tie
To tie an input to all outputs, click the input number for that input. Click the button to make the configuration changes or the button to Take Cancel abandon the configuration changes. MPX 866 A Media Presentation Matrix Switcher • HTML Operation... -
Page 113: Change The Input Gain And Attenuation
RGB and Audio Settings page. Audio levels can be adjusted so there are no noticeable volume differences between sources. Change an audio level setting as follows: Click the Input drop box. A drop down scroll box appears). Click the desired input. MPX 866 A Media Presentation Matrix Switcher • HTML Operation... -
Page 114: Mute And Unmute One Or All Outputs
Mute All UnMute All outputs. Observe the Mute status indications on the page. Unmuted is displayed in green and muted is displayed in red. MPX 866 A Media Presentation Matrix Switcher • HTML Operation... -
Page 115: Change The Output Volume Level
67 defines the value of each audio volume step. The X* NOTE: The table references in the table are SIS command variable only and have no meaning for HTML volume adjustment. MPX 866 A Media Presentation Matrix Switcher • HTML Operation... -
Page 116: Global Presets Page
If you do not rename an unassigned button, the MPX 866 A matrix switcher names the preset as Preset , “Preset 08” for example. {the selected preset number} If you do not rename an existing preset when it is overwritten, the MPX 866 A matrix switcher retains the same name. Click the button. -
Page 117: Special Characters
The switcher rejects the following characters or they are not recommended: {space} + ~ , @ = ‘ [ ] { } < > ’ “ “ ; (semicolon) : (colon) | \ and ?. MPX 866 A Media Presentation Matrix Switcher • HTML Operation... -
Page 118: Ethernet Connection
Subnetting — A Primer Ethernet Link The rear panel Ethernet connector on the MPX 866 A matrix switcher can be connected to an Ethernet LAN or WAN. This connection makes SIS control of the switcher possible using a computer connected to the same LAN. -
Page 119: Default Ip Address
Default IP Address To access the MPX 866 A matrix switcher via the LAN port, you need the IP address of the switcher. If the address has been changed to an address comprised of words and characters, you can determine the actual numeric IP address using the ping utility. If the address has not been changed, the factory-specified default is 192.168.254.254. -
Page 120: Configuring The Mpx 866 A Matrix Switcher For Network Use Via The Arp Command
Obtain a valid IP address for the MPX 866 A matrix switcher from your network administrator. Obtain the MAC address (UID #) of the MPX 866 A matrix switcher from the label on its rear panel. The MAC address should have this format: 00-05-A6-xx-xx-xx. -
Page 121: Connecting As A Telnet Client
Connecting as a Telnet Client The Microsoft Telnet utility is available from the Command prompt. Telnet allows you to input SIS commands to the MPX 866 A matrix switcher from the PC via the Ethernet link and the LAN. Access the Command prompt and start Telnet as follows:... -
Page 122: Telnet Tips
< Enter > at the Telnet prompt. If you are connected to the MPX 866 A matrix switcher and need to access the Telnet prompt to turn local echo off, type the Escape character ( <Ctrl> <]>... -
Page 123: Subnetting - A Primer
Exit the Telnet utility by typing quit and then pressing < Enter > at the Telnet prompt. If you are connected to the MPX 866 A matrix switcher, access the Telnet prompt by typing the Escape character ( <Ctrl> <]> Subnetting — A Primer It is not the purpose of this guide to describe TCP/IP protocol in detail. -
Page 124: Subnet Masks And Octets
≠.≠.X.X Match?: =.=.X.X — Match — No match =.≠.X.X — No match subnet) subnet) subnet) (Same (Different (Different Figure 75. Comparing the IP Addresses of the Local and Remote Devices MPX 866 A Media Presentation Matrix Switcher • Ethernet Connection... -
Page 125: Reference Information
Reference Information This section discusses the specifications, part numbers, and accessories for the MPX 866 A Media Presentation Matrix Switcher. Topics that are covered include: Specifications Part Numbers Mounting the Switcher Button Labels Specifications Video Routing RGB/VGA ......... 8 x 6 matrix S-video/composite video .. - Page 126 Volume range ......... -76 dB to 0 dB (volume numbers 0 to 64 in 1.0 dB steps) NOTE: Full attenuation is volume level 0, -76 dB. The default is -0 dB, volume level 64. MPX 866 A Media Presentation Matrix Switcher • Reference Information...
- Page 127 Compliances ......CE, C-tick, FCC Class A, ICES, VCCI MTBF ..........30,000 hours Warranty ........3 years parts and labor NOTES: • All nominal levels are at ±10%. • Specifications are subject to change without notice. MPX 866 A Media Presentation Matrix Switcher • Reference Information...
-
Page 128: Part Numbers
MKP 2000 matrix switcher X-Y remote control panel, black 60-682-02 MKP 3000, black 60-708-02 5-pole captive screw audio connectors (qty. 10) 100-460-01 3-pole captive screw serial connectors (qty. 10) 100-459-01 MPX 866 A Media Presentation Matrix Switcher • Reference Information... -
Page 129: Cables
BNC male RG6 crimp connectors, qty. 100 100-339-01 CTU 100 universal compression tool (BNC, F, RCA) 100-181-01 MHR BNC compression kit (100 MHR BNC connectors) 60-538-01 RG6 BNC compression kit (100 RG6 BNC connectors) 60-538-02 MPX 866 A Media Presentation Matrix Switcher • Reference Information... -
Page 130: Terminated Cable Assemblies
(30 cm to 1.8 m) SVHSM-BNCF, S-video male to BNC female, 26-353-01 8" (20 cm) Composite video male-to-male cable Part Number RG6 BNC, 3' to 100' (0.9 m to 30.4 m) 26-383-nn MPX 866 A Media Presentation Matrix Switcher • Reference Information... -
Page 131: Mounting The Switcher
Insert the switcher into the rack, aligning the holes in the mounting bracket with those in the rack. Secure the switcher to the rack using the supplied bolts. Figure 76. Installing the Switcher in a Rack MPX 866 A Media Presentation Matrix Switcher • Reference Information... -
Page 132: Button Labels
Set page scaling to None. After printing, verify that the printed strips fit behind the panel. Your printer configuration may cause the strip to be printed smaller or larger than specified. MPX 866 A Media Presentation Matrix Switcher • Reference Information... - Page 133 MPX 866 A Media Presentation Matrix Switcher • Reference Information...
- Page 134 Extron Electronics makes no further warranties either expressed or implied with respect to the product and its quality, performance, merchantability, or fitness for any particular use. In no event will Extron Electronics be liable for direct, indirect, or consequential damages resulting from any defect in this product even if Extron Electronics has been advised of such damage.