Xerox Phaser 4622 System Administrator Manual
Hide thumbs
Also See for Phaser 4622:
- User manual (150 pages) ,
- Specfications (6 pages) ,
- Specifications (5 pages)
Table of Contents
Advertisement
Quick Links
Advertisement
Table of Contents

Related Manuals for Xerox Phaser 4622


Summary of Contents for Xerox Phaser 4622
- Page 1 Version 2.0 February 2014 ® Xerox Phaser 4622 System Administrator Guide...
- Page 2 ® ©2014 Xerox Corporation. XEROX and XEROX and Design are trademarks of Xerox Corporation in the United States and/or other countries. Changes are periodically made to this document. Changes, technical inaccuracies, and typographic errors will be corrected in subsequent editions.
-
Page 3: Table Of Contents
Xerox Phaser 4622........ - Page 4 Configure Xerox Secure Access on the Device ........
- Page 5 Network Factory Default button ........... . . 109 Phaser 4622...
- Page 6 Management Information Base (MIB) ........... 142 Index Phaser 4622 System Administrator Guide...
-
Page 7: Introduction
Introduction • Welcome on page 2 • Machine Models on page 3 • Control Panel Overview on page 4 Phaser 4622 System Administrator Guide... -
Page 8: Welcome
Introduction Welcome WELCOME to the Xerox Phaser 4622. Who should use this Guide? This Guide is intended for System Administrators who need to install, setup and manage printers and other services on their network. To use the procedures in this Guide effectively, System Administrators must have previous experience working in a network environment and must possess Supervisor, Administrator, Account Operator, or equivalent rights to the network. -
Page 9: Machine Models
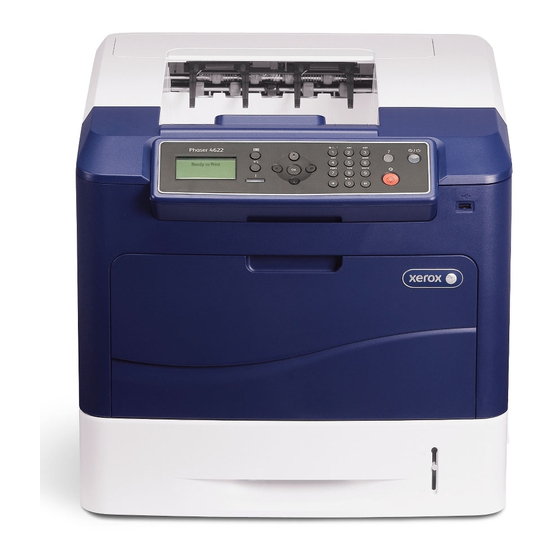
Introduction Machine Models The Xerox Phaser 4622 is a mono laser printer. The features and functions available on your machine depend on the model you have purchased. Xerox Phaser 4622 The Xerox Phaser 4622: • Supports printing from a USB flash drive and has the capability of storing print files on the machine. -
Page 10: Control Panel Overview
Introduction Control Panel Overview Menu OK Button Alphanumeric Help Button Display Keypad Button Return Status Directional Stop Power Save Button Indicator Buttons Button Button Phaser 4622 System Administrator Guide... -
Page 11: Machine Connection
Machine Connection This chapter shows you how to connect your machine to a network and configure Ethernet settings. • Connection Ports on page 6 • CentreWare Internet Services on page 11 Phaser 4622 System Administrator Guide... -
Page 12: Connection Ports
Machine Connection Connection Ports Front View Type A USB Port Phaser 4622 System Administrator Guide... -
Page 13: Rear View
Type A and Type B USB Ports These ports are used to allow direct printing and firmware upgrades. Phaser 4622 System Administrator Guide... -
Page 14: Initial Connection
1000 Mbps Full-Duplex (Gigabit) 10 Mbps Half-Duplex 100 Mbps Half-Duplex When Auto is selected, the machine detects the communication speed automatically and adjusts its settings accordingly. In most cases Auto should be the Ethernet setting. Phaser 4622 System Administrator Guide... -
Page 15: Printing A Configuration Report
Follow these steps to print a Configuration Report: Press the Menu button on the Control Panel. Select Information and press the OK button. Select Information Pages and press the OK button. Select Configuration Page and press the OK button. Phaser 4622 System Administrator Guide... - Page 16 Machine Connection Enter the Administrator’s Password. The default is 1111 and press the OK button Confirm printing by selecting Yes and pressing the OK button. Press the Menu button to return to the status screen. Phaser 4622 System Administrator Guide...
-
Page 17: Centreware Internet Services
Click on the Properties tab. Note If prompted, enter the Administrator's User Name admin and Password 1111, and click OK. Click on the Connectivity link. Click on the Protocols link. Click on the HTTP link. Phaser 4622 System Administrator Guide... -
Page 18: Change The Administrator Password
Change the Administrator Password It is recommended that you change the default administrator password to a more secure password, so this Xerox machine is not compromised. To change the admin password: At your Workstation, open your web browser and enter the TCP/IP Address of the machine in the Address bar. -
Page 19: Network Installation
• AppleTalk on page 25 • NetWare on page 26 • Unix on page 28 • Cloning on page 36 • Wireless Networking on page 38 • SMTP on page 41 • on page 42 Phaser 4622 System Administrator Guide... -
Page 20: Network Ping Test
Press the OK button to cancel the Ping Test. If the Packets Received is greater than zero then network connectivity has been established. 10. On the display, scroll down to Exit and press the OK button. Phaser 4622 System Administrator Guide... -
Page 21: Information Checklist
Use the arrow keys to set the Subnet mask address, then press OK. 10. Use the arrow keys to set the Gateway address, then press OK. 11. Press the Menu button to exit the Tools menu. Phaser 4622 System Administrator Guide... -
Page 22: Configure Dynamic Addressing
If DHCP is enabled, the Alternate DNS server information is not available as a feature summary. It is recommended that you change the default administrator password to a more secure password, so this Xerox device is not compromised. Configure Dynamic Addressing Information Checklist... -
Page 23: Configure Tcp/Ip Settings Using Centreware Internet Services
12. Enter an IP address for the Preferred DNS Server. Enter an IP address for Alternate DNS Servers 1 and 2. 13. Check the box to enable Dynamic DNS Registration. Note If your DNS Server does not support dynamic updates there is no need to enable DDNS. Phaser 4622 System Administrator Guide... - Page 24 Click the Enabled checkbox for Manual Address if required. 10. The Router Prefix is derived from router advertisements. Select a router address prefix from the list supplied in the Router Prefix menu to populate the prefix for manual entry address. Phaser 4622 System Administrator Guide...
- Page 25 Domain Name: • Domain Name – Displays the domain name. DHCP/DDNS: • Release Registration – Allows DHCP resources to be released when the machine is powering down. This is a display-only item and shows “Enabled”. Phaser 4622 System Administrator Guide...
- Page 26 Self Assigned Address (IPv4) – Allocates an IPv4 address without using a DHCP server. This check box is selected when IP Address Resolution is set to Autonet. This is a display-only item. • Self Assigned Address (IPv6) – Displays “Enabled”. This is a display-only item. Phaser 4622 System Administrator Guide...
-
Page 27: Service Location Protocol (Slp)
Enter the required parameters for the SLP configuration: • Directory Agent • Scope 1 • Scope 2 • Scope 3 • Message Type • Multicast Radius • SLP MTU • Registration Lifetime Click the apply button to save the changes. Phaser 4622 System Administrator Guide... -
Page 28: Simple Service Discovery Protocol (Ssdp)
Click on the Protocols link. Click on the SSDP link. Check the Enable Checkbox. Set the SSDP Time-To-Live (TTL) to a value between 1 and 60 hops. Click the apply button to save the changes. Phaser 4622 System Administrator Guide... -
Page 29: Windows Internet Name Service (Wins)
Click on the Connectivity link. Click on the Protocols link. Click on the WINS link. Check the Enable Checkbox. Enter the primary and secondary WINS server IP addresses. Click the apply button to save the changes. Phaser 4622 System Administrator Guide... -
Page 30: Snmp Configuration
MD5 or SHA may be used but the algorithm must match that used by the SNMPv3 agent. • Privacy password: enter the password required for SNMPv3 packet encryption authentication. • Algorithm: displays the algorithm used for packet encryption, in the case of SNMPv3 this is the DES encryption method. Phaser 4622 System Administrator Guide... -
Page 31: Appletalk
Select Setup and press the OK button. Select Network Settings and press the OK button. Select AppleTalk and press the OK button. Select On and press the OK button. Press the Menu button to exit the Tools menu. Phaser 4622 System Administrator Guide... -
Page 32: Netware
Enterprise Print Services (NEPS) allow Administrators to manage print resources centrally from anywhere on the network. The Xerox NDPS/NEPS Solution allows you to use Novell NDPS/NEPS with many models of Xerox printers. Refer to www.xerox.com for installation procedures and to download the Xerox NDPS Solution. - Page 33 16. Check the Enable box to enable Service Advertising Protocol and enter a SAP frequency of between 15 and 300 seconds into the SAP Frequency field. 17. Click the Apply button to save the changes. Phaser 4622 System Administrator Guide...
-
Page 34: Unix
Enter the following information into the Add Remote Printer/Plotter form: Printer Name: printer name. Where printer name is the name of the queue being created. Remote System Name: hostname. Where hostname is the machine hostname from the /etc/hosts file. Phaser 4622 System Administrator Guide... - Page 35 Enter Exit to exit the Bourne shell. Enter Exit to exit Super User mode. 10. Test the queue created, by entering the command: lp -d queuename /etc/hosts. Note 11. Verify that the job prints at the machine. Phaser 4622 System Administrator Guide...
-
Page 36: Solaris 2.X
Enter Exit to exit the Bourne shell. 10. Enter Exit to exit Super User mode. 11. Test the queue created, by entering the command: Note lp -d queuename /etc/hosts. 12. Verify that the job prints at the machine. Phaser 4622 System Administrator Guide... -
Page 37: Sco
Add the machine printer hostname to the etc/hosts file on the SCO workstation. Ensure that you can Ping the machine from the SCO workstation. Perform the following steps to create a machine print queue on a SCO UNIX workstation using either the GUI or the TTY method. Phaser 4622 System Administrator Guide... -
Page 38: Linux Cups
Before starting the Installation procedure, please ensure that the following items are available and/or the tasks have been performed: See Chapter 3, Configure Static Addressing using the Machine, Information Checklist on page 15. Linux operating system that supports printtool. Note Not all distributions of Linux support printtool. Phaser 4622 System Administrator Guide... -
Page 39: Dynamic Addressing
11. In the Device menu, click on Internet Printing Protocol. 12. Click on Continue. 13. Enter ipp://hostname/ipp/printername. Note Where hostname is the hostname of the Xerox machine and printername is the printer name of the Xerox machine. 14. Click on Continue. 15. Click on Xerox in the Make menu. -
Page 40: Linux Lpr Via Printtool
/var/spool/lpd. Add the name of the print queue to the end of the subdirectory path. 12. Ensure that the File Limit reads 0. 13. In the Remote Host area, enter the IP Address of the Xerox machine. 14. In the Remote Queue area, enter the Print Queue Name from step 10. -
Page 41: Linux Lprng
The spool directory is the directory where print jobs are stored and is a subdirectory of /var/spool/lpd. Add the name of the print queue to the end of the subdirectory path. In the Hostname/IP of Printer area, enter the hostname or IP Address of the Xerox machine. Click on OK. -
Page 42: Cloning
At your Workstation, open the web browser, enter the TCP/IP Address of the machine in the Address bar. Press Enter. Click on the Properties tab. Click on the General Setup link. Click on the Cloning link. Phaser 4622 System Administrator Guide... -
Page 43: Cloning Using Tftp
10. Under 066 Boot Server Host Name enter the host name of the machine running the TFTP server. Under 067 Bootfile Name enter the name of the clone file saved in your TFTP root directory. Phaser 4622 System Administrator Guide... -
Page 44: Wireless Networking
Network Installation Wireless Networking The Phaser 4622 can be fitted with an optional wireless network card to allow print jobs to be submitted via a wireless network. Procedure Install the wireless network card - refer to the kit instructions. Configure Wireless LAN settings - select and save the features or settings. - Page 45 Use Internet Explorer to import the certificate from Windows. Use Safari to import certificates from Macintosh. Configure the digital certificate Purpose for wireless LAN, either (client or root certificate). For the Root certificate, Enable Server Certificate Validation. Configure WPA-Enterprise for EAP-TLS, EAP-TTLS. Phaser 4622 System Administrator Guide...
-
Page 46: Smtp
11. A secure e-mail connection can be enabled on the machine. Select the Secure Email Connection with SSL/TLS option. 12. In the Options area, from the Maximum Message Size (Message and Attachment) drop down menu, select a value between 1MB - 10MB. 13. Click on Apply to accept the changes.‘ Phaser 4622 System Administrator Guide... -
Page 47: Wsd
Click on the Connectivity link. Click on the Protocols link. Click on the WSD link. Next to WSD Protocol select Enable to enable the WSD print service. Note The default port number is 8018. Click Apply. Phaser 4622 System Administrator Guide... - Page 48 Network Installation Phaser 4622 System Administrator Guide...
-
Page 49: Printer Drivers
TCP/IP Printing (OSX and OS9) on page 59 • AppleTalk Printing (OS9) on page 60 • Configure your Apple Mac Printer Driver on page 61 • UNIX on page 62 • Printer Driver Options on page 63 Phaser 4622 System Administrator Guide... -
Page 50: Windows Printing
Click on Details. Click on the Print Services for Unix checkbox. If Print Services for Unix is not installed, refer to instructions from Microsoft to install this service. When you are finished, return to this page. Phaser 4622 System Administrator Guide... -
Page 51: Install Printer Driver
For Windows XP/Vista or later select LPR Port. Click on the Next button. Enter the IP Address of the printer. Enter: • Printer name for Windows XP/2003. • Print Queue name for Windows Vista or later. Phaser 4622 System Administrator Guide... -
Page 52: Internet Printing Protocol (Ipp) Port
At your workstation, open the web browser and enter the TCP/IP address of the machine in the Address bar. Press Enter. Click on the Properties tab. Click on the Connectivity link. Click on the Protocols link. Select IPP in the directory tree. Phaser 4622 System Administrator Guide... - Page 53 14. Click on the Next button. 15. Click on the OK button to install the printer driver. 16. Click on the Have Disk button and browse to the location of the printer driver and click on the OK button. Phaser 4622 System Administrator Guide...
-
Page 54: Raw Tcp/Ip Printing (Port 9100)
Start, followed by Control Panel first. • For Windows Vista or later, click on Control Panel then Printers. Click on Add Printer in the far left column. The Add Printer Wizard window will appear. Click on the Next button. Phaser 4622 System Administrator Guide... - Page 55 16. Select the model of your machine from the list. 17. Click on the Next button. 18. Enter Printer Name (or accept the default name). 19. Click on the Next button. 20. If you want this to be your default printer, click on Yes. Phaser 4622 System Administrator Guide...
-
Page 56: Airprint
Enable Multicast DNS Registration. To configure, under Action click Edit. Under Protocol, select Enabled. To edit the name and location for your printer that appears in the list of AirPrint-enabled printers on connected devices, next to Device Name, click Edit. Click Save. Phaser 4622 System Administrator Guide... -
Page 57: Appletalk Printing
Click on Properties. Win NT From the Desktop: Right-click on the Network Neighbourhood icon Right-click on the network connection you want to configure AppleTalk on, and then click on Properties. The Connection Properties dialog box opens. Phaser 4622 System Administrator Guide... - Page 58 13. Click on Have Disk. Load the CentreWare Print Drivers CD into your CD drive. 14. Click on Browse and locate the CD drive. 15. Locate the folder containing the printer drivers on the CD and select the required Windows printer driver. Phaser 4622 System Administrator Guide...
-
Page 59: Usb Printing (Windows 2003/Xp/Vista Or Later)
A standard USB peripheral cable. A Workstation or laptop that supports USB connectivity. A printer driver has been installed and is correct for your Xerox Phaser 4622 printer model. Procedure Connect the USB cable to the machine and the other end to your Workstation or laptop. -
Page 60: Configure Your Printer Driver
Before starting the Installation procedure, please ensure that the following items are available and/or the tasks have been performed: The Phaser 4622 printer driver should be installed on your Windows operating system. Procedure At your workstation, open your Printers folder. - Page 61 Printer Drivers Printing Preferences Printing Preferences contains all the driver features and allows you to set default settings for the driver. Within your Printers folder, right-click on the Phaser 4622 printer driver and select Printing Preferences. Note Click on the Help button in the driver to view information about each feature.
- Page 62 You can also create and print watermarks on your documents. Advanced The Advanced tab contains settings specific to the driver, such as Postscript options and Font selections. Configure the advanced settings, as required. Click on the OK button to close the driver. Phaser 4622 System Administrator Guide...
-
Page 63: Configure The Windows Printer Driver
Ensure that the Paper/Output tab is selected and click on More Status at the bottom of the window. Current information about the printer is available. Click on Close to close the window. Change any default printer settings, as required. Click on the OK button. Phaser 4622 System Administrator Guide... -
Page 64: Manual Printer Driver Configuration
Click on Print Test Page. Click on the OK button to close the Test Page window. Click on Printing Preferences. 10. Change any default printer settings, as required. 11. Verify that the test page is printed at the machine. Phaser 4622 System Administrator Guide... -
Page 65: Apple Mac
21. Enter the IP Address of the printer. 22. Enter the Print Queue Name. (You may leave this blank). 23. Click on Xerox from the Printer Model list. 24. Select your Printer Model from the list. 25. Click on Add. The machine will appear in the Printer List. -
Page 66: Appletalk Printing (Os9)
17. Select the installed options which correspond to your machine configuration. 18. Click on the OK button. 19. Click on the OK button and close the Chooser. 20. Print a document from an application to verify that the printer is installed correctly. Phaser 4622 System Administrator Guide... -
Page 67: Configure Your Apple Mac Printer Driver
Information Checklist Before starting the Installation procedure, please ensure that the following items are available and/or the tasks have been performed: The Phaser 4622 printer driver should be installed on your Macintosh operating system. Procedure Configuration Click on Printer Setup Utility on the Dock and go to step 6, or: Double-click on the hard drive icon on the desktop. -
Page 68: Unix
Administration CD1. • Xerox Features - Job type (e.g. saved job), 2 sided, output destination. A summary of settings is shown under Summary. When you have set the options you require, select File and Save As, and enter a name for the Preset. -
Page 69: Printer Driver Options
Select Job Sheets and press the OK button. Select Banner Sheets and press the OK button. Use the arrow keys to highlight Enable and press the OK button. Press the Menu button to exit the Tools menu. Phaser 4622 System Administrator Guide... - Page 70 Printer Drivers Phaser 4622 System Administrator Guide...
- Page 71 This is the procedure to follow to install and setup this service: • Overview on page 66 • Information Checklist on page 67 • Enable and Configure Network Accounting on page 68 • Test Network Accounting on page 71 Phaser 4622 System Administrator Guide...
-
Page 72: Network Accounting
Users must enter their accounting IDs to access the machine, which allows information about the jobs performed to be recorded in the job log. The machine requires network access to a Xerox-certified Network Accounting third party software solution. Refer to your Xerox Sales Representative for further information. -
Page 73: Information Checklist
TCP/IP and HTTP protocols must be enabled on the machine so that the machine web browser can be accessed. Install and configure the Xerox-certified Network Accounting Solution Package on your network. Refer to the manufacturer's instructions with the network accounting package to complete this task. -
Page 74: Enable And Configure Network Accounting
To record print jobs sent to the machine, Accounting must be enabled in the user’s printer driver. Note If Accounting is enabled on the machine but not in the printer driver, any print jobs sent to the machine will be deleted. Phaser 4622 System Administrator Guide... -
Page 75: Win 2000
Click on Configuration. Click on Accounting. Click on Xerox Network Accounting from the Accounting System menu. Click on either Prompt for Every Job if you want Users to enter their User and Account ID each time they print or click on the Default Users and Account ID checkboxes to hide the User and Account ID information (then no entry is required for each job submission). - Page 76 Click on the OK button. Ensure that the Accounting preset is selected in the Presets menu each time you print. 10. Click on Print. 11. Enter your Network Accounting information. 12. Click on the OK button to print the document. Phaser 4622 System Administrator Guide...
-
Page 77: Test Network Accounting
Network Accounting Test Network Accounting Open a document on your workstation, select the Phaser 4622 printer driver and print your document. You should see the Accounting ID screen. Enter your Network Accounting User and Accounting ID and click OK. •... - Page 78 Network Accounting Phaser 4622 System Administrator Guide...
-
Page 79: Security
Security This chapter describes how to configure the Security features for the machine. The following features can be installed and configured: • Security @ Xerox on page 74 • Xerox Secure Access on page 75 • Administrator and Key User Accounts on page 78 •... -
Page 80: Security @ Xerox
Security Security @ Xerox For the latest information on securely installing, setting up and operating your machine see the Xerox Security Information web site located at www.xerox.com/security. Phaser 4622 System Administrator Guide... -
Page 81: Xerox Secure Access
Refer to the documentation with the authentication server to complete this task. Note Contact your Xerox Sales Representative if you do not have the Xerox Secure Access Server. If required, connect and configure your Secure Access Authentication device and card reader. -
Page 82: Configure Xerox Secure Access On The Device
This feature may be helpful in situations where the user’s card is not available or when the card reader is not used. Check that the Xerox Secure Access Server has been configured to point to the device. If the feature has been configured correctly the address information should be populated with the address of the Xerox Secure Access Server. -
Page 83: Use Secure Access
Security In Default Prompt, specify the prompt that will show on the Xerox device screen to tell the user what they need to do to be authenticated at the device. Note If the Title and Prompt have been configured in the Xerox Secure Access Server, then this information will overwrite the Default Title and Default Prompt text entered within Internet Services. -
Page 84: Administrator And Key User Accounts
Authentication works independently of any accounting access that is enabled on the machine. Information Checklist Ensure that the Xerox machine is fully functional on the network. TCP/IP and HTTP protocols must be configured so that Internet Services can be accessed. -
Page 85: Disable Security Settings Reset
The Security Settings Reset policy will be followed if the admin password is forgotten. If Enabled, the security settings can be reset to the Factory Default using directions available from Xerox Support. If Disabled, a chargeable service call would be required if security settings need to be reset. -
Page 86: 802.1X Authentication
IEEE 802.1X ensures all machines on the network are authenticated and authorized to use the network. 802.1X can be enabled for machines connected through wired Ethernet networks. The Administrator can configure the machine to use one EAP type. EAP types supported on the Xerox machine are: •... - Page 87 Under the 802.1X area, checkmark the 802.1X enable box. Select the Authentication Method from the drop-down menu. In the Credentials area, enter details for the Username and Password. Click on the Apply button to confirm selection. Phaser 4622 System Administrator Guide...
-
Page 88: Image Overwrite Security
Job for Reprint feature. Full overwrite takes approximately 53 minutes to complete. Information Checklist Before starting the Installation procedure, please ensure that the following item or task is available or has been performed: Ensure that the machine is fully functioning in its existing configuration. Phaser 4622 System Administrator Guide... -
Page 89: Immediate Image Overwrite
Before starting the Installation procedure, please ensure that the following item or task is available or has been performed: Ensure that the machine is fully functioning in its existing configuration before you enable Immediate Image Overwrite. Phaser 4622 System Administrator Guide... -
Page 90: Enable The Iio
Perform an On Demand Image Overwrite to ensure that the residual image data is overwritten from the machine. View the instructions in the On Demand Image Overwrite (ODIO) on page 82 to complete this task. Phaser 4622 System Administrator Guide... -
Page 91: Ip Filtering
2001:DB8:1234:215:215:99FF:FE04:D345 / 128 is used to reference a complete address. • 2001:DB8:1234:215:215:99FF:FE04:D345 / 64 is used to reference prefix address consisted of leftmost 64 bits only. • 2001:DB8:1234:215:215:99FF:: / 80 is used to reference prefix address consisted of leftmost 80 bits only. Phaser 4622 System Administrator Guide... - Page 92 Security 13. Click on the Apply button to accept changes. 14. If prompted, enter the Administrator’s User ID admin and Password 1111, and click on Login. 15. Click on OK. Phaser 4622 System Administrator Guide...
-
Page 93: Ip Sec
Enable the Protocol by placing a checkmark in the Enabled box. Enter the a password in the Shared Secret and Verify Shared Secret boxes. Checkmark Select to save new Shared Secret box. Click on the Apply to save settings. Phaser 4622 System Administrator Guide... -
Page 94: Audit Log
A unique value that identifies the entry. The following list shows the ID number allocated to each type of activity displayed in the Audit Log: 1 = System startup 2 = System shutdown 5 = Print job 10 = Audit Log Disabled 11 = Audit Log Enabled 16 = ODIO Standard started Phaser 4622 System Administrator Guide... - Page 95 • not-completed - the job was not completed. Identify the PC or User To record the User's name in the Audit Log, Network Authentication must be configured on the Xerox machine. IIO Status If IIO (Immediate Image Overwrite) is enabled, this column will show the status of overwrites completed on each job.
- Page 96 Entry Data This column contains any additional data that is recorded for an Audit Log entry, for example: • Machine name. • Job name. • Username. • Accounting Account ID (when Network Accounting is enabled). Phaser 4622 System Administrator Guide...
-
Page 97: Machine Digital Certificate Management & Trusted Certificate Authorities
A certificate from a Certificate Authority or a server functioning as a Certificate Authority (for example Windows 2000 running Certificate Services) can be uploaded to the machine. Note A separate request is required for each Xerox machine. Information Checklist Ensure that the machine is configured with the following items: An IP Address or Host Name must be configured on the machine. -
Page 98: Access The Machine Digital Certificate Management Screen
If prompted, enter the Administrator’s User ID admin and Password 1111, and click on Login. 13. If successful, the Current Status area will display the message, “A Self Signed Certificate is established on this machine. Follow the steps in Enable Secure HTTP (SSL) on page 94. Phaser 4622 System Administrator Guide... -
Page 99: Create A Request For A Certificate Signed By A Trusted Certificate Authority
11. To view installed certificates, click on the Trusted Certificate Authorities link in the Internet Services menu. The installed certificate will appear in the list. Phaser 4622 System Administrator Guide... -
Page 100: Enable Secure Http (Ssl)
Close your web browser and then access the Internet Services screen again. The Security warning will display. Self-signed certificates causes browsers to display messages which question the trust of the certificate. Click on the OK button to continue. Phaser 4622 System Administrator Guide... -
Page 101: Snmp
Click on the Apply button to accept changes, Cancel to return the settings to their previous values and return to the SNMP Properties screen, or Undo to return the settings to their default values but remain in the Community Names screen. Phaser 4622 System Administrator Guide... - Page 102 SNMP request that is received by the machine which contains an invalid community name. Click on the Apply button to accept the changes. If prompted, enter the Administrator’s User ID admin and Password 1111, and click on Login. Phaser 4622 System Administrator Guide...
-
Page 103: Snmpv3
Encryption is automatically enabled on the machine and no further configuration is required by the administrator. If the hard drive is removed from the network controller, then the encrypted data remains protected because the encryption key is not stored on the hard drive. Phaser 4622 System Administrator Guide... - Page 104 Security Phaser 4622 System Administrator Guide...
- Page 105 • Overview on page 100 • Information Checklist on page 101 • SMart eSolutions on page 102 • Meter Assistant™ on page 104 • Supplies Assistant™ on page 106 • Maintenance Assistant on page 107 Phaser 4622 System Administrator Guide...
-
Page 106: Smart Esolutions
SMart eSolutions Overview SMart eSolutions provides the ability to automatically send data to Xerox to be used for billing (Meter Assistant™) and toner replenishment (Supplies Assistant™). SMart eSolutions provides the following features: • Meter Assistant™ - automatically submits meter reads to Xerox from network machines. This ends the need to collect and report meter read information manually. -
Page 107: Information Checklist
TCP/IP and HTTP protocols must be enabled on the machine so that the machine web browser can be accessed. (Device Direct). • Enable SNMP (SMart eSolutions Client and CentreWare Web). If you want to use SMart eSolutions Windows Client or CentreWare Web, visit www.xerox.com/smartesolutions. Phaser 4622 System Administrator Guide... -
Page 108: Smart Esolutions
In the Enrollment area: For SMart eSolutions Enrollment, there are two options: • Enrolled — Communication with Xerox is enabled. This is the default state for the printer. • Not Enrolled — Communication with Xerox is disabled. Select this option to stop communications with Xerox. -
Page 109: Proxy Server
Enter details in the IP Address and Port or Host Name and Port fields. Enter details in the Exception List field. Click on Save Changes to save the changes. Click on OK when the acknowledgement message displays. Phaser 4622 System Administrator Guide... -
Page 110: Meter Assistant
The meter data is recorded in the Xerox service management system. It is used for the invoicing of metered service agreements, and also for evaluating consumable usage against printer performance. - Page 111 • Smart eSolutions communication error has occurred - an alert is generated when there is a communication error. Click on Save Changes to save the changes. 10. Click on OK when the acknowledgement message displays. Phaser 4622 System Administrator Guide...
-
Page 112: Supplies Assistant
Supplies Assistant™ Eligible machines will automatically be enabled for the Supplies Assistant™ when the machine is registered with Xerox. The Supplies Assistant™ manages supply order to ensure the right supplies are supplied on the right time. To set up Supplies Assistant™, go to www.xerox.com/smartesolutions... -
Page 113: Maintenance Assistant
SMart eSolutions Maintenance Assistant When calling for assistance you can send up-to- the minute performance related data to Xerox to help diagnose problems. You can also open an online diagnostic session with Xerox directly with Maintenance Assistant. This feature sends your device’s diagnostic information to Xerox to be immediately analyzed and matched with solutions to resolve detected issues. - Page 114 Click on the Close button. If there are any communication problems, a message window will display. Check your configuration and communication settings by clicking the Settings button. This will take you to the SMart eSolution Setup page. Phaser 4622 System Administrator Guide...
-
Page 115: Centreware Internet Services
• Properties on page 118 • Tray Settings on page 118 • Alert Notification on page 119 • Power Management on page 122 • Enabling/Disabling USB ports on page 123 • Support on page 127 Phaser 4622 System Administrator Guide... -
Page 116: Overview
Select Network Settings and press the OK button. Select Network Services and press the OK button. Select HTTP and press the OK button. Select On and press the OK button. Press the Menu button to exit Tools. Phaser 4622 System Administrator Guide... -
Page 117: Access Cwis
Once this has successfully occurred, the Administration Authentication screen will close and the machine will reboot. The web browser will not be able to connect to the machine via the CWIS until the Network Controller has been reset. Phaser 4622 System Administrator Guide... -
Page 118: Status
All information presented on the Local UI display is also presented in CWIS. This includes e- mail addresses, phone numbers and passwords as they are being entered. If this presents a security concern, Xerox recommends enabling the IP Filtering security feature in order to control remote access to the device. -
Page 119: Alerts
Trained - System Administrator needed to fix this problem. • Untrained - Normal User can fix this problem. • Field Service - Xerox Support needed to fix this problem. • Management - Network Administrator needed to fix this problem. •... -
Page 120: Consumables
For each unit, the % Life Remaining icon describes the current supply level as a percentage and provides a bar graph visual display. SMart eSolutions For information on SMart eSolutions, refer to SMart eSolutions on page 102 Phaser 4622 System Administrator Guide... -
Page 121: Jobs
The passcode is not required for personal print. The print job will now be printed and then deleted from the storage folder. Note Jobs can be deleted without printing by selecting Delete from the drop-down menu and clicking Go. Phaser 4622 System Administrator Guide... -
Page 122: Saved Jobs
To download the completed jobs list either as a comma-separated-values (CSV) file or as an XML file, select the format from the drop down list and press the Go button. To clear the table of all completed job information, press the Clear All Completed Jobs button. Phaser 4622 System Administrator Guide... -
Page 123: Print
When finished with your selections, click the Submit Job button to send your document to the printer. Wait for the Job Submission confirmation window to appear before exiting or navigating to a different screen: this prevents your print job being deleted. Retrieve the printed document(s) from the machine. Phaser 4622 System Administrator Guide... -
Page 124: Properties
Description The Description Page displays the machine model and serial number and provides fields for the entry of location, Xerox asset number and customer asset number information. Tray Settings The Tray Settings page allows you to set the Mode, Prompt option and Sequence settings for the machine’s media trays. -
Page 125: Alert Notification
12. Use the drop-down menus to assign a sequence number to each tray. 13. Click Apply to save the tray settings. Alert Notification Customers can set the Xerox machine to notify Users or operators of problems as they occur on the machine. Alert Notification is configured via CentreWare Internet Services. Phaser 4622... -
Page 126: General Device Alerts
In the Alert Recipient area, enter the full e-mail address of a User that you want to be notified of any machine problems. Note This is normally set to the System Administrator’s e-mail address. Note Multiple e-mail addresses can be added and must be separated by a semicolon. Phaser 4622 System Administrator Guide... -
Page 127: Date And Time
Select the preferred time format by clicking the radio button and enter the current time in the text fields Note Remember to specify AM or PM if Display as 12 hour clock is selected. 10. Click Apply to save changes. Phaser 4622 System Administrator Guide... -
Page 128: Power Management
Click on the Billing Information link. Click on the Refresh button to view the current billing information in the Total Impressions area. Billing Meter The Billing Meter area shows the date and number of impressions that were notified to the Xerox Communication Server. Phaser 4622... -
Page 129: Usage Counters
Press Enter. Click on the Properties tab. If required, enter the admin username admin and password 1111 and click OK. Click on the Services link. Click on the Printing link. Click on the Banner Pages link. Phaser 4622 System Administrator Guide... - Page 130 At your Workstation, open your web browser and enter the TCP/IP Address of the machine in the Address bar. Press Enter. Click on the Properties tab. If required, enter the admin username admin and password 1111 and click OK. Click on the Services link. Phaser 4622 System Administrator Guide...
-
Page 131: Ppds Menu
Features on the PPDS Menu page will allow you to set values for lines per page, page format and whether Line Feed is automatically applied after a Carriage Return. These settings are used to control Personal Printer Data Stream, primarily from IBM Mainframe applications. Phaser 4622 System Administrator Guide... -
Page 132: Maintenance
Click on the Properties tab. If required, enter the admin username admin and password 1111 and click OK. Click on the Maintenance link. Check the box to enable upgrades and cloning. Click Apply to save the changes. Phaser 4622 System Administrator Guide... -
Page 133: Support
The CentreWare Internet Services Support page provides easy access to the Xerox web site, to allow diagnostic information to be sent to Xerox or to initiate an on-line troubleshooting session. The page can also be set up to show Xerox support telephone numbers and the contact details for the system Administrator. - Page 134 CentreWare Internet Services Phaser 4622 System Administrator Guide...
-
Page 135: Software Upgrade
Software Upgrade This chapter explains how to upgrade the software on the Phaser 4622. The following information is provided. • Overview on page 130 • Manual Upgrade using CentreWare Internet Services on page 131 • Manual upgrade using a USB flash drive... -
Page 136: Overview
When should I upgrade the software? Xerox is continually seeking to improve its products and a software revision may become available to improve functionality on the machine. Your Customer Support Centre Representative will instruct you to upgrade your machine when it is necessary. -
Page 137: Manual Upgrade Using Centreware Internet Services
Before starting the procedure, please ensure that the following items have been performed: Obtain the new software upgrade file for your machine from the www.xerox.com web site or from your Xerox Customer Support Representative. The upgrade file will have an extension of .hd. - Page 138 The upgrade should take no longer than 30 minutes. 13. Once the machine has completed the upgrade it will reboot automatically. The configuration report will print (if enabled). Check the configuration report to verify that the software level has changed. Phaser 4622 System Administrator Guide...
-
Page 139: Manual Upgrade Using A Usb Flash Drive
Representative. The file will have an .hd extension. Note It is important to obtain the correct upgrade file for your particular model of machine. Xerox recommends that the file is stored in a subdirectory on the USB flash drive so that it is easier to locate from the machine’s User Interface. - Page 140 Software Upgrade Phaser 4622 System Administrator Guide...
-
Page 141: Troubleshooting
This chapter contains problem solving procedures and how to further assistance. For more information, refer to the following sections. • Problem Solving Procedure on page 136 • Network Accounting on page 137 • Printing on page 138 • Connectivity on page 139 • Saved Jobs on page 141 Phaser 4622 System Administrator Guide... -
Page 142: Problem Solving Procedure
Check that the software application being used to send print jobs is set up correctly. If printing documents is not available from a workstation, re-install a printer driver on the workstation. Call the local Xerox Welcome Center, where a representative will assist in the diagnosis and solution of the problem. Phaser 4622... -
Page 143: Network Accounting
Test the communication between the Network Accounting Server and the Xerox machine. At your Workstation, open the web browser, enter the IP Address of the Xerox machine in the address field, and press Enter. The machine Internet Services web pages should appear. If it does not, verify the IP Address settings on the machine. -
Page 144: Printing
I cannot print to the machine. Ensure that there are no network connectivity problems with the Xerox machine. Print a Test Page from the Xerox printer driver to the machine to verify connectivity. Ensure that the print server is functional. -
Page 145: Connectivity
Address, check the network cables at the machine and the computer that you are using to ping the machine. Configure the Xerox machine with an Ethernet speed that matches the speed set on your hub or switch. Ensure that the Ethernet cable is correctly patched in at the hub/switch. - Page 146 If the machine is configured with a static IP Address, it will not use AutoIP. I cannot access CentreWare Ensure that the Xerox machine is configured with a valid IP Internet Services. Address. Ensure HTTP is enabled within the Tools area at the Control Panel.
-
Page 147: Saved Jobs
The Saved Jobs feature is not available if the Machine is not configured with an optional hard drive. Install the optional 320 Gb Hard Drive. The Hard Drive is full. Delete Saved Jobs from public and private folders to increase available space. Phaser 4622 System Administrator Guide... - Page 148 Troubleshooting Phaser 4622 System Administrator Guide...
-
Page 149: Appendix
Appendix This chapter provides information on features and functionality not covered in the remainder of the System Administration Guide. The following information is provided. • Management Information Base (MIB) on page 144 Phaser 4622 System Administrator Guide... -
Page 150: Management Information Base (Mib)
All information presented on the Local UI display is also presented in the MIB. This includes e-mail addresses, phone numbers and passwords as they are being entered. If this presents a security concern, Xerox recommends enabling the SNMPv3 or the IP Filtering security feature in order to control remote access to the device. -
Page 151: Index
Network accounting, 66 event description, 87 print driver, 52 event ID, 86 identify PC or User, 87 Client IIO status, 87 GUI method , 32 Authentication and Accounting, 76 tty method , 32 Solaris 2.x Client Phaser 4622 System Administrator Guide... - Page 152 Ethernet Cable, 8 front, 7 Ethernet Settings, 8 rear, 7 Event Description, 87 Internet Printing Protocol (IPP) Port, 44 Event ID, 86 IP Filtering, 83 overview, 83 IP Sec, 85 IPP, 8 Feature Enablement Key, 7 Phaser 4622 System Administrator Guide...
- Page 153 Windows NetWare, 8 AppleTalk, 49 Netware, 26 LPR Printing, 42 Network Accounting, 63 Raw TCP/IP Printing (Port 9100), 46 test, 69 Print Queue Network accounting Linux CUPS activate machine, 66 dynamic addressing, 33 configure, 66 Phaser 4622 System Administrator Guide...
- Page 154 13, 41, 63, 71, 97, 107, 127, 133, 141 UNIX, 60 Saved Settings, 54 Unix Secure HTTP (SSL), 92 SCO, 31 Security @ Xerox, 72 configure client, 31 Self Signed Certificate, 90 GUI method , 32 Serial number, 100 tty method...
- Page 155 View IIO Status, 82 Who should use this Guide?, 2 Windows Print Driver accounting, 52 bi-directional setup, 52 installable options, 52 paper/output, 53 printing preferences, 53 saved settings, 54 Windows Printing, 42 Windows TCP/IP, 15 Phaser 4622 System Administrator Guide...