Table of Contents
Advertisement
Big Button Braille Augmented Keypad
Call Waiting Caller ID Cordless Telephone
talk
spk
talk off
DEF
1
ABC
3
2
GHI
MNO
4
JKL
6
5
PQRS
WXYZ
TUV
7
9
8
*
OPER
#
0
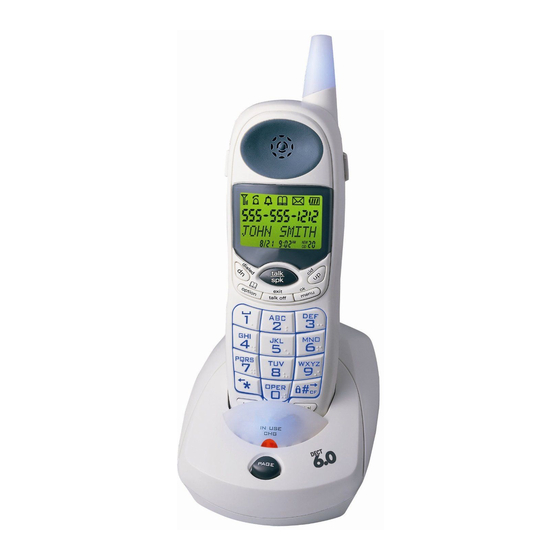
Congratulations on your selection of 31070 from Northwestern
Bell Phones. This DECT 6.0 Digital Enhanced Cordless
Telephone with Big Button Braille Augmented Keypad, Hearing
Aid Compatible with Call Waiting Caller ID like all Genuine
®
BELL
products, has been designed to give you many years of
continuous service and represents the best value for your money.
It requires little maintenance and is easy to setup and operate.
DECT 6.0
Hearing Aid Compatible with
IN USE
CHG
PAGE
31070
Advertisement
Table of Contents

Related Manuals for Bell Phones 31070

Summary of Contents for Bell Phones 31070
- Page 1 PAGE PQRS WXYZ OPER Congratulations on your selection of 31070 from Northwestern Bell Phones. This DECT 6.0 Digital Enhanced Cordless Telephone with Big Button Braille Augmented Keypad, Hearing Aid Compatible with Call Waiting Caller ID like all Genuine ®...
-
Page 2: Important Service Information
THIS SYMBOL IS INTENDED TO ALERT THE USER OF THE PRESENCE OF IMPORTANT OPERATING AND MAINTENANCE (SERVICING) INSTRUCTIONS IN THE OWNER'S MANUAL. 31070 CARTON CONTENTS • 31070 Base and Handset • Rechargeable Ni-Mh Battery Pack • Telephone Line Cord • AC Adaptor • User’s Manual • Warranty Card •... -
Page 3: Table Of Contents
TABLE OF CONTENTS Important Service Information ................. 1 Warning ......................1 Carton Contents ....................1 Important Safety Instructions ................. 5 Installation Precautions ..................6 Maintenance ....................... 7 Battery Cautionary Instruction ............... 7 FCC Notice ......................8 CONTROLS DIAGRAM ................. 12 Handset Controls Diagram ................ - Page 4 Conference Call ..................23 Pause Function ..................24 Flash Function ................... 24 Low Battery Warning ................24 Paging the Handset ................... 24 Handset Keypad Lock and Unlock ............24 MENU FUNCTION PROGRAMMING ............25 CALLER ID OPERATION ................26 Getting to know your New Phone ............26 Introduction to Caller ID &...
- Page 5 Main MENU Function Programming 3 - BASE (BS) SETTING ....35 (Handset De-registration) De-regis HS Setting ........35 Dial Mode Setting ..................35 Flash Time Setting ..................36 Modify Pin Setting ..................36 Base (BS) Default Setting ................. 37 Main MENU Function Programming 4 - HANDSET (HS) SETTING ..37 Alarm Setting .....................
-
Page 6: Important Safety Instructions
SAVE THESE INSTRUCTIONS IMPORTANT SAFETY INSTRUCTIONS When using your telephone equipment, basic safety precautions should always be followed to reduce the risk of fire, electric shock, and injury to persons, including the following: Read and understand all instructions. Follow all warnings and instructions marked on the product. Unplug this product from the wall outlet before cleaning. -
Page 7: Installation Precautions
the product. 11. To reduce the risk of electric shock, do not disassemble this product, but take it to a qualified service contractor when some service or repair work is required. Opening or removing covers may expose you to dangerous voltages or other risks. -
Page 8: Maintenance
MAINTENANCE Use a damp cloth to clean the plastic cabinet. A mild soap will help to remove grease or oil. Never use polish, solvents, abrasives or strong detergents since these can damage the finish. Your phone should be situated away from heat sources such as radiators, heaters, stoves or any other appliance that produces heat. -
Page 9: Fcc Notice
freezer or refrigerator for the purpose of extending shelf life should be stabilized at room temperature prior to use after cold storage. Disconnect telephone lines before installing batteries The battery compartment door requires no modification then. The door of the battery compartment should NEVER be dismantled when charging. - Page 10 company may discontinue your service temporarily. If possible, they will notify you in advance. But if advance notice is not practical, you will be notified as soon as possible. You will be advised of your right to file a complaint with the FCC. Your telephone company may make changes to its facilities, equipment, operations or procedures that could affect the proper function of your equipment.
- Page 11 Changes or modifications not expressly approved in writing by Northwestern Bell Phones may void the user's authority to operate this equipment. NOTE: This equipment has been tested and found to comply with the limits for a Class B digital device, pursuant to Part 15 of the FCC Rules.
- Page 12 CAUTION: To maintain the compliance with the FCC’s RF exposure guideline, place the base unit at least 20 cm from nearby persons. For a handset that has the potential to be used in a body worn configuration and has been tested and certified with a specific accessory device(s): For body worn operation, this handset has been tested and meets the FCC RF exposure guidelines when used with the (manufacturer name) accessories supplied or designated for this product.
-
Page 13: Controls Diagram
31070 HANDSET CONTROLS DIAGRAM Visual Ringer LED Indicator / IN USE LED Indicator LCD Display Dn / Dialed Button Talk / Spk (Speaker Phone) Button Up / CID Button (Phonebook) Option Button Menu / OK Button (Move Left ) Button... -
Page 14: Base Controls Diagram
31070 BASE CONTROLS DIAGRAM 6V DC 250mA LINE LINE DC 6V Jack Telephone Line Jack IN USE/CHARGE LED Indicator IN USE PAGE PAGE Button 061210B-1... -
Page 15: Controls Description
CONTROLS DESCRIPTIONS HANDSET CONTROLS: LCD Display - Shows call information, phone status, prompts and Phonebook items. Visual Ringer LED Indicator / IN USE LED Indicator (Visual Ringer LED Indicator) - Flashes to indicate the phone is ringing, as a signal to the user, when the ringer is switched off. (IN USE LED Indicator) - Lights solid whenever the handset is in TALK mode. - Page 16 Pa (Pause) Button –Press to insert pause while dialing. DN (DOWN) / DIALED CALLS Button –Scrolls down through lists and menu options. Decreases the earpiece speaker volume during a call. The 31070 can save the last 10 dialed numbers. Review the redial list from idle mode.
-
Page 17: Base Unit Controls
BASE UNIT CONTROLS: Base Unit Charge Terminals - Used for charging handset batteries. We recommend that clean these contacts periodically with alcohol-moistened cloth or cotton swab. IN USE LED Indicator / Visual Ringer LED Indicator (IN USE LED Indicator) - LED flashes when the phone is in talk mode. LED blinks when you have incoming call. -
Page 18: Installation
INSTALLATION CAUTION: USE ONLY THE Ni-Mh BATTERY TYPE INCLUDED WITH THIS UNIT. USE OF OTHER BATTERY TYPES MAY CAUSE INJURIES OR DAMAGE. Battery Installation: Remove the battery compartment cover of the handset by pressing the top of the cover and sliding it down. Connect the Ni-Mh battery pack plug along the slot into the handset’s battery connector as shown below. -
Page 19: Belt Clip Installation
Belt Clip Installation With the back of the handset facing up, insert one side of the belt clip hook into the matching slots at the top side of the handset as shown in Figure 2. Slide the other hook until it locks into place from the opposite side of the handset. Belt clip hook (Figure 2) WALL USE:... -
Page 20: Power Connection
Wall Mounting (No Standard Wall Jack) Drill two holes with a vertical distance between the two marked positions 15/16” of 3 100mm as shown in Figure 4. 15/1655 (100mm) (Figure 4) Drive a screw into each of the holes. Tighten them to the end of the screw lines, only leaving the smooth part of the screw head outside the wall. -
Page 21: Initial Setup
Plug the AC adaptor into a standard AC outlet. Insert the small plug into the DC 6V 250mA jack on the rear of the base unit and Insert the small plug into the DC 6V 250mA on the rear of the charger as shown in Figure 6. -
Page 22: Telephone Operation
TELEPHONE OPERATION A. PLACE a CALL Pick up the handset and Press [TALK/SPK Button]. The LCD Display will show “ ”. Listen for a dial tone. Dial the telephone number. The phone numbers appear on the LCD Display as you enter the number. When finished with your call, Press [TALK OFF Button]. -
Page 23: Dial One Of The Last 10 Dialed Numbers
If the Handset is on the Base: When the phone rings, the LCD Display will show “CALL”, simply pick up the handset from the base cradle if the unit is set to auto-answer ON mode. If the unit is set to auto-answer OFF mode, and Press [TALK/SPK Button] on the handset. -
Page 24: Intercom Call
INTERCOM CALL (Optional feature for Multi-Handset version only) In stand by mode, Press [INT Button] on the handset, and then enter the handset number that you want to call. The internal called handset will ring. To answer the intercom call, Press [TALK/SPK Button] on the called party handset. -
Page 25: Pause Function
PAUSE FUNCTION • In some cases, such as PABX or long distance service, a pause may be needed in the dialing sequence. Pressing [PA (Pause) Button] inserts a “pause” programmed time interval between dialed numbers. FLASH FUNCTION • Press [FASH Button] to access custom calling features such as Call Waiting or Three-Way Calling provided by your local phone company. -
Page 26: Menu Function Programming
MENU FUNCTION PROGRAMMING This phone contains the following special MENU Functions. To access, Press the [MENU/OK Button] at stand by mode, then Press [UP or DN Button] to select the function. ADD TO PB CID BOOK RECEIVED CALL LOG DELETE DIALED LIST DELETE ALL... -
Page 27: Caller Id Operation
If this is your first cordless telephone, you will soon discover that your cordless is similar to regular telephones, except without the cord. If you have owned a cordless telephone in the past, you will discover that the 31070 telephone is the most powerful and full-functioned Call Waiting ID cordless telephone on the market, some key features are: •... -
Page 28: Main Menu Programming 1 - Call Log
What is Caller Call Waiting ID is a device that can also identifies Waiting ID? the call waiting party before you answer a call. How does Caller ID When used with Caller ID/Call Waiting service, and Call Waiting ID the Caller ID/Call Waiting ID device displays the work? name (if available), and the telephone number (if available) of the person calling before you answer... -
Page 29: Viewing The Caller Id List
555-555-1212 The caller’s telephone number JOHN SMITH The caller’s name (if available) 12/15 10:00 The date and time of the call • If there are no call records, the LCD display shows “EMPTY” by pressing the CID button. VIEWING the CALLER ID LIST In stand by mode, Press [CID Button] to enter Caller ID list. -
Page 30: Message Waiting
Press [FLASH Button] to answer the second caller. When you are finished, Press [FLASH Button] to continue your conversation with the first caller. MESSAGE WAITING When the Caller ID receives the Message Waiting signal from your local phone company, the icon on the LCD panel will be flashed. -
Page 31: Selective Deleting From Caller List
Press [UP or DN Button] to select “RECEIVED”. Press [MENU/OK Button]. Press [UP or DN Button] to scroll the call record you wish to store. Press [MENU/OK Button]. Press [UP or DN Button] to select “ADD TO PB”. Press [MENU/OK Button] three times to confirm. 10. -
Page 32: Main Menu Function Programming 2 -Phonebook Setting
Press [MENU/OK Button] to confirm. Press [TALK OFF Button] to return to Idle Mode. Main MENU Function Programming 2 -PHONEBOOK SETTING SAVING in the PHONEBOOK Press [MENU/OK Button]. Press [UP or DN Button] to select “ PHONE BOOK” Press [MENU/OK Button]. Press [UP or DN Button] to select “ADD ITEM”. -
Page 33: Viewing The Phonebook
KEYPAD CHARACTERS BUTTON Space For example, if you want to enter the character “C”, Press “2” KEYPAD Button 3 times - 1 Press, letter “A” will be displayed, 2 Press “B” will be displayed, and the 3 Press will display “C”. VIEWING the PHONEBOOK [ The Phonebook lets you scroll through the Phone Book directory to find the name and telephone number of the person you need for one touch dialing. -
Page 34: Editing Name And Number In The Phonebook
EDITING NAME and NUMBER in the PHONEBOOK Press [MENU/OK button]. Press [UP or DN Button] to select “ PHONE BOOK” Press [MENU/OK Button]. Press [UP or DN Button] to select “ CHANGE ITEM” Press [MENU/OK Button]. Press [UP or DN Button] to select desired change. Press [MENU/OK Button]. -
Page 35: Placing Call From The Phonebook
PLACING CALLS from the PHONEBOOK Press [ Button]. Press [UP or DN Button] to find the contact you want to call. Press [TALK/SPK Button] to dial out the telephone number. Start your conversation. To end your conversation, Press [TALK OFF Button]. NOTE: Be sure to check that the line is not in use by another extension. -
Page 36: Main Menu Function Programming 3 - Base (Bs) Setting
Press [MENU/OK Button]. Press [UP or DN Button] to select “PHONE BOOK”. Press [MENU/OK Button]. Press [UP or DN Button] to select “PB STATUS”. Press [MENU/OK Button] to see how many entries. Press [TALK OFF Button] to return to Idle Mode. Main MENU Function Programming 3 –... -
Page 37: Flash Time Setting
Press [MENU/OK Button]. Press [UP or DN Button] to select TONE or PULSE. Press [MENU/OK Button] to confirm. Press [TALK OFF Button] to return to idle mode. FLASH TIME SETTING The user can select to change the Flash Time. Press [MENU/OK Button]. Press [UP or DN Button] to select “BS SETTING”. -
Page 38: Base (Bs) Default Setting
Note: The PIN number is very important. If you lost the PIN number, you can not restore to the factory default setting. (BASE) BS DEFAULT SETTING This function allows the user to restore the Base setting to the factory default. Press [MENU/OK Button]. -
Page 39: Alarm Off
10. Press [UP or DN Button] to select SNOOZE ON or SNOOZE OFF. 11. Press [MENU/OK Button] to confirm. 12. Press [TALK OFF Button] to return to idle mode. Note: If setting the “SNOOZE ON” temporarily halts the alarm from sounding when the alarm rings. -
Page 40: Tone Setting
10. Press [UP or DN Button] to select "MELODY 1-12". Press [UP or DN Button] to select Volume OFF, 1, 2, 3. 11. Press [MENU/OK Button] to confirm. 12. Press [TALK OFF Button] to return to idle mode. TONE SETTING A beep will sound when a key is pressed on the handset. -
Page 41: Handset Name (Hs) Label Setting
HANDSET NAME (HS) LABEL SETTING Press [MENU/OK Button]. Press [UP or DN Button] to select “HS SETTING”. Press [MENU/OK Button]. Press [UP or DN Button] to select “HS LABEL”. Press [MENU/OK Button]. Use the [TELEPHONE KEYPAD button] (0-9) to enter the name. The handset name is limited to 12 characters. -
Page 42: Date And Time Setting
Press [MENU/OK Button]. Press [UP or DN Button] to select ON or OFF, to select ON, and Press [MENU/OK Button] Press [UP or DN Button] select “NUMBER 1, 2, 3, 4”. 10. Press [MENU/OK Button]. The LCD will show “NUMBER?” 11. -
Page 43: Contrast Setting
CONTRAST SETTING Press [MENU/OK Button]. Press [UP or DN Button] to select “HS SETTING”. Press [MENU/OK Button]. Press [UP or DN Button] to select “CONTRAST”. Press [MENU/OK Button]. Press [UP or DN Button] to select level 1, 2, 3. Press [MENU/OK Button] to confirm. Press [TALK OFF Button] to return to idle mode. -
Page 44: Handset (Hs) Default Setting
Press [MENU/OK Button]. Press [UP or DN Button] to select "BASE 1, 2, 3, 4 or AUTO". Press [MENU/OK Button] to confirm. HANDSET (HS) DEFAULT SETTING This function allows the user to restore the Handset settings to the factory default. Press [MENU/OK Button]. -
Page 45: Security Coding
Press [MENU/OK Button]. Press [UP or DN Button] to select desired base number. Press [MENU/OK Button] to confirm. The LCD will show “SEARCHING NUMBER”. When the handset has been successfully registered, the PIN Code screen will be displayed, PIN number should be entered. The factory preset DEFAULT PIN Number is “0000”. -
Page 46: 68,719,476,736 Combination Security Coding
Ni-Mh battery and recharge as described: DISCHARGING Unplug the telephone line cord from the 31070. Make sure that the adapter is connected. Lift the handset out of the base cradle. Note: When the handset battery voltage level is low, the “BATTERY LOW”... -
Page 47: Maintenance
CHARGING Make sure the adapter and telephone line cord are connected to the 31070. Place the handset on the base cradle. The CHARGE LED indicator of the base unit will light steadily. Leave the handset charging on the base for 14 hours continuously to get a maximum charge. -
Page 48: Troubleshooting
INTERFERENCE: Some electronic devices operate in and/or generate interference near the operating frequencies of your cordless telephone. While several protection circuits are used to prevent unwanted signals, there may be periods when these unwanted signals cause interference. If interference occurs frequently, it can be minimized or eliminated by lowering the height of your base antenna or by relocating the base unit. -
Page 49: Caller Id Troubleshooting
• No power on Check the Ni-Mh battery pack for proper the handset connection inside the battery compartment on the unit handset. • The handset rechargeable Ni-Mh pack may need charging. • Does not charge Check the Ni-Mh battery pack for proper connection inside the battery compartment on the handset. - Page 50 • display is blank Check the telephone line cord connections. • Check the batteries for proper installation. • The Caller ID does The Caller ID unit will not function until you not show the have Caller ID service provided by your local caller’s name phone company.
- Page 51 Distributed Exclusively by Unical Enterprises Inc., City of Industry, California, USA www.nwbphones.com 31070/061210B-1 061210B-1...