Minolta EP4000 Operator's Manual
Hide thumbs
Also See for EP4000:
- General, mechanical/electrical (392 pages) ,
- Disassembly and reassembly (109 pages)
Table of Contents
Advertisement
Quick Links
i
EP4000/EP5000
Thank you for choosing Minolta.
This operator's manual explains how to operate the copier and replenish its supplies. It also gives
some troubleshooting tips as well as general precautions to be observed when operating the copier.
To ensure the best performance and effective use of your copier, read this manual carefully until yo u
familiarize yourself thoroughly with its operation and features. After you have read through the
manual, keep it for ready reference.
Please use this manual as a quick and handy reference tool for immediately clarifying any questions
which may arise.
CE Marking (Declaration of Conformity)
We declare under our sole responsibility that the copier and options to which this declaration
relates is in conformity with the specifications below.
This declaration is valid for the area of the European Union (EU) only.
Product Type
Copying Machine
Product Name
EP4000/EP5000
Options
AF-5, AFR-13, S-106, ST-104, S-208, ST-211, C-301, PF-5D, PF-205,
PF-105, AD-9, D-102, DT-103, E2000Kit
Standards
Safety*2
EMC*1
Notes
EC Directives
Safety
EMC
:
EN 60 950 / 1992 (A1 : 1993, A2 : 1993, A3 : 1995)
(Safety of information technology equipment, including electrical
business equipment)
:
EN 55 022 (Class B) / 1995
(Limits and method for measurement of radio disturbance
characteristics of information technology equipment (ITE))
EN 50 082-1 / 1992
(Electromagnetic compatibility - Generic immunity standard
Part1: Residential, commercial and light industry)
IEC 801-2 / 1991 (Electrostatic discharge requirement)
IEC 801-3 / 1984 (Radiated electromagnetic field requirement)
IEC 801-4 / 1988 (Electrical fast transient / burst requirement)
:
*1) EMC performance : This product was designed for operation
in a typical office environment.
*2) First year of labeling according to EC-directive 73/23/EEC
and 93/68/EEC :97
:
73 / 23 / EEC and 93 / 68 / EEC
:
89 / 336 / EEC and 93 / 68 / EEC
Advertisement
Table of Contents

Related Manuals for Minolta EP4000


Summary of Contents for Minolta EP4000
- Page 1 EP4000/EP5000 Thank you for choosing Minolta. This operator’s manual explains how to operate the copier and replenish its supplies. It also gives some troubleshooting tips as well as general precautions to be observed when operating the copier. To ensure the best performance and effective use of your copier, read this manual carefully until yo u familiarize yourself thoroughly with its operation and features.
-
Page 2: Table Of Contents
Contents Terms and Symbols for the Type of Originals and Copy Paper vi Chapter 1 Safety Notes p. 1 1. Installing the Copier p. 2 Installation Site Power Source Space Requirements 2. Precautions for Use p. 3 Operating Environment Using the Copier Properly Moving the Copier Care of Copier Supplies Chapter 2 Getting to Know Your Copier... - Page 3 Contents Chapter 3 Making Copies p. 23 1. Basic Copying Overview p. 24 Chapter 1 2. Placing Originals p. 26 Safety Notes 3. Manual Bypass Copying p. 32 4. Basic Functions Copy Paper Size p. 34 Chapter 2 Zoom Ratio p. 36 Image Density p.
- Page 4 Contents Chapter 4 Using the User Mode p. 77 1. Job Memory Input and Job Recall Job Memory Input p. 78 Recalling a Job from Memory p. 81 2. Zoom Memory Input p. 82 3. Meter Count, Toner Replenisher, and Drum Dehumidifier p. 83 4.
- Page 5 Contents Chapter 6 Troubleshooting p. 129 1. When This Type of Copy is Produced p. 130 Chapter 1 2. The Copier is not Functioning as Designed p. 132 Safety Notes Chapter 7 Miscellaneous p. 133 1. Specifications p. 134 Chapter 2 Copier Duplexing Document Feeder Getting to Know...
-
Page 6: Terms And Symbols For The Type Of Originals And Copy Paper
Terms and Symbols for the Type of Originals and Copy Paper A few special terms and symbols are used in this manual to designate types of originals and copy paper. This page explains about these terms and symbols. Feeding Direction (copy paper path) In this copier system, copy paper is taken up from the right-hand side of the copier and fed through the copier toward the left-hand side, face up onto the Copy Tray. -
Page 7: Chapter 1 Safety Notes
Chapter 1 Safety Notes This chapter explains about the operating environment, conditions, and precautions for use. 1. Installing the Copier p. 2 Installation Site Power Source Space Requirements 2. Precautions for Use p. 3 Operating Environment Using the Copier Properly Moving the Copier Care of Copier Supplies... -
Page 8: Installing The Copier
1. Installing the Copier Installation Site To ensure utmost safety and prevent possible malfunctions of the copier, install it in a location which meets the following requirements. A place away from a curtain or the like that A dust-free location. may catch fire and burn easily. -
Page 9: Precautions For Use
2. Precautions for Use Operating Environment The operating environmental requirements of the copier are as follows. Temperature : 10 °C to 30°C(50°F to 86°F) with a fluctuation of 10 °C(50°F) per hour Humidity : 15% to 85% with a fluctuation of 20% per hour. Using the Copier Properly To ensure the optimum performance of the copier, follow the precautions listed below. - Page 10 2. Precautions for Use...
-
Page 11: Chapter 2 Getting To Know Your Copier
Chapter 2 Getting to Know Your Copier This chapter gives you a brief description of the system and preliminary information about the different parts of the system. 1. Typical Types of Copies You Can Make with Your Copier p. 6 2. -
Page 12: Typical Types Of Copies You Can Make With Your Copier
1.Typical Types of Copies You Can Make with Your Copier Here’s a rundown of the features the copier is equipped with to turn out different types of copies. For the operations, see the relevant pages indicated by Original Copy p. 42 1-sided 1-sided 1-sided... -
Page 13: Zoom Ratio P
1. Typical Types of Copies You Can Make with Your Copier Zoom Ratio p. 36 Reduced, Full Size, Enlarged 1149O004AA 1149O004AA Auxiliary Functions p. 58 Page Insertion p. 62 Cover p. 58 1149O013AA 1149O013AA 1149O014AA OHP Interleaving p. 68 File Margin p. -
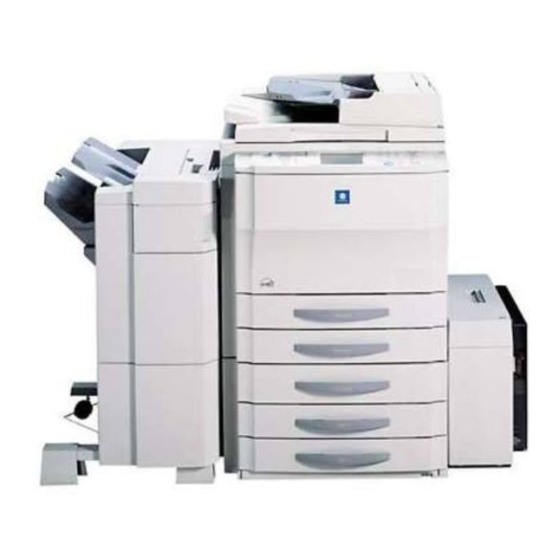
Page 14: System Overview
2. System Overview 10-Bin Sorter S-106 <Option> Permits sorting or grouping copies into up to 10 copy sets or stacks. Staple Sorter ST-104 <Option> Automatically staples copy sets or stacks that are sorted or grouped by the same function as that of S-106. 1136O020A 20-Bin Sorter S-208 <Option>... - Page 15 2. System Overview 1151O007AA 1156O012AA Automatic Document Feeder AF-5 Duplexing Document Feeder AFR-13 <Option> <Option> Capable of feeding in sheet originals one at a In addition to the function of the AF-5, it can time for making a copy or copies of each. turn over 2-sided originals for making copies.
-
Page 16: Copier Parts And Accessories
3. Copier Parts and Accessories Outside the Copier 1134O103CA Exit Tray Extender : Slide this Extender out when making copies on large-size paper. Exit Tray : Holds copies fed out of the copier. Front Door : Open to: Replace the Toner Bottle. p. -
Page 17: Inside The Copier
3. Copier Parts and Accessories Inside the Copier 1134O009AA Toner Bottle Holder : Swing open to replace the Toner Bottle. Toner Bottle : Contains toner. Replace it with a new one when the warning message tells you to. p. 108 Original Width Scale : Place the original along this Scale for correct positioning. -
Page 18: Options
3. Copier Parts and Accessories Options 1134O047AB 1134O046AA Paper Feed Cabinet (1-Drawer Type) Paper Descent Key : Press before sliding the Drawer out of the cabinet. 3rd Drawer : Holds up to 2,500 sheets of copy paper. p. 104 Paper Feed Cabinet (2-Drawer Type) 3rd Drawer : Holds up to 500 sheets of copy paper. - Page 19 3. Copier Parts and Accessories Options 1134O090CA Duplex Cabinet Duplex Unit : Turns over 1-sided copies for making 2-sided copies. Storage Drawer : Holds copy paper, toner and other supplies.
- Page 20 3. Copier Parts and Accessories Options 1156O010AA 20-Bin Sorter/20-Bin Staple Sorter Sort Bins (1st to 20th : Hold sorted or grouped copies, each capable of holding up to 50. Bin) Non-Sort Bin : Holds up to 100 copies fed out in the Non-Sort mode. Lock Release Lever : Press to unlock the Sorter from the copier for clearing a misfed sheet of paper or other service job.
- Page 21 3. Copier Parts and Accessories Options 1156O011AA 10-Bin Sorter /10-Bin Staple Sorter Lock Replase Lever : Press to unlock the sorter. pp. 110, 124 Sort Bins : Hold sorted or grouped copies. Stapler Door : Open to replace the Staple Cartridge. p.
-
Page 22: Control Panel Keys And Indicators
4. Control Panel Keys and Indicators User Mode d ª · e R s [ R s [ ¯ « • Z x I [ g x1.000 Job Recall { ƒ Mode Check Touch Panel Interrupt Key p. 22 Shows various screens and messages. Press to interrupt a current job with a See Touch Panel p. - Page 23 4. Control Panel Keys and Indicators Access d ª · e R s [ Energy Saver s [ ¯ « • x I [ g x1.000 I [ g Interrupt Start { ƒ Stop Panel Reset 1149O002EA 10 User Mode Key Press to show the User Mode menu.
-
Page 24: Using The Touch Panel
5. Using the Touch Panel What is the Touch Panel? When you turn ON the Power Switch, the Basic screen as shown below appears on the Touch Panel. It shows in messages and graphics the currently set functions, available functions to choose from, and the copier status. -
Page 25: Operating The Touch Panel
5. Using the Touch Panel (2) Message Display Shows the current copier status, operating instructions, precautions, and other data including the number of copies selected. 1156O062DA Example: Add paper (3) Basic Function/Key Display Shows the basic function keys and the corresponding functions currently selected for use. -
Page 26: Turning On And Off And Initial Mode
6. Turning ON and OFF and Initial Mode Turning ON and OFF Turning the Copier ON Press the Power Switch to the I (ON) position. Turning the Copier OFF Press the Power Switch to the (OFF) position. NOTE The Auto Power-OFF function will automatically shut down the copier a given period of time after the last activity. -
Page 27: Auxiliary Functions
7. Auxiliary Functions Panel Resetting Auto Power-OFF The Panel Reset key resets all control panel The Auto Power-OFF function shuts down the settings to default settings including the copier a given period time after the copier has number of copies and zoom ratio. been used last. -
Page 28: Interrupt
7. Auxiliary Functions Interrupt Access Number The Interrupt function allows you to interrupt a If an access number has been programmed, it current job and run a different one. Pressing allows only particular persons to use the copier the Interrupt key once sets the copier into the or a supervisor to keep track of the number of Interrupt mode. -
Page 29: Basic Copying Overview P
Chapter 3 Making Copies This chapter shows you how to make copies. The "Basic Copying Overview" offers quick, at-a-glance instructions for making copies. Each step is keyed to a page number with a more detailed description. 1. Basic Copying Overview p. 24 2. -
Page 30: Basic Copying Overview
1. Basic Copying Overview One of the most basic copying jobs is to make full-size ( 1.000) copies of the original. Place the original in position (step 1), set the number of copies to be made (step 8), and press the Start key (step 9). - Page 31 1. Basic Copying Overview Selecting the finishing type To sort copies To staple copies 6. Touch Finishing To punch holes in copies p. 48 1149O274CA Selecting the auxiliary functions To make a file margin 7. Touch Auxiliary. on the copy p.
-
Page 32: Placing Originals
2. Placing Originals Using the Automatic/Duplexing Document Feeder The Automatic/Duplexing Document Feeder automatically feeds in sheet originals placed on the Document Feed Tray one by one. After the copy cycle has been completed, it automatically ejects the original onto the Document Exit Tray. Some originals may not be suitable for reliable operation of the Document Feeder. - Page 33 2. Placing Originals Loading the Originals Using the Mixed Original Detection Mode Slide the Document Guide Plate to the size of the originals. Use the Mixed Original Detection mode to When using large size originals, flip make copies automatically from originals of up the Document Feed Tray assorted sizes loaded in the Extender.
- Page 34 2. Placing Originals Using the Single Automatic Document Feeding Mode (SADF Mode) This is the mode in which you load your originals one by one onto the Automatic/Duplexing Document Feeder to make a copy or copies from it. When you load the original, the copier automatically starts the copy cycle.
-
Page 35: Placing Originals On The Original Glass
2. Placing Originals Placing Originals on the Original Glass Different methods are used to place the original depending on its type. Use the appropriate procedure. Sheet Originals Highly Transparent Originals (Using transparencies and translucent paper for Raise the Original Cover and place the the original) original face down on the Original Glass. - Page 36 2. Placing Originals Making Copies from A Book Using Book Copy Mode ("Book" refers to an open bound original.) Place the open book so that its top Instructions for Original Placement edge is at the rear of the copier. Be sure to raise the Original Cover 15° or more before placing the original.
- Page 37 2. Placing Originals...
-
Page 38: Manual Bypass Copying
3. Manual Bypass Copying Use the Manual Bypass to make copies on paper not loaded in any drawer, or to copy onto transparencies, translucent paper, or any other special paper. When using the Multi Bypass Tray, you can load multiple sheets of copy paper. Copy Paper That Can be Used for Manual Bypass Non-Sort and 1-Sided Copy 2-Sided Copy... - Page 39 3. Manual Bypass Copying Touch Paper Useful Tip When you want to use inch size paper, touch on the screen given in step Inch and you have screen that allows you to select a inch paper size 1149O269CC Touch Input Size 1156O008CA When you use nonstandard size paper, touch...
-
Page 40: Basic Functions
4. Basic Functions In the following pages, we explain how to make the basic settings (copy paper, zoom ratio, and exposure level) to make copies. Basic Screen Key: Paper Touch this key to show a screen which allows you to select key: Exposure the paper size. - Page 41 4. Basic Functions Auto Drawer Switching Special Paper Setting If a symbol , or appears on the If the drawer currently selected for use paper select key shown on the Touch Panel, it runs out of paper and there is another means that particular drawer has been drawer loaded with paper of the same size designated for special paper.
-
Page 42: Zoom Ratio
4. Basic Functions Zoom Ratio When you touch on the Touch Panel, a screen appears that allows you to set the zoom Zoom ratio. You have six different ways to choose from to set the zoom ratio. Select one according to your need. - Page 43 4. Basic Functions For a Slightly Smaller Image Using Zoom Up/Down Keys This function lets you make a copy slightly Pressing the key changes the reduced in image size from that of the zoom ratio shown in 0.001 increments. original. You can keep touching the key to change the ratio quickly.
- Page 44 4. Basic Functions Using the 10-Key Pad Calling up a Ratio from Memory You may use the 10-Key Pad to directly You can store some of the most frequently enter the zoom ratio. used zoom ratios in memory and recall them later as necessary.
-
Page 45: Storing A Ratio In Memory
4. Basic Functions Storing a Ratio in Memory Touch Touch memory location key User Set in which to store the set zoom ratio. 1156O074DA 1149O303CA When the key is touched, the ratio is Touch shown on the key, indicating that it Store has been stored in memory. -
Page 46: Image Density
4. Basic Functions Image Density When you touch on the Touch Panel, a screen appears that allows you to set the Exposure exposure level or image density. You have a choice of three different ways to adjust the exposure level: Auto Exposure, Manual Exposure, or Photo mode. Select the appropriate mode according to your particular needs. - Page 47 4. Basic Functions Photo The copier can make a faithful reproduction of an original having a halftone image such as photos. The image density of the photo may be varied in nine steps. Touch Photo key is highlighted, Photo indicating that the copier is set into the Photo mode.
-
Page 48: Selecting The Original
5. Selecting the Original Copy Type In the following pages, let’s look at how we should make the settings for the type of copy we want to make from the type of original we have. When you touch on the Touch Panel, a screen appears that allows you to set the Orig. -
Page 49: Book
5. Selecting the Original Copy Type 1 2[2in1] <accessed via 2in1> <Only when an Automatic Document Feeder and Duplex Unit are mounted> Copy Originals Select 1 2-[2in1] to make a 2-sided copy, through reduction, from four 1-sided originals. Each pair of originals will be placed side-by-side on either side of the copy. -
Page 50: Selecting Original
5. Selecting the Original Copy Type Selecting Original Copy Type Touch Orig. Copy Margin key for the original: When you’re going to make copies using 2 or 2 1, first check to see if your original has a file margin in it. The copier makes a necessary correction of margin position to make good copies out of it as long as you instruct it properly. - Page 51 5. Selecting the Original Copy Type # of Origs key If you’re going to make copies using 1 2, 1 [2in1], or 1 2-[2in1], you need to enter the number of your originals. Then the copier can arrange the pages in correct order. When you know the number of originals Setting Even/Odd Touch...
-
Page 52: Some Precautions For Making Copies
5. Selecting the Original Copy Type Some Precautions for Making Copies Loading the Originals Use the following procedure when loading originals to make 1-sided copies from 2-sided originals Load the originals crosswise. If the originals are loaded lengthwise, the directions of the copy images will be mixed up. Correct: Incorrect: 2-Sided Originals... - Page 53 5. Selecting the Original Copy Type Precautions for 2-in-1 Separation Copying When the 2-in-1 separation function is selected, the copier automatically selects an enlargement ratio. You can nonetheless make a full-size copy. User’s Choice allows you to program a default zoom ratio, paper size, margin setting, and erase setting.
-
Page 54: Finishing Mode
6. Finishing Mode In the following, we explain about different finishing functions and setting procedures. When is touched on the Touch Panel, a screen appears that allows you to set a Finishing particular finishing function. Finishing Functions Non-Sort All copies are fed out without being sorted, grouped, stapled, or punched. -
Page 55: Group
6. Finishing Mode Group Copies <Only when a Sorter or Staple Sorter is mounted> 1st Bin Originals The copies made from each single original are separated into groups. Each group 2nd Bin contains the same number of copies. 3rd Bin 1076O147 Hole Punch Copies... -
Page 56: Selecting The Finishing Function
6. Finishing Mode Selecting the Finishing Function Sort / Group / Sort-and-Staple Touch the desired finishing function key. Removing Copies from the Sorter After the Sort, Group, or Sort Staple mode is finished, the bins will shift upward in position. When all movemet has ceased, then remove your copy sets or stacks from the bins. -
Page 57: Manual Staple
6. Finishing Mode Manual Staple Hole Punch <To staple copy sets made in Sort or copy Touch the desired finishing function stacks made in Group> key. Check that each copy set or stack has been fed into the Sorter Bin. NOTE Copies made in Non-Sort cannot be stapled manually... - Page 58 6. Finishing Mode Using the Manual Staple Function <To use as a stapler> *When a 10-Bin Staple Sorter is mounted. Align the sheets of paper neatly. Touch . Then, the paper stack Staple in the Sorter Bin will be stapled together.
- Page 59 6. Finishing Mode *When a 20-Bin Staple Sorter is mounted Align the sheets of paper neatly. Stapling Position 1149O085AA NOTES Make sure of the stapling position and 1134O039AA press the paper stack against the bracket. Insert the paper stack into the 1st Bin. Never attempt to reach for the stapling position.
-
Page 60: Functions
6. Finishing Mode Instructions for Loading Originals for the Finishing Functions Note the correct direction of the originals if the copies are to be stapled either in Sort Staple or Manual Staple Mode. Using the Automatic/Duplexing Document Feeder Load the originals crosswise in the document feeder. Ensure also that the stapling position is located as shown below. - Page 61 6. Finishing Mode Note the correct direction of the originals if the copies are to be punched using Hole Punch. NOTE Hole Punch is possible only when your copier is equipped with a 20-Bin Staple Sorter. Using the Automatic/Duplexing Document Feeder Load the originals so that the punched holes in them are located as shown below.
-
Page 62: Auto Dual Function
6. Finishing Mode Auto Dual Function Each of the Sort Bins holds up to 50 (*25) sheets of paper. The Auto Dual function, however, allows sorting of copies of up to 100 (*50) originals under certain conditions. NOTE All figures in the following text are given based on the 20-Bin Staple Sorter and 20-Bin Sorter. - Page 63 6. Finishing Mode Auto Dual Function in Group Mode When more than 51 (*26) copies are to be grouped together into one group, the Sorter or Staple Sorter uses the subsequent bin to continue grouping the copies. Original Copies Bins Used 1st to 50th (*25th) copies 1st Bin 51st (*26th) to subsequent copies...
-
Page 64: Auxiliary Functions
7. Auxiliary Functions These pages explain about convenient functions offered as the Auxiliary functions and how to set these features. When the key on the Touch Panel is touched, the Auxiliary Auxiliary function menu screen appears. Cover The Cover mode lets you make a front cover or a front and back cover for a copy set by copying the first page or the first and last page of an original set on different paper from the normal copy paper, such as colored paper. - Page 65 7. Auxiliary Functions Using the Cover Mode Touch Touch the key for Cover Sheet. Cover 1149O321CA 1156O076DA Touch the key for Front or Back. Select the drawer in which paper for the cover has been loaded in step 5. 1156O075AA 1156O077DA Touch Enter...
- Page 66 7. Auxiliary Functions Count the number of your originals and enter that number from the 10-Key Pad. 1149O045AA NOTES The maximum number of originals that can be entered is 61. Press the Clear key to correct a number entry. Useful Tip The copier offers a function that automatically counts the number of originals (Auto Count).
-
Page 67: Auto Original Count
7. Auxiliary Functions Auto Original Count The copier offers a feature that automatically counts the number of originals. It can be used by touching Auto Count 1149O332CA Press the Start key to start the original Using the Auto Count Function count sequence. -
Page 68: Page Insertion
7. Auxiliary Functions Page Insertion Page Insertion allows you to insert a blank sheet of paper (e.g., colored paper) into the copy set. Two different functions are available. Select the appropriate one according to your need. *The key is shown only when the copier is equipped with a document feeder. Page Insertion Functions Page Insertion <Copied Inserts>... - Page 69 7. Auxiliary Functions Specifying the Place for an Insert In the Page Insertion mode, you must specify where to place an insert. Two ways are available to specify the insert places, either ADF Detection or 10-Key Input. ADF Detection (automatic detection) Put a sheet of paper of a different size from the originals at your desired places in the original set (for convenience, let us call this paper the insert marker), load the original set onto the document feeder, and let the copier start the original count sequence.
- Page 70 7. Auxiliary Functions Using Page Insertion <ADF Detection> Select the paper source in which paper Touch Page Insertion for inserts has been loaded in step 3. 1149O334CA Touch the appropriate key for Copy 1156O079DA Onto Inserts to select whether to copy Touch Enter onto inserts (YES) or not (NO).
- Page 71 7. Auxiliary Functions Load the original set containing insert Put an insert marker into the desired markers into the document feeder. place in the original set. (Insert markers can be used in up to 20 places.) Insert Marker Original Set Insert Marker 1149O096AA 1134O070AA...
- Page 72 7. Auxiliary Functions Using Page Insertion <10-Key Input> Select the paper source in which paper Touch Page Insertion for inserts has been loaded in step 3. 1156O079DB 1149O344CB Touch Enter Touch the appropriate key for Copy Onto Inserts to select whether to copy onto inserts (YES) or not (NO).
- Page 73 7. Auxiliary Functions From the 10-Key Pad, enter a number Touch Enter for placement position no. 1. Load the original set into the document feeder. 1149O344CB Example 1: To place a copied insert at the 2nd position from top, enter 2 for position no.1. 1145O339DA Original Set Copy Set...
-
Page 74: Ohp Interleaving
7. Auxiliary Functions OHP Interleaving When you make copies on transparencies, the OHP Interleaving function inserts copied or non-copied interleaves after each transparency. Four different functions are available. Select the appropriate one according to your need. Functions Single Copy <Copied Interleaves> The copier copies onto OHP transparencies Originals Copies... - Page 75 7. Auxiliary Functions Multiple Copy <Copied Interleaves> The copier copies onto OHP transparencies Originals Copies and, for the 1st set, inserts a copied sheet of paper after each transparency. Also, the copier sorts extra copies into a specified number of sets. Copied Interleaves Extra Copies...
- Page 76 7. Auxiliary Functions Using OHP Interleaving Select the size of Insert Paper. Load OHP transparencies onto the Multi Bypass Tray. (Up to 20 sheets of OHP transparencies can be placed on the tray.) 1156O080DA 1145O367CB Touch Enter Touch OHP Interleaving Enter the number of copy sets to make from the 10-Key Pad.
- Page 77 7. Auxiliary Functions Load the originals into the document feeder. 1149O097AA NOTE If you make each copy through the Original Glass, start with the last page of the set. "Placing Originals" p. 29 Press the Start key and the copier starts the copy cycle for OHP Interleaving.
-
Page 78: File Margin
7. Auxiliary Functions File Margin The copier provides a file margin along the leading edge for your ease in filing. There are four different ways available for making a file margin. Use the one that is most suited to your need. Functions Shift-for-Margin The image of the original is shifted in the crosswise... - Page 79 7. Auxiliary Functions Using File Margin Select the "Width" of the margin. Touch File Margin 1149O353DA 1149O352CA Place the original. If you use a document feeder, loading NOTE your originals in the document feeder Having a margin width larger than will change the contents of the display.
-
Page 80: Edge/Frame Erase
7. Auxiliary Functions Edge/Frame Erase The copier erases a margin of a set width along the four edges, one edge, or at the center to erase shadows or other unwanted images. This feature is effective in erasing the communications record on a document received by fax. One of six different functions can be selected. - Page 81 7. Auxiliary Functions Using a Particular Edge/Frame Erase Function NOTE Touch Edge/Frame Erase The erase width represents that on the copy, not on the original. So, use care when making a reduction or enlargement copy. Example: Erasing the center of an A3 size book original on a copy reduced by 0.707.
-
Page 82: Using The Document Feeder
7. Auxiliary Functions Loading the Originals for Edge/Frame Erase <Using the Document Feeder> <Using the Glass> Erase Function Original Placement Erase Function Original Placement Left Edge Erase Left Edge Erase 1149O213AA 1149O207AB 1149O101AA 1149O109AA Right Edge Erase Right Edge Erase 1149O214AA 1149O208AA 1149O110AA... - Page 83 Chapter 4 Using the User Mode This chapter explains about the functions that are made available by using the User Mode key, i.e., Job Memory Input, Zoom Memory Input, Meter Count, Toner Replenisher, Drum Dehumidifier, User’s Choice and Data Send. 1.
-
Page 84: Job Memory Input And Job Recall
1. Job Memory Input and Job Recall Job Memory Input Up to 10 different, frequently used copying job programs can be stored in memory and recalled later as necessary. If "100 Accounts" or "1000 Accounts" is selected for "Copy Track" of Administrator Mode under User’s Choice, five more jobs can be stored in memory for each account (only for account #1 to #10), in addition to the ordinary jobs. - Page 85 1. Job Memory Input and Job Recall The job settings appear on the Touch Panel. 1149O360CA After you have checked the settings, touch Exit Touch on the Job Memory Input Exit screen. Then, the Basic screen reappears. 1149O359CA...
- Page 86 1. Job Memory Input and Job Recall Deleting a Program Touch Exit Press the User Mode key. Then, the Basic screen reappears. User Mode 1134P356CA Touch Job Memory Input 1149O362CA 1156O088DA Touch if you want to Account Job delete a job in Account Job memory. Touch , then touch the job Delete...
-
Page 87: Recalling A Job From Memory
1. Job Memory Input and Job Recall Recalling a Job from Memory Press the Job Recall key. Job Recall 1134P365CA Touch the number key in which the desired job has been stored. 1149O363CA If you want to recall a job from Account Job memory, touch and then the number key. -
Page 88: Zoom Memory Input
2. Zoom Memory Input Up to two different, frequently used zoom ratios can be stored in memory so you can use them later whenever necessary. For the Minimal ratio, X0.930 has been factory-set, but that can be changed as necessary. Storing a Zoom Ratio Press the User Mode Key. -
Page 89: Toner Replenisher
3. Meter Count, Toner Replenisher, and Drum Dehumidifier Meter Count Touching allows you to check the total count of each of the following five counters. Meter Count Total Counter 2-Sided Total Shows the total number of copies made Shows the number of 2-sided copies. since the installation of the copier. -
Page 90: User's Choice
4. User’s Choice The copier has been set so that the most frequently used settings are automatically selected in the initial mode. User’s Choice allows you to select the default settings which are automatically selected in the initial mode according to your own needs. By setting defaults that are most frequently used, time and effort to make extra settings will be eliminated when the copier is turned ON or when Auto Panel Reset is activated. - Page 91 4. User’s Choice Mixed Orig. Detection Expo. Mode Priority Select whether to enable ("ON") the Mixed Specify the default exposure mode selected Original Detection mode or not ("OFF") automatically when power is turned ON or when power is turned ON or panel reset. panel reset, either "Auto"...
- Page 92 4. User’s Choice Auto Panel Reset Intelligent Sort Select the time it takes the auto panel reset Select whether to turn "ON" or "OFF" the function to be activated from among "30 function that automatically switches sec.," "1 min.," "2 min.," "3 min.," or "5 between Sort and Non-Sort, selecting min.,"...
- Page 93 4. User’s Choice Custom 2in1 When a "Margin" setting is made, that It is possible to store in memory various setting is automatically selected when the settings that are automatically recalled when 2-in-1 separation copy is set. the 2-in-1 copy is selected. Functions that The initial setting is no margin.
- Page 94 OFF shuts down the copier a given period of This function allows the administrator to time after the last operation. keep track of the number of copies made by Initial Setting each account. EP4000 60min Select either "OFF," "100 Accounts," or EP5000 90min "1000 Accounts."...
- Page 95 4. User’s Choice Max. Copy Sets Determine the number of copies or copy sets that can be set using the 10-Key Pad. The initial setting is "OFF." User Help Set the help code to be transmitted by the user when a Data Terminal is mounted. For details, consult your Techninal Representative.
-
Page 96: Making The User's Choice Settings
4. User’s Choice Making the User’s Choice Settings Press the User Mode Key. Select the key of the page number on which the desired User’s Choice function is listed. User Mode For example, to change Finishing Priority from Non-Sort to Sort, touch 1134P356CA Touch User’s Choice... - Page 97 4. User’s Choice Touch Sort 1149O370CA Touch Enter Repeat steps 3 to 6 to make new settings for other User’s Choice functions. Touch Exit 1149O371CA...
-
Page 98: Copy Track Function
4. User’s Choice Copy Track Function The administrator of the copier should make the setting, either "100 Accounts" or "1000 Accounts." Setting the Copy Track Function Touch Press the User Mode key. Administrator Mode User Mode 1134P356CA Touch User’s Choice 1149O372CA Enter the administrator number using the 10-Key Pad. - Page 99 4. User’s Choice Touch Touch Copy Track Enter Touch Exit 1149O373CA Select the appropriate function. For example, to keep track of 100 accounts, touch and then 100 Accounts 1149O376CA Enter 1149O374CA Initialize the Copy Track function data. For example, you may touch Enter 1149O375CA NOTE...
- Page 100 4. User’s Choice Programming the ID # An ID # can be programmed when "100 Accounts" is selected. Press the User Mode key. Touch Administrator Mode User Mode 1134P356CA Touch User’s Choice 1149O372CA Enter the administrator number using the 10-Key Pad. 1156O088DA Touch 1149O235AB...
- Page 101 4. User’s Choice Touch Enter the ID # from the 10-Key Pad. Copy Track Data Then, touch Enter 1149O376CA 1149O243AA NOTES Select the page number on which the The ID number should be a 4-digit target account is shown. number. To correct a number entry, press the Clear key and then enter the new number.
- Page 102 4. User’s Choice Setting a Limit for Each Account A Limit can be set when "100 Accounts" is selected. Press the User Mode key. Touch Administrator Mode User Mode 1134P356CA Touch User’s Choice 1149O372CA Enter the administrator number using the 10-Key Pad. 1156O088DA Touch 1149O235AB...
- Page 103 4. User’s Choice Touch Enter a number for the Limit from the Copy Track Data 10-Key Pad. Then, touch Enter 1149O376CA 1149O244BA Select the page number on which the NOTES target account is shown. To correct a number entry, press the Clear key and then enter the new number.
- Page 104 4. User’s Choice Clearing Counters for Each Account A counter can be cleared for each account when "100 Accounts" or "1000 Accounts" is selected. Press the User Mode key. Touch Administrator Mode User Mode 1134P356CA Touch User’s Choice 1149O372CA Enter the administrator number using the 10-Key Pad.
- Page 105 4. User’s Choice Touch Press the Clear key and then touch Copy Track Data Enter 1149O376CA 1149O381CA NOTE Select the page number on which the target account is shown. If you want to clear the counters for other accounts, repeat steps 7 through Touch Enter Touch...
-
Page 106: Data Send
5. Data Send The copier provides a function that allows the user to tell his/her service shop the operating status of the copier by means of preset codes when a Data Terminal is mounted. For more details, consult your Technical Representative. 1156O088DA... -
Page 107: Chapter 5 When A Message Appears
Chapter 5 When a Message Appears This chapter explains about the various warning messages given on the Touch Panel and steps to take to correct these faulty conditions. It also covers the procedures to be used for replenishing supplies. 1. When the Message "The current Paper Drawer is empty." Appears p. -
Page 108: When The Message "The Current Paper Drawer Is Empty." Appears
1. When the Message "The current Paper Drawer is empty." Appears When the drawer currently selected for use runs out of paper, the message shown on the left appears. The current copy cycle is interrupted and you cannot then start a new copy cycle. - Page 109 1. When the Message "The current Paper Drawer is empty." Appears 2nd Drawer Slide the 2nd Drawer. Slide the Edge Guides snugly up against the paper stack. 1149O117AA 1149O120AA Slide the Edge Guides in the direction Slide the Drawer back in. of the arrows.
- Page 110 1. When the Message "The current Paper Drawer is empty." Appears 3rd Drawer (1-Drawer Type) Press the Paper Descent Key and slide Load another paper stack into the left the drawer out. half of the Drawer front side face down. Press the leading edge of the paper stack tightly up against the left side of the Drawer.
- Page 111 1. When the Message "The current Paper Drawer is empty." Appears 3rd/4th Drawer (2-Drawer Type) Slide out the Drawer. 1149O125AA Load the paper stack into the Drawer so that its front side faces down. 1149O116AA NOTE The paper should be Max.
- Page 112 1. When the Message "The current Paper Drawer is empty." Appears Place the paper stack onto the Paper Large Capacity Cassette Plate so that its front side faces up. Holding the Door Lock Release Lever, open the Cassette Door. 1134O054AA NOTES 1134O055AA When adding paper to a partially...
-
Page 114: When The Message "Replenish Toner." Appears
2. When the Message "Replenish Toner." Appears The message shown on the left appears when toner is soon running out. You can still make copies, but the image density will become lighter and lighter. It is recommended therefore that you replace the Toner Bottle with a new one as soon as possible. - Page 115 2. When the Message "Replenish Toner." Appears Tap a new Toner Bottle against a desk Check that the marking on the or other hard surface four to five times. Bottle is aligned with the marking Then, turn the Toner Bottle upside on the Toner Bottle Holder.
-
Page 116: When The Message "The Staple Cartridge Is Empty." Appears
3. When the Message "The Staple Cartridge is empty." Appears The message shown on the left appears when the staples are running out in a copier system equipped with a Staple Sorter. Replace the Staple Cartridge with a new one by following the procedure given below. - Page 117 3. When the Message "The Staple Cartridge is empty." Appears Insert the new Staple Cartridge in the Remove the sheet of paper from the 1st direction of the arrow until it clicks Bin and check that staples have been into position. driven into it.
- Page 118 3. When the Message "The Staple Cartridge is empty." Appears 20-Bin Staple Sorter Taking hold of the Lock Release Lever NOTE of the Staple Sorter, slide the Staple Check that no portion of the staple belt Sorter away from the copier. hangs out of the cartridge.
- Page 119 3. When the Message "The Staple Cartridge is empty." Appears Touch Staple The Staple Sorter automatically test-staples the paper 2 to 3 times. 1149O320CB Remove the sheet of paper and check that staples have been driven into it. 1136O017AA If no staples are evident, place another sheet of paper into the 1st Bin and repeat steps 7, 8, and 9.
-
Page 120: When The Message "A Paper Misfeed Has Been Detected." Appears
4. When the Message "A paper misfeed has been detected." Appears If a paper misfeed occurs during a copy cycle, the message shown on the left appears and that particular copy cycle is stopped in the middle of operation. Clear the misfed sheet of paper according to the procedure given below. -
Page 121: Misfeed Clearing Procedures Copier
4. When the Message "A paper misfeed has been detected." Appears Misfeed Clearing Procedures Copier Swing Transport Section Release NOTE Lever M2 down. Be careful not to touch the areas marked with High Voltage with bare hands. Caution Swing down the Front Door and remove the Exit Tray. - Page 122 4. When the Message "A paper misfeed has been detected." Appears Open the Right Door and pull out the In the same way, unload and reload the sheet of paper from the Paper Take-Up paper stack in the 2nd Drawer. Section.
-
Page 123: Copier (Multi Bypass Tray)
4. When the Message "A paper misfeed has been detected." Appears Multi Bypass Tray Unload the paper stack from the Multi Open and close the Front Door to reset Bypass Tray. the misfeed indication/message on the Then open the Right Door. Touch Panel. -
Page 124: Paper Feed Cabinet (2-Drawer Type)
4. When the Message "A paper misfeed has been detected." Appears Paper Feed Cabinet (2-Drawer Type) Open the Lower Right Door and pull To reset the paper misfeed indication out the sheet of paper. on the Touch Panel, open and close the Front Door. -
Page 125: Paper Feed Cabinet (1-Drawer Type)
4. When the Message "A paper misfeed has been detected." Appears Paper Feed Cabinet (1-Drawer Type) Open the Lower Right Door and pull To reset the paper misfeed indication out the sheet of paper. on the Touch Panel, open and close the Front Door. -
Page 126: Duplex Unit
4. When the Message "A paper misfeed has been detected." Appears Duplex Unit Open the Middle Left Door and Lower Slide out the Duplex Unit and open the Left Door. Pull out the sheet of paper Misfeed Removal Guide Plate. from the Transport Section. -
Page 127: Large Capacity Cassette
4. When the Message "A paper misfeed has been detected." Appears Large Capacity Cassette Press the Paper Descent Key. Press the Lock Release Lever and slide the cassette away from the copier. 1134O031AA 1134O028AA Holding the Door Lock Release Lever, Remove the sheet of paper. -
Page 128: Duplexing Document Feeder
4. When the Message "A paper misfeed has been detected." Appears Duplexing Document Feeder Remove the original stack from the Raise the Duplexing Document Feeder. Document Feed Tray. Gently pull out the original from the Document Turnover/Feed Unit. 1156O014AA 1156O017AA Swing open Document Feed Unit Door F1 and gently pull out the original. -
Page 129: Automatic Document Feeder
4. When the Message "A paper misfeed has been detected." Appears Automatic Document Feeder Remove the original stack from the Remove the original from the Original Document Feed Tray and the originals Glass and lower the Automatic fed onto the Document Exit Tray. Document Feeder. -
Page 130: Sorter/Staple Sorter
4. When the Message "A paper misfeed has been detected." Appears Sorter/Staple Sorter 10-Bin 20-Bin Holding the Lock Release Lever, slide Holding the Lock Release Lever, slide the Sorter/Staple Sorter away from the the Sorter/Staple Sorter away from the copier. copier. -
Page 131: When Appears
5. When 5. When Appears Appears When appears in the lower left corner of the Touch Panel, it means that part of the copier mechanism is malfunctioning. Call your Technical Representative immediately. If a copy function involving the malfunctioning component is selected, the message "The XXX is malfunctioning. -
Page 132: What Does Each Message Mean
6. What Does Each Message Mean? Message Cause Action A malfunction has been detected. The copier malfunctioned and is Call and inform your Technical Please call your technical rep. and unable to make copies. Representative of the code being provide the following code: shown on the Touch Panel. - Page 133 6. What Does Each Message Mean? Message Cause Action Original(s) left on the Glass. You have left an original on the Remove the original from the Original Glass. Glass. 2-sided copying is not possible on You have selected a paper size that Select a standard copy paper size paper sizes less than A5 size.
- Page 134 6. What Does Each Message Mean? Message Cause Action The maximum # for 2-sided copies You have entered 51 or more for If you press the Start key, the is 50. Please reenter. the number of copies to be made in copier starts the copy cycle to a 2-sided copying cycle.
-
Page 135: Chapter 6 Troubleshooting
Chapter 6 Troubleshooting This chapter gives you instructions on how to troubleshoot copier malfunctions by showing actual examples. 1. When This Type of Copy is produced p. 130 The image is too light. The image is too dark. The copy is blurry. The copy has dark specks or spots. -
Page 136: When This Type Of Copy Is Produced
1. When This Type of Copy is produced Symptom Possible Cause Action The image is too light. The exposure level for the Auto Change the setting of "Auto Exposure mode is set at "Lighter." Exposure Level" of User’s Choice. p. 85 Or, cancel the Auto Exposure mode and select Manual Exposure to adjust the exposure level to... - Page 137 1. When This Type of Copy is produced Symptom Possible Cause Action The copy has dark specks or spots. The Original Glass is dirty. Wipe the Original Glass clean with a soft dry cloth. p. 140 The Original Pad or Document Wipe the Original Pad or Feed Belt is dirty.
-
Page 138: The Copier Is Not Functioning As Designed
2. The Copier is not functioning as designed Symptom Check for: Action The Touch Panel shows nothing. Is only the Start key lit up green? The copier is in the Energy Saver mode. Press any key on the control panel to cancel Energy Saver. -
Page 139: Chapter 7 Miscellaneous
Chapter 7 Miscellaneous This chapter gives complete specifications of the copier system and options, plus care and reference information to facilitate your use of the copier. 1. Specifications p. 134 Copier Duplexing Document Feeder Automatic Document Feeder Sorter (10-Bin) Sorter (20-Bin) Staple Sorter (10-Bin) Staple Sorter (20-Bin) Paper Feed Cabinet (2-Drawer Type) -
Page 140: Specifications
1. Specifications Copier EP4000/EP5000 EP4000 EP5000 Type Console Copier Platen Type Stationary Photoconductor Copying System Electrostatic Dry Powdered Image Transfer to Plain Paper Developing System Micro-Toning System Fusing System Lamp-Heated Roller Types of Original Sheets, Books, and other three-dimensional objects... -
Page 141: Duplexing Document Feeder
1. Specifications Duplexing Document Feeder AFR-13 Document Feeding Standard Mode : 1-sided original, 2-sided original, 2-in-1, Single Feeding System Mixed Original Detection Mode: 1-sided Mixed Original Detection 2-sided Mixed Original Detection Kinds of Original Plain paper Original Weight 1-sided original Mode, 2-in-1 Mode : 50g/m to 110g/m 2-sided original Mode... -
Page 142: Sorter (10-Bin)
1. Specifications Sorter S-106 No. of Bins Sort Bins : 10 Modes Non-Sort Mode, Sort Mode, Group Mode Kinds of Paper Non-Sort Mode Plain paper, Recycled paper Special Paper Thick paper, Transparencies, Translucent paper Sort Mode, Group Mode Plain paper, Recycled paper Paper Size Non-Sort Mode : A3L to A6L... -
Page 143: Staple Sorter (10-Bin)
1. Specifications 1. Specifications Staple Sorter ST-104 No. of Bins Sort Bins : 10 Modes Non-Sort Mode, Sort Mode, Group Mode, Sort-Staple Mode Kinds of Paper Non-Sort Mode Plain paper, Recycled paper Special Paper Thick paper, Transparencies, Translucent paper Sort Mode, Group Mode, Sort-Staple Mode Plain paper, Recycled paper Paper Size Non-Sort Mode... -
Page 144: Paper Feed Cabinet (2-Drawer Type)
1. Specifications Paper Feed Cabinet PF-205 Kinds of Paper Plain paper, Recycled paper : Weighing 60g/m to 90g/m Copy Paper Size 3rd Drawer : A5L to A3L 4th Drawer : A4L to A3L Paper Feeding System Automatic feeding from drawer Total Drawer Capacity : 1,000 sheets (500 sheets Power Source DC24V supplied from copier... -
Page 145: Large Capacity Cassette
1. Specifications Large Capacity Cassette C-301 Type Automatic paper supply and take-up from a 3,000-sheet capacity Cassette Installation Fixed to copier by means of dedicated Stand with Slide Rails Types of Paper Plain paper, Recycled paper: Weighing 60g/m to 90g/m Paper Size Capacity 3,000 sheets (80g/m... -
Page 146: Care Of The Copier
2. Care of the Copier Cleaning Turn OFF the Power Switch of the copier when cleaning. Original Glass Housing Wipe the surface of the Original Glass Wipe the surface of the Housing clean clean with a soft, dry cloth. with a soft cloth dampened with mild home detergent. - Page 147 2. Care of the Copier Corona Units Document Transport Belt Gently slide out the Upper Corona Wipe the surface of the Document Unit Cleaning Lever as far as it goes. Transport Belt clean with a soft cloth dampened with mild home detergent. 1139O1910A 1136O073AA Gently slide the Cleaning Lever back...
-
Page 148: Function Combination Matrix
3. Function Combination Matrix Basic Orig. Copy Functions Set Last Paper Zoom Functions Set First Auto Paper Paper Manual Paper Auto Size Zoom Fixed Ratio Zoom Memory 1[2in1] 1 2[2in1] 1 1 [2in1] 1 2[2in1] Book 1 Book 2 Mixed Orig. Non-Sort Sort Group... - Page 149 3. Function Combination Matrix Finishing Auxiliary Functions Set Last Inter- File Margin leaving Functions Set First Auto Paper Paper Manual Paper Auto Size Zoom Fixed Ratio Zoom Memory 1[2in1] 1 2[2in1] 1 1 [2in1] 1 2[2in1] Book 1 Book 2 Mixed Orig.
- Page 150 3. Function Combination Matrix Conditions for Combined Functions A : The functions can be combined when the manual bypass paper size is input. B : The combination is possible if Auto Paper or Auto Size has been set, but not if Manual is set. (One of the functions must be canceled before a copy cycle can be initiated.) C : When OHP Interleaving is selected, the copier automatically selects A4 crosswise paper and therefore you cannot select paper of any other size.
-
Page 151: Description Of Copy Paper Size And Zoom Ratio Table
4. Description of Copy Paper Size and Zoom Ratio Table Paper Size Name Size (Metric) Size (Inch) 297 mm 420 mm 11-3/4" 16-1/2" 257 mm 364 mm 10" 14-1/4" 210 mm 297 mm 8-1/4" 11-3/4" 182 mm 257 mm 7-1/4" 10"... -
Page 152: Index
5. Index Data Send p. 100 (2in1) p. 42 Description of Copy Paper Size p. 145 1 p. 42 Drum Dehumidifier p. 83 2 p. 42 Drum Dehumidifier (User’s Choice) p. 86 2(2in1) p. 43 1(2in1) 1 p .43 2 1 p. 42 Edge/Frame Erase p. -
Page 153: Placing Originals P
5. Index OHP Interleaving p. 68 Original Copy Default (User’s Choice) p. 88 Original Thickness (User’s Choice) p. 86 Page Insertion p. 62 Panel Reset Key p. 16 Panel Resetting p. 21 Paper Priority (User’s Choice) p. 85 Photo Mode p. 41 Placing Originals p.