Table of Contents
Advertisement
Operating and Service Manual
Agilent 346A/B/C Noise Source
(Including Options
001, 002, and 004)
Serial Numbers
Instruments with serial prefixes 4124A and above are
supplied with the noise source ENR data preloaded on diskette
-see Chapters 3 & 4.
Manufacturing Part Number: 00346-90148
June 2013
Supersedes: June 2009
© Copyright 2001-2013 Agilent Technologies
Advertisement
Table of Contents

Related Manuals for Agilent Technologies 346A


Summary of Contents for Agilent Technologies 346A
- Page 1 Operating and Service Manual Agilent 346A/B/C Noise Source (Including Options 001, 002, and 004) Serial Numbers Instruments with serial prefixes 4124A and above are supplied with the noise source ENR data preloaded on diskette -see Chapters 3 & 4. Manufacturing Part Number: 00346-90148...
- Page 2 Notice Information contained in this document is subject to change without notice. Agilent Technologies makes no warranty of any kind with regard to this material, including, but not limited to, the implied warranties of merchantability and fitness for a particular purpose. Agilent...
- Page 3 Technologies from another country. Agilent Technologies warrants that its software and firmware designated by Agilent Technologies for use with an instrument will execute its programming instructions when properly installed on that instrument. Agilent Technologies does not warrant that the operation of the instrument, or firmware will be uninterrupted or error free.
- Page 4 WARNING A warning calls attention to a procedure, practice or the like, which, if not correctly performed or adhered to, could result in injury or the loss of life. Do not proceed beyond a warning until the indicated conditions are fully understood and met. A caution calls attention to a procedure, practice or the like, which, if not CAUTION correctly performed or adhered to, could result in damage or the...
- Page 5 Declaration of Comformity A copy of the Manufacturer’s European Declaration of Conformity for this instrument can be obtained by contacting your local Agilent Technologies sales repre- sentative.
-
Page 6: Table Of Contents
Table of Contents Page 1. General Information Introduction ............2 Specifications . - Page 7 Introduction ............36 Loading the ENR Data from Diskette .
-
Page 8: General Information
General Information... -
Page 9: Introduction
General Information Introduction Introduction This manual contains operating and service information for the Agilent Technologies model 346A, 346B, and 346C Noise Sources. Included in the manual is information necessary to operate the noise sources. Specifications The “Specifications - Table 1-1” on page 3, page 4, and page 5 are performance standards or limits against which the noise source may be tested. - Page 10 1. ENR values are given at cardinal frequency points over the frequency range of each noise source. Calibrated values at cardinal frequencies printed on each noise source label and on a separate report supplied with each Agilent 346 Noise Source. Specifications are valid at calibration temperature only.
- Page 11 0.03 - 5.0 <1.15:1 0.07 5.0 - 18.0 <1.25:1 0.11 346C 0.01-18.0 <1.25:1 0.11 18.0 - 26.5 <1.35:1 0.15 1. Maximum change in complex reflection coefficient between source ON and source OFF at all frequencies for 346A only: 0.01. Chapter 1...
- Page 12 Impedance 50 ohm nominal Maximum reverse power 1 Watt Power required 28 ±1 V 60 mA peak, 30 mA average for source ON 346A/B 45 mA 346C Connectors 346 Output APC-3.5 (male) standard 346 Input Bias: BNC (f) 1. Also mates with female SMA connectors. See option information for other connector styles.
- Page 13 United States National Institute of Standards and Technology (NIST) and/or The United Kingdom National Physics Laboratories (NPL). Agilent therefore reserve the right to change the overall expanded uncertainties based on changes in uncertainty values within the National Standards Institutes.
- Page 14 Introduction Excess Noise Ratio Expanded Uncertainty (U(Y)) - Table 1-2 Continued Characteristic ENR (U(Y)) Specification Instrument model Frequency ENR Uncertainty (±dB) (GHz) 346A 0.01- 1.5 0.21 1.5 - 3.0 0.20 3.0 - 7.0 0.20 7.0 - 18.0 0.23 346B 0.01- 1.5 0.20...
- Page 15 General Information Introduction Supplemental Characteristics - Table 1-3 Supplemental Characteristics ENR variation with <0.01 dB/°C for 30 MHz to 26.5 GHz temperature: ENR variation with Internal current regulator for <0.02 dB variation voltage: for 28 1 V Switching speed: For repetitive operation (in previous state for less than 5 seconds): Turn-on: <...
-
Page 16: Instruments Covered In This Manual
Manual changes for these older models are found in Chapter 2 “Manual Changes”. Agilent Technologies are migrating their existing product serial numbers NOTE to a new format. All new products use this new format. The format is the... -
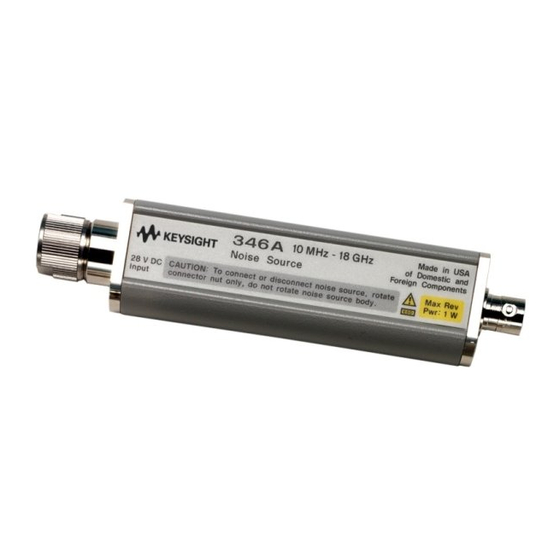
Page 17: Description
The output connector is a male APC-3.5 on the standard noise sources. Type-N and APC-7 connectors are available as options for the Agilent 346A and 346B Noise Sources. In addition to these general characteristics, certain characteristics apply to the specific models. -
Page 18: Model Characteristics Of Individual Noise Sources
Nominal ENR is 15 dB over the specified frequency range. specified frequency range. specified frequency range. Not directly usable for Suitable for Agilent/HP 8970A Suitable for Agilent/HP 8970A Agilent/HP 8970A IF attenuator IF attenuator calibration IF attenuator calibration calibration (Special Function (Special Function 33). -
Page 19: Warranty
1-3). The 9/16" torque wrench will not fit these older models. Figure 1-3 Agilent/HP Noise source with Older APC-3.5 Connector Options The Agilent 346A and 346B Noise Sources are available with the following output connector options: • Option 001, Type-N (male) • Option 002, APC-7 •... -
Page 20: Installation
Agilent Technologies office. If the shipping container is damaged, or the cushioning material shows signs of unusual stress, notify the carrier as well as the Agilent Technologies office. Keep the shipping materials for the carrier’s inspection. -
Page 21: Original Packaging
Original Packaging Container and materials identical to those used in factory packaging are available through Agilent Technologies offices. If the noise source is being returned to Agilent Technologies for servicing, attach a tag indicating the name and address of the company, the technical contact person, phone number and extension, the model number, serial number, type of service being requested, and failure symptoms if applicable. -
Page 22: Operation
General Information Operation Operation This section refers to operation with noise figure meters. For more detailed operating instructions, refer to the operating manual for the noise figure meter used. CAUTION Use a dc blocking capacitor to protect the noise source from damage when connected to any system where a dc voltage is present on the output center conductor. -
Page 23: Operating Environment
Power Meter and Power Minimum Sensitivity: 0.1 nW Agilent/HP E4418A Sensor Frequency Range: 10 MHz to with 18 GHz Agilent/HP 8481D, or E4412A, or E9300A Power Supply Voltage: 28.0 1.0 V Agilent/HP 6028A Current: 100 mA Noise Figure Meter Voltage Output: 28.0 1.0 V Agilent/HP 8970B Input Noise Figure:<7.4 FdB... -
Page 24: Operator's Check
Step 4. Verify that the result of the measurement is within the following limits and hence the noise source is operating correctly: • Agilent 346A Power output = -66 4 dBm. • Agilent 346B Power output = -56 4 dBm. - Page 25 General Information Operation Operator’s Check with Agilent/HP 8970B Noise Figure Meter (Check 2a) Step 1. Remove any cables from the noise figure meter input. Press PRESET After 5 seconds, verify the noise figure display shows --FdB and the left display shows 30 MHz.
- Page 26 Wait until the preset routine has completed before proceeding. NOTE The preset condition used is the NFA default of Preset (Factory) Step 3. Connect the 346A/B/C to the NFA Input port using a BNC cable, as shown in Figure 1-7. Figure 1-7 Operator’s Check Test Setup 2b Step 4.
- Page 27 Operation Step 9. Press the key to highlight the ENR Value column of the table. Step 10. Enter the ENR value of the 346A/B/C at 100 MHz (0.1 GHz) using the numeric keypad followed by the menu key. Step 11. Press the key.
- Page 28 Step 22. Monitor the power value which appears in the manual measurement screen. Figure 1-9 shows a typical example of this. NOTE The monitored value is only to be used to indicate if the 346A/B/C is switching the Excess Noise “On” and “Off” by showing a change in power value.
-
Page 29: Operator's Maintenance
Operation Figure 1-9 Typical example of power reading with Noise Source Off Step 23. If there is not a change in value, return the 346A/B/C to Agilent Technologies for repair. Operator’s Maintenance Proper connector care is a vital part of the maintenance which should be performed by the user. - Page 30 General Information Operation • Use isopropyl or ethyl alcohol on a swab to clean connectors. Absorbent, lint-free paper wrapped around the end of tweezers is recommended. Carefully clean the conductive surfaces and avoid wetting the plastic parts inside the connector with alcohol. After cleaning, be sure connector is blown dry before re-assembly.
-
Page 31: Performance Tests
Due to the complex test equipment involved, there are no recommended performance tests for the user to perform. Return the noise sources to Agilent Technologies when tests are required to verify its performance and for periodic re-calibration. The suggested interval before initial re-calibration is one year. -
Page 32: Adjustments
General Information Adjustments Adjustments There are no adjustments that can be made on the noise sources by the user. Chapter 1... -
Page 33: Replaceable Parts
Noise Sources. Figure 1-10 shows a typical Noise Source being prepared for parts replacement at modular level by removing the four end screws (two at each end). If the Agilent 346A/B/C is opened and parts replaced, the Noise Source NOTE will require calibration. -
Page 34: Replaceable Parts List
00346-60170 00346-60194 00346-60193 00346-60194 00346-60157 Option 004 00346-60171 00346-60194 00346-60193 00346-60194 00346-60157 Table 1-8 Replaceable Labels List Part Number Label Descriptions 00346-80006 346A Label Caution 00346-80007 346BA Label Caution 00346-80008 346C Label Noise 00346-80012 Label - Blank ENR Chapter 1... - Page 35 General Information Replaceable Parts Figure 1-10 Preparing for Parts Removal/Replacement Chapter 1...
-
Page 36: Service
Figure 1-11 shows a simplified diagram of the noise source. When driven by a +28V pulse, the 346 produces an output noise spectrum with an ENR of approximately 5.0 dB for the 346A and approximately 15.0 dB for the 346B and 346C. The noise generator is an avalanche diode positioned into a 50 ohm system. -
Page 37: Repair
When returning a 346 or Noise Source to Agilent Technologies for repair or calibration, please specify whether an ENR Data Diskette is needed. When the 346 is used with an Agilent Noise Figure Analyzer NFA, the ENR Data Diskette is used to automatically load the ENR values into memory. - Page 38 General Information Service Table 1-9 Agilent Technologies Sales and Service Offices UNITED STATES Agilent Technologies (tel) 1 800 452 4844 CANADA Agilent Technologies Canada Inc. Test & Measurement (tel) 1 877 894 4414 EUROPE Agilent Technologies Test & Measurement European Marketing Organization...
-
Page 39: Manual Changes
Manual Changes This chapter contains information for adapting this manual to Agilent/HP 346B Noise Sources with serial number prefixes of 2015A and 1935A. -
Page 40: Change A
Manual Changes Manual Changes Manual Changes To adapt this manual to your instrument, refer to Table 2-1. Make all of the manual changes listed opposite your instrument’s serial number prefix. Perform these changes in the sequence listed. Table 2-1 Manual Changes by Serial Number Instrument Serial Number Prefix Make Manual Changes... -
Page 41: Using The Enr Data Diskette
Using the ENR Data Diskette... -
Page 42: Introduction
Using the ENR Data Diskette Introduction Introduction The Agilent 346 and 347 series of Noise Sources are supplied with the noise source ENR data preloaded on diskette to allow easy downloading into the Agilent NFA series Noise Figure Analyzers. This eliminates time consuming and error prone manual keying of the ENR values. -
Page 43: Loading The Enr Data From Diskette
Using the ENR Data Diskette Loading the ENR Data from Diskette Loading the ENR Data from Diskette To load the ENR data from the diskette and use the data as the current ENR table, proceed as follows: Step 1. Power up the Noise Figure Analyzer and wait for the power-up sequence to complete. - Page 44 ENR filename format A0100123.enr, has the following format: • The first letter shows the noise source type and can be: — A = 346A — B = 346B — C = 346C — R = R347A — Q = Q347A •...
- Page 45 Using the ENR Data Diskette Loading the ENR Data from Diskette Model ID are correct and compare the Frequency and ENR values with the supplied Calibration Sheet or the data printed on the body of the Noise Source. Chapter 3...
-
Page 46: Saving The Enr Data To The Noise Figure Analyzer's Internal Memory
Using the ENR Data Diskette Saving the ENR Data to the Noise Figure Analyzer’s Internal Memory Saving the ENR Data to the Noise Figure Analyzer’s Internal Memory To save the current Noise Source ENR data from the diskette (A: drive) to the Noise Figure Analyzer’s internal memory (C: drive) proceed as follows: Step 1. -
Page 47: Copying The Enr Data To The Noise Figure Analyzer's Internal Memory
Using the ENR Data Diskette Copying the ENR Data to the Noise Figure Analyzer’s Internal Memory Copying the ENR Data to the Noise Figure Analyzer’s Internal Memory To copy the Noise Source ENR data from the diskette (A: drive) to the Noise Figure Analyzer’s internal memory (C: drive) proceed as follows: Step 1. -
Page 48: Enr File Format
ENR File Format... -
Page 49: Format Details
ENR File Format Format Details Format Details An ENR file: • includes all data currently supplied on the printed noise source Calibration Certificate • can be viewed and edited using a standard text editor (for example Notepad) • is simple to create and interpret •... - Page 50 ENR File Format Format Details whitespace. • Whitespace following the ']' is ignored. • The file must start with one or more header fields (ignoring comments and blank lines). All header fields must appear at the beginning of the file before the ENR data records.
-
Page 51: Format Details
ENR File Format Format Details Table 4-2 Optional header fields Fieldname Description Optional- Description Example Value Model identifies the modelcode model code [Model 346B] noise source string model number Option Identifies any optioncode option code [Option 001] model code string option Caldate date of... - Page 52 ENR File Format Format Details comments or header fields as ENR data. ENR data has the general form: Freq [Funit] ENR [Eunit] [Euncert [on_mag on_phase off_mag off_phase [Runcert]]] Note that the square brackets denote optional fields. Field separator Each field is separated by whitespace. A single ’,’ is allowed within or instead of the whitespace.
- Page 53 ENR File Format Format Details The reflection coefficient data is optional and is formatted as four fields Reflection coefficient data (on_mag, on_phase, off_mag, off_phase): • reflection magnitude with noise source on • reflection angle (in degrees) with noise source on •...
-
Page 54: Examples
This first example shows a simple ENR file where the Frequency and Example 1 ENR values have been entered manually into the Noise Figure Analyzer: # ENR Data File # Created by N8973A Agilent NFA Series Noise Figure Analyzer # Serial Number US00000012 Firmware Revision A.00.01 # 13:37:07... - Page 55 ENR File Format Examples The second example is a typical ENR file supplied on diskette with a Example 2 Noise Source: [Filetype ENR] [Version 1.0] [Serialnumber 3318A15364] [Model 346B] [Caldate 20000110.13:53:54] [Temperature 24C] [Humidity 40%] Frequency Refl. Coef. On Refl. Coef. Off Phase Deg Phase Deg 10 MHz...
-
Page 56: Caring For Connectors
Caring for Connectors The material contained in this appendix may not be apply to the connector you are using on the instrument. -
Page 57: Introduction
Never store connectors with the contact end exposed. Plastic end caps are provided with all Agilent connectors and these should be retained after unpacking and placed over the ends of the connectors whenever they are not in use. Extend the threads of connectors that have a retractable sleeve or sliding connector nut, then put the plastic end cap over the end of the connector. -
Page 58: Visual Inspection
Caring for Connectors Visual Inspection Visual Inspection Visual inspection and, if necessary, cleaning should be done every time a connection is made. Metal and metal by-product particles from the connector threads often find their way onto the mating plane surfaces when a connection is disconnected and even one connection made with a dirty or damaged connector can damage both connectors beyond repair. -
Page 59: Precision 7 Mm Connectors
Caring for Connectors Visual Inspection Light burnishing of the mating plane surfaces is normal, and is evident as light scratches or shallow circular marks distributed more or less uniformly over the mating plane surface. Other small defects and cosmetic imperfections are also normal. None of these affect electrical or mechanical performance. -
Page 60: Sexed Connectors
Caring for Connectors Visual Inspection Figure A-1 Precision 7mm Connector Outer Conductor Center Conductor Collet Outer Conductor Dielectric Mating Plane Support bead Sexed Connectors On sexed connectors, especially precision 3.5mm and SMA connectors, pay special attention to the female center conductor contact fingers (Figure A-2 and Figure A-3). - Page 61 Caring for Connectors Visual Inspection Figure A-3 SMA connectors MALE Outer Conductor Mating Plane FEMALE Appendix A...
-
Page 62: Cleaning
Caring for Connectors Cleaning Cleaning Careful cleaning of all connectors is essential to assure long, reliable connector life, to prevent accidental damage to connectors, and to obtain maximum measurement accuracy and repeatability. Yet it is the one step most often neglected or done improperly. Supplies recommended for cleaning microwave connectors are as follows: •... -
Page 63: Precision 7 Mm Connectors
Caring for Connectors Cleaning Alcohol should be used in liquid rather than spray form. If a spray must be used, always spray the alcohol onto a cloth or swab, never directly into a connector. Very dirty connectors can be cleaned with pure alcohol. Other solutions that contain additives should not be used. -
Page 64: Cleaning Interior Surfaces
Caring for Connectors Cleaning Cleaning Interior Surfaces Interior surfaces, especially on precision 3.5mm connectors, are very difficult to reach, and it is easy to damage connectors in trying to clean them. The openings are very small, and generally the center conductor is supported only at the inner end, by a plastic dielectric support bead. -
Page 65: Drying Connectors
Caring for Connectors Cleaning Moisten the cloth with a small amount of alcohol and carefully insert it into the connector to clean the interior surfaces. Use an illuminated magnifying glass or microscope to see clearly the areas you wish to clean. Drying Connectors When you have cleaned a connector, always be sure that it is completely dry before reassembling or using it. -
Page 66: Mechanical Inspection: Connector Gages
Table A-1 Recommended connector gages Connector gage kits containing all of the items required are included in many Agilent calibration kits. They are also available separately. Part numbers are as follows. Type Part Number/Ordering Information Precision 7mm... -
Page 67: Mechanical Specifications
Caring for Connectors Mechanical Specifications Mechanical Specifications The critical dimension to be measured, regardless of connector type, is the position (generally, the recession or setback) of the center conductor relative to the outer conductor mating plane. Mechanical specifications for connectors specify a maximum distance and a minimum distance that the center conductor can be positioned behind (or, in female Type-N connectors, in front of) the outer conductor mating plane. -
Page 68: Sexed Connectors
Caring for Connectors Mechanical Specifications Sexed Connectors In Type-N and precision 3.5mm connectors, the position of the center conductor in the male connector is defined as the position of the shoulder of the male contact pin - not the position of the tip. The male contact pin slides into the female contact fingers and electrical contact is made by the inside surfaces of the tip of the female contact fingers on the sides of the male contact pin. - Page 69 Caring for Connectors Mechanical Specifications Figure A-5 Type-N connectors MALE Outer Conductor Mating Plane FEMALE Therefore the mechanical specifications of Type-N connectors give a maximum protrusion of the female contact fingers in front of the outer conductor mating plane and a minimum recession of the shoulder of the male contact pin behind the outer conductor mating plane.
-
Page 70: Using Connector Gages
Caring for Connectors Using Connector Gages Using Connector Gages Before a connector gage is used, it must be inspected, cleaned, and zeroed. Inspecting and Cleaning the Gage Inspect the connector gage and the gage calibration block carefully, exactly as you have inspected the connector itself. Clean or replace the gage or the block if necessary (dirt on the gage or block will make the gage measurements of the connectors inaccurate and can transfer dirt to the connectors themselves, damaging them during gaging or when the... - Page 71 Caring for Connectors Using Connector Gages • Gently rock the two surfaces together, to make sure that they have come together flatly. The gage pointer should now line up exactly with the zero mark on the gage. If it does not, inspect and clean the gage and gage calibration block again and repeat this process.
-
Page 72: Precision 7Mm Connectors
Caring for Connectors Using Connector Gages Measuring Connectors Measuring the recession of the center conductor behind the outer conductor mating plane in a connector is done in exactly the same way as zeroing the gage, except of course that the graduated dial is not re-set when the measurement is made. -
Page 73: Making Connections
Caring for Connectors Making Connections Making Connections Making good connections is easy if a few simple principles are kept in mind: • Aall connectors must be undamaged, clean, and within mechanical specification. • The connectors must be precisely aligned with one another and in flat physical contact at all points on the mating plane surfaces. -
Page 74: To Make A Preliminary Connection
Caring for Connectors Making Connections Alignment of precision 7mm connectors is made easier by the fact that the connector sleeve on one of the connectors must be extended fully (and the sleeve on the other connector retracted fully) in order to make the connection. -
Page 75: Final Connection Using A Torque Wrench
Torque wrenches pre-set to the correct value for each connector type are included in many Agilent calibration kits, and they are also available separately. Torque settings are detailed in Table A-2. -
Page 76: Disconnection
Caring for Connectors Making Connections Table A-2 Recommended Torque Settings Type Description Precision 12 lb-in (136 N-cm.) Precision 8 lb-in (90 N-cm) 3.5mm 5 lb-in (56 N-cm) Use the SMA wrench to connect male SMA connectors to female precision 3.5min connectors. Connections of male precision 3.5mm. - Page 77 Caring for Connectors Making Connections NOTE Never disconnect connectors by twisting one connector or device out of the other as one might remove a screw or a light bulb. This is extremely harmful and connector damage can occur whenever the device body rather than the nut alone is being turned.
-
Page 78: Adapters
SMA (or male precision 3.5mm) connectors can be connected. Adapters are included in many Agilent calibration kits and with many Agilent devices, or they may be ordered separately. Appendix A... - Page 79 Caring for Connectors Adapters Table A-3 Adapters Type Description Precision 7mm and Precision 7mm/male 3.5mm Type-N Precision 7mm/female 3.5 mm Precision 7mm/male 50 Type-N Precision 7mm/female 50 Type-N Precision 3.5mm Male 3.5mm/female 3.5mm and SMA Male 3.5mm/female 3.5 mm Female 3.5mm/female 3.5mm Precision 7mm/male 3.5mm Precision 7mm/female 3.5mm “Connector saver”...
-
Page 80: Principles Of Microwave Connector Care
Caring for Connectors Principles of Microwave Connector Care Principles of Microwave Connector Care Table A-4 Principles of Microwave Connector Care Handling and Storage DO NOT • Keep connectors clean. • Touch mating plane surfaces. • Extend sleeve or connector nut. •... - Page 81 Caring for Connectors Principles of Microwave Connector Care Table A-4 Principles of Microwave Connector Care Gaging DO NOT • Clean and zero the gage before • Use an out-of-spec connector. using. • Use correct gage type. • Use correct end of calibration block.