Table of Contents
Advertisement
Quick Links
Advertisement
Table of Contents

Related Manuals for Korg D1600mkII


Summary of Contents for Korg D1600mkII
-
Page 2: Important Safety Instructions
IMPORTANT SAFETY INSTRUCTIONS • Read these instructions. • Keep these instructions. • Heed all warnings. • Follow all instructions. • Do not use this apparatus near water. • Mains powered apparatus shall not be exposed to dripping or splashing and that no objects filled with liquids, such as vases, shall be placed on the apparatus. -
Page 3: Data Handling
AVATTAESSA OLET ALTTIINA LASERSÄTEILYLLE. important data on a CD or other media. Please be aware that ÄLÄ TUIJOTA SÄTEESEEN. Korg will accept no responsibility for any damages which may result from loss of data. COPYRIGHT WARNING This professional device is intended only for use with... -
Page 4: Table Of Contents
Table of Contents 4. Make insert effect settings........24 Step 3: Mixdown ..........26 1. Apply effects ............. 26 IMPORTANT SAFETY INSTRUCTIONS ..... ii 2. Apply EQ (equalizer)..........27 3. Apply master effects ..........28 Data handling ............. iii Step 4: Mastering ..........30 1. - Page 5 2. Updating the system ..........86 Locate functions ............118 MIDI ..............87 11. AUTO PUNCH ..........119 1. MIDI connections............87 P1 AtPunch: Settings for auto punch-in/out 2. MIDI messages used by the D1600mkII ....87 recording ..............119 3. Using MIDI ..............87...
- Page 6 12. LOOP ............120 22. METER/TRACK VIEW ........133 P1 Loop: Loop playback/recording settings ... 120 23. TRACK STATUS ........134 13. UNDO ............120 24. PAN.............134 14. TRIGGER............ 121 25. FADER ............134 P1 Trigger: Settings to start trigger recording ..121 26.
- Page 7 Specifications..........162 MIDI implementation chart ......164 Block diagram ..........165 Effect Program List ......... 166 Rhythm Pattern List (215 patterns) ....168 Demo Song List..........169 Index..............169...
- Page 8 viii...
-
Page 9: Introduction
Introduction • Three independent effects usable simultaneously Thank you for purchasing the Korg D1600mkII Digital Recording Studio. The three independent built-in effects (Insert, Master, To ensure trouble-free enjoyment, please read this manu- and Final) use 44-bit internal processing. For each of al carefully and use the instrument as directed. -
Page 10: Printing Conventions In This Manual
2. Printing conventions in this manual Switches and knobs [ ] Keys, dials, and knobs on the panel of the D1600mkII are printed within [square brackets]. Parameters that appear in the LCD screen “ ” Parameters that appear in the LCD screen are printed inside “double quotation marks.”... -
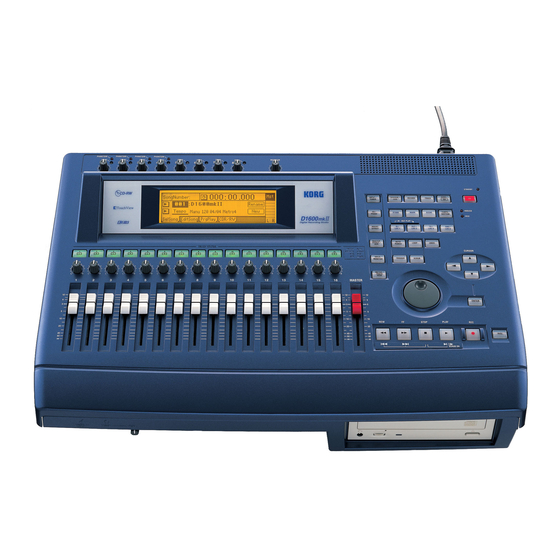
Page 11: Parts And Their Function
1. Top panel 12~31 1 LCD screen 4 [CHANNEL] faders (Ch1…16) The D1600mkII uses a TouchView system based on a These faders adjust the recording/playback volume touch panel screen. By pressing objects that are of each channel. shown in the LCD screen, you can select pages, tabs, These settings can be paired, and registered in a and parameters, and set their values. - Page 12 9 [POWER] key 16 [SOLO/MONITOR] key This turns the power of the D1600mkII on/off. When This key is used to solo an individual channel, send, the D1600mkII is in standby mode, pressing the or return. It is also used to select an audio source for [POWER] key will turn on the power.
-
Page 13: Front Panel
31 [SCRUB] key The time locations registered here are used as the punch-in/out locations, and the editing range for This key turns the Scrub, Play To/From, and Slow track editing operations such as copy or delete. Play functions on/off. The key will light when the By holding down the [IN/LOC1] key and pressing Scrub function is “On.”... -
Page 14: Rear Panel
This turns the main power on/off. When the [Main power] switch is turned on, the D1600mkII will be in standby mode. In standby If a condenser mic is connected or disconnected mode, you can press the [POWER] key to turn on the with the phantom power switch on, damage to power of the D1600mkII. - Page 15 Use this when you wish to control a connected exter- nal MIDI device from the D1600mkII. 15 [MIDI IN] connector MIDI messages are received at this connector. Use this when you wish to control the D1600mkII from a connected external MIDI device.
-
Page 16: Objects In The Lcd Screen And Their Functions
To execute, press the “OK” button. To cancel, press the 1. Objects in the LCD screen “Cancel” button. The dialog box will close. The LCD screen of the D1600mkII features the Touch View system, which uses a touch panel. By pressing objects displayed in the LCD screen you can... -
Page 17: Basic Operation
To make settings in the LCD screen for the various func- [VALUE] dial to edit the value. tions of the D1600mkII, you must first press the key of the This is the typical method, and also applies for mode that includes that function. -
Page 18: Preparations
Preparations 1. Connections The diagram below shows a basic example of connec- tions when using the D1600mkII to record. Make the appropriate connections for your system, substituting your own equipment as necessary for the equipment [PHONES] jack [PHONES LEVEL] knob shown here. -
Page 19: Turning The Power On/Off
When you are finished playing or recording a song, turn bus. Refer to “7. Using an external effect” (→p.58). off the power. If you will not be using the D1600mkII for Connections when using a foot switch to perform an extended time (e.g., when you have finished work for manual punch recording, or playback/stop etc. -
Page 20: Listening To The Demo Song
4. Press and hold down the D1600mkII’s [POWER] key to shut it down. 1. Move the D1600mkII’s [CHANNEL] faders to the 0 When you press and hold the [POWER] key, a dialog mark, and the [MASTER] fader to the –∞ mark. -
Page 21: Quick Start
2. Turn on the power refer to “2. Turning the power on/off” (→p.11). 1. Connect the power cable to the D1600mkII, and then plug it into an AC outlet. 2. Set the top panel [MASTER] fader to “–∞.” 3. Press the rear panel [POWER ON] key. -
Page 22: Create A New Song
3. Create a new song Before you can record a new composition, you must first create a new “song” on the D1600mkII. 1. Press the [SONG/CD] key. Then press the “SelSong” tab to access the [SONG/CD] “SelSong” tab page. You can also access the “SelSong” tab page by pressing the [SONG/ CD] key several times. -
Page 23: Assign The Input To A Mixer Channel
2. Press the “Rhythm” button to make the display read “ ”. The [TEMPO/RHYTHM] key will light. 3. Raise the [MASTER] fader and verify that you hear the rhythm. Use the front panel [PHONES LEVEL] knob to adjust the volume of your headphones, or use the top panel [MONITOR OUT LEVEL] knob to adjust the volume of your monitor speakers. -
Page 24: Check The Sound
Pre-fader level display 2. Press the [METER/TRACK VIEW] key. From the screen that appears, press the “ ” button to open the dialog box. 3. From the Select DisplayMode dialog box, press the “PreFaderLev” radio button and press the “OK” button; the pre-fader screen will appear. - Page 25 “000:00.000”. the time location” (→p.46). 7. Press the [REC] key. If you want to record the The D1600mkII will be in record-ready mode, and the [REC] and rhythm, refer to “3. Recording [PLAY] LEDs will blink. the rhythm” (→p.72).
-
Page 26: Play Back
9. When you have finished performing, press the [STOP] key. To stop the rhythm, access the Recording will stop, and the [REC] and [PLAY] LEDs will go dark. [TEMPO/RHYTHM] “Setup” tab page and press the “Rhythm” button to turn it “Off.”... -
Page 27: Step 2: Overdubbing
Step 2: Overdubbing “Overdubbing” is the process of recording additional performances on other tracks while you listen to the previously-recorded performance or rhythm. For this example we’ll overdub an additional performance on guitar or keyboard while listening to the performance you recorded in Step 1. We’ll also explain how to record your keyboard in stereo, and how to record on a virtual track. -
Page 28: Record A Keyboard
Check the recording mode If you’ve already checked the recording mode, there’s no need to check it again; if so, proceed to the next step. 1. Access the [RECORD] “RecMode” tab page, and make sure that “Select RecMode” is set to “Input.” Record For details on the counter dis- 1. - Page 29 Check the level Assign the audio from your keyboard to tracks, and check the levels. 1. Press the track 5 and 6 [TRACK STATUS] keys to select INPUT (LEDs lit orange). 2. Press the [METER/TRACK VIEW] key. In the screen that appears, press the “...
-
Page 30: Record Vocals On Virtual Tracks
Check the recording mode If you have already checked the recording mode, there’s no need to check it again; if so, proceed to the next step. 1. Access the [RECORD] “RecMode” tab page, and make sure that “Select RecMode” is set to “Input.” Record For details on the counter dis- 1. - Page 31 Check the sound 1. Set the [Channel 4] fader to unity gain (0 dB). 2. In the [SOLO/MONITOR] “Monitor” tab page, make sure that the “MasterLR” button is “On.” 3. Slowly raise the [MASTER] fader while you sing into the mic. Check the sound in your headphones or monitor speakers.
-
Page 32: Make Insert Effect Settings
Play back a virtual track 1. Hold down the [STOP] key and press the [REW] key to return to the beginning of the song. 2. Press the [TRACK STATUS] key to set the recorded tracks to PLAY. 3. Press the [PLAY] key to play back. At this time, the virtual tracks selected in the [TRACK] “Vtr 1–8”... - Page 33 Specify the destination for the processed sound In this example we’ll explain how to apply an insert effect to a stereo- connected keyboard. Connect your keyboard to the [INPUT 5] and [INPUT 6] jacks, and assign the audio to mixer channels 5 and 6. For our example, we will place insert effect 1 between [INPUT 5] jack and mixer channel 5, and between [INPUT 6] jack and mixer channel 6.
-
Page 34: Step 3: Mixdown
Step 3: Mixdown “Mixdown” is the process of applying insert effects, master effects, and EQ etc. to the sound of each track to adjust the overall balance, and combining everything into two-track stereo data. 1. Apply effects Here’s how to assign an insert effect to a mixer channel so that the effect is applied to the playback of the track. -
Page 35: Apply Eq (Equalizer)
For example, the dialog box shown above portrays the following set- tings. The upper left indicates track channel 3 → effect 1 → mixer channel 3. This means that the track 3 audio signal will be processed by effect 1, and sent to mixer channel 3. -
Page 36: Apply Master Effects
3. Apply master effects Here’s how you can apply master effects to the desired track channels. The D1600mkII contains two master effects, letting you apply two differ- ent effects simultaneously. This means that you can simulate complex acoustic spaces that could not be created by a single effect. To regulate the amount of the master effects, adjust the send and return controls. - Page 37 5. While you listen to the song, access the [MASTER EFFECT/AUX] “MstEff1” tab page. Watch the level meter in the screen, and adjust the return level so that “CLP” does not appear. 6. When you have finished making adjustments, press the [STOP] key. Select master effect 2, and make send and return settings 1.
-
Page 38: Step 4: Mastering
Step 4: Mastering “Mastering” is the process of applying a final effect and EQ to the mixed- down song in order to make the overall volume and tone consistent. We’ll also explain how you can use the CD-R/RW drive to create an au- dio CD of your song. -
Page 39: Create The Master Track
2. Create the master track When you create an audio CD, the data of track 1 and track 2 is what will be written to the CD. You will create the master track by combining the song data into tracks 1 and 2. -
Page 40: Write Your Song To A Cd
3. Access the [RECORD] “Bounce” tab page, and set “BounceMode” to “16Tr→2Tr”. “16Tr→2Tr” means that sixteen tracks will be bounced to two tracks. 4. Press the field at the right of “RecordVirtualTrack,” and turn the If tracks “1h” and “2h” already [VALUE] dial to select “h”. - Page 41 5. Carefully read the owner’s manual section “COPYRIGHT WARN- ING” (→p.iii), and press the “Yes” button if you accept the terms. The D1600mkII will begin creating an image file. You can stop creating the image file by pressing the “Abort” but- ton during this time.
- Page 42 6. Press the “No” button in the dialog box. If you want to create another The [SONG/CD] “CDR/RW” tab page will appear. identical CD, press the “Yes” button. If you want to write songs to If you want to write additional songs, select the next song and then more than one CD, write the perform steps 1–6.
-
Page 43: Basic Operation
Basic operation Creating/selecting a song 2. Naming a song Songs on the D1600mkII have a song number and a song Here’s how to create a song, assign a name to it, and se- name. lect songs. The song number is a number in the range of 001–100, assigned in the order in which each song was created. -
Page 44: Selecting Another Song
Assign audio inputs to the mixer 3. Selecting another song You can select an existing song in any of the following The D1600mkII has eight analog inputs and one (two- three ways. channel) digital input jack. Audio signals from devices... - Page 45 Set the INPUT 2 [TRIM] to the minimum (+4 dB), 3. Assign the input sound to mixer channel 8. lower the D1600mkII’s [MASTER] fader, and connect Press the track 8 [TRACK STATUS] key to set it to a mic to the [INPUT 2] jack.
-
Page 46: Digital Input
2. Digital input [INPUT 4] jacks, and assign them to mixer channels 9 and 10. The D1600mkII can record a digital audio signal that is input via the S/P DIF jack. 1. Connect your keyboard. Set the [INPUT 3] and [INPUT 4] trim to the mini-... -
Page 47: Using The Tuner
Recording 3. Using the tuner The D1600mkII has a built-in tuner function. This section explains the basic recording procedure on the D1600mkII. To tune an instrument Connect the instrument you want to tune to the [INPUT 8/GUITAR IN] jack. 1. Adjust the recording level, and 1. -
Page 48: Recording On Virtual Tracks
2. Recording on virtual tracks 4. Adjust the recording level of the input device, and record. The D1600mkII has sixteen tracks, and each of these Refer to “1. Analog inputs” and “1. Adjust the tracks has eight virtual tracks. recording level, and record” (→p.36, 39) For example when recording a solo part, you can switch In the [RECORD] “RecMode”... - Page 49 “AutoPunch” button to turn it “On.” The [AUTO you are at a distance from the D1600mkII. PUNCH] key will light. 1. Connect a foot switch to the [FOOT SW] jack.
-
Page 50: Combining Multiple Tracks Into Two: Bounce
(virtual track “a” selected for all tracks) can be recorded to virtual track “b” of tracks 1 and 2. You can also mix down your completed song to two tracks of the D1600mkII, instead of mixing down to Perform bounce recording as described in “Com- an external two-channel recorder. -
Page 51: Other Recording Methods
“PostFaderLev” so that you can view the meter dis- initiate recording. Recording will begin at the instant that play for each fader. sound is input to the D1600mkII. 8. Adjust the recording level. Use the [MASTER] fader to adjust the recording level. - Page 52 D1600mkII. For details refer to the page listed. ing. Set “Unit” to select the units in which the pre/ • Apply EQ to the audio being recorded. (→p.48) post-roll times are set.
-
Page 53: Playback
1. Access the [SONG/CD] “PrgPlay” tab page. 2. Press the [PLAY] key to begin playback. This section explains basic playback on the D1600mkII, Songs will be played in the order of the list, starting and also how to use program playback. -
Page 54: Changing The Time Location
Using the [FF] or [REW] keys Changing the time location Moving backward Press the [REW] key to move toward the beginning This section explains how you can move the counter that of the song. If you hold down the key, you will shows the current location within the song. -
Page 55: Using Scrub Playback Etc. To Find A Precise Time Location
Using marks to move the time location 3. Using scrub playback etc. to You can register a specific location in a mark, and then find a precise time location move instantly to the registered location. A name can be assigned to each mark, and used to navi- By using the Scrub function, the Play From/To function, gate within a song. -
Page 56: Using The Mixer
If you use EQ excessively by boosting the EQ gain of Using the mixer a channel to the maximum setting, the overall mix will become unbalanced. EQ can be used in the “cut” (Minus) direction as well. Here you can adjust various mixer settings such as volume, tone, pan, recording and playback, to create the desired levels for your song. -
Page 57: Pairing
5. Monitor settings ate level. Refer to “1. Analog inputs” and “1. Adjust the record- In order to monitor the audio from the D1600mkII, you ing level, and record” (→p.36, 39) will need to connect a set of powered monitor speakers Verify that the level meter on the left side of the LCD etc. -
Page 58: Solo Settings
2. Adjust the cue level. 7. Registering and playing scenes Press the “Level” button to access the cue level adjustment screen. Select the icons for each channel, Mixer settings you make can be registered as a scene, and and rotate the [VALUE] dial to adjust the volume selected automatically as playback progresses. - Page 59 Automatically switching scenes while a Editing a scene and overwriting it song plays: Scene Playback Here’s how you can modify part of a scene, and over- write the settings back onto that scene. Scenes you registered can be selected automatically dur- 1.
- Page 60 “Filter” button to display “Select SceneFilter.” device to recall a scene. 2. Select the parameters whose settings you wish to When the D1600mkII receives program change #0, it disable. will recall scene 001. Program changes #0–99 corre- There are two pages of settings, and you can use the spond to scene 001–100.
-
Page 61: Using Effects
During recording 1 in 2 out x 2 (mono-in/stereo-out × 2) On the D1600mkII, you can use up to eight insert effects While recording guitar and bass simultaneously, you that can be inserted into an analog input or mixer chan-... - Page 62 During track playback 1 in 1 out x 4 (mono-in/mono-out × 4) While recording four vocals simultaneously, you 2 in 2 out x 2 (stereo-in/stereo-out × 2) could apply Exciter-Comp to voices that lack impact, Two tracks containing stereo recorded drums etc. and apply Limiter-P4EQ to loud voices as you record.
-
Page 63: Master Effects
3. Master effects Access the [INSERT EFFECT] “InsEff1” tab page. Select “EffectNumber,” and rotate the [VALUE] dial The D1600mkII contains two master effects (MstEff1 and to select the desired effect program. MstEff2) which can be used simultaneously. You can adjust the send amount from each channel to change the depth of the effect. -
Page 64: Final Effect
4. View the effects and chain that make up the pro- 4. Final effect gram. Press the “(EffectProgramName)” button to access One stereo-in stereo-out effect is provided as the final the “EffectAlgorithm” dialog box that displays the effect. It applies to the master LR output (→diagram on structure of that effect program. -
Page 65: Controlling An Effect From An External Device
8. Save the effect program. 4. Select the effect program that you wish to control. If the song is playing, press the [STOP] key to stop it. In the [INSERT EFFECT] “InsEff1”–“InsEff4” tab pages, choose the insert effect that you selected in Press the “Store”... -
Page 66: Using An External Effect
1. Connect your external effect processor. 1. Creating an audio CD Connect the [AUX OUT] jack of the D1600mkII to the INPUT jack of your external effect processor, and You can use the CD-R/RW drive to create an original CD connect the OUTPUT jacks of the external effect from songs you record on the D1600mkII. - Page 67 CD with no gap between tracks. writing speed. An audio CD created using Disc At Once can also be Press the “Yes” button, and the D1600mkII will begin used as a master CD for pressing. creating an image file.
-
Page 68: Recording To A Master Tape
Connect your MD or DAT to the [S/P DIF OUT] jack or to the [MASTER OUTPUT] jacks. 3. Record on your external recording device. Play back the song on the D1600mkII, and adjust the recording level on your external recorder. Start recording on your external recorder, and play back the D1600mkII. -
Page 69: Track Editing
Depending on the “EditType,” the “Wave” button Track editing may appear, allowing you to view the waveform as you specify the location more precisely. (→p.101) 2. Access the [TRACK] “EditTrk” tab page. 1. Track editing functions The following functions are provided for track editing. •... -
Page 70: Track Editing Examples
Procedure for copying to a track in a different song 2. Track editing examples Here’s how to copy the IN–OUT region of song 001 track 1 to the TO location of song 002 track 2, once. 1. Select song 001. Copying track data: Copy Track 2. - Page 71 Inserting blank data: Insert Track Procedure for erasing track data (Erase) Here’s how to erase the IN–OUT region of track 1. The Insert Track command inserts blank space into the specified region (IN–OUT) of the recorded track. Track 1. Register the IN and OUT times. data located after the inserted blank will be moved 2.
- Page 72 You can use Undo to return to the state before execut- the data on the hard disk will become fragmented, ing the command. requiring the D1600mkII to access the disk more frequently, and making it more likely that skips will be Reversing track data: Reverse Track heard or that the “DiskBusy”...
- Page 73 Erasing audio events from silent areas You can use Undo to return to the state prior to execution. Here’s how you can erase audio events from silent areas This operation will require a longer time for comple- of the IN–OUT region of track 1. (These areas will be- tion in proportion to the length of the specified region come blank.) (IN–OUT).
- Page 74 Expanding or compressing a track: When processing is completed, the display will indi- cate “Completed.” Press the “OK” button. Expansion/Compression Track 8. Verify that the data was processed correctly. This command expands or compresses the specified Press the [TO/LOC3] key to play back from the TO region (IN–OUT) of recorded track data into the specified location, and verify that the data was expanded/ region (TO–END) of a specified track.
- Page 75 Exchanging entire tracks/virtual tracks: Procedure for copying to a virtual track Swap Whole Track Here’s how virtual track “a” (=currently selected) of track 1 can be copied to virtual track “b” of track 1. This command exchanges (swaps) the data of an entire 1.
- Page 76 5. Select the swap destination virtual track. 5. Execute the editing command. Set “DestVTrack” to virtual track “b.” Press the “Exec.” button. The display will ask “AreYouSure?,” so press the 6. Execute the editing command. “Yes” button to execute the command. Press the “Exec.”...
-
Page 77: Song Editing
1. Song editing operation • You can normalize either a single track, or adjacent tracks simultaneously. The D1600mkII provides the following song editing If data recorded at an extremely low level is normal- operations. ized, any noise included in that region will also be •... -
Page 78: Examples Of Song Editing
5. Execute the song editing operation. 3. Verify the song you want to move. Press the “Exec.” button to execute the song editing Make sure that “SourceSong” is set to the desired operation. move-source song. In the case of the screen shown in step 4, song 1 will 4. -
Page 79: Rhythm/Tempo Settings
Rhythm/tempo settings selected as the “DestSong”. 4. Turn the protect setting on or off. The D1600mkII contains numerous rhythm patterns for a Press the “Exec.” button. A lock symbol is displayed variety of time signatures (→p.174 “Rhythm Pattern to indicate a song for which Protect is turned on. The List”). -
Page 80: Recording Your Performance While You Listen To The Rhythm
Selecting the rhythm pattern 4. Specifying the tempo Select “SelRhythm,” and rotate the [VALUE] dial to select the rhythm pattern that you wish to use. As an alternative to playing your entire song at the same You can also press the “ ” button, and select tempo, you can make the tempo change during the song, from a list. - Page 81 Here’s how MIDI clock tempo data from an external MIDI sequencer can be recorded on the tempo track. Use this when you wish to synchronize the D1600mkII Use “Tempo” to set the tempo, “Beat” to set the time song with song data created on a MIDI sequencer in signature, and “Rhythm”...
- Page 82 7. Select the tempo track as the tempo source. 5. Record the tap tempo. Select the [TEMPO/RHYTHM] “SetUp” tab page. Press the “RecStart” button to put the D1600mkII in record-ready mode. Press either the [PLAY] key or the foot switch, and playback and recording will begin simultaneously.
-
Page 83: Data
If you want to save data on your computer, first save the Alternatively, you can press the “ ” button to open data to the USB drive of the D1600mkII’s hard disk, and the “Select Backup/Restore Type” dialog box. then save this data on your computer. - Page 84 When backed-up song data is restored back into the 1. Select the song that you want to back up. D1600mkII, the data will once again be playable. 2. Select “Backup1Song.” To restore In the [SYSTEM/USB] “B-U/Rst” tab page, select “B- U/RstType”...
-
Page 85: Backing Up And Restoring Effect User Data
When restoring from the USB drive 2. Backing up and restoring effect From the file list, select the song that you want to restore. user data Backing up effect user data You can back up effect user data in the following ways. •... - Page 86 Backing up to the USB drive Restoring effect user data Here’s how to back up user area insert effect “U055” to To restore the USB drive. 1. When restoring from CD-R/RW, insert the disc into 1. Select “BackupUserData.” the CD-R/RW drive. In the [SYSTEM/USB] “B-U/Rst”...
-
Page 87: Saving A Wav File
Exporting a WAV file: Audio data you copy to the to the length of the file you are importing. D1600mkII’s clipboard can be exported as a WAV-format 7. Move to the beginning of the song, and verify that audio file to CD-R/RW or the USB drive. - Page 88 file already exists on the USB drive. An exported WAV file can be loaded into the 7. Specify the date and time of the WAV file. D1600mkII or your computer even without finalizing Press the “Date” button to open the dialog box, select the disc.
-
Page 89: Data Compatibility With Other Models In The Digital Recording Studio Series
D1200mkII, it can be used in the same way as D1200 Recording Studio series. or D1200mkII data. However, the song data of tracks If you want to use D1600mkII data on the D16, you 13–16 cannot be restored. must update the D16’s system to version 2 or later. -
Page 90: Drive
“Quick” button off. For example you would turn Press the “Exec.” button to open the dialog box. this off if the D1600mkII failed to recognize the drive even after it was formatted with “Quick” turned on. Formatting with the “Quick” button turned off will require a substantial length of time for completion. -
Page 91: Erasing The Data From A Cd-Rw
finished. Press the “Yes” button. efficiently You can use the following three operations or techniques to make efficient use of the D1600mkII’s drive capacity. 3. Erasing the data from a CD-RW • Execute the Optimize Track operation • Erase the Undo data Here’s how you can erase the data from a CD-RW disc. - Page 92 If you want to erase this Undo data, simply restart the you recorded on the first take will remain “underneath” D1600mkII. When you restart, all of the Undo data will A’ and B’. This is because the first take is saved as one be erased, recovering the space on the hard disk.
-
Page 93: Usb
Windows users (Windows Me/2000 or later) In order to use the D1600mkII with Windows 98, you will need to install a device driver. For details on obtaining and installing the device driver, visit the Korg website From the menu that appears, left-click “Safely (http://www.korg.com). -
Page 94: Updating The System
Open “KORG D1600” that appeared in step 3, and you will see the contents of the USB drive within the Use a USB cable to connect the D1600mkII to your D1600mkII’s hard disk. Copy the desired data into computer, and copy the system file into the root level of your computer. -
Page 95: Midi
D1600mkII Note, aftertouch, velocity, pitch bend: This data is used by the D1600mkII to control effects. Program change: This data is used by the D1600mkII to select scenes. MIDI Sequencer Control change: This data is used by the D1600mkII to control mixer parameters. - Page 96 MIDI MIDI MIDI Synchronizing two D1600mkII units Here’s how you can synchronize two D1600mkII units. One D1600mkII will be the master, and the other will be the slave. Make connections as follows. MIDI Sequencer MTC “MTC Mstr” MTC “MTC Slave”...
- Page 97 Using MIDI to control the D1600mkII mixer Here’s how the mixer control data recorded in “Recording D1600mkII mixer control operations” can be transmitted back to the D1600mkII to control its mixer. Make the same connections as in “Controlling the D1600mkII from a MIDI sequencer.”...
-
Page 99: Reference
Select the external device that will control the internal shown. effects of the D1600mkII. The effect selected by “Asn” From the left, the numbers are Minutes. Seconds. can be controlled in real-time. -
Page 100: P2 Midi: Midi Settings
5. Fan Control ......[On, Rec&PlayOff, Off] together with your external tone generator. Control the operation of the internal fan. The action of making the D1600mkII operate at the same tim- On: The fan will operate constantly. ing as a MIDI sequencer is called synchronization. -
Page 101: P4 Mmc: Mmc Settings
To enable MMC transmission/reception, connect the song number of the song you selected in the [SONG/ external MIDI device to the D1600mkII via MIDI, set the CD] “SelSong” tab page. device ID to match, and set “Select MMC Mode” appro- 3. - Page 102 B-U/Rst Type: Backup User Data 5. Rename If you select “U:USB DOS” as the “Drive,” you can edit This operation backs-up effect user data. the backup-destination filename. For details, refer to “2. CD-R/RW: You can back up all effect user data in a single Naming a song”...
- Page 103 When backing up to CD-R/RW 2. Drive ............[S, C, U] Selects the restore-source drive. Choose C:CD or U:USB DOS. For more about the drive, refer to “B-U/Rst Type: Backup 1 Song” (→p.93). 3. Source Selects the restore-source song or effect. You can press the “...
-
Page 104: P6 Diskutil: Managing Drives
When you restore all songs, all of the “Source” songs 1. USB Mode..............will be placed after the last song existing in the Puts the D1600mkII in a mode where it can communi- “Destination” song drive; no songs will be overwritten. cate with your computer. To connect your computer, When you restore effect user data, the “Source”... - Page 105 Very low frequency vibration in a studio etc. may cause “DiskBusy” errors to appear. In this case, cor- rect the problem by moving the D1600mkII to a dif- ferent location before you execute Check Drive. 1a. Quick SW ..........[On, Off] Selects the type of formatting.
- Page 106 Executes DOS-formatting of the USB drive. Sel Operation: Load System/C, Load System/U These operations load the D1600mkII’s operating system program from the CD-R/RW drive or the USB drive to up- date the system. For details, refer to “Updating the system”...
-
Page 107: Record
2. RecordVirtualTrack ......[Current, a…h] 3. RECORD Select the recording destination virtual track. Select the virtual track of the recording track selected by the [TRACK STATUS] key on which bounce recording will occur. P1 RecMode: Selecting the recording By selecting a virtual track “a”–“h” other than “Cur- rent,”... -
Page 108: Track
4. TRACK P3 EditTrk: Track editing P1 Vtr1–8: Select virtual tracks 1–8 The tracks affected by your editing will be the currently selected virtual tracks for tracks 1–16. Virtual tracks that are not currently selected will not be affected. However, “CopyWholeTrack”... - Page 109 6c. Locate ..........[In, Out, To] Make Locate settings. When you place the cursor at “Locate,” the Scrub func- tion will automatically be turned on, and you can rotate the [VALUE] dial to listen to only the “SelectTrack” (solo) as you set the Locate points. When you press the “OK”...
- Page 110 Edit Type: Erase Track 3. Exec. (Execute) ............Execute the track editing operation. This operation erases the track data in the IN–OUT range of the erase destination track (“DestTrack”). 4. Wave................. When this is executed (“Exec.”), the IN–OUT range will con- This displays the audio data of the track as a waveform.
- Page 111 Edit Type: Reverse Track 3. Mode..[Normal, Erase Silence, Erase Punch Noise] Selects the type of optimization. This operation copies the track data of the IN–OUT range of the reverse source track (“SourceTrack”) to the TO location of the destination track (“DestTrack”) in reverse (flipped back-to-front).
- Page 112 4. Wave................. 7. Mode................. Displays the waveform of the track audio. Select how the expansion/compression will be processed. This lets you set the editing locations (IN, OUT, TO) This will appear when you press the “Mode” button. more precisely. For details, refer to “Edit Type: Copy Track”...
- Page 113 Edit Type: Fade Track 4. DestVTrack ............[a...h] Select the virtual track of the copy destination track This operation fades-in or fades-out the track data in the IN– (“DestTrack”) to which the data will be copied. OUT range of the fade-in destination track (“DestTrack”). When this operation is executed, the audio data in the IN–...
-
Page 114: P4 Import: Import A Wav File
Select [(folder name)] and press the “OK” button. You can import a WAV file saved on CD-ROM/R/RW or the USB drive, and paste it into a track of the D1600mkII. You can also use the clipboard to paste the data into a location other than the beginning of the song. -
Page 115: P5 Export: Export A Wav File
Press the “Date” button to open the dialog box, and specify the timestamp (date and time) for the WAV file. The D1600mkII can export WAV files in the following for- Select the field you want to edit, and use the [VALUE] mats. -
Page 116: Song/Cd
5b. Finalize..........[On, Off] 5. SONG/CD You can export successive WAV files to CD-R/RW, but if this export will be the last and you do not intend to export any more files, you can turn this item on. Some drives such as early CD-ROM drives are not able to read P1 SelSong: Selecting a song a CD unless it has been finalized. -
Page 117: P2 Editsong: Song Editing
4. New ................Details of each operation you can select here are explained below. This creates a new song following the last song of the currently selected drive. Press the “New” button to access the dialog box. Edit Type: Copy Song This operation copies the selected song to the desired song number. -
Page 118: P3 Prgplay: Program Playback Of Songs
Edit Type: Delete Song P3 PrgPlay: Program playback of This operation deletes the selected song. songs You can create a program play list with songs arranged in a desired playback order. For details on settings and procedure, refer to p.45. 2. - Page 119 This includes the following. If you have assigned the audio output of the CD-R/ • A CD-R created on the D1600mkII etc. and finalized RW drive to mixer channels in the [INPUT/TUNER] • A CD-RW created on the D1600mkII etc. and final- “Ch1–8”...
-
Page 120: Store
If you pressed the “Yes” button, the following message 6. STORE will appear, and the CD drive will be ejected. Insert another CD and press the “Yes” button. You can store a time location for a registration to a locate point, scene, or mark. -
Page 121: Mark
7. MARK 8. SCENE You can register a specific time location in a Mark, and then Mixer settings you edit can be stored as a “scene” at the jump instantly to that location when desired. Since you can desired time location, so that these mixer settings will be assign a name to each mark, you can use them to indicate recalled automatically when playback reaches that time sections within your song. -
Page 122: P2 Mixview: Pan/Fader Scene Display
7. Delete ................ This lets you delete a scene. The Undo function is not available after you delete a scene. On: Filtering will be turned on for the corresponding channel or parameter, and the settings of the scene will be ignored. 7a. -
Page 123: Tempo/Rhythm
3. Pan/fader guide ....[ 9. TEMPO/RHYTHM These symbols show the difference between the actual fader or pan locations and the values that are registered in the scene. Here you can make tempo, time signature, and rhythm When a scene is recalled, the current position of the fad- (metronome) settings for a song. -
Page 124: P2 Tmpmap: Editing The Tempo Map
4. SelRhythm......... [(Rhythm Pattern List)] P2 TmpMap: Editing the tempo map Specify the rhythm parameter that will be used when “TempoSource” is set to “Manual.” By creating a tempo map, you can cause the tempo, time In the cases of “TempoMap” and “TempoTrack,” this signature, and rhythm pattern to change while the song is will show the rhythm corresponding to the current time recorded or played back. -
Page 125: P3 Tmptrk: Create A Tempo Track
• Record tap tempo If you do not know the tempo of the audio recorded on the D1600mkII, you can record tap tempo so that you will be able to manage the data and perform track editing in units of measures. -
Page 126: In/Loc1, Out/Loc2, To/Loc3, End/Loc4
[OUT/LOC2] key 10. IN/LOC1, OUT/LOC2, The time location stored in the [OUT/LOC2] key is used in TO/LOC3, END/LOC4 the following ways. • Locate point 2 • Punch-out time for auto punch-recording You can store the desired time locations in [IN/LOC1], •... -
Page 127: Auto Punch
4c. Unit........ [Second, Meas(Measure)] 11. AUTO PUNCH Select the units for the pre roll, post roll times. You can select either seconds or measures. Press the “OK” button, and the specified pre/post-roll times will take effect. If you press the “Cancel” button, P1 AtPunch: Settings for auto punch- the times you set will be cancelled. -
Page 128: Loop
This data will occupy space on the disk, decreasing the available recording time. In such cases, you can recover this disk space by turning the D1600mkII off and then on again to erase the Undo data. -
Page 129: Trigger
3. PreTrigTime .......... [000…700ms] 14. TRIGGER When trigger recording is used, the D1600mkII can record the sound that was heard immediately before recording actually started. Trigger Recording is a function that starts recording when Trigger recording will initiate recording when the input the volume of the input sound exceeds the threshold level signal exceeds the “Threshold”... -
Page 130: Scrub
3. Zoom In/Out/Up/Down..........15. SCRUB Adjust the size of the waveform display and the play- back speed. Scrub, Play From/Play To, and Slow Play functions can be : Expand the waveform display vertically. switched on/off here. : Shrink the waveform display vertically. Each time you press the [SCRUB] key, the setting will be : Expand the waveform display horizontally. -
Page 131: Input/Tuner
After completing a song on the D1600mkII, you can synchronize a sequencer to the D1600mkII and use sub inputs to mix the sequenced sounds with the track playback of the D1600mkII. -
Page 132: P2 Ch9–16: Select The Inputs For Mixer Channels 9–16
4a. Select ChannelPair......[1 2…15 16] 5. InputLow......[(Fc=100Hz)–15.0…+15.0(dB)] Press the “1 2”–“15 16” button for the channels that you Set the input low EQ gain. This adjusts the low- wish to pair. When pairing is “On,” the heart icon will frequency range. -
Page 133: Eq/Phase
18. EQ/PHASE P4 Eq13–16: EQ settings for mixer channels 13–16 Apply EQ (equalizer) to the playback of tracks 13–16. P1 Eq1–4: EQ settings for mixer Refer to “P1 Eq1–4: EQ settings for mixer channels 1–4.” channels 1–4 Here you can apply EQ (equalizer) to the playback of tracks P5 Phase: Phase settings for mixer 1–4. -
Page 134: Insert Effect
Press the “OK” button to execute your settings, recording, or to track playback. or press the “Cancel” button to cancel them. The D1600mkII lets you use up to eight different insert The screen that appears next will differ according to effects simultaneously. -
Page 135: P2 Inseff1: Selection And Settings For Insert Effect
P2 InsEff1: Selection and settings for Insert Effect 1 3ac. Prev ............... Displays the previous page. 3b. Effect On/Off ......... [On, Off] Switches each effect on/off. 1. InputLevelMeter....(IN1, 2/CLP, –8, –18, –42dB) On: The effect is on. This shows the input level of each effect. Off: The effect is off. -
Page 136: P3 Inseff2: Selection And Settings For Insert Effect
The effect program whose name or parameters you modified can be stored in user areas “U001”–“U128.” Insert Effects 5–8 The D1600mkII provides 128 user areas for insert effects. In the “StoreEffect” dialog box, specify the “user area Select insert effects 5–8 and make settings for them. -
Page 137: Master Effect/Aux
They can be used to Select the effect program whose name you wish to adjust the overall depth and balance. The D1600mkII pro- modify, press the “Rename” button to access the dialog vides two master effects. -
Page 138: P4 Effsnd2: Send Settings For Effect 2
P4 EffSnd2: Send settings for effect 2 P6 FinalEff: Selection and settings for the final effect Here you can set the send level from each mixer channel to effect 2. The final effect is applied to the overall output from the For details, refer to “P3 EffSnd1: Send settings for effect 1”... -
Page 139: Solo/Monitor
21. SOLO/MONITOR The effect program whose name or parameters you modified can be stored in user areas “u033”–“u064.” The D1600mkII provides 32 user areas for final effects. In the “StoreEffect” dialog box, specify the “user area P1 Solo: Solo select number”... -
Page 140: P2 Monitor: Monitor Settings
5. Level (Cue Level)............P2 Monitor: Monitor settings Sets the level and panning for each mixer channel when “Cue” is turned “On” in “SelectMonitor.” Here you can select the audio that will be sent from the mon- Press the “Level” button to open the “Cue setting” itor output ([MONITOR OUT L/R] jacks) and the headphone dialog box, and make the desired settings. -
Page 141: Meter/Track View
2. Snd1, 2/Mon L, R/Mst L, R ......... 22. METER/TRACK VIEW These are the level meters for “Snd1, 2” (effect send 1, 2), “Mon L, R” (monitor L, R), and “Mst L, R” (master L, R). Here you can view the pre fader level meter and post fader “MstL, R”... -
Page 142: Track Status
23. TRACK STATUS 25. FADER These indicators show the status of each track. Adjusts the volume levels. Each time you press the [TRACK STATUS] key, the LED will The faders that adjust the recording level will differ depend- change color to indicate the selected function. ing on whether you are recording an external input or per- •... -
Page 143: Transport Keys
Play To. For details, refer to “15. SCRUB” (→p.122). 5. [REC] key When you press this key, the D1600mkII will enter record-ready mode (the LED will blink). In order to enter record-ready mode, [TRACK STATUS] must be set to REC for at least one track. -
Page 145: Effect Parameter List
Effect Parameter List Example Using the “Pre Delay Thru” parameter, you can mix the dry sound without delay, emphasizing the attack of the sound. Algorithm number: Category number: Algo- rithm name 1: RV1: Reverb Hall Parameter name shown on screen ..Range of Explanation parameter (parameter name) -
Page 146: Delay Dl1 - Dl6
5: RV5: Reverb Room Fdback (Feedback (C Delay)) ..– Sets the feedback amountof 100...+100 TapC This room-type reverb emphasizes the early reflections that HiDamp (High Damp [%]) ..0...100 Sets the damping amount in the make the sound tighter. Changing the balance between the early high range reflections and reverb sound allows you to simulate nuances, LoDamp (Low Damp [%]).. -
Page 147: Modulation Mo1- Mo7
11: DL4: St.Modulation Delay When “Polarity” is “+”, the “Control Target” value is obtained by multiplying the parameter value by the “Offset” value (if the input (Stereo Modulation Delay) level is below “Threshold”), or will equal the parameter value if the This stereo delay uses an LFO to sweep the delay time. - Page 148 trol the stereo image. This effect causes the pitch of the input signal to shimmer. You can use an expression pedal etc. to gradually increase or 15: MO2: St.Flanger decrease the shimmering speed. (Stereo Flanger) This effect gives a significant swell and movement of pitch to the LFO (LFO Waveform)...TRI, SIN Selects LFO Waveform sound.
-
Page 149: Dynamics Dy1 - Dy7
18: MO5: St.Tremolo (Stereo Tremolo) form. Increasing this value adds more shimmering, making the cho- rus effect more complex and richer. This effect modulates the volume level of the input signal. The effect is stereo, and offsetting the LFO of the left and right phases from each other produces a tremolo effect between left and right. - Page 150 : Envelope Select Fc (Side PEQ Cutoff [Hz]) .20...12.0k Sets the EQ center frequency for When “L/R Mix” is selected for this parameter, the left and right the trigger signal channels are linked to control the Limiter using the mixed signal. If Q (Q)........0.5...10.0 Sets the EQ bandwidth for the “L Only”...
- Page 151 With “Envelope Select” = “L/R Mix,” the left and right channel sig- DTime (Delay Time [msec])..0...100 Sets the delay time of the gate nal mixture will trigger the gate on/off. When “L Only” or “R input Only” is selected, the gate is controlled by either of the channel sig- Mix (Wet/Dry) ..Dry, 1:99...99:1, Wet Sets the balance between the nals.
-
Page 152: Special Effect Se1 - Se4
: Fixed Frequency [Hz] Mix (Wet/Dry)..Dry, 1:99...99:1, Wet Sets the balance between the This parameter sets the oscillator frequency. effect and dry sounds : Pre LPF 29: SE2: Doppler If a sampler with a very low sampling frequency receives very high- This effect simulates the “Doppler effect”... -
Page 153: Insert Effect (2In2Outx2)/ Final Effect
: Resonance *Speed (LFO Frequency [Hz]) .... Sets the LFO speed This parameter sets the intensity of resonance for the voice pattern. 0.02...20.0 A larger value will add more character to the sound. *Pitch (Pitch Depth) ....0...100 Sets the pitch variation of the moving sound *Pan (Pan Depth) .... - Page 154 mon use of this effect is to produce the sound of various instru- Carri (L [Carrier] Trim) .... 0...100 Sets the input level of left channel ments by inputting a voice to the Modulator via a microphone. (Carrier) A special effect is also achieved by using rhythm or effect Modul (R [Modulator] Trim) ..
- Page 155 : Mode, Fine If Cntrl is controlling Pitch and you change Mode or Fine, you must once again use Cntrl to readjust the Max and Min parameters.
- Page 156 36: LS5: Early Reflections L Adjust (Adjust) ..L50...CNT...R50 Sets the cancelling position This early reflection effect has more precise early reflections with Himix (Center Hi mix)..... 0...100 Sets the mixing amount of the high-frequency portion of the twice the maximum length of a normal-size effect. You can create a center position very smooth and dense sound.
-
Page 157: Insert Effect (1In2Outx2)
Insert Effect (1in2outx2) Category: Pre-amp simulator These algorithms can be selected for an insert effect if “Select Eff Type” is set to “1in2outx2”. 48: PA1: Pre Amp Simulator Effects GT1–VO2 are multi-effects for guitar/bass/vocal, and [Drive, NR2, Tone, Cabinet] contain three to five effects connected in series. Example Algorithm number: Category number: Algo- EB1 –... - Page 158 Drive P4EQ (Parametric 4band EQ) This effect models a compact effect unit or amp head. Fc1 (Band1 Cutoff [Hz]) ..20...1.0k Sets the center frequency of Band 1 Type (DriveType)......*1 Drive type Q1 (Q) ........ 0.5...10.0 Sets the bandwidth of Band 1 Drive (DriveGain) ....
- Page 159 CabRes actually being used. (CabinetResonator) This effect simulates the acoustical characteristics and cabinet Type (Amplifier Type)..AMP1...5 Selects the type of guitar ampli- resonances of a guitar amp speaker cabinet. fier The “AmpSimulator” is ideal for direct recording. Type (Cabinet Type)..1 × 8, 1 × 10, Selects the type of cabinet 1 ×...
- Page 160 Cho/Fl (Chorus/Flanger) provided, you can create special effects in which the pitch pro- gressively steps upward (or downward). This effect gives a sense of pitch movement and depth to the sound. Adjusting the delay time will change the effect signifi- Mode (Mode) ..
-
Page 161: Insert Effect (1In1Outx4)
teristic of a close-mic recording. Insert Effect (1in1outx4) : Set This switches the location of the mic. “Close” or “On” settings will simulate the proximity effect that boosts the low range, so you will These algorithms can be selected for an insert effect when need to use “Trim”... - Page 162 68: MM14: Exciter – Limiter Effects within multi-effect programs [Excit2, Lmtr] MM1–MM33, and their parameters 69: MM15: Exciter – Cho/Flng Here are explanations of the parameters of each effect in the [Excit2, ChFl1] multi-effect chains listed above. 70: MM16: Exciter – Phaser P4EQ (Parametric 4band EQ) [Excit2, Phaser]...
- Page 163 Comp2 ChFl2 (Compressor2) (Chorus/Flanger2) This effect adds Pre LEQ and Pre HEQ to Comp1. DTime (Delay Time [msec]) 0.0...50.0 Sets the delay time Sense (Sensitivity) ....1...100 Sets the sensitivity LFO (LFO Waveform) ..TRI, SIN Selects LFO Waveform Attack (Attack)......1...100 Sets the attack level *Speed (Frequency [Hz]) ...0.02...20.0 Sets the LFO speed Trim (EQ Trim) ......
-
Page 164: Insert Effect (1In1Outx8)
Attack (Attack) ......1...100 Sets the attack time Insert Effect (1in1outx8) Relse (Release)......1...100 Sets the release time The Gate of 86:MM32: Reverb-Gate is connected to the Wet These algorithms can be selected as an insert effect if output of the reverb. “1in1outx8”... -
Page 165: Effect Control
98: MN11: Expander Effect Control This effect makes the sound tighter and improves the dynamic range and S/N ratio by compressing signals that are below a specified level. Cntrl (Control) Thrshl (Threshold)....0...127 Sets the level at which the effect Select the parameter that will be controlled by an expression begins to apply pedal or an external MIDI controller, and specify the range of... -
Page 167: Appendices
Has Solo been turned on to mute the track audio? [TRACK STATUS] to INPUT (orange). (→p.131) Did you subject the D1600mkII to vibration or impact? If you are using audio punch-in/out and cannot hear The CD-R/RW drive in the D1600mkII is a removable the playback of the recorded track ([TRACK STATUS] unit. - Page 168 Channel fader or EQ does not work Does the D1600mkII support the sampling rate of the digital input? Faders do not work → 96 kHz sampling rate is not supported. When pairing is on, the faders of even-numbered channels 1–16 will not function.
- Page 169 Are the sub input settings correct? (→p.60, 123) Can’t synchronize using MTC or MIDI Clock Has the D1600mkII been set as the master and the MIDI sequencer as the slave? (→p.87, 92) Does the synchronization signal transmitted by the...
- Page 170 The D1600mkII does not synchronize as a slave Did you finalize the disc? → If the D1600mkII is set as a MTC slave, several → In the [SONG/CD] “CDR/RW” tab page to finalize seconds may be required before synchronization is the disc.
-
Page 171: Various Messages
→ When you press the “OK” button, the data on the hard completely. disk will be erased, the D1600mkII will be able to start → You can minimize the pops by executing “Optimize- up normally. - Page 172 Alternatively, you may be able to solve this problem → If you are recording MIDI Clock, set your sequencer or by shutting-down the D1600mkII and starting it up other MIDI output device to a tempo of =40 or again.
-
Page 173: About The Hard Disk And Cd-R/Rw Drive
About the hard disk and CD-R/ RW drive The D1600mkII is shipped with a removable hard disk and CD-R/RW drive installed at the factory. Please use caution when moving or transporting the D1600mkII. 1. Hard disk The hard disk is installed as follows. -
Page 174: About The Cd-R/Rw Drive
• Do not bend or drop the disc. Responsibility for loss of data Korg Corporation will accept no responsibility for any damages (direct or indirect, whether sustained by the customer or by a third party) resulting from loss of or damage to data written on a CD-R or CD-RW disc. -
Page 175: Playing Or Recording From An Audio Cd
Inserting a disc not be able to select digital input from the [S/P DIF IN] jack. Make sure that the power of the D1600mkII is turned on. 1. Set the [CHANNEL 1] and [CHANNEL 2] faders to 1. Open the disc tray 0 dB. -
Page 176: Specifications
<General> Specifications Display: 240 × 64 pixel LCD with backlight and touch panel Power supply: AC Local Voltage Operating temperature range: +5 – +35 °C (do not allow condensation) Power consumption: 40 W Dimensions: 510 (W) × 383 (D) × 138 (H) mm/ Specifications 20.08"... - Page 177 Owner’s Manual Demo song backup CD Options PS-1 pedal switch XVP-10 EXP/VOL pedal EXP-2 foot controller • For other recommended drives, please contact your Korg distribu- tor. * Appearance and specifications of this product are subject to change without notice. (July/2003)
-
Page 178: Midi Implementation Chart
*5: Received to control effects when selected in [SYSTEM/USB] “Control.” “Sync.” Mode 1: OMNI ON, POLY Mode 2: OMNI ON, MONO : Yes Mode 3: OMNI OFF, POLY Mode 4: OMNI OFF, MONO Consult your local Korg distributor for more information on MIDI IMPLEMENTATION. -
Page 179: Block Diagram
Block diagram... -
Page 180: Effect Program List
Effect Program List INSERT EFFECT Preset128 User128 ProgNo Categ ProgramName Algorithm EFF1 Mode ProgNo Categ ProgramName Algorithm EFF1 EFF2 EFF3 EFF4 EFF5 Mode Reverb 7 Mic Multi 1 I001 RV1 ReverbHall Reverb Hall HALL I064 MS1 MicMulti Mic Multi CabiRes MicSim Comp I002 RV2 SmoothHall Smooth Hall... - Page 181 MASTER EFFECT Preset32 User32 FINAL EFFECT Preset32 User32 ProgNo Categ ProgramName Algorithm EFF 1 ProgNo Categ ProgramName Algorithm EFF 1 Reverb 15 Dynamics 10 M001 RV1 ReverbHall Reverb Hall HALL F001 DY1 St.Comp St.Compressor StComp M002 RV2 SmoothHall Smooth Hall SmtHall F002 DY1 StudioComp St.Compressor...
-
Page 182: Rhythm Pattern List (215 Patterns)
Rhythm Pattern List (215 patterns) For Beat settings other than 3/4, 4/4 or 6/8, only (Blank), Metro, or Hihat can be selected. For Beat settings of 3/4, 4/4 or 6/8, the following rhythm patterns can be selected in addition to (Blank), Metro, or Hihat. [I], [F], and [E] indicate Intro, Fill, and Ending pattern marks. -
Page 183: Index
Demo Song List Index “Let The Sister Dance” Numerics The song is written by Mumbo Jumbo Band © 1997 Mumbo Jumbo Band -all rights reserved. 16-bit recording/playback..35, 109 24-bit recording/playback..35, 109 Adjusts the volume [CHANNEL] fader ....3, 134 [MASTER] fader......3, 134 [MONITOR OUT LEVEL] knob ...5 [PHONES LEVEL] knob ....5 Analog input......36, 48, 124... - Page 184 Copy Song........70, 109 Format MIDI DOS-format Global MIDI channel....92 Copy Track .........62, 100 USB drive........98 Mixer control.........89 Copy Whole Track.....66, 104 Hard disk .........82, 98 Setting..........87 Copyright..........iii Song drive........82, 97 Synchronize ........88 Counter display ......46, 91 USB drive ........82 What is MIDI.........87 Cue..........49, 132 MIDI channel .......87, 92...
- Page 185 Store Effect program.......57 Radio button ........8, 9 Undo ..........120 Final effect........131 Erasing..........84 Recording level........39 Insert effect ........128 Updating the system ....86, 98 Recording mode ......39, 99 Master effect ........129 USB drive ........75, 96 Recording track ......... 16 Sub input ........60, 123 What is USB ........85 Auto punch-in/out....
- Page 186 Please also retain your receipt as proof of purchase otherwise your product may be disqualified from the manufacturer's or distributor's warranty. 15-12, Shimotakaido 1-chome, Suginami-ku, Tokyo, Japan Printed in China 2003 KORG INC.