Table of Contents
Advertisement
Available languages
Available languages
Advertisement
Chapters
Table of Contents
Troubleshooting

Related Manuals for Wacom CINTIQ 21UX DTK-2100


Summary of Contents for Wacom CINTIQ 21UX DTK-2100
- Page 1 Installation Guide & Hardware Manual 설치 가이드 및 하드웨어 설명서 安装指南与硬件手册 DTK-2100...
- Page 3 Installation Guide & Hardware Manual Model: DTK-2100...
- Page 4 Wacom reserves the right to revise this publication without obligation to provide notification of such changes. Wacom does its best to provide current and accurate information in this manual. However, Wacom reserves the right to change any specifications and product configurations at its discretion, without prior notice and without obligation to include such changes in this manual.
-
Page 5: Introduction And Overview
(LCD) with the control, comfort, and productivity of Wacom’s cordless, battery-free pen technology. This gives you a direct pen-on-screen interface for your computer. The basic components of your Cintiq include a Wacom pen tablet internally mounted behind a TFT color display, the Wacom Grip Pen, and a modular display stand. -
Page 6: Precautions On Use And Handling
Failure to do so could cause the loss of data or damage to your computer. Failure to do so could also void your warranty, in which case Wacom shall have no responsibility to repair or replace the product. -
Page 7: Usage
Do not connect or disconnect the video or power cables while Cintiq or your computer are Caution turned on; this may damage the display or computer video card. In this case, Wacom shall have no responsibility to repair or replace the product. - Page 8 Do not disassemble the Cintiq stand. Improper disassembly could result in physical injury or Warning damage to the stand. In this case, Wacom shall have no responsibility to repair or replace the product. Choking hazard. Prevent children from swallowing the pen tip or side switch. The pen tip or Warning side switch may accidentally be pulled out if children are biting on them.
- Page 9 WEEE symbol shown at the beginning of this note unless this is not feasible because of the size or the function of the product. Wacom products are subject to the Directive 2002/96/EC and therefore you should always collect them separately and bring them to the appropriate collection point in your community or region.
-
Page 10: Table Of Contents
TABLE OF CONTENTS INTRODUCTION AND OVERVIEW ......... . .1 PRECAUTIONS ON USE AND HANDLING . - Page 11 CUSTOMIZING ............34 Opening the control panel .
- Page 12 Ordering parts and accessories ..........71 Available parts and accessories .
-
Page 13: Unpacking Your Cintiq
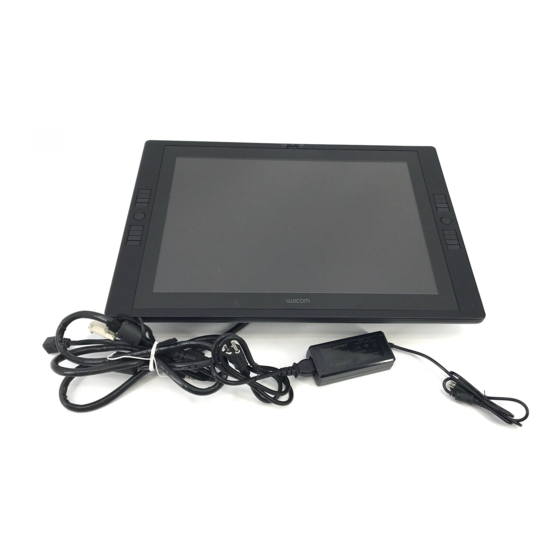
UNPACKING YOUR CINTIQ Carefully unpack and place all items on a stable surface. Verify that contents are complete. The product parts and accessories are packed together in the accessories box. To avoid damage, see the instructions on the following pages before setting up and using Cintiq or the Cintiq stand. Cintiq interactive pen display, Cintiq stand (MST-A155) with attached cabling... -
Page 14: Setting Up The Cintiq Stand
SETTING UP THE CINTIQ STAND Place the stand on your desktop or work surface. Make sure the stand is stable and will not tip or fall when the pen display is mounted on it. Then familiarize yourself with the stand components. Do not operate the incline adjustment levers when Cintiq is not mounted on the stand, and do Warning not lift the stand by the adjustment levers. -
Page 15: Unpacking And Mounting The Cintiq Pen Display
UNPACKING AND MOUNTING THE CINTIQ PEN DISPLAY Remove any packing materials from the back of the display unit and cabling. Mount Cintiq on the stand: • Make sure the stand is placed in a stable position on your desktop or other work surface so that it will not tip or fall when Cintiq is mounted on it. -
Page 16: Adjusting The Display Incline
When operating the incline adjustment levers, Warning Cintiq must be mounted on the stand with the stand feet resting on a stable, flat surface. The stand is spring-loaded and can snap back quickly, causing injury or damage if not – B – operated properly. -
Page 17: Adjusting Rotation
ADJUSTING ROTATION To adjust rotation, grasp Cintiq by the main body and rotate the unit to the desired position; it will move on the bearing hub. Cintiq can be rotated on the display stand when the incline is less than or equal to 25 degrees. -
Page 18: Your Cintiq Interactive Pen Display
YOUR CINTIQ INTERACTIVE PEN DISPLAY After the Cintiq pen display is safely mounted on the Cintiq stand, take some time to familiarize yourself with the features and components of your product. The display and tablet sensor function as an integrated output and input device. The tablet sensor reports pen coordinates, pressure, tilt, switch, eraser, and other information. -
Page 19: Rear View
REAR VIEW On Screen Display (OSD) controls Integrated pen holder and alternate cable exit Use these controls to adjust a variety The pen can be stored here. If you are not of display settings. See “Adjusting the using the Cintiq stand supplied with the unit, display”... -
Page 20: Pen Features
When pressure is applied to the pen tip, the pen simulates a primary mouse button click. Tip click pressure can be adjusted in the Wacom Tablet control panel. Important: Only use a pen that is compatible with Cintiq, such as the pen that shipped with the unit, or pens from the Intuos4 product line which have a part number ending in “-01”. -
Page 21: Installation
Then install as a pen tablet. Both stages require hardware and software installations and adjustments. Carefully follow ALL instructions. Important: You MUST install the Wacom driver software for correct pen-on-screen functionality. SYSTEM REQUIREMENTS Make sure your computer meets the following minimum system requirements: •... -
Page 22: Step 1: Display Installation
STEP 1: DISPLAY INSTALLATION In this step, Cintiq is installed as a display on your system. Important: Never connect or disconnect the video or power cables while your computer or pen display are powered on. This can damage the display or video card. 1. - Page 23 DISPLAY CABLING DIAGRAM – A – DVI/VGA switch Rear panel of computer Video card DVI or VGA Cintiq, rear view – B – DVI-I connector To connect to a DVI-D connector, use the DVI-D to DVI-I adapter. To connect to a VGA connector, use the VGA to DVI-I adapter.
- Page 24 ..An update driver dialog or Wizard will RIVER PDATE RIVER appear. E) Insert the Installation CD. If the Wacom Tablet installation menu displays, close it. Windows 7 and Vista: • Select B ROWSE MY COMPUTER FOR DRIVER SOFTWARE •...
- Page 25 8. As necessary, configure the display control panel settings for the proper size and color resolution. See the “Product specifications” on page 68 for details about the maximum (native) resolution and other resolution sizes that can be used with Cintiq. The display size and color resolution may be constrained by the capabilities of your video card.
-
Page 26: Step 2: Pen Tablet Installation
STEP 2: PEN TABLET INSTALLATION In this step, Cintiq is installed as a pen tablet. USB CABLE INSTALLATION Plug the USB connector into an available USB port on your computer or into a USB hub attached to your computer. To USB port Computer Next, install the pen tablet software. -
Page 27: Software Installation
Driver installation automatically activates the new pen input functions available within Microsoft Windows 7, Vista, and Office 2007 or later (except for Windows 7 Starter and Home Basic, and Windows Vista Home Basic). Visit the Wacom web site at www.wacom.com/vista for additional information on using your Wacom pen in Windows. -
Page 28: Working With Your Cintiq
Note regarding RSI: Wacom makes no representation, promise or guarantee that Wacom products will cure or prevent, in whole or in part, mouse-induced repetitive stress symptoms, injuries or conditions. Individual results may vary. Always obtain competent medical advice to determine the most appropriate treatment for your specific situation. - Page 29 Tips: If the rotation lock screws are attached to the back of Cintiq, they must be removed before Cintiq can be rotated. Before rotating the display unit, be sure the cable is freely rotating behind the unit. Do not pull the cable out of its computer connections by accidentally moving the pen display too far from the computer.
-
Page 30: Using The Grip Pen
USING THE GRIP PEN The pen is cordless, battery-free, and senses the amount of tilt and pressure you exert upon it. HOLDING THE PEN Hold the pen like you would a normal pen or pencil. Make sure the DuoSwitch is in a convenient location where you can toggle it with your thumb or forefinger, but not accidentally press it while drawing. -
Page 31: Positioning
POSITIONING To position the screen cursor, move the pen slightly above the Cintiq display screen without touching the screen surface. Press the pen tip on the display screen to make a selection. Note: You must calibrate the pen display to correctly align the screen cursor with the pen tip. -
Page 32: Dragging
. Switch functions can be modified or disabled using the IGHT LICK Wacom Tablet control panel. See the electronic Software User’s Manual for details. WORKING WITH PRESSURE SENSITIVITY The pen responds to the nuance and inflection of your hand movements, enabling you to create natural-looking pen and brush strokes within applications that support this feature. -
Page 33: Using The Pen Holder
USING THE PEN HOLDER An integrated pen holder is located at the back of the pen display. The pen holder is a handy feature for those times when it is inconvenient to use the desktop pen stand. Note: The pen holder is not available for use when routing the cable to exit through the top cable opening. -
Page 34: Pen Display Controls
PEN DISPLAY CONTROLS To improve your workflow in graphics or other applications, the Cintiq pen display features ExpressKeys and Touch Strips. While using the pen with your dominant hand, you can simultaneously use your other hand to operate the ExpressKeys or Touch Strip. Touch Strips (located on back of unit, one on each side) Touch Toggle button Slide your finger over the Touch Strip to zoom, scroll, or... -
Page 35: Using The Expresskeys
Cintiq pen display and your other displays. When selected, Cintiq can be used either as a pen display (the screen cursor is positioned at the pen tip location) or as a standard Wacom tablet (the screen cursor can be moved across the entire desktop or additional displays). -
Page 36: Using The Touch Strips
Here are a few ideas for using the ExpressKeys: • Set a pair of keys to commonly used keystrokes, such as [ and ] to decrease and increase your brush size in Photoshop. • Set a key to a commonly used keyboard shortcut in order to open files or start an application. •... - Page 37 The Touch Strip default setting states are as listed below. See the electronic Software User’s Manual for details on other available settings. The defaults are the same for the left and right side Touch Strips. • . Sets the Touch Strip to zoom in most graphics applications and scroll in CROLL most other applications.
-
Page 38: Customizing
After mastering the basics of using your Grip Pen on the Cintiq interactive pen display, you may want to customize the way your product works. The Wacom Tablet control panel make it easy to adjust your Cintiq and pen settings. -
Page 39: Customization Basics
This manual covers only the basics of customizing Cintiq. For detailed information see the Software User’s Manual. Open the Wacom Tablet control panel to customize Cintiq. When you open the control panel, an icon for the G is displayed in the T list and the appropriate tabs are displayed. -
Page 40: Calibrating Cintiq
See “Adjusting the display” on page 38 and “Adjusting pitch and phase (VGA only)” on page 37. 1. Open the Wacom Tablet control panel. If more than one pen display is installed on your system, select the unit you are working with from the T list. -
Page 41: Adjusting Pitch And Phase (Vga Only)
If the image is still blurred, adjust pitch and phase by following the below procedure. For optimal display quality, set your video card to the maximum (native) resolution that can be used with Cintiq. See the “Product specifications” on page 68 for details. 1. In the Wacom Tablet control panel, select the C tab. -
Page 42: Adjusting The Display
ADJUSTING THE DISPLAY FACTORY PRESETS, AUTO-SYNC, AND USER SETTINGS Factory presets: For optimal display quality, set your video card to the maximum (native) resolution that can be used with Cintiq. See the “Product specifications” on page 68 for details. Auto-sync: Cintiq automatically synchronizes to the incoming signal. The auto-sync function sets the horizontal and vertical screen position, as well as pitch and phase. - Page 43 Menu options are available when you open the On Screen Display (OSD). options allow you to choose the language in which to display ANGUAGE the OSD menu. OSD P options include: OSITION • . Adjusts the vertical position of the OSD menu window. ERTICAL •...
- Page 44 options include: CALING . Resizes the image to fill the whole screen. . Resizes the image to fill as much of the screen as possible SPECT while maintaining the correct aspect ratio. 1:1. Displays the image at the actual resolution. options include: THER •...
-
Page 45: Power Saving
POWER SAVING Cintiq conforms to VESA power saving guidelines. When used with a Display Power Management Signaling (DPMS) compliant computer or video card, the display will automatically comply with the below power saving parameters. When these power-saving functions are in effect, the screen display is darker than usual. Computer mode H-sync V-sync... -
Page 46: Troubleshooting
TROUBLESHOOTING Most of the time your interactive pen display will work flawlessly. But if you are having trouble, Wacom recommends you do the following: 1. If the Wacom driver failed to load properly, first perform the recommended action in any error message that may appear on your screen. - Page 47 Strips” on page 45 for more information. If you are still having problems, you may have a defective pen or pen display. After testing, use the Wacom Tablet control panel to reconfigure your tablet and tools for any custom settings you may originally have been using.
-
Page 48: Testing Controls And Input Tools
3. When you are done, click the C button to exit the dialog box. LOSE Important: Remember that some applications can override and control the ExpressKey functions. Consider closing any open applications except the Wacom Tablet control panel when testing the ExpressKeys. Troubleshooting Page 44... -
Page 49: Testing The Touch Strips
4. When you are done, click the C button to exit the dialog box. LOSE Important: Remember that some applications can override and control the Touch Strip functions. Consider closing any open applications except the Wacom Tablet control panel when testing the Touch Strips. Troubleshooting Page 45... -
Page 50: Testing A Pen
TESTING A PEN 1. While observing the P column, bring your pen within 5 mm (0.2 inch) of the OINTING EVICE display screen. A value for P , the D , and a D S/N (serial ROXIMITY EVICE EVICE EVICE number) should be displayed. -
Page 51: Display Troubleshooting
DISPLAY TROUBLESHOOTING If you encounter problems with the display portion of your Cintiq, refer to the following tables; your problem may be described here and you can try the solution offered. For additional information about color issues, see the documentation that came with your operating system or applications. GENERAL DISPLAY PROBLEMS No display. - Page 52 An ‘out of range’ message appears • The input signal frequency is incorrectly set or not briefly on your display screen. compatible with Cintiq. Set the refresh rate to a vertical frequency that is compatible with Cintiq. If your video card driver supports adjustment of the horizontal frequency, make sure it is set to a compatible value.
-
Page 53: Vga Problems
VGA PROBLEMS The display ripples or flickers. • Open the OSD menu and select the A option. DJUST Then, if necessary, manually adjust pitch and phase. • Verify that the display adapter or video card matches the specifications for Cintiq. •... -
Page 54: Pen Tablet Troubleshooting
Verify also that your application supports pressure sensitivity. Clicking is difficult. Open the Wacom Tablet control panel and go to the P tab. Try using a lighter T The pen selects everything or will Open the Wacom Tablet control panel and go to the P tab. - Page 55 The eraser selects everything or will Open the Wacom Tablet control panel and go to the E RASER not stop erasing. tab. Move the E slider toward F , or select the RASER ... button and increase the C setting.
- Page 56 (5 mm (0.2 inch)) of the pen display active area. Do this without pressing down on the pen tip. In the Wacom Tablet control panel, verify that the side switch is set to the proper function you are expecting to occur for the application and input tool you are using.
- Page 57 Wacom Tablet control panel. If you use application-specific settings, be sure you have updated the settings for the correct application. Touch Strip functions do not toggle...
-
Page 58: Windows-Specific Problems
WINDOWS-SPECIFIC PROBLEMS You suspect the Cintiq preferences Use the Wacom Tablet Preference File Utility to work with may be corrupted, or want to make your preferences. Close any open applications. Click the certain that all settings are at their icon and select A . -
Page 59: Macintosh-Specific Problems
If a pen display model is not listed, check the pen display USB cable connection or try plugging the pen display into a different USB port. If this does not help, contact Wacom for Technical Support. See “Technical support options” on page 57. You suspect the pen display Use the Wacom Tablet Utility to work with your preferences. - Page 60 , and then YSTEM REFERENCES enable handwriting recognition. 4. Test the Ink function using your Wacom pen display and pen. If this procedure does not resolve your problem with Ink, contact Apple Support for further assistance. Wacom is not the software manufacturer for Ink and we are limited in our abilities to support a third party software application.
-
Page 61: Technical Support Options
FAQs (Frequently Asked Questions) on the Wacom web site for your region. If you have an Internet connection you can download the latest software drivers from the Wacom web site for your region. See “Obtaining driver downloads” on page 58. -
Page 62: Obtaining Driver Downloads
OBTAINING DRIVER DOWNLOADS Wacom periodically updates the software driver for the tablet portion of the interactive pen display to maintain compatibility with new products. If you are having a compatibility problem between your interactive pen display and a new hardware or software product, it may be helpful to download a new Wacom software driver (when available) from the Internet. -
Page 63: Appendix
APPENDIX This section contains tips on caring for your Cintiq, instructions on how to uninstall the software, your license and warranty, and more. CARING FOR CINTIQ Keep the Grip Pen and the Cintiq LCD screen surface clean. Dust and dirt particles can stick to the pen and cause excessive wear to the display screen surface. -
Page 64: Replacing The Pen Tip
REPLACING THE PEN TIP The pen tip (nib) will wear with normal use. Excessive pressure will cause it to wear sooner. If your interactive pen display has a coated surface a worn nib may cause damage. To avoid this, periodic tip replacement is recommended. -
Page 65: Optional Display Configurations
OPTIONAL DISPLAY CONFIGURATIONS After mounting the pen display unit on the Cintiq stand, you can rotate the pen display to a variety of positions. If you do not plan to rotate the Cintiq and want to fasten it more securely to the stand, install the rotation lock screws as shown below. -
Page 66: Using An Alternate Mount Or Stand
USING AN ALTERNATE MOUNT OR STAND Cintiq can be attached to any mount arm or stand conforming to the VESA 100 standard. Mounting screws that are 4 mm wide with a 0.7 mm pitch (M4 Regular), with a screw clearance depth from 13 – 18 mm are required. - Page 67 4. Next remove the four attachment screws from the cable cover plate and lift the plate away from the pen display unit. 5. Place the cable into the cable exit channel. Then reattach the cable cover plate making sure to use the correct screws for reattachment.
- Page 68 6. Taking care not to dislodge the bearing stopper from the hub section, position the two halves of the bearing hub together around the pen display cable and over their attachment points. Proper positioning shows the hub sections aligned along the horizontal axis of the pen display.
-
Page 69: Pen And Digital Ink Capabilities In Windows
Journal simulates a physical notebook, but with the advantages of digital note taking. You can choose from a variety of pen, marker, and highlighter tools, plus an eraser that is easily activated by the eraser of your Wacom pen. Journal also includes a powerful search engine that can even locate your handwritten content. -
Page 70: About The Windows Tablet Pc Input Panel
3. Customize the Input Panel settings for the way you like to work. To learn more about using your Wacom pen in Microsoft Windows and Office 2007 or later, study the documentation that came with your system and Microsoft Office applications. Be sure to take advantage of the Windows training tools, including the Tablet PC tutorial, available from Microsoft. -
Page 71: Uninstalling Cintiq
UNINSTALLING CINTIQ Follow the appropriate procedure below to remove the Wacom driver software and Cintiq interactive pen display from your system. Important: When you remove the Wacom driver software from your system, your Wacom interactive pen display will no longer operate with full tablet functionality but will continue to function as a mouse device. -
Page 72: Product Specifications
PRODUCT SPECIFICATIONS GENERAL SPECIFICATIONS Dimensions (W x D x H) 561 x 421 x 47.8 mm (22.10 x 16.59 x 1.88 in), excluding center bearing and stand Weight 8.7 kg (19.14 lb), excluding stand 10.4 kg (22.88 lb) with stand Input voltage 12 VDC Power consumption, with AC adapter... -
Page 73: Display
Each LCD panel is produced under very stringent quality standards. Production techniques cannot guarantee an absolutely perfect TFT display. Wacom does not allow any pixel to be always white or always black. A small number of pixels are allowed to show a wrong color for some parts of the color spectrum. -
Page 74: Pen Tablet
PEN TABLET Reading technology Electro-magnetic resonance technology Active area 432.0 x 324.0 mm (17.0 x 12.8 in) Resolution 0.005 mm/point (5080 lpi) Accuracy ±0.5 mm (±0.02 in), center Edge area 1 (20 mm wide from edge of display area) to be ±2.0 mm (±0.08 in) Edge area 2 (3 mm wide from edge of display area) to be ±4.0 mm (±0.16 in) -
Page 75: Product Information
Thailand http://www.wacom-thai.com ORDERING PARTS AND ACCESSORIES To purchase parts and accessories, refer to the Wacom pen display Read Me file and see who to call for your region. You can also do the following: To purchase parts and accessories in the USA or Canada, call 1.888.884.1870 (toll-free) or visit Wacom’s web site at http://www.WacomDirect.com (USA only). -
Page 76: Available Parts And Accessories
AVAILABLE PARTS AND ACCESSORIES DESCRIPTION PART NUMBER Grip Pen. Sensitive to pressure and tilt, the Grip Pen is an all-purpose tool for KP-501E-01 drawing, erasing, and mouse operations. The easy-to-use DuoSwitch gives you two programmable switch functions. The pressure-sensitive pen has an ergonomically waisted grip area, optimum weight and balance, and superior tip sensitivity, making it the most natural freehand tool. - Page 77 ACK-30002 Pen grip, standard for pen use without side switch ACK-30003 For a list of other available parts and accessories, visit the Wacom web site for your region. For order information see “Ordering parts and accessories” on page 71. Appendix...
-
Page 78: Radio And Television Interference
Plug the equipment and computer into an outlet that is on a different circuit from the television or radio. If necessary, consult your Wacom dealer or an experienced radio/television technician for help. Changes or modifications to this product not authorized by Wacom could void the FCC Certification and negate your authority to operate the product. -
Page 79: Industry Canada (Canada Only)
- IEC61000-4-8: 2001 - IEC61000-4-11: 2004 Based on the results of these tests, Wacom declares that the above mentioned device conforms to the EMC Directive 2004/108/EC. Based on the results of these tests, Wacom declares that the above mentioned device conforms to the Safety Directive 2006/95/EC. -
Page 80: Warranty (Worldwide, Except For Europe, Africa And Middle East)
Wacom will pay for return shipping by United Parcel Service or by an equivalent service as chosen by Wacom. -
Page 81: Warranty Service In The U.s.a. And Canada
Wacom repair center. In all other respects, the terms of the warranty as set forth above apply to such sales. -
Page 82: Licence Warranty Conditions (Europe, Africa And Middle East)
WACOM Europe GmbH ("WACOM"). This software is an integral component of the product and is also held on the associated data carrier. The software of WACOM and the associated rights of use are not included with the purchase of this product from your retailer. WACOM grants you-the user-the right to use the software exclusively in accordance with the conditions stipulated in this licence agreement. -
Page 83: Limited Warranty
WACOM, nor for damages arising from wilful or grossly negligent behaviour on the part of WACOM, from damages leading to loss of life, personal injury or sickness or in the case of binding legal provisions. - Page 84 The jurisdiction agreement shall also apply for customers who do not have a general place of jurisdiction in Germany. The jurisdiction agreement shall not apply if, due to legal provisions, a different sole place of jurisdiction must be established for the case. Furthermore, WACOM is authorised to file a lawsuit against the headquarters of the customer.
-
Page 85: Cintiq Exchange Policy (Europe, Africa And Middle East)
Wacom Europe GmbH headquarters within 7 days after delivery of the exchange unit. In any case you can send in your defective Cintiq to any Wacom office for repair, either directly or through your dealer or distributor, however the fast exchange program is only available as described above. -
Page 86: Glossary
Click force. The amount of force you must apply to the tip of your pen for a click to occur. Double-click assist. A function of the Wacom Tablet control panel that makes it easier to double-click by setting the size of the double-click distance. - Page 87 Pixel. The smallest unit of measure on your display screen. Pressure sensitive. A quality of the Wacom pen tip and eraser that senses the amount of pressure being applied. This is used to create natural-looking pen, brush, and eraser strokes in applications that are pressure sensitive.
-
Page 88: Index
INDEX Accessories Industry Canada statement 75 available 72 Information, product 71 ordering 71 Input tools, testing 44 Auto-sync 38 Installation 17 Calibration, of pen display 36 software 23 CE declaration 75 step 1, display installation 18 Cintiq step 2, pen tablet installation 22 caring for 59 system requirements 17 uninstalling 67... - Page 89 troubleshooting 47 Testing uninstalling 67 Cintiq 42 user settings 38 controls 44 using an alternate mount 62 Expresskeys 44 working with 24 input tools 44 Pen holder, using 29 pen 46 Pen tablet Touch Strips 45 general problems 50 Tilt, drawing with 28 installation 22 Touch Strips 30 Macintosh-specific problems 55...
- Page 90 2-8 South Street Rydalmere CPF Bishan Building #06-08 NSW 2116 Australia Singapore 579838 Telephone: +61.2.9422.6700 Telephone: +65.6258.8640 Fax: +61.2.9420.2272 Fax: +65.6258.8697 WACOM TAIWAN INFORMATION CO., LTD. Suite 605, 6th floor, No. 205 Tun-Hwa North Road Taipiei, 105 Taiwan Telephone: +886.2.2712.2675 Fax: +886.2.2712.9789...
- Page 91 설치 가이드 및 하드웨어 설명서 모델 : DTK-2100...
- Page 92 위의 연도는 본 설명서가 제작된 시기를 가리킵니다 . 그러나 “설명서”는 해당하는 와콤 제품의 시장 출하와 동시 에 사용자에게 배포됩니다 . 듀오 스위치는 Wacom Co., Ltd. 의 상표이며 Cintiq 및 Wacom 은 등록상표입니다 . Adobe, Reader, 및 Photoshop 은 미국 및 / 또는 기타 국가 내의 Adobe systems Incorporated 의 등록상표 또는 상...
-
Page 93: 소개 및 개요
양방향 액정 펜 디스플레이는 LCD ( 액정 디스플레이 ) 와 전지를 사용하지 않는 와콤의 ® ® Wacom Cintiq 무선 펜 기술의 제어 기능 , 편안한 사용감 및 생산성을 결합한 것입니다 . 이는 컴퓨터의 화면에 직접 펜 을 사용할 수 있는 인터페이스를 제공합니다 . -
Page 94: 사용 및 취급 관련 주의사항
사용 및 취급 관련 주의사항 제품을 안전하게 사용하기 위해서 본 설명서의 모든 지시 , 주의 및 경고에 따라 주십시오 . 그렇게 하지 않으면 데이터 손실 또는 컴퓨터에 손상을 줄 수 있습니다 . 그렇게 하지 않으면 보증이 무효로 되며 , 와 콤은... - Page 95 사용 신티크와 함께 사용하도록 지정된 전원 어댑터만을 사용하십시오 . 다른 종류의 전원 어댑터를 경고 사용하는 경우에는 신티크가 올바르게 작동하지 않거나 손상될 수 있습니다 . 또한 , 다른 종류 의 전원 어댑터를 사용하면 잠재적인 화재의 우려가 있습니다 . 다른 전원 어댑터를 사용하면 보증이...
- Page 96 LCD 화면이 손상된 경우에는 누액된 액체를 만지지 마십시오 . 이 액체는 자극성 물질입니다 . 경고 피부 , 눈 또는 입에 닿은 경우에는 즉시 흐르는 물에 최소한 15 분 이상 씻어내 주십시오 . 눈이 나 입에 닿은 경우에는 의사에게도 상담하십시오 . 경고...
- Page 97 신티크를 고압 정전기 방전 또는 LCD 화면에서의 정전기 전하 축적에 노출되지 않도록 하십시 주의 오 . 그렇게 하면 디스플레이의 일시적인 변색 및 얼룩을 유발할 수 있습니다 . 변색이 발생하면 디스플레이를 켠 상태로 방치하면 몇 시간 내에 변색이 사라집니다 . 재사용 , 재활용 및 회수 . 사용 중인 제품을 신제품으로 교체하거나 가용 수명보다 더 오래 사 용한...
- Page 98 목차 소개 및 개요 ............1 사용...
- Page 99 펜 디스플레이 컨트롤 ........... 30 익스프레스키...
- Page 100 Windows 에서의 펜 및 디지털 잉크 기능 ........65 Windows 타블렛...
-
Page 101: 신티크 포장 풀기
신티크 포장 풀기 조심스럽게 포장을 풀고 모든 항목을 편평한 곳에 올려 놓습니다 . 내용물이 전부 들어있는지 확인합니다 . 제품 부품과 부속품은 부속품 상자에 함께 포장되어 있습니다 . 손상을 방지하려면 신티크 또는 신티크 스탠드를 설치 및 사용하기 전에 다음 페이지에 나온 지침을 참조하십시오 . 양방향... -
Page 102: 신티크 스탠드 설치 방법
신티크 스탠드 설치 방법 스탠드를 책상 또는 작업 표면에 놓습니다 . 스탠드가 안정된 상태인지 확인하고 펜 디스플레이를 장착 할 때 기울어지거나 떨어지지 않도록 주의하십시오 . 그런 다음 스탠드 구성 부품에 대해 숙지하십시오 . 스탠드에 신티크를 장착하지 않은 상태에서 스탠드 조정 손잡이를 조작하거나 조정 손잡이를 잡 경고... -
Page 103: 신티크 펜 디스플레이 포장 풀기 및 장착 방법
신티크 펜 디스플레이 포장 풀기 및 장착 방법 디스플레이 기기 후면과 케이블에서 모든 포장 재료를 제거합니다 . 스탠드에 신티크 장착 : 신티크를 장착할 때 기울어지거나 떨어지지 않도록 스탠드를 책상 또는 다른 작업 표면에서 안정된 • 위치에 배치했는지 확인하십시오 . 신티크를 두 손으로 확실히 잡으십시오 . 전원 스위치 및 LED 를 상단에... -
Page 104: 디스플레이 기울기 조정 방법
스탠드 조정 손잡이를 조작할 때는 스탠드 다리 경고 를 평평하고 안정된 표면에 놓은 상태에서 스탠 드에 신티크가 장착되어 있어야 합니다 . 스탠 드는 스프링 방식으로 로드되며 빠르게 되튕길 – B – 수 있으므로 , 제대로 조작하지 않을 경우 부상 또는 기기 손상을 초래할 수 있습니다 . 디스플레이... -
Page 105: 회전 조정 방법
회전 조정 방법 회전을 조정하려면 본체로 신티크를 잡고 원하는 위치로 기기를 돌리십시오 . 이렇게 하면 기기가 베어 링 허브에서 움직입니다 . 기울기가 25 도보다 작거나 같은 경우 화면 스탠드에서 신티크를 회전할 수 있 습니다 . 펜 디스플레이는 좌우 방향으로 179 도 까지만 회전할 수 있습니다 . 그 이상 회전 시키는 경우 통합... -
Page 106: 양방향 액정 펜 디스플레이
양방향 액정 펜 디스플레이 신티크 펜 디스플레이를 신티크 스탠드에 안전하게 장착한 후 , 약간의 시간을 할애하여 제품의 기능과 구성 부품을 숙지하십시오 . 디스플레이 및 타블렛 센서는 통합 출력 및 입력 장치로 기능합니다 . 타블렛 센서는 펜 좌표 , 압력 , 기울 기... - Page 107 후면 OSD (On Screen Display) 조정 버튼 통합 펜 홀더 및 대체 케이블 배출구 이러한 컨트롤을 사용하여 다양한 디스 여기에 펜을 보관할 수 있습니다 . 기기와 함께 플레이 설정을 조정할 수 있습니다 . 38 제공된 신티크 스탠드를 사용하지 않는 경우 , 페이지의...
-
Page 108: 펜 기능
펜 기능 지우개 : 펜 디스플레이 5 mm 이내의 위치로 가져가면 디스플레이의 타블렛 부분이 펜의 위치를 감지합니다 . 지우개를 대고 누르면 압력 정보가 감지됩니다 . 지우개의 기능은 [ 지우개 ] 로 기본 설정되어 있 습니다 . 듀오 스위치 ( 사이드 스위치 ): 프로그래머블 스위치를 엄지나 검지 손가락으로... -
Page 109: 시스템 요구 조건
설치 컴퓨터는 양방향 액정 펜 디스플레이를 두 개의 별도의 장치 ( 디스플레이와 펜 타블렛 ) 로 취급합니다 . 그러므로 , 설치 절차는 두 단계로 완료됩니다 : 먼저 디스플레이로써 설치합니다 . • 그리고 나서 펜 타블렛으로 설치합니다 . • 모든 과정에는 하드웨어 및 소프트웨어 설치와 조정이 필요합니다 . 모든 지침을 주의해서 따라 주십시 오... -
Page 110: 순서 1: 디스플레이 설치
순서 1: 디스플레이 설치 이 단계에서는 시스템의 디스플레이로 신티크를 설치합니다 . 중요 : 컴퓨터 또는 펜 디스플레이의 전원이 켜져 있는 동안에는 비디오 또는 전원 케이블을 연결하거나 분리하지 마십시오 . 디스플레이 또는 비디오 카드가 손상될 수 있습니다 . 1. 컴퓨터의 전원을 끄십시오 . 2. - Page 111 디스플레이 케이블 배선도 – A – DVI/VGA 스위치 컴퓨터 후면 패널 비디오 카드 DVI 또는 VGA 신티크 , 후면 – B – DVI-I 커넥터 DVI-D 커넥터에 연결하려면 DVI-D 대 DVI-I 어댑터를 사용하십시오 . VGA 커넥터에 연결하려면 VGA 대 DVI-I 어댑터를 사용하십시오 . AC 전원...
- Page 112 7. 그 다음으로 컴퓨터의 전원을 켜십시오 . Windows 인 경우 : 양방향 액정 펜 디스플레이가 자동으로 기본 모니터로 설치됩니다 . ( 일부 모델 에는 컬러 프로파일이 포함되지 않을 수 있습니다 .) 본 기기를 펜 디스플레이로 인식시키고 컬러 조 정 프로파일을 설치하려면 : A) 시스템의...
- Page 113 8. 필요한 경우에는 디스플레이 제어판의 설정을 변경해서 크기와 색 해상도를 적절하게 조정합니다 . 신티크에서 사용할 수 있는 최대 ( 네이티브 ) 해상도 및 기타 해상도 크기에 관한 상세한 내용은 68 페이지의“제품 사양”을 참조하십시오 . 디스플레이 크기 및 색 해상도는 사용하는 비디오 카드의 사양에...
-
Page 114: 순서 2: 펜 타블렛 설치
순서 2: 펜 타블렛 설치 이 단계에서는 신티크를 펜 타블렛으로 설치합니다 . USB 케이블 설치 USB 케이블을 컴퓨터에서 사용 가능한 USB 포트 또는 컴퓨터에 연결된 외부 전원이 공급되는 USB 허 브에 연결하십시오 . USB 포트로 컴퓨터 그런 다음 , 펜 타블렛 소프트웨어를 설치하십시오 . 23 페이지의 “소프트웨어 설치”를 참조하십시오 . 설치... -
Page 115: 소프트웨어 설치
Starter 및 Home Basic, Windows Vista Home Basic 제외 ) 에서 새로운 펜 입력 기능을 사용할 수 있게 됩니다 . Windows 에서 와콤 펜을 사용하는 방법에 대한 추가 정보는 와콤 웹사이트 www.wacom.com/vista 에서 확인할 수 있습니다 . 사용자 관련 환경 설정이 지원됩니다 . 각 사용자는 로그인을 한 후 와콤 타블렛 제어판에서 원하... -
Page 116: 신티크를 사용한 작업 방법
신티크를 사용한 작업 방법 신티크를 사용해 작업을 하면서 보드판이나 종이 위에 그림을 그릴 때와 마찬가지로 디스플레이 화면 위 에 손을 가볍게 올리고 쉴 수 있습니다 . 신티크 펜 디스플레이 표면은 사용하는 책상보다 조금 높게 되므로 기기를 편안하게 사용할 수 있도록 책상이나... - Page 117 도움말 : 신티크 뒷면에 회전 방지 나사가 설치된 경우 , 신티크를 회전하려면 이 나사를 제거해야 합니다 . 디스플레이 기기를 회전하기 전에 기기 뒤로 케이블을 자유롭게 회전할 수 있는지 확인하십시오 . 실수로 펜 디스플레이를 컴퓨터에서 멀리 이동시켜 컴퓨터 연결부에서 케이블이 뽑히지 않도록 주의하십시오...
-
Page 118: 그립 펜 사용 방법
그립 펜 사용 방법 펜은 무선으로 전지를 사용하지 않으며 , 펜촉에 가해지는 기울기와 압력의 정도를 감지합니다 . 펜 잡는 방법 일반 펜이나 연필을 잡는 방법과 동일하게 펜을 잡습니다 . 듀오 스위치 ( 사이드 스위치 ) 를 엄지나 검지 손가락으로 편하게 조작할 수 있지만 , 그리기를 할 때 스위치가 실수로 눌러지지 않도록 하십시오 . 신티 크를... -
Page 119: 위치 결정
위치 결정 스크린 커서의 위치를 정하려면 스크린 표면을 터치하지 않은 상 태로 펜 디스플레이 스크린 위에서 펜을 가볍게 이동시킵니다 . 디스플레이 화면에 펜촉을 대고 누르면 선택이 됩니다 . 주의 : 펜 디스플레이를 보정해서 스크린 커서와 펜촉을 정확히 맞추어야 합니다 . (36 페이지의 “신티크 보정 방법” 참 조... -
Page 120: 드래그
드래그 대상을 선택한 다음 펜촉을 디스플레이 화면 위에서 미끄러 지듯이 이동시켜 대상을 이동시킵니다 . 듀오 스위치 ( 사이드 스위치 ) 사용 방법 펜에는 듀오 스위치 ( 사이드 스위치 ) 가 장착되어 있습니다 . 이 스위치는 스위치를 양쪽 방향으로 눌러 선택할 수 있는 2 가지 프로그램 기능이 있습니다 . 펜촉을 디스플레이 화면 표면에서 5 mm 이내의 거리 를... -
Page 121: 펜 홀더 사용 방법
펜 홀더 사용 방법 통합 펜 홀더는 펜 디스플레이의 뒷면에 있습니다 . 펜 홀더는 책상용 펜 스탠드를 사용하기 불편할 경우 유용하게 사용할 수 있는 기능입니다 . 주의 : 상단 케이블 입구를 통해 나오도록 케이블을 연결한 경우에는 펜 홀더를 사용할 수 없습니다 . 신티크를... -
Page 122: 펜 디스플레이 컨트롤
펜 디스플레이 컨트롤 그래픽 또는 다른 애플리케이션에서의 작업 흐름을 개선하기 위해 신티크 펜 디스플레이에는 익스프레 스키와 터치 스트립 기능이 지원됩니다 . 평소에 사용하는 손으로 펜을 사용할 때 동시에 다른 손으로 익 스프레스키 또는 터치 스트립을 조작할 수 있습니다 . 터치 스트립 ( 기기 후면에 있음 , 기기 양쪽 측면에 하나씩 위치 ) 터치... -
Page 123: 익스프레스키 사용 방법
익스프레스키 사용 방법 자주 사용하는 기능 또는 키스트로크를 수행하려면 개별 키를 누르십시오 . 또한 익스프레스키를 사용해 서 작업할 때 펜 또는 다른 입력 도구 등록 정보를 수정할 수 있습니다 . 익스프레스키는 서로 조합해서 작동할 수도 있습니다 . 예를 들어 한 키가 [C ] 키와... -
Page 124: 터치 스트립 사용
익스프레스키를 사용하는 몇 가지 방법은 다음과 같습니다 : Photoshop 에서 브러시 크기를 줄이거나 늘이기 위해 [ 및 ] 와 같이 일반적으로 사용하는 키스트로 • 크에 키 쌍을 설정합니다 . 파일을 열거나 애플리케이션을 시작하기 위해 일반적으로 사용하는 키보드 바로가기에 키를 설정합니다 . •... - Page 125 아래에 터치 스트립 기본 설정 상태가 나와 있습니다 . 사용 가능한 다른 설정에 대한 자세한 내용은 전자 식 소프트웨어 사용설명서를 참조하십시오 . 기본 설정은 왼쪽과 오른쪽 터치 스트립에 대해 동일합니다 . 자동 스크롤 / 줌 . 대부분의 그래픽 애플리케이션에서 화면을 확대하도록 터치 스트립을 설정하고 , •...
-
Page 126: 사용자 정의
사용자 정의 양방향 액정 펜 디스플레이에서 펜의 기본적인 사용 방법을 익힌 다음에는 펜의 작동 방식을 사용자 정 의할 필요가 있을 수 있습니다 . 와콤 타블렛 제어판을 사용하면 신티크 및 펜 설정을 쉽게 조정할 수 있 습니다 . 제어판 여는 방법 와콤... -
Page 127: 사용자 정의 기본 사항
사용자 정의 기본 사항 이 설명서에서는 신티크 사용자 정의에 대한 기본적인 사항에 대해서만 다룹니다 . 자세한 내용은 소프 트웨어 사용설명서를 참조하십시오 . 신티크를 사용자 정의하려면 와콤 타블렛 제어판을 엽니다 . 제어판을 열면 [ 입력장치 ] 목록에 [ 그립 펜 ] 의... -
Page 128: 신티크 보정 방법
신티크 보정 방법 펜 디스플레이를 보정해서 스크린 커서와 디스플레이 화면의 펜 위치를 맞추어야 합니다 . 이것은 보기 각도를 보정하고 , 디스플레이 화면 보호 유리로 인한 시차를 조정하는 데에 필요합니다 . 신티크를 작업 위치에 설치한 후 아래의 절차를 따라 주십시오 . 중요... -
Page 129: 피치와 페이즈 조정 방법 (Vga 의 경우만 )
피치와 페이즈 조정 방법 (VGA 의 경우만 ) 신티크를 처음으로 연결한 경우 , 일부 컴퓨터 및 비디오 카드는 자동 동기화 기능이 완전히 작동하도록 하지 않을 수도 있습니다 . 텍스트의 일부가 흐려지는 경우에는 [ 자동 보정 ] 옵션을 사용해서 입력 신호 와... -
Page 130: 디스플레이 조정 방법
디스플레이 조정 방법 공장 출하 시의 기본 설정 , 자동 동기화 및 사용자 정의 공장 출하시의 기본 설정 : 최적의 디스플레이 화질을 얻으려면 비디오 카드를 신티크에서 사용할 수 있 는 최대 ( 네이티브 ) 해상도로 설정합니다 . 상세한 내용은 68 페이지의 “제품 사양”을 참조하십시오 . 자동... - Page 131 메뉴 옵션은 OSD (ON SCREEN DISPLAY) 디스플레이를 열 때에 사용할 수 있습니다 . [ 언어 ] 옵션에서 OSD 메뉴에 표시될 언어를 선택할 수 있습니다 . [OSD 위치 ] 옵션에 포함되는 항목 : [ 수직위치 ]. OSD 메뉴 창의 수직 위치를 조정합니다 . •...
- Page 132 [ 화면비율 ] 옵션에 포함되는 항목 : [ 전체 ]. 화상이 전체 화면을 채우도록 화상의 크기가 조정됩니다 . [ 가로세로비율유지 ]. 동일한 종횡비를 유지한 상태로 화면에 최대한 꽉 차도록 화상 크기가 조정됩니다 . [1:1] 화상을 실제 해상도로 표시합니다 . [ 기타 ] 옵션에 포함되는 항목 : [ 위상...
-
Page 133: 절전 기능
절전 기능 신티크는 VESA 절전 가이드라인을 준수합니다 . 디스플레이 절전 (DPMS) 기능의 컴퓨터 또는 비디오 카드와 함께 사용하는 경우 , 디스플레이는 자동으 로 다음의 절전 기준에 맞게 작동합니다 . 이들 절전 기능이 작동할 때에는 스크린 디스플레이가 평소보다 어두워집니다 . 컴퓨터 모드 수평... -
Page 134: 문제 해결
문제 해결 사용하는 양방향 액정 펜 디스플레이는 아무 문제없이 잘 작동할 것입니다 . 그러나 만약 문제가 발생한 경우 , 와콤은 다음 지시에 따라 문제를 해결할 것을 권장합니다 : 1. 와콤 드라이버가 제대로 로딩되지 않는 경우에는 우선 스크린에 표시되는 에러 메시지에서 제시하 는... - Page 135 3. 신티크 의 타블렛 부분과 그립 펜이 작동되고 있는지 확인하십시오 : 펜촉을 디스플레이에 눌러 보고 상태 표시 LED 가 청색으로 점등하는지 확인하십시오 . • LED 가 점등되지 않으면 신티크 USB 케이블이 활성화된 USB 포트에 연결되어 있는지 확인하 • 십시오 . 신티크가...
-
Page 136: 컨트롤 및 입력 도구 점검 방법
컨트롤 및 입력 도구 점검 방법 그립 펜 또는 신티크 익스프레스키나 터치 스트립이 원하는 대로 작동하지 않을 경우에는 우선 할당된 기능을 확인하고 해당 설정을 기본 상태로 리셋하는 것이 좋습니다 . 펜을 기본 설정으로 복귀시키는 가 장 간단한 방법은 제어판 목록의 [ – ] 버튼을 클릭해서 [ 입력장치 ] 목록에서 삭제하는 것입니다 . 펜이 제거된... -
Page 137: 터치 스트립 점검 방법
터치 스트립 점검 방법 1. 각 터치 스트립을 점검할 때 [ 진단 ] 대화 상자를 열고 [ 타블렛 정보 ] 란을 확인하십시오 . 시스템에 한 대 이상의 신티크 기기가 연결된 경우에는 [ 타블렛 정보 ] 란에서 점검할 기기를 선택했는지 확인 하십시오... -
Page 138: 펜 점검 방법
펜 점검 방법 1. [ 포인팅장치 정보란 ] 을 확인하면서 펜을 디스플레이 화면에서 5 mm 이내의 거리로 유지하십시오 . [ 근접값 ], [ 디바이스명 ], [ 디바이스타입 ] 및 [ Device S/N]( 시리얼 넘버 ) 의 값이 표시되어야 합 니다 . 시스템에 한 대 이상의 신티크 기기가 연결된 경우에는 [ 타블렛 정보 ] 란에서 펜을 점검할 기 기를... -
Page 139: 디스플레이 문제 해결
디스플레이 문제 해결 신티크의 디스플레이 부분에 문제가 발생한 경우에는 다음 표를 참조하십시오 . 표에 발생한 문제가 설 명되어 있는 경우에는 제시한 해결 방법을 사용해 보십시오 . 색상에 대한 보다 상세한 내용은 사용하는 운영 체제 또는 애플리케이션의 설명서를 참고하십시오 . 디스플레이의 일반적인 문제 현상 표시가... - Page 140 디스플레이 화면에 ‘out of range’ 입력 신호 주파수가 부적절하게 설정되었거나 신티크와 • 호환하지 않습니다 . 신티크와 호환하는 수직 주파수로 재 라는 메시지가 짧게 표시됩니다 . 생률을 설정하십시오 . 사용하는 비디오 카드 드라이버가 수평 주파수의 조정을 지원하는 경우에는 , 호환하는 값으 로...
-
Page 141: Vga 의 문제 현상
VGA 의 문제 현상 디스플레이 화면이 물결치거나 깜박 OSD 메뉴를 열고 [ 자동 보정 ] 옵션을 선택하십시오 . 그 • 거립니다 . 리고 필요에 따라 피치와 페이즈를 수동으로 조정하십시 오 . 디스플레이 어댑터 또는 비디오 카드 사양이 신티크에 맞 • 는지... -
Page 142: 펜 타블렛 문제 해결
대부분의 문제 현상에 대해 설명이 되어 있으므로 제시된 해결 방법을 사용해 해결하면 됩니다 . 최신 정 보는 신티크 Read Me 파일을 참조하십시오 . 보다 상세한 내용은 와콤 웹사이트 http://www.wacom.com/productsupport 에서 확인하십시오 . 일반적인 문제 현상 컴퓨터에 사용할 수 있는 USB 포트... - Page 143 지우개가 전체를 선택하거나 지우기 와콤 타블렛 제어판을 열고 [ 지우개 스의치 ] 탭을 선택하십시 가 중지되지 않습니다 . 오 . [ 지우개 감촉 ] 슬라이더를 [ 하드 ] 로 조정하거나 [ 상세 설정 ...] 버튼을 선택해 [ 클릭압력 ] 설정을 증가시키십시오 . 그래도...
- Page 144 펜 듀오 스위치 ( 사이드 스위치 ) 작 양방향 액정 펜 디스플레이와 함께 제공된 펜 또는 부품 번호 가“-01”로 끝나는 Intuos4 펜을 사용 중인지 확인하십시오 . 동하지 않습니다 . 그 밖의 펜은 펜 디스플레이에서 정상적으로 기능하지 않을 수 있습니다 . 펜촉이...
- Page 145 스크린 커서의 위치와 그리는 선의 정상적으로 기능하게 하려면 , 일부 애플리케이션의 경우에는 위치가 일치하지 않습니다 . 펜을 [ 펜 ] 모드로 설정해야 합니다 . 펜이 [ 마우스 ] 모드로 전 환되지 않았는지 확인하십시오 . 펜이 [ 펜 ] 모드로 설정되어 있지만 여전히 문제가 있는 경우 에는...
-
Page 146: Windows 관련 문제
Windows 관련 문제 신티크의 환경 설정의 오류가 의심 타블렛 환경 설정 파일 유틸리티가 사용중인 환경 설정과 함께 되거나 모든 설정이 공장 출하 시 기 작동하도록 하십시오 . 열려 있는 애플리케이션을 모두 닫습니 본 설정으로 되어 있는지 확인하고 다 . [ 시작 ] 아이콘을 클릭하고 [ 모든 프로그램 ] 을 선택하십 싶습니다... -
Page 147: Macintosh 관련 문제
Macintosh 관련 문제 기동이 시작되면 드라이버 로딩이 시스템 기동 시에 펜 디스플레이의 타블렛 부분이 발견되지 않 았습니다 . USB 인터페이스 케이블이 컴퓨터의 작동되는 USB 실패하였거나 펜 디스플레이 환경 포트 또는 외부 전원이 공급되는 USB 허브에 잘 연결되어 있 설정 (preference) 이 아직 생성되지 는지... - Page 148 주의 : 메인 Library PreferencePanes 폴더로부터 Wacom Tablet.prefpane 파일을 수동으로 삭제하지 마십시오 . 이 파일 은 와콤 소프트웨어 드라이버를 삭제하고 나서 [ 와콤 타블렛 유틸리티 ] 를 사용하는 경우에만 삭제할 수 있습니다 . 펜 디스플레이를 재교정합니다 . 펜 디스플레이에서 잉크가 정상적으...
-
Page 149: 기술 지원 옵션
기술 지원 옵션 신티크 펜 디스플레이에 문제가 있으면 우선 본 설명서의 설치 에서 해당 내용을 확인해 기기가 제대로 설치되었는지 확인하십시오 . 그리고 문제 해결 순서를 확인하십시오 . 본 설명서에서 해결 방법을 찾을 수 없는 경우에는 사용 시스템용 Read Me 파일 ( 설치 CD 에 포함 ) 에 서... -
Page 150: 드라이버 다운로드 방법
어 제품 간의 호환성에 충돌이 일어나는 경우에는 인터넷으로부터 신규 와콤 소프트웨어 드라이버 ( 사 용 가능한 경우 ) 의 다운로드가 도움이 될 수 있습니다 . 미국 , 캐나다 , 중앙 및 남부 아프리카 웹 사이트 주소 : http://www.wacom.com/productsupport 소프트웨어 업데이트 유럽 , 중동 및 아프리카 웹 사이트 주소 : 소프트웨어... -
Page 151: 신티크 관리
부록 이 곳에서는 신티크를 관리하기 위한 도움말 , 소프트웨어 삭제 방법에 대한 설명 , 라이센스 및 보증 등 에 관한 내용을 포함하고 있습니다 . 신티크 관리 그립 펜과 신티크 LCD 화면 표면을 깨끗하게 관리하십시오 . 펜에 먼지 등이 붙을 수 있으며 이로 인해 디스플레이... -
Page 152: 펜촉 교환 방법
펜촉 교환 방법 펜촉 ( 끝 ) 은 일반적인 사용 방법에도 마모가 됩니다 . 과도한 압력을 가하면 펜촉이 빨리 마모됩니다 . 마모된 펜촉은 양방향 액정 펜 디스플레이 화면의 코팅을 손상시킬 수 있습니다 . 이를 방지하기 위해 펜 촉을 정기적으로 교환해 주는 것이 좋습니다 . 1. -
Page 153: 선택적인 디스플레이 구성
선택적인 디스플레이 구성 신티크 스탠드에 펜 디스플레이 기기를 장착한 후에는 펜 디스플레이를 여러 위치로 회전할 수 있습니다 . 신티크를 회전하지 않고 스탠드에 보다 단단히 고정하길 원할 경우에는 아래에 표시된 대로 회전 방지 나 사를 설치하십시오 . 신티크를 화면 스탠드에 고정하는 방법 : 펜... -
Page 154: 대체용 장착대 또는 스탠드 사용 방법
대체용 장착대 또는 스탠드 사용 방법 신티크는 VESA 100 표준을 준수하는 모든 장착용 암 또는 스 탠드에 연결할 수 있습니다 . 너비 4 mm, 피치 0.7 mm (M4 규격 ), 나사 체결 길이가 13 – 18 mm 의 장착용 나사가 필요합니다 . 신티크를... - Page 155 4. 다음으로 케이블 덮개에서 4 개 연결 나사를 제거하고 펜 디스플레이 기기에서 판을 들어올려 분리 합니다 . 5. 케이블 배출 홈에 케이블을 놓습니다 . 그리고 케이블 덮개를 다시 장착합니다 . 이 때 올바른 나사를 사용하도록 하십시오 . ( 케이블 덮개 나사는 베어링 허브 연결 나사보다 짧습니다 .) 6.
- Page 156 6. 허브 부분에서 베어링 스토퍼가 움직이지 않도록 주의하면서 , 베어링 허브의 절반 두 개를 펜 디스 플레이 케이블 주위와 연결 지점 위에 배치합니다 . 적절한 위치 설정은 펜 디스플레이의 수평 축을 따라 허브 부분이 정렬되어 야 합니다 . 베어링 스토퍼가 포함된 부분은 펜 디 스플레이의...
-
Page 157: Windows 에서의 펜 및 디지털 잉크 기능
Windows 에서의 펜 및 디지털 잉크 기능 Microsoft Windows 7 및 Vista 는 펜 * 입력을 광범위하게 지원합니다 . Windows 7 또는 Vista 를 운영 체 제로 사용하는 컴퓨터에서 양방향 액정 펜 디스플레이를 사용하면 와콤 펜을 신속하고 직관적으로 사용 할 수 있도록 설계된 메모 작성 , 필기 인식 , 빠른 네비게이션 , 그리고 기타 디지털 잉크 옵션으로 사용자 의... -
Page 158: Windows 타블렛 Pc 입력 패널에 대하여
는 시스템과 Microsoft Office 애플리케이션과 함께 제공된 “설명서”를 참고하십시오 . Microsoft 로부 터 이용할 수 있는 타블렛 PC 지도서를 포함하는 Windows 학습 툴을 활용해 주십시오 . Windows 에서의 와콤 펜 사용 방법에 대한 자세한 내용은 와콤 웹 사이트 “www.wacom.com/vista”에 서도 확인할 수 있습니다 . -
Page 159: 신티크 제거 방법
신티크 제거 방법 아래 순서에 따라 시스템에서 와콤 드라이버 소프트웨어 및 양방향 액정 펜 디스플레이를 제거하십시 오 . 중요 : 시스템으로부터 와콤 드라이버 소프트웨어를 제거하면 더 이상 와콤 양방향 액정 펜 디스플레이 의 모든 타블렛 기능이 작동하지는 않게 되지만 , 마우스 장치로서의 기능은 계속 작동합니다 . Windows: 1. -
Page 160: 제품 사양
제품 사양 일반 사양 크기 ( 너비 x 깊이 x 높이 ) 561 x 421 x 47.8 mm (22.10 x 16.59 x 1.88 인치 ), 가운데 베어링 및 스탠드 제외 중량 8.7 kg (19.14 lb), 스탠드 제외 10.4 kg (22.88 lb), 스탠드 포함 입력... -
Page 161: 디스플레이
디스플레이 디스플레이 패널 비정질 실리콘 (a-Si) TFT 액티브 매크릭스 LCD (IPS 타입 ) 화면 크기 21.3 인치 , 432 x 324 mm 화면비율 4 : 3 화소 수 1600 x 1200 입력 비디오 신호 디지털 : DVI 1.0 규격 / 아날로그 RGB 지원하는... -
Page 162: 펜 타블렛
펜 타블렛 감지 기술 전자기파 공명 감지 기술 작업영역 432.0 x 324.0 mm 해상도 0.005 mm/ 포인트 (5080 lpi) 정밀도 ± 0.5 mm, 중앙 엣지 영역 1 ( 디스플레이 영역의 엣지로부터 20 mm) ± 2.0 mm 엣지 영역 2 ( 디스플레이 영역의 엣지로부터 3 mm) ±... -
Page 163: 제품 정보
거나 와콤의 웹사이트 http://www.WacomDirect.com ( 미국에만 해당 ) 에 방문해 주십시오 . 유럽에서 부품과 부속품을 구입하려면 , +49 (0)180.500.03.75 로 전화를 하시거나 spareparts@wacom.eu 로 이메일을 주십시오 . 또는 http://shop.wacom.eu 를 방문해 주십시오 . 또한 , 거주 지역에 해당하는 번호를 이용해서 판매점 , 대리점 또는 기술 지원에 연락을 할 수도 있습니다 . -
Page 164: 사용 가능한 부품과 부속품
사용 가능한 부품과 부속품 부품 번호 설명 그립 펜 . 압력과 기울기에 민감한 그립 펜은 그리기 , 지우기 , 마우스 조작 등에 KP-501E-01 사용할 수 있는 다목적 도구입니다 . 사용하기 쉬운 듀오 스위치는 두 가지 프로 그램 가능한 스위치 기능을 제공합니다 . 압력감지 입력을 지원하는 펜은 인간공 학적으로... - Page 165 부품 번호 설명 그립 펜 , 에어브러쉬 또는 클래식 펜의 교환용 펜촉 – 표준 펜심 단단한 플라스틱 펜촉 , 검정색 , 5 개 ACK-20001 – 스트로크 심 스프링 로드 방식의 펜촉 , 브러시 스타일의 촉감 , 5 개 ACK-20002 – 하드...
-
Page 166: 라디오와 Tv 의 간섭 현상
라디오와 TV 의 간섭 현상 본 설명서에서 설명한 장치는 무선 주파수 에너지를 생성하고 사용하며 방출할 수 있습니다 . 와콤의 지시 내용에 부 합하지 않는 잘못된 방법으로 설치하거나 사용할 경우 라디오와 TV 수신에 간섭 현상을 일으킬 수 있습니다 . FCC 고지 본... -
Page 167: Industry Canada (Canada Only)
- IEC61000-4-8: 2001 - IEC61000-4-11: 2004 Based on the results of these tests, Wacom declares that the above mentioned device conforms to the EMS Directive 2004/108/EC. Based on the results of these tests, Wacom declares that the above mentioned device conforms to the Safety Directive 2006/95/EC. -
Page 168: Cintiq Exchange Policy (Europe, Africa And Middle East)
Wacom Europe GmbH headquarters within 7 days after delivery of the exchange unit. In any case you can send in your defective Cintiq to any Wacom office for repair, either directly or through your dealer or distributor, however the fast exchange program is only available as described above. -
Page 169: 용어집
용어집 작업 영역 . 펜이 인식되는 펜 디스플레이의 영역 . 애플리케이션 관련 설정 . 개별적인 애플리케이션에 대해 사용자 정의된 펜 디스플레이 툴 및 타블렛 설정 . 와콤 타블렛 제어판은 다른 애플리케이션에서 독특한 거동을 하도록 펜을 설정할 수 있게 해 줍니다 . 애플 리케이션... - Page 170 펜촉 . 교체 가능한 펜촉 . 펜 모드 . 스크린 커서의 위치를 정하는 한 방법 . 양방향 액정 펜 디스플레이에 펜을 위치시킬 때마다 스 크린 커서가 화면상의 대응하는 지점으로 점프합니다 . 이것은 절대 위치라고 하며 , 펜에 대한 기본 설정 입니다...
- Page 171 색인 CE declaration 75 신티크 스탠드 70 FCC 고지 74 일반 68 Industry Canada statement 75 전원 어댑터 70 OSD (On Screen Display) 38 제품 68 Tablet PC 입력 패널 , 정보 66 펜 70 USB 케이블 , 설치 22 펜...
- Page 172 작업 공간 , 설정 24 점검 방법 46 작업 , 신티크 사용 24 지우기 28 전면 , 펜 디스플레이 14 클릭하기 27 절전 , 기능 41 펜촉 , 교환 60 점검 방법 필압감도 기능 , 작업하기 28 신티크 42 펜 디스플레이 익스프레스키...
- Page 173 2-8 South Street Rydalmere CPF Bishan Building #06-08 NSW 2116 Australia Singapore 579838 Telephone: +61.2.9422.6700 Telephone: +65.6258.8640 Fax: +61.2.9420.2272 Fax: +65.6258.8697 WACOM TAIWAN INFORMATION CO., LTD. Suite 605, 6th floor, No. 205 Tun-Hwa North Road Taipiei, 105 Taiwan Telephone: +886.2.2712.2675 Fax: +886.2.2712.9789...
- Page 176 ® ©...
- Page 177 ® ® • • • • • •...
- Page 178 • ° ° • ° ° • •...
- Page 179 • •...
- Page 180 • • •...
- Page 187 • • •...
- Page 188 • •...
- Page 189 • • • •...
- Page 193 • • • ™ •...
- Page 196 • • • • • • • • • •...
- Page 199 • • • • •...
- Page 200 • • • • • •...
- Page 202 • • •...
- Page 207 • • • • • • • •...
- Page 208 • • • • • • •...
- Page 209 • • • •...
- Page 215 • • • • • • • • •...
- Page 216 • • • • •...
- Page 218 • • • • •...
- Page 219 • • • • • • • •...
- Page 220 – • • •...
- Page 222 • • • •...
- Page 223 • • • • • • •...
- Page 224 • • • • • • • • •...
- Page 225 • • • • • • • • • •...
- Page 230 • •...
- Page 231 • •...
- Page 232 • • •...
- Page 233 • • • • • • • • • •...
- Page 236 • • •...
- Page 237 • • •...
- Page 239 –...
- Page 241 • • • •...
- Page 242 • • •...
- Page 243 • •...
- Page 244 ° ° ° ° ° °...
- Page 246 ° ° °...
- Page 250 Plug the equipment and computer into an outlet that is on a different circuit from the television or radio. If necessary, consult your Wacom dealer or an experienced radio/television technician for help. Changes or modifications to this product not authorized by Wacom could void the FCC Certification and negate your authority to operate the product.
- Page 251 - IEC61000-4-8: 2001 - IEC61000-4-11: 2004 Based on the results of these tests, Wacom declares that the above mentioned device conforms to the EMC Directive 2004/108/EC. Based on the results of these tests, Wacom declares that the above mentioned device conforms to the Safety Directive 2006/95/EC.
- Page 252 Wacom Europe GmbH headquarters within 7 days after delivery of the exchange unit. In any case you can send in your defective Cintiq to any Wacom office for repair, either directly or through your dealer or distributor, however the fast exchange program is only available as described above.
- Page 259 安装指南与硬件手册 型号: DTK-2100...
- Page 260 Wacom 尽力在本手册中提供最新且准确的信息。但 Wacom 保留自行更改任何规格说明和产品配置的权利,既无义 务事先通知,也无义务在本手册中体现出所做的更改。 上述年份为制作本手册的日期。但是,本 “手册”将于相应 Wacom 产品上市之日同时向用户发布。 DuoSwitch 是 Wacom Co., Ltd. 的商标,新帝和 Wacom 是其注册商标。 Adobe、Reader 和 Photoshop 是 Adobe systems Incorporated 在美国和 / 或其他国家的注册商标或商标。 Microsoft、Windows 和 Vista 是 Microsoft Corporation 在美国和 / 或其他国家的注册商标或商标。Apple、Apple 标 志和 Macintosh 是 Apple Computer, Inc., 在美国和其他国家的注册商标。...
- Page 261 简介和概述 Wacom 新帝 液晶数位板集液晶显示屏 (LCD) 的优点和 Wacom 的无线、免电池笔技术的控制性、舒 ® ® 适性和创造性于一身,为您的电脑提供直接的屏笔界面。 新帝的基本组成部分包括 TFT 彩色显示屏后内置的 Wacom 数位板、 Wacom 紧握笔、 以及组合式显示器 支架。 本手册介绍了新帝、紧握笔和显示器支架的安装和使用。 设置新帝支架或打开新帝液晶数位板之前,请参阅第 9 页的 “打开新帝的包装” 。 • 通过显示器支架,您可以将液晶数位板轻松旋转到任何方向,并调整工作面的倾斜度。详见第 10 页 • 的 “设置新帝支架” 。 若要了解本产品的诸多特性,请参阅第 14 页的 “您的新帝液晶数位板” 。 •...
- Page 262 使用和操作注意事项 为确保安全使用产品,请务必遵循本手册所含的所有指导说明、注意及警告。否则可能会导致数据丢失 或电脑损坏。否则可能还会无法获得维修担保,在这种情况下,Wacom 将不负责维修或更换产品。 表示如果无视此标记内容而进行错误操作的话,有可能导致 警告 人员死亡或重伤。 表示如果无视此标记内容而进行错误操作的话,有可能导致 注意 人身伤害或财产损失。 表示如果无视此标记内容而进行错误操作的话,有可能导致 警告 人员死亡或重伤。 如遇所述之操作,应特别注意并小心。 物理位置 液晶数位板专门适用于一般的办公环境,但在空调控制环境中也可用作中央控制台。本产品经 警告 Wacom 测试仅适用于一般的办公环境,有关其在医疗及军事应用领域的适用性,并未经过特 别检验。此外,液晶数位板既不防水,也不防爆。只能用作被动式显示和输入设备。由于测试 不足的原因,在所有并非为其专门用途而设计的应用场合,无法提供液晶数位板功能性及可能 故障的相关信息。对于在一般办公环境以外的其他应用领域采用液晶数位板的情况,用户责任 自担。 环境 温度及湿度 工作温度及湿度:5° ~ 35°C,20 ~ 80% 相对湿度 • 存放温度及湿度:-10° ~ 60°C,20 ~ 90% 相对湿度 • 请勿在以下位置使用或存放新帝 : 注意...
- Page 263 使用 仅限使用新帝专用的电源适配器。如果使用其他类型的电源适配器,新帝将无法正常工作或可 警告 能会损坏。使用其他类型的电源适配器还可能会导致起火。使用其他电源适配器将无法获得维 修担保。 对新帝供电时,请务必使用接地电源线。 注意 新帝或电脑接通时,请勿连接或断开视频电缆或电源线,否则可能会损坏显示屏或电脑图形 注意 卡。在这种情况下,Wacom 将不负责维修或更换产品。 本产品适用于搭配 DVI 或 VGA 图形卡使用,否则可能会损坏新帝。 注意 请勿堵塞背部面板的散热孔,否则可能会造成过热并损坏本机。 注意 长时间不使用新帝时,请从 AC 插座上拔下电源适配器。 操作 高压危险!请勿开启或拆解新帝液晶数位板。机壳开启会有触电的危险。这样操作还会无法获 警告 得维修担保,Wacom 将不负责维修或更换产品。 显示器支架上未安装新帝时,请勿操作支架倾斜调节杆,请勿通过调整杆提起支架;支架为弹 警告 簧式,如果在支架上没有新帝的重力作用的状态下松开,可能会造成伤害或损坏。操作不当可 能会导致人身伤害或支架损坏。 将新帝移到其他位置时,应 : 警告 从支架上拆下显示装置,然后将两者分开移动 (请参阅第 13 页的 “从显示器支架上拆下 •...
- Page 264 如果 LCD 屏幕损坏,请勿接触屏幕可能泄漏的液体,该液体具有刺激性。如果接触到皮肤、眼 警告 睛或嘴部,请立即用流水冲洗 15 分钟以上。如果接触到眼睛或嘴部,还应咨询专业医生。 警告 - 本产品内部灯泡含汞,必须依照当地、省市或国家的法规进行回收或处理。 液晶数位板的背光含汞 (Hg)。请务必依照当地法令法规正确处理并管理本机相关的任何处理。 请勿拆解新帝支架。拆解不当会导致人身伤害或支架损坏。在这种情况下,Wacom 将不负责 警告 维修或更换产品。 窒息危险!防止儿童吞服笔尖或侧面开关。儿童可能会不慎将笔尖或侧面开关咬出。 警告 请勿拆解紧握笔。否则可能会导致设备故障。在这种情况下,Wacom 将不负责维修或更换产 注意 品。 请勿刮擦显示屏幕。避免将尖锐物品放置在显示屏幕表面上。 注意 避免新帝、新帝支架或紧握笔受到强烈冲击或震动。敲击或跌落新帝可能会损坏显示屏幕或其 注意 他部件。 请勿将重物放置在液晶数位板上或用力按压,否则可能会损坏显示屏幕或破坏新帝支架锁定机 注意 构。 请勿将重物放置在液晶数位板接线上,反复过度弯曲电缆或用力按压电缆接头,否则可能会损 注意 坏本机或接线。 请勿在可能会过度弯折或卷曲电缆的表面上存放液晶数位板。 注意 如果液晶数位板拥有涂层表面,则变尖或呈一定角度的已磨损笔头可能会造成其损坏。请根据 注意 需要更换笔尖。 请勿使用任何有机溶剂 (例如酒精)或中性清洁剂清洁显示屏幕。否则可能会损坏显示屏幕。...
- Page 265 注意 变色或出现斑点。如果发生变色,请保持显示屏幕开启,变色会在几小时内消失。 再使用、再循环利用和再生利用。当您更换新产品或产品超过使用寿命时,鼓励您将其送到社 区或当地用于收集可回收材料的适当收集站。 废物中可能存在有害物质,在处理过程中流入环 境会产生潜在的不良影响;而通过上述举措,您可以帮助改善环境并将这种潜在的不良影响减 到最低。 在欧盟范围内,根据 2003 年 1 月 27 日欧洲议会和理事会的 2002/96/EC 指令或各成员国相应 的当地法规,要求用户不得将废旧电气电子设备 (WEEE) 当作未分类生活垃圾处理。 适用于该 规定的产品标有本条开头所示的 WEEE 标志,除非因产品尺寸或功能的原因而无法实行这一规 定。Wacom 产品遵循 2002/96/EC 指令,因此,请您务必分类收集该产品,将其送到社区或当 地的适当收集站。 Wacom 液晶数位板产品符合欧盟 RoHS 指令 2002/95/EC (RoHS 指令) 。 使用和操作注意事项 第 5 页...
- Page 266 目录 简介和概述 ..............1 使用和操作注意事项...
- Page 267 定位 ............... 27 点击...
- Page 268 VGA 问题 ..............49 数位板疑难解答...
-
Page 269: 打开新帝的包装
打开新帝的包装 请仔细拆开所有物品包装并将物品放置在平稳的表面上。确认包装物品是否齐全。 产品的零配件一并包装在配件箱内。为避免损坏,在设置和使用新帝或新帝支架之前,请参阅下几页的 说明。 新帝支架 (MST-A155) 新帝液晶数位板,带附属连接线 * 专利的 笔座,包括备用笔尖和笔尖更换工具 (PST-A042-02) 固定支架用螺丝,数量 2 (MNE-A185) 紧握笔、个性环 (KP-501E-01,FUZ-A157) 盖子及螺钉 (PPL-A274 和 MNE-A186) VGA 转 DVI-I 适配器 (STJ-A291) 使用手册 (本手册) DVI-D 转 DVI-I 适配器 (STJ-A292) 安装光盘 电源 (POW-A111) 和电源线 (SCD-A69-01) 注意: 某些配置可能另附含有应用程序软件的 CD 或 DVD。如需安装,请参阅这些 CD 或 DVD 的说明书。请保留包 装箱,以备存放或运送新帝时使用。... -
Page 270: 设置新帝支架
设置新帝支架 将支架放置在桌面或工作表面上。确保支架稳定,在液晶数位板安装于支架上时不会倾倒。然后熟悉支 架的部件。 新帝未安装在支架上时,请勿操作倾斜调节杆,请勿通过调整杆提起支架。支架装有弹簧,如果 警告 支架在没有新帝对其施加的重力的状态下松开,可能会造成伤害。操作不当可能会导致人身伤害 或支架损坏。小心不要让支架移动部分的缺口夹住手指。 倾斜调节杆 新帝安装于支架上时,可按照第 12 页的 “调整显示屏倾斜度”的说明,用这些杆调 整显示屏的倾斜度。 轴承凹处 前脚 后脚 前脚带有橡胶垫,可减少桌面上的 后脚在滚轮上, 调整倾 滑动。 斜度时可以移动。 下一步:打开液晶数位板的包装,将其安装到新帝支架上。请参阅第 11 页。 打开新帝的包装 第 10 页... -
Page 271: 打开包装并安装新帝液晶数位板
打开包装并安装新帝液晶数位板 取下显示装置背面的包装材料和接线。 将新帝安装到支架上 : 请勿必将支架安置在桌面或工作表面的稳定位置,以免支架在安装时新帝倾倒。双手紧握新帝,使显 • 示屏朝向自己,电源开关和 LED 位于顶端。 使新帝与支架的前方平行, 轴承轮位于支架轴承凹处的 V 形上边缘之间。 V 形边缘用作轴承轮的定位 • 向导。参见下图 – A – 。 使新帝紧靠支架,降低新帝,直至轴承轮牢固安置在轴承凹处内。参见下页图 - B - 。显示装置将 • 依靠重力作用固定到位,不会发出表示机械锁定的 “啪”声。 轴承轮 轴承凹处 - A - 如果不需要旋转新帝液晶数位板,可使用固定支架用螺丝将其固定在支架上。请参阅第 61 页的 “可选 显示配置” 。 如欲了解其他安装方式,请参阅第... -
Page 272: 调整显示屏倾斜度
操作倾斜调节杆时, 新帝必须安装在支架上, 而 警告 支架脚架必须安置在稳定、 平坦表面上。 支架为 弹簧式, 如果操作不当会快速闭合, 造成伤害或 – B – 损坏。 显示装置已经安装在支架上时, 取出锁定调整 杆位置的泡沫块。 将这些泡沫块与其他包装材 料一同保存;以后运送新帝时需要使用这些 泡沫块。 调整显示屏倾斜度 要调整显示屏倾斜度,应面朝新帝液晶数位板的正面,以与新帝支架调整杆大致相同的高度握住左右两 侧。用指尖将倾斜调节杆轻轻拉向显示装置;便可脱开支架的离合机构。倾斜显示屏以调整倾斜度设置。 若要降低新帝,请将左侧倾斜调节杆拉向新帝,将新帝轻轻地降低到所需的倾斜角度。松开调整杆, • 便可将支架锁定到位。 若要提升新帝,请将右侧倾斜调节杆拉向新帝,将新帝轻轻地提升到所需的倾斜角度。松开调整杆, • 便可将支架锁定到位。 注意:离合机构接合之前,支架调整杆会表现出一定的自然间隙。调整支架倾斜度时,应将其设置为比 预期工作高度略高的位置,然后再将显示屏降低到所需的位置。 移动新帝之前,应先将支架调整到完全竖立的位置;这样可以减少弹簧张力,以免支架意外松开或 警告 猛然关闭。如果显示装置为横向,应一手握住显示屏的底部,另一手握住支架的后部。请务必同时 提起显示屏和支架,以免移动新帝时支架从显示屏上分离。如果新帝为纵向或者已经使用固定支架 用螺丝锁定到支架上 (请参阅第 61 页 ),则支架不会脱离显示屏,可以双手握住显示装置安全地 提起新帝。... -
Page 273: 调整旋转度
调整旋转度 要调整旋转度,请握住新帝的主体部分,将本机旋转到所需的位置;它会在轴承轮上移动。 倾斜角度小 于或等于 25 度时,新帝可在显示器支架上旋转。液晶数位板只能沿任一方向旋转 180 度。如果不打算旋 转液晶数位板,请用固定支架用螺丝将显示屏横向固定于支架上。请参阅第 61 页的 “可选显示配置” 。 从显示器支架上拆下新帝 要从显示器支架上拆下新帝: 如果安装了选装固定支架用螺丝,请从新帝背面拆下这些螺丝。 • 从显示器支架上拆下液晶数位板之前,请将其调整到横向位置。 • 只有在新帝处于横向位置时,支架才能松开。 接下来,将支架倾斜度提升到最高位置。请参阅第 12 页的 “调整显示屏倾斜度” 。 • 紧握液晶数位板的左右两侧,从显示器支架上提出。 • 重要:从显示器支架上拆下新帝时,请务必按照与支架前方平行 的方向提起新帝。可能还需要略微旋转新帝才能使支架松 开。 注意:将新帝包装起来运输时,应先将支架调整到最低位置,在倾斜调节杆下面安置泡沫包装块,然后 再从支架上拆下新帝。泡沫块可以防止支架在包装时突然闭合。请务必将新帝及其支架包装在原 来的包装和保护垫内。切勿将新帝安装在支架上进行包装,否则可能会在运输过程中损坏本机或 支架。 打开新帝的包装 第 13 页... -
Page 274: 您的新帝液晶数位板
您的新帝液晶数位板 将新帝液晶数位板妥善安装在新帝支架上之后,请花一些时间熟悉一下本产品各部件的特性。 显示屏和数位板传感器用作集成输出和输入设备。数位板传感器会报告笔的坐标、压力、倾斜、开关、 橡皮擦及其他信息。 正面视图 电源开关 状态指示灯 电源指示灯 打开或关闭本机。 笔处于液晶数位板的活动区域并且按压笔 新帝的电源接通并且有视频信号时点亮 尖、橡皮擦或侧面开关时点亮为蓝色。 为蓝色。 只有在将 USB 电缆接口插入有效的 USB 没有检测到视频信号时点亮为橙色。 端口并且有视频信号时,指示灯才会点亮。 (例如,电脑关闭、启动或进入不发送 视频信号的电源管理模式。 ) 触控切换键 ExpressKey 触控切换键 按此按钮可切换触控带功 能。请参阅第 30 页的 “液晶数位板控制钮” 。 指示灯显示四种触控带功 能中的有效功能。 ExpressKey 这些可自定义键可模拟修饰键、键盘及其他常用功能。此外,还具备 切换显示映射功能,可让您在新帝液晶数位板与其它显示器之间切 换屏幕光标。请参阅第 30 页的 “液晶数位板控制钮” 。 您的新帝液晶数位板... -
Page 275: 背面视图
背面视图 屏显 (OSD) 控制钮 一体式笔架和备用电缆出口 用这些控制钮调整各种显示设置。请参 可以将笔存放于此处。如果不使用本机附带的新 阅第 38 页的 “调节显示屏幕” 。 帝支架,可以从此处引出电缆。请参阅第 62 页 的 “使用替代底座或支架” 。 数字 / 模拟 (DVI/VGA) 开关 通过此开关设置要使用的视频连接。 轴承轮 触控带 装配到新帝支架上的轴承 在触控带上面滑动手指可进 凹处内。可以旋转新帝,便 行缩放、卷动或进行自定义 于在支架上安装和拆卸。 键盘操作。 请参阅第 30 页的 “液晶数 位板控制钮” 。 触控带 笔绳器系缚点 本机每侧各一处。... -
Page 276: 笔的功能
橡皮擦功能设为 [ 橡皮擦 ]。 DuoSwitch:确保可编程开关处在一个非常方便的位置,使您可用拇指 或食指对其进行操作,而在绘图时又不会意外地将其按下。只要笔尖 位于显示屏幕表面感应区以内便可使用该开关;笔尖无需接触显示屏 表面。 向任何方向切换开关均可激活按钮功能。默认值状态下,上部开关设 为 [ 双击 ],下部开关设为 [ 右键单击 ]。 笔尖 (可替换笔尖) :笔尖位于液晶数位板感应区上方 5 mm 以内即 可激活笔。让您在笔尖没有接触显示屏幕的情况下定位屏幕光标。 对笔尖施加压力时,笔模拟鼠标主按钮的单击。笔尖单击压力可在 Wacom 数位板控制面板中调节。 重要:只能使用与新帝兼容的笔,例如随本机一同装运的笔,或零部件编号以 “-01”结尾的 Intuos4 系 列产品的笔。其他笔可能无法正常工作。请参阅第 72 页的 “可供销售的部件和配件” 。此外,新 帝笔尖专为使用新帝液晶数位板所设计。其他笔的笔尖会损坏新帝显示屏。 不使用笔时,请将其放入笔座、笔架中或平放在您的桌子上。为了保持笔的灵敏度,请勿将笔放 在会让笔尖或橡皮擦着力的容器中。 您的新帝液晶数位板 第 16 页... -
Page 277: 系统要求
电脑会将液晶数位板识别为两个单独的设备 (显示器和数位板) 。因此,安装操作分为两个阶段: 首先作为显示器安装。 • 然后作为数位板安装。 • 双个阶段均需要硬件和软件的安装及调节。请务必遵循所有指导说明。 重要:必须安装 Wacom 驱动程序软件才能获得正确的屏笔功能。 系统要求 请确保电脑符合下列最低系统要求: 电脑:Windows 7, Vista™ ,XP (32 和 64 位) 。DVI 或 VGA 接口、可用的 USB 端口和 CD-ROM • 驱动器。 Macintosh:OS X, v10.4 或更高版本。DVI 或 VGA 接口、可用的 USB 端口和 CD-ROM 驱动器。... -
Page 278: 第 1 步:显示器安装
第 1 步:显示器安装 在这一步骤中,新帝作为系统的显示器安装。 重要:电脑或液晶数位板接通时,切勿连接或断开视频电缆或电源线。否则会损坏显示屏或图形卡。 1. 关闭电脑。 2. 如果电脑只有一个视频接口,则请拔下原有显示器的插头或添置第二张图形卡。确定电脑带有数字 (DVI) 接口还是模拟 (VGA) 接口,然后根据当前使用的视频连接设置位于新帝背面的 DVI/VGA 开关。 将开关移向数位板边缘用于数字(DVI-I 或 DVI-D) ,移向 OSD 按钮用于模拟 (VGA)。参见第 19 页 连接图中的 – A –。 3. 确保旋紧接口指旋螺丝,遵循下列视频接口的指导说明。参见连接图中的 – B –。 对于 DVI-I 操作,将新帝视频电缆插入您的图形卡的 DVI-I 接口。 DVI-I 接口 对于... - Page 279 显示器接线图 - A - DVI/VGA 开关 电脑的后面板 图形卡 DVI 或 VGA 新帝,后视图 - B - DVI-I 接口 要连接到 DVI-D 接口,需使用 DVI-D 转 DVI-I 适配器。 要连接到 VGA 接口,需使用 VGA 转 DVI-I 适配器。 至 AC 插座 - C - DC 输入 - D - 电源适配器...
- Page 280 板对应的编号。 B) 单击 [ 高级 ...]。 C) 选择 [ 监视器 ] 标签并单击 [ 属性 ]。 D) 选择 [ 驱动程序 ] 标签并单击 [ 更新驱动程序 ...]。将会出现更新驱动程序对话框或向导。 E) 插入安装光盘。 如果显示 Wacom 数位板安装菜单,则请将其关闭。 Windows 7 和 Vista: 选择 [ 浏览计算机以查找驱动程序软件 ]。 • 输入安装光盘的驱动器盘符并单击 [ 下一步 ]。...
- Page 281 8. 根据需要配置显示控制面板设置,获得正确的尺寸和颜色分辨率。有关新帝可用的最高 (原生)分 辨率及其他分辨率规格的详情,请参阅第 68 页的 “产品规格” 。屏幕尺寸和颜色分辨率可能受到图 形卡性能的限制。 Windows:如果当前将新帝用作副显示器,则可能首先需要在显示属性控制面板中启用本机。 如需微调显示器,请参阅第 38 页的 “调节显示屏幕” 。如果使用模拟 (VGA) 模式,另请参阅第 37 页的 “调节点距和相位 (仅限 VGA) ” 。 9. 安装的 LCD 显示器部分令人满意之后,请跳到第 2 步:数位板安装。 有关疑难解答技巧,请参阅第 42 页的 “疑难解答” 。 注意: 每块液晶数位板 LCD 面板均依照非常严格的质量标准进行制造。制造技术无法保证绝对完美的显 示,部分面板可能出现一定数量的像素呈现错误的颜色。有关详情,请参阅第 68 页的 “产品规 格”...
-
Page 282: 第 2 步:数位板安装
第 2 步:数位板安装 在这一步骤中,新帝作为数位板安装。 USB 电缆安装 将 USB 接口插入电脑上可用的 USB 端口或连接至电脑的 USB 集线器。 至 USB 端口 电脑 接下来,安装数位板软件。请参阅第 23 页的 “软件安装” 。 安装 第 22 页... -
Page 283: 软件安装
• 难解答” 。 注意: 驱动程序安装会自动激活 Microsoft Windows 7、Vista 和 Office 2007 或更高版本 (Windows 7 Starter 和 Home Basic 以及 Windows Vista Home Basic 除外)提供的新笔输入功能。有 关在 Windows 中使用 Wacom 笔的更多信息,请访问 Wacom 网站:www.wacom.com/vista。 支持用户特定参数。登录之后,每位用户均可在 Wacom 数位板控制面板中自定义个人设置。切 换到其他用户将自动加载对应用户的设置。 如果液晶数位板不正确响应或无法控制光标,则液晶数位板参数可能损坏。可以删除当前参数设 置,然后将液晶数位板回复到初始默认值。关于管理参数设置的详细说明,请参阅软件使用手册。 如需卸载软件驱动程序,请参阅第 67 页的 “卸载新帝” 。... -
Page 284: 使用您的新帝
使用您的新帝 使用新帝时,显示屏幕就如同画板或纸张一样,可将手稍稍靠在显示屏幕上。 由于新帝表面略高于桌面,因此可考虑调整桌面或椅子的高度,使您可以舒适地使用本设备。 设置工作区域 新帝液晶数位板和支架在设计上为您提供尽可能广泛的灵活性和符合人体工程学的工作方式。该设计可 让您根据需要,随时将新帝快速调整到不同位置。通过不同高度和位置的调整试验,可以确定最适合您 自己特有的工作方式和任务的状态。 为了减少疲劳,请整理您的工作区域以便能够舒适地工作。将新帝、笔和键盘放到适当的地方,使您能 毫不费力地拿取。调整好液晶数位板和任何其他显示器的位置,从而可舒适地浏览并减少眼睛的疲劳。 在任务间歇稍作休息,伸展并放松您的肌肉。 • 使用笔时手要轻握。 • 经常变换工作内容。 • 随时保持良好的姿势。尽量避免会导致不适的姿势和重复性动作。 • 如果您的工作姿势导致感觉不适,请改变您的姿势。 • 经常变换不同的使用模式。 • 若要模仿传统的动画桌,可将支架调整到最低位 当您的工作需要进行大量的键盘输入时,一般需要 置。 绘制和编辑图像时,新帝可以自由旋转到任 将支架调整到最高位置。向您的同事或客户展示您 何角度而无需接触桌面,具有最大的舒适性和精 的作品时,也可以使用这种位置。 确的笔触。 有关 RSI 的注意事项:Wacom 不陈述、允诺或担保 Wacom 产品会完全或减轻纠正或预防腕管综合症。症状可能会 因人而异,请接受专家医疗建议以找到最适合您症状的治疗措施。 使用您的新帝 第 24 页... - Page 285 提示: 如果新帝背面安装了固定支架用螺丝,则必须拆下这些螺丝方可旋转新帝。 旋转显示装置之前,应确保电缆可在装置后自由转动。 请注意不要无意中将液晶数位板搬离电脑太远,而断开两者间的电缆连接。 新帝还可安装到符合 VESA 100 显示器支架规格的支撑臂或其他第三方支架上。有关详情,请参 阅第 62 页的 “使用替代底座或支架” 。 下一步:如果您尚不了解自定义本产品以适应自己喜欢的工作方式的基本操作,请了解这方面的内容。 请参阅第 34 页的 “自定义” 。 使用您的新帝 第 25 页...
-
Page 286: 使用紧握笔
使用紧握笔 该笔为无线、免电池笔,可以感应您对笔施加的倾斜度和压力。 握笔 握笔就像握普通钢笔或铅笔一样。确保 DuoSwitch 处在一个非常方便的位置,使您可用拇指或食指对其 进行操作,而在绘图时又不会意外地将其按下。使用新帝时,可将手稍稍靠在显示屏幕上。另可按照感 觉最合适的方式倾斜笔。 要个性化您的笔,可以旋开顶锥,更 换另一种颜色的笔环 (附带 )。 关于自定义笔设置的信息,请参阅 第 34 页的 “自定义”和电子版的软 件使用手册。 将笔座放在触手可及的地方。不使用笔时,请将其放入笔座、笔架中或平放在您的桌子上。可以在笔座 上竖放或横放笔。 为了保持笔的灵敏度,请勿将笔放在会让笔尖或橡皮擦着力的容器中。 旋开笔座的底部便可使用笔尖更换工具和适用的备用笔尖。 笔尖更换器 备用笔尖 6 个标准笔尖,黑色 • 1 个弹性笔尖,白色 • 3 个硬毛毡笔尖,灰色 • 使用您的新帝 第 26 页... - Page 287 定位 如需定位屏幕光标,请在笔没有接触屏幕表面的情况下将其略微 挪动到新帝显示屏幕上方。在显示屏幕上按下笔尖进行选择。 注意:必须校正液晶数位板才能将屏幕光标与笔尖对准。 (请参 阅第 36 页的 “校正新帝” 。 )将笔放在显示屏幕上时,如 果屏幕光标没有跳到笔尖附近的位置,则液晶数位板软件 驱动程序可能尚未安装或加载。请根据需要安装驱动程序 软件。另请参阅第 42 页的 “疑难解答” 。 点击 用笔尖轻敲显示屏幕一次,或用足够的压力使笔接触显示屏幕便 可产生一次点击。 提示:如需使得用笔操作更加容易,请将 Windows 配置为光标 指向时选定和通过单击打开项目。如需打开该功能,请首 先打开一个文件夹。 对于 Windows 7 和 Vista,从 [ 组织 ] 下拉菜单中选择 [ 文 件夹和搜索选项 ]。从 [ 常规 ] 标签中选择 [ 通过单击打开 项目...
-
Page 288: 使用侧面开关
拖动 选择一个对象,然后沿着显示屏幕滑动笔尖即可移动该 对象。 使用侧面开关 笔配备 DuoSwitch。此开关具有两个可编程功能,可通过在两个方向上摇动开关进行选择。只要笔尖位 于显示屏幕表面感应区 5 mm 以内便可使用 DuoSwitch。笔尖无需接触显示屏表面便可使用此开关。默 认值状态下,上部开关设为 [ 双击 ],下部开关设为 [ 右键单击 ]。使用 Wacom 数位板控制面板可修改或 禁用开关功能。详见电子版的软件使用手册。 使用压感 通过支持该功能的应用程序,笔可以对您手的运动的细微差别和偏转作出反应,这使得您可以创建笔触 看起来比较自然的笔划。如需使用笔压来绘图和书写,请从当前应用程序的工具面板中选择一个具有压 力感应功能的工具。在屏幕表面上工作时,对笔尖施加不同的压力。轻压可描绘细线或淡色。用力按压 可描绘粗线或浓色。 以倾斜方式绘图 液晶数位板能识别笔由垂直方向倾斜的位置。在支持的应用程序中,可利用倾斜来控制线条的形状和粗 细。 擦除 在支持的应用程序中,笔的橡皮擦工作方式就像铅笔上的 橡皮擦一样。在文本应用程序中,用橡皮擦选择文本,然后 将橡皮擦从液晶数位板提起即可删除该文本。 使用您的新帝 第 28 页... -
Page 289: 使用笔架
使用笔架 一体式笔架位于液晶数位板的背面。不方便使用桌面的笔座时,使用笔架非常便利。 注意:从顶端电缆开口引出电缆时,无法使用笔架。 使用您的新帝 第 29 页... -
Page 290: 液晶数位板控制钮
液晶数位板控制钮 为了改善图形及其他应用程序的工作流程,新帝液晶数位板配备了 ExpressKey 和触控带。以惯用手执笔 时,您可以同时使用另一只手操作 ExpressKey 或触控带。 触控带 (位于本机背面,每侧各一) 触控切换键 在触控带上面滑动手指便可进行缩放、 卷动或发挥分配的键 按此按钮可切换触控带功能。左按钮 盘功能。按照默认设置,触控带可让您在大多数图形应用程 切换左侧触控带功能,右按钮切换右 序中缩放,在其他应用程序中卷动。也可以将其设为发挥自 侧触控带功能。 定义键盘功能。例如,可以将触 控带功能设置为在使用 指示灯显示四种可用的触控带功能中 Photoshop 时更改笔刷大小。请参阅第 32 页的 “使用触控 的有效功能。 带” 。 ExpressKey 按可自定义 ExpressKey 可执行常用功能或键盘,或模拟按钮点击或修饰键。请参阅第 31 页的 “使用 ExpressKey” 。 此外,还具有适用于多显示器系统的切换显示映射功能。此项功能可让您使用新帝液晶数位板上的笔在系统的任意 显示器上操作屏幕光标。 使用您的新帝 第... -
Page 291: 使用 Expresskey
ExpressKey 从上到下的默认设置如下所示。 有关其他可用的键设置的详情,请参阅电子版软件使用手 册。左右两侧 ExpressKey 组的默认设置相同。 帮助:显示新帝 ExpressKey 和触控带的图表,该图表会显示各控制钮的当前功能设置。 • 径向菜单:显示径向菜单。每级分层菜单由八个菜单部分组成,这些菜单部分含有可选的多种特征和 • 选项。 精确模式:更改当前笔尖位置周围的映射,因此您必须将笔移动两倍的距离,才能使显示屏幕上的屏 • 幕光标达到相同的距离。如需激活,请按住已分配了该功能的工具按钮。松开该按钮便可回复到正常 的映射。 切换显示映射:适用于多台显示器的系统。让您在新帝液晶数位板和其他显示器之间切换屏幕光标。 • 选择后,新帝可用作液晶数位板 (屏幕光标处于笔尖位置),或者用作标准的 Wacom 数位板 (屏 幕光标可在整个桌面或其他显示器上移动) 。 修饰键。 • HIFT 修饰键。 • 修饰键。 • 平移/卷动。 通过按下设为 [平移/卷动] 的笔按钮并用笔尖拖动到液晶数位板活动区域, 可让您在活动 • 窗格内以任意方向摆放文档或图像。 使用您的新帝... -
Page 292: 使用触控带
可以考虑下面几种 ExpressKey 使用方式 : 将一对键设为常用键盘,例如 [ 和 ] 以在 Photoshop 中增大或减小笔刷。 • 将一个键设为常用的键盘快捷方式,以便打开文件和启动应用程序。 • 如果不想 (或无法)使用紧握笔上的侧面开关,则可以将某个键设为右击或双击。 • 选择其他可用的功能。 • 重要:某些应用程序可能会忽略或控制 ExpressKey 的功能。有关详情,请参阅软件使用说明中关于结合 数位板控制使用应用程序的部分。 使用触控带 以惯用手执紧握笔工作时,用另一只手在触控带上面滑动手指,即可迅速放大或缩小、上下卷动、或执 行其他功能。也可以将各触控带设为发挥自定义键盘功能。例如,可以将触控带动作设置为在使用 Photoshop 时循环切换图层。触控带可以通过三种不同方式操作 : 标准操作:上下滑动手指可进行缩放、卷动或发挥分配的键盘功能。 • 连续操作:在触控带的任一端按住手指可连续卷动。可在卷动长文档或网页时使用。 • 单次操作 在触控带的任一端按下并松开手指,可逐次缩放、卷动或发挥分配的键盘功能。 • 在此处按住手指进行连续 操作,按下并松开手指进 行单次操作。 按触控切换键 (位于本机正面)可在四种可自定义触控带功能之间切换。左按钮切换左侧触控带功能,右按钮切 换右侧触控带功能。... - Page 293 触控带的默认设置状态如下所示。有关其他可用设置的详情,请参阅电子版软件使用手册。左右两侧触 控带的默认设置相同。 自动滚动 / 缩放:在大多数图形应用程序中触控带设置为缩放,在其他应用程序中设置为卷动。不支 • 持页面卷动。某些应用程序可能会将缩放事件解释为或卷动事件,或完全忽略缩放。同样,卷动事件 也可能被解释为缩放事件,或者被完全忽略。 键盘 ... 循环图层:用 Adobe Photoshop 工作时,可在重叠的图层间上下循环切换。沿触控带向上移 • 动手指即可向上循环切换图层。 键盘 ... 笔刷大小:用 Adobe Photoshop 工作时,将触控带设置为增大或减小绘图工具的尺寸。 • 键盘 ... 画布旋转:用 Adobe Photoshop CS4 或更高版本工作时,可以旋转或翻转整个图像。 • 重要:某些应用程序可能会忽略或控制触控带的功能。有关详情,请参阅软件使用说明中关于结合数位 板控制使用应用程序的部分。 提示:经常更改笔刷大小的 Photoshop 可能希望将 [ 和 ] 键分配到触控带。 在触控带上上下滑动手指即可 更改笔刷大小,而无需借助键盘或访问...
-
Page 294: 自定义
ACOM 板 ] 图标。 打开控制面板后便可开始自定义液晶数位板。请参阅第 35 页的 “自定义基本操作” 。 注意:支持用户特定参数。登录之后,每位用户均可在 Wacom 数位板控制面板中自定义个人设置。切 换到其他用户将自动加载对应用户的设置。 详细了解新帝 有关自定义新帝的详细信息,请参阅电子版软件使用手册。 如需浏览手册,请打开 Wacom 数位板控制面板并点击 [ 帮助 ] 按钮。 如需在安装新帝之前阅读软件使用手册,请先将安装光盘插入电脑的 CD-ROM 驱动器。出现软件菜单 时,选择 [ 用户手册 ] 选项。 需要 Adobe Reader 或其他 .pdf 浏览器才能查看手册。 自定义 第 34 页... -
Page 295: 自定义基本操作
自定义基本操作 本手册仅就自定义新帝的基本操作作了说明。有关详细信息,请参阅软件使用手册。 打开 Wacom 数位板的控制面板以自定义新帝。打开控制面板时,[ 工具 ] 列表中显示 [ 紧握笔 ] 的图标 并显示相应的标签。如需自定义笔和液晶数位板,请对标签控制进行更改。体验不同的设置,找出最适 合自己的作业方式。所进行的任何更改均会立刻生效。点击 [ 默认值 ] 可回复到默认值设置。 注意:应用程序特定设置适用于高级用户。这方面的内容在软件使用手册中说明。 控制面板上半部分显示的图标表示液晶数位板 关闭控制面板。 ([ 数位板 ]) 、[ 工具 ] 和 [ 应用程序 ] 设置。 选择 [ 功能 ] 可自定义 您的 ExpressKey、 触... -
Page 296: 校正新帝
璃引起的色差需要此项校正。请将新帝置于作业位置,然后遵循下列操作。 重要:采用 VGA 连接时,请确保在校正之前正确 调节新帝。请参阅第 38 页的 “调节显示 屏幕”和第 37 页的“调节点距和相位(仅 限 VGA) ” 。 1. 打开 Wacom 数位板的控制面板。 如果系统上装有多个液晶数位板,则请从 [ 数位板 ] 列表中选择当前使用的设备。 2. 从 [ 工具 ] 列表中选择 [ 紧握笔 ]。 然后选择 [ 校正 ] 选项卡。 3. 如果配备多台显示器,则请选择液晶数位板... -
Page 297: 调节点距和相位 (仅限 Vga
则请使用 [ ] 选项与输入信号同步 (请参阅第 38 页的 “出厂预设、自动同步和用户设置” ) 。 如果图像仍然模糊,则请按照下列步骤调整点距和相位。为了获得最佳的显示质量,请将图形卡设为新 帝可用的最高 (原生)分辨率。有关详情,请参阅第 68 页的 “产品规格” 。 1. 从 Wacom 数位板控制面板中选择 [ 校正 ] 标 签。 2. 如果使用多台显示器, 请确保 [ 显示器 ] 菜单 中已选择新帝对应的选项。 3. 单击 [ 校正 ...] 按钮激活校正屏幕。... -
Page 298: 调节显示屏幕
调节显示屏幕 出厂预设、自动同步和用户设置 出厂预设:为了获得最佳的显示质量,请将图形卡设为新帝可用的最高 (原生)分辨率。有关详情,请 参阅第 68 页的 “产品规格” 。 自动同步:新帝自动同步输入信号。自动同步功能用于设置屏幕的水平和垂直位置以及点距和相位。自 动同步将在支持的水平及垂直频率范围内起作用。有关详情,请参阅第 68 页的 “产品规格” 。 如果新帝没有自动同步输入信号,则可用 OSD [ ] 选项初始化显示屏幕同步。使用屏显 (OSD) 控制钮可手动进行更多的屏幕显示调节。 颜色校正:更改颜色、色温、对比度、亮度或背光的默认值设置时,将会使安装光盘所含的 ICC 颜色配 置文件无效。 屏显 (OSD) 设置 OSD 功能让您轻触按钮即可优化各种显示设置。 使用位于设备背面的 OSD 控制钮进行调节。越过显示屏顶端便可找到按钮的位置。 数字 / 模拟 1. [M ] 按钮 (DVI/VGA) 开关... - Page 299 打开屏显 (OSD) 时可用下列菜单选项。 ] 选项用于选择显示 OSD 菜单的语言。 ] 选项包括: ]:调节 OSD 菜单窗口的垂直位置。 • ]:调节 OSD 菜单窗口的水平位置。 • ]:更改 OSD 菜单背景的透明度。 • ] 选项包括: ]:增减图像的对比度。对比度的更改可能会影响颜色精度。 • ]:增减图像的亮度。 • ]:增减背光的亮度。 • ] 选项包括: [5000K],[6500K],[9300K]:用于调节液晶数位板的色温 (绝对温 • 度) 。 ] 用于直接显示图形卡的颜色而不作任何调节。选择该项后 • 无法调节对比度和亮度。 ] 用于分别调节...
- Page 300 ] 选项包括: ]:调整图像尺寸,使其占据整个屏幕。 ]:调整图像尺寸,在保持合适宽高比的同时占据尽量多的屏 幕。 [1:1]:以实际分辨率显示图像。 ] 选项包括: ]: (仅限 VGA。 )同步液晶数位板的信号时序与图形卡的信号 • 时序。遇到不稳定或抖动的图像,或者遇到水平失真线条时使用。 ]: (仅限 VGA。 )更改显示数据频率,使其与图形卡的显示数据 • 频率匹配。遇到不稳定或抖动的图像,或者遇到垂直失真线条时使用。 ]: (仅限 VGA。 )更改图像的垂直位置。如需自动调节,请使 • 用 [ ] 选项。 [ 水平 ]: (仅限 VGA。 )更改图像的水平位置。如需自动调节,请使 • 用 [ ] 选项。 ]:...
- Page 301 节能 新帝符合 VESA 节能设计标准。 搭配显示能源管理信号 (DPMS) 兼容电脑或图形卡进行使用时,显示屏将自动遵循下列节能参数。 下述节能功能生效时,屏幕显示会比平常略暗。 电脑模式 水平同步 垂直同步 视频 功耗 电源指示灯 电源开启 是 是 活动 54 W,最大 蓝色 待机模式 否 是 空白 2 W,最大 蓝色 / 橙色 * 暂停模式 是 否 空白 2 W,最大 蓝色 / 橙色 * 关闭模式...
-
Page 302: 疑难解答
1. 如果 Wacom 驱动程序没有正确加载,请首先按照屏幕上可能出现的任何错误信息采取推荐的措施。 如果仍然无法解决问题,则请浏览本章节中的 “疑难解答”部分。 2. 如果新帝工作不正常,请参阅下列页码的 “疑难解答”部分。另请参阅第 47 页的 “显示疑难解答” 或第 50 页的 “数位板疑难解答” 。您的问题可能在其中有描述,您可以尝试它给出的解决方案。 3. 打开 Wacom 液晶数位板的 Read Me (读我)文件获取最新信息。另可在当前地区对应的 Wacom 网站上查阅产品 FAQ (常见问题) 。 4. 如果新帝与新的硬件或软件产品之间存在兼容性冲突, 则请考虑下载最新的软件驱动程序。 为了保持 与新产品的兼容性,Wacom 会定期更新软件驱动程序。请参阅第 58 页的 “获取驱动程序下载” 。 5. 如果已经尝试了本指南中的建议却仍然无法解决问题, 则可联系 Wacom 获取技术支持。 有关何处获... - Page 303 对笔尖未施加压力但保持笔位于液晶数位板表面上方 5 mm 以内时,按下侧面开关。状态指示灯 • 应当再次点亮为蓝色。 如果进行这些测试时状态指示灯均未点亮为蓝色,请确保使用新帝专用的笔。 • 有关详情,请参阅第 44 页的 “测试控制钮和输入工具”和第 46 页的 “测试笔” 。 • 5. 检查 ExpressKey。有关详情,请参阅第 44 页的 “测试控制钮和输入工具”和第 44 页的 “测试 ExpressKey” 。 6. 检查触控带。有关详情,请参阅第 44 页的“测试控制钮和输入工具”和第 45 页的“测试触控带” 。 如果仍有问题,则可能使用了有缺陷的笔或液晶数位板。 测试后,使用 Wacom 数位板控制面板重新配置数位板和工具,进行原来使用的自定义设置。 疑难解答 第 43 页...
-
Page 304: 测试控制钮和输入工具
测试控制钮和输入工具 如果紧握笔、新帝 ExpressKey 或触控带未能按照预定方式工作,最好先检查所分配的功能或将它们重置 到默认状态。通过点击控制面板的 [-] 按钮,从 [ 工具 ] 列表中删除笔,便可将笔快速恢复到默认设置。 将笔删除之后,将其重新放到显示屏幕表面上。笔将被添回到 [ 工具 ] 列表中,并具备默认值设置。 打开 Wacom 数位板控制面板, 然后点击 [ 关于 ] 按钮。 在出现的对话框中, 点击 [ 诊断 ...] 按钮。 [ 诊断 ] • 对话框可显示关于新帝液晶数位板和笔的动态信息。测试新帝和输入工具时可使用该信息。 如果多个新帝被连接到系统上,请在 [ 数位板信息 ] 栏中选择当前测试的设备。... -
Page 305: 测试触控带
到系统上,请确保在 [ 数位板信息 ] 栏中选择了当前测试的设备。 2. 沿所要测试的触控带的整个长度上下滑动手指。沿着触控带触摸并移动手指时,[ 左 Touch Strip] 或 [ 右 Touch Strip] 旁边会显示数字,用于表示各个触控带的当前手指位置。 3. 按所测试触控带的对应触控切换键。 便可在触控带的四种可自定义状态之间切换。 在设置之间循环切 换时,相应的指示灯会亮起。在 [ 诊断 ] 对话框中,也会显示按钮状态。 如果将某功能设为 [ 跳过 ],则切换序列中对应的指示灯将被跳过。 4. 完成测试之后,点击 [ 关闭 ] 按钮退出对话框。 重要:请注意,某些应用程序可能会忽略或控制触控带的功能。测试触控带时,请关闭除 Wacom 数位 板控制面板外打开的其他应用程序。 疑难解答 第 45 页... -
Page 306: 测试笔
测试笔 1. 观察 [ 工具信息 ] 栏的同时将笔放在显示屏幕上方 5 mm 以内。随即应会显示 [ 感应区 ] 值、[ 工具名 ] 和 [ 工具类型 ] 和 [ 工具 S/N] (序号) 。如果多个新帝被连接到系统上,请确保在 [ 数位板信息 ] 栏中选 择了当前测试的笔的设备。 2. 沿着液晶数位板表面移动工具。X 轴和 Y 轴数值会随着工具位置的更改而更改。 3. 测试笔开关。每次点击工具笔尖,按下侧面开关或用工具的橡皮擦按压显示屏幕时,新帝状态指示灯 应当点亮为蓝色。 用笔尖按压显示屏幕表面。 [ 开关 ] 状态和 [ 笔压 ] 值应会改变。 ([ 笔压 ] 会在没有施压时的 0% 和 •... -
Page 307: 显示疑难解答
显示疑难解答 如果遇到新帝显示相关问题,请参阅下表;您的问题可能在其中有描述,您可以尝试给出的解决方案。 有关颜色问题的详情,请参阅操作系统或应用程序附带的文档。 一般显示问题 无显示。电源指示灯熄灭。 确认 AC 电源适配器的灯亮,电源线已牢固插入新帝的电源插 口。检查新帝的电源开关是否打开。 无显示。电源指示灯点亮为蓝色。 检查对比度、亮度和背光控制。根据需要进行调节。或者打开 OSD 菜单,然后选择 [ ] 选项。 电源指示灯点亮为橙色。 电脑可能处于电源管理模式。用笔尖接触新帝显示屏幕, • 移动鼠标或按下键盘上的任意键。 显示屏幕上短暂出现 “no input signal go to power saving mode” 关闭电脑和液晶数位板。 • 信息。 检查视频电缆的接口针脚是否弯曲或破损。然后正确连接 视频电缆并打开液晶数位板和电脑。 确认 DVI/VGA 开关是否设置正确。 • 请在切换开关位置之后重新启动电脑。 确认图形卡是否安装正确。 •... - Page 308 显示屏幕上短暂出现 “out of 输入信号频率未正确设置或与新帝不兼容。将刷新率设为 • range”信息。 兼容新帝的垂直频率。如果图形卡驱动程序支持水平频率 的调节,请确保将其设为兼容的数值。 有关频率范围详情,请参阅第 68 页的 “产品规格” 。在单 台显示器系统上,需要连接其他显示器来更改刷新率。 分辨率或刷新率设置过高。有关新帝可用的最高 (原生) • 分辨率、刷新率及其他分辨率规格的详情,请参阅第 68 页 的 “产品规格” 。 设置显示属性来检测即插即用显示器。 • 显示屏幕上短暂出现 “set refresh 将刷新率设为兼容新帝的垂直频率。有关频率范围详情,请参 range”信息。 阅第 68 页的 “产品规格” 。 图像在显示屏上出现重影。 请勿延长视频电缆或使用输入选择切换盒。 不刷新屏幕的情况下长时间显示静 使用屏幕保护程序或其他电源管理功能。 态图像时,短时间内会留有残像。 颜色质量不佳。...
-
Page 309: Vga 问题
VGA 问题 显示屏出现波纹或闪烁。 打开 OSD 菜单, 然后选择 [ ] 选项。 然后, 根据需 • 要手动调节点距和相位。 确认显示适配器或图形卡符合新帝的规格。 • 在显示属性控制面板中调节刷新率。 • 显示屏不清晰。文本或屏幕其他部分 将图形卡的显示分辨率设为新帝可用的最高 (原生)分辨 • 出现模糊。 率。有关详情,请参阅第 68 页的 “产品规格” 。 关闭新帝并重新打开。 • 打开 OSD 菜单, 然后选择 [ ] 选项。 根据需要手动 • 调节亮度、点距和相位设置。 显示内容和... -
Page 310: 数位板疑难解答
笔在绘图时没有压力感应。 某些应用程序需要在其中或所选工具中打开压力支持功能才能 支持笔的压力感应。 另请确认应用程序支持压力感应。 点击困难。 打开 Wacom 数位板控制面板,然后前往 [ 笔 ] 标签。 尝试使用较轻的 [ 笔尖感应 ]。 笔不停地选择,或不停地绘图。 打开 Wacom 数位板控制面板,然后前往 [ 笔 ] 标签。 将 [ 笔尖感应 ] 滑块移动到 [ 用力 ], 或者选择 [ 细节 ...] 按钮并 增加 [ 点击滑块 ] 设置。如果仍然没有帮助,请参阅第 42 页的... - Page 311 橡皮擦不停地选择,或不停地擦除。 打开 Wacom 数位板控制面板,然后前往 [ 擦除 ] 标签。将 [ 橡 皮擦感应 ] 滑块移动到 [ 用力 ], 或者选择 [ 细节 ...] 按钮并增加 [ 点击滑块 ] 设置。如果仍然没有帮助,请参阅第 42 页的 “测 试新帝” 。 您注意到在开始下笔或墨水划线时 打开 Wacom 数位板控制面板,然后前往 [ 笔 ] 标签。 存在延迟。 尝试减少 [ 双击时笔尖间距 ]。如果仍然不起作用,请尝试将...
- Page 312 确保按下侧面开关时状态指示灯点亮为蓝色。如果指示灯没有 点亮,请确认 USB 电缆是否已插入电脑或 USB 集线器上有效 的 USB 端口。 如果指示灯仍然没有点亮,则可能遇到了有缺陷的硬件 (请参 阅第 42 页的 “疑难解答” ) 。 笔尖和屏幕光标没有正确对齐。 打开 Wacom 数位板控制面板, 然后选择 [ 校正 ] 标签。 请参阅 第 36 页的 “校正新帝”继续操作。 屏幕光标会移动但不会跳到显示屏 打开 Wacom 数位板控制面板来确认 Wacom 驱动程序已正确 幕上的笔尖位置,并且在笔沿着显示 加载。如果驱动程序没有加载,则会看到错误信息。如果出现错 屏移动时不会跟随笔尖移动。...
- Page 313 请遵循 Windows 或 Macintosh 疑难解答部分的指导说明来创 建新的参数文件。 电脑不进入休眠状态。 不使用笔时,请将笔从液晶数位板表面上移开,否则新帝会继 续发送数据,使电脑一直处于工作状态。 使用普通鼠标或轨迹球时,屏幕光标 不使用笔时,请将笔放在笔架中或液晶数位板周围,但不要放 跳回原位。 在显示屏上。使用其他输入设备时,将笔放在显示屏上会干扰 屏幕光标的定位。 其他数位板连接到电脑上时,屏幕光 新帝的数位板部分会发射一定频率的电磁波。如果其他数位板 标不规则移动或在显示屏幕周围跳 距离新帝过近,则可能会干扰屏幕光标的定位。如果发生这种 动。 情况,请将该数位板挪动到离新帝稍远一些的地方。 使用某些应用程序工作时, 某些应用程序可能会忽略或控制ExpressKey和触控带的功能。 ExpressKey 或触控带会执行与 关于结合数位板控制使用应用程序的信息,请参阅软件使用手 Wacom 数位板控制面板所设置的功 册。 能不同的功能。 如果使用应用程序特定设置,请务必更新正确应用程序的设 置。 按触控切换键时,触控带功能不能 按触控切换键时,确保不要不经意地接触本机背面的触控带。 正常切换或切换不稳定。 如果在按触控切换键的同时使用 (或接触)触控带,切换功能 将无法启用。 疑难解答 第 53 页...
-
Page 314: Windows 特定问题
预置 ] 下的 [ 删除 ] 按钮删除当前用户的参数设置。 多个用户:点击 [ 所有的用户预置 ] 下的 [ 删除 ] 删除多个 用户的参数设置。请注意,需要管理员权限才能删除所有 用户的参数设置。重新启动所有当前运行的数位板应用软 件。 点击 [ 我的预置 ] 下的 [ 恢复 ...] 即可快速恢复已备份的数位板 参数设置。 更改电脑鼠标控制面板中的左右手 重新启动 Windows 便可正确识别 Wacom 工具设置。 设置之后,笔尖不再正常工作。 疑难解答 第 54 页... -
Page 315: Macintosh 特定问题
点击实用工具中的 [ 恢复 ...] 按钮即可快速恢复针对 [ 当前用户 ] 或 [ 所有用户 ] 备份的数位板参数设置。 注意:请勿从主 [ “资源库”的 P ] 文件夹中手 REFERENCE ANES 动删除 [W ] 文件。此文件仅在卸 ACOM ABLET PREFPANE 载 Wacom 软件驱动程序或使用 [W 数位板工具 ] ACOM 时才可删除。 重新校正液晶数位板。 疑难解答 第 55 页... - Page 316 FRAMEWORK PLIST • APPLE INKPAD PLIST • APPLE INKPAD SKETCH 3. 回到 [ 系统偏好设置 ] 和 [I ],然后启用手写识别。 4. 使用 Wacom 液晶数位板和笔测试 Ink 功能。 如果该操作无法解决 Ink 问题,请联系 Apple 技术支持获取进 一步的帮助。 Wacom 并非 Ink 软件厂商, 对于第三方软件应用 程序我们只能提供有限的支持。 疑难解答 第 56 页...
-
Page 317: 技术支持选项
如有互联网连接,则可通过当前地区对应的 Wacom 网站下载最新的软件驱动程序。请参阅第 58 页的 “获取驱动程序下载” 。 如果无法解决问题并且认为 Wacom 产品确实工作不正常,则可联系产品所在购买地区的 Wacom 技术 支持。请参阅位于安装光盘上的 Wacom 数位板 Read Me (读我)文件获得联系信息。 拨打电话时,应在电脑旁边并准备下列信息: 本手册。 • 液晶数位板序列号。 (请查阅本机背面的标签。可能需要旋转本机才能看到序列号标签。 ) • 驱动程序版本号。 (请查阅安装光盘或点击 Wacom 数位板控制面板的 [ 关于 ] 按钮。 ) • 电脑的厂商和型号,以及操作系统版本号。 • 图形卡的厂商、型号和连接类型。 • 连接到电脑的外围设备的清单。 • 问题发生所在的软件应用程序及其版本。... -
Page 318: 获取驱动程序下载
获取驱动程序下载 为了保持与新产品的兼容性,Wacom 会定期更新液晶数位板数位板部分的软件驱动程序。如果液晶数位 板和新的硬件或软件产品之间存在兼容性问题, 从互联网上下载新的 Wacom 软件驱动程序(如有提供) 也许能解决问题。 美国、加拿大、中美洲和南美洲 网址: http://www.wacom.com/productsupport 软件更新 欧洲、中东和非洲 网址: http://www.wacom.eu/downloads 软件更新 日本 网址: http://tablet.wacom.co.jp/download 软件更新 (日语) 亚太地区 (英文) 网址: http://www.wacom-asia.com 软件更新 (英语) 中国 网址: http://www.wacom.com.cn 软件更新 (简体中文) 韩国 网址: http://www.wacomkorea.com 软件更新 (韩语) 中国台湾 网址: http://www.wacom.com.tw 软件更新... -
Page 319: 保养新帝
附录 本章节包含新帝的保养技巧,软件卸载的指导说明,许可和维修担保,以及其他信息。 保养新帝 请保持紧握笔和新帝 LCD 屏幕表面清洁。灰尘和尘土颗粒会黏着在笔上,使显示屏幕表面过度磨损。定 期清洁有助于延长 LCD 屏幕表面和笔的寿命。 将新帝、新帝支架和紧握笔放置在清洁、干燥的地方,避免使其处于极端温度中。室温是最佳温度。新 帝、新帝支架和紧握笔不可拆分。拆分产品将无法获得维修担保。 重要:注意切勿将液体洒到液晶数位板或笔上。尤其注意不要弄湿显示屏、ExpressKey、触控带或笔按 钮和笔尖,否则液体渗入会造成内含的电子部件失效。 如需清洁新帝机壳、新帝显示器支架和紧握笔,请使用柔软的干布;另可使用少量肥皂经水稀释后将布 蘸湿。请勿使用涂料稀释剂、汽油、酒精或其他溶剂清洁本机机壳或笔。 如需清洁显示屏幕,请使用防静电布或略微蘸湿的布。清洁时,只需稍稍按压显示屏幕即可,请勿弄湿 屏幕表面。请勿使用清洁剂清洁显示屏幕,否则可能会损坏液晶数位板。此类损坏无法获得厂商的维修 担保。 附录 第 59 页... -
Page 320: 更换笔尖
更换笔尖 笔尖 (笔头)随正常使用会磨损。用力按压更加容易造成笔头磨损。如果液晶数位板拥有涂层表面,磨 损的笔头可能会造成损坏。为避免发生这种情况,推荐定期更换笔尖。 1. 旋开笔座的底部便可使用笔尖更换工具和备用笔尖。 笔尖更换器 备用笔尖 6 个标准笔尖,黑色 • 1 个弹性笔尖,白色 • 3 个硬毛毡笔尖,灰色 • 2. 使用笔尖更换工具、镊子、针鼻钳子或类似的工具夹紧旧笔头,将其从笔中拔出。 3. 将新笔头直直地插入笔筒。平稳地推动笔头直到其停止前进。 笔头 1 mm 或更短 注意: 弹性笔尖装有弹簧,使用该笔或选购的喷枪笔时,具有更强的触觉反馈。它们的安装方式与标准笔 尖相同。 警告 窒息危险!防止儿童吞服笔头或侧面开关。儿童可能会不慎将笔头或侧面开关咬出。 如需订购替换部件,请参阅第 72 页的 “可供销售的部件和配件” 。 重要:不使用笔时,请将其放入笔座、笔架中或平放在您的桌子上。不使用选购的喷枪笔时,请将其平 放在您的桌子上。为了保持输入工具的灵敏度,请勿将其放在会让笔尖或橡皮擦着力的容器中。 附录 第 60 页... -
Page 321: 可选显示配置
可选显示配置 将液晶数位板安装到新帝支架上之后,可以将其旋转到各种位置。如果您不打算旋转新帝,而希望将其 更加牢固地固定在支架上,请按照以下图示安装固定支架用螺丝。 要将新帝锁定在支架上: 将液晶数位板旋转到标准横向位置 (电源开关位于装置顶部) 。 • 支架上的两个孔将与新帝装置上的两个螺丝孔对齐。 • 使用十字螺丝刀将固定螺丝插入并拧紧。 • 注意 避免对新帝支架施加过大的压力,否则会损坏支架。 固定螺丝 附录 第 61 页... -
Page 322: 使用替代底座或支架
使用替代底座或支架 新帝可以安装到符合 VESA 100 标准的任何底座臂或支架。 需要纵深不超过 13 -18 mm 的 M4 普通螺丝 (直径 4 mm, 螺距 0.7 mm) 。 要将新帝安装到 VESA 100 底座平台上 : 1. 关闭电脑和新帝。 然后断开本机与电脑之间的所有电缆连接。 2. 从支架上拆下新帝,将其面朝下放置在平坦、柔软的表面 上 (例如桌面上平铺的布) 。 3. 卸下四根轴承轮安装螺钉,拆下轴承轮。然后,小心地分 开轴承半体并取出轴承制动装置,松开接线。请注意不要 丢失在某个轴承轮内槽中找到的小轴承制动装置。 连接线凹槽 轴承制动装置 连 接 线 盖 子 (已 拆 下)和安装螺钉... - Page 323 4. 接下来,卸下连接线盖子上的四根安装螺钉,从液晶数位板上提起盖板。 5. 将电缆安置在电缆引出槽内。然后,重新安装连接线盖子,确保使用正确的安装螺钉。 (连接线盖子 的螺钉比轴承轮的安装螺钉短。 ) 6. 使用轴承盖板附带的螺钉安装盖板,以防止装置内部沾染灰尘粒子。 7. 此时,使用合适的 VESA 安装螺钉,将新帝牢固安装到替代底座平台上。 将新帝安装到替代底座平台上时,请务必遵循平台厂商提供的文档中的所有指导说明。如果安 注意 装不当,本机可能会跌落,造成本机损坏或人身伤害。 8. 将电缆重新连接到电脑。必要时可参阅第 18 页的 “第 1 步:显示器安装” 。 要从替代底座平台上拆下新帝 : 1. 关闭电脑和新帝。然后断开本机与电脑之间的所有电缆连接。 2. 从替代底座平台上拆下新帝。 3. 将液晶数位板面朝下放置在平坦、柔软的表面上 (例如桌面上平铺的布) 。拆下轴承盖板。 4. 拆下连接线盖子,从连接线凹槽中提出电缆。解开电缆之后,重新安装连接线盖子。 5. 摆放并研究轴承轮的部件 应该有两个轴承轮部分、一个轴承轮制动装置和四根螺钉。将轴承制动装 置安置在某个轴承轮部分内。 (可以使用任一个轴承轮部分,因为它们完全相同。)正确安置后,轴 承制动装置会在制动装置槽内从一侧顺利地移动到另一侧。制动装置也会与后轴承轮表面齐平。...
- Page 324 6. 注意不要让轴承制动装置从轴承轮部分中移位, 将两个轴承轮半体一同安置在数位板电缆周围, 轴承 轮半体的安装位置上。 正确定位时,轴承轮部分应当与数位 板的水平轴线对齐。 含有轴承制动装置的部分应当定位 在朝向数位板顶端的位置。 7. 将轴承轮部分安装到本机上,确保使用正确的安装螺钉。 (轴承轮的螺钉比连接线盖子的螺钉长。 ) 附录 第 64 页...
-
Page 325: Windows 中的笔和数字墨水功能
数位板时,Wacom 笔可以利用功能强大的笔记、手写识别、快速浏览和其他数字墨水选项快速得到直观 结果,从而增强您的体验。 笔记:使用 Wacom 笔在 Windows 记事本中粗记笔记和绘制草图。记事本可模拟纸质笔记本,但是 • 利用了数字笔记的优势。您可以选择不同的笔、马克笔和荧光笔工具,还有通过 Wacom 笔的橡皮擦 即可轻松激活的橡皮擦。记事本还有强大的搜索引擎,甚至可以查找手写内容。 手写识别:由于 Windows 7 和 Vista 含有强大的手写识别功能,因此可用 Wacom 笔在电脑接受键 • 入的任何地方快速输入手写内容。您可以随时将手写内容转换为键入文本。 笔势:使用 Wacom 笔在液晶数位板上进行简单的笔势移动,即可触发浏览、编辑和其他功能的自定 • 义动作。如需自定义笔势,请在 [ 笔和输入设备 ] 控制面板中选择 [ 笔势 ] 标签。 Microsoft Office 2007 中的数字墨水:利用 Windows 7 或 Vista 中运行的 Microsoft Office 2007 或... -
Page 326: 关于 Windows 平板电脑输入面板
ABLET 如需自定义输入面板: 1. 首先打开输入面板,然后点击菜单栏上的 [ 工具 ]。 2. 选择 [ 选项 ] 打开输入面板选项对话框。 3. 自定义为您喜欢的输入面板设置。 如需了解在 Microsoft Windows 和 Office 2007 或更高版本中使用 Wacom 笔的更多信息,请查阅系统 和 Microsoft Office 应用程序附带的文档。请务必充分利用 Microsoft 提供的包括平板电脑指南在内的 Windows 培训工具。 另可访问 Wacom 网站:www.wacom.com/vista,获取在 Windows 中使用 Wacom 笔的更多信息。 附录... -
Page 327: 卸载新帝
卸载新帝 按照下列相应操作从系统中移除 Wacom 驱动程序软件和新帝液晶数位板。 重要:从系统中删除 Wacom 驱动程序软件后,Wacom 液晶数位板将不能使用数位板的全部功能,但仍 可继续作为鼠标设备使用。 Windows: 1. 点击 Windows [ 开始 ] 按钮并打开 [ 控制面板 ]。 2. 在 [ 控制面板 ] 窗口中 Windows 7 和 Vista : 点击 [ 卸载程序 ]。 在出现的对话框中, 选择 [W 数位板 ] 并点击 [ 卸载 ] •... -
Page 328: 产品规格
产品规格 一般规格 尺寸 (宽 x 深 x 高) 561 x 421 x 47.8 mm (不包括中心轴承和支架) 重量 8.7 kg (不包括支架) 10.4 kg (包括支架) 输入电压 12 伏、直流 功耗,使用 AC 适配器 54 W,最大 2 W 或更低,休眠模式 1 W 或更低,关闭模式 电源管理 VESA DPMS 即插即用 DDC2B,DDC/CI 兼容性... -
Page 329: 显示器
26 ms (典型值) 照度 220 cd/m2 (典型值) ,仅限 LCD 面板 200 cd/m2 (典型值) ,带防护玻璃 OSD 手动控制 亮度,对比度,点距,相位,垂直位置,水平位置,透明度,自动调 整,语言,背光,菜单位置,重置,缩放比例,色温 (9300K/6500K/ 5000K/ 使用者自定 / 用户/原色温) 即插即用 DDC 2B,DDC/CI LCD 质量 每块 LCD 面板均依照非常严格的质量标准进行制造。 制造技术无法保 证绝对完美的 TFT 显示屏。Wacom 不允许任何像素一直呈现白色或 黑色。但可允许少数像素显示色谱中某些部分的颜色时出现错误。这 并不表示显示屏有缺陷。 附录 第 69 页... -
Page 330: 数位板
数位板 读取技术 电磁感应技术 活动区域 432.0 x 324.0 mm 分辨率 0.005 mm/ 点 (5080 lpi) 精度 ± 0.5 mm,中央 边缘区域 1 (自显示区域边缘 20 mm 的宽度)为 ± 2.0 mm 边缘区域 2 (自显示区域边缘 3 mm 的宽度)为 ± 4.0 mm 最大笔倾斜范围 与垂直方向成 40 度 (边角除外) 笔倾斜级别... -
Page 331: 产品信息
中国 (简体中文) http://www.wacom.com.cn 韩国 http://www.wacomkorea.com 中国台湾 http://www.wacom.com.tw 泰国 http://www.wacom-thai.com 订购部件和配件 如需购买部件和配件,请查阅 Wacom 液晶数位板 Read Me (读我)文件获取当前地区的联系人信息。 另可采取下列措施: 如需在美国或加拿大购买部件和配件,请拨打 1.888.884.1870 (免费)或访问 Wacom 网站: http://www.WacomDirect.com (仅限美国) 。 如需在欧洲购买部件和配件,请拨打 +49 (0)180.500.03.75 或发送电子邮件给 spareparts@wacom.eu. 或者访问 http://shop.wacom.eu. 另可使用所在地区正确的号码联系当地经销商、分销商或技术支持。 如需在澳大利亚、新加坡、台湾地区和韩国购买部件和配件,请分别访问:www.BuyWacom.com.au, www.BuyWacom.com.sg,www.BuyWacom.com.tw 和 www.BuyWacom.co.kr。 如需在其他国家或地区购买部件和配件,请联系当地经销商或分销商。 请注意,并非所有地区均有销售全部部件和配件。... -
Page 332: 可供销售的部件和配件
可供销售的部件和配件 介绍 零部件编号 紧握笔 紧握笔能够感知压力和倾斜,是用于绘图、擦除和鼠标操作的通用工具。易 KP-501E-01 于使用的 DuoSwitch 具有可编程开关功能。该压感笔具备符合人体工程学的笔腰紧 握区域、最佳重量和平衡、以及出色的笔尖灵敏度,使其成为最自然的手绘工具。 包含以下配件:笔座,标准笔尖(1 个) ,弹性笔尖 (1 个) ,硬毛毡笔尖(1 个) , 柔韧笔尖 (1 个) 。 喷枪笔 一款真正的数字喷枪笔,具有压感笔尖和橡皮擦、倾斜感应、以及可在更 KP-400E-01 大程度上对数字绘图应用程序进行控制的指动轮。该工具也带有可编程顶部按钮。 包含以下配件:笔座,标准笔尖 (1 个),弹性笔尖 (1 个),硬毛毡笔尖 (1 个) ,柔韧笔尖 (1 个) 。 美术笔 这款专业笔可进行 360 度笔筒旋转,和紧握笔一样具有压力和倾斜感应。 KP-701E-01 这些功能与独有的凿状笔尖相结合,... - Page 333 零部件编号 紧握笔、喷枪笔或描画笔的替换笔尖 标准笔尖 刚性,塑料笔尖,黑色,5 个 ACK-20001 弹性笔尖 弹簧式笔尖,具有较强的 “笔刷般”的感觉,5 个 ACK-20002 硬毛毡笔尖 柔性笔尖,具有 “在纸上使用铅笔或记号笔”的感觉,5 个 ACK-20003 柔韧笔尖 柔韧、有弹性,具有 “较高的摩擦”感,5 个 ACK-20004 用于美术笔的笔尖套装 ACK-20006 笔夹,标准 ACK-30001 笔夹,厚笔夹在不使用笔侧面开关时使用 ACK-30002 笔夹,标准笔夹在不使用笔侧面开关时使用 ACK-30003 有关可供销售的其他部件和配件的清单,请访问所在地区的 Wacom 网站。有关订购信息,请参阅第 71 页的 “订购部件和配件” 。 附录 第 73 页...
- Page 334 术语 活动区域:检测到笔的液晶数位板区域。 应用程序特定设置:为单个应用程序自定义的液晶数位板工具和数位板设置。Wacom 数位板控制面板可 让您在不同的应用程序中自定义笔的独特操作方式。只要使用相应的应用程序,应用程序特定设置便会 生效。 宽高比:液晶数位板活动区域的水平尺寸和垂直尺寸之间的比例。 点击力度:必须施加到笔尖才能产生点击的力度。 双击辅助:一种 Wacom 数位板控制面板的功能,即通过设置双击间距的大小更加容易地进行双击。 双击间距:光标在点击之间可移动且仍被视为双击操作的最大距离 (屏幕像素) 。增大双击间距可使双 击更加容易,但在某些图形应用程序中可能会造成笔刷线条延迟。 双击速度:点击之间可经过且仍被视为双击的最长时间。 橡皮擦应用程序:内置笔的橡皮擦支持的软件应用程序。根据应用程序实际应用的不同,此类应用程序 以不同的方式利用橡皮擦。 记事本:一种 Microsoft Windows 应用程序,以电子方式模拟纸质记事本,但是利用了数字笔记的优势。 例如,您可创建草图和速写笔记,而后便可转换为文本并发送给同事进行数字标记。记事本包含不同的 笔、马克笔和荧光笔工具,还有通过 Wacom 笔的橡皮擦即可轻松激活的橡皮擦。此外,您的手写内容 还可在记事本中进行搜索。 修正器:修饰键包括 Windows 的 S 、A 和 C ,或者 Macintosh 的 、 、 HIFT...
- Page 335 压力感应:一种 Wacom 笔尖和橡皮擦的特性,可感应正在施加的压力。用于在具有压力感应的应用程 序中创建看起来比较自然的笔划、笔刷线条和橡皮擦线条。 具有压力感应的应用程序:支持压力感应输入的任何应用程序。 感应区:可检测到笔的液晶数位板活动区域上方的高度。 径向菜单:分层菜单 (圆形格式) 。每级菜单由八个菜单部分组成,这些菜单部分含有可选的多种特征 和选项。您可自定义笔按钮来显示该菜单。 屏幕光标:幕上的指针。根据当前运行的应用程序的不同,屏幕光标以多种形状 (例如 I 形条、箭头或 方框)出现。 平板电脑输入面板 (TIP) : Microsoft Windows Vista 平板电脑输入面板可让您利用 Wacom 笔创建手写笔 记或通过屏幕键盘进行工作。输入面板会动态地将手写内容转换为文本。创建的信息随后便可插入其他 文档、幻灯片或图片中。 USB:通用串行总线。用于连接电脑外围设备的硬件接口标准。USB 端口支持热插拔,可让您在不关闭 电脑的情况下连接或断开 USB 设备。 Wintab:一种 Windows 应用程序使用的接口标准,用于接收数位板信息。液晶数位板支持 Windows 下 的所有 Wintab 兼容应用程序。 术语...
- Page 336 索引 ExpressKey 30 笔 46 测试 44 触控带 45 使用 31 控制钮 44 USB 电缆,安装 22 输入工具 44 VGA 模式, 疑难解答 49 新帝 42 安装 17 触控带 30 USB 电缆 22 测试 45 第 2 步,数位板安装 22 使用 32 第 1 步,显示器安装 18 打开包装...
- Page 337 清洁 调整旋转度 13 笔 59 可选配置 61 液晶数位板 59 控制钮 30 驱动程序下载,获取 58 使用 24 人体工程学 24 使用替代底座 62 软件,安装 23 卸载 67 输入工具,测试 44 疑难解答 47 数位板 Macintosh 特定问题 55 用户设置 38 Windows 特定问题 54 在支架上安装 11 安装 22 正面视图...
- Page 338 2-8 South Street Rydalmere CPF Bishan Building #06-08 NSW 2116 Australia Singapore 579838 Telephone: +61.2.9422.6700 Telephone: +65.6258.8640 Fax: +61.2.9420.2272 Fax: +65.6258.8697 WACOM TAIWAN INFORMATION CO., LTD. Suite 605, 6th floor, No. 205 Tun-Hwa North Road Taipiei, 105 Taiwan Telephone: +886.2.2712.2675 Fax: +886.2.2712.9789...
- Page 340 Installation Guide & Hardware Manual 설치 가이드 및 하드웨어 설명서 安装指南与硬件手册 Wacom Co., Ltd. UM-0442...