Multitech MultiModem iSMS SF 100-G User Manual For System Administrators
Intelligent sms server
Hide thumbs
Also See for MultiModem iSMS SF 100-G:
- Administrator's manual (129 pages) ,
- User manual (95 pages) ,
- User manual for system administrators (80 pages)

Related Manuals for Multitech MultiModem iSMS SF 100-G


Summary of Contents for Multitech MultiModem iSMS SF 100-G
- Page 1 ® MultiModem iSMS Intelligent SMS Server Models: SF 100-G SF 400-G SF 800-G User Guide for System Administrators Downloaded from Elcodis.com electronic components distributor...
- Page 2 Get answers to your most complex questions, ranging from implementation, troubleshooting, product configuration, firmware upgrades and much more. To create an account and submit a Support Case on the Portal, visit support.multitech.com Knowledge Base and Support Services www.multitech.com/en_US/SUPPORT...
-
Page 3: Table Of Contents
Table of Contents Contents 1 – S ................6 HAPTER AFETY NFORMATION AND RODUCT ESCRIPTION Safety Warnings ..............................6 Ethernet Port Caution ..........................6 Handling Precautions ..........................6 Ship Kit Contents .............................. 6 MultiModem iSMS Documentation ........................7 Front and Back Panels ............................7 SF 100 Front Panel ............................. - Page 4 Table of Contents 4 – U SMS W ................28 HAPTER SING THE ULTI ODEM I NTERFACE Administration ..............................28 Administration > System Setup ........................ 28 Administration > SNTP Client ........................30 Administration > Administrative Access ....................32 Administration > Admin Access > Allowed Networks ................33 Administration >...
- Page 5 Table of Contents A – A (API)................74 PPENDIX PPLICATION ROGRAMMING NTERFACE Introduction ..............................74 Purpose ..............................74 Scope ................................ 74 Acronyms and Definitions ........................74 SMS API ................................75 HTTP API ..............................75 TCP API ..............................91 Receive SMS API ............................. 94 Non Polling Mode Receive SMS API ......................
-
Page 6: Chapter 1 - Safety Information And Product Description
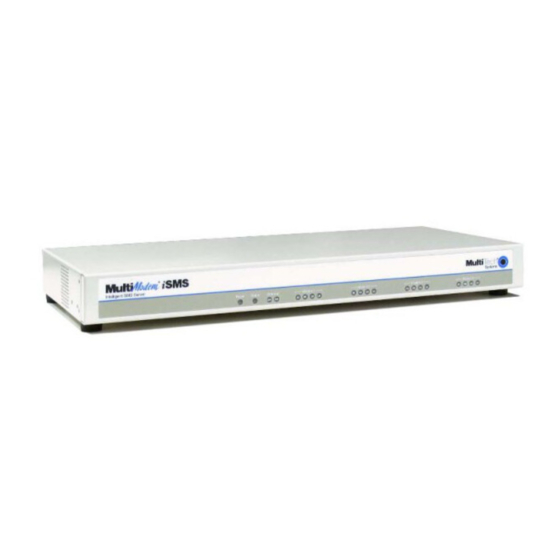
Chapter 1 – Safety Information and Product Description The Multi-Tech iSMS is an intelligent Short Message Services (SMS) server that empowers businesses with the ability to broadcast and receive SMS text messages with a click of a button. The ready-to-use solution simply plugs into the Ethernet network and connects to the wireless network via an integrated quad-band GSM modem. -
Page 7: Multimodem Isms Documentation
MultiModem iSMS Documentation User Guides All product documentation is available on your product CD and also the Multi-Tech website: http://www.multitech.com/man.go AT Commands AT commands used to configure this product are published in a separate reference guide and included on the MultiModem iSMS CD as well as being posted on the Multi-Tech web site. -
Page 8: Sf 400/800 Front Panel
Chapter 1 – Safety Information and Product Description SF 400/800 Front Panel SF 400/800 Front Panel LEDs LEDs Description Power Lights when power is being supplied to the MultiModem iSMS. Status When functioning normally, the LED blinks. The LED is a solid light when the MultiModem iSMS is booting up, saving the configuration, restarting, or updating the firmware. -
Page 9: Sf 400/800 Sim Card Installation
Chapter 1 – Safety Information and Product Description SF 400/800 SIM Card Installation SIM (Subscriber Identity Module) cards are required for the MultiModem iSMS to operate on a GPRS network. To install the SIM cards: Power off the unit and unplug the power cord. Do not under any circumstances remove protective power supply cover. -
Page 10: Modem Numbering
Chapter 1 – Safety Information and Product Description Modem Numbering When using the Web interface, the modem tabs correspond to the internal modems with the numbering scheme shown below. The row of LEDs shows where the front of the unit is. Unpopulated modems should be disabled as described in Network Setup. -
Page 11: Panel Mounting (Sf 100)
Chapter 1 – Safety Information and Product Description Panel Mounting (SF 100) The SF 100 model can be panel mounted with screws spaced according to the measurement shown. Note: Use either #6 or #8 pan head screws for all four mount locations. Multi-Tech Systems, Inc. -
Page 12: Rack Or Wall Mounting (Sf 400/800)
Chapter 1 – Safety Information and Product Description Rack or Wall Mounting (SF 400/800) The MultiModem SF 400/800 units can be rack (or wall) mounted with screws using the mounting brackets. Rack Mounting Ensure proper installation of the unit in a closed or multi-unit enclosure by following the recommended installation as defined by the enclosure manufacturer. -
Page 13: Technical Specifications
Chapter 1 – Safety Information and Product Description Technical Specifications Specifications SF 100 SF 400/800 Hardware Network: 1 Ethernet 10/100BaseT Network: 1 Ethernet 10/100BaseT Interfaces Console: 1 serial RS-232 Wireless Modems 1 Quad Band GSM 4 or 8 Quad Band GSM 850/900/1800/1900 MHz 850/900/1800/1900 MHz Dimensions... -
Page 14: Chapter 2 - Getting Started
Chapter 2 – Getting Started Setting Up Your MultiModem iSMS New MultiModem iSMS units come preconfigured with an IP address of 192.168.2.1 and a 24 bit subnet mask (255.255.255.000). Before connecting your new MultiModem iSMS to your network and powering it up, identify the existing IP network numbering scheme of the target network. -
Page 15: Sf 100 Cabling
Chapter 2 – Getting Started SF 100 Cabling Plug one end of a RJ-45 cable into the LAN port on the MultiModem iSMS and the other end into your network or workstation interface. Attach the cellular antenna. Connect the provided power supply cable to the 9 volt power port on the back of the MultiModem iSMS, and plug the other end into an AC power outlet. -
Page 16: Sf 400/800 Cabling
Chapter 2 – Getting Started SF 400/800 Cabling Plug one end of a RJ-45 cable into the LAN port on the MultiModem iSMS and the other end into your network or workstation interface. Attach the cellular antennas. Connect the provided power supply cable to the 9 volt power port on the back of the MultiModem iSMS, and plug the other end into an AC power outlet. -
Page 17: Establishing Tcp/Ip Communication
Chapter 2 – Getting Started Establishing TCP/IP Communication An IP enabled Workstation with an Internet WEB Browser is needed to setup and manage the MultiModem iSMS. Your workstation needs to be configured with a 192.168.2.x IP address and subnet mask of 255.255.255.000, to be able to communicate with a new (or factory defaulted) MultiModem iSMS (where x is not the number 0, 1, or 255, nor any other host number that may already be in use by another computer or device on the 192.168.2.x subnet). - Page 18 Chapter 2 – Getting Started The Local Area Connection Properties dialog box displays. • Select Internet Protocol [TCP/IP]. • Click the Properties button. The Internet Protocol (TCP/IP) Properties screen displays. Multi-Tech Systems, Inc. MultiModem® iSMS User Guide for Administrators Downloaded from Elcodis.com electronic components distributor...
- Page 19 Chapter 2 – Getting Started The Internet Protocol (TCP/IP) Properties screen. Important Note: If this screen opens and displays your current IP configuration, we suggest you record this information for future reference (i.e., after the MultiModem iSMS is configured, you may wish to return this PC to its original settings).
-
Page 20: Obtaining And Activating A Wireless Account
Chapter 2 – Getting Started Obtaining and Activating a Wireless Account Before you can use the cellular feature, you must obtain a GSM wireless account with an activated SIM card capable of sending SMS text messages through your service provider. Then activate the account by installing the SIM into the MultiModem iSMS. -
Page 21: Signal Strength
Chapter 2 – Getting Started Signal Strength Signal Strength Command To View Strength For the SF 400/800 models without signal LEDs, signal strength can be determined by using the following AT command: AT+CSQ. This command is the default setting on the Network Setup > Cellular Modem screen. -
Page 22: Chapter 3 - Isms Basics And The Setup Wizard
Chapter 3 – iSMS Basics and the Setup Wizard Starting the iSMS Open a Web Browser Be sure that the MultiModem iSMS is cabled and that the power is connected as shown in Chapter 2. Then open a Web browser. Type the IP address of your MultiModem iSMS in the address/location area of your browser: http://192.168.2.1 Press Enter. -
Page 23: Navigating The Screens
Chapter 3 – iSMS Basics and Setup Wizard Navigating the Screens Before using the Web Interface, you may find the following information about navigating through the screens and the structuring of the menus helpful. Other Menu Options Screen Name Menu Input Area Menus... -
Page 24: Table Of Menus And Sub-Menus
Chapter 3 – iSMS Basics and Setup Wizard Table of Menus and Sub-Menus Administration System Setup – Set up the SMTP server for e-mail notifications, the names of individuals who will receive notifications, and the email ID for the notifications FROM line. SNTP Client –... -
Page 25: Saving System Configuration Changes
Chapter 3 – iSMS Basics and Setup Wizard Saving System Configuration Changes There are two types of save functions within the WEB Management menu system. The first is a 'per feature' (per menu) save button. Most changes made per menu take effect immediately upon performing this save (but not all, some require a system restart). -
Page 26: Using The Multimodem Isms Wizard Setup
Chapter 3 – iSMS Basics and Setup Wizard Configuring the MultiModem iSMS Using the Wizard Setup Using the MultiModem iSMS Wizard Setup Use the Wizard Setup for Quick Configuration The Wizard Setup menu provides a convenient menu focused on the minimal setup requirements for a Users (web browser) based Send SMS environment. -
Page 27: Save & Restart
Chapter 3 – iSMS Basics and Setup Wizard Configuring the MultiModem iSMS Using the Wizard Setup Admin Password – You should change the password immediately after initial installation and also change it regularly thereafter for security purposes. Old Password – Enter the existing password (factory default is admin). New Password –... -
Page 28: Chapter 4 - Using The Multimodem Isms Web Interface
Chapter 4 – Using the MultiModem iSMS Web Interface Now that you have completed the Wizard Setup, you can use the Web-based configuration and management interface to set up other SMS features and parameters. This chapter takes you screen-by-screen through the Web Interface. - Page 29 Chapter 4 – Using the Web Interface Administration > System Setup E-Mail Notification SMTP Server Enter the IP address or the resolvable name (e.g. smtp.yourdomain.com) of your mail server. Port Enter the port number on which the mail server listens. Example: 25. Click the Save button. SMTP Server Authentication Some mail servers accept connection only after a user name and password are authenticated.
-
Page 30: Administration > Sntp Client
Chapter 4 – Using the Web Interface Administration > SNTP Client Administration > SNTP Client Clicking the SNTP Client check box enables the SNTP client within the MultiModem iSMS. SNTP (Simple Network Time Protocol) is an internet protocol used to set up the synchronization of the unit’s clock to real time. - Page 31 Chapter 4 – Using the Web Interface Administration > SNTP Client Time Zone Configuration Time Zone Enter your time zone. Default = UTC (Universal Coordination). The greenwichmeantime.com Web site has Time Zone information in detail or you can find a portion of the Time Zone abbreviations in Appendix E of this manual.
-
Page 32: Administration > Administrative Access
Chapter 4 – Using the Web Interface Administration > Administrative Access Administration > Administrative Access Use this screen to set up the password that will be used by the administrator and to set an automatic inactivity disconnection interval. Additionally, use this screen to define which TCP port the Web Management interface listens on. -
Page 33: Administration > Admin Access > Allowed Networks
Chapter 4 – Using the Web Interface Administration > Admin Access > Allowed Networks Administration > Remote Syslog Administration > Admin Access > Allowed Networks Use this screen to set the networks that will be allowed access to the MultiModem iSMS. The administrator can then add, edit and delete any network. -
Page 34: Administration > Tools
Chapter 4 – Using the Web Interface Administration > Tools Administration > Tools This screen is used to reset the cellular modem. You may want to use Reset if you have lost your connection or the modems are not functioning properly but you don't want to recycle power through the MultiModem iSMS. -
Page 35: Administration > Factory Defaults
Chapter 4 – Using the Web Interface Administration > Factory Defaults Administration > Factory Defaults Reset to Factory Defaults Click the Factory Defaults button to set all configuration parameters to the factory default settings. This includes setting the administrator account password back to "admin" and deleting all User accounts. -
Page 36: Network Setup
Chapter 4 – Using the Web Interface Network Setup > IP Settings Network Setup Network Setup > IP Settings Use this screen to set up your network. IP Settings – LAN The MultiModem iSMS needs to be programmed with a static IP address. The MultiModem iSMS does not support DHCP assigned IP addresses. -
Page 37: Network Setup > Cellular Modem
Chapter 4 – Using the Web Interface Network Setup > Cellular Modem Network Setup > Cellular Modem Use this screen to configure the cellular modems. Click the Modem# tab at the top to work with that specific modem. Each modem is configured individually. Status Modem Status (SF 400 and SF 800 models only) This box will be checked by default, meaning that this modem will be considered for use. - Page 38 Chapter 4 – Using the Web Interface Network Setup > Cellular Modem Signal Strength Command The string entered here is sent to the cellular modem so that the signal strength LEDs can display the current signal strength. Use the following command: AT+CSQ See the Signal Strength LEDs Reference Table below.
-
Page 39: Save & Restart
Chapter 4 – Using the Web Interface TCP Connection The TCP Connection feature is a per modem port feature that provides direct AT Command access to the modem's serial interface for troubleshooting purposes only. When you open a TCP socket on the defined TCP port number (e.g. -
Page 40: Sms Services
Chapter 4 – Using the Web Interface SMS Services > Address Book SMS Services The sub menus within SMS Services are used to setup how the MultiModem iSMS SMS server handles incoming and outgoing SMS messages. Additionally, you can use the Send SMS menu to generate and send SMS (text) messages to other mobile devices (specific numbers or entries found in the Address Book). - Page 41 Chapter 4 – Using the Web Interface Address Book Click the Add button to display the Add a Phone Number screen. Add a Phone Number Note that fields marked with an asterisk are required. Name Enter the name of the person you want to add to the SMS Phonebook. The maximum number of characters is 50 including spaces and punctuation.
-
Page 42: Sms Services > Groups
Chapter 4 – Using the Web Interface SMS Services > Groups SMS Services > Groups Use this screen to create groups of recipients (names and phone numbers of mobile end points). A group is made up of entries from the Address Book. The MultiModem iSMS can hold up to 50 groups. -
Page 43: Sms Services > International Number
Chapter 4 – Using the Web Interface SMS Services > International Number SMS Services > Send SMS Users SMS Services > International Number Use this screen to allow or disallow SMS messaging to international numbers. International numbers are identified according to the number of digits. Disable International Number If Disable International Number is checked (this is the default), SMS messages can be sent to phone numbers limited by the maximum allowed digits (entered in the Maximum Digits field). - Page 44 Chapter 4 – Using the Web Interface SMS Services > Send SMS Users User Name Click the Add button to display the Add a New User screen. After a user name is added using the Add a New User screen, it will display on the Users screen. You can delete any user from this screen, if desired. Add a New User Note that fields marked with an asterisk are required.
-
Page 45: Sms Services > Sms Settings
Chapter 4 – Using the Web Interface SMS Services > SMS Settings SMS Services > SMS Settings Use this screen to set general system settings related to SMS encoding format, time & date format and network registration. Extended ASCII 8-bit Configuration Extended ASCII 8-bit (ISO-8859-1) Enabling this mode allows the MultiModem iSMS to pass characters in the text message that are made up of 8 bits instead of 7 bits (1 byte characters 0x80 through 0xFF). - Page 46 Chapter 4 – Using the Web Interface Unicode Configuration Unicode Enabling this mode allows the MultiModem iSMS to pass characters encoded via UTF16 (2 byte characters 0x0001 through 0xFFFF). Select this check box and click the Save button to allow Unicode text in the SMS messages.
-
Page 47: Sms Services > Send Sms
Chapter 4 – Using the Web Interface SMS Services > Send SMS SMS Services > Send SMS Use this menu to generate a message and then send it to a specific phone number(s) or Address Book contact(s) or Group(s). Notes about User Limitations This screen and their Outbox screen are the only screens available to non-administrative users. - Page 48 Chapter 4 – Using the Web Interface SMS Services > Send SMS SMS Text Enter the text of the message you want to send. -or- You can choose a Pre-Configured Message that you set up on the Triggers > Pre-Configured SMS screen.
- Page 49 Chapter 4 – Using the Web Interface SMS Services > Send SMS Modem Here you may select a specific modem from which to send the message, or you may leave it at the default of “Any”. Priority Here you can set the priority level for the message to be sent. When messages enter the queue to be sent, the priority levels will be compared and the messages flagged as High will be sent first, followed by Normal and Low.
-
Page 50: Sms Services > Sms Api
Chapter 4 – Using the Web Interface SMS Services > SMS API SMS Services > SMS API Basic setup of the MultiModem iSMS Application Program Interface is performed here. HTTP API and TCP API are Send SMS APIs (for sending SMS messages to mobile endpoints on the cellular network). - Page 51 Chapter 4 – Using the Web Interface SMS Services > SMS API Non Polling Receive API Configuration This section/option dictates which method of Receive API is implemented by the MultiModem iSMS server (how SMS Messages received from the cellular network are handled).There are two methods: A) Polling: the received SMS will be left in our Receive SMS queue until your application queries for it via an HTTP GET.
-
Page 52: Sms Services > Load Balancing
Chapter 4 – Using the Web Interface SMS Services > Load Balancing SMS Services > Load Balancing This feature provides a single interface to your Send SMS application when multiple units are needed for increased throughput. When multiple iSMS units are available on a network, they can be set up to work together to share the outgoing message load. -
Page 53: Sms Services > Inbox
Chapter 4 – Using the Web Interface SMS Services > Inbox SMS Services > Inbox This screen displays a list of all messages received by the cellular modem port. There is an Inbox per modem port. Each listing includes the sender's number, the message received, and a timestamp. Click on the individual modem number tabs for a list of messages received by that modem. -
Page 54: Sms Services > Outbox
Chapter 4 – Using the Web Interface SMS Services > Outbox SMS Services > Outbox The Outbox is for the unit as a whole. This screen chronologically lists sent messages and includes Message ID, Sending unit, who submitted the message, receiver's number, the message sent, and the timestamp. -
Page 55: Triggers
Chapter 4 – Using the Web Interface Triggers > Authentic List Triggers > Broadcast Triggers Triggers On the four Triggers screens, a system administrator can accomplish the following tasks: • Establish a list of users who are authorized to trigger a broadcast. •... - Page 56 Chapter 4 – Using the Web Interface Triggers > Broadcast Triggers Continued Add a Broadcast Trigger Note that the fields marked with an asterisk are required. This is a setup screen; no messages are sent from this screen. Trigger Message Type in a code or word that will be used to trigger the sending of the Broadcast Message.
-
Page 57: Triggers > Action Triggers
Chapter 4 – Using the Web Interface Triggers > Action Triggers Triggers > Action Triggers Action Triggers are the codes or words sent from a remote cell phone and received by the MultiModem iSMS – the trigger will execute the action associated with it. This is a setup screen; no messages are sent from this screen. - Page 58 Chapter 4 – Using the Web Interface Table of Trigger Codes and Trigger Actions Trigger Objective Configuring the Trigger Code and Its Action Code/Word Associated Trigger Action To add an entry in the Configuration format: Adds name with number address book <act_tri_configured>;name;number to address book.
-
Page 59: Triggers > Pre-Configured Sms
Chapter 4 – Using the Web Interface Triggers > Pre-Configured SMS Triggers > Pre-Configured SMS Use this screen to compose and save pre-configured messages. Pre-Configured SMS Click the Add button to open the Add a Pre-Configured SMS screen. Add a Pre-Configured SMS Note that fields marked with an asterisk are required. -
Page 60: Utilities
Chapter 4 – Using the Web Interface Utilities > Backup Utilities Utilities > Backup The Backup screen has two functions. First, it lets you save all MultiModem iSMS configuration files into one file for storing externally (Export Backup). Second, it is used to import and apply a configuration backup file (Import Backup from Remote Client). -
Page 61: Utilities > Firmware Upgrade
Chapter 4 – Using the Web Interface Utilities > Firmware Upgrade Utilities > Firmware Upgrade The firmware on the MultiModem iSMS can be upgraded to the latest version using this feature. All Multi- Tech firmware upgrades are posted on the Multi-Tech Web site from which they can be downloaded. Before upgrading the unit's firmware: •... -
Page 62: Import & Export Address Book
Chapter 4 – Using the Web Interface Import & Export Address Book > Import Import & Export Address Book Import & Export Address Book > Import Use this screen to import contact information from a CSV formatted file. The process allows you to select which fields (values) in the CSV file to import. - Page 63 Chapter 4 – Using the Web Interface Import & Export Address Book > Import Continued Example: Excerpt from a .CSV File First Name,Last Name,phone,description first1,last1,17633604174,Parent first2,last2,17633604174,Parent first3,last3,17633604174,Student first4,last4,17633604174,Teacher first5,last5,17633604174,Supplier first6,last6,17633604174,Newspaper first7,last7,17633604174,Photographer Important Note: If you plan to use authentication on any entry in the address book, the phone numbers of these individuals should be entered exactly as how the Cellular Network presents Sender Number information (usually that is with a + symbol followed by the country code and then area code).
-
Page 64: Import & Export Address Book > Export
Chapter 4 – Using the Web Interface Import & Export Address Book > Export Import & Export Address Book > Export Use this screen to export the contents of the MultiModem iSMS Address Book. The export creates a CSV file with 4 fields (values) per record: Firstname,Lastname,Description,Phone-Number. This .csv file is then ‘tarred’... -
Page 65: Statistics & Logs
Chapter 4 – Using the Web Interface Statistics & Logs > System Information Statistics & Logs Statistics & Logs > System Information The System Information screen provides the following information: System Information Product Model Number • Firmware Version • • MAC Address •... -
Page 66: Statistics & Logs > Sms Statistics
Chapter 4 – Using the Web Interface Statistics & Logs > SMS Statistics Statistics & Logs > SMS Statistics The SMS Statistics screen provides the following information by individual modem: SMS Statistics (SF 400/800 can select modem number): SIM Status - Indicates the presence of a SIM card and if the modem port is enabled or disabled. -
Page 67: Statistics & Logs > Load Balancing Statistics
Chapter 4 – Using the Web Interface Statistics & Logs > Load Balancing Statistics Statistics & Logs > Load Balancing Statistics When load balancing is set up with multiple units, this section will be populated with statistics corresponding to the workload shared. Load Balancing Statistics Slaves List of possible slave units. -
Page 68: Statistics & Logs > Log Traces
Chapter 4 – Using the Web Interface Statistics & Logs > Log Traces Statistics & Logs > Log Traces The Log Traces screen provides detailed information about SMS messages, API functions, and the SMS system per modem: SMS Logs (Sent, Received, Failure, Live) Send API Logs (Status, Failure, HTTP API Live, TCP API Live) Receive API Logs (Live, Failure) Load Balance Logs... -
Page 69: Chapter 5 - The Non-Administrative User Interface
Chapter 5 – The Non-Administrative User Interface Introduction This chapter covers the Web Interface available to non-administrative users. Non-administrative users have access to the Send SMS menu and an Outbox tied to their account. Users browse to the address of the MultiModem iSMS, login using the name and password created by the administrator and can then send messages from the SMS Services >... - Page 70 Chapter 5 – The User Interface SMS Services > Send SMS This is the screen from which general users will send SMS text messages (original text or pre- configured messages). The screen options here are the same options available to the administrator. SMS Services >...
-
Page 71: Sms Examples
Chapter 6 – SMS Examples Ensure the SIM Card Is Installed Correctly & Activated This example will verify that the SIM is installed correctly and that it is activated. Power up the MultiModem iSMS. Wait until the Status LED and the LS LED are blinking before continuing. - Page 72 Chapter 6 – SMS Examples Check the Outbox and you will see that the message was sent. Check the Inbox and you will see that the message was received. This verifies that the cellular modem is functioning. Note: Sometimes you may have to refresh this screen and wait several minutes for the cellular provider to deliver the message.
-
Page 73: Creating A Broadcast Message For Future Use
Chapter 6 – SMS Examples Creating a Broadcast Message for Future Use In this example a school wants to be prepared to send a message that school is closed for the day. The Administrator creates a Trigger Message word Snow and the following Broadcast Message: School is closed today. -
Page 74: Appendixa - Application Programming Interface (Api)
Appendix A – Application Programming Interface (API) Introduction Purpose To provide descriptions and examples for customers who require an Application Programming Interface (API) to integrate the MultiModem iSMS Send and Receive SMS capability into their own custom application. This document defines the API interface provided for sending SMS via the MultiModem iSMS and for receiving SMS via the MultiModem iSMS Scope APIs are defined to send and receive SMS using HTTP or TCP protocols. -
Page 75: Sms Api
Appendix A – Application Programming Interface (API) SMS API HTTP API Configuration of the "HTTP Send API" Using the MultiModem iSMS Web Admin Interface HTTP Send API Status: Enable “HTTP Send API Status” to send SMS / query status using HTTP API. By default, HTTP Send API is disabled. - Page 76 Appendix A – Application Programming Interface (API) HTTP Send API Format Each "HTTP Send API Request" consists of four parts: • The first part is the destination; i.e., the MultiModem iSMS IP and HTTP port number. • The second part is the API call which is the query; therefore, it has a '?' post-fixed to the call. •...
- Page 77 Appendix A – Application Programming Interface (API) Authentication The system needs to authenticate any API request. We achieve this by having the authentication credentials as part of the "Send SMS URL" or “Send SMS TCP” command. user - The username of the account, which has a maximum of 50 bytes. passwd - The password of the account, which has a maximum of 50 bytes.
- Page 78 Appendix A – Application Programming Interface (API) • modem Modem index to send SMS (this is only for the SF 400/800 models) Range : 1 to 4 for SF 400 1 to 8 for SF 800 0 for any modem (Send API job will be distributed via all the available modems) If modem is not specified in the request, send API job will be distributed via all the available modems.
- Page 79 Appendix A – Application Programming Interface (API) Sending to an Address Book Name The API can be used to send the message to a name in the MultiModem iSMS address book. If the name does not exist in the address book, the message is dropped. HTTP API format is: http://192.168.2.1[:portnumber]/sendmsg?user=user1&passwd=user1&cat=1 [&enc=0][priority=3][&modem=2]&ton=”bob”&text=message...
- Page 80 Appendix A – Application Programming Interface (API) • modem Modem index to send SMS (this is only for the SF 400/800 models) Range : 1 to 4 for SF 400 1 to 8 for SF 800 0 for any modem (Send API job will be distributed via all the available modems) If modem is not specified in the request, send API job will be distributed via all the available modems...
- Page 81 Appendix A – Application Programming Interface (API) Sending to a Group The API can be used to send SMS to a pre-defined group. The group should exist in the MultiModem iSMS. If the group does not exist, the message is dropped. HTTP API format is: http://192.168.2.1[:portnumber]/sendmsg?user=user1&passwd=user1&cat=1 [enc=1][priority=1][&modem=4]&group=”admin”&text=message...
- Page 82 Appendix A – Application Programming Interface (API) • modem Modem index to send SMS (this is only for the SF 400/800 models) Range : 1 to 4 for SF 400 1 to 8 for SF 800 0 for any modem (Send API job will be distributed via all the available modems) If modem is not specified in the request, send API job will be distributed via all the available modems.
- Page 83 Appendix A – Application Programming Interface (API) Sending a Broadcast Trigger Message We can use the API to send a broadcast trigger message to the MultiModem iSMS. HTTP API format is: http://192.168.2.1[:portnumber]/sendmsg?user=user2&passwd=user2&cat=2 [&enc=0][&modem=5]&text=message -or- http://192.168.2.1[:portnumber]/sendmsg?user=user2&passwd=user2&cat=2 [&enc=2][&modem=5]&text=message should be hexadecimal form -or- http://192.168.2.1[:portnumber]/sendmsg?user=user2&passwd=user2&cat=2 [&enc=3][&modem=5]&text=message should be decimal form...
- Page 84 Appendix A – Application Programming Interface (API) • text The trigger message text to be sent. Enable Extended ASCII in the MultiModem iSMS to send both ASCII and extended ASCII characters. By default, Extended ASCII is disabled, and the message can have only ASCII characters.
- Page 85 Appendix A – Application Programming Interface (API) Sending an Action Trigger Message We could use this API to perform a predefined action. HTTP API format is: http://192.168.2.1[:portnumber]/sendmsg?user=user1&passwd=user1&cat=3 [&enc=0]&text=message -or- http://192.168.2.1[:portnumber]/sendmsg?user=user1&passwd=user1&cat=3 [&enc=2]&text=message should be hexadecimal form Example: Configured action trigger for adding preconfigured SMS as 41;42;43 (with enc=2). Preconfigured SMS to add is 645;646;647;648 (in hexadecimal form).
- Page 86 Appendix A – Application Programming Interface (API) Examples for action trigger with enc=2: To Add an entry in the Address book: Configured trigger: 41;42;43 (with enc=2) Name: 61;62;63;64 (abcd) Phone number: 39;38;38;36;30;39;38;38;36;30 (9886098860) http://192.168.2.1[:portnumber]/sendmsg?user=user1&passwd=user1& cat=3[&enc=2]&text=41;42;43;3a;61;62;63;64;3a;39;38;38;36;30;39; 38;38;36;30 Here 3a is the equivalent hexadecimal for semi-colon. Instead of 3a, we can use 3b (equivalent hexadecimal value for colon) also.
- Page 87 Appendix A – Application Programming Interface (API) To delete an entry in the Address Book: Configured trigger: 47;48;49(with enc=2) Name: 61;62;63;64 (abcd) Phone number: 39;38;38;36;30;39;38;38;36;30 (9886098860) With Name and Number: http://192.168.2.1[:portnumber]/sendmsg?user=user1&passwd=user1& cat=3[&enc=2]&text=47;48;49;3a;61;62;63;64;3a;39;38;38;36;30;39; 38;38;36;30 With Name only: http://192.168.2.1[:portnumber]/sendmsg?user=user1&passwd=user1& cat=3[&enc=2]&text=47;48;49;3a;61;62;63;64 With Number only: http://192.168.2.1[:portnumber]/sendmsg?user=user1&passwd=user1&...
- Page 88 Appendix A – Application Programming Interface (API) • Modem Modem index to send SMS Range : 1 to 4 for SF400 1 to 8 for SF800 0 for any modem Specifying modem for a cat=3 job is not applicable. Action trigger is executed even if modem is specified.
- Page 89 Appendix A – Application Programming Interface (API) HTTP Query API Format Processing the "Send API" and sending the message takes some time. So, only an apimsgid is returned as a response to the "Send SMS API". Query API can be used to query the status of a Send. It returns the status of a message submitted earlier.
- Page 90 Appendix A – Application Programming Interface (API) Error Codes Error Code Error Description Response to Authentication Failed Send API, Query API Parse Error Send API, Query API Invalid Category Send API SMS message size is greater than 160 chars Send API Recipient Overflow Send API Invalid Recipient...
-
Page 91: Tcp Api
Appendix A – Application Programming Interface (API) TCP API Configuration of the "TCP Send API" Using the MultiModem iSMS Web Admin Interface TCP Send API Status: Enable “TCP Send API Status” to send SMS / query status using TCP API. By default, TCP Send API is disabled. - Page 92 Appendix A – Application Programming Interface (API) TCP Send API Format /sendmsg?user=admin&passwd=admin&cat=1&enc=0&priority=1&modem=1&to="+91 9844895691"&ton=”Bob”&group=”eng”&text=Here is the test message Notes: “enc” and “priority” parameters are optional. Encoding type to send SMS(Optional field) Range: 0 to 3 0 - SMS text should be in ASCII form 1 - SMS text should be in Extended ASCII form 2 - SMS text should be in hexadecimal form (i.e.
- Page 93 Appendix A – Application Programming Interface (API) Sending a Job to a Slave MultiModem iSMS From Master MultiModem iSMS TCP API is also used to distribute the Job Load from Master MultiModem iSMS unit to a Slave unit when load balancing is enabled in the master and with the slaves properly configured. TCP API format is: /sendmsg?user=admin&passwd=admin&cat=4&enc=0&priority=2&to="+9198448956 91",”+16675674532”&text=Here is the test message...
-
Page 94: Receive Sms Api
Appendix A – Application Programming Interface (API) Receive SMS API The Receive API feature is implemented in two modes: 1. Non-Polling Mode 2. Polling Mode Note: By Default, Polling mode will be configured. Non Polling Mode Receive SMS API Process: •... -
Page 95: Http Receive Api - Non-Polling Mode
Appendix A – Application Programming Interface (API) HTTP Receive API – Non-Polling Mode Configuration of the "Non-Polling Mode HTTP Receive API" Using the MultiModem iSMS Web Admin Interface POST Packet Format with Authentication POST /cgi-bin/postquery.cgi HTTP/1.1 HOST: 192.168.2.2:80 User-Agent: MultiModem iSMS/1.40 Accept: text/xml, application/xml, application/xhtml+xml,text/html;q=0.9,text/plain;q=0.8, application/msword, application/vnd.ms-powerpoint, image/png, */*... - Page 96 Appendix A – Application Programming Interface (API) POST Packet Format without Authentication POST /ismsResponse_1.4x.rb HTTP/1.1 HOST: 172.17.20.1:80 User-Agent: MultiModem iSMS/1.41 Accept: text/xml, application/xml, application/xhtml+xml,text/html;q=0.9,text/plain;q=0.8,image/png, Accept-Language: en-us; en;q=0.50 Accept-Encoding: gzip, deflate Accept-Charset: ISO-8859-1, utf-8;q=0.7, *;q=0.7 Keep-Alive: 300 Connection: keep-alive Content-Type: application/x-www-form-urlencoded Content-Length: 439 XMLDATA=%3C%3Fxml%20version%3D%221.0%22%20encoding%3D%22ISO-8859- 1%22%3F%3E%0D%0A%3CResponse%3E%0D%0A%3CMessageNotification%3E%0D%0A%3CModemNum...
-
Page 97: Tcp Receive Api - Non-Polling Mode
Appendix A – Application Programming Interface (API) TCP Receive API – Non-Polling Mode Configuration of the "Non Polling mode TCP Receive API" Using the MultiModem iSMS Web Admin Interface TCP Receive API Request without Authentication From: MultiModem iSMS/1.40 Authentication: OFF Data-Length: 123 1:19525945092 +17635280856... - Page 98 Appendix A – Application Programming Interface (API) TCP Receive API Request with Authentication From: MultiModem iSMS/1.40 Authentication: OFF Data-Length: 123 smsuser1 smsuser1 1:19525945092 +17635280856 08/10/15 07:29:32 26632HTTP Message text. Above payload comprised of: • Username, Password if authentication is enabled and configured. •...
-
Page 99: Polling Mode Receive Sms Api
Appendix A – Application Programming Interface (API) Polling Mode Receive SMS API Process: • Upon the receipt of request from TCP/HTTP application, the MultiModem iSMS will respond with the SMS received based on the filter condition in the request and availability. Notes: •... -
Page 100: Receive Api - Polling Mode
Appendix A – Application Programming Interface (API) Receive API – Polling Mode Receive API polling mode has two commands. The querycount? command and the recvmsg? command. querycount? The query count command is used to determine the number of unread SMS messages in the MultiModem iSMS receive queue. - Page 101 Appendix A – Application Programming Interface (API) HTTP Query Request using browser: http://192.168.2.1:81/querycount?user=admin&passwd=admin TCP Query Request: /querycount?user=admin&passwd=admin Successful responses for the query count will be in the following format: Count: Value ‘Value’ gives the number of unread messages. Error responses for the above commands will be in the following format: Err: error code Error Codes Error Code...
- Page 102 Appendix A – Application Programming Interface (API) Query to receive unread messages (recvmsg?) Examples: HTTP: /recvmsg?user=admin&passwd=admin[&options of your choice defining up to how many you want to receive at one time and received during what specific period]HTTP/1.1\r\n HTTP request using the browser to read 10 unread messages for a specific set of dates: http://192.168.2.1:81/recvmsg?user=admin&passwd=admin&count=10&fdate=09/08/2 2&tdate=09/08/24 TCP:...
- Page 103 Appendix A – Application Programming Interface (API) Command responses (continued) Recvmsg? Successful responses to the recvmsg? command will be in the following format: Packet_end_flag Unread_available Msg_Count Msg_index_1 Number Date Time Encode type Message Msg_index_2 Number Date Time Encode type Message Msg_index_N Number Notes:...
- Page 104 Appendix A – Application Programming Interface (API) HTTP HTTP Receive API Response to recvmsg? command: <?xml version="1.0" encoding="ISO-8859-1" ?> <Response> <Response_End>1</Response_End> <Unread_Available>1</Unread_Available> <Msg_Count>03</Msg_Count> <MessageNotification> <Message_Index>1</Message_Index> <SenderNumber>+919742204905</SenderNumber> <Date>09/07/24</Date> <Time>11:24:34</Time> <EncodingFlag>Unicode</EncodingFlag> <Message>00280031006F0066003300290041006C006C00200074006800650020006C006F0067007300200 0730068006F0075006C006400200062006500200064006900730070006C006100790065006400200070007 2006F007000650072006C007900200069006E00200074006</Message> </MessageNotification> <MessageNotification> <Message_Index>2</Message_Index> <SenderNumber>+919742204905</SenderNumber> <Date>09/07/24</Date> <Time>11:38:08</Time> <EncodingFlag>ASCII</EncodingFlag> <Message>Multimodem%20iSMS%20Easy%20way%20to%20send%20bulk%20SMS%20Go%20to%20MultiTech %20site%20for%20more%20details</Message>...
- Page 105 AE0BAA0BA90BA40BAF0BB20BB50BB70BB80BB80BB90BB9 Msg_index_2 +919742204905 09/07/24 11:40:48 ASCII MultiModem iSMS easy way to send bulk SMS. Go to MultiTech site for more details Msg_index_3 +919742204905 09/07/24 11:57:29 Extended ASCII MultiModem iSMS supports Unicode ASCII and Extended ASCII Go to MultiTech site for...
-
Page 106: Appendixb - Table Of Commonly Supported Subnet Addresses
Appendix B – Table of Commonly Supported Subnet Addresses This table lists commonly supported Subnets organized by Address. Network Number Hosts Available Broadcast Address 255.255.255.128 N.N.N.0 N.N.N.1-126 N.N.N.127 N.N.N.128 N.N.N.129-254 N.N.N.255 Network Number Hosts Available Broadcast Address 255.255.255.192 N.N.N.0 N.N.N.1-62 N.N.N.63 N.N.N.64 N.N.N.65-126... - Page 107 Appendix B – Table of Commonly Supported Subnet Addresses N.N.N.160 N.N.N.161-166 N.N.N.167 N.N.N.168 N.N.N.169-174 N.N.N.175 N.N.N.176 N.N.N.177-182 N.N.N.183 N.N.N.184 N.N.N.185-190 N.N.N.191 N.N.N.192 N.N.N.193-198 N.N.N.199 N.N.N.200 N.N.N.201-206 N.N.N.207 N.N.N.208 N.N.N.209-214 N.N.N.215 N.N.N.216 N.N.N.217-222 N.N.N.223 N.N.N.224 N.N.N.225-230 N.N.N.231 N.N.N.232 N.N.N.233-238 N.N.N.239 N.N.N.240 N.N.N.241-246 N.N.N.247 N.N.N.248...
- Page 108 Appendix B – Table of Commonly Supported Subnet Addresses N.N.N.228 N.N.N.229-230 N.N.N.231 N.N.N.232 N.N.N.233-234 N.N.N.235 N.N.N.236 N.N.N.237-238 N.N.N.239 N.N.N.240 N.N.N.241-242 N.N.N.243 N.N.N.244 N.N.N.245-246 N.N.N.247 N.N.N.248 N.N.N.249-250 N.N.N.251 N.N.N.252 N.N.N.253-254 N.N.N.255 Multi-Tech Systems, Inc. MultiModem® iSMS User Guide for Administrators Downloaded from Elcodis.com electronic components distributor...
-
Page 109: Appendixc - Antenna For The Multi Modem Isms
Appendix C – Antenna for the MultiModem iSMS RF Specifications GSM 850 EGSM 900 GSM 1800 GSM 1900 Frequency RX 869 to 894 MHz 925 to 960 MHz 1805 to 1800 MHz 1930 to 1990 MHz Frequency TX 824 to 849 MHz 880 to 915 MHz 1710 to 1785 MHz 1850 to 1910 MHz... -
Page 110: Appendixd - Waste Electrical And Electronic Equipment Directive (Weee)
Appendix D – Waste Electrical and Electronic Equipment Directive (WEEE) Waste Electrical and Electronic Equipment (WEEE) Directive The WEEE directive places an obligation on manufacturers, distributors and retailers to take-back electronic products at the end of their useful life. A sister Directive, ROHS (Restriction of Hazardous Substances), complements the WEEE Directive by banning the presence of specific hazardous substances in the products at the design phase. -
Page 111: Appendixe - Time Zone Abbreviations
Appendix E – Time Zone Abbreviations This list represents a portion of the abbreviations used for different Time Zones. All of those listed here are valid entries for the MultiModem iSMS products. Code Name Region UTC Variance ACDT Australian Central Daylight Time Australia + 10:30 hours ACST... -
Page 112: Appendixf - End User License Agreement (Eula)
Software Registration Card, and return the card by mail. Registration may also be done on Multi-Tech Systems web site at www.multitech.com/register. Opening the packaged program constitutes agreement to be bound by the terms and conditions of this Software License Agreement. - Page 113 Appendix F – End User License Agreement (EULA) I am not a citizen, national, or resident of, and am not under the control of the government of: Afghanistan, Cuba, Iran, Iraq, Libya, Montenegro, North Korea, Pakistan, Serbia, Sudan, Syria, nor any other country to which the United States has prohibited export. I will not download or by any other means export or re-export the Programs, either directly or indirectly, to the above countries, nor to citizens, nationals or residents of the above countries.
-
Page 114: Appendixg - Regulatory Information
Appendix G – Regulatory Information Restriction of the Use of Hazardous Substances (RoHS) Multi-Tech Systems, Inc. Certificate of Compliance 2002/95/EC Multi-Tech Systems, Inc. confirms that this product now complies with the chemical concentration limitations set forth in the directive 2002/95/EC of the European Parliament (Restriction Of the use of certain Hazardous Substances in electrical and electronic equipment - RoHS) These Multi-Tech Systems, Inc. - Page 115 Appendix G – Regulatory Information Information on HS/TS Substances According to Chinese Standards 依照中国标准的有毒有害物质信息 根据中华人民共和国信息产业部 (MII) 制定的电子信息产品 (EIP) 标准-中华人民共和国《电子信息产品污染控制管理办法》(第 39 号),也称作中国 RoHS,下表列出了 Multi-Tech Systems Inc. 产品中可能含有的有毒物质 (TS) 或有害物质 (HS) 的名称及含量水平方面的信息。 有害/有毒物质/元素 镉 (CD) 成分名称 汞 (Hg) 多溴联苯 (PBB) 铅 六价铬 多溴二苯醚...
- Page 116 Appendix G – Regulatory Information 47 CFR Part 15 Regulation This equipment has been tested and found to comply with the limits for a Class A digital device, pursuant to 47 CFR Part 15 regulations. The stated limits in this regulation are designed to provide reasonable protection against harmful interference in a commercial environment.
-
Page 117: Index
Index Action Triggers ..............57, 58 Groups in SMS Services ............42 Address Book in SMS Services ..........40 Address List Format ..............64 Admin Access ................. 32 Handling Precautions ............... 6 Administration > Admin Access ..........32 Humidity .................13 Administration > Admin Access Allowed Networks .... - Page 118 Index Subnet Addresses ..............106 Supported Subnet Addresses ..........106 Rack Mounting ................ 12 System Information Log ............65 Remote Syslog ................ 33 System Setup ................28 Reset ..................10 Roaming Status ............... 21 TCP Connection ..............39 TCP/IP Communication ............17 Safe password ................. 22 Temperature ................13 Save &...