
Related Manuals for Epson L5290 Series


Summary of Contents for Epson L5290 Series
- Page 1 User's Guide Printing Copying Scanning Faxing Maintaining the Printer Solving Problems NPD6444-00 EN...
-
Page 2: Table Of Contents
Protecting Your Personal Information... 15 Registering to Epson Connect Service from the Control Panel......67... - Page 3 ID Card Copy:......77 More....... . 110 Borderless Copy:.
- Page 4 Network Settings..... . . 260 Epson Connect Services....261 Cannot Solve Printing or Copying Problems.
- Page 5 Help for Users in Vietnam....283 Help for Users in Indonesia....283 Help for Users in Hong Kong.
- Page 6 Guide to This Manual Introduction to the Manuals......... . . 7 Searching for Information.
-
Page 7: Guide To This Manual
Searching for Information Introduction to the Manuals The following manuals are supplied with your Epson printer. As well as the manuals, check the various types of help information available from the printer itself or from the Epson software applications. ❏ Important Safety Instructions (paper manual) Provides you with instructions to ensure the safe use of this printer. -
Page 8: Printing Only The Pages You Need
Guide to This Manual > > About This Manual Marks and Symbols Jumping directly from bookmarks Click a title to jump to that page. Click + or > to view the lower level titles in that section. To return to the previous page, perform the following operation on your keyboard. -
Page 9: Notes On Screenshots And Illustrations
Guide to This Manual > > About This Manual Operating System References Important: Instructions that must be observed to avoid damage to your equipment. Note: Provides complementary and reference information. Related Information & Links to related sections. Notes on Screenshots and Illustrations ❏... -
Page 10: Trademarks
EPSON EXCEED YOUR VISION or EXCEED YOUR VISION is a trademark of Seiko Epson Corporation. ❏ Epson Scan 2 software is based in part on the work of the Independent JPEG Group. ❏ libtiff Copyright © 1988-1997 Sam Leffler Copyright ©... -
Page 11: Copyright
Neither Seiko Epson Corporation nor its affiliates shall be liable to the purchaser of this product or third parties for damages, losses, costs, or expenses incurred by the purchaser or third parties as a result of accident, misuse, or abuse of this product or unauthorized modifications, repairs, or alterations to this product, or (excluding the U.S.) -
Page 12: Important Instructions
Important Instructions Safety Instructions..........13 Printer Advisories and Warnings. -
Page 13: Safety Instructions
❏ Some of the symbols used on your printer are to ensure safety and proper use of the printer. Visit the following Web site to learn the meaning of the symbols. http://support.epson.net/symbols ❏ Use only the power cord supplied with the printer and do not use the cord with any other equipment. Use of other cords with this printer or the use of the supplied power cord with other equipment may result in fire or electric shock. -
Page 14: Printer Advisories And Warnings
Important Instructions > > Printer Advisories and Warnings Advisories and Warnings for Using the Printer Printer Advisories and Warnings Read and follow these instructions to avoid damaging the printer or your property. Make sure you keep this manual for future reference. Advisories and Warnings for Setting Up the Printer ❏... -
Page 15: Advisories And Warnings For Using The Lcd Screen
Important Instructions > Protecting Your Personal Information ❏ Prolonged use of the printer when the ink level is below the lower line could damage the printer. Fill the ink tank to the upper line while the printer is not operating. To display the correct ink level estimates, reset the ink level after filling the tank. -
Page 16: Part Names And Functions
Part Names and Functions Part Names and Functions..........17... -
Page 17: Part Names And Functions
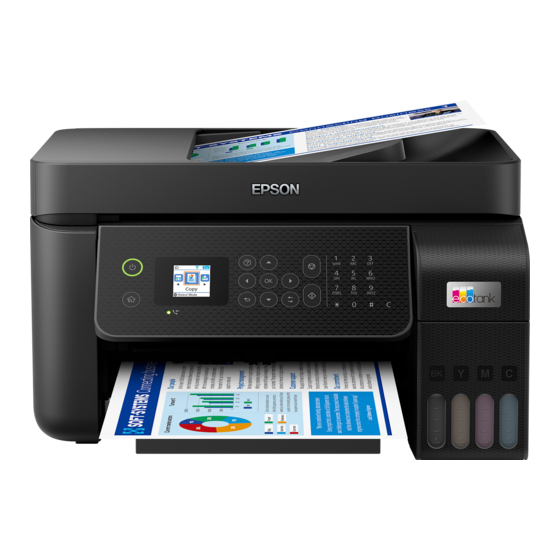
Part Names and Functions > Part Names and Functions Part Names and Functions Only for ET-4800 Series/L5290 Series ADF (Automatic Document Open when removing jammed originals in the ADF. Feeder) cover ADF input tray Feeds originals automatically. ADF edge guide Feeds originals straight into the printer. - Page 18 Part Names and Functions > Part Names and Functions Rear paper feeder Loads paper. Paper support Supports loaded paper. Edge guide Feeds the paper straight into the printer. Slide to the edges of the paper. Feeder guard Prevents foreign substance from entering the printer. Usually keep this guard closed.
- Page 19 Part Names and Functions > Part Names and Functions Scanner unit Scans placed originals. Open to remove jammed paper. This unit should usually be kept closed. Ink tank cap Open to refill the ink tank. Ink tank cover Ink tank unit Contains the ink tanks.
- Page 20 Part Names and Functions > Part Names and Functions Only for ET-4800 Series/L5290 Series...
-
Page 21: Guide To The Control Panel
Guide to the Control Panel Control Panel........... . . 22 Home Screen Configuration. -
Page 22: Control Panel
Applies to a variety of functions depending on the situation. Returns to the previous screen. Turns on when received documents that have not yet been printed or saved are stored in the printer's memory. Displays the home screen. Only for ET-4800 Series/L5290 Series... -
Page 23: Home Screen Configuration
Guide to the Control Panel > > Home Screen Configuration Guide to the Network Icon Home Screen Configuration Displays the network connection status. See the following for more details. “Guide to the Network Icon” on page 23 When are displayed, you can scroll right or left by pressing the button. -
Page 24: Entering Characters
Guide to the Control Panel > Viewing Animations The printer is not connected to a wireless (Wi-Fi) network. The printer is searching for SSID, unset IP address, or having a problem with a wireless (Wi-Fi) network. The printer is connected to a wireless (Wi-Fi) network. The number of bars indicates the signal strength of the connection. - Page 25 Guide to the Control Panel > Viewing Animations ❏ Press button: Displays the help screen. Select How To and then select the items that you want to view. ❏ Select How to at the bottom of the operation screen: Displays the context-sensitive animation.
-
Page 26: Loading Paper
Loading Paper Paper Handling Precautions......... . 27 Paper Size and Type Settings. -
Page 27: Paper Handling Precautions
Paper Handling Precautions ❏ Read the instruction sheets supplied with the paper. ❏ To achieve high-quality printouts with genuine Epson paper, use the paper in the environment stated on the sheets supplied with the paper. ❏ Fan and align the edges of the paper before loading. Do not fan or curl photo paper. Doing so may damage the printable side. -
Page 28: List Of Paper Type
To obtain optimum printing results, select the paper type that suits the paper. Media Name Media Type Control Panel Printer Driver Epson Bright White Ink Jet Paper Plain paper Plain paper Epson Ultra Glossy Photo Paper Ultra Glossy Epson Ultra Glossy... -
Page 29: Loading Paper In The Rear Paper Feeder
Loading Paper in the Rear Paper Feeder Loading Paper in the Rear Paper Feeder 1. Pull out the paper support. ET-4800 Series/L5290 Series ET-2820 Series/L3260 Series 2. Slide the edge guides. 3. Load paper at the center of the paper support with the printable side facing up. - Page 30 Loading Paper > Loading Paper in the Rear Paper Feeder Important: ❏ Do not load more than the maximum number of sheets specified for the paper. For plain paper, do not load above the line just under the symbol inside the edge guide. ❏...
-
Page 31: Loading Envelopes In The Rear Paper Feeder
Loading Envelopes in the Rear Paper Feeder Loading Envelopes in the Rear Paper Feeder 1. Pull out the paper support. ET-4800 Series/L5290 Series ET-2820 Series/L3260 Series 2. Slide the edge guides. 3. Load envelopes short edge first at the center of the paper support with the flap facing down. -
Page 32: Loading Various Paper
Loading Paper > > Loading Various Paper Loading Pre-punched Paper Important: Do not load more than the maximum number of sheets specified for the envelopes. 4. Slide the edge guides to the edges of the envelopes. ET-2820 Series/L3260 Series: Close the feeder guard after sliding the edge guides. Important: ET-2820 Series/L3260 Series: Do not place objects on the feeder guard. -
Page 33: Loading Long Papers
Loading Paper > > Loading Various Paper Loading Long Papers Load a single sheet of defined size plain paper with binding holes at the left or right. Adjust the print position of your file to avoid printing over the holes. Loading Long Papers When loading paper longer than legal size, store the paper support, and then flatten the leading edge of the paper. -
Page 34: Placing Originals
Placing Originals Originals that are not Supported by the ADF......35 Placing Originals on the ADF. -
Page 35: Originals That Are Not Supported By The Adf
Placing Originals > Placing Originals on the ADF Originals that are not Supported by the ADF Important: Do not feed photographs or valuable original artwork into the ADF. Misfeeding may wrinkle or damage the original. Scan these documents on the scanner glass instead. To prevent paper jams, avoid placing the following originals in the ADF. -
Page 36: Placing Originals On The Scanner Glass
Placing Originals > Placing Originals on the Scanner Glass Important: ❏ Do not load originals above the line indicated by the triangle symbol on the ADF. ❏ Do not add originals while scanning. Related Information “ADF Specifications” on page 270 &... - Page 37 Placing Originals > Placing Originals on the Scanner Glass 3. Place the original face-down and slide it to the corner mark. Note: ❏ A range of 1.5 mm from the corner of the scanner glass is not scanned. ❏ When originals are placed in the ADF and on the scanner glass, priority is given to the originals in the ADF. 4.
-
Page 38: Printing
Printing Printing Documents..........39 Printing on Envelopes. -
Page 39: Printing Documents
Printing > > Printing Documents Printing from a Computer - Windows Printing Documents Printing from a Computer - Windows Printing Using Easy Settings Note: Operations may differ depending on the application. See the application's help for details. 1. Load paper in the printer. “Loading Paper in the Rear Paper Feeder”... - Page 40 Printing > > Printing Documents Printing from a Computer - Windows 5. Select Preferences or Properties to access the printer driver window. 6. Change the settings as necessary. You can see the online help for explanations of the setting items. Right-clicking an item displays Help. 7.
- Page 41 Printing > > Printing Documents Printing from a Computer - Windows Adding Printing Presets for Easy Printing If you create your own preset of frequently used print settings on the printer driver, you can print easily by selecting the preset from the list. 1.
- Page 42 ❏ Depending on the paper and the data, ink may bleed through to the other side of the paper. ❏ You cannot perform manual 2-sided printing unless EPSON Status Monitor 3 is enabled. If EPSON Status Monitor 3 is disabled, access the printer driver window, click Extended Settings on the Maintenance tab, and then select Enable EPSON Status Monitor 3.
- Page 43 ❏ Depending on the paper and the data, ink may bleed through to the other side of the paper. ❏ You cannot perform manual 2-sided printing unless EPSON Status Monitor 3 is enabled. If EPSON Status Monitor 3 is disabled, access the printer driver window, click Extended Settings on the Maintenance tab, and then select Enable EPSON Status Monitor 3.
- Page 44 Printing > > Printing Documents Printing from a Computer - Windows Printing Several Pages on One Sheet You can print several pages of data on a single sheet of paper. Note: This feature is not available with borderless printing. 1. On the printer driver's Main tab, select 2-Up, 4-Up, 6-Up, 8-Up, 9-Up, or 16-Up as the Multi-Page setting. 2.
- Page 45 Printing > > Printing Documents Printing from a Computer - Windows Note: This feature is not available with borderless printing. 1. On the printer driver's More Options tab, make the following settings. ❏ Document Size: Select the size of the paper you set in the application setting. ❏...
- Page 46 Printing > > Printing Documents Printing from a Computer - Windows 5. Click Print. Related Information “Loading Paper in the Rear Paper Feeder” on page 29 & “Printing Using Easy Settings” on page 39 & Printing One Image on Multiple Sheets for Enlargement (Creating a Poster) This feature allows you to print one image on multiple sheets of paper.
- Page 47 Printing > > Printing Documents Printing from a Computer - Windows Making Posters Using Overlapping Alignment Marks Here is an example of how to make a poster when 2x2 Poster is selected, and Overlapping Alignment Marks is selected in Print Cutting Guides. 1.
- Page 48 Printing > > Printing Documents Printing from a Computer - Windows 2. Place the edge of Sheet 1 on top of Sheet 2 and align the cross marks, then temporarily tape the two sheets together from the back. 3. Cut the taped sheets in two along the vertical red line through the alignment markers (this time, the line to the left of the cross marks).
- Page 49 Printing > > Printing Documents Printing from a Computer - Windows 4. Tape the sheets together from the back. 5. Repeat steps 1 to 4 to tape Sheet 3 and Sheet 4 together. 6. Cut off the margins of Sheet 1 and Sheet 2 along the horizontal blue line through the center of the left and right side cross marks.
- Page 50 Printing > > Printing Documents Printing from a Computer - Windows 7. Place the edge of Sheet 1 and Sheet 2 on top of Sheet 3 and Sheet 4 and align the cross marks, and then temporarily tape them together from the back.
- Page 51 Printing > > Printing Documents Printing from a Computer - Windows 8. Cut the taped sheets in two along the horizontal red line through the alignment markers (this time, the line above the cross marks). 9. Tape the sheets together from the back.
- Page 52 Printing > > Printing Documents Printing from a Computer - Windows 10. Cut off the remaining margins along the outer guide. Printing with a Header and Footer You can print information such as a user name and printing date in headers or footers. 1.
- Page 53 Printing > > Printing Documents Printing from a Computer - Windows 2. Settings, and then select the items you want to print and then click OK. Note: ❏ To specify the first page number, select Page Number from the position you want to print in the header or footer, and then select the number in Starting number.
- Page 54 Printing > > Printing Documents Printing from a Computer - Windows Related Information “Loading Paper in the Rear Paper Feeder” on page 29 & “Printing Using Easy Settings” on page 39 & Printing Multiple Files Together Job Arranger Lite allows you to combine several files created by different applications and print them as a single print job.
- Page 55 Printing > > Printing Documents Printing from a Computer - Windows Printing Using the Color Universal Print Feature You can enhance the visibility of texts and images in printouts. Color Universal Print is only available when the following settings are selected. ❏...
- Page 56 Printing > > Printing Documents Printing from a Computer - Windows PhotoEnhance produces sharper images and more vivid colors by automatically adjusting the contrast, saturation, and brightness of the original image data. Note: PhotoEnhance adjusts the color by analyzing the location of the subject. Therefore, if you have changed the location of the subject by reducing, enlarging, cropping, or rotating the image, the color may change unexpectedly.
-
Page 57: Printing From A Computer - Mac Os
Printing > > Printing Documents Printing from a Computer - Mac OS Printing Clear Bar Codes You can print a bar code clearly and make it easy to scan. Only enable this feature if the bar code you printed cannot be scanned. You can use this feature under the following conditions. - Page 58 Printing > > Printing Documents Printing from a Computer - Mac OS 3. Select Print from the File menu or another command to access the print dialog. If necessary, click Show Details or to expand the print window. 4. Select your printer. 5.
- Page 59 Printing > > Printing Documents Printing from a Computer - Mac OS Adding Printing Presets for Easy Printing If you create your own preset of frequently used print settings on the printer driver, you can print easily by selecting the preset from the list. 1.
- Page 60 Printing > > Printing Documents Printing from a Computer - Mac OS 1. Select Layout from the pop-up menu. 2. Set the number of pages in Pages per Sheet, the Layout Direction (page order), and Border. 3. Set the other items as necessary. 4.
- Page 61 Printing > > Printing Documents Printing from a Computer - Mac OS Printing a Reduced or Enlarged Document at any Magnification You can reduce or enlarge the size of a document by a specific percentage. 1. Select Print from the File menu or another command to access the print dialog. 2.
-
Page 62: Printing Documents From Smart Devices (Ios)
1. Set up your printer for wireless printing. 2. If Epson Smart Panel is not installed, install it. “Application for Easily Operating the Printer from a Smart device (Epson Smart Panel)” on page 252 3. Connect your smart device to the wireless router. -
Page 63: Printing Documents From Smart Devices (Android)
1. Set up your printer for wireless printing. 2. If Epson Smart Panel is not installed, install it. “Application for Easily Operating the Printer from a Smart device (Epson Smart Panel)” on page 252 3. Connect your smart device to the wireless router. - Page 64 You can wirelessly print your documents, emails, photos, and web pages right from your Android phone or tablet (Android v4.4 or later). With a few taps, your Android device will discover an Epson printer that is connected to the same wireless network.
-
Page 65: Printing On Envelopes
Printing > > Printing on Envelopes Printing on Envelopes from a Computer (Mac OS) 5. Print from your device to your printer. Note: For more details, access the Mopria Web site at https://mopria.org. Related Information “Loading Paper in the Rear Paper Feeder” on page 29 &... -
Page 66: Printing Web Pages
Printing Web Pages from Smart Devices Printing Web Pages Printing Web Pages from a Computer Epson Photo+ allows you to display web pages, crop the specified area, and then edit and print them. See the application’s help for details. Printing Web Pages from Smart Devices Note: Operations may differ depending on the device. -
Page 67: Printing Using A Cloud Service
Printing Using a Cloud Service By using Epson Connect service available on the Internet, you can print from your smartphone, tablet PC, or laptop, anytime and practically anywhere. To use this service, you need to register the user and the printer in Epson Connect. - Page 68 > > Printing Using a Cloud Service Registering to Epson Connect Service from the Control Panel 2. Select Epson Connect Services > Register/Delete to print the registration sheet. 3. Follow the instructions on the registration sheet to register the printer.
-
Page 69: Copying
Copying Available Copying Methods......... . . 70 Menu Options for Copying. -
Page 70: Available Copying Methods
Copying > > Available Copying Methods Copying Originals Available Copying Methods Place the originals on the scanner glass or the ADF, and then select the Copy menu on the home screen. Copying Originals This section explains how to use the Copy menu on the control panel to copy originals. 1. -
Page 71: Copying By Enlarging Or Reducing
Copying > > Available Copying Methods Copying by Enlarging or Reducing 6. Press the OK button to display and check the print settings, and then change the settings as necessary. To change the settings, press the button, specify the setting menu using the buttons, and then change the settings using the buttons. -
Page 72: Copying Multiple Originals Onto One Sheet
Copying > > Available Copying Methods Copying Multiple Originals onto One Sheet 6. Specify Reduce/Enlarge using the buttons, and then change the magnification using the buttons. Note: If you want to copy by reducing or enlarging the size of a document by a specific percentage, select Custom as the Reduce/Enlarge setting, press the button, and then press the button. - Page 73 Copying > > Available Copying Methods Copying Multiple Originals onto One Sheet ❏ Portrait originals ❏ Landscape originals 2. Select Copy on the home screen. u d l r To select an item, use the buttons, and then press the OK button. 3.
-
Page 74: Copying Id Card
Copying > > Available Copying Methods Copying ID card 6. Select Multi-Page using the buttons, and then press the button. 7. Select 2-up. 8. Specify the layout order and the orientation of the original, and then press the OK button. 9. -
Page 75: Copying Without Margins
Copying > > Available Copying Methods Copying Without Margins 7. Place the original face-down and slide it to the corner mark. Place an ID card 5 mm away from the corner mark of the scanner glass. 8. Place the back of the original face down, slide it to the corner mark, and then press the button. -
Page 76: Menu Options For Copying
Copying > Menu Options for Copying 5. Press the OK button, and then press the button. 6. Select Borderless Copy using the buttons, and then press the button. 7. Select On. 8. Specify the Expansion. 9. Press the OK button, and then press the button. -
Page 77: Custom Size
Copying > Menu Options for Copying ❏ Auto Fit Detects the scan area and automatically enlarges or reduces the original to fit to the paper size you selected. When there are white margins around the original, the white margins from the corner mark of the scanner glass are detected as the scan area, but the margins at the opposite side may be cropped. - Page 78 Scanning Basic Information on Scanning........79 Scanning Originals to a Computer.
-
Page 79: Basic Information On Scanning
Scanning > > Basic Information on Scanning Available Scanning Methods Basic Information on Scanning What is a "Scan"? A "scan" is the process of converting the optical information of paper data (such as documents, magazine clippings, photos, handwritten illustrations, and so on) into digital image data. You can save scanned data as a digital image such as a JPEG or PDF. -
Page 80: Recommended File Formats To Suit Your Purpose
Scanning Directly from Smart Devices You can save scanned images directly to a smart device such as a smart phone or tablet by using the Epson Smart Panel application on the smart device. Recommended File Formats to Suit Your Purpose Generally speaking, the JPEG format is suitable for photos while the PDF format is suitable for documents. -
Page 81: Recommended Resolutions To Suit Your Purpose
Scanning > Scanning Originals to a Computer File Format Description JPEG (.jpg) A file format that allows you to compress the data to be saved. If the compression ratio is high, the image quality declines, and you cannot convert the image back to the original quality. -
Page 82: Scanning From The Control Panel
❏ Epson Scan 2 (application required to use the scanner feature) See the following to check for installed applications. Windows 10: Click the start button, and then check the Epson Software folder > Epson ScanSmart, and the EPSON folder > Epson Scan 2. -
Page 83: Scanning From A Computer
Scanning Originals Using WSD 5. Press the button. When using Windows 7 or later, or OS X El Capitan or later: Epson ScanSmart automatically starts on your computer, and scanning starts. Note: ❏ See the Epson ScanSmart help for detailed operation information for the software. Click Help on the Epson ScanSmart screen to open the help. -
Page 84: Setting Up A Wsd Port
Scanning > > Scanning Originals Using WSD Setting Up a WSD Port 2. Select Scan on the control panel. u d l r To select an item, use the buttons, and then press the OK button. 3. Select To WSD. 4. - Page 85 Note: The printer name you set on the network and model name (EPSON XXXXXX (XX-XXXX)) are displayed on the network screen. You can check the printer's name set on the network from the printer's control panel or by printing a network status sheet.
-
Page 86: Scanning Originals To A Smart Device
3. Select scan menu on the home screen. 4. Follow the on-screen instructions to scan and save the images. Advanced Scanning Scanning Multiple Photos at the Same Time Using Epson ScanSmart, you can scan multiple photos at the same time and save each image individually. - Page 87 Enter the application name in the search charm, and then select the displayed icon. ❏ Windows 7 Click the start button, and then select All Programs > Epson Software > Epson ScanSmart. ❏ Mac OS Select Go > Applications > Epson Software > Epson ScanSmart.
-
Page 88: Faxing
Faxing Before Using Fax Features..........89 Overview of this Printer's Fax Features. -
Page 89: Before Using Fax Features
Connecting the Printer to a Phone Line Before Using Fax Features Faxing feature is available only for ET-4800 Series/L5290 Series. Check the following before you start using the fax features. ❏ The printer and the phone line, and (if it is being used) the phone machine are connected correctly ❏... - Page 90 Faxing > > Before Using Fax Features Connecting the Printer to a Phone Line You may need to connect the phone cable to an adapter provided for your country or region. Note: Remove the cap from the EXT. port of the printer only when connecting your telephone to the printer. Do not remove the cap if you are not connecting your telephone.
- Page 91 Faxing > > Before Using Fax Features Connecting the Printer to a Phone Line Connecting Your Phone Device to the Printer When using the printer and your telephone on a single phone line, connect the telephone to the printer. Note: ❏...
-
Page 92: Making The Printer Ready To Send And Receive Faxes
Faxing > > Before Using Fax Features Making the Printer Ready to Send and Receive Faxes 3. Select Fax on the printer's control panel. u d l r To select an item, use the buttons, and then press the OK button. 4. - Page 93 Faxing > > Before Using Fax Features Making the Printer Ready to Send and Receive Faxes Making the Printer Ready to Send and Receive Faxes Using Fax Setting Wizard 1. Select Settings on the home screen on the printer's control panel. u d l r To select an item, use the buttons, and then press the OK button.
-
Page 94: Making Settings For The Printer's Fax Features According To Use
Faxing > > Before Using Fax Features Making Settings for the Printer's Fax Features According to Use Related Information “Connecting the Printer to a Phone Line” on page 89 & “Making Settings to Use an Answering Machine” on page 95 &... - Page 95 Faxing > > Before Using Fax Features Making Settings for the Printer's Fax Features According to Use 6. Press the OK button to apply the settings. The access code is stored in the printer. Making Settings When You Connect a Phone Device Making Settings to Use an Answering Machine You need settings to use an answering machine.
- Page 96 Faxing > > Before Using Fax Features Making Settings for the Printer's Fax Features According to Use Making Settings for Blocking Junk Faxes You can block junk faxes. 1. Select Settings on the home screen on the printer's control panel. u d l r To select an item, use the buttons, and then press the OK button.
-
Page 97: Making Contacts Available
Faxing > > Before Using Fax Features Making Contacts Available Note: You can also change the settings using the FAX Utility. However, if there are any faxes that have been unsaved to the computer, the feature does not work. 1. Select Settings on the home screen on the printer's control panel. u d l r To select an item, use the buttons, and then press the OK button. - Page 98 Faxing > > Before Using Fax Features Making Contacts Available 3. Do one of the following. ❏ To register a new group of contacts, select Add Group, and then select the registry number. ❏ To edit a group of contacts, select Edit, and then select the target group. ❏...
-
Page 99: Overview Of This Printer's Fax Features
Faxing > > Overview of this Printer's Fax Features Feature: Sending Faxes Items Settings and Explanation Fax Number Enter between 1 and 64 characters using 0-9 - * # and space. Fax Speed Select a communication speed for a destination. Registering Destinations as a Group 1. -
Page 100: Feature: Receiving Faxes
Faxing > > Overview of this Printer's Fax Features Feature: PC-FAX Send/Receive (Windows/Mac OS) ❏ Sending manually When you perform a manual check on the line connection by dialing the recipient, press the button to select Send Fax to start sending a fax directly. “Sending Faxes Dialing from the External Phone Device”... -
Page 101: Features: Various Fax Reports
Faxing > > Overview of this Printer's Fax Features Features: Other Useful Features “Software for Faxing” on page 253 “Sending a Fax from a Computer” on page 112 PC-FAX Receive You can receive faxes on a computer. “Making Settings to Send and Receive Faxes on a Computer” on page 96 “Software for Faxing”... -
Page 102: Sending Faxes Using The Printer
Faxing > Sending Faxes Using the Printer Sending Faxes Using the Printer You can send faxes by entering fax numbers for recipients on the printer's control panel. Note: When sending a fax in monochrome, you can preview the scanned image on the LCD screen before sending. 1. -
Page 103: Selecting Recipients
Faxing > > Sending Faxes Using the Printer Various Ways of Sending Faxes Selecting Recipients You can specify recipients to send the fax using the following methods. Entering Fax Number Manually Press the fax number with the number buttons, and then press the OK button. - To add a pause (pause for three seconds during dialing), press the button. - Page 104 Faxing > > Sending Faxes Using the Printer Various Ways of Sending Faxes 3. Select Fax on the home screen. u d l r To select an item, use the buttons, and then press the OK button. 4. Press the OK button, and then select Scan Settings or Fax Send Settings to make settings such as the resolution and the sending method if necessary.
-
Page 105: Receiving Faxes On The Printer
Faxing > Receiving Faxes on the Printer You can also make settings such as the resolution and the sending method in Scan Settings or Fax Send Settings if necessary. 5. Press the button until return to Fax screen, and then press the button. -
Page 106: Receiving Incoming Faxes
Faxing > > Receiving Faxes on the Printer Receiving Incoming Faxes Received faxes are printed. When you want to check the status of the fax settings, print a Fax Settings List by selecting Fax > Menu > More > Fax Report > Fax Settings List. Receiving Incoming Faxes There are two options in Receive Mode. -
Page 107: Receiving Faxes By Making A Phone Call
Faxing > > Receiving Faxes on the Printer Receiving Faxes by Making a Phone Call ❏ Using the line for faxing only (external telephone is not necessary) ❏ Using the line for faxing mainly, and sometimes phoning Receiving Faxes Without an External Phone Device The printer automatically switches to receive faxes when the number of rings you set in Rings to Answer is complete. -
Page 108: Menu Options For Faxing
Faxing > > Menu Options for Faxing 1. Select Fax on the home screen. u d l r To select an item, use the buttons, and then press the OK button. 2. Press the OK button, and then select More. 3. -
Page 109: Scan Settings
Faxing > > Menu Options for Faxing Fax Send Settings Scan Settings Select the menus on the control panel as described below: Fax > Menu > Scan Settings Resolution: Select the resolution of the outgoing fax. If you select a higher resolution, the data size becomes larger and it takes time to send the fax. -
Page 110: More
Faxing > > Menu Options for Faxing More ❏ Off: Sends a fax with no header information. ❏ Outside of Image: Sends a fax with header information in the top white margin of the fax. This keeps the header from overlapping with the scanned image, however, the fax received by the recipient may be printed across two sheets depending on the size of the originals. -
Page 111: Contacts Manager
Faxing > > Using Other Faxing Features Printing Fax Report Manually Fax Settings List: Prints the current fax settings. Protocol Trace: Prints a detailed report for the previous fax that was sent or received. Reprint Faxes: Reprints the received faxes in the printer. Polling Receive: When this is set to On and you call the sender's fax number, you can receive documents from the sender's fax machine. -
Page 112: Sending A Fax From A Computer
“Application for Configuring Fax Operations and Sending Faxes (FAX Utility)” on page 253 “Application for Sending Faxes (PC-FAX Driver)” on page 253 ❏ If the FAX Utility is not installed, install the FAX Utility using the EPSON Software Updater (application for updating software). - Page 113 Faxing > > Sending a Fax from a Computer Sending Documents Created Using an Application (Windows) 6. When you want to send other documents in the same fax transmission, select Add documents to send checkbox. The screen for adding documents is displayed when you click Next in step 9. 7.
-
Page 114: Sending Documents Created Using An Application (Mac Os)
Faxing > > Sending a Fax from a Computer Sending Documents Created Using an Application (Mac OS) ❏ When you have selected Attach a cover sheet checkbox, specify the content of the cover sheet in the Cover Sheet Settings window. Select a cover sheet from samples in the Cover Sheet list. - Page 115 Faxing > > Sending a Fax from a Computer Sending Documents Created Using an Application (Mac OS) 4. Make settings for each item. ❏ Specify 1 in Number of copies. Even if you specify 2 or more, only 1 copy is sent. ❏...
-
Page 116: Receiving Faxes On A Computer
“Application for Configuring Fax Operations and Sending Faxes (FAX Utility)” on page 253 “Application for Sending Faxes (PC-FAX Driver)” on page 253 ❏ If the FAX Utility is not installed, install the FAX Utility using the EPSON Software Updater (application for updating software). -
Page 117: Checking For New Faxes (Mac Os)
Faxing > > Receiving Faxes on a Computer Checking for New Faxes (Mac OS) ❏ : Checking for new faxes. ❏ : Importing new faxes is complete. 2. Right-click the icon, and then click View Receiving Fax Record. The Receiving Fax Record screen is displayed. 3. -
Page 118: Canceling The Feature That Saves Incoming Faxes To The Computer
Faxing > > Receiving Faxes on a Computer Canceling the Feature that Saves Incoming Faxes to the Computer ❏ Notification that new faxes have been received Select the Notify me of new faxes via a dock icon in the Fax Receive Monitor > Preferences in the FAX Utility, the fax receive monitor icon on the Dock jumps to notify you that new faxes have arrived. -
Page 119: Maintaining The Printer
Maintaining the Printer Checking the Ink Level..........120 Improving Print, Copy, Scan, and Fax Quality. -
Page 120: Checking The Ink Level
EPSON Status Monitor 3. ❏ Mac OS Apple menu > System Preferences > Printers & Scanners (or Print & Scan, Print & Fax) > Epson(XXXX) > Options & Supplies > Utility > Open Printer Utility > EPSON Status Monitor Related Information “Refilling the Ink Tanks”... - Page 121 Maintaining the Printer > > Improving Print, Copy, Scan, and Fax Quality Checking and Cleaning the Print Head Important: ❏ Do not open the inner cover or turn off the printer during head cleaning. If the head cleaning is incomplete, you may not be able to print.
-
Page 122: Running Power Cleaning
Click Print Head Nozzle Check on the Maintenance tab. ❏ Mac OS Apple menu > System Preferences > Printers & Scanners (or Print & Scan, Print & Fax) > Epson(XXXX) > Options & Supplies > Utility > Open Printer Utility > Print Head Nozzle Check Related Information “Running Power Cleaning”... -
Page 123: Preventing Nozzle Clogging
Click Power Cleaning on the Maintenance tab. ❏ Mac OS Apple menu > System Preferences > Printers & Scanners (or Print & Scan, Print & Fax) > Epson(XXXX) > Options & Supplies > Utility > Open Printer Utility > Power Cleaning Related Information “Checking and Cleaning the Print Head”... -
Page 124: Cleaning The Paper Path For Ink Smears
Maintaining the Printer > > Improving Print, Copy, Scan, and Fax Quality Cleaning the Scanner Glass 1. Select Maintenance on the printer's control panel. u d l r To select an item, use the buttons, and then press the OK button. 2. -
Page 125: Cleaning The Adf
Maintaining the Printer > > Improving Print, Copy, Scan, and Fax Quality Cleaning the ADF 1. Open the document cover. 2. Use a soft, dry, clean cloth to clean the surface of the scanner glass. Important: ❏ If the glass surface is stained with grease or some other hard-to-remove material, use a small amount of glass cleaner and a soft cloth to remove it. - Page 126 Maintaining the Printer > > Improving Print, Copy, Scan, and Fax Quality Cleaning the ADF 2. Use a soft, moist cloth to clean the roller and the interior of the ADF. Important: Using a dry cloth may damage the surface of the roller. Use the ADF after the roller has dried. 3.
- Page 127 Maintaining the Printer > > Improving Print, Copy, Scan, and Fax Quality Cleaning the ADF Important: ❏ If the glass surface is stained with grease or some other hard-to-remove material, use a small amount of glass cleaner and a soft cloth to remove it. Wipe off all remaining liquid. ❏...
-
Page 128: Cleaning The Printer
Maintaining the Printer > Checking the Total Number of Pages Fed Through the Printer Cleaning the Printer If the components and the case are dirty or dusty, turn off the printer and clean them using a soft, clean cloth that has been dampened with water. -
Page 129: Saving Power
Click Printer and Option Information on the Maintenance tab. ❏ Mac OS Apple menu > System Preferences > Printers & Scanners (or Print & Scan, Print & Fax) > Epson(XXXX) > Options & Supplies > Utility > Open Printer Utility > Printer and Option Information Saving Power The printer enters sleep mode or turns off automatically if no operations are performed for a set period. - Page 130 & Checking if a genuine Epson printer driver is installed - Windows You can check if a genuine Epson printer driver is installed on your computer by using one of the following methods. Select Control Panel > View devices and printers (Printers, Printers and Faxes), and then do the following to...
- Page 131 ❏ Windows XP/Windows Server 2003 R2/Windows Server 2003 From the File menu, select Server Properties. Click the Driver tab. If your printer name is displayed in the list, a genuine Epson printer driver is installed on your computer. Related Information “Installing the Applications Separately”...
-
Page 132: Adding The Printer (For Mac Os Only)
Select System Preferences from the Apple menu > Printers & Scanners (or Print & Scan, Print & Fax), and then select the printer. Click Options & Supplies, and if the Options tab and Utility tab are displayed on the window, a genuine Epson printer driver is installed on your computer. Related Information “Installing the Applications Separately”... - Page 133 If the User Account Control window is displayed, click Continue. 7. Follow the on-screen instructions. Uninstalling Applications - Mac OS 1. Download the Uninstaller using EPSON Software Updater. Once you have downloaded the Uninstaller, you do not need to download it again each time you uninstall the application.
-
Page 134: Updating Applications And Firmware
Do not turn off the computer or the printer until the update is complete; otherwise, the printer may malfunction. Note: If you cannot find the application you want to update in the list, you cannot update using the EPSON Software Updater. Check for the latest versions of the applications from your local Epson website. http://www.epson.com Updating the Printer's Firmware Using the Control Panel If the printer can be connected to the Internet, you can update the printer's firmware using the control panel. -
Page 135: Transporting And Storing The Printer
Maintaining the Printer > Transporting and Storing the Printer Transporting and Storing the Printer When you need to store the printer or transport it when moving or for repairs, follow the steps below to pack the printer. 1. Turn off the printer by pressing the button. - Page 136 Maintaining the Printer > Transporting and Storing the Printer 8. Prepare to pack the printer as shown below. 9. Place the printer in the plastic bag and fold it closed. 10. Pack the printer in its box using the protective materials.
- Page 137 Maintaining the Printer > Transporting and Storing the Printer Important: ❏ When storing or transporting the printer, place the printer in the plastic bag and fold it closed. Avoid tilting the printer, placing it vertically, or turning it upside down; otherwise ink may leak. ❏...
-
Page 138: Solving Problems
Solving Problems The Printer Does Not Work as Expected....... . . 139 An Error Code is Displayed on the LCD Screen. -
Page 139: The Printer Does Not Work As Expected
Solving Problems > > The Printer Does Not Work as Expected Paper Does Not Feed Properly The Printer Does Not Work as Expected The Printer Does Not Turn On or Off Power Does Not Turn On The following causes can be considered. The power cord is not plugged in properly to the electrical outlet. - Page 140 Solving Problems > > The Printer Does Not Work as Expected Paper Does Not Feed Properly The installation location is inappropriate. Solutions Place the printer on a flat surface and operate in the recommended environmental conditions. “Environmental Specifications” on page 275 &...
- Page 141 Solving Problems > > The Printer Does Not Work as Expected Paper Does Not Feed Properly Unsupported paper is being used. Solutions Use paper supported by this printer. “Available Paper and Capacities” on page 245 & “Unavailable Paper Types” on page 247 &...
- Page 142 Solving Problems > > The Printer Does Not Work as Expected Paper Does Not Feed Properly Unsupported paper is being used. Solutions Use paper supported by this printer. “Available Paper and Capacities” on page 245 & “Unavailable Paper Types” on page 247 &...
- Page 143 Solving Problems > > The Printer Does Not Work as Expected Paper Does Not Feed Properly Paper Out Error Occurs Paper is not loaded in the center of the rear paper feeder. Solutions When a paper out error occurs although paper is loaded in the rear paper feeder, reload paper in the center of the rear paper feeder.
-
Page 144: Cannot Print
The cause and solution to the problem differ depending on whether or not they are connected. Checking the Connection Status Use Epson Printer Connection Checker to check the connection status for the computer and the printer. You may be able to solve the problem depending on the results of the check. - Page 145 Solving Problems > > The Printer Does Not Work as Expected Cannot Print Something is wrong with the network devices for Wi-Fi connection. Solutions Turn off the devices you want to connect to the network. Wait for about 10 seconds, and then turn on the devices in the following order;...
- Page 146 Solving Problems > > The Printer Does Not Work as Expected Cannot Print ❏ Example of connecting to SSIDs with a different frequency range A privacy separator on the wireless router is available. Solutions Most wireless routers have a separator function that blocks communication between devices within the same SSID.
- Page 147 Solving Problems > > The Printer Does Not Work as Expected Cannot Print Follow the steps below to disable IEEE802.3az for the printer and then connect. 1. Remove the Ethernet cable connected to the computer and the printer. 2. When IEEE802.3az for the computer is enabled, disable it. See the documentation provided with the computer for details.
- Page 148 There is a problem with the software or data. Solutions ❏ Make sure that a genuine Epson printer driver (EPSON XXXXX) is installed. If a genuine Epson printer driver is not installed, the available functions are limited. We recommend using a genuine Epson printer driver.
- Page 149 Network connection: EPSON XXXX Series (network) If you install the printer driver multiple times, copies of the printer driver may be created. If copies such as "EPSON XXXX Series (copy 1)" are created, right-click the copied driver icon, and then click Remove Device.
- Page 150 Solving Problems > > The Printer Does Not Work as Expected Cannot Print The printer port is not set correctly. Solutions Click Print Queue on the printer driver's Maintenance tab. Make sure the printer port is set correctly as shown below in Property > Port from the Printer menu. USB connection: USBXXX, Network connection: EpsonNet Print Port Suddenly the Printer Cannot Print over a Network Connection The problem could be one of the following issues.
- Page 151 Network connection: EPSON XXXX Series (network) If you install the printer driver multiple times, copies of the printer driver may be created. If copies such as "EPSON XXXX Series (copy 1)" are created, right-click the copied driver icon, and then click Remove Device.
- Page 152 The cause and solution to the problem differ depending on whether or not they are connected. Checking the Connection Status Use EPSON Status Monitor to check the connection status for the computer and the printer. 1. Select System Preferences from the Apple menu > Printers & Scanners (or Print & Scan, Print & Fax), and then select the printer.
- Page 153 Solving Problems > > The Printer Does Not Work as Expected Cannot Print printer and computer or smart device closer to the wireless router to help with radio wave communication, and then try to make network settings again. Devices cannot receive signals from the wireless router because they are too far apart. Solutions After moving the computer or the smart device and the printer closer to the wireless router, turn off the wireless router, and then turn it back on.
- Page 154 Solving Problems > > The Printer Does Not Work as Expected Cannot Print ❏ Example of connecting to SSIDs with a different frequency range A privacy separator on the wireless router is available. Solutions Most wireless routers have a separator function that blocks communication between devices within the same SSID.
- Page 155 Solving Problems > > The Printer Does Not Work as Expected Cannot Print The printer has been connected by Ethernet using devices that support IEEE802.3az (Energy Efficient Ethernet). Solutions When you connect the printer by Ethernet using devices that support IEEE802.3az (Energy Efficient Ethernet), the following problems may occur depending on the hub or router that you are using.
- Page 156 There is a problem with the software or data. Solutions ❏ Make sure that a genuine Epson printer driver (EPSON XXXXX) is installed. If a genuine Epson printer driver is not installed, the available functions are limited. We recommend using a genuine Epson printer driver.
- Page 157 The Print Settings Menu is Not Displayed. The following causes can be considered. The Epson Printer Driver has Not been Installed Correctly Solutions If the Print Settings menu is not displayed on macOS Catalina (10.15) or later, macOS High Sierra...
- Page 158 Use Epson Smart Panel to check the connection between the smart device and the printer. Open the Epson Smart Panel. If you cannot connect to the printer, tap [+] at the top of the screen to reset. If you are not using Epson Smart Panel, see the link below.
- Page 159 Solving Problems > > The Printer Does Not Work as Expected Cannot Print When changing the wireless router, the settings do not match the new router. Solutions Make the connection settings again so that they match the new wireless router. The SSIDs connected from the computer or smart device and computer are different.
- Page 160 Solving Problems > > The Printer Does Not Work as Expected Cannot Print The IP address is incorrectly assigned. Solutions If the IP address assigned to the printer is 169.254.XXX.XXX, and the subnet mask is 255.255.0.0, the IP address may not be assigned correctly. Print the network connection report, and then check the IP address and the subnet mask assigned to the printer.
-
Page 161: Cannot Start Scanning
The cause and solution to the problem differ depending on whether or not they are connected. Checking the Connection Status Use Epson Printer Connection Checker to check the connection status for the computer and the printer. You may be able to solve the problem depending on the results of the check. - Page 162 The Printer Does Not Work as Expected Cannot Start Scanning If there is no icon on the desktop, follow the methods below to start Epson Printer Connection Checker. ❏ Windows 10 Click the start button, and then select Epson Software > Epson Printer Connection Checker.
- Page 163 Solving Problems > > The Printer Does Not Work as Expected Cannot Start Scanning Devices cannot receive signals from the wireless router because they are too far apart. Solutions After moving the computer or the smart device and the printer closer to the wireless router, turn off the wireless router, and then turn it back on.
- Page 164 Solving Problems > > The Printer Does Not Work as Expected Cannot Start Scanning A privacy separator on the wireless router is available. Solutions Most wireless routers have a separator function that blocks communication between devices within the same SSID. If you cannot communicate between the printer and the computer or smart device even if they are connected to the same network, disable the separator function on the wireless router.
- Page 165 Solving Problems > > The Printer Does Not Work as Expected Cannot Start Scanning 6. On the computer, access Web Config. Launch a Web browser, and then enter the printer's IP address. “Running Web Config on a Web Browser” on page 255 7.
- Page 166 The cause and solution to the problem differ depending on whether or not they are connected. Checking the Connection Status Use EPSON Status Monitor to check the connection status for the computer and the printer. 1. Select System Preferences from the Apple menu > Printers & Scanners (or Print & Scan, Print & Fax), and then select the printer.
- Page 167 Solving Problems > > The Printer Does Not Work as Expected Cannot Start Scanning Devices cannot receive signals from the wireless router because they are too far apart. Solutions After moving the computer or the smart device and the printer closer to the wireless router, turn off the wireless router, and then turn it back on.
- Page 168 Solving Problems > > The Printer Does Not Work as Expected Cannot Start Scanning A privacy separator on the wireless router is available. Solutions Most wireless routers have a separator function that blocks communication between devices within the same SSID. If you cannot communicate between the printer and the computer or smart device even if they are connected to the same network, disable the separator function on the wireless router.
- Page 169 Solving Problems > > The Printer Does Not Work as Expected Cannot Start Scanning 4. On the printer, print a network connection report. “Printing a Network Connection Report” on page 236 5. Check the printer's IP address on the network connection report. 6.
- Page 170 Use Epson Smart Panel to check the connection between the smart device and the printer. Open the Epson Smart Panel. If you cannot connect to the printer, tap [+] at the top of the screen to reset. If you are not using Epson Smart Panel, see the link below.
- Page 171 Solving Problems > > The Printer Does Not Work as Expected Cannot Start Scanning When changing the wireless router, the settings do not match the new router. Solutions Make the connection settings again so that they match the new wireless router. The SSIDs connected from the computer or smart device and computer are different.
-
Page 172: Cannot Send Or Receive Faxes
Solving Problems > > The Printer Does Not Work as Expected Cannot Send or Receive Faxes The IP address is incorrectly assigned. Solutions If the IP address assigned to the printer is 169.254.XXX.XXX, and the subnet mask is 255.255.0.0, the IP address may not be assigned correctly. - Page 173 Solving Problems > > The Printer Does Not Work as Expected Cannot Send or Receive Faxes There are some problems in the DSL filter when you connect to a DSL phone line. Solutions If you can not send or receive fax, connect the printer directly to a telephone wall jack to see if the printer can send a fax.
- Page 174 Solving Problems > > The Printer Does Not Work as Expected Cannot Send or Receive Faxes ❏ When you send the fax in monochrome, enable Direct Send in Fax > Fax Settings > Fax Send Settings. “Sending Many Pages of a Monochrome Document (Direct Send)” on page 104 ❏...
- Page 175 Solving Problems > > The Printer Does Not Work as Expected Cannot Send or Receive Faxes The sender has sent the fax without header information. Solutions Ask the sender if header information is setup on their fax machine. Or, disable Fax Header Blank in Settings >...
- Page 176 Checking the Connection Status Use Epson Printer Connection Checker to check the connection status for the computer and the printer. You may be able to solve the problem depending on the results of the check.
- Page 177 Solving Problems > > The Printer Does Not Work as Expected Cannot Send or Receive Faxes Something is wrong with the network devices for Wi-Fi connection. Solutions Turn off the devices you want to connect to the network. Wait for about 10 seconds, and then turn on the devices in the following order;...
- Page 178 Solving Problems > > The Printer Does Not Work as Expected Cannot Send or Receive Faxes ❏ Example of connecting to SSIDs with a different frequency range A privacy separator on the wireless router is available. Solutions Most wireless routers have a separator function that blocks communication between devices within the same SSID.
- Page 179 Solving Problems > > The Printer Does Not Work as Expected Cannot Send or Receive Faxes Follow the steps below to disable IEEE802.3az for the printer and then connect. 1. Remove the Ethernet cable connected to the computer and the printer. 2.
- Page 180 Make sure the printer (fax) is displayed in Devices and Printers, Printer, or Printers and Other Hardware. The printer (fax) is displayed as "EPSON XXXXX (FAX)". If the printer (fax) is not displayed, uninstall and then re-install the FAX Utility. See the following to access Devices and Printers, Printer, or Printers and Other Hardware.
- Page 181 Checking the Connection Status Use EPSON Status Monitor to check the connection status for the computer and the printer. 1. Select System Preferences from the Apple menu > Printers & Scanners (or Print & Scan, Print & Fax), and then select the printer.
- Page 182 Solving Problems > > The Printer Does Not Work as Expected Cannot Send or Receive Faxes Devices cannot receive signals from the wireless router because they are too far apart. Solutions After moving the computer or the smart device and the printer closer to the wireless router, turn off the wireless router, and then turn it back on.
- Page 183 Solving Problems > > The Printer Does Not Work as Expected Cannot Send or Receive Faxes A privacy separator on the wireless router is available. Solutions Most wireless routers have a separator function that blocks communication between devices within the same SSID.
- Page 184 Solving Problems > > The Printer Does Not Work as Expected Cannot Send or Receive Faxes 6. On the computer, access Web Config. Launch a Web browser, and then enter the printer's IP address. “Running Web Config on a Web Browser” on page 255 7.
-
Page 185: Cannot Operate The Printer As Expected
Solving Problems > > The Printer Does Not Work as Expected Cannot Operate the Printer as Expected The software is not installed. Solutions Make sure that the PC-FAX driver have been installed on the computer. The PC-FAX driver is installed with FAX Utility. - Page 186 Solving Problems > > The Printer Does Not Work as Expected Cannot Operate the Printer as Expected Bidirectional printing is disabled. Solutions Enable the bidirectional (or high speed) setting. When this setting is enabled, the print head prints while moving in both directions, and the printing speed increases. ❏...
- Page 187 Solving Problems > > The Printer Does Not Work as Expected Cannot Operate the Printer as Expected LCD Screen Gets Dark The printer is in sleep mode. Solutions Press any button on the control panel to return the LCD screen to its former state. Operation Sounds Are Loud Quiet Mode is disabled.
-
Page 188: An Error Code Is Displayed On The Lcd Screen
Turn the power off and on again. E-11 An ink pad needs to be replaced. Contact Epson or an authorised Epson service provider to replace the ink pad . It is not a user-serviceable part. However, non-printing features such as scanning are available. - Page 189 The printer will advise you when the pad requires replacing and this can only be performed by an authorised Epson Service...
-
Page 190: Paper Gets Jammed
Solving Problems > > Paper Gets Jammed Removing Jammed Paper Paper Gets Jammed Check the error displayed on the control panel and follow the instructions to remove the jammed paper including any torn pieces. Next, clear the error. Important: ❏ Remove the jammed paper carefully. Removing the paper vigorously may cause damage to the printer. ❏... - Page 191 Solving Problems > > Paper Gets Jammed Removing Jammed Paper 3. Open the inner cover. 4. Open the scanner unit until it clicks. Caution: Be careful not to trap your hand or fingers when opening or closing the scanner unit. Otherwise you may be injured.
- Page 192 Solving Problems > > Paper Gets Jammed Removing Jammed Paper 5. Remove the jammed paper. Important: Do not touch the parts shown in the illustration inside the printer. Doing so may cause a malfunction.
- Page 193 Solving Problems > > Paper Gets Jammed Removing Jammed Paper 6. Close the scanner unit. For safety, the scanner unit is closed in two steps. Note: The scanner unit must be closed completely before it can be opened again. 7. Close the inner cover. 8.
-
Page 194: Removing Jammed Paper From The Adf
Solving Problems > > Paper Gets Jammed Removing Jammed Paper from the ADF Removing Jammed Paper from the ADF 1. Open the ADF cover. 2. Remove the jammed paper. 3. Raise the ADF input tray. Important: Make sure that you open the ADF cover before raising the ADF input tray. Otherwise, the ADF may be damaged. -
Page 195: Preventing Paper Jams
Solving Problems > > Paper Gets Jammed Preventing Paper Jams 4. Remove the jammed paper. 5. Close the ADF cover until it clicks. Preventing Paper Jams Check the following if paper jams occur frequently. ❏ Place the printer on a flat surface and operate in the recommended environmental conditions. “Environmental Specifications”... -
Page 196: It Is Time To Refill The Ink
❏ Do not store the ink bottles in high or freezing temperatures. ❏ Epson recommends using the ink bottle before the date printed on the package. ❏ When storing or transporting an ink bottle, do not tilt the bottle and do not subject it to impacts or temperature changes. -
Page 197: Refilling The Ink Tanks
❏ Visually check ink levels in the actual ink tanks. Prolonged use of the printer when the ink is expended could damage the printer. Epson recommends filling the ink tank to the upper line when the printer is not operating to reset the ink level. - Page 198 6. While holding the ink bottle upright, turn the cap slowly to remove it. Important: ❏ Epson recommends the use of genuine Epson ink bottles. ❏ Be careful not to spill any ink. 7. Check the upper line (a) in the ink tank.
- Page 199 Solving Problems > > It is Time to Refill the Ink Refilling the Ink Tanks If the ink does not start flowing into the tank, remove the ink bottle and reinsert it. However, do not remove and reinsert the ink bottle when the ink has reached the upper line; otherwise ink may leak. 9.
- Page 200 Solving Problems > > It is Time to Refill the Ink Refilling the Ink Tanks Note: If any ink remains in the ink bottle, tighten the cap and store the bottle upright for later use. 10. Close the ink tank cap securely. 11.
-
Page 201: Printing, Copying, Scanning, And Faxing Quality Is Poor
Solving Problems > > Printing, Copying, Scanning, and Faxing Quality is Poor Print Quality is Poor Related Information “Ink Bottle Codes” on page 248 & “Ink Bottle Handling Precautions” on page 196 & “Cleaning Spilled ink” on page 128 & Printing, Copying, Scanning, and Faxing Quality is Poor Print Quality is Poor... - Page 202 Inks to Create Black, you can print at Standard print quality when the Paper Type is Plain paper or Envelope. Note that this feature cannot solve nozzle clogging. To solve nozzle clogging, we recommend contacting Epson support for repairs. Colored Banding Appears at Intervals of Approximately 2.5 cm The following causes can be considered.
- Page 203 Solving Problems > > Printing, Copying, Scanning, and Faxing Quality is Poor Print Quality is Poor Blurry Prints, Vertical Banding, or Misalignment The following causes can be considered. The print head position is out of alignment. Solutions Select the Maintenance > Print Head Alignment > Vertical Alignment menu on the control panel to align the print head.
- Page 204 Solving Problems > > Printing, Copying, Scanning, and Faxing Quality is Poor Print Quality is Poor “Running Power Cleaning” on page 122 & The print settings and the paper size loaded in the printer are different. Solutions Change the print settings according to the paper size loaded in the printer. Load paper in the printer that matches the print settings.
- Page 205 Solving Problems > > Printing, Copying, Scanning, and Faxing Quality is Poor Print Quality is Poor The print head is rubbing the surface of the paper. Solutions When printing on thick paper, the print head is close to the printing surface and the paper may be scuffed.
- Page 206 Color correction has been applied. Solutions When printing from the Windows printer driver, the Epson auto photo adjustment setting is applied by default depending on the paper type. Try change the setting. On the More Options tab, select Custom in Color Correction, and then click Advanced. Change the Scene Correction setting from Automatic to any other option.
- Page 207 Solving Problems > > Printing, Copying, Scanning, and Faxing Quality is Poor Print Quality is Poor ❏ Windows Click Settings next to the Borderless checkbox on the printer driver's Main tab, and then change the settings. ❏ Mac OS Change the Expansion setting from the print dialog's Print Settings menu. The Position, Size, or Margins of the Printout Are Incorrect The following causes can be considered.
- Page 208 Solving Problems > > Printing, Copying, Scanning, and Faxing Quality is Poor Print Quality is Poor The USB cable is not connected correctly. Solutions Connect the USB cable securely to the printer and the computer. There is a job waiting to be printed. Solutions Cancel any paused print jobs.
-
Page 209: Copy Quality Is Poor
Solving Problems > > Printing, Copying, Scanning, and Faxing Quality is Poor Copy Quality is Poor Images or photos with a low resolution were printed. Solutions When printing images or photos, print using high-resolution data. Images on web sites are often low resolution although they look good enough on the display, and so print quality may decline. - Page 210 Solving Problems > > Printing, Copying, Scanning, and Faxing Quality is Poor Copy Quality is Poor The paper type setting does not match the paper loaded. Solutions Select the appropriate paper type setting for the type of paper loaded in the printer. “List of Paper Type”...
- Page 211 Solving Problems > > Printing, Copying, Scanning, and Faxing Quality is Poor Copy Quality is Poor The print head nozzles may be clogged. Solutions Perform the nozzle check, and then try Power Cleaning if the print head nozzles are clogged. “Checking and Cleaning the Print Head”...
- Page 212 Solving Problems > > Printing, Copying, Scanning, and Faxing Quality is Poor Copy Quality is Poor Cannot Copy Without Margins Borderless is not set in the print settings. Solutions Select Copy > Print Settings > Settings > Borderless Copy on the control panel. If you select a paper that does not support borderless printing, you cannot enable borderless settings.
- Page 213 Solving Problems > > Printing, Copying, Scanning, and Faxing Quality is Poor Copy Quality is Poor The paper is loaded incorrectly. Solutions Load paper in the correct direction, and slide the edge guide against the edge of the paper. “Loading Paper in the Rear Paper Feeder” on page 29 &...
- Page 214 Solving Problems > > Printing, Copying, Scanning, and Faxing Quality is Poor Copy Quality is Poor There is dust or dirt on the originals or the scanner glass. Solutions Remove any dust or dirt that adheres to the originals, and clean the scanner glass. “Cleaning the Scanner Glass”...
- Page 215 Solving Problems > > Printing, Copying, Scanning, and Faxing Quality is Poor Copy Quality is Poor An Image of the Reverse Side of the Original Appears in the Copied Image The following causes can be considered. When scanning thin originals, images on the back may be scanned at the same time. Solutions Place the original on the scanner glass and then place a piece of black paper over it.
-
Page 216: Scanned Image Problems
Solving Problems > > Printing, Copying, Scanning, and Faxing Quality is Poor Scanned Image Problems Scanned Image Problems Uneven Colors, Dirt, Spots, and so on Appear when Scanning from the Scanner Glass There is dust or dirt on the originals or the scanner glass. Solutions Remove any dust or dirt that adheres to the originals, and clean the scanner glass. - Page 217 “Cleaning the Scanner Glass” on page 124 & When scanning multiple originals using Epson ScanSmart, there is not enough of a gap between the originals. Solutions When placing multiple originals on the scanner glass, make sure there is a gap of at least 20 mm (0.8 in.)
- Page 218 Enter the application name in the search charm, and then select the displayed icon. ❏ Windows 7/Windows Vista/Windows XP Click the start button, and then select All Programs or Programs > EPSON > Epson Scan 2 > Epson Scan 2 Utility.
-
Page 219: The Quality Of The Sent Fax Is Poor
Solving Problems > > Printing, Copying, Scanning, and Faxing Quality is Poor The Quality of the Sent Fax is Poor The Quality of the Sent Fax is Poor Quality of the Sent Fax is Poor The following causes can be considered. There is dust or dirt on the originals or the scanner glass. - Page 220 Solving Problems > > Printing, Copying, Scanning, and Faxing Quality is Poor The Quality of the Sent Fax is Poor The Image Quality of the Sent Fax is Poor The following causes can be considered. The resolution is set to low. Solutions If you do not know the performance of the sender’s fax machine, set the following before sending a fax.
-
Page 221: Received Fax Quality Is Poor
Ask the sender to send faxes at a higher quality. Cannot Solve Problem If you cannot solve the problem after trying all of the solutions, contact Epson support. If you cannot solve printing or copying problems, see the following related information. - Page 222 ❏ Check that you are using genuine Epson ink bottles. Try to use genuine Epson ink bottles. The use of non-genuine ink bottles may cause print quality to decline. ❏ Make sure that there are no paper fragments left inside the printer.
-
Page 223: Adding Or Replacing The Computer Or Devices
Adding or Replacing the Computer or Devices Connecting to a Printer that has been Connected to the Network....224 Re-setting the Network Connection........225 Connecting a Smart Device and Printer Directly (Wi-Fi Direct). -
Page 224: Connecting To A Printer That Has Been Connected To The Network
Access the following website, and then enter the product name. Go to Setup, and then start setting up. http://epson.sn ❏ Setting up using the software disc (only for the models that come with a software disc and users with Windows computers with disc drives.) -
Page 225: Using A Network Printer From A Smart Device
Access the following website, and then enter the product name. Go to Setup, and then start setting up. http://epson.sn ❏ Setting up using the software disc (only for the models that come with a software disc and users with Windows computers with disc drives.) -
Page 226: When Changing The Computer
Access the following website, and then enter the product name. Go to Setup, and then start setting up. http://epson.sn ❏ Setting up using the software disc (only for the models that come with a software disc and users with Windows computers with disc drives.) - Page 227 Adding or Replacing the Computer or Devices > > … Re-setting the Network Connection Changing t ❏ Setting up using the software disc (only for the models that come with a software disc and users with Windows computers with disc drives.) Insert the software disc into the computer, and then follow the on-screen instructions.
-
Page 228: Making Wi-Fi Settings From The Control Panel
Adding or Replacing the Computer or Devices > > … Re-setting the Network Connection Making Wi- 3. Select Network Settings > Wired LAN. 4. Select ON for IEEE 802.3az. 5. Click Next. 6. Click OK. Making Wi-Fi Settings from the Control Panel You can make network settings from the printer's control panel in several ways. - Page 229 Adding or Replacing the Computer or Devices > > … Re-setting the Network Connection Making Wi- 4. Select Wi-Fi Setup Wizard. 5. Select the SSID for the wireless router from printer's control panel, and then press the OK button. Note: ❏...
- Page 230 Adding or Replacing the Computer or Devices > > … Re-setting the Network Connection Making Wi- 5. Hold down the [WPS] button on the wireless router until the security light flashes. If you do not know where the [WPS] button is, or there are no buttons on the wireless router, see the documentation provided with your wireless router for details.
-
Page 231: Connecting A Smart Device And Printer Directly (Wi-Fi Direct)
This method allows you to connect the printer directly to smart devices without a wireless router. Note: For iOS or Android users, it is convenient to set up from Epson Smart Panel. You only need to make these settings for the printer and the smart device that you want to connect to once. Unless you... - Page 232 Adding or Replacing the Computer or Devices > … Connecting a Smart Device and Printer Directly (Wi 1. Select Wi-Fi Setup on the home screen. u d l r To select an item, use the buttons, and then press the OK button. 2.
- Page 233 For smart devices that have been connected to the printer before, select the network name (SSID) on the smart device's Wi-Fi screen to connect them again. Note: If you are using an iOS device, you can also connect by scanning the QR code with the standard iOS camera. See the link below http://epson.sn.
-
Page 234: Disconnecting Wi-Fi Direct (Simple Ap) Connection
Adding or Replacing the Computer or Devices > … Connecting a Smart Device and Printer Directly (Wi Disconnecting Wi-Fi Direct (Simple AP) Connection There are two methods available to disable a Wi-Fi Direct (Simple AP) connection; you can disable all connections by using the printer's control panel, or disable each connection from the computer or the smart device. -
Page 235: Checking The Network Connection Status
Adding or Replacing the Computer or Devices > > … Checking the Network Connection Status Chec 6. Select the menu item that you want to change. You can select the following menu items. ❏ Change Network Name Change the Wi-Fi Direct (simple AP) network name (SSID) used for connecting to the printer to your arbitrary name. -
Page 236: Printing A Network Connection Report
Adding or Replacing the Computer or Devices > > … Checking the Network Connection Status Printi Checking the Network Connection Status using the Network Icon You can check the network connection status and strength of the radio wave using the network icon on the printer's home screen. - Page 237 Adding or Replacing the Computer or Devices > > … Checking the Network Connection Status Printi Messages and Solutions on the Network Connection Report Check the messages and error codes on the network connection report, and then follow the solutions. a.
- Page 238 ❏ If your Wi-Fi connection suddenly disconnects, check for the conditions below. If any of these conditions are applicable, reset your network settings by downloading and running the software from the following website. http://epson.sn > Setup ❏ Another smart device was added to the network using push button setup.
- Page 239 Adding or Replacing the Computer or Devices > > … Checking the Network Connection Status Printi Solutions: Make sure the wireless router’s security type is set to one of the following. If it is not, change the security type on the wireless router, and then reset the printer’s network settings.
- Page 240 If still does not connect your printer and network devices after confirming the above, turn off the wireless router. Wait for about 10 seconds, and then turn it on. Then reset your network settings by downloading and running the installer from the following website. http://epson.sn > Setup Related Information “Making Settings for Connecting to the Computer”...
- Page 241 ❏ Turn off the wireless router. Wait for about 10 seconds, and then turn it on. ❏ Make network settings again using the installer. You can run it from the following website. http://epson.sn > Setup ❏ You can register several passwords on a wireless router that uses WEP security type. If several passwords are registered, check if the first registered password is set on the printer.
-
Page 242: Printing A Network Status Sheet
Adding or Replacing the Computer or Devices > > … Checking the Network Connection Status Chec Related Information “Printing a Network Status Sheet” on page 242 & “Making Settings for Connecting to the Computer” on page 226 & Message on the Network Environment Message Solution The Wi-Fi environment needs to be... - Page 243 Adding or Replacing the Computer or Devices > > … Checking the Network Connection Status Chec ❏ ipconfig command Display the connection status of the network interface that is currently used by the computer. By comparing the setting information with actual communication, you can check whether the connection is correct.
-
Page 244: Product Information
Product Information Paper Information..........245 Consumable Products Information. -
Page 245: Paper Information
Epson recommends using genuine Epson paper to ensure high-quality printouts. Note: ❏ The availability of paper varies by location. For the latest information on paper available in your area, contact Epson support. ❏ See the following for information on available paper types for borderless and 2-sided printing. - Page 246 Various other paper types Media Name Size Loading Capacity (Sheets) Epson Photo Quality Self Adhesive Sheets Commercially Available Paper Note: See the following for information on available paper types for borderless and 2-sided printing. “Paper for Borderless Printing” on page 247 “Paper for 2-Sided Printing”...
-
Page 247: Unavailable Paper Types
Genuine Epson Paper ❏ Epson Ultra Glossy Photo Paper (10x15 cm (4x6 in.) ) ❏ Epson Premium Glossy Photo Paper (10x15 cm (4x6 in.), 16:9 wide size(102x181 mm)) ❏ Epson Premium Semigloss Photo Paper (10x15 cm (4x6 in.) ) ❏ Epson Photo Paper Glossy (10x15 cm (4x6 in.) ) ❏... -
Page 248: Consumable Products Information
The following are the codes for genuine Epson ink bottles. Important: ❏ Epson warranty does not cover damage caused by inks other than those specified, including any genuine Epson ink not designed for this printer or any third party ink. -
Page 249: Software Information
C: Cyan M: Magenta Y: Yellow Software Information This section introduces the network services and software products available for your printer from the Epson website. Software for Printing Application for Printing from a Computer (Windows Printer Driver) The printer driver controls the printer according to the commands from an application. Making settings on the printer driver provides the best printing results. - Page 250 Access the printer driver window. Click the Maintenance tab. Making Operation Settings for the Windows Printer Driver You can make settings such as enabling EPSON Status Monitor 3. 1. Access the printer driver window. 2. Click Extended Settings on the Maintenance tab.
- Page 251 Application for Quick and Fun Printing from a Computer (Epson Photo+) Epson Photo+ is an application that allows you to easily print images with a variety of layouts. You can also perform image correction and adjust the position while viewing a preview of your document. You can also brighten up your images by adding text and stamps wherever you like.
-
Page 252: Software For Scanning
Application for Printing Easily from an Android Application (Epson Print Enabler) Epson Print Enabler is an application that allows you to wirelessly print your documents, emails, photos, and web pages right from your Android phone or tablet (Android v4.4 or later). With a few taps, your Android device will discover an Epson printer that is connected to the same wireless network. -
Page 253: Software For Faxing
Enter the application name in the search charm, and then select the displayed icon. ❏ Windows 7/Windows Vista/Windows XP Click the start button, and select All Programs (or Programs) > Epson Software > FAX Utility. Starting on Mac OS Select System Preferences from the Apple menu > Printers & Scanners (or Print & Scan, Print & Fax), and then select the printer (FAX). -
Page 254: Software For Package Creation
EpsonNet SetupManager is a software to create a package for a simple printer installation, such as installing the printer driver, installing EPSON Status Monitor and creating a printer port. This software allows the administrator to create unique software packages and distribute them among groups. - Page 255 IPv6: http://[2001:db8::1000:1]/ Note: Using the smart device, you can also run Web Config from the product information screen of the Epson Smart Panel. Since the printer uses a self-signed certificate when accessing HTTPS, a warning is displayed on the browser when you start Web Config;...
-
Page 256: Software For Updating
EPSON Software Updater is an application that installs new software, and updates firmware over the Internet. If you want to check for update information regularly, you can set the interval for checking for updates in EPSON Software Updater's Auto Update Settings. -
Page 257: Settings Menu List
Click the start button, and then select All Programs (or Programs) > Epson Software > EPSON Software Updater. Note: You can also start EPSON Software Updater by clicking the printer icon on the task bar on the desktop, and then selecting Software Update. Starting on Mac OS Select Go >... -
Page 258: Printer Setup
Printer Setup Select the menus on the control panel as described below. Settings > Printer Setup Before Using Basic Settings In this menu group, the following items are only for ET-4800 Series/L5290 Series. ❏ Sound ❏ Date/Time Settings ❏ Country/Region... - Page 259 Product Information > > Settings Menu List Printer Setup Sound: Adjust the volume. ❏ Mute Select On to mute all sound. ❏ Normal Mode Select the volume such as Button Press. ❏ Quiet Mode Select the volume such as Button Press in Quiet Mode. Quiet Mode: Select On to reduce noise during printing, however, this may lower the print speed.
-
Page 260: Network Settings
Product Information > > Settings Menu List Network Settings Keyboard Change the layout of the keyboard on the LCD screen. Sleep Timer: Adjust the time period to enter a sleep mode (energy saving mode) when the printer has not performed any operations. The LCD screen turns black when the setting time passes. PC Connection via USB: Select Enable to allow a computer to access the printer when connected by USB. -
Page 261: Epson Connect Services
Check the printer's email address that is registered to the Epson Connect services. Status: Check whether or not the printer is registered and connected to the Epson Connect services. Contacts Manager This menu is only available for ET-4800 Series/L5290 Series. -
Page 262: Fax Settings
Delete the entry or group registered in contacts. Print Contacts: Print the entry information and group information for the contacts in the list. Fax Settings Faxing feature is available only for ET-4800 Series/L5290 Series. Related Information “Check Fax Connection” on page 262 &... - Page 263 Product Information > > Settings Menu List Fax Settings Fax Speed: Select the fax transmission speed. We recommend selecting Slow(9,600bps) when a communication error occurs frequently, when sending/receiving a fax to/from abroad, or when you are using an IP (VoIP) phone service. ECM: Automatically corrects errors in the fax transmission (Error Correction Mode), mostly caused by telephone line noise.
- Page 264 Product Information > > Settings Menu List Fax Settings Rings to Answer: Select the number of rings that must occur before the printer automatically receives a fax. Remote Receive: Remote Receive When you answer an incoming fax call on a phone connected to the printer, you can start receiving the fax by entering the code using the phone.
- Page 265 Product Information > > Settings Menu List Fax Settings documents are printed at their original size on multiple sheets, or a blank second page may be ejected. Split Page Settings: Prints received faxes with the page split when the size of the received documents is larger than the size of the paper loaded in the printer.
- Page 266 Product Information > > Settings Menu List Fax Settings Fax Log Auto Print: Prints the fax log automatically. Select On(Every 30) to print a log every time 30 fax jobs are completed. Select On(Time) to print the log at a specified time. However, if the number of fax jobs exceeds 30, the log is printed before the specified time.
-
Page 267: Print Status Sheet
Select the menus on the control panel as described below. Settings > Customer Research Select Approve to provide product usage information such as the number of prints to Seiko Epson Corporation. Select Modify to change this setting. Restore Default Settings Select the menus on the control panel as described below. -
Page 268: Firmware Update
Product Information > > Product Specifications Printer Specifications Resets the following menus to their defaults. ❏ Network Settings ❏ Copy Settings ❏ Scan Settings ❏ Fax Settings ❏ Clear All Data and Settings Firmware Update Select the menus on the control panel as described below. Settings >... -
Page 269: Scanner Specifications
Product Information > > Product Specifications Scanner Specifications Printing with borders 3.0 mm (0.12 in.) 3.0 mm (0.12 in.) 41.0 mm (1.61 in.) 37.0 mm (1.46 in.) Borderless printing 44.0 mm (1.73 in.) 40.0 mm (1.57 in.) Printable Area for Envelopes Print quality may decline in the shaded areas due to the printer's mechanism. -
Page 270: Interface Specifications
❏ 1 bits per pixel external Light Source Interface Specifications For Computer Hi-Speed USB USB 3.0 cables are not supported. ADF Specifications ET-4800 Series/L5290 Series Only Available Paper Sizes A4, Letter, Legal, 8.5×13in, Indian-Legal Paper Type Plain Paper Weight of Paper 64 to 95 g/m2 Loading Capacity A4, Letter: 30 sheets or 3.3 mm... -
Page 271: Network Specifications
Simple AP mode is compatible with a Wi-Fi connection (infrastructure) or an Ethernet connection. Wi-Fi Direct supports WPA2-PSK (AES) only. Complies with WPA2 standards with support for WPA/WPA2 Personal. Ethernet Specifications ET-4800 Series/L5290 Series Only Standards IEEE802.3i (10BASE-T) IEEE802.3u (100BASE-TX) *2*3 IEEE802.3az (Energy Efficient Ethernet) - Page 272 IPv4, IPv6 ✓ IPP Printing (Windows, Mac IPv4, IPv6 PictBridge Printing (Wi-Fi) IPv4 Digital camera ✓ Epson Connect (Email Print, IPv4 Remote Print) ✓ AirPrint (iOS, Mac OS) IPv4, IPv6 iOS 5 or later, Mac OS X v10.7 or later ✓...
-
Page 273: Supported Third Party Services
5 or later/Mac OS X v10.7.x or later Scan OS X Mavericks or later OS X Mountain Lion or later Dimensions ET-4800 Series/L5290 Series Dimensions Storage ❏ Width: 375 mm (14.8 in.) ❏ Depth: 347 mm (13.7 in.) ❏ Height: 237 mm (9.3 in.) Printing ❏... -
Page 274: Electrical Specifications
Product Information > > Product Specifications Electrical Specifications Electrical Specifications ET-4800 Series/L5290 Series Power Supply Rating AC 100-240 V AC 220-240 V Rated Frequency Range 50-60 Hz 50-60 Hz Rated Current 0.4-0.2 A 0.2 A Power Consumption (with USB Con- Standalone copying: Approx. -
Page 275: Environmental Specifications
Product Information > > Product Specifications System Requirements Environmental Specifications Operation Use the printer within the range shown in the following graph. Temperature: 10 to 35°C (50 to 95°F) Humidity: 20 to 80% RH (without condensation) Storage Temperature: -20 to 40°C (-4 to 104°F) Humidity: 5 to 85% RH (without condensation) You can store for one month at 40°C (104°F). -
Page 276: Regulatory Information
Manufacturer: Seiko Epson Corporation Type: J26H006 This product conforms to Part 15 of the FCC Rules and RSS-210 of the IC Rules. Epson cannot accept responsibility for any failure to satisfy the protection requirements resulting from a non-recommended modification of the product. Operation is subject to the following two conditions: (1) this device may not cause harmful interference, and (2) this device must accept any interference received, including interference that may cause undesired operation of the device. -
Page 277: Restrictions On Copying
Restrictions on Copying Standards and Approvals for Australian Model AS/NZS CISPR32 Class B Epson hereby declares that the following equipment Models are in compliance with the essential requirements and other relevant provisions of AS/NZS4268: C622B, C634G Epson cannot accept responsibility for any failure to satisfy the protection requirements resulting from a non- recommended modification of the products. - Page 278 Product Information > > Regulatory Information Restrictions on Copying ❏ Passports, driver’s licenses, warrants of fitness, road passes, food stamps, tickets, etc. Note: Copying these items may also be prohibited by law. Responsible use of copyrighted materials: Printers can be misused by improperly copying copyrighted materials. Unless acting on the advice of a knowledgeable attorney, be responsible and respectful by obtaining the permission of the copyright holder before copying published material.
-
Page 279: Where To Get Help
Contacting Epson Support........ -
Page 280: Technical Support Web Site
Depending on the product, the dial list data for fax and/or network settings may be stored in the product’s memory. Due to breakdown or repair of a product, data and/or settings may be lost. Epson shall not be responsible for the loss of any data, for backing up or recovering data and/or settings even during a warranty period. -
Page 281: Help For Users In Australia
Epson Helpdesk Phone: 1300-361-054 Epson Helpdesk is provided as a final backup to make sure our clients have access to advice. Operators on the Helpdesk can aid you in installing, configuring and operating your Epson product. Our Pre-sales Helpdesk staff can provide literature on new Epson products and advise where the nearest dealer or service agent is located. -
Page 282: Help For Users In Singapore
Phone: 0800 237 766 Epson Helpdesk is provided as a final backup to make sure our clients have access to advice. Operators on the Helpdesk can aid you in installing, configuring and operating your Epson product. Our Pre-sales Helpdesk staff can provide literature on new Epson products and advise where the nearest dealer or service agent is located. -
Page 283: Help For Users In Vietnam
Where to Get Help > > Contacting Epson Support Help for Users in Indonesia Epson Call Centre Phone: 66-2685-9899 Email: support@eth.epson.co.th Our Call Centre team can help you with the following over the phone: ❏ Sales enquiries and product information ❏... - Page 284 Where to Get Help > > Contacting Epson Support Help for Users in Indonesia Epson Service Center Province Company Name Address Phone E-mail JAKARTA Epson Sales and Wisma Keiai Lt. 1 Jl. Jenderal 021-5724335 Service Jakarta Sudirman Kav. 3 Jakarta Pusat - DKI ess@epson-indonesia.co.id...
- Page 285 Where to Get Help > > Contacting Epson Support Help for Users in Indonesia Province Company Name Address Phone E-mail SURABAYA Epson Sales & Jl. Haji Abdul Wahab Saimin, Ruko 031- 5120994 Service Surabaya Villa Bukit Mas RM-11, Kec. Dukuh sby-technical@epson-indonesia.co.id...
-
Page 286: Help For Users In Hong Kong
To obtain technical support as well as other after-sales services, users are welcome to contact Epson Hong Kong Limited. Internet Home Page http://www.epson.com.hk Epson Hong Kong has established a local home page in both Chinese and English on the Internet to provide users with the following information: ❏ Product information ❏ Answers to Frequently Asked Questions (FAQs) ❏... -
Page 287: Help For Users In Malaysia
Accessible 9am to 6pm, Monday through Saturday (Except public holidays) Help for Users in the Philippines To obtain technical support as well as other after sales services, users are welcome to contact the Epson Philippines Corporation at the telephone, fax numbers and e-mail address below:... - Page 288 Help for Users in the Philippines World Wide Web http://www.epson.com.ph Information on product specifications, drivers for download, Frequently Asked Questions (FAQ), and E-mail Enquiries are available. Epson Philippines Customer Care Toll Free: (PLDT) 1-800-1069-37766 Toll Free: (Digital) 1-800-3-0037766 Metro Manila: (632) 8441 9030 Web Site: https://www.epson.com.ph/contact...