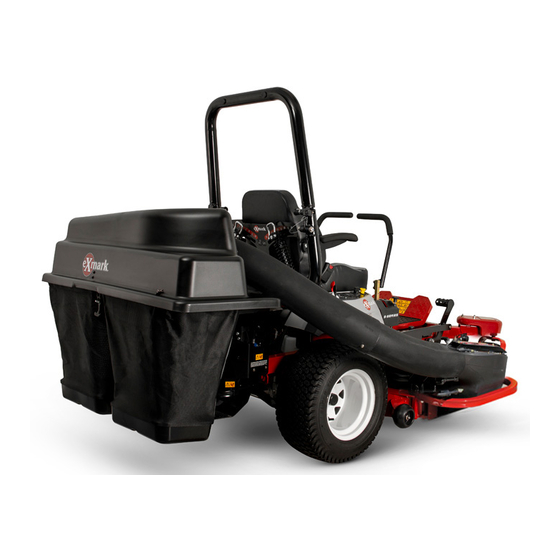
Exmark ULTRAVAC BAGGER 126-6954 Setup Instructions
Hide thumbs
Also See for ULTRAVAC BAGGER 126-6954:
- Operator's manual (24 pages) ,
- Setup instructions (9 pages)
Advertisement
Quick Links
This product contains a chemical or chemicals known to the State of California to
Loose Parts
Use the chart below to verify that all parts have been shipped. Part numbers not shown are available on the dealer
extranet.
Dealer Pack
Part No.
—
Literature Pack
Manual-Operator's
© 2017—Exmark Mfg. Co., Inc.
P.O. Box 808
Beatrice, NE 68310
WARNING
CALIFORNIA
Proposition 65 Warning
cause cancer, birth defects, or reproductive harm.
Description
ULTRAVAC
Setup Instructions
For UltraVac Serial Nos. 400,000,000 & Higher
(To fit Radius Models Serial Nos. 400,000,000 & Higher)
Qty.
Fill out the online warranty registration
form.
All Rights Reserved *4503-419* C
Part No. 4503-419 Rev. C
Printed in the USA.
BAGGER
®
126-6954
Use
Advertisement

Summary of Contents for Exmark ULTRAVAC BAGGER 126-6954
- Page 1 Part No. Description Qty. Fill out the online warranty registration — form. Literature Pack Manual-Operator's © 2017—Exmark Mfg. Co., Inc. All Rights Reserved *4503-419* C Part No. 4503-419 Rev. C P.O. Box 808 Printed in the USA. Beatrice, NE 68310...
- Page 2 Models and Required Completing Kits Completing Kits Note: Use the following charts to verify the kits required for the unit you are installing the UltraVac on. E- and S-Series Deck Completing Kit 126-8272 48 inch 52 inch 126-8273 60 inch 126-8274 X-Series Deck...
- Page 3 Installing the Mount Brackets Raise the deck to the transport position. Raise the back of the machine up and support the machine with jack stands. CAUTION Raising the mower deck for service or maintenance relying solely on mechanical or hydraulic jacks could be dangerous. The mechanical or hydraulic jacks may not be enough support or may malfunction allowing the unit to fall, which could cause injury.
- Page 4 Place the RH side bracket on the outer frame and align the mounting holes. Using two 5/16-18 x 3 1/2 inch hex screws, 5/16 inch washers, and 5/16 inch flanged nyloc nuts secure the side bracket to the frame and support bracket. Using one 3/8-16 x 1 inch hex screw, washer, and 3/8 inch flanged nyloc nut secure the rear of the RH bagger support bracket to the RH bagger bracket as...
- Page 5 g037183 Figure 8 1. Bolt 3. Washer 2. Knob 4. Caster weight g185955 Figure 6 Insert the bolt through the bracket hole and install the washer and knob. 1. Weight 4. Tabbed weight bracket plate Tighten the knob on weight assembly until the 2.
- Page 6 g204818 Figure 11 g037341 603 Deck Figure 9 483 and 523 Decks 1. 3/8-16 x 1 inch hex bolt 4. Blocker plate 2. Belt cover bracket 5. 3/8-16 x 1 1/4 carriage bolt 1. 3/8-16 x 1 1/4 inch carriage bolt 3.
- Page 7 Install the double sheave onto the right spindle shaft. • X-Series: Reinstall the spring disc washer and nut; torque to 130-160 ft-lb (176–217 N-m). g007981 Figure 14 g007021 Figure 13 1. Belt cover bracket 4. Belt 1. Torque sheave nut to 130-160 ft-lb (176–217 N-m). 2.
- Page 8 g189695 Figure 18 View from Top of Blower g189941 Figure 16 1. Spring loaded idler 3. Fixed idler 1. Nut 2. Belt guide 2. Impeller sheave 4. Deck sheave Mount the blower on the deck by inserting the Position the belt cover at an angle and slide it under mounting pin into the tube welded to the rear corner the mower frame (see Figure 19).
- Page 9 g037432 Figure 20 1. Blower 3. Deck lip 2. Belt cover Install the knob and its hardware (reference Figure 14). g037115 Figure 22 Installing the Hopper Assembly 1. Rotate hopper assembly 4. Frame mount barrel 2. Rear bumper 5. Hairpin Lay the hopper assembly down as shown in 3.
- Page 10 g007027 Figure 23 g007028 1. Dimple Figure 24 1. Drill the holes here Set the deck in the lowest cutting position. Slide the lower tube onto the blower and attach the Reinsert the upper tube in the hopper seal — push latches.
- Page 11 g038069 Figure 25 1. Drill 3. #10-24 x 3/4 inch hex screw 2. #10 washer 4. ROPS pin with lanyard Place the #10 washer and lanyard cable end onto the #10-24 x 3/4 inch hex screw and install into the RH ROPS hole.


