Table of Contents
Advertisement
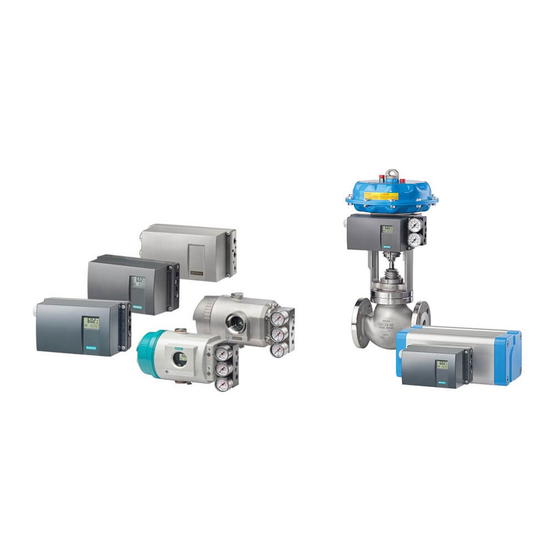
Quick Links
Advertisement
Table of Contents

Related Manuals for Siemens 6DR55 Series


Summary of Contents for Siemens 6DR55 Series
- Page 1 Manual Edition 03/2006 Electropneumatic Positioner SIPART PS2 PA 6DR55xx sipart...
- Page 3 SIPART PS2 PA 6DR55xx Edition 03/2006 Manual Electropneumatic Positioner for Linear and Part--Turn Actuators SIPART PS2 PA Manual A5E00127926--05...
- Page 4 Technical data subject to change without notice Trademarks SIMATICe, SIPARTe, SIRECe, SITRANSe are registered trademarks of the Siemens AG Third parties using for their own purposes any other names in this document which refer to trademarks might infringe upon the rights of the trademark owners.
-
Page 5: Table Of Contents
Contents Information for the operator ..........General information . - Page 6 2.6.3 Iy module ........... . 2.6.4 Alarm module .
- Page 7 Diagnosis ........... 4.5.1 Diagnostic display .
- Page 8 SIPART PS2 PA Manual A5E00127926--05...
-
Page 9: Information For The Operator
Information for the operator Information for the operator Dear customer, Please read this manual before starting work! It contains important information and data which, when observed, ensure full availability of the equipment and save service costs. This simplifies handling of this control instrument considerably and provides accurate measuring results. -
Page 10: Classification Of Safety--Related Notices
Siemens office or the office responsible for you. Functionality, commissioning and operation are described in this manual. -
Page 11: Qualified Personnel
Information for the operator CAUTION used with the safety alert symbol indicates a potentially hazardous situation which, if not avoided, may result in minor or moderate injury. CAUTION used without safety alert symbol indicates a potentially hazardous situation which, if not avoided, may result in property damage. NOTICE used without the safety alert symbol indicates a potential situation which, if not avoided, may result in an undesireable result or state. - Page 12 Information for the operator WARNING The instrument must only be installed and commissioned by qualified personnel. The instrument is designed for connection to functional and safety extra low voltage. The instrument is designed for connection to operate voltage or safety extra--low voltage.
-
Page 13: Use As Intended
FI 01 catalog is also available at the above Web address. If you need more information or have particular problems which are not covered sufficiently by the operating instructions, contact your local Siemens office. You will find your local Siemens office on the Internet under: www.siemens.com/processinstrumentation Click on ”Contact”... -
Page 14: Warranty Information
We should like to point out that the content of this manual is not part of and does not modify a previous or current agreement, undertaking or legal relationship. Siemens is bound solely by the contract of sale, which also contains the complete and exclusive warranty. The contractual warranty conditions are neither extended nor restricted by this document. -
Page 15: Introduction
Introduction Introduction General information about the positioner The positioner is used to adjust and control pneumatic actuators. The controller operates electropneumatically with compressed air as an energy supply. The positioner together with the PROFIBUS PA communications interface are components in a digital process automation system. It communicates with the master as a slave via the PROFIBUS PS field bus. - Page 16 Introduction The housing is available in three versions: Plastic housing for single-- and double--acting actuators Metal housing for single--acting actuators Explosion proof housing for single and double--acting actuators The device is designed with IP66/NEMA4x degree of protection. Degree of protection Explosion The intrinsically safe version can be used in hazardous areas in zone 1 Protection...
- Page 17 Introduction Actuator Positioner, single--acting in metal housing Lantern Manometer block, single--acting Valve Figure 1 Positioner mounted on linear actuator (single--acting) Positioner in plastic housing Part--turn actuator Manometer block, double--acting Figure 2 Positioner mounted on part--turn actuator (double--acting) SIPART PS2 PA Manual A5E00127926--05...
- Page 18 Introduction Actuator Positioner, single--acting in explosion proof housing Lantern Manometer block, single--acting Figure 3 Explosion proof positioner mounted on linear actuator (single--acting) Positioner double--acting in explosion proof housing Part--turn actuator Manometer block, double--acting Figure 4 Explosion proof positioner mounted on part--turn actuator (double--acting) SIPART PS2 PA Manual A5E00127926--05...
-
Page 19: General Information Regarding Profibus
Introduction General information regarding PROFIBUS The PROFIBUS PA (PA = Process Automation) is a variant of the PROFIBUS--DP (DP = Decentral Peripheral) which is widely used in manufacturing engineering. The PROFIBUS (Process Field Bus) is an open communication system for automation engineering and thousands are used all over the world. -
Page 20: Properties Of The Profibus Pa
(GS*) files. The files are available on the Internet at: www.siemens.com/sipartps2 Click on “More Info” and “--> Instructions and Manuals”. One or more class 2 masters can access the field devices acyclically in addition to the cyclic mode. -
Page 21: Profile
Introduction 1.2.4 Profile Supplementary to the EN standard 50170, the PNO (PROFIBUS Userorganisation) has defined the functionality of the individual field device types in a so--called profile description. This profile defines minimum functional requirements and optional extensions. The device--internal Device Management supplies all the basic information necessary for finding the profile parameters to the control system configuration tool. - Page 22 Introduction An additional terminating resistor T must be fitted at the far end of the bus for transmission--technical reasons. When using the recommended bus cable, the theoretically possible line length (sum of all line sections) is a maximum of 1900 mm. In addition, the voltage drop over the lines supplying the field devices must be taken into account in the planning.
- Page 23 Introduction Before operation make sure that the positioner addresses of two or more field devices are set on the bus. So that the addresses are unique, each address must only be assigned once. In principle, an address range from 1 to 125 is possible. In its as--supplied state, address 126 is set.
- Page 24 Introduction SIPART PS2 PA Manual A5E00127926--05...
-
Page 25: Design And Method Of Operation
Design and method of operation Design and method of operation The following chapter describes the mechanical and electrical design, the instrument components and method of operation of the positioner. Overview The electropneumatic positioner forms a control system in connection Introduction with an actuator. - Page 26 Design and method of operation The limit value alarms are output by the alarm option module which can monitor and report the function of the positioner and the actuator additionally through a fault message output. The value of the control difference dependent on the travel time is monitored in automatic mode.
-
Page 27: Design Rating Plate
Design and method of operation Design Rating Plate Order number Serial number Manufacturer Place of manufacture Product name Protection class Technical data Observe manual Figure 7 Design rating plate, example with protection class EEx ia/ib Instrument components Input: Supply air Transmission ratio selector Output: Actuating pressure Y1 Adjustment wheel for friction clutch... -
Page 28: Motherboard
Design and method of operation -- -- Input: Supply air Transmission ratio selector Output: Actuating pressure Y1 (only possible with positioner open) Display Adjustment wheel for friction clutch Output: Actuating pressure Y2 Terminals standard controller Operating keys Terminals option modules Restrictor Y1 Safety catch Restrictor Y2... -
Page 29: Pneumatic Connections
Design and method of operation 2.3.3 Pneumatic connections The pneumatic connections are on the right hand side of the positioner (figure 10 and figure 11). Actuating pressure Y1 in single-- and double--acting actuators Feedback shaft Supply air P Actuating pressure Y2 in double--acting actuators Exhaust air output E with silencer on the bottom of the instrument Figure 10 Pneumatic connection in normal version... - Page 30 Design and method of operation The exhaust air output E can be provided for supplying dry instrument air to the tapping chamber and spring chamber to prevent corrosion. Figure 12, page 28 shows the pneumatic connection variants for the different actuator types, the positioning acting and the safety position after power failure.
-
Page 31: Mounting Kit
Design and method of operation 2.3.4 Mounting kit The positioner can be mounted on almost all actuators with the appropriate mounting kit. 2.3.5 Purge air switching (not in the explosion proof version) The purge air switch is accessible above the pneumatic terminal strip with the housing open (figure 13). -
Page 32: Method Of Operation
Design and method of operation Method of operation The electropneumatic positioner forms a control circuit with the pneumatic actuator in which the actual value x is the position of the actuator bar in linear actuators or the position of the actuator shaft in part--turn actuators and the command variable w is supplied digitally via the PROFIBUS. -
Page 33: State As Supplied
Design and method of operation NOTE The exhaust air valve is always open when there is no current. Figure 15 Method of operation five--point switch State as supplied There are no mechanical mounting accessories on the controller in the state as supplied. These must be ordered and installed according to the ”operating instructions”... - Page 34 Design and method of operation Installation The option modules are secured by a assembly covering ((1), see fi- gure 16, page 33) and mechanically fixed. NOTE The housing must be opened to install the options modules. The degree of protection IP66 is not guaranteed as long as the positioner is open.
- Page 35 Design and method of operation Module cover SIA-module and mechanical limit switch module Fixing screws Special screw Motherboard Actuating disc for A1 (terminals 41 and 42) Fixing screws Actuating disc for A2 (terminals 51 and 52) -module with ribbon cable (6) Adjusting wheel for friction clutch Alarm module with ribbon cable (5) Transmission ratio selector...
-
Page 36: Installation Of Options Modules In Explosion Proof Version
Design and method of operation 2.6.2 Installation of options modules in explosion proof version The following option modules are available for the positioner in the explosion proof version: -- I module -- Alarm module Installation The options modules are protected and mechanically fixed by a module cover ((1), see figure 17, page 36). - Page 37 Design and method of operation NOTE To prevent premature wearing of the fixture by the self--tapping screw (1.1) next to the display, the following method of mounting the module cover (1) has proven effective. 1. Turn the screws counterclockwise until you feel them snap into the thread.
-
Page 38: Iy Module
Design and method of operation 13.1 13.1 Module cover Transmission ratio selector Fixing screws Adjusting wheel for friction clutch PA module Housing module with ribbon cable Screw--on cover Alarm module with ribbon cable Safety catch Ribbon cable for alarm module Rack Ribbon cable for I module... -
Page 39: Alarm Module
Design and method of operation Installation The I module (3) is pushed in to the bottom compartment of the mo- dule rack up to the stop and connected by the enclosed 6-wire ribbon cable (6) to the motherboard (see figure 16, page 33). 2.6.4 Alarm module The alarm module contains 3 digital outputs and... -
Page 40: Sia Module
Design and method of operation 2.6.5 SIA module The SIA module contains three digital outputs. A collected fault message (see alarme module) is output via a digita- Function loutput. The floating digital output is implemented as a self error repor- ting semiconductor output. -
Page 41: Mechanical Limit Switch Module
Design and method of operation 11. Select the plates which already exist on the standard version of the module cover from the set of plates enclosed. Stick the selected plates according to the standard version to the mounted module cover. In the case of the version which doesn’t feature explosion protection, stick the warning sign (figure 2) onto the side of the ground plate opposite the typeplate. - Page 42 Design and method of operation Installation CAUTION The following maximal values only refer to the clamps 41 and 42 as well as the clamps 51 and 52. Maximal voltage (not Ex) AC 250 V or DC 24 V Maximal current (not Ex) AC/DC 4 A Maximal voltage (Ex) DC 30 V...
- Page 43 Design and method of operation Place the insulating cover (10) over the mechanical limit switch module underneath the surface of the motherboard onto the con- tainer on the wall. The recesses in the insulating cover must slot into the corresponding lugs on the container wall. Place the insula- ting cover on the mechanical limit switch module by carefully ben- ding the container walls.
- Page 44 Design and method of operation Figure 18 Cable connection Setting the two limit values: Drive the actuator to the first desired mechanical position. Adjust the top actuating disc (7.2) by hand until the output signal on terminals 41 and 42 changes. Drive the actuator to the second desired mechanical position.
-
Page 45: Emc Filter Module
Design and method of operation 2.6.7 EMC filter module The positioner can also be driven by an external position sensor (po- tentiometer or NCS) (see page 50 ”3.3.2 Instructions for using positio- ners which are exposed to strong accelerations or vibrations”). An EMC filter module, order number C73451--A430--D23, is required for this. - Page 46 Design and method of operation SIPART PS2 PA Manual A5E00127926--05...
-
Page 47: Preparing For Operation
Preparing for operation Preparing for operation This chapter describes all the preparations necessary for operating the positioner. Instrument identification (type key) The order number of the positioner is printed on the rating plate and on the packaging. Compare this with the order number in chapter 8.1, page 168 Installation of any modules required is described in chapter 2.6, page 31 of this technical manual. - Page 48 Preparing for operation 79,5 G 1/4 or 20,5 1/4” NPT 2xM6 29,5 58,75 Thread depth 5.5 Figure 21 Dimensional drawing terminal strip for plastic housing 50 x 4 x M6 9 deep M8, 9 deep All air connections 11,2 G 1/4 or 1/4” NPT M20 x 1.5 or NPT--adapter 14,5 38,5...
-
Page 49: Assembly
Preparing for operation All air connections M8, 14 deep (4x) ”NPT M6, 11 deep (4x) M6, 8 deep (2x) 87,2 M20, M25 or 14,3 25,7 ”NPT (2x) 129,5 Connection 238/Y2 only in double--acting version 235,3 ∅ 8 h9 Figure 23 Dimensional drawing for positioner with metal housing in explosion proof version 6DR5xx5 Assembly General... -
Page 50: Instructions For Using Positioners In A Wet Environment
Preparing for operation NOTE The positioner will be equipped at the factory and delivered complete with the necessary options at the customer’s request. Options modules may only be retrofitted by our service technicians. The positioner must be assembled -- especially in a moist environment -- in such a way as to rule out freezing of the positioner axle at low ambient temperature. - Page 51 Preparing for operation Figure 24 Favorable and unfavorable installation positions If conditions oblige you to operate the positioner in a unfavorable installation position, you can take additional precautionary measures to prevent penetration by water. NOTE Never clean the positioner with a high pressure water jet because the IP66 degree of protection is inadequate protection for this.
-
Page 52: Instructions For Using Positioners Which Are Exposed To Great Accelerations Or Vibrations
Preparing for operation Assembly of the screw--type gland with plastic hose Unscrew the sinter bronze silencer from the exhaust air opening on the underside of the housing. Screw the screw--type gland mentioned above into the exhaust air opening. Mount the above mentioned plastic hose on the screw--type gland and check the good fit. - Page 53 Preparing for operation Procedure After you have mounted the positioner and commissioned it completely, you can set the friction clutch torque as follows: Plug a conventional 4 mm wide screwdriver into a slot in the yellow wheel. Then turn the yellow wheel to the left with the screwdriver until it snaps in audibly.
- Page 54 Preparing for operation External position Applications in which the measures described above are inadequate detection are also conceivable. This applies for instance with continuous and heavy vibration, increased or too low ambient temperatures and in the case of nuclear radiation. The separate attachment of position displacement sensor and controller unit can help here.
-
Page 55: Mounting Kit "Linear Actuator" 6Dr4004--8V And 6Dr4004--8L
Preparing for operation 3.3.3 Mounting kit ”linear actuator” 6DR4004--8V and 6DR4004--8L The scope of delivery of the mounting kit” linear actuator IEC 534 (3 mm to 35 mm)” are contained (ser. no. see figure 26, page 55): Ser. no. pieces Designation Note NAMUR mounting kit bracket... - Page 56 Preparing for operation Selection of the row of holes depends on the width of the actuator yoke. The roll (5) should engage in the pick--up bracket (2) as close as possible to the spindle but may not touch the clamping assembly.
- Page 57 Preparing for operation Without explosion proof version Explosion proof version: Figure 26 Assembly procedure (linear actuator) SIPART PS2 PA Manual A5E00127926--05...
-
Page 58: Mounting Kit "Part--Turn Actuator" 6Dr4004--8D
Preparing for operation Mounting on yoke Mounting on yoke with plane surface with ledge Mounting on yoke with columns as required Figure 26 Assembly procedure (linear actuator) continued 3.3.5 Mounting kit ”part--turn actuator” 6DR4004--8D The scope of delivery of the mounting kit ”part--turn actuator” contains (ser. no. see figures 27 and 28): Ser. -
Page 59: Assembly Procedure (See Figure 27 And Figure 28)
Preparing for operation 3.3.6 Assembly procedure (see figure 27 and figure 28) Attach VDI/VDE 3845 mounting console ((9), actuator--specific, scope of delivery actuator manufacturer) onto rear of positioner and secure using hexagon head screws (14) and lock washers (15). Adhere pointer (4.2) onto mounting console in the center of the centering hole. - Page 60 Preparing for operation 0%20 40 60 80 100% Figure 27 Assembly procedure (part--turn actuator) SIPART PS2 PA Manual A5E00127926--05...
- Page 61 Preparing for operation 0%20 40 60 80 100% Figure 28 Assembly procedure for explosion proof version (part--turn actuator) SIPART PS2 PA Manual A5E00127926--05...
- Page 62 Preparing for operation CUT A -- B 14,15 Positioner part--turn actuators Clutch wheel Feedback shaft Driver Hexagon--head screw M6×12 Multiple--purpose plate Retaining washer S6 Scale Round--head screw M6×12 Pointer mark Washer VDI/VDE 3845 mounting bracket Socket--head cap screw Figure 29 Mounted positioner for part--turn actuators SIPART PS2 PA Manual A5E00127926--05...
- Page 63 Preparing for operation fastening level positioner 4 mm +0,1 part--turn actuator F05--Lkr.-- 4 50 Figure 30 Attachment of part--turn actuator, mounting console (scope of delivery actuator manufacturer), dimensions SIPART PS2 PA Manual A5E00127926--05...
-
Page 64: Electrical Connection
Preparing for operation Electrical connection NOTE Any necessary options modules must be installed before electrical connection (see chapter 2.6, page 31). N.B.: The transmission ratio selector can only be set when the positioner is open. Therefore check this setting before closing the positioner. - Page 65 Preparing for operation CAUTION To discharge impulses under fault conditions, the positioner must be connected via a low resistance to an equipotential bonding (ground potential). For this the positioner in plastic housing is provided with an additional cable. Connect this cable using the cable clip to the PROFIBUS cable shield and to the equipotential bonding.
- Page 66 Preparing for operation 5. Tighten the cable gland. 5. Tighten the Ex--d--certified cable gland. *) 6. Connect the red and green wires as 6. Connect the red and green wires as shown in figure 33, page 65 to terminals 3 shown in figure 35, page 66 to terminals 6 and 7 of the motherboard (the polarity is and 7 of the motherboard (the polarity is...
- Page 67 Preparing for operation for positioner in normal version: Bus cable Cable clip Basic PCB Module cover Plate Terminal block Ground potential Cable glands Figure 33 Bus cable connection for positioner in explosion proof version Base plate Cable shield Cable clip EEx d certified cable inlets Bus cable Figure 34...
- Page 68 Preparing for operation Hazardous area zone 1 Non--hazardous area Approved associated apparatus or barrier ≤ 30 V Input: Safe position Positioner PROFIBUS PA ≤ 24 V DP/PA coupling Binary input 1 Figure 35 Electric connection of basic device with in intrinsically safe version Hazardous area Non--hazardous area ≤...
-
Page 69: Connection Variant: Options In Positioner In Non--Intrinsically Safe And Explosion--Proof Version
Preparing for operation 3.4.1 Connection variant: options in positioner in non--intrinsically safe and explosion proof version Current output ≤ 35 V --module: 6DR4004--8J Figure 37 module 6DR4004--8J, non Ex Binary inputs and outputs Alarm module 6DR4004--8A +13 V ≤ 30 V ≥1 Binary input 2 +4.5 V... - Page 70 Preparing for operation SIA module SIA module: 6DR4004--8G 1K21 < 35 V Fault message 8.2 V Limit A1 8.2 V Limit A2 Figure 39 SIA module 6DR4004--8G, non Ex Mechnical limit switch module Limit switch module 6DR4004-8K 1K21 < 35 V Fault message max.
-
Page 71: Connection Variant: Options In The Positioner In Intrinsically Safe Version
Preparing for operation 3.4.2 Connection variant: options in the positioner in intrinsically safe version Current output Non--hazardous area Hazardous area zone 1 or zone 2 ≤ 30 V module: 6DR4004--6J Intrinsically safe power sources Figure 41 module 6DR4004--6J, EEx i Binary inputs and outputs Non--hazardous area Hazardous area zone 1 or zone 2... - Page 72 Preparing for operation SIA module Non--hazardous area Hazardous area zone 1 or zone 2 SIA module: 6DR4004--6G Intrinsically 8.2 V Fault safe message Switching amplifier to EN 50227 8.2 V Limit A1 8.2 V Limit A2 Figure 43 SIA module 6DR4004--8G, EEx i Mechnical limit switch module Hazardous area zone 1 or zone 2 Non-hazardous area...
-
Page 73: Connection Variant: Options In The Positioner In Type Of Protection "N" Version
Preparing for operation 3.4.3 Connection variant: options in the positioner in type of protection ”n” version Current output Non--hazardous area Hazardous area zone 2 ≤ 30 V module 6DR4004--6J Figure 45 module 6DR4004--6J, EEx n Binary inputs and outputs Non--hazardous area Hazardous area zone 2 Alarm module 6DR4004--6A... - Page 74 Preparing for operation SIA module Non--hazardous area Hazardous area zone 2 SIA module 6DR4004--6G 8.2 V Fault message 8.2 V Limit A1 8.2 V Limit A2 Figure 47 SIA module 6DR4004--6G, EEx n SIPART PS2 PA Manual A5E00127926--05...
-
Page 75: Pneumatic Connection
Preparing for operation Pneumatic connection WARNING For reasons of safety, the pneumatic power may only be supplied after assembly when the positioner is switched to operating mode P manual operation with electrical signal applied (as--delivered state, see figure 57, page 94). NOTE Note the air quality! Oil--free industrial air, solid content <... -
Page 76: Commissioning
Preparing for operation Commissioning Once the positioner has been fitted to a pneumatic actuator, it must be provided with electrical and pneumatic auxiliary power. The electrical auxiliary power can be provided via a bus interface or separate power source with 15 to 30 V DC. Then you can then adapt the positioner to the respective actuator by parameterizing and initializing it and setting the bus address. -
Page 77: Preparations For Linear Actuators
Preparing for operation 3.6.1 Preparations for linear actuators Assemble the positioner with the appropriate mounting kit (see chapter 3.3.3, page 39). NOTE Particularly important is the position of the transmission ratio selector (7, figure 8, page 25) in the positioner: Stroke Lever Position of the transmission ratio... -
Page 78: Automatic Initialization Of Linear Actuator
Preparing for operation NOTICE for the explosion proof version: Only adjust the outer friction clutch (8, Fig. 9, page 26). The internal friction clutch (9, Fig. 8 page 25) is fixed and, for the explosion proof version, must not be adjusted. 3.6.2 Automatic initialization of linear actuator If you can move the actuator correctly, leave it standing in a central position and start automatic initialization:... - Page 79 Preparing for operation Switch on to the following display with the operation mode key Start initialization by pressing the key for longer than 5 s. Display: During the initialization phase ”RUN1” to ”RUN5” appear one after another in the bottom display (see also structograms figures 49, page 85 to figure 52, page 88).
-
Page 80: Manual Initialization Of Linear Actuator
Preparing for operation 3.6.3 Manual initialization of linear actuator The positioner can be initialized with this function without the actuator being driven hard against the limit stop. The start and end positions of the stem path are set manually. The other initialization steps (optimization of the control parameters) run automatically as in automatic initialization. - Page 81 Preparing for operation Switch on to the following display by pressing the operation mode key twice: Start initialization by pressing the increment key for longer than 5 s. Display: After 5 s the display changes to: (The display of the potentiometer setting is shown here and below as an example only).
- Page 82 Preparing for operation If step 7 was successful, the following display appears: Now move the actuator to the position which you want to define as the second end position with the increment decrement key. Then press the operation mode key .
-
Page 83: Preparations For Part--Turn Actuator
Preparing for operation 3.6.4 Preparations for part--turn actuator NOTE Very important: Switch the transmission ratio selector in the positioner (8, figure 8, page 25) to position 90° (normal angle for part--turn actuator). Mount the positioner with the appropriate mounting kit (see chapter 3.3.5, page 56). - Page 84 Preparing for operation Set the parameter with the key to ”turn” Display: Switch to the second parameter by pressing the operation mode briefly. This has set automatically to 90°. Display: Switch on to the following display with the operation mode key Start initialization by pressing the key for longer than 5 seconds.
-
Page 85: Manual Initialization Of Part--Turn Actuators
Preparing for operation The following display appears after pressing the operation mode key briefly: To exit the Configuration mode, press the operation mode key longer than 5 seconds. The software version is displayed after about 5 seconds. The instrument is in manual operation after releasing the operation mode key. - Page 86 Preparing for operation Switch to the second parameter by pressing the operation mode briefly. Display: NOTE Make sure that the transmission ratio selector is in position 90 °! Switch on to the following display by pressing the operation mode twice: The following steps are identical with the steps 6) to 9) for initialization of linear actuators.
-
Page 87: Automatic Initialization (Structograms)
Preparing for operation 3.6.7 Automatic initialization (structograms) Linear actuator Part--turn actuator Down Open Closed Figure 48 Direction of action of the actuators The initialization procedure should be taken from the following structogram (figure 49 to figure 52). The terms Open/Closed and up/down in the structogram refer to the direction of action of the actuators as illustrated in figure 48. - Page 88 Preparing for operation actuator moves into closed position turn friction clutch until 0 appears in the bottom line tolerance band of the display 4% < dw < 10% continue with: actuator moves into open position hard stop up < 97 % ? continue with: check mechanics...
- Page 89 Preparing for operation set lever vertical to stem with: continue with: actuator moves continue with: into closed position has friction clutch been moved? continue with: correct height adjustment or turn friction clutch until 0 appears tolerance band in the bottom line 4% <...
- Page 90 Preparing for operation continue with: determine travel times set restrictor(s) to display travel times change the travel flashes times if setting of travel alternating times is desired flashes within alternating 5 s ? display of travel times in s actuator comes to standstill after display of leakage within...
-
Page 91: Copying Initialization Data (Positioner Exchange)
Preparing for operation Copying initialization data (positioner exchange) With this function you have the possibility of starting up a positioner without running the initialization routine. This allows for example a positioner to be changed on a running system in which automatic or manual initialization cannot be performed without disturbing the process. - Page 92 Preparing for operation SIPART PS2 PA Manual A5E00127926--05...
-
Page 93: Operation
Operation Operation The following chapter describes the operation of the positioner. Display The LC display has two lines whereby the lines have different segmentation. The elements of the top line consist of 7, those of the bottom line of 14 segments. The display depends on the selected operating mode (see chapter 4.3, page 94) NOTE If the positioner is operated in ranges with temperatures below --10 °C... - Page 94 Operation Figure 54 Meaning of the various display options SIPART PS2 PA Manual A5E00127926--05...
- Page 95 Operation Display Operation mode key Decrement key Increment key Figure 55 Display and input keys of the positioner Explanations of the input keys The operation mode key (manual key) serves to switch over the operating mode and pass on parameters. NOTE By pressing and holding the operation mode key and additionally pressing the decrement key, you can select the parameters in reverse...
-
Page 96: Operating Modes
Operation Operating modes The positioner can be operated in five operating modes. P--manual mode (ex--factory state) Configuration and initialization Manual mode (MAN) Automatic (AUT) Diagnostic display Figure 57 gives you an overview of the possible operating modes and the change between them. Figure 57 Change between the operating modes SIPART PS2 PA Manual... - Page 97 Operation P--manual mode The display of the positioner shows you the current potentiometer (ex--factory state) setting in the top line and ”NOINI” flashes in the second line. You can move the actuator with the decrement and increment key . In order to adapt the positioner to your actuator, you have to change to the Configuration menu.
- Page 98 Operation at the same time at the same time at the same time at the same time Figure 58 Overview: Configuration Manual mode In this operating mode you can move the actuator with the decrement (MAN) ) and increment keys ( ) and the current position is held regardless of the setpoint current and any leakages.
-
Page 99: Parameters
Operation NOTE The respective operating mode (MAN or AUT) of the positioner is retained when you switch to the diagnostic display, i.e. in automatic operation the specified setpoint is still used for controlling and in manual operation the position last reached is retained. Parameters All the parameters of the positioner are listed in this chapter. - Page 100 Operation ■ SIPART PS2 PA configurations (PROFIBUS version) Parameter- Function Parameter values Dimen- name sion Parameter- Function Parameter values Dimen- 39. BIN2 Function of binary input 2 name sion None 1. YFCT Type of actuator: part-turn/linear Only signal - Part-turn actuator turn Drive valve to ye - Linear actuator...
- Page 101 Operation setpoint tight closing processing function setpoint SDIR YCLS TSUF YCDO TSDO master YCUP SFCT SLO..SL20 actual value adaptive processing five--point position switch YFCT DEBA YAGL YWAY INIT A valve 1 INIT M PRST valve 2 SFCT YNRM alarm binary signal detection processing alarm module...
- Page 102 Operation NOTE In particular if the positioner has previously been operated using a different actuator, it must always be reinitialized in order to restore the factory settings. Only in this way can the positioner matching process start from known conditions. The parameter ”51 PRST” is provided for this purpose.
- Page 103 Operation NOTE After ”LWAY, ncSt, --ncSt or ncSL, ncSLL” have been adjusted, both the following parameters ”2. YAGL” and ”3. YWAY” will not be displayed. 2.YAGL Rated angle of rotation of the feedback shaft In part--turn actuators, an angle of 90° is preset automatically by 1.YFCT = turn (see above).
- Page 104 Operation 4.INITA Automatic initialization (see chapter 3.6, page 74) By selecting ”Strt” and pressing the increment key for at least 5 seconds, automatic initialization is started. The initialization process is displayed by ”RUN 1” to ”RUN 5” (see figure 49, page 85 to figure 52, page 88).
- Page 105 Operation Six valve characteristics are stored in the positioner linear (9.SFCT = Lin, factory setting) equal percentage 1 : 25 (9.SFCT = 1 : 25) equal percentage 1 : 33 (9.SFCT = 1 : 33) equal percentage 1 : 50 (9.SFCT = 1 : 50) inverse equal percentage 25 : 1...
- Page 106 Operation 31.DEBA Dead zone of the controller At dEbA = AUto the dead zone in automatic operation is adapted continuously to the requirements of the control circuit. The dead zone is gradually increased on detecting a control oscillation. The reverse adaptation takes place by a time criterion.
- Page 107 Operation YNRM = MPOS or YNRM = FLOW Presetting: YA = 0% and YE = 100% Input current (setpoint) 7.2mA 10.4mA 13.6mA 16.8mA 20mA X display W display 100% Mechan. Stroke (actual value) 16mm 32mm 48mm 64mm 80mm YA = 0% YE = 100% Example: YNRM = MPOS with YA = 10 % and YE = 80 %...
- Page 108 Operation 36.YCDO Value for tight closing, bottom Value for tight closing, up 37.YCUP NOTE YCDO must always be set to less than YCUP. The tight closing function has a fixed hysteresis of 1 %. ”36.YCDO” and ”37.YCUP” relate to mechanical stops and are independent of the settings of ”6.SDIR”...
- Page 109 Operation 40.AFCT Alarm function There are 6 setting capabilities available: 1. Min 2. Min 3. Max 4. --Min --Max (inverted reporting) 5. --Min --Min (inverted reporting) 6. --Max --Max (inverted reporting) Limit Alarm module SIMATIC A1 = 48 AFCT = MIN / MAX A2 = 52 Travel = 45 Activated...
- Page 110 Operation 41.A1 Response threshold alarm 1 42.A2 Response threshold alarm 2 The alarm thresholds are related to the mechanical path (MPOS--scale). 43. FCT Function of the fault message output If fault messages are used as a monitor for control non--conformities over a period of time, they will be triggered in addition by the following events also: Power failure...
- Page 111 Operation 45. LIM Response threshold of the fault message Here a value (%) can be set for the permissible variable of control error for releasing the fault message. If the parameters ”44. TIM” and ”45. LIM” are both set to ”Auto” (factory setting), the fault message is set if the slow step zone is not reached within a certain time.
- Page 112 Operation 49. OPEN Tolerance value for monitoring the top hard stop With this value a limit value (in percent related to the total mechanical distance) can be preset for the monitoring of the top hard stop. If this tolerance value is exceeded or dropped below of, the fault message output (optional) is activated.
- Page 113 Operation Three settings are possible FSVL the actuator must continue to control with the parameterized safety setpoint. This value will remain effective even after a loss of electrical power. FSSP the actuator must continue to control with the last effective setpoint FSAC (factory setting) here this outlet air valve is opened and the single--acting actuator moves to its final position by spring power.
- Page 114 Operation NOTE Each device operating mode has a particular device master data file (GSD) assigned to it. If the configuration of your PROFIBUS PA channel does not correspond to the device operating mode set, the device will not pick up the cyclic data exchange. The station number and device operating mode cannot be changed during communication with a master of class 1.
-
Page 115: Diagnosis
Operation Diagnosis 4.5.1 Diagnostic display You go to the diagnostic display from automatic or manual operation by simultaneously pressing all three keys for at least two seconds. The following table shows an overview of the displayable values. In the third column the corresponding English term from which the abbreviation is derived is shown next to the German meaning unless this is self explanatory. -
Page 116: Meaning Of The Diagnostic Values
Operation Abbrevia-- Meaning Displayable Unit Rest tion values poss. Number of operating hours in Temperature range 7 0 to 4.29E9 Hours Number of operating hours in Temperature range 8 0 to 4.29E9 Hours Number of operating hours in Temperature range 9 0 to 4.29E9 Hours VENT1... - Page 117 Operation 4 A1CNT Alarm counter 1 5 A2CNT Alarm counter 2 Responses of alarm 1 and alarm 2 are counted with these two counters. The prerequisite is the activation of the alarms with the parameter ”40.AFCT”. The counters can be reset to zero with the increment key 6 HOURS Operating hours...
- Page 118 Operation 13 IMPUP Impulse length up 14 IMPDN Impulse length down During initialization the smallest impulse lengths are determined with which a movement of the actuator can be achieved. They are determined and displayed here for the ”Up”--direction and the ”Down”--direction.
- Page 119 Operation 22 T1 to Number of operating hours in temperature range T1 to T9 30 T9 Statistics how long operation takes place in which temperature ranges is kept in the instrument. To do this, the measured temperature over one hour respectively is averaged and incremented in the counter which is assigned to the corresponding temperature range every hour.
-
Page 120: Online--Diagnosis
Operation 36 WT00 to Number of operating hours in distance class WT00 to WT95 43 WT95 If the positioner is in automatic mode, statistics are constantly kept for how long a valve or a flap has been operated in which section of the setting range. - Page 121 Operation Error Event Parameter Fault message Possible causes code setting disappears when ... Binary input BI1 43. FCT= nAB ... the binary input is no The contact connected to or BI2 active and binary function longer activated the binary input has become BIN1 or BIN2 to active (e.g.
- Page 122 Operation 3 Binary input BI1 or BI2 active A fault message is generated when the binary input is activated at the the corresponding setting of the parameter ”43. FCT”, function of the fault message output and the parameter ”38.BIN1”, function binary input 1.
- Page 123 Operation 8 Monitoring of the dead zone adaptation If the dead zone increases unproportionally in operation in automatic adaptation of the dead zone (parameter 31.DEBA = Auto) this points to an error in the system (e.g. a marked increase in stuffing box friction, play in the displacement detection, leakage).
-
Page 124: Meanings Of Other Display Texts
Operation Meanings of other display texts Notes on the tables: stands for variable numerical values Fault symbol (slash): the texts to the left and right of the slash flash alternately Reports before initializing (first commissioning): Meaning/Cause Actions Report after connecting the electrical S·... - Page 125 Operation Meaning/Cause Actions YEND2 only during manual initialization Move to second end position using second end position can be moved the ”+” or ”--” key Press ”operating mode” key to acknowledge RANGE only during manual initialization Using ”+” and ”--” keys move to the End position or measurement span other end position and press ”opera-- are outwith the permitted...
- Page 126 Operation Meaning/Cause Actions d nn.n Display the positioning time ”Down” Wait, or U-->d To change the positioning time interrupt initialization with the ”--” key, Activate the leakage test with the ”+” NOZZL Actuator stationary (initialization inter- Positioning time can be adjusted by rupted with the ”--”...
- Page 127 Operation Meaning/Cause Actions FS ---- ---- Fail safe (air discharge valve opened). Possible causes No communication Correct station address with master Set target mode to Target mode set to ”automatic” with class 2 ”MA” master Send status ”0x80” Master sending (good) incorrect status FS nn...
-
Page 128: Optimization Of The Control Data
Operation Optimization of the control data The data automatically determined during initialization for control quality are optimized for short duration commands with small overshoots. In special cases (e.g. extremely small and specially quick actuators or when operating with boosters) it can however occur that these data need to be revised to achieve quick responses or heavy damping. -
Page 129: Fault Correction
Operation Fault correction Diagnostics indicator Table In which operating mode did the fault occur? Initialization • Manual mode and automatic mode • Under which circumstances and conditions did the fault occur? Wet environment (e.g. heavy rain or constant condensation) • Vibrating fittings •... - Page 130 Operation Fault description (symp- Possible cause(s) Corrective actions toms) CPU test blinks in the Water in the valve manifold At the early stages the fault can be • • • display of the posi- (from wet compressed air) corrected by subsequent operation tioner (ca.
- Page 131 Operation Fault description (symp- Possible cause(s) Corrective actions toms) The two piezo valve Static friction on the packing Reduce static friction or increase • • • constantly switch glands of the fittings or actuator dead zone of positioner (parameter alternately in stationary too high dEbA) until the oscillating automatic mode...
- Page 132 Operation SIPART PS2 PA Manual A5E00127926--05...
-
Page 133: Functions/Operation Via Profibus Pa
Functions/operation via PROFIBUS PA Functions/operation via PROFIBUS PA System integration The positioner can be controlled and monitored by acyclic and cyclic data transmission by a control system (master). So that the positioner can be in communication as slave with the master, its address must be set up in advance. -
Page 134: Allocate Address
Functions/operation via PROFIBUS PA With SIMATIC PDM the process device data can be displayed, adjusted, changed, compared, checked for plausibility administered and simulated In general, we recommend the following procedure: First of all read the current settings from the device, by initiating the action ”Load to PG/PC”, Check the current settings, Check the required settings,... -
Page 135: Set Maintenance Information
Functions/operation via PROFIBUS PA To see the values displayed, open the ”Device” menu and open the ”Read maintenance information” submenu. Because there is so much information, these are divided amongst several registers: Maintenance information 1 and 2 here the initialization values such as zero point P0, end value P100, positioning times etc. -
Page 136: Operation
Functions/operation via PROFIBUS PA Only by confirming the register ”Reset counter” by pressing the ”Reset maintenance counter” key will the following maintenance counters be reset: Number of 100% strokes (STRKS) Number of changes of direction (CHDIR) Number of fault messages (\CNT) Number of alarms 1 and 2 (A1CNT / A2CNT) 5.2.1.6 Operation... - Page 137 Functions/operation via PROFIBUS PA NOTE Note that the positioner will respond after the transmission with the quality ”Bad” and the status ”value constant”. On leaving this target mode and if no further master sends a setpoint to the positioner, the positioner after the set monitoring period will adopt the parameterized fail safe value.
- Page 138 Functions/operation via PROFIBUS PA Local Overlay (LO) To allow the drive to insist on maintaining the current position, the positioner can be set using the PDM to ”Local Overlay”. In this mode the positioner valves will not be activated, although they can detect any leakage.
-
Page 139: Reset
Functions/operation via PROFIBUS PA Simulation of Simulation functions are of assistance during commissioning pieces of readbacks equipment and positioner. Process values can be generated without output of real positional values. Equally the outputs from the alarm modules and the position value of the Iy module will not be affected by them. -
Page 140: Initialization Parameters
Functions/operation via PROFIBUS PA To remove an positioner from the PROFIBUS line, its address should be restored to 126 using this function, so that in future it can be linked into this or another system if necessary. If a cyclic master is already in communication with the positioner, the address cannot be reset. -
Page 141: Write Protection
This means that it is possible to optimise the quantity of data to be transmitted. The GSD files for all common devices are already stored in the Siemens control system, however they are also accessible over the Internet and can be subsequently imported. - Page 142 Functions/operation via PROFIBUS PA PC or PG (Master class 2) Power supply PROFIBUS DP Bus termination PROFIBUS PA DP/PA Coupler DP/PA Link Splitters MPI cable (is required for commission-- ing and monitoring) SIMATIC S7 (Master class 1) PA devices Figure 64 Example of a small PROFIBUS DP/PA system Here is a small STEP 7 program that established cyclic data transmission with the positioner with PROFIBUS PA.
-
Page 143: User Data Via Profibus
Functions/operation via PROFIBUS PA In this example all fies supported by the device are transmitted in the input or output direction. 256 (W#16#100) is selected as the initial I/O address. Legend Byte 15 15 bytes of input data consisting of the following: READBACK 5 Byte RCAS_OUT... - Page 144 Functions/operation via PROFIBUS PA Checkback The checkback is displayed bit--coded in 3 bytes: Meaning for ”1” Notes Device in failsafe position Position determined by parameter 46 (FSTY) Request for local operation Reports that a key has been pressed Device is operated locally Device locally parameterized (e.g.
- Page 145 Functions/operation via PROFIBUS PA Status The status provides information about the quality of the input or output value. The format of the status is always Quality Additional information Limit value bits Quality 0: bad 1: uncertain 2: good 3: good (cascade) 0: good Grenzwertbit 1: lower limit value reached, exceeded or limited to lower limit value...
- Page 146 Functions/operation via PROFIBUS PA Possible combinations of useful data and position in the address space. For communication of cyclic useful data between the master and the positioner you can select a combination of values during configuration: Setpoint Output (master view) Initial address SP -- Floating--point number...
- Page 147 Functions/operation via PROFIBUS PA Output (master view) Initial address SP -- Floating--point number SP -- status Checkback, setpoint Checkback, SP Input (master view) Initial address CHECKBACK Output (master view) Initial address SP -- Floating--point number SP -- status READBACK, Readback, position discrete, checkback, setpoint CHECKBACK, POS_D, SP Input (master view)
- Page 148 Functions/operation via PROFIBUS PA RCAS_OUT, Remote cascade output, checkback, remote cascade input CHECKBACK, RCAS_IN Input (master view) Initial address RCAS_OUT -- Floating--point number RCAS_OUT -- status CHECKBACK Output (master view) Initial address RCAS_IN -- Floating--point number RCAS_IN -- status READBACK, Readback, remote cascade output, position discrete, checkback, RCAS_OUT, setpoint, remote cascade input...
- Page 149 Functions/operation via PROFIBUS PA Ouptut (master view) Initial address SP -- Floating--point number SP -- status RCAS_IN -- Floating--point number RCAS_IN -- status 5.3.2.1 Status Status gives information regarding: 1. Whether the measured values can be used in the application program 2.
-
Page 150: Status
Functions/operation via PROFIBUS PA Accompanying PDM display Cause Action status code READBACK, POS_D bad, Function block has been For normal operation reinstate out of service, disabled by command. Device target mode ”AUTO” value will move to safety position constant READBACK, POS_D uncertain, Connection is disconnected or Check the connection and... -
Page 151: Diagnostics
Functions/operation via PROFIBUS PA To communicate diagnostic information standard mechanisms within the PROFIBUS--DP can be called upon and an active report made to the class 1 master. PROFIBUS--DP provides a protocol for this to convey information that is of higher precedence than operating data to the class 1 master. -
Page 152: Diagnostics Acc. To Profibus Dp (Ddlm_Slave_Diag)
Functions/operation via PROFIBUS PA Byte Meaning for “1” Cause Action Memory error During operation the memory is Exchange the electronics. continually checked for check sum errors and read / write errors. If an error occurs, this report is generated. Device not initialized The initialization run required for Perform initialization. -
Page 153: Condensed Status
Functions/operation via PROFIBUS PA 5.3.4 Condensed Status Each of the three process variables (FEEDBACK_VALUE, READBACK und POS_D) which the SIPART PS2 PA positioner sends to the Master is accompanied by a status. The “condensed status”, however, redefines the meaning of this status. The user can reposition or reallocate the meaning of each diagnosis event to the diagnosis byte (DIAGNOSIS) and the quality status (status byte) (see Fig. - Page 154 Functions/operation via PROFIBUS PA Figure 67 Choosing the status type when parameterizing the device according to the example HW--config with SIMATIC S7 SIPART PS2 PA Manual A5E00127926--05...
- Page 155 Functions/operation via PROFIBUS PA Figure 68 Selecting the status type when parameterizing the device according to the example SIMATIC PDM When evaluating the device’s status and diagnosis messages by means of SIMATIC PDM, the results are displayed on the user interface as clear text and as a pictogram.
- Page 156 Functions/operation via PROFIBUS PA Configuration warning Configuration changed Process value error Process value uncertain Process value out of tolerance Normal operation lowest Table 11 Icon definitions As shown in Figure 66, each diagnosis event can influence both the Diagnosis events and status / variable’s status and the bits in the DIAGNOSIS byte.
- Page 157 Functions/operation via PROFIBUS PA The following two tables show the configurable diagnosis events. The available option is specified in the “Option” column. An “M”, for exam- ple, means that only the DIAGNOSIS bits and the quality status with the option “M” are available. The meanings of “M”, “F” and “P” have been defined in the two previous tables.
- Page 158 Functions/operation via PROFIBUS PA Simulation mode Depends on simulated quality DIA_FUNCTION_CHECK status Device in TRACE mode Depends on simulated quality DIA_FUNCTION_CHECK status Simulation: diagnosis Depends on simulated value Table 15 Non configurable diagnostic events and their representation in status and DIAGNOSIS DIAGNOSIS and Each diagnosis event has its own bit in the parameters DIAGNOSIS_...
- Page 159 Functions/operation via PROFIBUS PA Simulation mode Device in TRACE mode Diagnosis simulation Table 16 Position of the diagnosis event bits in the parameters DIAGNOSIS_EXTENSION and ACTUAL_DIAGNOSIS_EXTENSION SIPART PS2 PA Manual A5E00127926--05...
- Page 160 Functions/operation via PROFIBUS PA SIPART PS2 PA Manual A5E00127926--05...
-
Page 161: Service And Maintenance
Service and maintenance Service and maintenance The positioner is largely maintenance--free. The positioners are fitted with filters in the pneumatic connections as protection against coarse particles of dirt. This dirt will be deposited under pressure on to the filter and the filters may clog and impair the function of the positioner. In this case the filters can be cleaned as follows. - Page 162 You will find the serial number on the type plate. Address of the responsible repair location, your contact, lists of spare parts etc. can all be found on the Internet, under: www.siemens.com/automation/services&support or www.automation.siemens.com/partner SIPART PS2 PA Manual A5E00127926--05...
-
Page 163: Technical Data
Technical data Technical data (see following pages) SIPART PS2 PA Manual A5E00127926--05... - Page 164 Technical data ■ • Bumping (half-sine) 150 m/s² (492 ft/s²), 6 ms, Technical specifications to DIN EN 60068-2-29/03.95 1000 shocks/axis SIPART PS2 (all versions) • Noise (digitally controlled) 10 ... 200 Hz; 1 (m/s²)²/Hz to DIN EN 60068-2-64/08.95 (3.28 (ft/s²)²/Hz) General data 200 ...
- Page 165 Technical data ■ Technical specifications SIPART PS2 PA Basic device Basic device Basic device Basic device without Ex protection with EEx-d protection with EEx ia/ib protection with EEx n protection (flameproof casing) Explosion protection to Without EEx d EEx ia/ib EEx n EN 50014, EN 50020 and EN 50021 II 2 G EEx d II C T4/T5/T6...
- Page 166 Technical data SIPART PS2 PA Basic device Basic device Basic device Basic device without Ex protection with EEx-d protection with EEx ia/ib protection with EEx n protection (flameproof casing) Communication Layers 1 and +2 according to PROFIBUS PA, transmission technique according to IEC 1158-2; slave function;...
- Page 167 Technical data ■ Technical specifications Option modules Without Ex protection With Ex protection EEx ia/ib With Ex protection EEx n (EEx d also) Ex protection to EN 50014, EN 50020 and – II 2G EEx ia/ib II C T4/T5/T6 II 3G EEx nA L [L] II C T6 EN 50021 Mounting location –...
- Page 168 Technical data Accessory modules Without Ex protection With Ex protection EEx ia/ib With Ex protection EEx n (EEx d also) 6DR4004-8K 6DR4004-6K 6DR4004-6K Limit value contact module Limit transmitter with mechanical ground contact and alarm output Ex protection without II 2 G EEx ia/ib IIC T6 II 3 G EEx nA L [L] IIC T6 Max.
-
Page 169: Scope Of Delivery
Scope of delivery Scope of delivery The positioner and its options modules are delivered as separate units and in different versions. positioners and options modules for operation in hazardous areas and non--hazardous areas are available. These ver- sions are identified respectively by a special rating plate. WARNING In the combination of components it must be ensured that only positioners and options modules are combined which are approved for... -
Page 170: Ordering Data
Scope of delivery Ordering data Selection and ordering data Order No. Selection and ordering data Order No. Electropneumatic positioner 6 D R 5 7 7 7 7 7 7 7 Electropneumatic positioner 6 D R 5 7 7 7 7 7 7 7 SIPART PS2, PS2 PA and PS2 FF SIPART PS2, PS2 PA and PS2 FF Version... -
Page 171: Scope Of Delivery Of Options
Scope of delivery Scope of delivery of options Option Bestellnummer module without explosion protection 6DR4004-8J module with explosion protection PTB 6DR4004-6J modulel with explosion protection FM 6DR4004-7J Alarm module without explosion protection 6DR4004-8A Alarm module with explosion protection PTB 6DR4004-6A Alarm module with explosion protection FM 6DR4004-7A SIA module without explosion protection... -
Page 172: List Of Spare Parts
Scope of delivery List of Spare Parts Spare parts list: SIPART PS2 positioner Description Order No. for version Cover (plastic enclosure) with C73451--A430--D82 6DR4___ screws (4 pcs) and seal 6DR5___ Cover (metal enclosure) with screws C73451--A430--D83 6DR4___ (4 pcs) and seal 6DR5___ Motherboard, two--wire without A5E00082459... -
Page 173: Index
Index Index Dimensional drawings, 45 Display, 91 Accessories, 43 Distance class, 118 Alarm function, 107 Documentation, 11 Alarm module, 37, 71 double--acting, 15, 16 Ex, 69 non Ex, 67 Application positioner in a wet environment, 48 Electrical connection, 26, 62 under great accelerations or vibrations, EMV--filter module, 43 Assembly, 47... - Page 174 Index Linear actuator, 15, 16 Purge air switching, 29 automatic initialization, 76 manual initialization, 78 preparation, 75 Literatur, 173 Qualified Personnel, 9 Rating Plate, 25 Maintenance, 159 Regulations, 12 Manometer block, 43 Reset, 110 Manual mode Restrictors, 29 Changing the operating mode, 96 Rotary actuator P manual mode, 95 automatic initialization, 81...
-
Page 175: Appendix
Issued by Order number PNO guide PNO-- 2.091 PROFIBUS PA Technologiefabrik Haid-und-Neu-Str. 7 D--76131 Karlsruhe SIMATIC field technology package Siemens AG Internet address: http://www.ad.siemens.de:80 80/virlib/html_00/ doc/index.htm on: Profibus descriptions (free) / system description / PA system description, German ST PI catalog... -
Page 176: Certificates
Appendix 10.2 Certificates The certificates are enclosed as a collection of loose leaves in the ope- rating instructions (or on CD). SIPART PS2 PA Manual A5E00127926--05... - Page 178 Siemens Aktiengesellschaft @ 1 P A 5 E 0 0 1 2 7 9 2 6 @ Automation and Drives A5E00127926 Process Instrumentation and Analytics 76181 KARLSRUHE GERMANY www.siemens.com/processinstrumentation A5E00127926-05...