Delta AH500 Manual
Hide thumbs
Also See for AH500:
- Programming manual (749 pages) ,
- Hardware operation manual (681 pages) ,
- Hardware manual (229 pages)
Table of Contents
Advertisement
Quick Links
Advertisement
Chapters
Table of Contents
Troubleshooting

Related Manuals for Delta AH500


Summary of Contents for Delta AH500
- Page 1 AH-0109820-06 2018-04-12...
- Page 2 AH500 Module Manual Revision History Ve r s i o n R e vi s i o n D a t e T h e f i r s t v e r s i o n w a s p u b l i s h e d .
- Page 3 Ve r s i o n R e vi s i o n D a t e i n s ta l l a t i o n i m a g e s a n d e r r o r c o d e s . C h a p t e r 11 : u p d a t e t h e l e n g t h W o f A H B P 0 6 E 1 - 5 A 1 0 .
-
Page 5: Table Of Contents
AH500 Module Manual Table of Contents Chapter 1 Introduction Overview ....................1-2 Specifications ....................1-4 1.2.1 General Specifications ................1-4 1.2.2 EMC Standards ..................1-4 1.2.2.1 EMI ....................1-4 1.2.2.2 EMS ....................1-4 1.2.2.3 Conducted Immunity Test ............1-5 Chapter 2 Analog Input Module AH04AD/AH08AD Overview ....................2-2 2.1.1... - Page 6 Overview ....................3-2 3.1.1 Characteristics ................... 3-2 Specifications and Functions ..............3-2 3.2.1 Specifications ..................3-2 3.2.2 Profile ....................3-4 3.2.3 Dimensions ..................3-5 3.2.4 Arrangement of Terminals ..............3-6 3.2.5 Functions ................... 3-6 Installation ....................3-10 3.3.1 Installing a Module ................3-10 3.3.2 Installing a Removable Terminal Block ..........
- Page 7 HWCONFIG in ISPSoft ................4-19 4.4.1 Initial Setting ..................4-19 4.4.2 Checking the Version of a Module............ 4-22 4.4.3 Monitoring Table ................4-23 4.4.4 Online Mode ..................4-25 4.4.5 Importing/Exporting a Parametr File ..........4-26 4.4.6 Parameters ..................4-27 Troubleshooting ..................4-32 4.5.1 Error Codes ..................
- Page 8 5.2.3 Specifications ................... 5-39 5.2.4 Profile ....................5-40 5.2.5 Dimensions ..................5-41 5.2.6 Arrangement of Terminals ............... 5-41 5.2.7 Functions ..................5-42 5.2.8 Installation ..................5-50 5.2.8.1 Installing a Module ..............5-50 5.2.8.2 Installing a Removable Terminal Block ........5-51 5.2.9 Wiring ....................
- Page 9 6.4.3 Monitoring Table ................6-21 6.4.4 Online Mode ..................6-23 6.4.5 Importing/Exporting a Parametr File ..........6-24 6.4.6 Parameters ..................6-25 Troubleshooting ..................6-34 6.5.1 Error Codes ..................6-34 6.5.2 Troubleshooting Procedure .............. 6-36 Chapter 7 High-speed Counter Module AH02HC/AH04HC Introduction ....................7-2 7.1.1 Characteristics ...................7-2...
- Page 10 Modbus Advance ................8-34 8.6.5 COM Port History ................. 8-34 Application ....................8-35 8.7.1 Modbus..................8-35 8.7.1.1 Modbus Slave─Connection with Delta Products ....... 8-36 8.7.1.2 Modbus Master─Connection with Delta Products ..... 8-38 8.7.2 Connecting to ISPSoft ..............8-46 8.7.3 RS-485/RS232 ................8-47 8.7.3.1...
- Page 11 9.1.4 Profile ....................9-3 9.1.5 RJ-45 Port ..................9-4 Installation and Wiring ................9-4 9.2.1 Installation ..................9-4 9.2.2 Connecting to the Network ..............9-5 Registers ....................9-5 9.3.1 Functions of the Input Registers ............9-5 9.3.2 Functions of the Output Registers ............9-6 9.3.3 Functions of the Control Registers .............9-7 9.3.4 Introduction of the Related Instructions ..........
- Page 12 10.3.4 Choice and Purpose of a DeviceNet Terminal Resistor ....10-12 10.3.5 DeviceNet Network Supply Power ..........10-13 10.4 Configuration of AH10DNET-5A ............10-14 10.4.1 Data Mapping Areas ..............10-14 10.4.2 Assignment of Mapping Area (in Master Mode) ......10-14 10.4.3 Assignment of Mapping Area (in Slave Mode) ......
- Page 13 11.2.2 Profile ................... 11-5 11.2.3 DeviceNet Communication Connector .......... 11-6 11.2.4 Address Switch ................11-6 11.2.5 Function Switch ................11-7 11.2.6 CPU Interface ................11-7 11.3 Basic Installation of AHRTU-DNET-5A ..........11-7 11.3.1 Installing AHRTU-DNET-5A on the Rack ........11-7 11.3.2 Applicable Modules during Installation ........
- Page 14 11.6 AH10SCM-5A Application Example ........... 11-77 11.6.1 Hardware Configuration ............. 11-77 11.6.2 AH10SCM-5A Configuration ............11-78 11.6.2.1 Configuration of AH10SCM-5A Parameters ......11-78 11.6.2.2 Configuration of AH10SCM-5A Serial Port Data ..... 11-82 11.6.2.3 Downloading AH10SCM-5A Serial Port Configuration .... 11-98 11.6.3 Execution by Trigger ..............
- Page 15 …………………………………………………………………..12-11 12.4.2.2 Using AH10PFBM-5A to Create the ROFIBUS DP Network ... 12-12 12.4.3 Notes on Network Wiring ............12-13 12.5 Configuration of AH10PFBM-5A in AH PLC ........12-14 12.6 AH10PFBM-5A Application Example ..........12-22 12.6.1 Control Requirement ..............12-22 12.6.2 Connection Figure ..............12-22 12.6.3 Slave Module Setting ..............
- Page 16 13.6 GSD File ....................13-8 13.7 Mapping Area of AH10PFBS-5A ............13-8 13.7.1 Configuration Options AH10PFBS-5A Supports ......13-8 13.7.2 Mapping Relations between AH10PFBS-5A and a Master ... 13-9 13.7.3 Options Setting of I/O Data When AH10PFBS-5A is Offline ..13-10 13.8 LED Indicator and Troubleshooting ...........
- Page 17 14.7 Mapping Areas in AHRTU-PFBS-5A ..........14-13 14.7.1 Configuration of AH10PFBM-5A Master in Hardware ....14-13 14.7.2 Configuration of PROFIBUS DP Network ........14-17 14.7.3 Mapping relationships between AHRTU-PFBS-5A and Master..................14-45 14.8 LED Indicator and Trouble-shooting ...........14-49 14.8.1 RUN and NET Indicators ............14-49 14.8.2 Digital Display ................
- Page 18 Station.. ………………………………………………………………15-22 15.5 Sending SDOs and NMT, and Reading Emergencies by Functions Blocks ………………………………………………………………………………15-23 15.5.1 Principle..................15-23 15.5.2 Sending an SDO Command ............15-24 15.5.3 Sending an NMT Command ............15-27 15.5.4 Reading Emergency Messages ..........15-29 15.5.5 Obtaining the States of the Slave Stations on a CANopen Network .......................
- Page 19 Chapter 1 Introduction Table of Contents Overview ....................1-2 Specifications ................... 1-4 1.2.1 General Specifications ............... 1-4 1.2.2 EMC Standards ................. 1-4 1.2.2.1 EMI ..................... 1-4 1.2.2.2 EMS ................... 1-4 1.2.2.3 Conducted Immunity Test ............1-5 1 - 1...
-
Page 20: Ah500 Module Manual
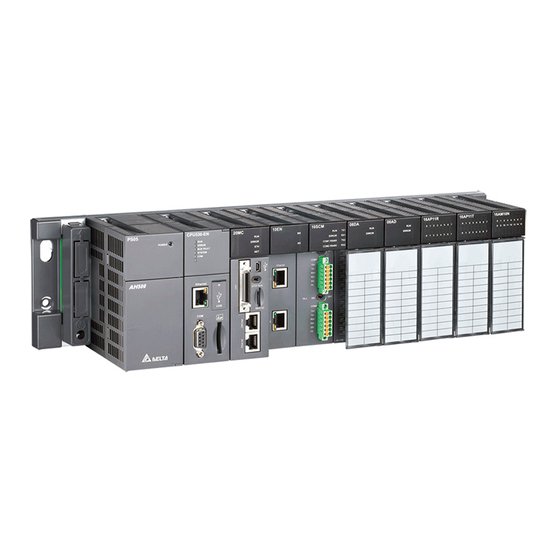
AH 5 00 Mo d u le Ma n ua l 1.1 Overview This manual introduces the usage of special modules. Analog input/output modules, temperature measurement modules, motion control modules, and network modules are special modules. They are described below. Classification Model Name Description... -
Page 21: Chapter 1 Introduction
Ch a pt er 1 In tr od uc t i o n Classification Model Name Description Four-channel four-wire/three-wire RTD Sensor type: Pt100/Pt1000/Ni100/Ni1000 sensor, and 0~300 Ω input impedance AH04PT-5A Resolution: 0.1 ℃/0.1 ℉ (16 bits) Four-wire conversion time: 150 ms/channel Three-wire conversion time: 300 ms/channel Eight-channel four-wire/three-wire/two-wire RTD Sensor type: Pt100/Pt1000/Ni100/Ni1000, and 0~300 Ω... -
Page 22: Specifications
AH 5 00 Mo d u le Ma n ua l 1.2 Specifications 1.2.1 General Specifications Item Specifications Operating -20~60°C temperature Storage temperature -40~70°C 5~95% Operating humidity No condensation 5~95% Storage humidity No condensation Vibration/Shock International standards IEC61131-2, IEC 68-2-6 (TEST Fc)/IEC61131-2 resistance &... -
Page 23: Conducted Immunity Test
Ch a pt er 1 In tr od uc t i o n 1.2.2.3 Conducted Immunity Test Fast transient High energy Radio frequency Environmental phenomenon burst surge interference Reference standard IEC 61000-4-4 IEC 61000-4-5 IEC 61000-4-6 Specific Interface/Port Test level Test level Test level interface/port... - Page 24 AH 5 00 Mo d u le Ma n ua l MEMO 1 - 6...
-
Page 25: Chapter 2 Analog Input Module Ah04Ad/Ah08Ad
Chapter 2 Analog Input Module AH04AD/AH08AD Table of Contents Overview ....................2-2 2.1.1 Characteristics ...................2-2 Specifications and Functions ..............2-2 2.2.1 Specifications ..................2-2 2.2.2 Profile ....................2-4 2.2.3 Dimensions ..................2-5 2.2.4 Arrangement of Terminals ..............2-6 2.2.5 Functions ....................2-7 Installation ....................2-11 2.3.1 Installing a Module ................2-11 2.3.2 Installing a Removable Terminal Block .......... -
Page 26: Overview
AH5 00 Mod ule Manua l 2.1 Overview The specifications for analog-to-digital modules, the operation, and the programming are described in this chapter. AH04AD-5A, AH08AD-5A, AH08AD-5B, and AH08AD-5C are analog-to-digital modules. 2.1.1 Characteristics (1) A module is selected according to practical application. AH04AD-5A: There are four channels. - Page 27 Ch ap te r 2 Ana lo g In pu t M odule AH04 AD /AH0 8AD Functional specifications Analog-to-digital Voltage input conversion -10 V~10 V 0 V~10 V ±5 V 0 V~5 V 1 V~5 V Rated input range Hardware input -10.1 V~10.1 V -0.1 V~10.1 V -5.05 V~5.05 V -0.05 V~5.05 V 0.95 V~5.05 V range...
-
Page 28: Profile
AH5 00 Mod ule Manua l 2.2.2 Profile AH04AD-5A/AH08AD-5B/AH08AD-5C 04AD 08AD 08AD RU N RU N RU N E RROR E RROR E RROR S LD S LD S LD S LD -10~+10V 20mA -20~+20mA -10~+10V 0/4~ 20m A ... -
Page 29: Dimensions
Ch ap te r 2 Ana lo g In pu t M odule AH04 AD /AH0 8AD Number Name Description Clip Removing the terminal block Label Nameplate Set screw Fixing the module Connector Connecting the module and a backplane Projection Fixing the module 2.2.3 Dimensions ... -
Page 30: Arrangement Of Terminals
AH5 00 Mod ule Manua l AH08AD-5A 123.4 Unit: mm 2.2.4 Arrangement of Terminals AH04AD-5A AH08AD-5A AH08AD-5B AH08AD-5C 08AD 08AD 08AD 04AD RU N RU N RU N E RROR E RRO R ERROR E RROR S LD S LD S LD S LD -10~+10V... -
Page 31: Functions
Ch ap te r 2 Ana lo g In pu t M odule AH04 AD /AH0 8AD 2.2.5 Functions HWCONFIG, built-in utility software in ISPSoft, can be used to set a module. Users can set modes and parameters by means of HWCONFIG. Item Function Description... - Page 32 AH5 00 Mod ule Manua l Signals after the calibration Original signals (X2, Y2) (10 V, 9.95) -10 V Voltage (X) 10 V (X1, Y1) (0 V, -0.05) Digital value (Y) (X: Analog signal; Y: Digital value) Example 2: The inputs received by a channel are voltages in the range of -10.0 V to +10.0 V. The original signals are used.
- Page 33 Ch ap te r 2 Ana lo g In pu t M odule AH04 AD /AH0 8AD 3. Average Digital values are averaged. The number by which the sum of several digital values is divided is between 1 and 100. The sampled values are taken as a queue, and the length of the queue is N. Each time a new sampled value is put at the end of the queue, an original value at the start of the queue is removed.
- Page 34 AH5 00 Mod ule Manua l Channel detection No (No detection) Enabling There are no error logs physical range in the CPU module detection and the analog module. No (Warning) Giving alarms The BUS FAULT LED The warning indicator on the CPU LED indicators module and the ERROR blink.
-
Page 35: Installation
Ch ap te r 2 Ana lo g In pu t M odule AH04 AD /AH0 8AD b. Interrupt service routine The procedure below explains how to trigger an interrupt service routine in a CPU module. Channel detection Alarm/Warning No (No detection) Enabling physical range detection... - Page 36 AH5 00 Mod ule Manua l AH08AD-5A 3. Tighten the screw on the module. AH04AD-5A/AH08AD-5B/AH08AD-5C AH08AD-5A 2 - 1 2...
-
Page 37: Installing A Removable Terminal Block
Ch ap te r 2 Ana lo g In pu t M odule AH04 AD /AH0 8AD 2.3.2 Installing a Removable Terminal Block Installation 1. Level a terminal block at the printed circuit board, and press it into the module. ... - Page 38 AH5 00 Mod ule Manua l 2. Press the clip in the direction indicated by the arrow, or use a slotted screwdriver to tighten the screws on the two sides of the high-density terminal block. AH04AD-5A/AH08AD-5B/AH08AD-5C AH08AD-5A Removal 1.
- Page 39 Ch ap te r 2 Ana lo g In pu t M odule AH04 AD /AH0 8AD AH08AD-5A 2. Pull up the clip. AH04AD-5A/AH08AD-5B/AH08AD-5C AH08AD-5A 2 - 1 5...
-
Page 40: Wiring
AH5 00 Mod ule Manua l 3. The terminal block is removed. AH04AD-5A/AH08AD-5B/AH08AD-5C AH08AD-5A 2.3.3 Wiring Precautions In order to make the functions of an analog-to-digital module perfect and ensure the reliability of a system at the same time, external wiring which prevents noise is necessary. Before installing cables, users need to follow the precautions below. - Page 41 Ch ap te r 2 Ana lo g In pu t M odule AH04 AD /AH0 8AD External wiring (1) AH04AD-5A/AH08AD-5A Four-wire connection: Voltage input Shielded cable*1 -10V ~+10V +24V VI0- Four-wire connection: Current input Shielded cable*1 -20mA~+20mA +24V VI1- Two-wire connect ion: Current input 4mA~+20mA...
- Page 42 AH5 00 Mod ule Manua l (2) AH08AD-5B Four-wire connection: Voltage input Shielded cable*1 -10V~+10V +24V Example: Position transducer or proportioning valve Three-wire connection: Voltage input Shielded cable*1 -10V ~+10V +24V Example: Position transducer or proportioning valve *1. Please use a shielded cable as an analog input cable, and isolate the shielded cable from other power cables.
-
Page 43: Led Indicators
Ch ap te r 2 Ana lo g In pu t M odule AH04 AD /AH0 8AD *1. Please use a shielded cable as an analog input cable, and isolate the shielded cable from other power cables. *2. Please connect the terminal SLD to the ground terminal 2.3.4 LED Indicators Number Name... - Page 44 AH5 00 Mod ule Manua l (2) Click I/O scan on the toolbar. (3) ISPSoft is scanning the actual hardware configuration. 2 - 2 0...
- Page 45 Ch ap te r 2 Ana lo g In pu t M odule AH04 AD /AH0 8AD (4) After the scan of the actual hardware configuration is complete, the system automatically assigns the corresponding registers to the channels. Users can alter the input device range by themselves.
-
Page 46: Checking The Version Of A Module
AH5 00 Mod ule Manua l (7) Set the parameters, and then click OK. (8) Click Download on the toolbar to download the parameters. (The parameters can not be downloaded when the CPU module runs.) 2.4.2 Checking the Version of a Module (1) On the Option menu, click Online Mode. -
Page 47: Monitoring Table
Ch ap te r 2 Ana lo g In pu t M odule AH04 AD /AH0 8AD (2) Right-click the module, and then click Module Information on the context menu. The version of the firmware and that of the hardware are displayed. 2.4.3 Monitoring Table (1) Select the Monitor checkboxes at the right sides of the corresponding registers. - Page 48 AH5 00 Mod ule Manua l (2) On the Option menu, click Online Mode. (3) On the Option menu, click Monitor Table. The registers are monitored. 2 - 2 4...
-
Page 49: Online Mode
Ch ap te r 2 Ana lo g In pu t M odule AH04 AD /AH0 8AD 2.4.4 Online Mode (1) Click Online Mode on the toolbar. (2) Double-click the module. (3) If some parameters are altered, users can click SVPV. The new setting values are written into the CPU module and the I/O module. -
Page 50: Importing/Exporting A Parameter File
AH5 00 Mod ule Manua l 2.4.5 Importing/Exporting a Parameter File (1) After Export is clicked, the parameters will be saved as a CSV file (.csv). 2 - 2 6... -
Page 51: Parameters
Ch ap te r 2 Ana lo g In pu t M odule AH04 AD /AH0 8AD (2) Click Import, and then click the CSV file. 2.4.6 Parameters 2 - 2 7... - Page 52 AH5 00 Mod ule Manua l (1) The input modes of the channels Module name AH04AD-5A AH08AD-5A AH08AD-5B AH08AD-5C 0: The channel is 0: The channel is 0: The channel is 0: The channel is disabled. disabled. disabled. disabled. 1: -10 V~10 V 1: -10 V~10 V 1: -10 V~10 V 1: 0 mA~20 mA...
- Page 53 Ch ap te r 2 Ana lo g In pu t M odule AH04 AD /AH0 8AD (3) The offsets and the gains used for calibration (4) The scale range (5) The channel alarm 2 - 2 9...
- Page 54 AH5 00 Mod ule Manua l Bit 0~bit 7: CH0~CH7 (The physical range detection) (ON: Enable; OFF: Disable) Description Bit 8~bit 15: CH0~CH7 (Giving an alarm or a warning) (ON: Alarm; OFF: Warning) (6) Enabling the interrupts Bit 0~bit 7: CH0~CH7 (The interrupt service routines) Description (ON: Enable;...
- Page 55 Ch ap te r 2 Ana lo g In pu t M odule AH04 AD /AH0 8AD (8) Setting the warning LED indicator Bit 0~bit 7: CH0~CH7 (Warning LED indicator) Description (ON: Flash; OFF: Not flash) (9) The conversion flags Bit 0~bit 7: The signals received by CH0~CH7 exceed the range of inputs which can be received by the hardware.
-
Page 56: Troubleshooting
AH5 00 Mod ule Manua l 2.5 Troubleshooting 2.5.1 Error Codes ERROR Error RUN LED Type Description Code indicator indicator 16#A600 Alarm Hardware failure 16#A601 Alarm The external voltage is abnormal. Internal error 16#A603 Alarm The factory correction is abnormal. The signal received by channel 0 exceeds the range 16#A400 Alarm... -
Page 57: Troubleshooting Procedure
Ch ap te r 2 Ana lo g In pu t M odule AH04 AD /AH0 8AD ERROR Error RUN LED Type Description Code indicator indicator The signal received by channel 5 exceeds the range 16#A805 Warning of inputs which can be received by the hardware. The signal received by channel 6 exceeds the range 16#A806 Warning... - Page 58 AH5 00 Mod ule Manua l MEMO 2 - 3 4...
- Page 59 Chapter 3 Analog Output Module AH04DA/AH08DA Table of Contents Overview ....................3-2 3.1.1 Characteristics ...................3-2 Specifications and Functions ..............3-2 3.2.1 Specifications ..................3-2 3.2.2 Profile ....................3-4 3.2.3 Dimensions ..................3-5 3.2.4 Arrangement of Terminals ..............3-6 3.2.5 Functions ....................3-6 Installation ....................3-10 3.3.1 Installing a Module ................3-10 3.3.2 Installing a Removable Terminal Block ..........
- Page 60 AH5 00 Mod ule Manua l 3.1 Overview An analog output module receives four/eight pieces of 16-bit digital data from a CPU module. The digital data is converted into analog signals (voltages or currents). The analog signals are sent by the four/eight channels on the analog output module.
-
Page 61: Chapter 3 Analog Output Module Ah04Da/Ah08Da
Ch ap te r 3 Ana lo g Ou tpu t Modu le AH0 4DA/AH08D A Functional specifications Analog-to-digital Voltage output conversion Rated output ±10 V 0 V~10 V ±5 V 0 V~5 V 1 V~5 V range Hardware -10.1 V~10.1 V -0.1 V~10.1 V -5.05 V~5.05 V -0.05 V~5.05 V 0.95 V~5.05 V output range Fiducial error ±0.02%... -
Page 62: Profile
AH5 00 Mod ule Manua l 3.2.2 Profile AH04DA-5A/AH08DA-5B/AH08DA-5C 04DA 08DA 08DA ERROR ERROR ERROR -10~+10V 0/4~+2 0mA -10~+10 V 0/4~20mA AH08DA-5A 08DA RU N ERRO R IO 0 IO 4 V O0 IO 1 IO 5 V O1 IO 2 IO 6 V O2... -
Page 63: Dimensions
Ch ap te r 3 Ana lo g Ou tpu t Modu le AH0 4DA/AH08D A Number Name Description Description of the Simple specifications for the module outputs Clip Removing the terminal block Label Nameplate Set screw Fixing the module Connector Connecting the module and a backplane Projection... -
Page 64: Arrangement Of Terminals
AH5 00 Mod ule Manua l 3.2.4 Arrangement of Terminals AH04DA-5A AH08DA-5A AH08DA-5B AH08DA-5C 04DA 08DA 08DA 08DA RU N ERROR ERROR ERROR E RRO R IO 0 IO 4 V O0 V O4 IO 1 IO 5 V O1 V O5 IO 2 IO 6... - Page 65 Ch ap te r 3 Ana lo g Ou tpu t Modu le AH0 4DA/AH08D A Example 1: The outputs sent by a channel are voltages in the range of -10.0 V to +10.0 V. The original signals are used. The gain is 1, and the offset is 0. The digital value received by the channel is 0, and the voltage measured is -0.05 V.
- Page 66 AH5 00 Mod ule Manua l (X2, Y2) (10, 10.1 V) Original signals 10.1 V 10 V Signals after the calibration Digital value (X) (X1, Y1) (0, 0 V) -10 V Voltage (Y) (X: Digital value; Y: Analog signal) 3. Scale range The analog output mode of a channel has a corresponding digital range.
- Page 67 Ch ap te r 3 Ana lo g Ou tpu t Modu le AH0 4DA/AH08D A 4. Retaining an output When a module stops running, a signal sent by the module is retained. The output is not retained: Analog signal Output signal Time The module stops running.
-
Page 68: Installation
AH5 00 Mod ule Manua l 3.3 Installation 3.3.1 Installing a Module Insert a module into a slot, make sure that the module is installed on the backplane properly, and tighen the the screw, as illustrated below. 1. Insert the projection under the module into the hole in the backplane. 2. - Page 69 Ch ap te r 3 Ana lo g Ou tpu t Modu le AH0 4DA/AH08D A 3. Tighten the screw on the module. AH04DA-5A/AH08DA-5B/AH08DA-5C AH08DA-5A 3 - 11...
-
Page 70: Installing A Removable Terminal Block
AH5 00 Mod ule Manua l 3.3.2 Installing a Removable Terminal Block Installation 1. Level a terminal block at the printed circuit board, and press it into the module. AH04DA-5A/AH08DA-5B/AH08DA-5C AH08DA-5A 3 - 1 2... - Page 71 Ch ap te r 3 Ana lo g Ou tpu t Modu le AH0 4DA/AH08D A 2. Press the clip in the direction indicated by the arrow, or use a slotted screwdriver to tighten the screws on the two sides of the high-density terminal block. ...
- Page 72 AH5 00 Mod ule Manua l 2. Pull up the clip. AH04DA-5A/AH08DA-5B/AH08DA-5C AH08DA-5A 3 - 1 4...
-
Page 73: Wiring
Ch ap te r 3 Ana lo g Ou tpu t Modu le AH0 4DA/AH08D A 3. The terminal block is removed. AH04DA-5A/AH08DA-5B/AH08DA-5C AH08DA-5A 3.3.3 Wiring Precautions In order to make the functions of a digital-to-analog module perfect and ensure the reliability of a system at the same time, external wiring which prevents noise is necessary. - Page 74 AH5 00 Mod ule Manua l External wiring (1) AH04DA-5A/AH08DA-5A AC moto r dr ive , Vol tage o utp ut r ecor de r .. . pr op or tion in g val ve -10 V~+10V VO 0 S hie ld ed ca ble 1 * SL D AC moto r dr ive ,...
-
Page 75: Led Indicators
Ch ap te r 3 Ana lo g Ou tpu t Modu le AH0 4DA/AH08D A *3. Please connect the ground in the shielded cable to the terminal SG. *4. Once AH08DA-5B is installed on a backplane, the connection between the terminal SG on AH08DA-5B and the terminal on the backplane will be a short circuit. -
Page 76: Hwconfig In Ispsoft
AH5 00 Mod ule Manua l 3.4 HWCONFIG in ISPSoft 3.4.1 Initial Setting (1) Start ISPSoft, and then double-click HWCONFIG. (2) Click I/O scan on the toolbar. 3 - 1 8... - Page 77 Ch ap te r 3 Ana lo g Ou tpu t Modu le AH0 4DA/AH08D A (3) ISPSoft is scanning the actual hardware configuration. (4) After the scan of the actual hardware configuration is complete, the system automatically assigns the corresponding registers to the channels. Users can alter the output device range by themselves.
- Page 78 AH5 00 Mod ule Manua l (6) Open the Parameter Setting window. (7) Set the parameters, and then click OK. (8) Click Download on the toolbar to download the parameters. (The parameters can not be downloaded when the CPU module runs.) 3 - 2 0...
-
Page 79: Checking The Version Of A Module
Ch ap te r 3 Ana lo g Ou tpu t Modu le AH0 4DA/AH08D A 3.4.2 Checking the Version of a Module (1) On the Option menu, click Online Mode. (2) Right-click the module, and then click Module Information on the context menu. The version of the firmware and that of the hardware are displayed. -
Page 80: Monitoring Table
AH5 00 Mod ule Manua l 3.4.3 Monitoring Table (1) Select the Monitor checkboxes at the right sides of the corresponding registers. (2) On the Option menu, click Online Mode. 3 - 2 2... -
Page 81: Online Mode
Ch ap te r 3 Ana lo g Ou tpu t Modu le AH0 4DA/AH08D A (3) On the Option menu, click Monitor Table. The registers are monitored. 3.4.4 Online Mode (1) Click Online Mode on the toolbar. (2) Double-click the module. 3 - 2 3... -
Page 82: Importing/Exporting A Parameter File
AH5 00 Mod ule Manua l (3) If some parameters are altered, users can click SVPV. The new setting values are written into the CPU module and the I/O module. If users want to read the present values in the I/O module, they can click Refresh. - Page 83 Ch ap te r 3 Ana lo g Ou tpu t Modu le AH0 4DA/AH08D A (2) Click Import, and then click the CSV file. 3 - 2 5...
-
Page 84: Parameters
AH5 00 Mod ule Manua l 3.4.6 Parameters (1) The output modes of the channels 3 - 2 6... - Page 85 Ch ap te r 3 Ana lo g Ou tpu t Modu le AH0 4DA/AH08D A Module AH04DA-5A AH08DA-5A AH08DA-5B AH08DA-5C name 0: The channel is 0: The channel is 0: The channel is 0: The channel is disabled. disabled. disabled.
- Page 86 AH5 00 Mod ule Manua l (4) Retaining the outputs Bit 0~bit 7: Retaining the outputs sent by CH0~CH7 Description (ON: The output is retained. OFF: The output is cleared.) (5) The error codes Bit 0~bit 14: Reserved Description Bit 15: The external voltage is abnormal. 3 - 2 8...
-
Page 87: Troubleshooting
Ch ap te r 3 Ana lo g Ou tpu t Modu le AH0 4DA/AH08D A 3.5 Troubleshooting 3.5.1 Error Codes ERROR Error RUN LED Type Description Code indicator indicator 16#A600 Error Hardware failure 16#A601 Error The external voltage is abnormal. 3.5.2 Troubleshooting Procedure Description Procedure... - Page 88 AH5 00 Mod ule Manua l MEMO 3 - 3 0...
-
Page 89: Chapter 4 Analog Input/Output Module Ah06Xa
Chapter 4 Analog Input/Output Module AH06XA Table of Contents Overview ....................4-2 4.1.1 Characteristics ...................4-2 Specifications and Functions ..............4-2 4.2.1 Specifications ..................4-2 4.2.2 Profile ....................4-5 4.2.3 Dimensions ..................4-6 4.2.4 Arrangement of Terminals ..............4-6 4.2.5 Functions ....................4-7 Installation ....................4-15 4.3.1 Installing a Module ................4-15 4.3.2 Installing a Removable Terminal Block .......... -
Page 90: Overview
AH5 00 Mod ule Manua l 4.1 Overview The specifications for an analog input/output module, the operation, and the programming are described in this chapter. Analog signals (voltages or currents) are received by four channels on an analog input/output module, and are converted into 16-bit digital signals. Besides, the analog input/output module receives two pieces of 16-bit digital data from a CPU module. - Page 91 C h ap te r 4 A na lo g In pu t /O u tput Mo du le A H 0 6X A Functional specifications for the analog-to-digital conversion Analog-to-digital Voltage input conversion -10 V~10 V 0 V~10 V ±5 V 0 V~5 V 1 V~5 V...
- Page 92 AH5 00 Mod ule Manua l Digital-to-analog Current output conversion 0 mA~20 mA 4 mA~20 mA Rated output range Hardware output -0.2 mA~20.2 mA 3.8 mA~20.2 mA range Fiducial error (Room ±0.06% temperature) Fiducial error (Full ±0.07% temperature range) Linearity error (Room ±0.01% temperature) Linearity error (Full...
-
Page 93: Profile
C h ap te r 4 A na lo g In pu t /O u tput Mo du le A H 0 6X A 4.2.2 Profile 06XA ERROR 10V, 20mA 10V,0/4~20mA Number Name Description Model name Model name of the module Operating status of the module RUN LED ON: The module is running. -
Page 94: Dimensions
AH5 00 Mod ule Manua l 4.2.3 Dimensions Unit: mm 4.2.4 Arrangement of Terminals AH06XA-5A 06XA ERROR ± 10V, ± 20mA 10V,0/4~20mA ± 4 - 6... -
Page 95: Functions
C h ap te r 4 A na lo g In pu t /O u tput Mo du le A H 0 6X A 4.2.5 Functions HWCONFIG, built-in utility software in ISPSoft, can be used to set a module. Users can set modes and parameters by means of HWCONFIG. - Page 96 AH5 00 Mod ule Manua l Signals after the calibration Original signals (X2, Y2) (10 V, 9.95) -10 V Voltage (X) 10 V (X1, Y1) (0 V, -0.05) Digital value (Y) (X: Analog signal; Y: Digital value) Example 2: The inputs received by a channel are voltages in the range of -10.0 V to +10.0 V. The original signals are used.
- Page 97 C h ap te r 4 A na lo g In pu t /O u tput Mo du le A H 0 6X A 3. Average Digital values are averaged. The number by which the sum of several digital values is divided is between 1 and 100.
- Page 98 AH5 00 Mod ule Manua l Channel detection No (No detection) Enabling There are no error logs physical range in the CPU module detection and the analog module. No (Warning) Giving alarms The BUS FAULT LED The warning indicator on the CPU LED indicators module and the ERROR blink.
- Page 99 C h ap te r 4 A na lo g In pu t /O u tput Mo du le A H 0 6X A b. Interrupt service routine The procedure below explains how to trigger an interrupt service routine in a CPU module.
- Page 100 AH5 00 Mod ule Manua l Example 1: The outputs sent by a channel are voltages in the range of -10.0 V to +10.0 V. The original signals are used. The gain is 1, and the offset is 0. The digital value received by the channel is 0, and the voltage measured is -0.05 V.
- Page 101 C h ap te r 4 A na lo g In pu t /O u tput Mo du le A H 0 6X A (X2, Y2) (10, 10.1 V) Original signals 10.1 V 10 V Signals after the calibration Digital value (X) (X1, Y1) (0, 0 V) -10 V Voltage (Y)
- Page 102 AH5 00 Mod ule Manua l 4. Retaining an output When a module stops running, a signal sent by the module is retained. The output is not retained: Analog signal Output signal Time The module stops running. The output is retained: Analog signal Output signal Time...
-
Page 103: Installation
C h ap te r 4 A na lo g In pu t /O u tput Mo du le A H 0 6X A 4.3 Installation 4.3.1 Installing a Module Insert a module into a slot, make sure that the module is installed on the backplane properly, and tighen the the screw, as illustrated below. -
Page 104: Installing A Removable Terminal Block
AH5 00 Mod ule Manua l 4.3.2 Installing a Removable Terminal Block Installation 1. Level a terminal block at the printed circuit board, and press it into the module. 2. Press the clip in the direction indicated by the arrow. ... -
Page 105: Wiring
C h ap te r 4 A na lo g In pu t /O u tput Mo du le A H 0 6X A 2. Pull up the clip. 3. The terminal block is removed. 4.3.3 Wiring Precautions In order to make the functions of AH06XA-5A perfect and ensure the reliability of a system at the same time, external wiring which prevents noise is necessary. - Page 106 AH5 00 Mod ule Manua l External wiring (1) AH06XA-5A 4- wir e: V ol tage i n pu t C H0 Sh ie ld ed cab le 1 * -10V~ +1 0V + 24V CH 0 25 0 I0 + VI 0- 4- wir e: C ur re nt i n pu t...
-
Page 107: Led Indicators
C h ap te r 4 A na lo g In pu t /O u tput Mo du le A H 0 6X A *5. If the ripple voltage of the input terminal of the load connected is large, and results in interference with the wiring, please connect a 0.1~0.47 μF and 25 V capacitor. - Page 108 AH5 00 Mod ule Manua l (2) Click I/O scan on the toolbar. (3) ISPSoft is scanning the actual hardware configuration. (4) After the scan of the actual hardware configuration is complete, the system automatically assigns the corresponding registers to the channels. Users can alter the input device range and the output device range by themselves.
- Page 109 C h ap te r 4 A na lo g In pu t /O u tput Mo du le A H 0 6X A (5) Double-click the module AH06XA-5A. (6) Open the Parameter Setting window. (7) Set the parameters, and then click OK. 4 - 2 1...
-
Page 110: Checking The Version Of A Module
AH5 00 Mod ule Manua l (8) Click Download on the toolbar to download the parameters. (The parameters can not be downloaded when the CPU module runs.) 4.4.2 Checking the Version of a Module (1) On the Option menu, click Online Mode. 4 - 2 2... -
Page 111: Monitoring Table
C h ap te r 4 A na lo g In pu t /O u tput Mo du le A H 0 6X A (2) Right-click the module, and then click Module Information on the context menu. The version of the firmware and that of the hardware are displayed. 4.4.3 Monitoring Table (1) Select the Monitor checkboxes at the right sides of the corresponding registers. - Page 112 AH5 00 Mod ule Manua l (2) On the Option menu, click Online Mode. (3) On the Option menu, click Monitor Table. The registers are monitored. 4 - 2 4...
-
Page 113: Online Mode
C h ap te r 4 A na lo g In pu t /O u tput Mo du le A H 0 6X A 4.4.4 Online Mode (1) Click Online Mode on the toolbar. (2) Double-click the module AH06XA-5A. (3) If some parameters are altered, users can click SVPV. The new setting values are written into the CPU module and the I/O module. -
Page 114: Importing/Exporting A Parametr File
AH5 00 Mod ule Manua l 4.4.5 Importing/Exporting a Parameter File (1) After Export is clicked, the parameters will be saved as a CSV file (.csv). 4 - 2 6... -
Page 115: Parameters
C h ap te r 4 A na lo g In pu t /O u tput Mo du le A H 0 6X A (2) Click Import, and then click the CSV file. 4.4.6 Parameters 4 - 2 7... - Page 116 AH5 00 Mod ule Manua l (1) The input modes of the channels, and the output modes of the channels AH06XA-5A Input channel Output channel 0: The channel is disabled. 0: The channel is disabled. 1: -10 V~10 V 1: -10 V~10 V 2: 0 V~10 V 2: 0 V~10 V 3: -5 V~5 V...
- Page 117 C h ap te r 4 A na lo g In pu t /O u tput Mo du le A H 0 6X A (3) The offsets and the gains used for calibration (4) The scale range (5) Retaining the outputs 4 - 2 9...
- Page 118 AH5 00 Mod ule Manua l (6) The channel detection (7) Enabling the interrupts (8) The interrupt numbers 4 - 3 0...
- Page 119 C h ap te r 4 A na lo g In pu t /O u tput Mo du le A H 0 6X A (9) Setting the warning LED indicator (10) The error codes 4 - 3 1...
-
Page 120: Troubleshooting
AH5 00 Mod ule Manua l 4.5 Troubleshooting 4.5.1 Error Codes ERROR Error RUN LED Type Description Code indicator indicator 16#A600 Alarm Hardware failure 16#A601 Alarm The external voltage is abnormal. Internal error 16#A603 Alarm The factory correction is abnormal. The signal received by channel 0 exceeds the 16#A400 Alarm... -
Page 121: Troubleshooting Procedure
C h ap te r 4 A na lo g In pu t /O u tput Mo du le A H 0 6X A 4.5.2 Troubleshooting Procedure Description Procedure Hardware failure Return the module to the factory for repair. Check whether the external 24 V power supply to the The external voltage is abnormal. - Page 122 AH5 00 Mod ule Manua l MEMO 4 - 3 4...
- Page 123 Chapter 5 Temperature Measurement Module AH04PT/AH08PTG Table of Contents AH04PT-5A ....................5-3 5.1.1 Overview ................... 5-3 5.1.2 Characteristics................... 5-3 5.1.3 Specifications ..................5-3 5.1.4 Profile ....................5-4 5.1.5 Dimensions ..................5-5 5.1.6 Arrangement of Terminals ..............5-5 5.1.7 Functions ................... 5-6 5.1.8 Installation ..................5-13 5.1.8.1...
-
Page 124: Troubleshooting Procedure
5.2.12.1 Error Codes ................5-72 5.2.12.2 Troubleshooting Procedure ........... 5-73 5 - 2... -
Page 125: Characteristics
Ch a pt er 5 Tem per at ur e M eas ur em ent Mo d u l e A H 04 PT / AH 0 8 PT G 5.1 AH04PT-5A 5.1.1 Overview The specifications for a temperature measurement module, the operation, and the programming are described in this section. -
Page 126: Profile
AH 5 00 Mo d u le Ma n ua l Functional specifications Analog-to-digital Input Centigrade (°C) Fahrenheit (°F) conversion impedance Pt100: -180°C~800°C Pt100: -292°F~1,472°F Ni100: -80°C~170°C Ni100: -112°F~338°F 0~300 Ω Rated input range Pt1000: -180°C~800°C Pt1000: -292°F~1,472°F Ni1000: -80°C~170°C Ni1000: -112°F~338°F Average function Range: 1~100... -
Page 127: Dimensions
Ch a pt er 5 Tem per at ur e M eas ur em ent Mo d u l e A H 04 PT / AH 0 8 PT G 5.1.5 Dimensions Unit: mm 5.1.6 Arrangement of Terminals AH04PT-5A 04PT ERROR 2/3/4-WIRE 5 - 5... -
Page 128: Functions
AH 5 00 Mo d u le Ma n ua l 5.1.7 Functions Item Function Description 1. Users can enable or disable a channel. Enabling/Disabling 2. If a channel is disabled, the total conversion time is a channel decreased. Users can select the degree Celsius (°C) or the degree Temperature unit Fahrenheit (°F) as a unit of measurement for temperature. - Page 129 Ch a pt er 5 Tem per at ur e M eas ur em ent Mo d u l e A H 04 PT / AH 0 8 PT G Signals after the calibration Original signals (X2, Y2) (100℃, 99) -100℃...
- Page 130 AH 5 00 Mo d u le Ma n ua l 4. Average Digital values are averaged. The number by which the sum of several digital values is divided is between 1 and 100. The sampled values are taken as a queue, and the length of the queue is N. Each time a new sampled value is put at the end of the queue, an original value at the start of the queue is removed.
- Page 131 Ch a pt er 5 Tem per at ur e M eas ur em ent Mo d u l e A H 04 PT / AH 0 8 PT G b. Interrupt service routine The procedure below explains how to trigger an interrupt service routine in a CPU module. Channel detection Alarm/Warning...
- Page 132 AH 5 00 Mo d u le Ma n ua l Cooler: The setting value is 200 (20°C), and KP is 100 (10°C). The relation between the temperature and the operation amount is shown below. O pe ra tio n a mou nt 1 00 % Co o le r Te mpe ra tur e...
- Page 133 Ch a pt er 5 Tem per at ur e M eas ur em ent Mo d u l e A H 04 PT / AH 0 8 PT G Control diagram: T he instruction PID is inside the dotted line. G(s) The PID algorithm is as follows.
- Page 134 AH 5 00 Mo d u le Ma n ua l c. PID parameters PID parameter Description Performing/Not performing the PID Bit 0~bit 3: CH0~CH3 (Performing/Not algorithm performing the PID algorithm) Bit 8~bit 11: CH0~CH3 (Manual/Automatic Manual/Automatic tuning tuning) Heating/Cooling mode Bit 0~bit 3: CH0~CH3 One-word decimal format Sampling time...
-
Page 135: Installation
Ch a pt er 5 Tem per at ur e M eas ur em ent Mo d u l e A H 04 PT / AH 0 8 PT G 5.1.8 Installation 5.1.8.1 Installing a Module Insert a module into a slot, make sure that the module is installed on the backplane properly, and tighen the the screw, as illustrated below. -
Page 136: Installing A Removable Terminal Block
AH 5 00 Mo d u le Ma n ua l 5.1.8.2 Installing a Removable Terminal Block Installation 1. Level a terminal block at the printed circuit board, and press it into the module. 2. Press the clip in the direction indicated by the arrow. ... -
Page 137: Wiring
Ch a pt er 5 Tem per at ur e M eas ur em ent Mo d u l e A H 04 PT / AH 0 8 PT G 2. Pull up the clip. 3. The terminal block is removed. 5.1.9 Wiring ... -
Page 138: External Wiring
AH 5 00 Mo d u le Ma n ua l External wiring (1) AH04PT-5A Ω 0~30 0 1.53mA Ni1 00/N i1000 (Ni100Pt100, Sh ie lde d cab le 1 * C H 0 Pt1 00/Pt1000 Resi stor)/ 204.8uA O0 + (Pt1000)* 3 I0 +... -
Page 139: Initial Setting
Ch a pt er 5 Tem per at ur e M eas ur em ent Mo d u l e A H 04 PT / AH 0 8 PT G 5.1.11 HWCONFIG in ISPSoft 5.1.11.1 Initial Setting (1) Start ISPSoft, and then double-click HWCONFIG. (2) Click I/O scan on the toolbar. - Page 140 AH 5 00 Mo d u le Ma n ua l (3) ISPSoft is scanning the actual hardware configuration. (4) After the scan of the actual hardware configuration is complete, the system automatically assigns the corresponding registers to the channels. Users can alter the input device range by themselves.
- Page 141 Ch a pt er 5 Tem per at ur e M eas ur em ent Mo d u l e A H 04 PT / AH 0 8 PT G (6) Open the Parameter Setting window. (7) Set the parameters, and then click OK. (8) Click Download on the toolbar to download the parameters.
-
Page 142: Checking The Version Of A Module
AH 5 00 Mo d u le Ma n ua l 5.1.11.2 Checking the Version of a Module (1) On the Option menu, click Online Mode. (2) Right-click the module, and then click Module Information on the context menu. The version of the firmware and that of the hardware are displayed. -
Page 143: Monitoring Table
Ch a pt er 5 Tem per at ur e M eas ur em ent Mo d u l e A H 04 PT / AH 0 8 PT G 5.1.11.3 Monitoring Table (1) Select the Monitor checkboxes at the right sides of the corresponding registers. (2) On the Option menu, click Online Mode. -
Page 144: Online Mode
AH 5 00 Mo d u le Ma n ua l 5.1.11.4 Online Mode (1) Click Online Mode on the toolbar. (2) Double-click the module AH04PT-5A. (3) If some parameters are altered, users can click SVPV. The new setting values are written into the CPU module and the I/O module. - Page 145 Ch a pt er 5 Tem per at ur e M eas ur em ent Mo d u l e A H 04 PT / AH 0 8 PT G 5.1.11.5 Importing/Exporting a Parameter File (1) After Export is clicked, the parameters will be saved as a CSV file (.csv). 5 - 2 3...
-
Page 146: Parameters
AH 5 00 Mo d u le Ma n ua l (2) Click Import, and then click the CSV file. 5.1.11.6 Parameters 5 - 2 4... - Page 147 Ch a pt er 5 Tem per at ur e M eas ur em ent Mo d u l e A H 04 PT / AH 0 8 PT G (1) The input modes of the channels 0: The channel is disabled. 6: Pt100 sensor 1: Pt100 sensor (Three-wire configuration)
- Page 148 AH 5 00 Mo d u le Ma n ua l (3) The number of values averaged (4) The offsets and the gains used for calibration 5 - 2 6...
- Page 149 Ch a pt er 5 Tem per at ur e M eas ur em ent Mo d u l e A H 04 PT / AH 0 8 PT G (5) The channel detection (6) Enabling the interrupts 5 - 2 7...
- Page 150 AH 5 00 Mo d u le Ma n ua l (7) The interrupt numbers (8) Setting the warning LED indicator Bit 0~bit3: CH0~CH3 (Warning LED indicator) Description (ON: Flash; OFF: Not flash) 5 - 2 8...
- Page 151 Ch a pt er 5 Tem per at ur e M eas ur em ent Mo d u l e A H 04 PT / AH 0 8 PT G (9) The error codes Bit 0~bit 3: The signals received by the CH0~CH3 exceed the range of inputs which can be received by the hardware.
- Page 152 AH 5 00 Mo d u le Ma n ua l (11) The automatic tuning (12) Refreshing the manual output values automatically 5 - 3 0...
- Page 153 Ch a pt er 5 Tem per at ur e M eas ur em ent Mo d u l e A H 04 PT / AH 0 8 PT G (13) The heating/cooling mode (14) The target values 5 - 3 1...
- Page 154 AH 5 00 Mo d u le Ma n ua l (15) The sampling time (16) The proportional gains 5 - 3 2...
- Page 155 Ch a pt er 5 Tem per at ur e M eas ur em ent Mo d u l e A H 04 PT / AH 0 8 PT G (17) The integral gains (18) The derivative gains 5 - 3 3...
- Page 156 AH 5 00 Mo d u le Ma n ua l (19) The range within which the error values are count as 0 (20) The manual output values 5 - 3 4...
- Page 157 Ch a pt er 5 Tem per at ur e M eas ur em ent Mo d u l e A H 04 PT / AH 0 8 PT G (21) The maximum output values (22) The minimum output values 5 - 3 5...
- Page 158 AH 5 00 Mo d u le Ma n ua l (23) Reading the output values (24) The accumulated integral values 5 - 3 6...
-
Page 159: Troubleshooting
Ch a pt er 5 Tem per at ur e M eas ur em ent Mo d u l e A H 04 PT / AH 0 8 PT G 5.1.12 Troubleshooting 5.1.12.1 Error Codes ERROR Error RUN LED Type Description Code indicator... -
Page 160: Troubleshooting Procedure
AH 5 00 Mo d u le Ma n ua l 5.1.12.2 Troubleshooting Procedure Description Procedure Hardware failure Return the module to the factory for repair. Check whether the external 24 V power supply to The external voltage is abnormal. the module is normal. -
Page 161: Specifications
Ch a pt er 5 Tem per at ur e M eas ur em ent Mo d u l e A H 04 PT / AH 0 8 PT G (4) High accuracy The error is ±1°C of a Pt100/Pt1000/Ni100/Ni1000 sensor’s temperature. The error is ±0.1% of a resistance in the range of 0 Ω... -
Page 162: Profile
AH 5 00 Mo d u le Ma n ua l Functional specifications Analog-to-digital Input Centigrade (°C) Fahrenheit (°F) conversion impedance Pt100: -180°C~800°C Pt100: -292°F~1,472°F Ni100: -80°C~170°C Ni100: -112°F~338°F 0~300 Ω Rated input range Pt1000: -180°C~800°C Pt1000: -292°F~1,472°F Ni1000: -80°C~170°C Ni1000: -112°F~338°F Average function Range: 1~100... -
Page 163: Dimensions
Ch a pt er 5 Tem per at ur e M eas ur em ent Mo d u l e A H 04 PT / AH 0 8 PT G 5.2.5 Dimensions 123.4 Unit: mm 5.2.6 Arrangement of Terminals AH08PTG-5A 5 - 4 1... -
Page 164: Functions
AH 5 00 Mo d u le Ma n ua l 5.2.7 Functions Item Function Description 1. Users can enable or disable a channel. Enabling/Disabling 2. If a channel is disabled, the total conversion time is a channel decreased. Users can select the degree Celsius (°C) or the degree Temperature unit Fahrenheit (°F) as a unit of measurement for temperature. - Page 165 Ch a pt er 5 Tem per at ur e M eas ur em ent Mo d u l e A H 04 PT / AH 0 8 PT G Signals after the calibration Original signals (X2, Y2) (100℃, 99) -100℃...
- Page 166 AH 5 00 Mo d u le Ma n ua l 4. Average Digital values are averaged. The number by which the sum of several digital values is divided is between 1 and 100. The sampled values are taken as a queue, and the length of the queue is N. Each time a new sampled value is put at the end of the queue, an original value at the start of the queue is removed.
- Page 167 Ch a pt er 5 Tem per at ur e M eas ur em ent Mo d u l e A H 04 PT / AH 0 8 PT G a. Giving alarms or warnings The procedure below explains how to set a module so that it gives an alarm or a warning. Channel detection No (No detection)
- Page 168 AH 5 00 Mo d u le Ma n ua l b. Interrupt service routine The procedure below explains how to trigger an interrupt service routine in a CPU module. Channel detection Alarm/Warning No (No detection) Enabling physical range detection Enabling interrupts Selecting interrupt...
- Page 169 Ch a pt er 5 Tem per at ur e M eas ur em ent Mo d u l e A H 04 PT / AH 0 8 PT G Cooler: The setting value is 200 (20°C), and KP is 100 (10°C). The relation between the temperature and the operation amount is shown below.
- Page 170 AH 5 00 Mo d u le Ma n ua l Control diagram: T he instruction PID is inside the dotted line. G(s) The PID algorithm is as follows. ∫ Forward action: Reverse action: b. Control mode Cyclic control mode: Users set a cycle according to a controlled environment. (If the ambient air temperature changes slowly, the cycle can be longer.) The width of a pulse is defined below.
- Page 171 Ch a pt er 5 Tem per at ur e M eas ur em ent Mo d u l e A H 04 PT / AH 0 8 PT G c. PID parameters PID parameter Description Performing/Not performing the PID Bit 0~bit 7: CH0~CH7 (Performing/Not algorithm performing the PID algorithm)
-
Page 172: Installation
AH 5 00 Mo d u le Ma n ua l 5.2.8 Installation 5.2.8.1 Installing a Module Insert a module into a slot, make sure that the module is installed on the backplane properly, and tighen the the screw, as illustrated below. 1. -
Page 173: Installing A Removable Terminal Block
Ch a pt er 5 Tem per at ur e M eas ur em ent Mo d u l e A H 04 PT / AH 0 8 PT G 5.2.8.2 Installing a Removable Terminal Block Installation 1. Level a terminal block at the printed circuit board, and press it into the module. Tighten the screws on the removable terminal block by means of a screwdriver. -
Page 174: Wiring
AH 5 00 Mo d u le Ma n ua l Removal 1. Loosen the screws on the removable terminal block by means of a screwdriver. Pull up the removable terminal block. 5.2.9 Wiring Precautions In order to make the functions of a temperature measurement module perfect and ensure the reliability of a system at the same time, external wiring which prevents noise is necessary. - Page 175 Ch a pt er 5 Tem per at ur e M eas ur em ent Mo d u l e A H 04 PT / AH 0 8 PT G (3) Please connect a shielded cable and a hermetically sealed cable with the ground separately.
-
Page 176: Led Indicators
AH 5 00 Mo d u le Ma n ua l temperature sensor, On+ and In+ have to be short-circuited, and On- and In- have to be short-circuited. (n is in the range of 0 to 7.) *2. If users want to measure the resistance in the range of 0 Ω to 300 Ω, they can use a two-wire or three-wire sensor instead of a four-wire sensor. - Page 177 Ch a pt er 5 Tem per at ur e M eas ur em ent Mo d u l e A H 04 PT / AH 0 8 PT G (2) Click I/O scan on the toolbar. (3) ISPSoft is scanning the actual hardware configuration. (4) After the scan of the actual hardware configuration is complete, the system automatically assigns the corresponding registers to the channels.
- Page 178 AH 5 00 Mo d u le Ma n ua l (5) Double-click the module AH08PTG-5A. (6) Open the Parameter Setting window. (7) Set the parameters, and then click OK. 5 - 5 6...
-
Page 179: Checking The Version Of A Module
Ch a pt er 5 Tem per at ur e M eas ur em ent Mo d u l e A H 04 PT / AH 0 8 PT G (8) Click Download on the toolbar to download the parameters. (The parameters can not be downloaded when the CPU module runs.) 5.2.11.2 Checking the Version of a Module (1) On the Option menu, click Online Mode. -
Page 180: Monitoring Table
AH 5 00 Mo d u le Ma n ua l 5.2.11.3 Monitoring Table (1) Select the Monitor checkboxes at the right sides of the corresponding registers. 5 - 5 8... - Page 181 Ch a pt er 5 Tem per at ur e M eas ur em ent Mo d u l e A H 04 PT / AH 0 8 PT G (2) On the Option menu, click Online Mode. (3) On the Option menu, click Monitor Table. The registers are monitored. 5 - 5 9...
-
Page 182: Online Mode
AH 5 00 Mo d u le Ma n ua l 5.2.11.4 Online Mode (1) Click Online Mode on the toolbar. (2) Double-click the module AH08PTG-5A. (3) If some parameters are altered, users can click SVPV. The new setting values are written into the CPU module and the I/O module. -
Page 183: Importing/Exporting A Parameter File
Ch a pt er 5 Tem per at ur e M eas ur em ent Mo d u l e A H 04 PT / AH 0 8 PT G 5.2.11.5 Importing/Exporting a Parameter File (1) After Export is clicked, the parameters will be saved as a CSV file (.csv). 5 - 6 1... -
Page 184: Parameters
AH 5 00 Mo d u le Ma n ua l (2) Click Import, and then click the CSV file. 5.2.11.6 Parameters 5 - 6 2... - Page 185 Ch a pt er 5 Tem per at ur e M eas ur em ent Mo d u l e A H 04 PT / AH 0 8 PT G (1) Quick mode (2) The input modes of the channels 0: The channel is disabled.
- Page 186 AH 5 00 Mo d u le Ma n ua l (3) Temperature unit (Celsius/Fahrenheit) K0: Celsius Description K1: Fahrenheit (4) The number of values averaged (5) Setting the temperature corresponding to a low voltage 5 - 6 4...
- Page 187 Ch a pt er 5 Tem per at ur e M eas ur em ent Mo d u l e A H 04 PT / AH 0 8 PT G (6) The offsets and the gains used for calibration (7) The channel detection (8) Enabling the interrupts 5 - 6 5...
- Page 188 AH 5 00 Mo d u le Ma n ua l (9) The interrupt numbers (10) Setting the warning LED indicator Bit 0~bit 7: CH0~CH7 (Warning LED indicator) Description (ON: Flash; OFF: Not flash) (11) The error codes 5 - 6 6...
- Page 189 Ch a pt er 5 Tem per at ur e M eas ur em ent Mo d u l e A H 04 PT / AH 0 8 PT G Bit 0~bit 7: The signals received by the CH0~CH7 exceed the range of inputs which can be received by the hardware.
- Page 190 AH 5 00 Mo d u le Ma n ua l (15) The heating/cooling mode (16) The target values (17) The sampling time 5 - 6 8...
- Page 191 Ch a pt er 5 Tem per at ur e M eas ur em ent Mo d u l e A H 04 PT / AH 0 8 PT G (18) The proportional gains (19) The integral gains (20) The derivative gains 5 - 6 9...
- Page 192 AH 5 00 Mo d u le Ma n ua l (21) The range within which the error values are count as 0 (22) The manual output values (23) The maximum output values 5 - 7 0...
- Page 193 Ch a pt er 5 Tem per at ur e M eas ur em ent Mo d u l e A H 04 PT / AH 0 8 PT G (24) The minimum output values (25) Reading the output values (26) The accumulated integral values 5 - 7 1...
-
Page 194: Troubleshooting
AH 5 00 Mo d u le Ma n ua l 5.2.12 Troubleshooting 5.2.12.1 Error Codes ERROR Error RUN LED Type Description Code indicator indicator 16#A600 Alarm Hardware failure 16#A601 Alarm The external voltage is abnormal. Internal error 16#A603 Alarm The factory correction is abnormal. - Page 195 Ch a pt er 5 Tem per at ur e M eas ur em ent Mo d u l e A H 04 PT / AH 0 8 PT G ERROR Error RUN LED Type Description Code indicator indicator The signal received by channel 6 exceeds the 16#A006 Warning range of inputs which can be received by the...
- Page 196 AH 5 00 Mo d u le Ma n ua l Description Procedure The signal received by channel 4 exceeds the range of inputs which can be received Check the signal received by channel 4. by the hardware. The signal received by channel 5 exceeds the range of inputs which can be received Check the signal received by channel 5.
- Page 197 Chapter 6 Temperature Measurement Module AH04TC/AH08TC Table of Contents Overview ....................6-2 6.1.1 Characteristics................... 6-2 Specifications and Functions ..............6-3 6.2.1 Specifications ..................6-3 6.2.2 Profile ....................6-4 6.2.3 Dimensions ..................6-5 6.2.4 Arrangement of Terminals ..............6-5 6.2.5 Functions ................... 6-6 Installation ....................6-13 6.3.1 Installing a Module ................6-13...
-
Page 198: Overview
AH 5 00 Mo d u le Ma n ua l 6.1 Overview The specifications for AH04TC-5A and AH08TC-5A, the operation, and the programming are described in this chapter. AH04TC-5A and AH08TC-5A are temperature measurement modules. They convert temperatures received from thermocouples into digital signals. Users can select the degree Celsius or the degree Fahrenheit as a unit of measurement for temperature. -
Page 199: Specifications And Functions
Ch a pt er 6 Tem per at u r e M eas ur em ent M o d u le A H 04T C / AH 08T C AH-08TC-5A: There are eight channels. Inputs received by a channel are temperatures. (3) High-speed conversion A temperature is converted into a digital signal at a speed of 200 μs a channel. -
Page 200: Profile
AH 5 00 Mo d u le Ma n ua l 6.2.2 Profile 08TC 04TC ERROR ERROR Th er mo couple Th er mo couple J,K ,R,S,T,E,N J,K ,R,S,T,E,N Number Name Description Model name Model name of the module Operating status of the module RUN LED ON: The module is running. -
Page 201: Dimensions
Ch a pt er 6 Tem per at u r e M eas ur em ent M o d u le A H 04T C / AH 08T C 6.2.3 Dimensions Unit: mm 6.2.4 Arrangement of Terminals AH04TC-5A AH08TC-5A 04TC 08TC ERROR ERROR... -
Page 202: Functions
AH 5 00 Mo d u le Ma n ua l 6.2.5 Functions Item Function Description 1. Users can enable or disable a channel. Enabling/Disabling 2. If a channel is disabled, the total conversion time is a channel decreased. Users can select the degree Celsius (°C) or the degree Temperature unit Fahrenheit (°F) as a unit of measurement for temperature. - Page 203 Ch a pt er 6 Tem per at u r e M eas ur em ent M o d u le A H 04T C / AH 08T C Signals after the calibration Original signals (X2, Y2) (100℃, 99) -100℃ Temperature (X) 100℃...
- Page 204 AH 5 00 Mo d u le Ma n ua l 4. Average Digital values are averaged. The number by which the sum of several digital values is divided is between 1 and 100. The sampled values are taken as a queue, and the length of the queue is N. Each time a new sampled value is put at the end of the queue, an original value at the start of the queue is removed.
- Page 205 Ch a pt er 6 Tem per at u r e M eas ur em ent M o d u le A H 04T C / AH 08T C b. Interrupt service routine The procedure below explains how to trigger an interrupt service routine in a CPU module. Channel detection Alarm/Warning...
- Page 206 AH 5 00 Mo d u le Ma n ua l Cooler: The setting value is 200 (20°C), and KP is 100 (10°C). The relation between the temperature and the operation amount is shown below. O pe ra tio n a mou nt 1 00 % Co o le r Te mpe ra tur e...
- Page 207 Ch a pt er 6 Tem per at u r e M eas ur em ent M o d u le A H 04T C / AH 08T C Control diagram: T he instruction PID is inside the dotted line. G(s) The PID algorithm is as follows.
- Page 208 AH 5 00 Mo d u le Ma n ua l c. PID parameters PID parameter Description Performing/Not performing the PID Bit 0~bit 3: CH0~CH3 (Performing/Not algorithm performing the PID algorithm) Bit 4~bit 7: CH4~CH7(Performing/Not performing the PID algorithm) (AH08TC-5A) Manual/Automatic tuning Bit 8~bit 11: CH0~CH3 (Manual/Automatic tuning)
-
Page 209: Installation
Ch a pt er 6 Tem per at u r e M eas ur em ent M o d u le A H 04T C / AH 08T C 6.3 Installation 6.3.1 Installing a Module Insert a module into a slot, make sure that the module is installed on the backplane properly, and tighen the the screw, as illustrated below. -
Page 210: Installing A Removable Terminal Block
AH 5 00 Mo d u le Ma n ua l 6.3.2 Installing a Removable Terminal Block Installation 1. Level a terminal block at the printed circuit board, and press it into the module. 2. Press the clip in the direction indicated by the arrow. ... -
Page 211: Wiring
Ch a pt er 6 Tem per at u r e M eas ur em ent M o d u le A H 04T C / AH 08T C 2. Pull up the clip. 3. The terminal block is removed. 6.3.3 Wiring ... -
Page 212: Led Indicators
AH 5 00 Mo d u le Ma n ua l External wiring (1) AH04TC-5A Thermocouple Shielded cable *1 -150 mV~150 mV Cold-junction compensation (2) AH08TC-5A Thermocouple Shielded cable *1 -150 mV~150 mV Cold-junction compensation *1. The cables or the shielded twisted pair cables for Type J, type K, type R, type S, type T, type E, and type N thermocouples are used, and should be kept separate from other power cables and cables which generate noise. -
Page 213: Hwconfig In Ispsoft
Ch a pt er 6 Tem per at u r e M eas ur em ent M o d u le A H 04T C / AH 08T C 6.4 HWCONFIG in ISPSoft 6.4.1 Initial Setting (1) Start ISPSoft, and then double-click HWCONFIG. (2) Click I/O scan on the toolbar. - Page 214 AH 5 00 Mo d u le Ma n ua l (3) ISPSoft is scanning the actual hardware configuration. (4) After the scan of the actual hardware configuration is complete, the system automatically assigns the corresponding registers to the channels. Users can alter the input device range by themselves.
- Page 215 Ch a pt er 6 Tem per at u r e M eas ur em ent M o d u le A H 04T C / AH 08T C (5) Double-click the module. (6) Open the Parameter Setting window. (7) Set the parameters, and then click OK. 6 - 1 9...
-
Page 216: Checking The Version Of A Module
AH 5 00 Mo d u le Ma n ua l (8) Click Download on the toolbar to download the parameters. (The parameters can not be downloaded when the CPU module runs.) 6.4.2 Checking the Version of a Module (1) On the Option menu, click Online Mode. 6 - 2 0... -
Page 217: Monitoring Table
Ch a pt er 6 Tem per at u r e M eas ur em ent M o d u le A H 04T C / AH 08T C (2) Right-click the module, and then click Module Information on the context menu. The version of the firmware and that of the hardware are displayed. - Page 218 AH 5 00 Mo d u le Ma n ua l (2) On the Option menu, click Online Mode. (3) On the Option menu, click Monitor Table. The registers are monitored. 6 - 2 2...
-
Page 219: Online Mode
Ch a pt er 6 Tem per at u r e M eas ur em ent M o d u le A H 04T C / AH 08T C 6.4.4 Online Mode (1) Click Online Mode on the toolbar. (2) Double-click the module. (3) If some parameters are altered, users can click SVPV. - Page 220 AH 5 00 Mo d u le Ma n ua l 6.4.5 Importing/Exporting a Parameter File (1) After Export is clicked, the parameters will be saved as a CSV file (.csv). 6 - 2 4...
-
Page 221: Parameters
Ch a pt er 6 Tem per at u r e M eas ur em ent M o d u le A H 04T C / AH 08T C (2) Click Import, and then click the CSV file. 6.4.6 Parameters 6 - 2 5... - Page 222 AH 5 00 Mo d u le Ma n ua l (1) The input modes of the channels 0: The channel is disabled. 1: Type J thermocouple 2: Type K thermocouple 3: Type R thermocouple Description 4: Type S thermocouple 5: Type T thermocouple 6: Type E thermocouple 7: Type N thermocouple...
- Page 223 Ch a pt er 6 Tem per at u r e M eas ur em ent M o d u le A H 04T C / AH 08T C (3) The number of values averaged (4) The offsets and the gains used for calibration (5) The channel detection 6 - 2 7...
- Page 224 AH 5 00 Mo d u le Ma n ua l (6) Enabling the interrupts (7) The interrupt numbers (8) Setting the warning LED indicator Bit 0~bit 7: CH0~CH7 (Warning LED indicator) Description (ON: Flash; OFF: Not flash) 6 - 2 8...
- Page 225 Ch a pt er 6 Tem per at u r e M eas ur em ent M o d u le A H 04T C / AH 08T C (9) The error codes Bit 0~bit 7: The signals received by CH0~CH7 exceed the range of inputs which can be received by the hardware.
- Page 226 AH 5 00 Mo d u le Ma n ua l (12) Refreshing the manual output values automatically (13) The heating/cooling mode (14) The target values 6 - 3 0...
- Page 227 Ch a pt er 6 Tem per at u r e M eas ur em ent M o d u le A H 04T C / AH 08T C (15) The sampling time (16) The proportional gains (17) The integral gains 6 - 3 1...
- Page 228 AH 5 00 Mo d u le Ma n ua l (18) The derivative gains (19) The range within which the error values are count as 0 (20) The manual output values 6 - 3 2...
- Page 229 Ch a pt er 6 Tem per at u r e M eas ur em ent M o d u le A H 04T C / AH 08T C (21) The maximum output values (22) The minimum output values (23) Reading the output values 6 - 3 3...
-
Page 230: Troubleshooting
AH 5 00 Mo d u le Ma n ua l (24) The accumulated integral values 6.5 Troubleshooting 6.5.1 Error Codes ERROR Error RUN LED Type Description Code indicator indicator 16#A600 Alarm Hardware failure 16#A601 Alarm The external voltage is abnormal. Internal error 16#A602 Alarm... - Page 231 Ch a pt er 6 Tem per at u r e M eas ur em ent M o d u le A H 04T C / AH 08T C ERROR Error RUN LED Type Description Code indicator indicator The signal received by channel 7 exceeds the 16#A407 Alarm range of inputs which can be received by the...
-
Page 232: Troubleshooting Procedure
AH 5 00 Mo d u le Ma n ua l 6.5.2 Troubleshooting Procedure Description Procedure Hardware failure Return the module to the factory for repair. Check whether the external 24 V power supply The external voltage is abnormal. to the module is normal. Internal error Please contact the factory. - Page 233 Chapter 7 High-speed Counter Module AH02HC/AH04HC Table of Contents Introduction ....................7-2 7.1.1 Characteristics ...................7-2 Specifications ....................7-3 7.2.1 Dimensions of AH02HC-5A ..............7-3 7.2.2 Specifications for AH02HC-5A ............7-3 7.2.3 Dimensions of AH04HC-5A ..............7-4 7.2.4 Specifications for AH04HC-5A ............7-4 7.2.5 Functions of AH02HC-5A/AH04HC-5A ..........7-5 7.2.6 Profile of AH02HC-5A .................7-6 7.2.7...
-
Page 234: Introduction
AH5 00 Mod ule Manua l 7.1 Introduction An AH500 series high-speed counter module has several bidirectional high-speed counters. It can update the number of input pulses instantly. It can also cyclically update, prescale, and average the number of sampled pulses. If the number of sampled pulses is monitored, an alarm can be generated. -
Page 235: Specifications
Ch ap te r 7 High-s pee d C oun ter Modu le AH0 2HC /AH0 4HC limit value set, or less than the lower-lower limit value set, an alarm will be generated. 8. Detecting the number of accumulated pulses overflows If linear accumulation is used, users can detect whether the number of accumulated pulses overflows. -
Page 236: Dimensions Of Ah04Hc-5A
AH5 00 Mod ule Manua l Item Specifications General count Type Circular count Input CH0: X0.0+ and X0.0- (differential CH1: X0.1+ and X0.1- signal) RESET input 5~24 V DC Signal level Maximum 15 mA current Channel 0: The high-speed pulse output Y0.8 is a transistor whose collector is an open collector. -
Page 237: Functions Of Ah02Hc-5A/Ah04Hc-5A
Ch ap te r 7 High-s pee d C oun ter Modu le AH0 2HC /AH0 4HC Item Specifications Maximum The maximum frequency is 200 kHz. frequency of counting The number of sampled pulses is in the range of -200000 to 200000. -
Page 238: Profile Of Ah02Hc-5A
AH5 00 Mod ule Manua l Function Description the number of input pulses If the number of sampled pulses is larger than the upper-upper limit value set, or less than the lower-lower limit value set, an alarm will be generated. If the number of Alarm sampled pulses is between the upper-lower limit value set and the lower-upper limit value set, the alarm will stop. -
Page 239: Profile Of Ah04Hc-5A
Ch ap te r 7 High-s pee d C oun ter Modu le AH0 2HC /AH0 4HC 7.2.7 Profile of AH04HC-5A 04HC R U N E RR O R Number Name Description Model name Model name of the module Operating status of the module RUN LED indicator ON: The module is running. -
Page 240: External Wiring
AH5 00 Mod ule Manua l AH04HC-5A Function Function Pin Terminal Pin Terminal Count Count COM3 Y0.11 Out3 COM2 Y0.10 Out2 COM1 Y0.9 Out1 COM0 Y0.8 Out0 . . . . . . . . X0.3- Rst3- X0.3+ Rst3+ X0.15- CntB3- X0.15+... -
Page 241: Hwconfig In Ispsoft
5~24VDC HWCONFIG in ISPSoft AH04HC-5A is taken for instance. If the AH500 series high-speed counter module that users use is AH02HC-5A, it is operated in the same way as AH04HC-5A is operated. 7.3.1 Checking the Firmware Version of a Module Users can check the firmware version of a module through HWCONFIG in ISPSoft. - Page 242 AH5 00 Mod ule Manua l (2) The HWCONFIG window is shown below. (3) After users click I/O Scan on the Option menu, the modules installed on the present backplane will be scanned. (4) The scan result is shown below. AH04HC-5A is installed in the second slot on the main backplane.
- Page 243 Ch ap te r 7 High-s pee d C oun ter Modu le AH0 2HC /AH0 4HC (5) Click Online Mode on the toolbar. (6) After the users right-click the module AH04HC-5A, a context menu will appear. (7) After the users click Module Information on the context menu, the Module Information window will appear.
-
Page 244: Initial Setting
AH5 00 Mod ule Manua l Initial Setting Users can set the parameters in a module through ISPSoft. After the parameters are set, they can be downloaded to the module. The steps of setting the parameters in the module AH04HC-5A are as follows. -
Page 245: Updating Parameters
Ch ap te r 7 High-s pee d C oun ter Modu le AH0 2HC /AH0 4HC (4) Set the parameters. (5) After the setting of the parameters is complete, users can click Download on the toolbar to download the parameters to the module. Updating Parameters If users click Upload on the toolbar in the HWCONFIG window, the parameters in the modules will be uploaded. -
Page 246: Monitoring Parameters
AH5 00 Mod ule Manua l Monitoring Parameters (1) Registers are assigned to the modules by means of ISPSoft. AH04HC-5A has four channels, and uses thirty-two registers in a CPU module. The CPU module reads the values in twenty-eight registers periodically. The commands that the CPU module sends to AH04HC-5A are stored in the remaining four registers. - Page 247 Ch ap te r 7 High-s pee d C oun ter Modu le AH0 2HC /AH0 4HC Input devices Register CH0 Register CH1 Register CH2 Register Parameter Operating state of a #103 counter Number of sampled #104 pulses (Low word) Number of sampled #105 pulses (high word)
-
Page 248: Parameter Table
AH5 00 Mod ule Manua l (2) Using the instruction FROM Please refer to AH500 Programming Manual for more information. Users can read parameters in AH04HC-5A by means of the instruction FROM. The parameters read are stored in the data registers specified. -
Page 249: Writing Parameters
Ch ap te r 7 High-s pee d C oun ter Modu le AH0 2HC /AH0 4HC Default CH3 Attribute Register name Remark value value (Low word) Upper-lower limit value (High word) Lower-upper limit value (Low word) -200000~200000 Lower-upper limit value (High word) Lower-lower limit value (Low word) -
Page 250: Descriptions Of The Control Registers
AH5 00 Mod ule Manua l will be valid if AH02HC-5A/AH04HC-5A stops counting. If the users want to write parameters by means of TO, the maximum data length is 128 words. If the users want to write parameters by means of DTO, the maximum data length is 64 double words. Descriptions of the Control Registers 7.9.1 Operation of a Counter... -
Page 251: Input Pulse Type
Ch ap te r 7 High-s pee d C oun ter Modu le AH0 2HC /AH0 4HC 2. Bit 1 in CR0/CR28/CR56/CR84: If bit 1 in CR0/CR28/CR56/CR84 is turned ON, the sampling register/accumulation register/pulse input register, and bit 1 in CR19/CR47/CR75/CR103 will be reset. -
Page 252: Cycle Of Reading The Number Of Pulses
AH5 00 Mod ule Manua l The conversion results are shown in the following table. The setting of the frequency 5.187988 of an input pulse is disabled. 2656.2504 2.593994 1328.1252 1.296997 664.0626 0.648499 332.0313 0.324249 166.0156 0.162125 83.00781 0.081062 41.50391 0.040531 20.75195 0.020266... - Page 253 Ch ap te r 7 High-s pee d C oun ter Modu le AH0 2HC /AH0 4HC bit# Description OFF: The function is disabled. ON: The function is enabled. Setting the accumulation register OFF: The accumulation register counts linearly. ON: The accumulation register counts circularly. Setting the function of comparing the number of accumulated pulses with the comparison value set OFF: The function is disabled.
- Page 254 AH5 00 Mod ule Manua l C oun t c yc le N umber of in put pulse 10 00 99 2 10 02 Example: A flow counter is used. A pulse represents a flow of 5 cm . The unit magnitude set is 1. Prescale value set: 5 Prescale function selected: 0 (x1) Count cycle: 0 (1 second)
- Page 255 Ch ap te r 7 High-s pee d C oun ter Modu le AH0 2HC /AH0 4HC 4. Bit 3 in CR4/CR32/CR60/CR88: If bit 3 in CR4/CR32/CR60/CR88 is turned ON, the alarm function is enabled. If bit 3 in CR4/CR32/CR60/CR88 is turned OFF, the alarm function is disabled.
- Page 256 AH5 00 Mod ule Manua l The operation of the upper limit alarm and the operation of the lower limit alarm are as shown below. Upper -upper limit value Upper -lower limit value Cou nt cycl e Lower -upper limit value Lower -lower limit value Alar m flags...
- Page 257 Ch ap te r 7 High-s pee d C oun ter Modu le AH0 2HC /AH0 4HC (1) Linear accumulation: If an accumulation register counts up, it counts from 0 to 999999999. If an accumulation register counts down, it counts from 0 to -999999999. If the value in an accumulation register is larger than the maximum value 999999999 or less than the minimum value -999999999, the value in the accumulation register will be 999999999 or -999999999, and bit 1 in CR19/CR47/CR75/CR103 will be turned ON.
- Page 258 AH5 00 Mod ule Manua l (2) Circular accumulation: If an accumulation register counts up, it counts from 0 to 999999999. If an accumulation register counts down, it counts from 0 to -999999999. If the circular accumulation is larger than the maximum value 999999999 or less than the minimum value -999999999, bit 2 in CR19/CR47/CR75/CR103 will be turned ON, and the value in the accumulation register will become 0.
- Page 259 Ch ap te r 7 High-s pee d C oun ter Modu le AH0 2HC /AH0 4HC Bit 0 in CR19/CR47/CR75/CR103 Comparison value 1200 Bit 0 in CR0/CR28/CR56/CR84 Number of sampled pulses 1100+203>1200 0+686 Number of accumulated pulses 1303 Bit 3 in CR19/CR47/CR75/CR103 Bit 3 in CR0/CR28/CR56/CR84 OFF *1: If bit 0 in CR0/CR28/CR56/CR84 is turned ON, bit 0 in CR19/CR47/CR75/CR103 will be turned ON, and the system will start the count.
-
Page 260: Operating State Of A Counter
AH5 00 Mod ule Manua l 7. Bit 6 in CR4/CR32/CR60/CR88: If bit 6 in CR4/CR32/CR60/CR88 is turned OFF, ≧ is selected. If bit 6 in CR4/CR32/CR60/CR88 is turned ON, ≦ is selected. Before users select a type of comparison condition, bit 5 in CR4/CR32/CR60/CR88 must be turned ON. 8. -
Page 261: Number Of Input Pulses
Ch ap te r 7 High-s pee d C oun ter Modu le AH0 2HC /AH0 4HC bit# Described The number of accumulated pulses meets the comparison condition set. Upper limit alarm Lower limit alarm Error flag 7~15 Reserved 7.9.7 Number of Input Pulses High word Low word High word Low word High word Low word High word Low word #109 #108... -
Page 262: Troubleshooting
AH5 00 Mod ule Manua l 7.10 Troubleshooting 7.10.1 Error Codes REN LED ERROR LED Code Description indicator indicator 16#A001 Channel 0: The linear accumulation exceeds the range. Blinking 16#A002 Channel 0: The prescale value set exceeds the range. Blinking 16#A003 Channel 0: The number of cycles set exceeds the range. - Page 263 Modbus Advance................8-34 8.6.5 COM Port History ................8-34 Application ....................8-35 8.7.1 Modbus .................... 8-35 8.7.1.1 Modbus Slave─Connection with Delta Products ....... 8-36 8.7.1.2 Modbus Master─Connection with Delta Products ..... 8-38 8.7.2 Connecting to ISPSoft ..............8-46 8.7.3 RS-485/RS232 ................. 8-47 8.7.3.1...
-
Page 264: Introduction
AH5 00 M od ul e M anua l 8.1 Introduction Thanks for using AH10/15SCM-5A, a serial communication module. To ensure that AH10/15SCM-5A is installed and operated correctly, please read this manual carefully before using the module. AH10/15SCM-5A is a serial communication module. It supports the Modbus UD Link (user-defined format). - Page 265 Ch ap te r 8 Ser ia l C om mu nic a ti on Mod ul e AH1 0/15 SC M Electrical specifications Item Specifications Supply voltage 5 V DC Electric energy 1.5 W consumption Insulation 2,500 V DC voltage 150 g Weight...
-
Page 266: Dimensions And Profile
AH5 00 M od ul e M anua l 8.2 Dimensions and Profile 8.2.1 Dimensions AH10SCM-5A 10SCM R UN ER ROR C OM 1 R S4 85 C OM 2 R S4 85 TR 1 OF F COM 1 TX + TX - RX +... -
Page 267: Profile
Ch ap te r 8 Ser ia l C om mu nic a ti on Mod ul e AH1 0/15 SC M 8.2.2 Profile AH10SCM-5A 1 0 SCM R UN ERROR C O M1 RS4 85 C O M2 RS4 85 TR 1 O FF CO M 1... -
Page 268: Port
AH5 00 M od ul e M anua l Number Name Description block Label Nameplate Set screw Fixing the module Connector Connecting the module and a backplane Projection Fixing the module AH15SCM-5A 15SCM ERROR C O M 1 CO M 2 Number Name Description... -
Page 269: Communication Port
Ch ap te r 8 Ser ia l C om mu nic a ti on Mod ul e AH1 0/15 SC M 8.2.3 Communication Port RS-485 / RS-422 European-style Terminal number RS-485 RS-422 terminal block RS-232 Terminal number RS-232 8 - 7... -
Page 270: Installation And Wiring
AH5 00 M od ul e M anua l 8.3 Installation and Wiring This section introduces the installation of AH10/15SCM-5A. 8.3.1 Installation Insert a module into a slot, make sure that the module is installed on the backplane properly, and tighen the the screw, as illustrated below. -
Page 271: Control Registers
Ch ap te r 8 Ser ia l C om mu nic a ti on Mod ul e AH1 0/15 SC M 8.4 Control Registers Attribute Register name Description Reserved High byte: Reading data from bit devices Low byte: Reading data from word devices Triggering the reading of data 0: Not triggering it through COM1... - Page 272 AH5 00 M od ul e M anua l Attribute Register name Description The communication protocol for exchanging data through COM2 must be UD Link. Users have to select Base+Offset in the Mapping Register Base register used for the box in the Message Variable Edit window sending of data through COM2 in SCMSoft.
- Page 273 Ch ap te r 8 Ser ia l C om mu nic a ti on Mod ul e AH1 0/15 SC M Attribute Register name Description device through COM2 (256 values/16 words) Bit=0: Disabling the writing of data into a Selecting Enable boxes to word device through COM2 32771~...
-
Page 274: Descriptions Of The Control Registers
AH5 00 M od ul e M anua l Attribute Register name Description data is received through COM2 1~65535 ms Number of times the sending of 37373 a command through COM2 is 0~255 retried Length of a packet which is sent 37374 Length of a packet which is sent through COM2... - Page 275 Ch ap te r 8 Ser ia l C om mu nic a ti on Mod ul e AH1 0/15 SC M CR# 21 : Triggering the sending/receiving of the packets in a group through COM1 [Description] After a group number is written into CR#21, the packets in a group will be sent/received through COM1.
- Page 276 AH5 00 M od ul e M anua l CR4099 Bit b15 b14 b13 b12 b11 b10 b9 CR#4099: No. 16~No. 1; CR#4100: No. 32~No. 17; CR#4101: No. 48~No. 33; CR#4102: No. 64~No. 49; CR#4103: No. 80~No. 65; CR#4104: No. 96~No. 81; CR#4105: No. 112~No. 97; CR#4106: No.
- Page 277 Ch ap te r 8 Ser ia l C om mu nic a ti on Mod ul e AH1 0/15 SC M CR# 204 83~CR# 204 98 : Selecting Enable boxes to enable the reading of data from bit devices through COM2 [Description] Users can select Enable boxes to enable the reading of data from bit devices through COM2.
- Page 278 AH5 00 M od ul e M anua l CR# 368 64 : Status of sending a command through COM1 [Description] A command is sent from AH10/15SCM-5A. 1: The sending of a command is executed. 0: The sending of a command is complete. CR# 368 65 : Status of receiving a command through COM1 [Description] 0: A command has not been received.
- Page 279 Ch ap te r 8 Ser ia l C om mu nic a ti on Mod ul e AH1 0/15 SC M CR# 373 68 : Status of sending a command through COM2 [Description] Please refer to the description of CR#36864. CR# 373 69 : Status of receiving a command through COM2 [Description] Please refer to the description of CR#36865.
-
Page 280: Introduction Of The Related Instructions
Explanation: Users can use this instruction to read the data from the control register in the special module into the AH500 series PLC. The operand m should be in the range of 1 to 8. 1 represents a main rack, and 2~8 represent extension racks. - Page 281 Ch ap te r 8 Ser ia l C om mu nic a ti on Mod ul e AH1 0/15 SC M Example: Suppose the first special module at the right side of the CPU module is AH10/15SCM-5A. When X0.0 is switched from OFF to ON, the instruction FROM is executed. The mode of the data exchange through COM1 on AH10/15SCM-5A stored in CR#7 is read into D100.
- Page 282 : Data length Word/Double word Explanation: Users can use this instruction to write the data in the AH500 series PLC into the control register in the special module. The operand m should be in the range of 1 to 8. 1 represents a main rack, and 2~8 represent extension racks.
- Page 283 Ch ap te r 8 Ser ia l C om mu nic a ti on Mod ul e AH1 0/15 SC M The use of the parameters: The module is placed on the main rack. Therefore, the rack code stored in D40 is 16#0001. ...
-
Page 284: Quick Start
AH5 00 M od ul e M anua l Additional remark: 1. If the values in m and m exceed the range, the operation error occurs, the instruction is not executed, SM0 is ON, and the error code in SR0 is 16#2003. 2. - Page 285 Ch ap te r 8 Ser ia l C om mu nic a ti on Mod ul e AH1 0/15 SC M Modbus Advance Start SCMSoft, and then click MODBUS Advance Wizard on the toolbar. 8 - 2 3...
- Page 286 AH5 00 M od ul e M anua l Setting Modbus Advance To speed up standard Modbus communication, SCMSoft provides the Modbus Advance wizard. Users only need to specify registers or absolute positions from which data is read, specify registers or absolute positions into which data is written, select a communication port, and download the setting to AH10/15SCM-5A.
- Page 287 Ch ap te r 8 Ser ia l C om mu nic a ti on Mod ul e AH1 0/15 SC M Reading data from bit devices/word devices: Right-click a blank, and click Add Item. After users double-click the item which is added, the Parameter Edit window appears. 8 - 2 5...
- Page 288 Slave: Slave ID: A slave from which data is read Device type: Users can select a Delta PLC. Leave the Device Type box blank if a device used is not a Delta PLC. Length: The length of data read is 100 words at most.
- Page 289 Ch ap te r 8 Ser ia l C om mu nic a ti on Mod ul e AH1 0/15 SC M Downloading the parameters After the setting is complete, check whether the setting of other parameters conforms to the setting of the slave.
- Page 290 AH5 00 M od ul e M anua l The TCP keepalive period by default is set to 30 seconds. D500 is an initial register in which statuses of data exchanges are stored. Users can enter MODBUS Advance to alter the initial register.
-
Page 291: Software
(See section 8.6.3.) Modbus Advance: A standard Modbus RS-485/RS-422/RS-232 device can use this function. Other Delta automation products and other standard Modbus communication devices can also use this function. (See section 8.6.4.) COM port history: The communication history of AH10/15SCM-5A can be recorded. (See section 8.6.5.) -
Page 292: Ud Link (User-Defined Communication)
AH5 00 M od ul e M anua l 8.6.3 UD Link (User-defined Communication) The UD Link provides non-Modbus RS-485/RS-422/RS-232 communication. A packet can be edited according to a communication format. The steps of creating an UD Link are as follows. (1) Creating a groupEditing TX packets and RX packetsCreating commandsDownloading the group, and then triggering the sending/receiving of the packets (2) Creating a groupEditing TX packets and RX packetsCreating commandsCreating other... -
Page 293: Tx Packets And Rx Packets
Ch ap te r 8 Ser ia l C om mu nic a ti on Mod ul e AH1 0/15 SC M commands. Finally, the sending/receiving of the packets in the group is triggered. Besides, if several different types of packets are required in a larger system, users can arrange several groups in sequence, and set the sequence of sending/receiving the packets in the groups. - Page 294 AH5 00 M od ul e M anua l Constant: Data is a constant. Format: Users can select Hex, ASCII, or Code in the Format box. If Code is selected, data used is a control code. Value: User can enter a constant. ...
-
Page 295: Command
Ch ap te r 8 Ser ia l C om mu nic a ti on Mod ul e AH1 0/15 SC M Format: Users can select the format of a checksum Initial value: Users can set an initial value. Reverse: The high byte of a one-word checksum which is calculated, and the low byte of the checksum are reversed. -
Page 296: Sequence
AH5 00 M od ul e M anua l 8.6.3.3 Sequence After users right-click a blank and click Add Group, they can select groups and set the sequence of executing the groups. After the sequence is downloaded, the packets in the groups will be sent/received through a communication port. - Page 297 8.7 Application 8.7.1 Modbus This section introduces the how AH10/15SCM-5A is connected to other Delta industrial products such as a human-machine interface, a temperature controller, a programmable logic controllers, an AC motor drive, and a servo motor through Modbus. The connection framework is as follows.
-
Page 298: Modbus Slave─Connection With Delta Products
AH5 00 M od ul e M anua l 8.7.1.1 Modbus Slave─Connection with Delta Products If AH10/15SCM-5A functions as a Modbus slave, users only need to set a slave ID and a transmission speed. After the users double-click AH10/15SCM-5A in the HWCONFIG window, they can set communication parameters. - Page 299 Ch ap te r 8 Ser ia l C om mu nic a ti on Mod ul e AH1 0/15 SC M Right-click AH10/15SCM-5A in the HWCONFIG window, click Intelligent Module Configuration on the context menu, and click Yes. SCMSoft is started. Start SCMSoft.COM PORT Setting: SCM Device1Set communication protocols.
-
Page 300: Modbus Master─Connection With Delta Products
AH5 00 M od ul e M anua l 8.7.1.2 Modbus Master─Connection with Delta Products (1) Setting communication parameters for COM2: Slave ID: 246 (default) Transmission mode: ASCII Transmission speed: 38400 bps Communication format: 7_E_1 (2) Start SCMSoft, right-click MODBUS Advance, and click Add MODBUS Advance. - Page 301 Ch ap te r 8 Ser ia l C om mu nic a ti on Mod ul e AH1 0/15 SC M VFD: (D10016#2103); (D150 and D15116#2000 and 16#2001) ASDA: (D20016#0101; D20116#020A) 8 - 3 9...
- Page 302 AH5 00 M od ul e M anua l (D25016#0101; D25116#020A) PLC: (Master: D300~D309Slave: D100~D109); (Master: D350~D354Slave: D200~D204) 8 - 4 0...
- Page 303 Ch ap te r 8 Ser ia l C om mu nic a ti on Mod ul e AH1 0/15 SC M TC: (D40016#1000); (D45116#1001) 8 - 4 1...
- Page 304 AH5 00 M od ul e M anua l Click MODBUS Advance, and double click Modbus1. Select 2 in the SCM COM Port box, select 1 in the Rack box, and select 1 in the Slot box. (4) Downloading parameters Click Download on the toolbar, click a module which will be downloaded, and click OK.
- Page 305 Ch ap te r 8 Ser ia l C om mu nic a ti on Mod ul e AH1 0/15 SC M 5) Triggering the reading/writing of data Method 1: Users can use the instruction TO in ISPSoft to trigger the reading of data from bit devices/word devices, and the writing of data into bit devices/word devices.
- Page 306 AH5 00 M od ul e M anua l After M0 is triggered, data will be read from a device in a slave thorough COM2. After M1 is triggered, data will be written into a device in a slave through COM2. Method 2: In addition to using the instruction TO to trigger data exchange, users can use HWCONFIG in ISPSoft to trigger data exchange.
- Page 307 Ch ap te r 8 Ser ia l C om mu nic a ti on Mod ul e AH1 0/15 SC M The data register D1 can be used to trigger the data exchanges through COM1. 8 - 4 5...
-
Page 308: Connecting To Ispsoft
ID set for COM1. The station address is not the station address of the AH500 series CPU module. (3) After users click OK, a program can be downloaded to or uploaded from the AH500 series CPU module. -
Page 309: Rs-485/Rs232
Ch ap te r 8 Ser ia l C om mu nic a ti on Mod ul e AH1 0/15 SC M 8.7.3 RS-485/RS232 This section introduces how AH10/15SCM-5A is connected to other industrial products through a non-Modbus RS-485/RS-232 communication port on AH10/15SCM-5A. 8.7.3.1 Connecting to a Power Meter A power meter can be connected through Modbus, or through a RS-485/RS-232 port. - Page 310 AH5 00 M od ul e M anua l Open HWCONFIG.Right-click AH10/15SCM-5A.Click Intelligent Module Configuration. Start SCMSoft.COM PORT SettingSet communication protocols. 8 - 4 8...
- Page 311 Ch ap te r 8 Ser ia l C om mu nic a ti on Mod ul e AH1 0/15 SC M (2) Record types The slave ID of the power meter is 5. All telegrams consist of one of three types of records. These types of records are abbreviated records, control records, and full records.
- Page 312 AH5 00 M od ul e M anua l Type Telegram to the power meter Response (via a record type) All measured values Full record (via a control record) Output parameters Full record (via a control record) Statuses Full record (via a control record) Instrument specifications Full record...
- Page 313 Ch ap te r 8 Ser ia l C om mu nic a ti on Mod ul e AH1 0/15 SC M End mark: 16#16 The editing is complete. No response is needed. Users do not need to edit a RX packet. Editing a command: TX packet 1 is sent.
- Page 314 AH5 00 M od ul e M anua l Type 2: Sending an abbreviated record, and receiving an abbreviated record Sending an abbreviated record: The packet which will be sent is the same as TX packet 1 in type 1. The function field is 16#29. Copy TX packet 1 in the Reset Group.
- Page 315 Ch ap te r 8 Ser ia l C om mu nic a ti on Mod ul e AH1 0/15 SC M Receiving an abbreviated record: 『Start bit』 + 『Instrument address (IA)』 + 『Function field (FF)』 + 『Checksum (CS)』 + 『End mark』 16#10+D0+16#09+(IA+FF)+16#16 Start bit: 16#10 Instrument (IA): Check whether the...
- Page 316 AH5 00 M od ul e M anua l End mark: 16#16 The editing is complete. Editing a command: TX packet 1 is sent, and RX packet 1 is received. 8 - 5 4...
- Page 317 Ch ap te r 8 Ser ia l C om mu nic a ti on Mod ul e AH1 0/15 SC M Type 3: Sending an abbreviated record, and receiving a full record Sending an abbreviated record: The packet which will be sent is the same as TX packet 1 in type 1 or TX packet 1 in type 2.
- Page 318 AH5 00 M od ul e M anua l Start bit (repeat): 16#68 Instrument (IA): Check whether the instrument address received and the instrument address sent previously are the same. Function field (FF): 1 byte is ignored. The data types following the function field are stored in the data registers starting from D100.
- Page 319 Ch ap te r 8 Ser ia l C om mu nic a ti on Mod ul e AH1 0/15 SC M The editing is complete. *: Users can ignore some unimportant bytes, and store data they need in data registers. Besides, if the length of data received is unknown, the users can store the data in data registers.
- Page 320 AH5 00 M od ul e M anua l Type 4: Sending an abbreviated record, and receiving a full record: Sending an abbreviated record: The packet which will be sent is the same as TX packet 1 in type 1 or TX packet 1 in type 2. The function field is 16#A9. Receiving a full record: 『Start bit』...
- Page 321 Ch ap te r 8 Ser ia l C om mu nic a ti on Mod ul e AH1 0/15 SC M Function field (FF): 1 byte is ignored. The parameter index and the data block are stored in the data registers starting from D100.
- Page 322 AH5 00 M od ul e M anua l Type 5: Sending a control record, and receiving a full record: Sending a control record: The function field is 16#89. 『Start bit』+『Length』+『Length (repeat)』+『Start bit (repeat)』+『Instrument address (IA)』 +『Function field (FF)』+『Parameter index (PI)』+『Checksum (CS)』+『End mark』 16#68+16#03+16#03+16#68+D0+16#89+D1+(Summation of the characters starting from IA to PI)+16#16 The instrument address (IA) is read from...
- Page 323 Ch ap te r 8 Ser ia l C om mu nic a ti on Mod ul e AH1 0/15 SC M Checksum (CS) End mark: 16#16 Receiving a full record: 『Start bit』 + 『Length』 + 『Length (repeat)』 + 『Start bit (repeat)』 + 『Instrument (IA)』 + 『Function field (FF)』+『Parameter index (PI)』+『Data block (DB)』+『Checksum (CS)』+『End mark』...
- Page 324 AH5 00 M od ul e M anua l Start bit (repeat): 16#68 Instrument (IA): Check whether the instrument address received and the instrument address sent previously are the same. Function field (FF) The parameter index received must be the same as the parameter index sent previously.
- Page 325 Ch ap te r 8 Ser ia l C om mu nic a ti on Mod ul e AH1 0/15 SC M Data block (DB): The data received is stored in the registers starting from D100. (5) Downloading a group list Users can click Download on the toolbar in SCMSoft.
- Page 326 AH5 00 M od ul e M anua l 8 - 6 4...
-
Page 327: Error Flags
Ch ap te r 8 Ser ia l C om mu nic a ti on Mod ul e AH1 0/15 SC M 8.8 Error Flags The error flags and the UD Link statuses are stored in data registers. Users can modify the input device range by themselves. - Page 328 AH5 00 M od ul e M anua l Contents of the error flags: Error code Description 16#0001 Hardware failure An error occurs when the communication protocol for exchanging data 16#0002 through a communication port is UD Link. 16#0004 An error occurs when data is exchanged through a communication port. An error occurs when the communication protocol for exchanging data 16#0008 through a communication port is Modbus.
- Page 329 Ch ap te r 8 Ser ia l C om mu nic a ti on Mod ul e AH1 0/15 SC M D6, D7, and D8 Communication Description Buffer overrun Parity check error Framing error timeout error Internal Internal Description Reserved communication communication...
- Page 330 AH5 00 M od ul e M anua l MEMO 8 - 6 8...
- Page 331 Chapter 9 Ethernet Communication Module AH10/15EN-5A Table of Contents Introduction ....................9-2 9.1.1 Functions ....................9-2 9.1.2 Specifications ..................9-2 9.1.3 Dimensions ..................9-3 9.1.4 Profile ....................9-3 9.1.5 RJ-45 Port ..................9-4 Installation and Wiring ................9-4 9.2.1 Installation ..................9-4 9.2.2 Connecting to the Network ..............9-5 Registers ....................9-5 9.3.1 Functions of the Input Registers ............9-5...
-
Page 332: Introduction
AH5 00 Mod ule Manua l 9.1 Introduction AH10/15EN-5A is an AH500 series Ethernet module. The data in an AH500 series CPU module can be transmitted to a remote device through Ethernet. Besides, the CPU module can control the remote device through ISPSoft, and a program can be downloaded to the CPU module through ISPSoft. -
Page 333: Dimensions
Ch ap te r 9 Ether ne t Co mmun ica tio n Mo du le AH1 0 /1 5 EN 9.1.3 Dimensions Unit: mm 9.1.4 Profile 10EN Et he rne t Number Name Description Model name Model name of the module Seven-segment Display display... -
Page 334: Port
AH5 00 Mod ule Manua l Number Name Description MS LED indicator LED indicator RJ45 port 1 RJ45 port 1 RJ45 port 2 RJ45 port 2 Label Nameplate Set screw Fixing the module Connector Connecting the module and a backplane Projection Fixing the module 9.1.5 RJ-45 Port... -
Page 335: Connecting To The Network
3. Tighten the screw on the module. 9.2.2 Connecting to the Network After an AH500 series CPU module is set through HWCONFIG in ISPSoft, AH10/15EN-5A can carry out communication. The basic setting of the CPU module is accomplished through the RS-232/USB/Ethernet port. -
Page 336: Functions Of The Output Registers
AH5 00 Mod ule Manua l Number Attribute Register name Description HW LW Statuses of the Modbus Number of Modbus TCP clients which are TCP clients connected Statuses of the Modbus Number of Modbus TCP servers which are TCP servers connected Reserved Reserved... -
Page 337: Functions Of The Control Registers
Ch ap te r 9 Ether ne t Co mmun ica tio n Mo du le AH1 0 /1 5 EN Number Attribute Register name Description HW LW Reserved Reserved Reserved Reserved Reserved Every bit represents a trigger. Trigger for the sending of the email 1: The email is sent. - Page 338 AH5 00 Mod ule Manua l number Attribute Register name Description HW LW 0: The assignment of an IP address is complete. Triggering the setting of the IP parameters 1: The setting of the IP parameters (in for port 1 CR#4~CR#10) for port 1 is triggered.
- Page 339 Ch ap te r 9 Ether ne t Co mmun ica tio n Mo du le AH1 0 /1 5 EN Value in the control register Execution state of the email The email is sent successfully. Reserved AH10/15EN-5A cannot connect to an SMTP server. The email address of a receiver is incorrect.
- Page 340 AH5 00 Mod ule Manua l connection #526 Connection 5 Common ASDU Common ASDU Address of the 5 Address slave connection #528 #527 Connection 6 IP Address IP address of the 6 slave connection #529 Connection 6 Common ASDU Common ASDU Address of the 6 Address slave connection #531...
- Page 341 Ch ap te r 9 Ether ne t Co mmun ica tio n Mo du le AH1 0 /1 5 EN #611 Reserved #612 ~ #627 Sending commands to the One word represents one connection 1~16 connection of a remote device. Input a command code to send the command and work with CR#644~CR#649 to write the...
- Page 342 AH5 00 Mod ule Manua l corresponding to the master connection 4 #736 ~ #724 CPU register number corresponding to the master connection 5 #749 ~ #737 CPU register number corresponding to the master connection 6 #762 ~ #750 CPU register number corresponding to the master connection 7 #775 ~ #763...
- Page 343 Ch ap te r 9 Ether ne t Co mmun ica tio n Mo du le AH1 0 /1 5 EN Value in the Description Number control register #645 K100 IOA 100 (information object address) of the remote device #646 1:ON,0:OFF #647 #620...
- Page 344 AH5 00 Mod ule Manua l #683 Packed single-point information with status change detection corresponds to the starting position of D device #684 Measured value, normalized value without quality descriptor corresponds to the starting position of D device Example: when AH15EN-5A is as a master, it will scan and obtain the IOA of the remote ...
-
Page 345: Introduction Of The Related Instructions
Explanation: Users can use this instruction to read data from a control register in a network module into an AH500 series PLC. The operand m should be in the range of 1 to 8. 1 represents a main rack, and 2~8 represent extension racks. - Page 346 AH5 00 Mod ule Manua l Example: Suppose the first special module at the right side of the CPU module is AH10/15EN-5A. When X0.0 is switched from OFF to ON, the instruction FROM is executed. The operation mode stored in CR#3 in AH10/15EN-5A is read into D100.
- Page 347 : Data length Word/Double word Explanation: Users can use this instruction to write data in an AH500 series PLC into a control register in a network module. The operand m should be in the range of 1 to 8. 1 represents a main rack, and 2~8 represent extension racks.
- Page 348 AH5 00 Mod ule Manua l Example: Suppose the first special module at the right side of the CPU module is AH10/15EN-5A. When X1.1 is switched from OFF to ON, the instruction TO is executed. The value stored in CR#3 in AH10/15EN-5A changes from 0 to 1.
-
Page 349: Introduction Of The Iec60870-5-104 Protocol
Ch ap te r 9 Ether ne t Co mmun ica tio n Mo du le AH1 0 /1 5 EN Additional remark: 1. If the values in m and m exceed the range, the operation error occurs, the instruction is not executed, SM0 is ON, and the error code in SR0 is 16#2003. - Page 350 AH5 00 Mod ule Manua l C_DC_NA_1 (46) Double command C_RC_NA_1 (47) Regulating step command C_SE_NA_1 (48) Set-point command, normalized value C_SE_NB_1 (49) Set-point command, scaled value C_SE_NC_1 (50) Set-point command, short floating point value C_BO_NA_1 (51) Bit string of 32 bit C_SC_TA_1 (58) Single command with time tag CP56Time2a C_DC_TA_1 (59)
- Page 351 Ch ap te r 9 Ether ne t Co mmun ica tio n Mo du le AH1 0 /1 5 EN Refer to the section of information elements for more details. Command and parameters Data Type id Value Type C_SC_NA_1 (45) SCO: Refer to the section of information elements for more details.
- Page 352 AH5 00 Mod ule Manua l Information elements Single command SCO: CP8{SCS, BS1, QU, S/E} SCS: Single command state Description 0: OFF 1: ON Qualifier for the commands Description 0: Unspecified 1: Short pulse 2: Long pulse 3: Persistent output 4…8:Reserved for standard definitions of companion standard (compatible range) 9…15:Reserved for the selection of other predefined functions...
- Page 353 Ch ap te r 9 Ether ne t Co mmun ica tio n Mo du le AH1 0 /1 5 EN Qualifier of counter interrogation QCC: CP8{RQT, FRZ} RQT: Request qualifier of counter interrogation command Description 0: No counter read 1: Request counter group 1 2: Request counter group 2 3: Request counter group 3...
-
Page 354: Hwconfig─Network Parameters
AH5 00 Mod ule Manua l Quality descriptor for events of protection equipment QDP: CP8{ RES, EI, BL, SB, NT, IV} Refer to section of SEP for more details. Output cirquit information of protection equipment OCI: CP8{ RES, EI, BL, SB, NT, IV} 9.4 Setting AH10/15EN-5A through ISPSoft This section introduces the setting of AH10/15EN-5A through ISPSoft. -
Page 355: Hwconfig─Function List
Ch ap te r 9 Ether ne t Co mmun ica tio n Mo du le AH1 0 /1 5 EN IP address An IP address is the address of a device on a network. Every device connected to a network needs an IP address. -
Page 356: Hwconfig─Ip Filter Parameters
Users can set a Modbus TCP port number. The default value is 502. Enabling the time correction function AH10/15EN-5A synchronizes the real-time clock in an AH500 series CPU module to a slave on a network through the Network Time Protocol (NTP). To ensure that time is correct, the time is corrected every specific period of time ... -
Page 357: Hardware Configuration ─ Iec60870-5 Parameters
Ch ap te r 9 Ether ne t Co mmun ica tio n Mo du le AH1 0 /1 5 EN Input data parameters Users can set an initial data register to which input data is transmitted, and the number of data registers. -
Page 358: Intelligent Module Configuration─Email
AH5 00 Mod ule Manua l Correction cycle AH10/15EN-5A synchronizes the real-time clock in an AH500 series CPU module to a slave on a network through the Network Time Protocol (NTP). To ensure that time is correct, the time is corrected every specific period of time. - Page 359 Ch ap te r 9 Ether ne t Co mmun ica tio n Mo du le AH1 0 /1 5 EN SMTP slave An email is sent to an SMTP slave, and then the SMTP slave sends the email to an address which is specified.
-
Page 360: Intelligent Module Configuration─Data Exchange
AH5 00 Mod ule Manua l User message Users can enter a user message. The message will be the contents of an email. Attachment The present value in a device in a CPU module can be an attachment to an email. ... - Page 361 Ch ap te r 9 Ether ne t Co mmun ica tio n Mo du le AH1 0 /1 5 EN Operation mode The data exchange function can be always enabled, controlled by a program, or enabled when a PLC runs. If the data exchange function is always enabled, AH10/15EN-5A will execute the function continually.
-
Page 362: Intelligent Module Configuration─Snmp
1. Check whether the module is connected to the backplane properly. The communication with an 2. Power the CPU module and the module AH500 series CPU module fails. again. If the error still occurs, please contact the factory. 1. The subnet mask set is illegal. - Page 363 Chapter 10 DeviceNet Communication Module AH10DNET Table of Contents 10.1 Introduction ..................10-3 10.1.1 Feature ..................10-3 10.1.2 Functions ..................10-3 10.1.3 Specifications ................10-3 10.2 Profile and Outline ................10-4 10.2.1 Profile and Dimensions ..............10-4 10.2.2 Parts .....................10-5 10.2.3 DeviceNet Communication Connector ..........10-5 10.2.4 Address Switch ................10-6 10.2.5 Function Switch ................10-6...
- Page 364 10.10 Error Diagnosis and Trouble Shooting ..........10-60 10.10.1 Indicator Diagnosis ..............10-60 10.10.2 Seven-segment Display Diagnosis ..........10-61 10.10.3 Software Diagnosis..............10-63 7 - 2...
-
Page 365: Chapter 10 Devicenet Communication Module Ah10Dnet
Ch a pt er 1 0 De v ic eN e t Com m unic at i on Mo d ul e A H 10 DN ET 10.1 Introduction AH10DNET-5A is installed at the right side of an AH500 series CPU module. AH10DNET-5A and an AH500 series CPU module constitute the DeviceNet master or slave. -
Page 366: Profile And Outline
AH 5 00 Mo d u le Ma n ua l DeviceNet Communication Item Specifications Master mode: Support explicit message, all kinds of I/O connection with the slave such as I/O polled, bit-strobe, state changing, Message type cyclic Slave mode: Support explicit message and Group 2 only server Standard: 125 kbps, 250 kbps and 500 kbps Transmission Extension: 10 kbps, 20 kbps, 50 kbps, 125 kbps, 250 kbps, 500 kbps,... -
Page 367: Parts
Ch a pt er 1 0 De v ic eN e t Com m unic at i on Mo d ul e A H 10 DN ET 10.2.2 Parts 1 0 D N E T x 10 N o d e Ad d re s s x 10 DR 1 DR 0... -
Page 368: Address Switch
AH 5 00 Mo d u le Ma n ua l 10.2.4 Address Switch The switch is used on setting up the node address of AH10DNET-5A on DeviceNet. Range: 00~63 (64~99 are forbidden.) Switch setting Description 0-63 Valid DeviceNet node address 64-99 Invalid DeviceNet node address Example: If you need to set the node address of AH10DNET-5A to 26, simply switch the... -
Page 369: Installation
Ch a pt er 1 0 De v ic eN e t Com m unic at i on Mo d ul e A H 10 DN ET 10.3 Installation 10.3.1 Installing the Module 1. Insert the projection under the module into the hole in the backplane. 2. -
Page 370: Connecting To The Devicenet Communication Connector
AH 5 00 Mo d u le Ma n ua l 10.3.2 Connecting to the DeviceNet Communication Connector 1. After wiring is completed, insert the DeviceNet connector to the port. 2. Tighten the screws on two sides of the DeviceNet terminal. 10.3.3 DeviceNet Bus Network Topology Structure The transmission distance on the DeivceNet bus network is determined by the transmission rate. - Page 371 Ch a pt er 1 0 De v ic eN e t Com m unic at i on Mo d ul e A H 10 DN ET 1 0 - 9...
- Page 372 AH 5 00 Mo d u le Ma n ua l Delta network products related with DeviceNet bus: Product picture Type Function AH10DNET-5A, a DeviceNet module, running on the I/O slot of an AH10DNET-5A AH500 series main backplane can work as the DeviceNet master or slave.
- Page 373 Ch a pt er 1 0 De v ic eN e t Com m unic at i on Mo d ul e A H 10 DN ET Product picture Type Function Used for connecting the C2000 series CMC-DN01 AC motor drive to the DeviceNet network Used for the connection between the DN-02...
-
Page 374: Choice And Purpose Of A Devicenet Terminal Resistor
The terminal resistor is used for eliminating the signal reflection in the communication cable. All signal transmission cables have the characteristic impedance. The characteristic impedance of Delta DeviceNet communication cable is about 121 ohm. When being transmitted to the end of the communication cable, because the impedance of the end is different from the characteristic impedance, the signal will be reflected, which will interfere with the new signal and the signal wave form distortion will happen. -
Page 375: Devicenet Network Supply Power
The network just needs one or multiple supply powers which supply the power to each piece of network equipment via the bus cable. Delta DeviceNet bus cable consists of five wires, among which the power wire and signal wire occupy two wires respectively and the left one is the shielded wire as the above figure shows. -
Page 376: Configuration Of Ah10Dnet-5A
The farther the scanner module is away from an AH500 series CPU module, the larger its unit number is. The unit number of the first AH10DNET-5A of the right side of an AH500 series CPU module is 1. The next one nearest to the first scanner module is 2. And the following ones will be 3, 4 and so on. -
Page 377: Assignment Of Mapping Area (In Slave Mode)
The starting addresses for output and input are D500 and D1000 respectively. Note: D500 and D1000 in the above window are the registers in an AH500 series CPU module on the left of AH10DNET-5A functioning as a master. - Page 378 AH 5 00 Mo d u le Ma n ua l Note: D1000 and D500 in the above window are the registers in an AH500 series CPU module on the left of AH10DNET-5A functioning as a slave. The following figure illustrates the corresponding relations in the mapping areas of the master and slave.
-
Page 379: Bit-Strobe Command
Ch a pt er 1 0 De v ic eN e t Com m unic at i on Mo d ul e A H 10 DN ET ○ represents the control data that DeviceNet master sends and these data will be updated in the registers starting from D1000 in real time. -
Page 380: Network Node Status Display
AH 5 00 Mo d u le Ma n ua l 10.6 Network Node Status Display 10.6.1 Scan List Node Status Display The function is used for monitoring whether the DeviceNet slave is offline or not. The scanner module conducts the real-time monitor and control of the nodes in the scan list and maps the status of each node in the scan list to one bit so that users could acquire the status information of the network node through monitoring the value in the corresponding register. -
Page 381: Special Operation In Master Mode
10.7.1 Master Mode Setting If AH10DNET-5A is in slave mode, it can be set to the master mode via the DeviceNet Builder software. 1. PC accesses an AH500 series CPU module via USB after connecting the device according to the following figure. PS05... - Page 382 AH 5 00 Mo d u le Ma n ua l 3. Select “Tool” >> “Communication Setting” and then the following dialog box appears where select the already built driver. Note: The driver is built via COMMGR software. See section 8.1.4 in the help file of the DeviceNet Builder software for more.
- Page 383 Ch a pt er 1 0 De v ic eN e t Com m unic at i on Mo d ul e A H 10 DN ET 5. Select “Option” >> “Download” in the HWCONFIG software interface and then the following dialog box appears, where select “OK”...
- Page 384 AH 5 00 Mo d u le Ma n ua l 8. Select “Network” >> “Online” and the software interface will be shown as below. 9. Select “Network” >> “Scanner Setting” and then “Scanner Setting” dialog box appears, where pick “Master Mode” and then click “OK” after setting is over. 10.
-
Page 385: Mapping Areas Setting
Note: If “E7” is displayed on AH10DNET-5A, please remove its DeviceNet terminals before downloading. Otherwise, failure to download will occur. 11. Power off the AH500 series CPU module and then power it on again after downloading is finished. And at the time, AH10DNET-5A is set to the master mode. - Page 386 AH 5 00 Mo d u le Ma n ua l 3. Select “Tool” >> “Communication Setting” and then the following dialog box appears where select the already built driver. Note: The driver is built via COMMGR software. See section 8.1.4 in the help file of the DeviceNet Builder software for more.
- Page 387 Ch a pt er 1 0 De v ic eN e t Com m unic at i on Mo d ul e A H 10 DN ET 5. Double click 10DNET icon in the above window and the parameter configuration interface of AH10DNET-5A will pop up as follows.
- Page 388 AH10DNET-5A after the network enters the online mode and the configuration is completed. 9. Power off the AH500 series CPU module and then power it on again after downloading is finished. And at the time, the starting address of the mapping area is modified successfully.
- Page 389 Ch a pt er 1 0 De v ic eN e t Com m unic at i on Mo d ul e A H 10 DN ET PS05 DeviceNet Builder CPU530-EN AH10DNET-5A C U530-EN 10DNET P 05 RS232 Note: The introduction in this section is made in the USB communication method. 2.
- Page 390 AH10DNET-5A after the network configuration is completed. 6. Power off the AH500 series CPU module and then power it on again after downloading is finished. And at the time, the starting addresses of the mapping areas are modified successfully.
-
Page 391: Extension Baud Rate Setting
Ch a pt er 1 0 De v ic eN e t Com m unic at i on Mo d ul e A H 10 DN ET 10.7.3 Extension Baud Rate Setting 1. PC accesses the AH500 series CPU module via RS232 after connecting the device according to the following figure. - Page 392 Otherwise, failure to download will occur. 6. After downloading is completed, turn both of the function switch DR0 and DR1 of AH10DNET-5A to ON and then repower the AH500 series CPU module. At the time, the extension baud rate setting is finished.
-
Page 393: Special Operation In Slave Mode
AH10DNET-5A can be set simultaneously. Method 1: Setting slave mode and the starting addresses of the mapping areas through ISPSoft and DeviceNet Builder 1. PC accesses an AH500 series CPU module via USB after connecting the device according to the following figure. PS05... - Page 394 AH 5 00 Mo d u le Ma n ua l 3. Select “Tool” >> “Communication Setting” and then the following dialog box appears where select the already built driver. Note: The driver is built via COMMGR software. See section 8.1.4 in the help file of the DeviceNet Builder software for more.
- Page 395 Ch a pt er 1 0 De v ic eN e t Com m unic at i on Mo d ul e A H 10 DN ET 5. Double click 10DNET icon in the above window and then the following dialog box appears, where modify the starting addresses of the mapping areas of AH10DNET-5A.
- Page 396 AH 5 00 Mo d u le Ma n ua l 7. Right click 10DNET icon in the HWCONFIG software interface and then select “Intelligent Module Setting”. 8. Select “Network” >> “Online” and the software interface is shown as below. 1 0 - 3 4...
- Page 397 Note: If “E7” is displayed on AH10DNET-5A, please remove its DeviceNet terminals before downloading. Otherwise, failure to download will occur. 11. Power off the AH500 series CPU module and then power it on again after downloading is finished. And at the time, AH10DNET-5A is set to the slave mode.
- Page 398 AH 5 00 Mo d u le Ma n ua l PS05 DeviceNet Builder CPU530-EN AH10DNET-5A C U530-EN 10DNET P 05 RS232 Note: The introduction in this section is made in the USB communication method. 2. Open DeviceNet Builder, select “Setup” >> “Communication Setting” and then the following dialog box appears, where select the driver.
- Page 399 Note: If “E7” is displayed on AH10DNET-5A, please remove its DeviceNet terminals before downloading. Otherwise, failure to download will occur. 6. Power off the AH500 series CPU module and then power it on again after downloading is finished. And at the time, AH10DNET-5A is set to the slave mode.
-
Page 400: Modifying The Data Length Of The Slave
AH 5 00 Mo d u le Ma n ua l 10.8.2 Modifying the Data Length of the Slave When AH10DNET-5A works in slave mode, the data length could be modified through the software according to the following steps. 1. Scan AH10DNET-5A in slave mode through the DeviceNet master. “AH10DNET Slave”... - Page 401 Ch a pt er 1 0 De v ic eN e t Com m unic at i on Mo d ul e A H 10 DN ET 3. Modify the data length of the slave in the parameter editor. “Length of input data” is the length of the data that the slave sends to the master and “Length of output data”...
-
Page 402: Extension Baud Rate Setting
AH 5 00 Mo d u le Ma n ua l Meanwhile, the master will automatically assign 50 bytes of registers in the output list to AH10DNET Slave. 5. Repower AH10DNET-5A after setting is over and then modifying the data length is successful. 10.8.3 Extension Baud Rate Setting When AH10DNET-5A is in slave mode, its extension baud rate can be set as the following steps. - Page 403 Note: These parameters in the parameter editor belong to the current slave. After downloading is completed, turn both of the function switch DR0 and DR1 of AH10DNET-5A (Slave) to ON and then repower the AH500 series CPU module. At the time, the extension baud rate setting is finished.
-
Page 404: Application Example
CP U53 0-E N 1 0DNE T Note: (1) AHCPU510-EN and AHCPU530-EN both are Delta AH500 series CPU modules. AHCPU510-EN and AH10DNET-5A constitute the DeviceNet master and AHCPU530-EN and AH10DNET-5A constitute the DeviceNet slave. (2) Either end of the DeviceNet bus must be connected with one terminal resistor of about 121 ohm. -
Page 405: Configuration Of Devicenet Slave
Ch a pt er 1 0 De v ic eN e t Com m unic at i on Mo d ul e A H 10 DN ET 10.9.2 Configuration of DeviceNet Slave 1. PC accesses an AH500 series CPU module via RS232 after connecting the device according to the following figure. - Page 406 AH 5 00 Mo d u le Ma n ua l 4. Double click HWCONFIG under “Project” and the HWCONFIG software interface is called out. 5. Start to scan by selecting “Option” >> “I/O Scan” in the HWCONFIG software interface. 1 0 - 4 4...
- Page 407 Ch a pt er 1 0 De v ic eN e t Com m unic at i on Mo d ul e A H 10 DN ET The device connected to AHCPU530-EN will be scanned. 6. 10DNET in the window is the abbreviation of AH10DNET-5A. Double click the icon of 10DNET and then the parameter setting window of 10DNET will pop up.
- Page 408 AH 5 00 Mo d u le Ma n ua l 8. Right click 10DNET icon and select “Intelligent Module Configuration” to call the DeviceNet Builder software interface out. 9. The DeviceNet Builder software is called out. 1 0 - 4 6...
- Page 409 Ch a pt er 1 0 De v ic eN e t Com m unic at i on Mo d ul e A H 10 DN ET 10. Select “Network” >> “Online” and AH10DNET-5A will appear under the project list. If current AH10DNET-5A has been set to the slave mode, the software interface will be as shown below.
- Page 410 Note: If E7 appears on AH10DNET-5A, please remove the DeviceNet terminal before downloading. Otherwise, Failure to download will occur. 13. After downloading is completed, power off the AH500 series CPU module and then repower it. At the moment, AH10DNET-5A is set to the slave mode.
-
Page 411: Configuration Of Devicenet Master
Ch a pt er 1 0 De v ic eN e t Com m unic at i on Mo d ul e A H 10 DN ET 10.9.3 Configuration of DeviceNet Master 1. Connect the devices following the figure below and remove the RS232 cable from AHCPU530-EN to AHCPU510-EN. - Page 412 AH 5 00 Mo d u le Ma n ua l 4. Double click HWCONFIG under “Project” and the HWCONFIG software interface is called out. 5. Start to scan by selecting “Option” >> “I/O Scan” in the HWCONFIG software interface. 1 0 - 5 0...
- Page 413 Ch a pt er 1 0 De v ic eN e t Com m unic at i on Mo d ul e A H 10 DN ET The device connected to AHCPU510-EN is scanned. 6. 10DNET in the window is the abbreviation of AH10DNET-5A. Double click the icon of 10DNET and then the parameter setting window of 10DNET will pop up.
- Page 414 AH 5 00 Mo d u le Ma n ua l 7. Select “Option” >> “Download” to download the above setting to AHCPU510-EN. 8. Right click 10DNET icon and select “Intelligent Module Configuration” to call the DeviceNet Builder software interface out. 1 0 - 5 2...
- Page 415 Ch a pt er 1 0 De v ic eN e t Com m unic at i on Mo d ul e A H 10 DN ET 9. The DeviceNet Builder software is called out. 10. Select “Network” >> “Online” and AH10DNET-5A will appear under the project list. 1 0 - 5 3...
- Page 416 AH 5 00 Mo d u le Ma n ua l If AH10DNET-5A has been set to the slave mode, the software interface will be as shown below. Note: If AH10DNET-5A has been set to the slave mode, set current AH10DNET-5A to the master mode first and then conduct the next operation.
- Page 417 Ch a pt er 1 0 De v ic eN e t Com m unic at i on Mo d ul e A H 10 DN ET 12. Right click the icon on AH10DNET Slave (node 1) and select “Parameter Edit...”. 13.
-
Page 418: Configuring Devicenet Slave Into The Master
(4) The registers in “Input Table” are specified by “Input Start”. 3. Click “OK” after confirming that no error exists to download the configuration to AH10DNET-5A. If the AH500 series CPU module is in run mode during downloading, the warning dialogue box will pop up as below. -
Page 419: Data Flow Direction
DeviceNet network is completed. 10.9.5 Data Flow Direction Configure the DeviceNet network following the above steps and the mapping relation between AH10DNET-5A and the slave device is shown below: AH500 series CPU module → AH10DNET-5A → Slave device AH10DNET-5A AH10DNET-5A AHCPU510-EN... - Page 420 AH 5 00 Mo d u le Ma n ua l 10.9.6 Ladder Diagram Program Control request: AHCPU510-EN makes the remote monitor and control of D0, D30, D50, D150 and D230 in AHCPU530-EN via the DeviceNet bus. In order to achieve the above control request, write the following PLC program in AHCPU530-EN. PLC program: NETWORK 1 SM400...
- Page 421 Ch a pt er 1 0 De v ic eN e t Com m unic at i on Mo d ul e A H 10 DN ET NETWORK 6 SM400 D2500 NETWORK 7 SM400 D2501 NETWORK 8 SM400 D2502 NETWORK 9 SM400 D150 D2503...
- Page 422 AH 5 00 Mo d u le Ma n ua l 10.10 Error Diagnosis and Trouble Shooting AH10DNET-5A provides three diagnosis methods such as indicator, seven-segment display and software diagnosis. 10.10.1 Indicator Diagnosis NS LED LED status Indication How to deal with 1.
- Page 423 How to deal with Node address of DVPDNET-SL 0~63 (in normal operation) Turn the AH500 series CPU module to RUN AH10DNET-5A in STOP status. and start I/O data exchange. The node address of 1. Ensure that the node address of AH10DNET-5A is identical to AH10DNET-5A is unique.
- Page 424 AH 5 00 Mo d u le Ma n ua l Code Indication How to deal with Method 2: No slave is configured in the scan list. Download the empty configuration to AH10DNET-5A by using the “Simulate online” function. Finally, repower it. The data exchange between If the error still exists after AH CPU and AH10DNET-5A and AHCPU...
- Page 425 Excessively low voltage Check if the work power for AH10DNET-5A and the 16#A0F2 for AH10DNET-5A. AH500 series CPU module is normal. AH10DNET-5A enters the Switch IN1 from ON to OFF and repower 16#A0F3 test mode. AH10DNET-5A.
- Page 426 AH 5 00 Mo d u le Ma n ua l Error code Description How to deal with extension rack 3. Check if the bus communication cable length connection fails. exceeds the maximum transmission distance. (Refer to section 10.3.3. The system may no longer keep stable if the maximum distance is exceeded.) 4.
- Page 427 Chapter 11 DeviceNet Remote I/O Module AHRTU-DNET Table of Contents 11.1 Introduction of AHRTU-DNET-5A ..........11-3 11.1.1 Feature ..................11-3 11.1.2 Function and Specifications ............. 11-3 11.2 Profile and Outline ..............11-4 11.2.1 Dimensions ................11-4 11.2.2 Profile ..................11-5 11.2.3 DeviceNet Communication Connector ........
- Page 428 11.6 AH10SCM-5A Application Example ........11-77 11.6.1 Hardware Configuration ............11-77 11.6.2 AH10SCM-5A Configuration ..........11-78 11.6.2.1 Configuration of AH10SCM-5A Parameters ......11-78 11.6.2.2 Configuration of AH10SCM-5A Serial Port Data ....11-82 11.6.2.3 Downloading AH10SCM-5A Serial Port Configuration ..11-98 11.6.3 Execution by Trigger ............
-
Page 429: Introduction Of Ahrtu-Dnet-5A
According to the actual need, users select whether to retain the buffer register information when the network is offline. It is can be connected to one main rack, 7 extension racks and 68 AH500 series I/O modules. The maximum input and output data it supports: 980 bytes respectively ... -
Page 430: Profile And Outline
AH500 Module Manual Environment Item Specification ESD (IEC 61131-2, IEC 61000-4-2): 8 kV Air Discharge EFT (IEC 61131-2, IEC 61000-4-4): Power Line: 2 kV, Digital I/O: 1 kV Noise Analog & Communication I/O: 1 kV immunity Damped-Oscillatory Wave: Power Line: 1 kV, Digital I/O: 1 kV... -
Page 431: Profile
Ch a pt er 11 DeviceNet Re m ote I/O Module AHRTU-DNET Length and height of each rack: Total height of rack Model Length W Rack’s height plus module AHBP04M1-5A (Main rack) 16.7 119.7 (16.7+103) AHBP06M1-5A (Main rack) 16.7 119.7 (16.7+103) AHBP08M1-5A (Main rack) 16.7 119.7 (16.7+103) - Page 432 AH500 Module Manual 11.2.3 DeviceNet Communication Connector The connector is used on the connection to DeviceNet. Wire it by using the connector enclosed with AHRTU-DNET-5A. Pin definition of DeviceNet connector: Signal Color Description 24 V DC Signal (positive CAN_H White...
-
Page 433: Basic Installation Of Ahrtu-Dnet-5A
Use slotted screwdriver to rotate the switch carefully in case you scratch the switch. 11.2.6 CPU Interface The interface is used to connect AHRTU-DNET-5A to the CPU slot of AH500 series rack. Please note that AHRTU-DNET-5A must be inserted to the CPU slot on the rack in order to prevent from damaging the module or the rack. - Page 434 AH500 Module Manual After installing properly, tighten the screw on the top of the module. By the same way, install the following power and I/O module. The power module must be installed to the POWER slot; the I/O module must be installed to the I/O slot; AH10SCM-5A must be installed to the I/O slot on the main rack.
- Page 435 Ch a pt er 11 DeviceNet Re m ote I/O Module AHRTU-DNET AHRTU-DNET-5A supports maximum 1 main rack, 7 extension racks and 68 I/O modules. See the figure of connection of the racks as below. Note: AHRTU-DNET-5A must be installed to the CPU interface and AHPS05-5A power supply module can only be mounted to the POWER slot and I/O modules are mounted to the I/O slots only.
- Page 436 AH500 Module Manual Applicable Modules during Installation 11.3.2 The power module, main rack, extension rack and the model and specification of the rack communication cable, which could be connected to AHRTU-DNET-5A are listed in the following table. Module Description...
-
Page 437: Connecting The Cable To The Devicenet Connector
Ch a pt er 11 DeviceNet Re m ote I/O Module AHRTU-DNET Default I/O mapping data length (Unit: Word) Special module DeviceNet→AHRTU-DNET-5A AHRTU-DNET-5A→DeviceNet AH04DA-5A AH08DA-5B AH08DA-5C AH06XA-5A AH04PT-5A AH04TC-5A AH08TC-5A AH10SCM-5A Note: AH10SCM-5A can only be mounted to the main rack. ... -
Page 438: Installing The Devicenet Connector
AH500 Module Manual Tighten the screw of the communication connector to fix the cable to the holes of the connector with a standard slotted screwdriver. Installing the DeviceNet Connector 11.3.4 After wiring is over, insert the DeviceNet connector to the interface. - Page 439 The terminal resistor is used for eliminating the signal reflection in the communication cable. All signal transmission cables have the characteristic impedance. The characteristic impedance of Delta DeviceNet communication cable is about 121 ohm. When being transmitted to the end of the communication cable, because the impedance of the end is different from the characteristic impedance, the signal will be reflected, which will interfere with the new signal and the signal wave form distortion will happen.
- Page 440 AH500 Module Manual The DeviceNet network topology structure is illustrated as below. 11-14...
- Page 441 Delta network products related with DeviceNet bus: Product picture Type Function AH10DNET-5A, a DeviceNet module, running on the I/O slot of AH500 series main AH10DNET-5A rack can work as the DeviceNet master or slave. AHRTU-DNET-5A, an AH500 series remote I/O data exchange module, is used for...
- Page 442 AH500 Module Manual Product picture Type Function Used for connecting the E series AC motor CME-DN01 drive to the DeviceNet network. Used for connecting the C2000, CH2000, CMC-DN01 CP2000 series AC motor drive to the DeviceNet network. It converts DeviceNet to Modbus gateway...
-
Page 443: Configuration Of Ahrtu-Dnet-5A
11.4 Configuration of AHRTU-DNET-5A As the DeviceNet slave, AHRTU-DNET-5A is used to achieve the remote data exchange between the DeviceNet master and the AH500 series I/O modules connected to itself. Transmits the output data of the DeviceNet master to I/O modules. -
Page 444: Introduction Of Software
AH500 Module Manual Name Unit Explanation The first word of the input data which the master assigned to AHRTU-DNET-5A is the status word of AHRTU-DNET-5A. It is Status word Word used for displaying the operational state of AHRTU-DNET-5A. Refer to section 4.3.3 for more details on status word. -
Page 445: Establishing The Connection Between Devicenet Builder And A Plc
Ch a pt er 11 DeviceNet Re m ote I/O Module AHRTU-DNET 11.4.2.1 Establishing the Connection between DeviceNet Builder and a To make the normal communication between DeviceNet Builder and PLC CPU, the communication management software COMMGR should be set up first. Set up COMMGR as below: 1. - Page 446 AH500 Module Manual 3. Click “OK” after setting Driver 1 is completed. OK will show up on the status column if Driver1 is started up successfully. 4. Open DeviceNet Builder and select menu “Setup”>“Communication Setting” after the communication channel Driver 1 is started up successfully.
- Page 447 Ch a pt er 11 DeviceNet Re m ote I/O Module AHRTU-DNET 5. On the “Communication Setting” interface, select Driver 1 for “Driver”. “Station address” represents the address of PLC CPU and the station address 0 indicates to broadcast. Finally, click “OK”.
-
Page 448: Ahrtu-Dnet-5A Configuration Interface
AH500 Module Manual 7. After the modules succeed in being online, select the module AH10DNET-5A to be operated in Project List and then click “Scan DeviceNet Network” button to start scanning the nodes on the network. Before clicking the “Scan DeviceNet Network” button, make sure that the selected AH10DNET-5A in Project List is the master. - Page 449 Ch a pt er 11 DeviceNet Re m ote I/O Module AHRTU-DNET 2. Double click AHRTU-DNET-5A icon of the network nodes and the “Node Configuration…” dialog box will pop up. 3. Click “I/O Configure…” button on the “Node Configuration” dialog box and then the following main interface of AHRTU-DNET-5A configuration will appear.
- Page 450 AH500 Module Manual Explanation of AHRTU-DNET-5A configuration interface: Item Description To detect all modules currently inserted to the I/O slots of the rack. The modules saved on the software will be compared with the modules actually inserted to the I/O slots of the rack and the inconsistency will be displayed with the abnormal icons.
- Page 451 Ch a pt er 11 DeviceNet Re m ote I/O Module AHRTU-DNET Item Description The output data mapping range of each module which depends on the Output start address offset and length of output mapping data Comment Remark for the I/O modules on the rack Click “OK”...
- Page 452 AH500 Module Manual One module which can not be identified is scanned by AHTRUT-DNET. Right click the current icon and select “Change” to change the icon into one identifiable icon for configuration. 5. Select the icon of the rack where the I/O module is placed or the I/O module symbol. Click...
- Page 453 Ch a pt er 11 DeviceNet Re m ote I/O Module AHRTU-DNET The mapping starting addresses of each module can be classified into the following two cases. The first case: The window is as below before the DeviceNet master has assigned the starting address to AHRTU-DNET-5A (that is, AHRTU-DNET-5A has not been pulled into the scan list).
- Page 454 AH500 Module Manual The second case: The window is as below after the DeviceNet master has assigned the starting address to AHRTU-DNET-5A (that is, AHRTU-DNET-5A has been pulled into the scan list). The starting address of each module can be set here. If the value in Start Address is set to 1006, it means that the mapping starting address of the module is D1006.
-
Page 455: Ahrtu-Dnet-5A Status Setting Interface
Ch a pt er 11 DeviceNet Re m ote I/O Module AHRTU-DNET 11.4.2.3 AHRTU-DNET-5A Status Setting Interface After setting the mapping addresses of the I/O module devices is finished, the AHRTU-DNET-5A configuration interface will be shown as follows. On the AHRTU-DNET-5A configuration interface, double click left-side AHRTU-DNET-5A icon and its status setting interface will pop up, which is used for setting the error treatment of AHRTU-DNET-5A as below. -
Page 456: I/O Module Configuration Interface
AH500 Module Manual Explanation of “AHRTU-DNET Setup” interface: Item Explanation Default Output start It is the initial output address of AHRTU-DNET-5A and device occupies one word. It is the initial input address of AHRTU-DNET-5A and occupies Input start device one word. - Page 457 Ch a pt er 11 DeviceNet Re m ote I/O Module AHRTU-DNET E.g. double click where “AH04AD-5A” icon is and AH04AD-5A configuration interface will pop up immediately as below, which is used for parameter mapping configuration of AH04AD-5A. Explanation of the I/O module configuration interface: Item Explanation To show the module name, MDS version and MDS build date.
- Page 458 AH500 Module Manual The mapping relations between the general I/O module parameters and devices are set in the following four kinds of cases. 1. Select the appropriate parameter value in the pull-down box of the Initial column (Channel 0 input mode: -10 V~+10 V for AH04AD-5A as shown below) 2.
- Page 459 Ch a pt er 11 DeviceNet Re m ote I/O Module AHRTU-DNET 3. Tick the small box to the left of the Initial column, and then can be seen there. (For AH04AD-5A, when channel 1 input signal exceeds the hardware range, warning LED indicator will flash as below.) 4.
-
Page 460: Monitoring Function Of Software
AH500 Module Manual 11.4.2.5 Monitoring Function of Software When the software is online and the current configuration of AHRTU-DNET-5A is consistent with that saved in the software, click “Start Monitor” to enter the monitor interface through which the operation state of AHRTU-DNET-5A and I/O modules can be monitored in real time. - Page 461 Ch a pt er 11 DeviceNet Re m ote I/O Module AHRTU-DNET Indicates that the module connected to the slot of the rack does not match that configured in the software or the current module has been removed from the slot though it matched that configured in the software previously Indicates that the slot in the software is empty but actually, it is inserted by other module on the rack...
- Page 462 AH500 Module Manual On the monitor interface, double click the selected module icon to enter the monitor interface of the module. The module can be monitored in real time through the default mapping address of the module and the mapping register of the parameter that user chooses.
-
Page 463: Ah10Scm-5A Module Configuration Interface
Ch a pt er 11 DeviceNet Re m ote I/O Module AHRTU-DNET 11.4.2.6 AH10SCM-5A Module Configuration Interface AH10SCM-5A parameter setting When AH10SCM-5A is used as the I/O module of AHRTU-DNET-5A, please ensure that the master on the network is AH10DNET-5A and AH10SCM-5A has been inserted to the I/O slot of the main rack. - Page 464 AH500 Module Manual Double click AH10SCM-5A icon to enter the communication parameter configuration interface of AH10SCM-5A as follows. The left-side box contains the module parameters read from MDS file by AH10SCM-5A and the right-side contains the module name, MDS version, MDS Build date and etc.
- Page 465 Ch a pt er 11 DeviceNet Re m ote I/O Module AHRTU-DNET Communication parameters setting of COM1 of AH10SCM-5A (The communication format of COM1 serial port and the mapping register corresponding to the trigger condition of the serial port data exchange are set here, corresponding to the basic register BR in AH10SCM-5A.) Communication parameters setting of COM2 of AH10SCM-5A (The communication format of COM2 serial port and the mapping register corresponding to the trigger condition of the serial port data exchange are set here, corresponding to the basic register BR in AH10SCM-5A.)
- Page 466 AH500 Module Manual AH10SCM-5A intelligent module setting The setting of serial port data exchange of AH10SCM-5A is done on the configuration interface of AH10SCM-5A and the method is as below. Right click the AH10SCM-5A icon and select “Intelligent module configuration” to go to the AH10SCM-5A configuration interface.
- Page 467 Ch a pt er 11 DeviceNet Re m ote I/O Module AHRTU-DNET The AH10SCM-5A configuration interface contains the basic information of AH10SCM-5A, the communication mode of every COM port (UD Link or Modbus), the mapping relations between register mapping range and the internal register I and Q in AH10SCM-5A and etc. Explanation of SCM Configuration interface: Item Explanation...
- Page 468 AH500 Module Manual COM port can be set to UD Link mode or Modbus mode via the right key of the mouse. (Select Modbus Mode when using the standard Modbus protocol; select UD Link mode when using RS485 user-defined format). In the two-mode switch, please note that the previous mode will be lost after being changed into the other one.
- Page 469 Description of the device where the data of maximum 30 bytes can be Description input Slave ID The station number of the slave to exchange the data with AH10SCM-5A Delta PLC model is selectable; default: other Device Device Type If the non-Delta PLC device is used, select other Device. 11-43...
- Page 470 MODBUS 6 digit is a decimal 6-bit digit. If the device type is the Data Type Delta PLC model, the data type will be changed into D register or M device automatically. If the data type is other Device, the input value is the starting address of Start the slave for data exchange;...
- Page 471 Ch a pt er 11 DeviceNet Re m ote I/O Module AHRTU-DNET On one new Group setting interface, right click on Packet List box to add Tx/Rx packet. In one group, multiple Tx packets and Rx packets can be built. Double click the new Tx/Rx packet, the Packet Edit interface will pop up as below.
- Page 472 AH500 Module Manual The Tx/Rx packet consists of message, address, length and checksum. Multiple messages and one address, length and checksum may exist in the packet. Explanation of packet edit interface: Item Explanation Packet Name For editing the name of the packet...
- Page 473 Ch a pt er 11 DeviceNet Re m ote I/O Module AHRTU-DNET Explanation of message variable edit interface: Item Explanation To set the format of the data Null: No action of the data is taken. Hex: It converses data from ASCII into hex format. The character which can Format not be conversed will be changed to 0.
- Page 474 AH500 Module Manual Command Edit interface: Explanation of Command Edit interface: Item Explanation Each group has its number and the execution order is specified Command No. through the number. Command Type Send, Receive and Send & Receive are for option.
-
Page 475: Devicenet Mapping Data
Ch a pt er 11 DeviceNet Re m ote I/O Module AHRTU-DNET The already built group could be added to Sequence by clicking the Add button on the Sequence setting interface. Download the group with sequence as the unit to COM port and make the execution. -
Page 476: Allocation Of The Mapping Addresses For Master Ah10Dnet-5A
AH500 Module Manual 11.4.3.1 Allocation of the Mapping Addresses for Master AH10DNET-5A When AH10DNET-5A serves as the master, the output and input starting addresses can be specified by users. The maximum lengths of the input and output mapping addresses are both 495 words. -
Page 477: Allocation Of The Mapping Addresses For Ahrtu-Dnet-5A
Ch a pt er 11 DeviceNet Re m ote I/O Module AHRTU-DNET Input area: Slave Master Output area: Master Slave AH500 series AH500 series Data Data CPU register Purpose CPU register Purpose Length Length number number DeviceNet input... - Page 478 AH500 Module Manual If AHRTU-DNET-5A is added to the master prior to DT01S, the input and output mapping addresses of AHRTU-DNET-5A are D1005~D1044 and D2005~D2044 respectively and D1005 and D2005 are its input and output mapping starting addresses respectively. When AHRTU-DNET-5A is added to the master, its input and output mapping starting addresses are fixed and defined as the status word and control word of AHRTU-DNET-5A respectively as below.
-
Page 479: Allocation Of The Mapping Addresses For The Modules
Ch a pt er 11 DeviceNet Re m ote I/O Module AHRTU-DNET 11.4.3.3 Allocation of the Mapping Addresses for the Modules There are two forms of data mapping for each module. When the DeviceNet master has not allocated the input and output mapping starting addresses to AHRTU-DNET-5A, the value in “Start Address”... - Page 480 AH500 Module Manual When the mapping address is not allocated to AHRTU-DNET-5A, the Device Mapping interface is shown as below. AHRTU-DNET-5A is pulled into Scan List for allocation of its mapping addresses. After the mapping address is allocated to AHRTU-DNET-5A, the Device Mapping interface is as follows.
- Page 481 Ch a pt er 11 DeviceNet Re m ote I/O Module AHRTU-DNET The mapping address allocation for each module is independent and adding or deleting one module will not affect the mapping addresses of other module. By doing so, the work load of modifying the program can be reduced.
- Page 482 AH500 Module Manual Configuration of the module parameters: AH06XA-5A is set to the present values of 4 channels and 8 words of input and 2 channels and 4 words of output. AH04DA-5A is of 4 channels and 8 words for output by default and is configured with 2 parameters “Mapping to Device”...
- Page 483 Ch a pt er 11 DeviceNet Re m ote I/O Module AHRTU-DNET Status word of AHRTU-DNET-5A Status value Definition AHRTU-DNET-5A is in operational state. Bit 0 AHRTU-DNET-5A is in STOP state. Bit 1 Reserved No abnormality occurs for I/O module. Bit 2 The abnormality occurs for I/O module.
- Page 484 AH500 Module Manual the master is downloading the configuration, 80 and its node address are shown on the seven-segment display of AHRTU-DNET-5A alternately; While AHRTU-DNET-5A configuration is being downloaded, 83 and its node address are shown alternately; while AH10SCM-5A serial port data configuration is being downloaded, 84 and its node address are shown alternately.
-
Page 485: Building And Starting The Communication Channel Driver 1 In Commgr
Ch a pt er 11 DeviceNet Re m ote I/O Module AHRTU-DNET 3. Ensure that the baud rates of AH10DNET-5A and AHRTU-DNET-5A are same. Module Station address Baud rate AH10DNET-5A 500 kbps AHRTU-DNET-5A 500 kbps 4. Add 24 V network power between V+ and V- and the 120 ohm terminal resistor between CAN_H and CAN_L. -
Page 486: Calling Devicenet Builder Via Ispsoft
AH500 Module Manual Click “OK” after setting Driver 1 is completed. OK will show up on the status column if Driver 1 is started up successfully. 11.5.2.2 Calling DeviceNet Builder via ISPSoft Open ISPSoft and select “Tools”>>”Communication Settings”; the following dialogue box will appear, where select the built driver and then click OK. - Page 487 Ch a pt er 11 DeviceNet Re m ote I/O Module AHRTU-DNET 1. Select “File”>>“New”>>“New” and the following dialogue box will appear, where select the corresponding PLC type and then click OK. 2. Double click “HWCONFIG” on the Project area to call the HWCONFIG software. 11-61...
- Page 488 AH500 Module Manual 3. Select “Option”>>“I/O Scan” in HWCONFIG to start scanning. The device connected to AHCPU530-EN will have been scanned. 11-62...
- Page 489 Ch a pt er 11 DeviceNet Re m ote I/O Module AHRTU-DNET 4. “10DNET” on the above window is the abbreviation of AH10DNET-5A. Double click the AH10DNET-5A icon and then the parameter configuration dialog box of AH10DNET-5A will pop up. Set Start D device address mapped by INPUT area (input mapping starting address) and Start D device address mapped by OUTPUT area (output mapping starting address) on the Parameters of I/O Mapping interface as follows.
- Page 490 AH500 Module Manual 5. Select “Option”>>“Download” to download the above setting to AHCPU530-EN. 6. Right click the AH10DNET-5A icon and select “Intelligent Module Configuration” to call the DeviceNet Builder software. 11-64...
- Page 491 Ch a pt er 11 DeviceNet Re m ote I/O Module AHRTU-DNET 7. The initialized interface of the called DeviceNet Builder is shown as below. 8. Click “Online” button, all DeviceNet modules AH10DNET-5A connected to AHCPU530-EN will show up with the relevant properties in Project List. 11-65...
-
Page 492: Configuration Of Ahrtu-Dnet-5A
AH500 Module Manual 11.5.2.3 Configuration of AHRTU-DNET-5A Select the network to be scanned in Project List, click the button “Scan DeviceNet network” to start scanning the nodes on the network. If scanning fails, please check if the selected AH10DNET-5A in Project List is the master. - Page 493 Ch a pt er 11 DeviceNet Re m ote I/O Module AHRTU-DNET Click “IO Configure” on the Node Configuration interface to go to the AHRTU-DNET-5A Configuration interface. Click the “Scan” button and all the I/O modules currently inserted to the rack will be scanned. 11-67...
- Page 494 AH500 Module Manual Double click the selected module icons respectively to enter the configuration interface of each module and select the module parameters which need to be configured. The corresponding module parameters can be monitored in real time by ticking “Mapping to Device”. Channel 0 input mode of AH06XA-5A is set to -10 V~+10 V.
- Page 495 Ch a pt er 11 DeviceNet Re m ote I/O Module AHRTU-DNET User can also configure the starting mapping address of each module by manual through the Setup button for input and output on the rack. 11-69...
- Page 496 AH500 Module Manual Double click the AHRTU-DNET-5A icon, select its work mode. Set the operational mode of AHRTU-DNET-5A through error setting. 11-70...
-
Page 497: Downloading And Monitoring
Ch a pt er 11 DeviceNet Re m ote I/O Module AHRTU-DNET 11.5.2.4 Downloading and Monitoring Click “Download” to download and save the current configuration of AHRTU-DNET-5A to AHRTU-DNET-5A after all module mapping allocation has been completed. After downloading is finished, click “OK” to return to the node configuration interface where ensure that “Input Size”... - Page 498 AH500 Module Manual After returning to the main interface of the software, double click AH10DNET-5A Scanner icon, the “Scanner Module Configuration” dialogue box will pop up immediately, where the currently available node AHRTU-DNET-5A can be seen in the left-side list. Remove AHRTU-DNET-5A in Available Nodes to the right-side Scan List and specify Output Start and Input Start of AH10DNET-5A to D1000 and D500 respectively.
- Page 499 Ch a pt er 11 DeviceNet Re m ote I/O Module AHRTU-DNET After AHRTU-DNET-5A has been added to the AH10DNET-5A master, the mapping starting address of output and input which the master allocates to AHRTU-DNET-5A are D1005 and D505 respectively and their respective mapping address lengths are 60 bytes and 36 bytes. Therefore, the input mapping addresses that the master allocates to AHRTU-DNET-5A are D505~D522 and the allocated output mapping addresses are D1005~D1034.
- Page 500 AH500 Module Manual After downloading is over, double click the AHRTU-DNET-5A icon to enter the Node Configuration interface, where click “IO Configure…” to enter the “AHRTU-DNET-5A Configuration” interface. There click “Start Monitor” to enter the software monitor state. Double click the selected module icon to go to the monitor interface of each module where the default output mapping parameter and the input mapping parameter to be monitored when user sets the configuration of the module can be modified in real time.
- Page 501 Ch a pt er 11 DeviceNet Re m ote I/O Module AHRTU-DNET The input mapping addresses of AHRTU-DNET-5A are D505~D522 and the output mapping addresses are D1005~D1034. The initial mapping addresses for output and input are D1005 and D505 as the control word and status word of AHRTU-DNET-5A respectively. The mapping addresses for each module connected to AHRTU-DNET-5A are listed in the following table.
-
Page 502: Using The Ladder Diagram To Control The Entire Network
AH500 Module Manual 11.5.3 Using the Ladder Diagram to Control the Entire Network Program Explanation:: In segment 1, the curve gain is set to 1 for Channel 1 of AH06XA-5A and AH08DA-5B. In segment 2, by comparing the input voltage of channel 1 of AH06XA-5A, the Y0.0 indicator is ON when the voltage is larger than 5 V. - Page 503 Ch a pt er 11 DeviceNet Re m ote I/O Module AHRTU-DNET 11.6 AH10SCM-5A Application Example AHRTU-DNET-5A supports to configure the serial communication module AH10SCM-5A in the DeviceNet Builder software. Before configuring AH10SCM-5A, please ensure that the selected master is AH10DNET-5A. Otherwise, AHRTU-DNET-5A does not support to configure AH10SCM-5A.
- Page 504 AH500 Module Manual The communication format and the mapping relations between the AC motor drive and the DVP-SV series PLC are shown below. Station Communication Read CPU buffer Write CPU buffer Product address format address register address register 38400, ASCII...
- Page 505 Ch a pt er 11 DeviceNet Re m ote I/O Module AHRTU-DNET Double click AHRTU-DNET-5A icon to enter the Node Configuration interface after scanning is over. Click “IO Configure” on the Node Configuration interface to enter the AHRTU-DNET-5A configuration interface as follows. 11-79...
- Page 506 AH500 Module Manual Click “Scan” button and then all AH10SCM-5A modules currently inserted to the I/O slots on the rack can be scanned as below. Double click the selected AH10SCM-5A icon and then the “Module Configuration: AH10SCM-5A” interface pops up, where MDS version, MDS build date of AH10SCM-5A can be seen and the communication parameters of the COM port can be set.
- Page 507 Ch a pt er 11 DeviceNet Re m ote I/O Module AHRTU-DNET Click “COM1 Setting” on the left side to enter the interface where set the communication parameters of COM1 and select the special register parameters to be mapped to the device (COM1 is set to Modbus mode and its communication format should be consistent with those of slave 28SV and VFD connected to COM1 and thus the baud rate is set to 38400 bps).
-
Page 508: Configuration Of Ah10Scm-5A Serial Port Data
AH500 Module Manual 11.6.2.2 Configuration of AH10SCM-5A Serial Port Data Click “SCM” on the lower side and then click the button of Input or Output column to enter the Device Mapping interface of AH10SCM-5A where set the start address and length of input and output mapping of the serial port data in AH10SCM-5A and the maximum length is 100 words. - Page 509 Ch a pt er 11 DeviceNet Re m ote I/O Module AHRTU-DNET To display the mapping relations of the serial port data in the following configuration, please remove the slave AHRTU-DNET-5A to Scan List of the master AH10DNET-5A and then the mapping addresses of the serial port data in AH10SCM-5A will be fixed.
- Page 510 AH500 Module Manual Return to the interface of AHRTU-DNET-5A configuration, right click AH10SCM-5A icon and select “Intelligent module configuration” to enter the interface of SCM configuration. 11-84...
- Page 511 Ch a pt er 11 DeviceNet Re m ote I/O Module AHRTU-DNET AH10SCM-5A intelligent module configuration interface shows basic information of AH10SCM-5A, communication mode of COM port, mapping range of registers and the mapping relation of the internal register I and Q in AH10SCM-5A. Right click “COM Port” on the left side and then select Modbus mode or UD Link mode as the communication mode of COM port.
- Page 512 AH500 Module Manual When COM port 1 is in Modbus mode, click “Read” or “Write”. Right click the right box and click “Add Item” to add bit and word item of Read and Write. The upper part is bit item of Read/Write and the lower part is word item of Read/Write.
- Page 513 AH10DNET-5A along the DeviceNet bus and AH10DNET-5A will transmit the data to D1540 of AH500 series PLC via the rack. The values in D1020 and D1021 of AH500 series PLC are transmitted to AH10DNET-5A via the rack; AH10DNET-5A will transmit the data to AHRTU-DNET-5A along the bus;...
- Page 514 AH500 Module Manual D1550~D1559 (AH500 series PLC)D100~D109 (DVP-SV series PLC), D1030~D1034 (AH500 series PLC)D200~D204 (DVP-SV series PLC) The data transmission method is the same as that between AH500 series PLC and the AC motor drive. 11-88...
- Page 515 Ch a pt er 11 DeviceNet Re m ote I/O Module AHRTU-DNET Bit 0 in D1560~bit 1 in D1561 (AH500 series PLC)M100~M109 (DVP-SV series PLC), bit 0 in D1040~ bit 1 in D1041 (AH500 series PLC) M200~M209 (DVP-SV series PLC). The data transmission method is the same as that between AH500 series PLC and the AC motor drive.
- Page 516 AH500 Module Manual UD Link mode When COM port 2 is in UD Link mode, right click Group List and select “New Group” so as to add a new group. In newly built Group List, right click the box of TX/RX Packet List to add TX/RX packet.
- Page 517 Ch a pt er 11 DeviceNet Re m ote I/O Module AHRTU-DNET Double click the new TxPacket1 to edit the content of the data packet. The data packet consists of message, address, length and checksum. Multiple messages and one address, length and checksum may exist in the packet. 11-91...
- Page 518 AH500 Module Manual Content of the packet is as follows. After setting is over, click “OK” to finish editing Tx Packet1. 11-92...
- Page 519 Ch a pt er 11 DeviceNet Re m ote I/O Module AHRTU-DNET After building multiple TX and RX packets, create a new item by a right click on the “Command List” box to edit the TX/RX packet and plan the sequence of implementing commands. Double click the new command so as to do the editing.
- Page 520 AH500 Module Manual Command editing interface is displayed as below. After command editing is completed, the interface will be as follows. 11-94...
- Page 521 Ch a pt er 11 DeviceNet Re m ote I/O Module AHRTU-DNET By the same way, create a Group2 under Group List. Create a new RX packet under Group list: 11-95...
- Page 522 AH500 Module Manual Edit a new command on the following interface: The interface is shown as below after command editing is completed.: 11-96...
- Page 523 Ch a pt er 11 DeviceNet Re m ote I/O Module AHRTU-DNET Click “Sequence” under COM Port 2 (UD LINK) and then the sequence editing interface will appear on the right side. Clicking “Add” enables the new group to be added to Sequence. The configured data will be executed after being downloaded to AH10SCM-5A with Sequence as the unit.
-
Page 524: Downloading Ah10Scm-5A Serial Port Configuration
AH500 Module Manual 11.6.2.3 Downloading AH10SCM-5A Serial Port Configuration Return to the main interface after configuration of the intelligent module AH10SCM-5A is completed. Please download the AHRTU-DNET-5A configuration before downloading AH10SCM-5A serial port configuration data. Click “Download” to download the configured data to AHRTU-DNET-5A. - Page 525 Ch a pt er 11 DeviceNet Re m ote I/O Module AHRTU-DNET After downloading the configuration to AHRTU-DNET-5A is over, select AH10SCM-5A module and click “Download SCM” button to download the serial port configuration data to AH10SCM-5A. When downloading the configuration to AH10SCM-5A, please note to select the AH10SCM-5A module to be downloaded first and ensure that the master AH10DNET-5A has finished allocating the mapping addresses to AHRTU-DNET-5A.
-
Page 526: Execution By Trigger
AH500 Module Manual After downloading is over, below appears the dialog box showing the downloading information about AH10SCM-5A by clicking “OK”. 11.6.3 Execution by Trigger 11.6.3.1 Control Condition The program edited through ISPSoft can manage Modbus data exchange (such as to read bit and word device, write bit and word device) and UD Link data transferring and receiving trigger which is classified into Group ID trigger and sequence trigger. -
Page 527: Monitoring Via The Software
Ch a pt er 11 DeviceNet Re m ote I/O Module AHRTU-DNET Notes: 1. Write 16#0002 to D1006 for always reading the word device; write 16#0001 to D1006 for only reading once. Write 16#0002 to D1007 for always writing to word device and write 16#001 to D1007 for only writing once. - Page 528 AH500 Module Manual Double click AH10SCM-5A module to enter the monitor interface of AH10SCM-5A during monitoring. By setting the values of the mapping parameter registers, the serial port data exchange is triggered. Click “Set” key on the above interface to enter the interface of setting value, where write the present value H0202 and click “Send”...
-
Page 529: Error Diagnosis And Troubleshooting
Ch a pt er 11 DeviceNet Re m ote I/O Module AHRTU-DNET 11.6.3.3 Program Control In segment 1, by triggering M1, COM1 of AH10SCM-5A will always read the preset slave address including Word device and Bit device. In segment 2, by triggering M2, COM1 of AH10SCM-5A will always write to the preset slave address including Word device and Bit device ... - Page 530 AH500 Module Manual 11.7.1 Indicator Diagnosis NS indicator How to deal with LED status Indication 1. Make sure that AHRTU-DNET-5A is powered and is connected normally. No power or bus OFF 2. Check if the communication is normal and the baud rate of AHRTU-DNET-5A is the same as that of the master.
-
Page 531: Digital Display Diagnosis
Ch a pt er 11 DeviceNet Re m ote I/O Module AHRTU-DNET How to deal with LED status Indication Send it back to the factory for repair if the Red light ON Hardware error error still exists after repowering AHRTU-DNET-5A. 11.7.2 Digital Display Diagnosis How to deal with LED status... - Page 532 AH500 Module Manual How to deal with LED status Indication 1. Check if the extension rack is connected The extension rack error or correctly. the extension rack does not 2. Check if the extension rack is consistent with exist. the configuration.
-
Page 533: Status Word Diagnosis
Ch a pt er 11 DeviceNet Re m ote I/O Module AHRTU-DNET When multiple errors exist simultaneously, the digital displayer of AHRTU-DNET-5A will show the error codes cyclically. For example, E4 12 E5 02 E4 12 E5 02 is shown in cycle, the error indication is as follows. - Page 534 AH500 Module Manual How to deal with Status value Indication AHRTU-DNET-5A runs normally. Bit 5 Check if the connection between AHRTU-DNET-5A is in low AHRTU-DNET-5A and the rack is voltage normal and the power module works. Bit 6 Reserved AHRTU-DNET-5A runs normally.
-
Page 535: Diagnosis By Software
Ch a pt er 11 DeviceNet Re m ote I/O Module AHRTU-DNET 11.7.4 Diagnosis by Software On the main interface of AHRTU-DNET-5A configuration, click “Diagnose” and then the related information will be shown on the diagnosis data area. How to deal with Error code Indication 1. - Page 536 AH500 Module Manual MEMO 11-110...
- Page 537 Chapter 12 Network Module AH10PFBM Table of Contents 12.1 Introduction to AH10PFBM-5A ..............12-2 12.1.1 Features ..................12-2 12.1.2 Introduction ..................12-2 12.1.3 Specifications .................12-2 12.2 Profile and Components ................12-3 12.2.1 Profile and Dimensions ..............12-3 12.2.2 Components ...................12-4 12.2.3 PROFIBUS DP Port ................12-4 12.2.4 Seven-segment Display ..............12-5 12.3...
-
Page 538: Introduction To Ah10Pfbm-5A
DPV1 provided by ISPSoft. The module automatically exchanges the data with AH500 series PLC. User can directly operate the specified registers in AH500 series PLC so as to achieve to control and monitor the slave. ... -
Page 539: Profile And Components
Ch a pt er 1 2 N e t wor k Mo d u le AH 10 P F BM PROFIBUS DP communication Item Specification Cyclic data exchange Message type AH10PFBM-5A Module name 0B49 Product ID Serial transmission 9.6kbps; 19.2kbps; 31.25kpbs;45.45kbps;93.75kbps; 187.5kbps; speed supported (auto- 500kbps;... -
Page 540: Profibus Dp Port
AH 5 00 Mo d u le Ma n ua l 12.2.2 Components Name Description Model name The name of the module 7-segment display A display The interface where the hardware CONF interface configuration is downloaded PROFIBUS DP interface PROFIBUS DP connection RUN indicator A indicator SYS indicator... -
Page 541: Seven-Segment Display
Ch a pt er 1 2 N e t wor k Mo d u le AH 10 P F BM 12.2.4 Seven-segment Display The digital display could provide the following functions: Displaying the node address and error information of AH10PFBM-5A ... -
Page 542: Connecting Profibus Dp Connector
AH 5 00 Mo d u le Ma n ua l 4. Install PS05 and AH CPU to the POWER interface and CPU interface on the rack respectively according to the above steps and the figure is shown as below after the installation is over. 12.3.2 Connecting PROFIBUS DP Connector 1. -
Page 543: Profibus Dp Network Wiring And Topology
Currently we mainly face the customers using the wired medium though we also have the devices which support the wireless communication. Delta provides the standard PROFIBUS cable to the customers for purchase. The order number of the cable is 4009414800. The PROFIBUS cable is the two-wire twisted shielded cable and the two wires inside the cable, A-green and B-red are connected to the pin 3(B) and 8(A) of the DP interface respectively. -
Page 544: Communication Rate And Distance
The PROFIBUS connector used for connecting the PROFIBUS cable and stations is usually classified into two types as below. No Delta PROFIBUS connector is available for user to purchase currently. Users themselves need to choose the D-sub 9-pin PROFIBUS connector conforming to the specification. - Page 545 Ch a pt er 1 2 N e t wor k Mo d u le AH 10 P F BM The In hole has 2 pins, A1 and B1 and the Out hole has two pins, A2 and B2. A1 and A2 are connected to the green wires in the cable and B1 and B2 are connected to the red wires in the cable.
-
Page 546: Connecting Rs-485 Repeater To The Profibus Dp Network
AH 5 00 Mo d u le Ma n ua l Impedance discontinuity: The signal at the end of the transmission cable suddenly encounters too low impedance or even 0 impedance (E.g.: short circuit) or too high impedance (E.g.: broken circuit) and then it will cause the signal reflection. -
Page 547: Using Ah10Pfbm-5A To Create The Rofibus Dp Network
Ch a pt er 1 2 N e t wor k Mo d u le AH 10 P F BM 12.4.2.2 Using AH10PFBM-5A to Create the ROFIBUS DP Network 1 2 - 1 1... -
Page 548: Notes On Network Wiring
PROFIBUS DP network. AHRTU-PFBS-5A is a PROFIBUS DP remote I/O communication AHRTU-PFBS-5A module and used to connect Delta AH series I/O module to the PROFIBUS DP network. DVPPF02-SL is a PROFIBUS DP slave module running on the left side of the S series and EH2 series PLC CPU and used to connect DVPPF02-SL the PLC CPU to the PROFIBUS DP network. -
Page 549: Configuration Of Ah10Pfbm-5A In Ah Plc
This section is going to describe how the PC communicates with PLC by means of USB. For the usage and operation of ISPSoft, please refer to the user manual of ISPSoft. 1. Open Delta communication manager COMMGR software as below. 2. Click “Add” and the following window pops up then. - Page 550 AH 5 00 Mo d u le Ma n ua l 3. Select “USB(Virtual COM)” in the following window. 4. Clicking “OK” the USB communication drive setting succeeds. 1 2 - 1 4...
- Page 551 Ch a pt er 1 2 N e t wor k Mo d u le AH 10 P F BM 5. Open ISPSoft as below. 6. Click “Tool”> “Communication Settings…” and the communication setting dialog box appears as below. 1 2 - 1 5...
- Page 552 AH 5 00 Mo d u le Ma n ua l 7. Select the same driver name from the drop-down menu of Driver as that in COMMRG. Set the station address to 0 or to the MODBUS station address identical to that of PLC. The station address 0 indicates the broadcast search.
- Page 553 Ch a pt er 1 2 N e t wor k Mo d u le AH 10 P F BM 8. Double click HWCONFIG under Project and the following dialog box appears. 9. Click the I/O Scan button to scan the rack module. 1 2 - 1 7...
- Page 554 AH 5 00 Mo d u le Ma n ua l 10. After scanning is over, 10PFBM module will show up beside the PLC CPU module on the rack. 11. The registers in the normal exchange area in AH10PFBM-5A display if the current state of the PROFIBUS DP network is normal.
- Page 555 Ch a pt er 1 2 N e t wor k Mo d u le AH 10 P F BM 12. Double click the 10PFBM icon in the HWCONFIG window; the “Parameter Setting” dialog box pops up and then click “Normal Exchange Area” tab as below. (Note: For details on the registers in normal exchange area, see the following table “Explanation of corresponding registers in the normal exchange area in AH10PFBM-5A”.) 13.
- Page 556 AH 5 00 Mo d u le Ma n ua l 14. Click “Download” and the current configuration is downloaded to PLC then. 1 2 - 2 0...
-
Page 557: Ah10Pfbm-5A Application Example
Ch a pt er 1 2 N e t wor k Mo d u le AH 10 P F BM 12.6 AH10PFBM-5A Application Example 12.6.1 Control Requirement To achieve the data exchange between two PLC CPUs, the master PLC transmits 6 words of data to the slave PLC and the slave PLC transmits 6 words of data to the master PLC. - Page 558 AH 5 00 Mo d u le Ma n ua l 12.6.3 Slave Module Setting Set the node address of AHRTU-PFBS-5A to 2 with the rotary switches. Setup of INPUT and OUTPUT areas that AH PLC CPU assigns to master module The INPUT and OUTPUT areas that AH PLC CPU assigns to the master module AH10PFBM-5A are shown below.
-
Page 559: Configuration Of Master
Ch a pt er 1 2 N e t wor k Mo d u le AH 10 P F BM 12.6.4 Configuration of master 1. Open the SYCON.net software for configuration of the master and the User Login dialog appears as follows. Please select “Administrator” for User Name and do not input anything for Password since the default password is blank. - Page 560 AH 5 00 Mo d u le Ma n ua l 3. Select the master module AH10PFBM-5A on the right-side interface of the software and meanwhile drag it to the position as shown. 4. Release the mouse when the mark [+] appears with the arrow and then the master module is added as follows.
- Page 561 Ch a pt er 1 2 N e t wor k Mo d u le AH 10 P F BM 5. Double click the master icon to enter the master configuration interface. (Note: The PC and the CONF communication port of the master have correctly finished connection in hardware before the communication parameters are set.) 1 2 - 2 5...
- Page 562 AH 5 00 Mo d u le Ma n ua l 6. Click Driver on the left-side window and then tick the box marked in red on the right-side window to select the USB driver for the communication between the master and PC. 1 2 - 2 6...
- Page 563 Ch a pt er 1 2 N e t wor k Mo d u le AH 10 P F BM 7. Click “Scan” button on the right-side window after clicking “Device Assignment” item on the left- side window and then select “All” from the Device Selection box on the right-side window. 1 2 - 2 7...
- Page 564 AH 5 00 Mo d u le Ma n ua l 8. After the master is scanned, pick the box marked in red below for the scanned master. 9. Click “OK” to exit from the slave configuration interface and return to the main interface of the software after the master communication parameters settings are over.
- Page 565 Ch a pt er 1 2 N e t wor k Mo d u le AH 10 P F BM 10. Right click the master and select “Network Scan…” from the menu which pops up to scan the network. (Note: If it is the first time to use the product after it left the factory, please download the master configuration before use.
- Page 566 AH 5 00 Mo d u le Ma n ua l 12. Select the DTM device which is consistent with the actual slave. 13. Click “Create Devices” button to add the slave device as below. 1 2 - 3 0...
- Page 567 Ch a pt er 1 2 N e t wor k Mo d u le AH 10 P F BM 14. Right click the master and select “Disconnect” from the menu which pops up. 15. And then return to the main interface of the software. 1 2 - 3 1...
- Page 568 AH 5 00 Mo d u le Ma n ua l 16. Double click the slave icon and then the slave configuration interface is opened as follows. (Note: In process of creating the slave device, one default “1 Word Out, 1 Word In” module is configured and user could keep or delete it according to need) Insert: When there is no module in “Configured Modules”, select the desired module in “Available Module”;...
- Page 569 Ch a pt er 1 2 N e t wor k Mo d u le AH 10 P F BM The corresponding input and output lengths in the configuration are shown below Module Input length (Unit: byte) Output length (Unit: byte) 4 Word out, 4 Word In 2 Word out, 4...
- Page 570 AH 5 00 Mo d u le Ma n ua l 18. Click “Parameters” item on the left-side window and then set the slave parameters as shown on the following three interfaces. Pick “Common” in the following box marked in red and then double click “Hold I/O data” in order to set the handling of receiving the master data after AH10PFBS-5A is offline.
- Page 571 Ch a pt er 1 2 N e t wor k Mo d u le AH 10 P F BM Select “<Slot 1> 4 Word Out 4 Word In” in the box marked in red and then double click the place marked in blue as below so as to set the starting addresses for input and output of the configured module.
- Page 572 AH 5 00 Mo d u le Ma n ua l Select “<Slot 2> 2 Word Out 2 Word In” in the box marked in red and then double click the place marked in blue as below so as to set the starting addresses for input and output of the configured module.
- Page 573 Ch a pt er 1 2 N e t wor k Mo d u le AH 10 P F BM Configured module of slave Mapping parameter of slave Output_5 D600 Output_6 D601 2 Word Out, 2 Word In Input_5 D500 Input_5 D501 1 2 - 3 7...
- Page 574 AH 5 00 Mo d u le Ma n ua l 19. Click “Extensions” on the left-side window and then the following settings are done. (Note: The settings here are default. For the meaning of each option, please refer to section 10.2 in the SYCON.net help.) 20.
- Page 575 Ch a pt er 1 2 N e t wor k Mo d u le AH 10 P F BM 21. Double click the master icon to enter the master configuration interface and start to set the master parameters. 1 2 - 3 9...
- Page 576 AH 5 00 Mo d u le Ma n ua l 22. Click “Bus Parameters” on the left-side window to do the setting of the parameters. 1 2 - 4 0...
- Page 577 Ch a pt er 1 2 N e t wor k Mo d u le AH 10 P F BM 23. Pick “Overwrite slave specific Watchdog Control Time” and then click “Adjust” button to make an automatic adjustment of the bus parameters. (For the meaning of each item, please refer to section 10.3.2 in the SYCON.net help.) 1 2 - 4 1...
- Page 578 AH 5 00 Mo d u le Ma n ua l 24. Click “Address Table” on the left-side window to set the offset addresses of master. For details, please refer to “I/O Mapping relations between master PLC and slave PLC” in the following section.
- Page 579 Ch a pt er 1 2 N e t wor k Mo d u le AH 10 P F BM Click “Process Data” on the left-side window and the details about the slave configuration pop out on the right-side window. The corresponding relations among the slave configuration modules, the Input list and the Output list of master and the mapping parameters of the slave are listed in the following table.
- Page 580 AH 5 00 Mo d u le Ma n ua l 25. Click “Station Table” on the left-side window and then click the red box on the right-side window to modify the node address of the slave on the software. (Note: Pick the place of “Activate”...
- Page 581 Ch a pt er 1 2 N e t wor k Mo d u le AH 10 P F BM 26. Click “Master Settings” on the left-side window to set the master parameters. (The settings here are default. For the meaning of each item, please refer to section 10.3.2 in the SYCON.net help.) 27.
- Page 582 AH 5 00 Mo d u le Ma n ua l 28. Right click the master module and select “Download” from the menu which pops up to download the configuration data to the master. 29. The following window appears; click “Yes” to continue to download then. 1 2 - 4 6...
-
Page 583: I/O Mapping Relations Between Master Plc Cpu And Slave Plc Cpu
Ch a pt er 1 2 N e t wor k Mo d u le AH 10 P F BM 30. Return to the main interface of the software after downloading is completed. (Note: After downloading is completed, the three indicators of the master are all green and the digital display shows the node address of the master, which indicates that the network communication is normal.) 12.6.5 I/O Mapping Relations between Master PLC CPU and... - Page 584 AH 5 00 Mo d u le Ma n ua l It is the mapping addresses the master assigns to the configured module parameters of the slave on the following interface. It can be seen that the configured modules of the slave corrspond to the starting number of D registers in OUTPUT and INPUT areas of the master PLC through the interfaces above and below.
- Page 585 Ch a pt er 1 2 N e t wor k Mo d u le AH 10 P F BM As the two interfaces above show, the starting addresses of the INPUT and OUTPUT areas that AH PLC assigns to the master module are D1000 and D6000 respectively. On the above interface, the input offset address for 4 word input is 0 and the corresponding starting number of D registers in the master PLC is 1000(1000=1000+0/2).
-
Page 586: Plc Programs Writing
AH 5 00 Mo d u le Ma n ua l 12.6.6 PLC Programs Writing 【Control program in master PLC】 Write the program through the ISPsoft software After the master PLC runs and M0 is ON, write 500~505 to the corresponding D6000~D6005 in the master PLC respectively and the values in D6000~D6005 are sent to the slave through PROFIBUS. - Page 587 Ch a pt er 1 2 N e t wor k Mo d u le AH 10 P F BM 【Control program in slave PLC】 Write the program through the ISPsoft software After the slave PLC runs and M1 is ON, write 100~103 to the corresponding D200~D203; 104 and 105 to D500 and D501 respectively in the slave PLC.
- Page 588 AH 5 00 Mo d u le Ma n ua l After the master establishes the communication with the slave, the data in registers D of the master and slave for exchange are shown as the following table. Data Value Value Register in master transmitted...
- Page 589 Ch a pt er 1 2 N e t wor k Mo d u le AH 10 P F BM DP LED DP LED displays if the communication between AH10PFBM-5A and PROFIBU DP slaves is normal. LED status Indication How to correct Master makes the Green light on...
-
Page 590: Registers In Normal Exchange Area In Ah10Pfbm-5A
AH 5 00 Mo d u le Ma n ua l The display mechanism of the digital display: 1. When AH10PFBM-5A is in normal state and PLC is in RUN state, the digital display of AH10PFBM-5A only displays the node address. 2. - Page 591 Ch a pt er 1 2 N e t wor k Mo d u le AH 10 P F BM Double click the 10PFBM icon in the HWCONFIG window; the “Parameter Setting” dialog box pops up and then click “Normal Exchange Area” tab as below. Explanation of corresponding registers in the normal exchange area in AH10PFBM-5A.
- Page 592 AH 5 00 Mo d u le Ma n ua l Content Item Description Treatment value error The low word Reserved communicator error Configured The number of the slaves slaves configured in the master. The number of the slaves Active slaves communicating with the master normally.
-
Page 593: Error Codes Of Profibus Network On Plc System Log Read Via Ispsoft
Ch a pt er 1 2 N e t wor k Mo d u le AH 10 P F BM 12.7.4 Error Codes of PROFIBUS Network on PLC System Log Read via ISPSoft Select menu “PLC”-> “System Log” to check the system log when ISPSoft is in monitor state. Explanation of error codes of PROFIBUS network on the PLC system log. -
Page 594: Explanation Of Slave Status Word Registers In Input Area In Ah10Pfbm-5A
AH 5 00 Mo d u le Ma n ua l 12.7.5 Explanation of Slave Status Word Registers in Input Area in AH10PFBM-5A (Refer to Section 10.3.2 Configuration Parameters of Master in the SYCON.net help file for more details.) 12.7.6 Diagnosis of Device Status and Network Status via SYCON.net (Refer to Chapter 12 Diagnosis of Bus Troubles via SYCON.net in the SYCON.net help file for more details.) - Page 595 Chapter 13 PROFIBUS Slave Module AH10PFBS Table of Contents 13.1 Introduction of AH10PFBS-5A ..........13-2 13.1.1 Functions .................13-2 13.2 Product Profile and Outline............13-2 13.2.1 Parts ..................13-2 13.2.2 Specifications ................13-3 13.3 Installation ................13-3 13.3.1 Dimensions ................13-3 13.3.2 Installing AH10PFBS-5A and a CPU Module on the Rack ..13-4 13.3.3 Connecting PROFIBUS-DP Connector ........13-5 13.3.4...
-
Page 596: Introduction Of Ah10Pfbs-5A
4. The power module AHPS05-5A, an AH500 series PLC and the main rack are necessary for using AH10PFBS-5A. 5. AH10PFBS-5A can only be connected to the I/O slot of the main AH500 series rack instead of the extension rack. 13.1.1 Functions ... - Page 597 Ch a pt er 1 3 P RO F IB U S Slave M o du l e A H1 0 PF B S 13.2.2 Specifications PROFIBUS-DP port Interface DB9 connector Transmission method High-speed RS-485 Transmission cable Shielded twisted pair cable Electrical isolation 500 V DC ...
-
Page 598: Installing Ah10Pfbs-5A And A Cpu Module On The Rack
AH 5 00 Mo d u le Ma n ua l 13.3.2 Installing AH10PFBS-5A and a CPU Module on the Rack Insert the projection under the module into the hole in the rack; push the module in the direction indicated by the following arrow to meet the I/O slot of the rack. ... -
Page 599: Connecting Profibus-Dp Connector
Ch a pt er 1 3 P RO F IB U S Slave M o du l e A H1 0 PF B S Install AHPS05-5A and the AH500 series CPU module to the POWER interface and CPU interface on the rack respectively according to the above steps and the figure is shown as below after the installation is over. -
Page 600: Definition Of Profibus-Dp Port Pin
AH 5 00 Mo d u le Ma n ua l 13.3.4 Definition of PROFIBUS-DP Port Pin Definition Description RxD/TxD-P Sending/receiving data (P (B)) DGND Signal ground (C) Supplying positive voltage RxD/TxD-N Sending/receiving data (N (A)) 13.3.5 PROFIBUS Node Address Setting The rotary node address switch of AH10PFBS-5A is used for setting the node address of AH10PFBS-5A on the PROFIBUS-DP network. -
Page 601: Constructing Profibus-Dp Network By Using Ah10Pfbs-5A
Ch a pt er 1 3 P RO F IB U S Slave M o du l e A H1 0 PF B S 13.4 Constructing PROFIBUS-DP Network by Using AH10PFBS-5A 13.4.1 PROFIBUS-DP Network Figure AH10PFBS-5A is used for connecting the AH500 series CPU module to the PROFIBUS-DP network. See the following illustration. 13.4.2 Terminal Resistors... - Page 602 PROFIBUS-DP master. After the import of the file, the configuration software for master will display AH10PFBS-5A and its configuration settings. You can download the GSD file for AH10PFBS-5A at Delta’s website: http://www.deltaww.com/ 13.7 Mapping Area of AH10PFBS-5A 13.7.1 Configuration Options AH10PFBS-5A Supports AH10PFBS-5A provides multiple configuration options to users for selection in order to meet users’...
- Page 603 Ch a pt er 1 3 P RO F IB U S Slave M o du l e A H1 0 PF B S 13.7.2 Mapping Relations between AH10PFBS-5A and a Master After one slot is configured with one configuration option, double click the slot number as the mouse indicates and then the right-side “Properties–-DP slave”...
-
Page 604: Options Setting Of I/O Data When Ah10Pfbs-5A Is Offline
Take Siemens S7-300 as the master and set slot 0 according to the above figure. The mapping relations between the master and AH10PFBS-5A are listed as the following table. PROFIBUS-DP network Corresponding registers in Register in S7-300 master data transmission direction the AH500 series CPU module PQW256 D100 PQW258 D101 PIW256 PIW258 13.7.3 Options Setting of I/O Data When AH10PFBS-5A is... - Page 605 Ch a pt er 1 3 P RO F IB U S Slave M o du l e A H1 0 PF B S Indication of options in “Properties—DP slave” dialog box: Option Selection Indication After AH10PFBS-5A and PROFIBUS-DP master are Hold I/O data disconnected, retain the input and output data before disconnection.
- Page 606 AH 5 00 Mo d u le Ma n ua l Code Indication How to correct If the error still exists after repowering GPIO detection error AH10PFBS-5A, replace it with a new AH10PFBS-5A. AH10PFBS-5A enters the mode of Repower AH10PFBS-5A after setting factory test.
- Page 607 Ch a pt er 1 3 P RO F IB U S Slave M o du l e A H1 0 PF B S The high byte of the state register is used for monitoring whether the CPU module is in RUN or STOP state and the low byte is for monitoring whether the work state of AH10PFBS-5A is normal.
- Page 608 AH 5 00 Mo d u le Ma n ua l The meanings of error codes in AH10PFBS-5A shown in the system log of PLC are listed in the following table. Error code Indication How to deal with it The node address of Set the node address of AH10PFBS-5A between 16#A0F0 AH10PFBS-5A exceeds the...
-
Page 609: Control Request
PROFIBUS-DP network figure: 2. Set the PROFIBUS node address of AH10PFBS-5A to 1. 3. Insert AH10PFBS-5A to the I/O interface of the main AH500 series rack and ensure that the AH500 series CPU module is connected to AH10PFBS-5A normally. 13.9.3 Applied Software ... -
Page 610: Configuration Of Ah10Pfbs-5A Via Ispsoft
AH 5 00 Mo d u le Ma n ua l 13.9.4 Configuration of AH10PFBS-5A via ISPSoft Build a new project 1. Open ISPSoft and the following interface appears then. 2. Click “File”>“New” and “Create a New Project” dialog box pops up then. 3. - Page 611 Ch a pt er 1 3 P RO F IB U S Slave M o du l e A H1 0 PF B S 4. Build a new project interface as follows. Hardware configuration 1. Double click “HWCONFIG” icon and then “HWCONFIG” dialog box appears. 13-17...
- Page 612 Make sure that the communication cable connection and communication setting between the PC and the AH500 series CPU module are normal before starting the above actions. 3. The already scanned AH10PFBS-5A is as the red box in the following window indicates.
- Page 613 D0 as the state register. The state register of AH10PFBS-5A can only be D device. The state register can be used to display whether the AH500 series CPU module is in RUN or STOP state and whether the PROFIBUS communication of AH10PFBS-5A is normal.
- Page 614 AH 5 00 Mo d u le Ma n ua l Create a program 1. Right click “Programs” in the following window; then click “POU”>”New” and finally “Create Program” dialog box appears. 2. After selecting related options, click “OK” in the following dialog box. 1 3 - 2 0...
- Page 615 Ch a pt er 1 3 P RO F IB U S Slave M o du l e A H1 0 PF B S 3. The interface is shown as below after one program is created. 4. Users could write the program in the following program area after creating one program. See the help file of the software on the programming method.
-
Page 616: Configuration On The Profibus-Dp Network (Software Configuration)
AH 5 00 Mo d u le Ma n ua l 13.9.5 Configuration on the PROFIBUS-DP Network (Software Configuration) Create a new project by using the project wizard 1. Open Siemens PLC (S7-300) programming software Step7 and the software interface is shown as below. - Page 617 Ch a pt er 1 3 P RO F IB U S Slave M o du l e A H1 0 PF B S 3. Click “Next” in the following “STEP 7 Wizard: New Project” dialog box. 4. Select the S7-300 CPU type according to S7-300 model and then click “Next”. 13-23...
- Page 618 AH 5 00 Mo d u le Ma n ua l 5. Select the desired program block and the language for the selected block according to the user’s demand and then click “Next”. 6. Input the project file name at “Project name” and then click “Finish” as the following window. 1 3 - 2 4...
- Page 619 Ch a pt er 1 3 P RO F IB U S Slave M o du l e A H1 0 PF B S 7. A new window will emerge after building the project is finished and the new project file is built.
- Page 620 AH 5 00 Mo d u le Ma n ua l 2. Double click where “DP” is in the left column of the following “HW Config” window and then a new dialog box will emerge. 3. Click “Properties” in the following dialog box appearing newly and another new dialog box emerges then.
- Page 621 Ch a pt er 1 3 P RO F IB U S Slave M o du l e A H1 0 PF B S 4. Select one node address from the pull-down menu of “Address” in the following dialog box. The node address is for PROFIBUS-DP master on the PROFIBUS-DP network.
- Page 622 AH 5 00 Mo d u le Ma n ua l 6. Click “OK” after confirming that the transmission rate and master’s address of the PROFIBUS-DP bus are correct in the following dialog box. 7. Click “OK” after confirming that the PROFIBUS-DP bus information is correct in the following dialog box.
- Page 623 Ch a pt er 1 3 P RO F IB U S Slave M o du l e A H1 0 PF B S 8. One PROFIBUS-DP bus will appear after UR when the above parameter setting is finished. Add AH10PFBS-5A GSD file 1.
- Page 624 AH 5 00 Mo d u le Ma n ua l 2. Click “Browse” marked in red box to find the GSD storage path and then select the GSD file indicated by the arrow and finally click “Install” marked in blue box to add the needed GSD file as below.
- Page 625 Ch a pt er 1 3 P RO F IB U S Slave M o du l e A H1 0 PF B S Add AH10PFBS-5A slave and configure the parameters 1. Select the PROFIBUS-DP bus as below; double click AH10PFBS-5A icon in the right column of the following window and a new dialog box appears.
- Page 626 AH 5 00 Mo d u le Ma n ua l 3. AH10PFBS-5A has been added to the PROFIBUS-DP bus as follows. 4. Select Slot 0 and then double click the “2 Word Out 2 Word In” option in the right column of the following window.
- Page 627 Ch a pt er 1 3 P RO F IB U S Slave M o du l e A H1 0 PF B S 5. And “2 Word Out 2 Word In” has been configured to Slot 0 as follows. 6.
- Page 628 AH 5 00 Mo d u le Ma n ua l Item Indication Default Input D mapping The number of starting D 0 ( Changeable by the keyboard) register in input area (Slave->Master) output D mapping The number of starting D 100 (Changeable by the keyboard) register in output area (Master->Slave)
-
Page 629: Program Example
Ch a pt er 1 3 P RO F IB U S Slave M o du l e A H1 0 PF B S 13.9.6 Data Mapping Data mapping relations in the above parameter configuration are listed as below. PROFIBUS-DP network Corresponding register in the Register in S7-300 master AH500 series CPU module data transmission direction PQW256 D6000 PQW258 D6001... - Page 630 Slave program 1. The Delta AH500 series PLC program can be programmed via ISPSoft and see the software help file for more details on how to program. 2. When M0 is ON, write 1000 to D6250 and D6251 and AH10PFBS-5A will transmit the data in D6250 and D6251 to PIW256 and PIW258 of the master via the PROFIBUS-DP bus.
- Page 631 Chapter 14 Remote I/O Communication Module AHRTU-PFBS Table of Contents 14.1 Introduction to AHRTU-PFBS-5A ............14-2 14.1.1 Function ..................14-2 14.2 Profile and Specification ..............14-2 14.2.1 Components ................14-2 14.2.2 Specification ................14-3 14.3 Installation ..................14-4 14.3.1 Dimension ...................14-4 14.3.2 Installing AHRTU-PFBS-5A to the Main Rack ......14-4 14.3.3 Connecting PROFIBUS DP Connector ........14-5 14.3.4...
-
Page 632: Introduction To Ahrtu-Pfbs-5A
AH500 Module Manual 14.1 Introduction to AHRTU-PFBS-5A 1. Thank you for choosing Delta AHRTU-PFBS-5A module. Please read the product instruction carefully before use so as to install and operate the product properly. 2. The instruction is simply a guideline for operation of the product and the details on the PROFIBUS DP protocol is excluded here. - Page 633 Chapter 14 Remote I/O Communication Module AHRTU-PFBS 14.2.2 Specification PROFIBUS DP port Interface DB9 connector Transmission High-speed RS-485 method Transmission Two-wire twisted shielded cable cable Electrical isolation 500 VDC Communication Message type Cyclical data exchange Module name AHRTU-PFBS -5A GSD file DETA09B9.GSD Product ID...
-
Page 634: Installing Ahrtu-Pfbs-5A To The Main Rack
AH500 Module Manual 14.3 Installation 14.3.1 Dimension Unit: mm 14.3.2 Installing AHRTU-PFBS-5A to the Main Rack Insert the projection under the module into the hole in the rack; push the module in the direction indicated by the following arrow to meet the CPU slot of the rack. -
Page 635: Connecting Profibus Dp Connector
Chapter 14 Remote I/O Communication Module AHRTU-PFBS After properly installing, tighten the screw on the upper of the module. 14.3.3 Connecting PROFIBUS DP Connector Insert the PROFIBUS DP bus connector in the direction indicated by the following arrow to AH10PFBS-5A communication port. -
Page 636: Definition Of Profibus Dp Port Pin
AH500 Module Manual 14.3.4 Definition of PROFIBUS DP Port Pin Definition Description Receiving/Sending data RxD/TxD-P (P (B)) Data reference potential DGND Power voltage – positive Receiving/Sending data RxD/TxD-N (N (A)) 14.3.5 Setting PROFIBUS Node Address via the Rotary Switches The rotary node address switch of AHRTU-PFBS -5A is used for setting the node address of AHRTU-PFBS-5A on the PROFIBUS DP network. -
Page 637: Using Ahrtu-Pfbs-5A To Create The Profibus Dp Network
Chapter 14 Remote I/O Communication Module AHRTU-PFBS 14.4 Using AHRTU-PFBS-5A to Create the PROFIBUS DP Network 14.4.1 PROFIBUS DP Network Figure AHRTU-PFBS-5A is used to connect AH series I/O modules to the PROFIBUS DP network. The PROFIBUS DP network figure is illustrated as below with AH10PFBM as the master and AHRTU-PFBS-5A as the slave. -
Page 638: Model And Specification Of I/O Modules
AH500 Module Manual 14.4.2 Terminal Resistor When AHRTU-PFBS-5As are installed at the two ends of the PROFIBUS network, their PROFIBUS interfaces need connect the terminal resistors including the following 3 resistors, Rt, Ru and Rd. The standard PROFIBUS connector contains the built-in terminal resistor which user could select whether to connect to the station or not via the switch. - Page 639 Chapter 14 Remote I/O Communication Module AHRTU-PFBS Model Description AHACABD0-5A The 40.0m communication cable specially used by the extension rack AHACABE0 The 50.0m communication cable specially used by the extension rack AHACABF0 The 60.0m communication cable specially used by the extension rack AHACABG0 The 70.0m communication cable specially used by the extension rack AHACABH0...
- Page 640 AH500 Module Manual I/O mapping parameter and length(Unit: Byte) I/O module Input mapping parameter model Output mapping parameter (Length) (Length) Y0.0~Y0.15 in AH16AN01S AH16AN01S-5A (Length = 2) Y0.0~Y0.15 in AH16AP11R X0.0~X0.15 in AH16AP11R AH16AP11R-5A (Length = 2) (Length =2) Y0.0~Y0.15 in AH16AP11T X0.0~X0.15 in AH16AP11T...
- Page 641 Chapter 14 Remote I/O Communication Module AHRTU-PFBS Arrangement of mapping Special module Mapping parameter (length) parameters in each channel model (Length) Digital value in Byte0~ Byte1 that the input channel 0 corresponds to(Length=2) Digital value in Byte2~ Byte3 that the input channel 1 Digital value converted from the corresponds to(Length=2) AH04AD-5A...
-
Page 642: Transmission Distance And Baud Rate
PROFIBUS DP master. After the GSD file is imported, AHRTU-PFBS-5A and other configuration options will show up in the master configuration software. The GSD file of AHRTU-PFBS-5A can be downloaded from the following Delta website. http://www.deltaww.com/ 14-12... -
Page 643: Mapping Areas In Ahrtu-Pfbs-5A
Chapter 14 Remote I/O Communication Module AHRTU-PFBS 14.7 Mapping Areas in AHRTU-PFBS-5A This section is going to describe the configuration of the PROFIBUS DP network and the data mapping relationships by using AH10PFBM-5A as the master and AHRTU-PFBS-5A as the slave. 14.7.1 Configuration of AH10PFBM-5A Master in Hardware As the PROFIBUS DP master module of AH series PLC, AH10PFBM-5A should be used with AH CPU together. - Page 644 AH500 Module Manual 2. Click “Tool” > “Communication Settings…” and the communication setting dialog box appears as below. 3. Select the driver name from the drop-down menu of Driver same as that in COMMRG. Set the station address to 0 or to the MODBUS station address identical to that of PLC. The station address 0 indicates the broadcast search.
- Page 645 Chapter 14 Remote I/O Communication Module AHRTU-PFBS 4. Double click HWCONFIG under Project and the following dialog box appears. 5. Click the I/O Scan button to scan all modules on the rack. 14-15...
- Page 646 AH500 Module Manual 6. After scanning is over, 10PFBM module will show up beside the PLC CPU module on the rack. 7. Double click the 10PFBM icon and then the Parameter Setting dialog box pops up. Set Input Area D Begin Address, Input Area D Length, Output Area D Begin Address and Output Area D Length by clicking the place marked in red box below.
-
Page 647: Configuration Of Profibus Dp Network
Chapter 14 Remote I/O Communication Module AHRTU-PFBS 8. Click “Download” and the current configuration is downloaded to PLC then. 14.7.2 Configuration of PROFIBUS DP Network When AH10PFBM-5A is used as the master, the configuration of the PROFIBUS DP network will be implemented in the PROFIBUS DP configuration tool SYCON.net. - Page 648 AH500 Module Manual Addition of the network nodes 1. Open the SYCON.net software as below. 2. Select the master module AH10PFBM-5A on the right-side interface of the software and meanwhile drag it to the position as shown below. 14-18...
- Page 649 Chapter 14 Remote I/O Communication Module AHRTU-PFBS 3. Release the mouse when the mark [+] appears with the arrow and then the master module is added as follows. 4. Add the slave AHRTU-PFBS-5A in the same way. 14-19...
- Page 650 AH500 Module Manual Configuration of AHRTU-PFBS-5A Slave 1. Double click AHRTU-PFBS-5A slave icon and the slave configuration interface is opened. “Available Modules” includes all configuration options that AHRTU-PFBS-5A supports. “Configured Modules” includes the actual configuration options. The inputs and Outputs of AHRTU-PFBS-5A are the sum of the inputs and outputs of all configuration options respectively with byte as the unit.
- Page 651 Chapter 14 Remote I/O Communication Module AHRTU-PFBS 3. Click left-side “Parameter” item after adding I/O module. Click the Common place marked in red to set the parameters of each I/O module connected to the slave AHRTU-PFBS-5A. Pick “Common” and the parameters of AHRTU-PFBS-5A are displayed for setting as follows.
-
Page 652: Modules
AH500 Module Manual Explanation of the options above Name Setting Explanation When an error in some I/O module connected to AHRTU-PFBS-5A occurs, Stop I/O exchange & report AHRTU-PFBS-5A stops the data fault exchange between other I/O modules and the master and meanwhile reports the E4 error. - Page 653 Chapter 14 Remote I/O Communication Module AHRTU-PFBS Name Setting Explanation for example. If a Siemens PLC is used as the master and PQD256(containing PQB256, PQB257, PQB258 and PQB259) corresponds to the 32-point output module, PQB256 corresponds to Y0.0~Y0.7, PQB257 to Y0.8~Y0.15, PQB258 to Y1.0~Y1.7, PQB259 to Y1.8~Y1.15.
- Page 654 AH500 Module Manual When some I/O module has a fault and the master is disconnected or stops, the DO and AO modules added to AHRTU-PFBS-5A are set as the above two figures shows. Besides, anyone of them can also be set separately. Take a DO module for example as below.
- Page 655 Chapter 14 Remote I/O Communication Module AHRTU-PFBS The settings in the above three figures affect the output result of DO and AO modules as follows. Master in Clear Fail-Safe Behavior Output hold Output result mode DO and AO are disable cleared.
- Page 656 AH500 Module Manual Settings of the digital modules and special modules connectable to AHRTU-PFBS-5A are introduced below. Settings of all digital modules are same and the following will make the introduction of the setting by taking AH16AP11R-5A as an example.
- Page 657 Chapter 14 Remote I/O Communication Module AHRTU-PFBS Setting of AH04AD-5A After configuring AH04AD-5A, refer to Figure 1 for the related parameters setting. Figure 1 Explanation of the options above Name Setting Explanation The number of the rack where the I/O module is (Rack number ranges from 1 to 8, 1 represents rack 0x01...
- Page 658 AH500 Module Manual Setting of AH08AD-5B After configuring AH08AD-5B, refer to Figure 2 for the related parameters setting. Figure 2 Explanation of the options above Name Setting Explanation The number of the rack where the I/O module is (Rack number ranges from 1 to 8, 1 represents...
- Page 659 Chapter 14 Remote I/O Communication Module AHRTU-PFBS Setting of AH08AD-5C After configuring AH08AD-5C, refer to Figure 3 for the related parameters setting. Figure 3 Explanation of the options above Name Setting Explanation The number of the rack where the I/O module is (Rack number ranges from 1 to 8, 1 represents rack 0x01...
- Page 660 AH500 Module Manual Setting of AH04DA-5A After configuring AH04DA-5A, refer to Figure 4 for the related parameters setting. Figure 4 Explanation of the options above Name Setting Explanation The number of the rack where the I/O module is (Rack number ranges from 1 to 8, 1 represents...
- Page 661 Chapter 14 Remote I/O Communication Module AHRTU-PFBS Setting of AH08DA-5B After configuring AH08DA-5B, refer to Figure 5 for the related parameters setting. Figure 5 Explanation of the options above Name Setting Explanation The number of the rack where the I/O module are placed (Rack number is 1~8, 1 represents the rack 0x01...
- Page 662 AH500 Module Manual Setting of AH08DA-5C After configuring AH08DA-5C, refer to Figure 6 for the related parameters setting. Figure 6 Explanation of the options above Name Setting Explanation The number of the rack where the I/O module is (Rack number ranges from 1 to 8, 1 represents...
- Page 663 Chapter 14 Remote I/O Communication Module AHRTU-PFBS Setting of AH06XA-5A After configuring AH06XA-5A, refer to Figure 7 for the related parameters setting. Figure 7 Explanation of the options above Name Setting Explanation The number of the rack where the I/O module is (Rack number ranges from 1 to 8, 1 represents rack 0x01...
- Page 664 AH500 Module Manual Name Setting Explanation 1V~+5V Mode: -5V~+5V 0mA~20mA Mode: 0V~+5V 4mA~20mA Mode: 1V~+5V Mode: 0mA~20mA Mode: 4mA~20mA CH0~CH3 Input 0x0A Average times setting for CH0~ CH3 input average time Output hold options: Enable: the output of other I/O modules of...
- Page 665 Chapter 14 Remote I/O Communication Module AHRTU-PFBS Explanation of the options above Name Setting Explanation The number of the rack where the I/O module is (Rack number ranges from 1 to rack 0x01 8, 1 represents the main rack, 2~8 stand for extension racks and the slot number is 0~11.) The number of the slot on the rack where...
- Page 666 AH500 Module Manual Setting of AH08TC-5A The setting of AH08TC-5A is same as that of AH04TC-5A. Refer to Figure 9 for the related parameters setting. Figure 9 Explanation of the options above Name Setting Explanation The number of the rack where the I/O...
- Page 667 Chapter 14 Remote I/O Communication Module AHRTU-PFBS Name Setting Explanation Mode: T-Type Mode: E-Type Mode: -Type Mode:±150mV CH0~CH7 Input 0x0A Average times setting for CH0~ CH7 input average time Ensure that all I/O module parameters settings are correct. Otherwise, the module will report the error or the communication error of AHRTU-PFBS-5A occurs.
- Page 668 AH500 Module Manual 5. After configuration of the slave module is completed, click “OK” to exit from the configuration interface and return to the main interface of the software. Configuration of AH10PFBM-5A parameters 1. Double click the master icon to enter the master configuration interface and start to set the master parameters.
- Page 669 Chapter 14 Remote I/O Communication Module AHRTU-PFBS 2. Click “Driver” on the left-side window and then select the communication driver marked in red on the right-side window. Ensure that the USB connector of the USB cable is inserted to the CONF port of AH10PFBM-5A. 3.
- Page 670 AH500 Module Manual 4. After the master is scanned, pick the box marked in red below for the scanned master. 5. Click “Bus Parameters” on the left-side window to do the setting of the parameters. 14-40...
- Page 671 Chapter 14 Remote I/O Communication Module AHRTU-PFBS 6. Pick “Overwrite slave specific Watchdog Control Time” and then click “Adjust” button to make an automatic adjustment of the bus parameters. (For the meaning of each item, please refer to the user manual of AH10PFBM-5A.) 7.
- Page 672 AH500 Module Manual 8. Click “Station Table” on the left-side window and then click the red box on the right-side window to modify the node address of the slave on the software. (Note: Pick the place of “Activate” column as below. Otherwise, the configuration data of the...
- Page 673 Chapter 14 Remote I/O Communication Module AHRTU-PFBS 9. Click “Master Settings” on the left-side window to set the master parameters. (The settings here are default. For the meaning of each item, please refer to the user manual of AH10PFBM-5A.) When there is an IW or QW-type module and its offset address does not start at 0 or an even number, user could tick “2 Byte boundaries”...
- Page 674 AH500 Module Manual 10. After setting the master parameters is over, click “OK” to exit from the master parameters setting interface and return to the main interface of the software. Download of network configuration 1. Right click the master module and select “Download” from the menu which pops up to download the configuration data to the master.
- Page 675 Chapter 14 Remote I/O Communication Module AHRTU-PFBS 2. The following window appears; then click “Yes” to continue to download. 3. Return to the main interface of the software after downloading is completed. 14.7.3 Mapping relationships between AHRTU-PFBS-5A and Master The following interface shows the starting addresses and lengths of the OUTPUT area and INPUT area that PLC CPU assigns to the master module.
- Page 676 AH500 Module Manual The following figure shows the I/O modules that AHRTU-PFBS-5A configures and the input and output data length that each I/O module corresponds to. 14-46...
- Page 677 Chapter 14 Remote I/O Communication Module AHRTU-PFBS The following window contains the offset address of I/O modules that AHRTU-PFBS-5A configures. That is the offsets of the starting addresses of INPUT area and OUTPUT area that AH master PLC assigns to the master module with Byte as the unit. The D device in PLC regards Word as the unit, the offset address regards Byte as the unit and therefore the counting of the starting D register in the master PLC that the configured module of the slave corresponds to:...
- Page 678 AH500 Module Manual IO mapping relationships between master PLC and the I/O modules connected to AHRTU-PFBS-5A Devices connected to Register in master PLC Offset AHRTU-PFBS-5A Y0.0~Y0.7 of 16AP D6000(bit0~bit7) Y0.0~Y0.7 of 16AP D6001(bit0~bit7) Digital value that output channel 0 in...
- Page 679 Chapter 14 Remote I/O Communication Module AHRTU-PFBS 14.8 LED Indicator and Trouble-shooting 14.8.1 RUN and NET Indicators RUN LED RUN LED displays the work status of AHRTU-PFBS-5A. LED state Indication How to deal with AHRTU-PFBS-5A is in Green RUN state and is light ON communicating with the master.
- Page 680 AH500 Module Manual 14.8.2 Digital Display The digital display displays the status of AHRTU-PFBS-5A. Code Indication How to deal with When AHRTU-PFBS-5A works normally, the digital 1~ 7D display displays its node address. AHRTU-PFBS-5A is in Turn the RUN/STOP switch of the master PLC to STOP status.
- Page 681 Chapter 14 Remote I/O Communication Module AHRTU-PFBS The display mechanism of the digital display: When AHRTU-PFBS-5A is in normal state and the master PLC is in RUN state, the digital display of AHRTU-PFBS-5A only displays its node address. ...
- Page 682 AH500 Module Manual 14.9 Application Example 1 14.9.1 Control Requirement To achieve the data exchange between AH CPU and the remote I/O modules connected to AHRTU-PFBS-5A through the PROFIBUS DP network. Make Y0.0~Y0.3 of all 16AP11R modules connected on the main rack and extension rack ON.
- Page 683 Chapter 14 Remote I/O Communication Module AHRTU-PFBS 14.9.3 Setup of INPUT and OUTPUT Areas that AH PLC CPU Assigns to Master Module The INPUT and OUTPUT areas that AH PLC CPU assigns to the master module AH10PFBM-5A are shown below. (Please refer to section 15.1 in the SYCON.net help for the detailed setting) 14.9.4 Configuration of the Master 1.
- Page 684 AH500 Module Manual 2. Click “OK” and then enter the initial interface of the SYCON.net as below. 3. Select the master module AH10PFBM-5A on the right-side interface of the software and meanwhile drag it to the position as shown below.
- Page 685 Chapter 14 Remote I/O Communication Module AHRTU-PFBS 4. Release the mouse when the mark [+] appears with the arrow and then the master module is added as follows. 5. Double click the master icon to enter the master configuration interface. (Note: The PC and the CONF communication port of the master have correctly finished connection in hardware before the communication parameters are set.) 14-55...
- Page 686 AH500 Module Manual 6. Click Driver on the left-side window and then tick the box marked in red on the right-side window to select the USB driver for the communication between the master and PC. 7. Click “Scan” button on the right-side window after clicking “Device Assignment” item on the left-side window and then select “All”...
- Page 687 Chapter 14 Remote I/O Communication Module AHRTU-PFBS 8. After the master is scanned, pick the box marked in red below for the scanned master. 9. Click “OK” to exit from the master configuration interface and return to the main interface of the software after the master communication parameters settings are over.
- Page 688 AH500 Module Manual 10. Right click the master and select “Network Scan…” from the menu which pops up to scan the network. (Note: If it is the first time to use the product after it left the factory, please download the master configuration before use.
- Page 689 Chapter 14 Remote I/O Communication Module AHRTU-PFBS 12. Select the DTM device AHRTU-PFBS-5A which is consistent with the actual slave. 13. Click “Create devices” button to add the slave device as below. 14-59...
- Page 690 AH500 Module Manual 14. Right click the master and select “Disconnect” from the menu which pops up. 15. And then return to the main interface of the software. 14-60...
- Page 691 Chapter 14 Remote I/O Communication Module AHRTU-PFBS 16. Double click the slave AHRTU-PFBS-5A icon and then the slave configuration interface is opened as follows. Add AH16AP11R-5A, AH08DA-5B, and AH06XA-5A; “Available Modules” contains all configuration options that AHRTU-PFBS-5A supports and “Configured Modules” includes actually configured configuration options.
- Page 692 AH500 Module Manual See the above input and output lengths of each configuration option in the following table. Output Module Input length Data type length AH16AP11R-5A Byte AH16AP11R-5A Byte AH06XA-5A Byte AH08DA-5B Byte AH16AP11R-5A Byte 14-62...
- Page 693 Chapter 14 Remote I/O Communication Module AHRTU-PFBS 17. Click “Parameters” item on the left-side window, click the place marked in red box below. A menu pops up then; select each I/O module connected to AHRTU-PFBS-5A to set the parameters as the following red box shows. 14-63...
- Page 694 AH500 Module Manual Pick “Common” to set the parameters of AHRTU-PFBS-5A itself as below. To revise the parameter, double click the location marked in red. The parameter can be revised directly if the mouse arrow becomes “I” symbol. Click the symbol and select the...
- Page 695 Chapter 14 Remote I/O Communication Module AHRTU-PFBS Explanation of the options above Name Setting Explanation The number of the rack where the I/O module are placed (Rack number is 1~8, 1 represents the main rack 0x01 rack, 2~8 are extension racks and the slot number is 0~11.) The number of the slot on the rack where the I/O module is.
- Page 696 AH500 Module Manual Explanation of the options above Name Setting Explanation The number of the rack where the I/O module are placed (Rack number is 1~8, 1 represents the rack 0x01 main rack, 2~8 are extension racks and the slot number is 0~11.)
- Page 697 Chapter 14 Remote I/O Communication Module AHRTU-PFBS When the input/ output mode of the analog module is positive voltage or positive current, the corresponding digital value is 0 ~32000; for example, if the modes are 0V~10V and 4mA~20mA, the corresponding digital values are both 0~32000. When the input /output mode of the analog module is negative voltage or negative current, the corresponding digital value is -32000~32000;...
- Page 698 AH500 Module Manual Explanation of the options above Name Setting Explanation The number of the rack where the I/O module are placed (Rack number is 1~8, 1 represents the rack 0x02 main rack, 2~8 are extension racks and the slot number is 0~11.)
- Page 699 Chapter 14 Remote I/O Communication Module AHRTU-PFBS When the input /output mode of the analog module is negative voltage or negative current, the corresponding digital value is -32000~32000; for example, the modes are -10V~+10V, and -20mA~20mA, the corresponding digital values are both -32000~32000. 18.
- Page 700 AH500 Module Manual 19. After configuration of the slave module is completed, click “OK” to exit from the configuration interface and return to the main interface of the software. 20. Double click the master icon to enter the master configuration interface and start to set the master parameters.
- Page 701 Chapter 14 Remote I/O Communication Module AHRTU-PFBS 21. Click “Bus Parameters” on the left-side window to do the setting of the parameters. 22. Pick “Overwrite slave specific Watchdog Control Time” and then click “Adjust” button to make an automatic adjustment of the bus parameters. (For the meaning of each item, please refer to section 10.3.2 in the SYCON.net help.) 14-71...
- Page 702 AH500 Module Manual 23. Click “Address Table” on the left-side window to set the offset addresses of master. For details, please refer to “Mapping relationships between master PLC and slave PLC” in the following section. For the IW or QW-type module, try to adjust the offset address to start at 0 or an even number for the purpose of easy control via the program.
- Page 703 Chapter 14 Remote I/O Communication Module AHRTU-PFBS 24. Click “Station Table” on the left-side window and then click the red box on the right-side window to modify the node address of the slave on the software. (Note: Pick the place of “Activate” column as below. Otherwise, the configuration data of the slave will be invalid.) 25.
- Page 704 AH500 Module Manual 26. After setting the master parameters is over, click “OK” to exit from the master parameters setting interface and return to the main interface of the software. 27. Right click the master module and select “Download” from the menu which pops up to download the configuration data to the master.
- Page 705 Chapter 14 Remote I/O Communication Module AHRTU-PFBS 28. The following window appears; then click “Yes” to continue to download. 29. Return to the main interface of the software after downloading is completed. (Note: After downloading is completed, the three indicators of the master are all green and the digital display shows the node address of the master, which indicates that the network communication is normal.) 14-75...
- Page 706 AH500 Module Manual 14.9.5 IO Mapping Relationships between Master PLC and Remote I/O modules The following interface shows the starting addresses and lengths of the OUTPUT area and INPUT area that PLC CPU assigns to the master module. The data in OUTPUT area are sent to the slave...
- Page 707 Chapter 14 Remote I/O Communication Module AHRTU-PFBS The above explanation is based on the connection between master and AHRTU-PFBS-5A. The mapping relationships between D registers in the master PLC and the configured modules of the slave are related with the master parameters settings. For more details on setting, please refer to section 10.3.2 in the SYCON.net help.
- Page 708 AH500 Module Manual IO mapping relationships between master PLC and the I/O modules connected to AHRTU-PFBS-5A: Devices connected to Register in master PLC Offset AHRTU-PFBS-5A Y0.0~Y0.7 of 16AP D6000(bit0~bit7) Y0.0~Y0.7 of 16AP D6001(bit0~bit7) Digital value that output channel D6002 0 in 06XA corresponds to...
- Page 709 Chapter 14 Remote I/O Communication Module AHRTU-PFBS 14.9.6 PLC Programs Writing 【Control program in master PLC】 After the master PLC runs and M0 is ON, the master PLC controls the modules connected to AHRTU-PFBS-5A; when M1 is ON, the master PLC reads the values of the modules connected to AHRTU-PFBS-5A.
- Page 710 AH500 Module Manual 14-80...
- Page 711 Chapter 14 Remote I/O Communication Module AHRTU-PFBS 【Program Execution】 Before the master establishes the communication with the slave, the data in registers D in the master PLC and the state of the modules connected to AHRTU-PFBS-5A are shown as the following table.
- Page 712 AH500 Module Manual After the master establishes the communication with the slave, the data in registers D in the master PLC and the state of the modules connected to AHRTU-PFBS-5A are shown as the following table. Data Register in transmitted...
- Page 713 Chapter 15 CANopen Communication Module AH10COPM Table of Contents 15.1 Introduction ...................15-2 15.1.1 Characteristics ................15-2 15.1.2 Functions ..................15-2 15.1.3 Functional Specifications ..............15-3 15.2 Profile and Outline ................15-4 15.2.1 Profile and Dimensions ..............15-4 15.2.2 Parts .....................15-4 15.2.3 CANopen Communication Connector ...........15-5 15.2.4 Address Switches .................15-5 15.2.5...
- Page 714 CANopen builder can directly configure a network through AH10COPM-5A. When AH10COPM-5A exchanges PDOs with an AH500 series CPU module, users only need to write a program for the D registers in the AH500 series CPU module which are mapped, and do 1 5 - 2...
-
Page 715: Functional Specifications
Electrical isolation 500 V DC Connector Removable connector (5.08 mm) It is suggested that users should use the Delta standard cables UC-DN01Z-01A and UC-DN01Z-02A. Communication cable The communication cable used should be away from the power cable used, and the shielded cables used should be connected to the ground. - Page 716 AH 5 00 Mo d u le Ma n ua l Item Specifications Operation 0ºC~55ºC (Temperature), 5~95% (Humidity), pollution level 2 temperature Storage -25ºC~70ºC (Temperature), 5~95% (Humidity) temperature Vibration/ International standard IEC 61131-2, IEC 68-2-6 (TEST Fc)/IEC 61131-2 & IEC 68-2-27 (TEST Ea) Shock resistance Certifications IEC 61131-2, UL508...
-
Page 717: Canopen Communication Connector
Ch a pt er 1 5 C AN o pe n Communication M o du l e AH 1 0CO P M Number Name Description Model name Model name of the module Address switches For setting an address Function switch For setting a function CANopen connector For a CANopen connection... -
Page 718: Function Switch
AH 5 00 Mo d u le Ma n ua l 15.2.5 Function Switch The function switch on AH10COPM-5A is used to set the communication speed at which AH10COPM-5A is connected to a CANopen network. There is a limit on the maximum communication distance to which a communication speed corresponds. -
Page 719: Connecting A Canopen Connector
Ch a pt er 1 5 C AN o pe n Communication M o du l e AH 1 0CO P M 3. Tighten the screw on the module. 15.3.2 Connecting a CANopen Connector 1. Remove the 30 millimeter plastic jacket of a cable with a professional tool. Please do not damage the shielded cable when the plastic jacket is removed. - Page 720 Creating a CANopen network An AH500 series CPU module can be connected to eight AH10COPM-5A modules at most. Before users create a network, they have to know the requirements for creating the network, and plan data exchange, including the slave stations which need to be used, the data which needs to be exchanged, transmission methods, the total quantity of data which needs to be exchanged, and response time.
-
Page 721: Using Canopen Builder To Configure A Network
Ch a pt er 1 5 C AN o pe n Communication M o du l e AH 1 0CO P M After the users select a mode, and save the setting, they can start CANopen Builder by means of Intelligent Module Configuration. 15.4.2 Using CANopen Builder to Configure a Network 1. - Page 722 AH 5 00 Mo d u le Ma n ua l 3. After the scan is complete, the icons representing the slave stations on the CANopen network created will appear. The users can select devices on the device list, and add slave stations manually.
- Page 723 Ch a pt er 1 5 C AN o pe n Communication M o du l e AH 1 0CO P M Setting the parameters in a slave station on a CANopen network Setting the parameters in an ASDA-A2 series AC servo drive: After users double-click the icon representing the ASDA-A2 series AC servo drive functioning as a slave, the Node Configuration…...
- Page 724 AH 5 00 Mo d u le Ma n ua l The parameters are described below. Parameter name Description Remark A master station polls slave stations according Guard Time to the interval set in the Guard Time box. If the Heartbeat Life time=Guard option button is Node...
- Page 725 Ch a pt er 1 5 C AN o pe n Communication M o du l e AH 1 0CO P M Parameter name Description Remark Consume Time box. After users click OK, they will return to the Node Configuration… window, and the parameters set in the Error Control Setting window will be retained.
- Page 726 AH 5 00 Mo d u le Ma n ua l The data in the Data (hex) box is the data which will be written. (It is a hexadecimal value.) If the data which will be written occupies two bytes, the low byte will precede the high byte in the Data (hex) box, and the two bytes will be separated by a space.
- Page 727 Ch a pt er 1 5 C AN o pe n Communication M o du l e AH 1 0CO P M The users can add parameters in the Available Objects from EDS file section to the Mapped Objects section. The total of the data lengths of the parameters added to a PDO can not exceed eight bytes.
- Page 728 AH 5 00 Mo d u le Ma n ua l Transmission Description Remark type After a TxPDO is changed, and the slave station receives a synchronous message, the new TxPDO will be sent to the master station. The new TxPDO will take effect immediately after the master station receives it.
- Page 729 ID 3 will be added to the list under Node List. When node ID 3 on the list under Node List is selected, the data registers in an AH500 series module onto which the I/O data in node ID 3 is mapped are shown in the Output Table section and the Input Table section.
- Page 730 The users can add node ID 2 to the list under Node List in the same way. When node ID 2 on the list under Node List is selected, the data registers in the AH500 series module onto which the I/O data in node ID 2 is mapped are shown in the Output Table section and the Input Table section.
- Page 731 Ch a pt er 1 5 C AN o pe n Communication M o du l e AH 1 0CO P M After the users click Download, the configuration data set will be downloaded to the AH10COPM-5A module selected. If the AH10COPM-5A module is operating, the users will be asked to stop the AH10COPM-5A module before the configuration data is downloaded.
-
Page 732: Assigning Mapping Areas
AH10COPM-5A functions as a slave station. The data lengths that the users can set must be in the range of 0 words to 32 words. The relation between the object dictionary in AH10COPM-5A and registers in an AH500 series CPU module is shown below. Index... -
Page 733: Setting A Master Station
Ch a pt er 1 5 C AN o pe n Communication M o du l e AH 1 0CO P M 15.4.4 Setting a Master Station If AH10COPM-5A functions as a master station, users can determine whether the network configuration loaded is a necessary network configuration. -
Page 734: Flowchart Representing The Action Of A Canopen Master Station
AH 5 00 Mo d u le Ma n ua l 15.4.5 Flowchart Representing the Action of a CANopen Master Station Poweri ng AH10CO PM-5A Whether the E rror code module is initializ ed A0F 5/A0F 7 suc cessfully Slave mode Mas er mode Setting AH10COPM- 5A by HWCO NF IG... -
Page 735: Sending Sdos And Nmt, And Reading Emergencies By Functions Blocks
IFD9 50 3 V FD-B A: An AH500 series CPU module sends request information to the master station AH10COPM-5A. B: The master station AH10COPM-5A sends the request information to target equipment. C: The target equipment processes the request information, and sends response information to the master station AH10COPM-5A. -
Page 736: Sending An Sdo Command
AH 5 00 Mo d u le Ma n ua l 15.5.2 Sending an SDO Command 1. Function block The AH10COPM-5A module which functions as a master station in a slot on the main backplane used can send an SDO command by means of the function block CANopen_SDO in ISPSoft. 2. - Page 737 Ch a pt er 1 5 C AN o pe n Communication M o du l e AH 1 0CO P M Output pin Time when there is Time when there is a Data a transition in an Name Function transition in an output pin’s type output pin’s signal...
- Page 738 0C: The module does Done output pin’s not support the signal from low to function. high, the value of AH500 series CPU the ErrorID output module error code pin is updated. When there is a transition in the Error output pin’s...
-
Page 739: Sending An Nmt Command
Ch a pt er 1 5 C AN o pe n Communication M o du l e AH 1 0CO P M Status codes Status code Description No request for data transmission The sending of the SDO is successful. The SDO is being transmitted. - Page 740 AH 5 00 Mo d u le Ma n ua l Input pin Data Name Function Setting value Time when a value is valid type Resetting application 82 (Hex): Resetting communication Output pin Time when there is Time when there is a Data a transition in an Name...
-
Page 741: Reading Emergency Messages
Done function. output pin’s signal from low to high, the value of AH500 series CPU the ErrorID output pin is module error code updated. 15.5.4 Reading Emergency Messages 1. Function block The AH10COPM-5A module which functions as a master station in a slot on the main backplane used can read the emergency messages received from slave stations by means of the function block CANopen_NMT in ISPSoft. - Page 742 AH 5 00 Mo d u le Ma n ua l Output pin Time when there is a Time when there is a Data transition in an Name Function transition in an output pin’s type output pin’s signal signal from high to low from low to high ...
- Page 743 ErrorID Error code WORD transition in the Done the function. output pin’s signal AH500 series from low to high, the CPU module error value of the ErrorID code output pin is updated. When there is a...
-
Page 744: Obtaining The States Of The Slave Stations On A Canopen Network
AH 5 00 Mo d u le Ma n ua l 15.5.5 Obtaining the States of the Slave Stations on a CANopen Network 1. Function block Users can obtain the states of the slave stations on a CANopen network from the AH10COPM-5A module in a slot on the main backplane used by means of the function block CANopen_Info. - Page 745 Done the function. output pin’s signal from low to high, the AH500 series value of the ErrorID CPU module error output pin is updated. When there is a Every bit indicates the...
- Page 746 AH 5 00 Mo d u le Ma n ua l Output pin Data Name Function Output range Update type 16~station 0: Normal output pin’s signal address 31 from low to high, the 1: Abnormal value of the Nodes_1 output pin is updated. ...
-
Page 747: Error Diagnostics And Troubleshooting
If the green light is blinking when the AH500 series CPU module is running, users have to check whether the bus cable on the CANopen network created is connected correctly. -
Page 748: Error Codes
OF F 15.6.2 Error Codes Users can monitor the error codes in the system log in ISPSoft, or the error code in the module error code register in the AH500 series CPU module used. AH10COPM-5A functions as a master station. - Page 749 Ch a pt er 1 5 C AN o pe n Communication M o du l e AH 1 0CO P M Code Description Solution AH10COPM-5A does not receive a PDO Make sure that the PDOs in the 16#A0E2 from a slave station. slave station are set correctly.
- Page 750 AH 5 00 Mo d u le Ma n ua l AH10COPM-5A functions as a slave station. Code Description Solution AH10COPM-5A does not send a Check whether the bus cable on the 16#A0B0 heartbeat message after a set period of CANopen network created is time.
- Page 751 Chapter 16 Remote I/O Module AHRTU-ETHN-5A Table of Contents 16.1 Introduction to AHRTU-ETHN-5A ............16-2 16.1.1 Function ..................16-2 16.1.2 Specification ................. 16-2 16.2 Parts of AHRTU-ETHN-5A ..............16-4 16.2.1 Profile and Dimensions ..............16-4 16.2.2 Parts ..................... 16-4 16.2.3 Ethernet Connector...............
- Page 752 16.1 Introduction to AHRTU-ETHN-5A Thank you for choosing Delta AHRTU-ETHN-5A module. Please read the product instruction carefully before use so as to install and operate the product properly. AHRTU-ETHN-5A is AH series remote I/O module. AH series CPU such as AHCPU5x1-EN of V2.0 and above can easily control AH digital I/O module and analog I/O module through EtherNet/IP communication protocol.
- Page 753 Chapter 16 Remote I/O Module AHRTU-ETHN-5A Item Specification Packet transmission 1 ms~1000ms interval Max. communication 10,000 pps capacity Max. data length 500 bytes Class 3 (Connected Type) 48 (Servers), shared with UCMM UCMM(Non-Connected 48 (Clients + Servers), shared with Class 3 Type)...
- Page 754 AH500 Module Manual 16.2 Parts of AHRTU-ETHN-5A 16.2.1 Profile and Dimensions 1 03 IP Add re ss 19 2. 168 .1 .X L in k A ck L in k A ck Unit: mm 16.2.2 Parts x 1 6 I P Ad dr ess 19 2.
- Page 755 Chapter 16 Remote I/O Module AHRTU-ETHN-5A X1 Ack indicator X2 Link indicator X2 Ack indicator X1/X2 of RJ-45 port MS indicator NS indicator I/O indicator 16.2.3 Ethernet Connector The pins of Ethernet connector are defined in the following table. Pin No. Name Description RJ-45 figure...
- Page 756 AH500 Module Manual Securely tighten the screws on the top of the module after the installing is proper. Install the power module and I/O modules in the same way as above. The power module can only be inserted to the POWER slot and I/O modules can only be placed at the I/O slots.
- Page 757 Chapter 16 Remote I/O Module AHRTU-ETHN-5A At most 1 AH series main backplane, 7 AH series extension backplanes and 68 I/O modules are connectable to AHRTU-ETHN-5A as shown in the following figure. AHRTU ETHN modules Main bac kplane 7 RTU -DN ET Ex tens ion bac kp lan e 1 Ext ension back plane 2 Communicat io n ca ble for ex ten sion ba ck planes...
- Page 758 AH500 Module Manual 16.3.2 Modules Supported Below is the table of AH series main backplanes and extension backplanes which AHRTU-ETHN-5A can be connected to. Model Description 4-slot main backplane exclusively used for AHBP04M1-5A AHCPU5x1-EN/AHRTU-ETHN-5A 6-slot main backplane exclusively used for...
- Page 759 Chapter 16 Remote I/O Module AHRTU-ETHN-5A I/O Data length (Unit: words) Digital I/O EtherNet/IP Scanner → AHRTU-ETHN-5A → module AHRTU-ETHN-5A EtherNet/IP Scanner AH16AP11P-5A Analog I/O module Below is the table of analog I/O modules connectable to AHRTU-ETHN-5A and corresponding data lengths.
- Page 760 AH500 Module Manual MODBUS MODBUS Data Attribute Device address function code Description type (Hex.) (Hex.) Status of Y; the points are Word A000 ~ A0E9 03, 04 numbered in the order from small to large. Status of Y; the points are...
- Page 761 Chapter 16 Remote I/O Module AHRTU-ETHN-5A Number Attribute Name Description b2 0: Stop, 1: In operation b3 0: No module exists. 1: The module exists. 0: Inconsistent with the software configuration. 1: consistent with the software configuration. SR21~28: The states of I/O modules 0~7 on the extension backplane 1 SR29~36: The states of I/O modules 0~7 on the extension backplane 2.
- Page 762 Scanner 16.5.2 EIP Builder EIP Builder provides the functions of planning the network for Delta EtherNet/IP products and setting the parameters of EtherNet/IP slaves. After building AHRTU-ETHN-5A module in the NetworkView window, create network connection lines by dragging. Double click the module icon to open the RTU HWCONFIG page.
- Page 763 Chapter 16 Remote I/O Module AHRTU-ETHN-5A You can edit the I/O modules connected to RTU module and set the parameters of I/O modules in the (AHRTU-ETHN-5A)-HWCONFIG window. Double click AHRTU-ETHN-5A module to open the RTU Parameter Setting page where you can set the parameters on the Ethernet-Basic, Ethernet-Advance and Error Handling pages.
- Page 764 AH500 Module Manual Ethernet-Basic 16-14...
- Page 765 Chapter 16 Remote I/O Module AHRTU-ETHN-5A Name Description IP Addressing Mode of getting IP address Mode Static: Fixed IP address. DHCP: DHCP server assigns the dynamic IP address. BOOTP (default): BOOTP server assigns the dynamic IP address. If DHCP or BOOTP is selected, you can make the setting through IP manager in EIP Builder.
- Page 766 AH500 Module Manual Set the range of input addresses in the following window. Note that the start IP address should be less than the end IP address. Click “OK” after setting is finished. For instance, after the setting, only the IP address 192.168.1.x (x= 10,11,12,13,14,15,...
- Page 767 Chapter 16 Remote I/O Module AHRTU-ETHN-5A (1) Before the network time update is set, select “Enable NTP Client Service” and then set relevant parameters on the lower part of the following page. Error handling: Set the mechanism for handling errors in AHRTU-ETHN-5A through the software. ...
- Page 768 AH500 Module Manual Output module(set via the I/O Digital input Error handling module & analog (Set via the module software) mechanism input module software) Clear Hold Output value The master is No data can be Stop Output value= 0 unchanged...
- Page 769 Chapter 16 Remote I/O Module AHRTU-ETHN-5A 16.5.2.1 Login/Logout Type the user name and password on the Login/Logout area and click Login. After login succeeds, the user name will appear on the User field. Click Logout to log out after setting is over. 16.5.2.2 Menu The menu area provides such items as Information, Network configuration, Diagnosis and...
- Page 770 AH500 Module Manual 16.5.2.3 Information • Device information The following page introduces basic product information. The page can be opened even if you have not logged in. The page can not be revised. 16.5.2.4 Network configuration • Network setup The page provides IP address setting information of the product. But it is not open for setting IP addresses.
- Page 771 Chapter 16 Remote I/O Module AHRTU-ETHN-5A • Account management 8 groups of user accounts at most can be set on the page. Now AHRTU-ETHN-5A only supports Admin as the user ID. Field Description User ID Preset user ID: Admin with 16 characters at most. Default password is an empty string and the set password has 16 Password characters at most.
- Page 772 AH500 Module Manual 16.5.2.5 Diagnostic • Hardware status This page displays the status of AHRTU-ETHN-5A including RTU module and I/O modules connected. The status here is the same as that of the LED indicators of the device. 16-22...
- Page 773 Chapter 16 Remote I/O Module AHRTU-ETHN-5A Field Description It indicates a backplane ID. When the set rack ID is in IO table but it is inconsistent with the actually Rack connected rack ID, the background is red. When the actually connected rack ID can be detected but the rack ID is not in IO table, the background is yellow.
- Page 774 AH500 Module Manual Description Field (All field contents are read only) Ethernet Tx Number of Ethernet Tx packets packet statistic Ethernet Rx Number of Ethernet Rx packets packet statistic Etherent frame checksum error Number of Etherent checksum error packets packet statistic...
- Page 775 Chapter 16 Remote I/O Module AHRTU-ETHN-5A Description Field (All field contents are read only) Transmit ARP Number of transmitted ARP packets packet Transmit Unicast Number of transmitted Unicast packets packet Transmit Multicast Number of transmitted multicast packets Packet Transmit Number of transmitted broadcast packets Broadcast Packet TCP Connection Number of TCP connections which has been used...
- Page 776 AH500 Module Manual Description Field (All field contents are read only below) DLR Supervisor status Supervisor Status 0: Supervisor as a back up 1: RTU module works under the mode of Ring Supervisor. 2: End points of ring topology. Supervisor Status 3: Non-DLR ring topology.
- Page 777 Chapter 16 Remote I/O Module AHRTU-ETHN-5A Error code classification Phase Phase Description Category Item error software. Extension backplane The main backplane and extension offline backplane are disconnected. EtherNet/IP error EtherNet/IP communication failure. MODBUS TCP communication Communication error MODBUS TCP error failure.
- Page 778 AH500 Module Manual Error 7-segment Category Explanation How to deal with code display Modify the IP 16#1003 address when in RUN state. 1. Check if the two ends of the network are connected Firmware Firmware update properly. 16#1004 error failure 2.
- Page 779 Chapter 16 Remote I/O Module AHRTU-ETHN-5A Error 7-segment Category Explanation How to deal with code display timeout 2. Check if the module is normal. 3. Raise the setting value of RPI. DLR link Check if Ring network products 16#3001 offline are connected correctly.
- Page 780 AH500 Module Manual LED Status Indication How to deal with conflict addresses in the network. 2. Modify the IP address setup. 1. Check the setup for connecting the server. Network server Green light blinks 2. Check if the system server exists.