
Related Manuals for AGFA CR 10-X


Summary of Contents for AGFA CR 10-X
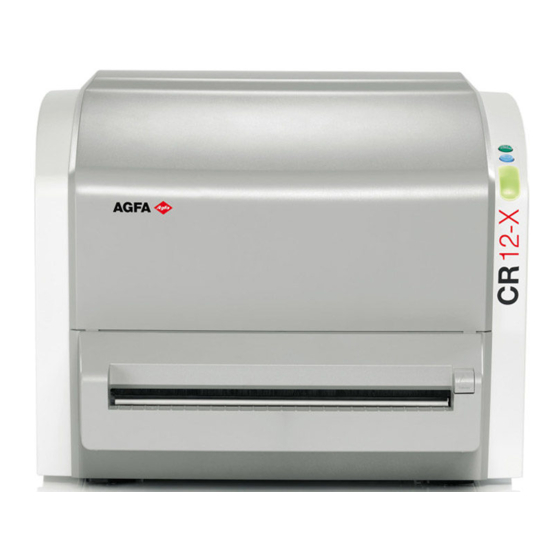
- Page 1 CR 10-X, CR 12-X, CR 15-X 5151/100 5151/200 5151/300 User Manual 2491E EN 20150409 1543...
-
Page 2: Table Of Contents
2 | CR 10-X, CR 12-X, CR 15-X | Contents Contents Legal Notice ................4 Introduction ................5 Introduction to this Manual ........6 Scope .............7 About the safety notices in this document ..8 Disclaimer ............. 9 Introduction to CR 10-X, CR 12-X and CR 15-X .. - Page 3 CR 10-X, CR 12-X, CR 15-X | Contents | 3 Troubleshooting ............59 Digitizer Remote Display ......60 Connection Problems ........61 Cassette Could Not Be Identified ....62 Cassette release button pressed before end of cycle ................63 Cannot read data on the image plate ....64...
-
Page 4: Legal Notice
Agfa and the Agfa rhombus are trademarks of Agfa-Gevaert N.V., Belgium or its affiliates. CR 10-X, CR 12-X, CR 15-X, NX, ADC QS and ADC VIPS are trademarks of Agfa HealthCare N.V., Belgium or one of its affiliates. All other trademarks are held by their respective owners and are used in an editorial fashion with no intention of infringement. -
Page 5: Introduction
CR 10-X, CR 12-X, CR 15-X | Introduction | 5 Introduction Topics: • Introduction to this Manual • Introduction to CR 10-X, CR 12-X and CR 15-X 2491E EN 20150409 1543... -
Page 6: Introduction To This Manual
6 | CR 10-X, CR 12-X, CR 15-X | Introduction Introduction to this Manual Topics: • Scope • About the safety notices in this document • Disclaimer 2491E EN 20150409 1543... -
Page 7: Scope
CR 10-X, CR 12-X, CR 15-X | Introduction | 7 Scope This manual contains information for safe and effective operation of the CR 10-X , CR 12-X and CR 15-X digitizers, further referred to as the digitizer, unless the information applies to a specific type. -
Page 8: About The Safety Notices In This Document
8 | CR 10-X, CR 12-X, CR 15-X | Introduction About the safety notices in this document The following samples show how warnings, cautions, instructions and notes appear in this document. The text explains their intended use. DANGER: A danger safety notice indicates a hazardous situation of direct, immediate danger for a potential serious injury to a user, engineer, patient or any other person. -
Page 9: Disclaimer
CR 10-X, CR 12-X, CR 15-X | Introduction | 9 Disclaimer Agfa assumes no liability for use of this document if any unauthorized changes to the content or format have been made. Every care has been taken to ensure the accuracy of the information in this document. -
Page 10: Intended Use
10 | CR 10-X, CR 12-X, CR 15-X | Introduction Intended Use The digitizer is part of a CR system, further containing a cassette, image plate and modality workstation. The CR system is used in a radiological environment by qualified staff to read-out, process and route static X-ray radiographic images. -
Page 11: Indications For Use
CR 10-X, CR 12-X, CR 15-X | Introduction | 11 Indications for Use Agfa’s Computed Radiography (CR) System with CR 10-X, CR 12-X or CR 15-X digitizer is indicated for use in general projection radiographic applications to capture for display diagnostic quality radiographic images of human anatomy. -
Page 12: Intended User
12 | CR 10-X, CR 12-X, CR 15-X | Introduction Intended User This manual has been written for trained users of Agfa products and trained diagnostic X–ray clinical personnel who have received proper training. Users are those persons who actually handle the equipment and those who have authority over the equipment. -
Page 13: Configuration
CR 10-X, CR 12-X, CR 15-X | Introduction | 13 Configuration The system consists of: • the digitizer for scanning image plates retaining latent X-ray images. The digitizer accepts one cassette containing one image plate at a time. • cassette and plate system: •... - Page 14 14 | CR 10-X, CR 12-X, CR 15-X | Introduction In case of power failure, the batteries of the UPS supply power to the digitizer, the NX workstation and monitor. Full Leg Full Spine Application Components • CR Full Body Cassette Holder •...
-
Page 15: Operation Controls
CR 10-X, CR 12-X, CR 15-X | Introduction | 15 Operation Controls The digitizer interfaces with the user via: • a power button, • an erase button, • a status indicator, • a cassette release button. Power button Erase button... - Page 16 16 | CR 10-X, CR 12-X, CR 15-X | Introduction Color Constant/ Status Action Blinking Blinking Busy with erasing Wait. and return of the IP into cassette Green Constant Standby mode Proceed. (Ready) Remove cassette. Cassette is ready for removal...
-
Page 17: System Documentation
• CR 10-X, CR 12-X, CR 15-X User Manual (this document), document 2491. • AGFA CR Plates and Cassettes User Manual, document 2492. • Getting started with CR 10-X, CR 12-X and CR 15-X, document 2493. The NX User Documentation CD contains: • NX user documentation •... -
Page 18: Training
18 | CR 10-X, CR 12-X, CR 15-X | Introduction Training The user must have received adequate training on the safe and effective use of the system before attempting to work with it. Training requirements may vary from country to country. The user must make sure that training is received in accordance with local laws or regulations that have the force of law. -
Page 19: Product Complaints
If the device malfunctions and may have caused or contributed to a serious injury, Agfa must be notified immediately by telephone, fax or written correspondence to the following address: Agfa Service Support - local support addresses and phone numbers are listed on www.agfa.com Agfa - Septestraat 27, 2640 Mortsel, Belgium... -
Page 20: Compatibility
Compatibility The equipment must only be used in combination with other equipment or components if these are expressly recognized by Agfa as compatible. A list of such equipment and components is available from Agfa service on request. Changes or additions to the equipment must only be carried out by persons authorized to do so by Agfa. -
Page 21: Compliance
CR 10-X, CR 12-X, CR 15-X | Introduction | 21 Compliance Topics: • General • Safety • Laser Safety • Electromagnetic Compatibility • Environmental Compliance • Equipment Classification General • The product has been designed in accordance with the MEDDEV... - Page 22 22 | CR 10-X, CR 12-X, CR 15-X | Introduction Equipment Classification This device is classified as following: Table 1: Equipment classification Class I equipment Equipment in which protection against electric shock does not relay on basic insulation only, but includes a power supply cord with protective earth conductor.
-
Page 23: Connectivity
CR 10-X, CR 12-X, CR 15-X | Introduction | 23 Connectivity The digitizer is connected to the workstation via Ethernet connection and uses the DICOM protocol to communicate with the workstation. 2491E EN 20150409 1543... -
Page 24: Installation
24 | CR 10-X, CR 12-X, CR 15-X | Introduction Installation WARNING: When using the power supply, care must be taken to ensure that there is either a mains plug or an all-cable disconnecting device in the internal installation fitted near the device and that it is easily accessible in case of emergency. - Page 25 CR 10-X, CR 12-X, CR 15-X | Introduction | 25 The classification of this product according to the medical electrical equipment standard IEC 60601-1 requires installation outside the patient vicinity. For definition of patient vicinity see dimensions below. Patient vicinity Patient vicinity patient_vicinity.cdr...
-
Page 26: Labels
26 | CR 10-X, CR 12-X, CR 15-X | Introduction Labels Always take into account the markings and labels provided on the inside and outside of the machine. A brief overview of these markings and labels and their meaning is given below. -
Page 27: Serial Number
CR 10-X, CR 12-X, CR 15-X | Introduction | 27 Type label Date of manufacture Manufacturer Serial number WEE Symbol, see section about Environmental protection. This mark indicates how to insert the cassette in the slot, depending on the cassette size that is indicated in the mark (CR 15-X only). - Page 28 28 | CR 10-X, CR 12-X, CR 15-X | Introduction divergence is 120 - 350 mrad. The laser beam’s deflection frequency is 70 1/s up to 90 1/s. Under normal operating conditions - device with all covers - there can be no laser radiation outside the digitizer.
-
Page 29: Cleaning And Disinfection
CR 10-X, CR 12-X, CR 15-X | Introduction | 29 Cleaning and Disinfection All appropriate policies and procedures should be followed to avoid contamination of the staff, patients and device. All existing universal precautions should be taken to avoid that the digitizer and its accessories come into contact with potential contaminations. -
Page 30: Patient Data Security
30 | CR 10-X, CR 12-X, CR 15-X | Introduction Patient data security The user must ensure that the patients’ legal requirements are met and that the security of the patient data is guarded. The user must define who can access patient data in which situations. -
Page 31: Maintenance
CR 10-X, CR 12-X, CR 15-X | Introduction | 31 Maintenance Topics: • Preventive Maintenance • Cleaning the Optical Unit Preventive Maintenance No regular preventive maintenance is required other than described further in this chapter. The digitizer informs you when preventive maintenance is required and displays the following message "Maintenance interval expired. -
Page 32: Recurrent Safety Tests
32 | CR 10-X, CR 12-X, CR 15-X | Introduction Recurrent safety tests The device shall be tested according to IEC 62353* in a time interval of at least 36 months or less if local regulations are different. * Medical electrical equipment – Recurrent test and test after repair of medical electrical equipment. -
Page 33: Environmental Protection
CR 10-X, CR 12-X, CR 15-X | Introduction | 33 Environmental protection Figure 2: WEEE symbol Figure 3: Battery symbol WEEE end user notice The directive on Waste Electrical and Electronic Equipment (WEEE) aims to prevent the generation of electric and electronic waste and to promote the reuse, recycling and other forms of recovery. -
Page 34: Safety Directions
34 | CR 10-X, CR 12-X, CR 15-X | Introduction Safety Directions WARNING: To avoid risk of electric shock, this equipment must only be connected to a supply mains with protective earth. WARNING: Position the digitizer so that it is possible to disconnect it from the mains power if required. -
Page 35: General Safety Instructions
CR 10-X, CR 12-X, CR 15-X | Introduction | 35 CAUTION: The digitizer is not suitable for scanning imaging plates (IPs) exposed with a dose higher than 5000 µG and for CR HD5.0S General a dose higher than 2500 µG. - Page 36 36 | CR 10-X, CR 12-X, CR 15-X | Introduction • Do not allow the digitizer to be subject to excessive vibration during operation, due to unstable ground (e.g. vibration of nearby equipment or footsteps). • Switch off the device before performing any maintenance work or repairs.
-
Page 37: Quality Control
CR 10-X, CR 12-X, CR 15-X | Introduction | 37 Quality Control Quality control can be performed by means of the Auto QC2 tool. CAUTION: Unnoticed image quality degradation can cause false negative diagnosis. Apply regular quality control according local regulations. -
Page 38: Getting Started
38 | CR 10-X, CR 12-X, CR 15-X | Getting started Getting started Topics: • Starting the Digitizer • Basic Workflow • Stopping the Device 2491E EN 20150409 1543... -
Page 39: Starting The Digitizer
CR 10-X, CR 12-X, CR 15-X | Getting started | 39 Starting the Digitizer To start the Digitizer: 1. Make sure the digitizer is connected to the control PC and that the control PC is running the appropriate NX software. -
Page 40: Basic Workflow
40 | CR 10-X, CR 12-X, CR 15-X | Getting started Basic Workflow The main functions of the system are digitizing image plates and transmitting the digital image data to the image processing station, where you can perform an image quality control. -
Page 41: Step 1: Select A Patient And Start The Exam
CR 10-X, CR 12-X, CR 15-X | Getting started | 41 Step 1: Select a patient and start the exam At the NX workstation: 1. Open the Worklist window of NX. In the Worklist window, you can view and manage the exams that are scheduled via the Worklist pane. -
Page 42: Step 2: Digitize The Image
42 | CR 10-X, CR 12-X, CR 15-X | Getting started Step 2: Digitize the image At the digitizer: 1. Check that the digitizer is ready for operation: The status indicator on the digitizer constantly lights up in green. 2. Insert the cassette containing the exposed image plate into the cassette slot of the digitizer. - Page 43 CR 10-X, CR 12-X, CR 15-X | Getting started | 43 Figure 6: Inserting 24 cm x 30 cm cassette using the cassette adapter Once the cassette is locked, the status indicator on the digitizer is blinking yellow. Note: The cassette is unidentified, so the digitizer will send a request to the NX station.
- Page 44 44 | CR 10-X, CR 12-X, CR 15-X | Getting started 4. As soon as the digitizer has received the complete identification data from the NX station (via Ethernet) it will start digitizing the image plate. The digitizer converts the information of the latent image to digital data.
-
Page 45: Step 3: Perform A Quality Control
CR 10-X, CR 12-X, CR 15-X | Getting started | 45 Step 3: Perform a quality control At the NX workstation: 1. Select the image on which quality control is to be performed. 2. Prepare the image for diagnosis by using e.g. L/R markers or annotations. -
Page 46: Step 4: Remove The Cassette And Insert The Next One
46 | CR 10-X, CR 12-X, CR 15-X | Getting started Step 4: Remove the cassette and insert the next one At the digitizer: 1. When the digitizer has finished treating the cassette, the status indicator constantly lights up in green. -
Page 47: Stopping The Device
CR 10-X, CR 12-X, CR 15-X | Getting started | 47 Stopping the Device Topics: • Before Switching Off • Switching Off 2491E EN 20150409 1543... -
Page 48: Before Switching Off
48 | CR 10-X, CR 12-X, CR 15-X | Getting started Before Switching Off Check that the digitizer is not scanning an image plate. If the digitizer is scanning an image plate, the status indicator is blinking yellow. Note: A clamped cassette should be removed before switching off the device. -
Page 49: Switching Off
CR 10-X, CR 12-X, CR 15-X | Getting started | 49 Switching Off It is recommended to switch off the digitizer at the end of the day. To switch off, press the power button. Power button Note: After switch off, the device is still in stand-by mode. To remove the device from the mains supply disconnect the mains plug. -
Page 50: Operating Cr 10-X, Cr 12-X And Cr 15-X
50 | CR 10-X, CR 12-X, CR 15-X | Operating CR 10-X, CR 12-X and CR 15-X Operating CR 10-X, CR 12-X and CR 15- This chapter provides information about functions that are available in operator mode. Finally you will find some preventive maintenance and troubleshooting guidelines. -
Page 51: Reading An Emergency Image Plate
CR 10-X, CR 12-X, CR 15-X | Operating CR 10-X, CR 12-X and CR 15-X | 51 Reading an Emergency Image Plate Note: Reading an emergency image plate is a licensed functionality, necessary to facilitate the emergency cases and to improve the workflow. -
Page 52: Re-Erasing An Image Plate
52 | CR 10-X, CR 12-X, CR 15-X | Operating CR 10-X, CR 12-X and CR 15-X Re-erasing an Image Plate At the end of a normal or emergency digitizing cycle, the digitizer returns an erased image plate. However, in the following cases, you must re-erase the... - Page 53 CR 10-X, CR 12-X, CR 15-X | Operating CR 10-X, CR 12-X and CR 15-X | 53 Figure 8: Inserting small cassette Figure 9: Inserting 24 cm x 30 cm cassette using the cassette adapter As a result, the digitizer starts erasing the image plate: the status indicator switches to the state “blue blinking”.
-
Page 54: Reading The Initialization Data Of An Image Plate
54 | CR 10-X, CR 12-X, CR 15-X | Operating CR 10-X, CR 12-X and CR 15-X Reading the Initialization Data of an Image Plate The initialization data stored in the IP barcode can be read via the digitizer. Reading the initialization data of an image plate can be necessary in case you want to find a specific IP. - Page 55 CR 10-X, CR 12-X, CR 15-X | Operating CR 10-X, CR 12-X and CR 15-X | 55 Make sure that the cassette is firmly pushed into the slot, so that it is locked (you should hear a click). Otherwise, the digitizer cannot read the image plate.
- Page 56 56 | CR 10-X, CR 12-X, CR 15-X | Operating CR 10-X, CR 12-X and CR 15-X Note: You can only remove the cassette from the cassette slot when the cassette is unlocked. Related Links Cassette formats on page 78...
-
Page 57: Expiry Of Image Plates
CR 10-X, CR 12-X, CR 15-X | Operating CR 10-X, CR 12-X and CR 15-X | 57 Expiry of Image Plates Topics: • Upcoming Expiry of the Image Plate • Expired Image Plate 2491E EN 20150409 1543... -
Page 58: Upcoming Expiry Of The Image Plate
58 | CR 10-X, CR 12-X, CR 15-X | Operating CR 10-X, CR 12-X and CR 15-X Upcoming Expiry of the Image Plate The Digitizer Remote Display informs you about upcoming expiry of the image plate 90 and 30 days before the expiry date. Please replace the image plates before expiry to avoid reduced system performance. -
Page 59: Troubleshooting
CR 10-X, CR 12-X, CR 15-X | Operating CR 10-X, CR 12-X and CR 15-X | 59 Troubleshooting In case of a malfunction of the digitizer, consult the Digitizer Remote Display UI (User Interface) messages on the control PC. Error messages are displayed in a dialog box in the middle of the screen or in a fixed part of the screen. -
Page 60: Digitizer Remote Display
60 | CR 10-X, CR 12-X, CR 15-X | Operating CR 10-X, CR 12-X and CR 15-X Digitizer Remote Display Digitizer Remote Display is an application running on the NX PC. To verify if Digitizer Remote Display is running, check if the Digitizer Remote Display icon is present in the Windows taskbar: To start the Digitizer Remote Display, go to the Windows Start menu >... -
Page 61: Connection Problems
CR 10-X, CR 12-X, CR 15-X | Operating CR 10-X, CR 12-X and CR 15-X | 61 Connection Problems CAUTION: Operation failure of the device can cause delayed diagnosis. Check if Digitizer Remote Display is running. In case the status indicator of the digitizer is blinking red, the user should look at the “status”... -
Page 62: Cassette Could Not Be Identified
62 | CR 10-X, CR 12-X, CR 15-X | Operating CR 10-X, CR 12-X and CR 15-X Cassette Could Not Be Identified Details This error message is displayed on the NX PC: Cause A cassette has been inserted in the digitizer and the ID button was clicked directly afterwards. -
Page 63: Cassette Release Button Pressed Before End Of Cycle
CR 10-X, CR 12-X, CR 15-X | Operating CR 10-X, CR 12-X and CR 15-X | 63 Cassette release button pressed before end of cycle Details The following error message is displayed in the Digitizer Remote Display: Do not press the cassette release button before end of cycle. -
Page 64: Cannot Read Data On The Image Plate
64 | CR 10-X, CR 12-X, CR 15-X | Operating CR 10-X, CR 12-X and CR 15-X Cannot read data on the image plate Details The following error message is displayed in the Digitizer Remote Display: Error during read out of data on the image plate. Remove the cassette and press the confirm button. -
Page 65: Image Plate Transport Problems
CR 10-X, CR 12-X, CR 15-X | Operating CR 10-X, CR 12-X and CR 15-X | 65 Image Plate Transport Problems Details The following error message is displayed in the Digitizer Remote Display: Image plate is not erased! Remove the cassette and press the confirm button. -
Page 66: Removing A Jammed Image Plate
66 | CR 10-X, CR 12-X, CR 15-X | Operating CR 10-X, CR 12-X and CR 15-X Removing a Jammed Image Plate Note: The technical concept does not allow the user to remove the top cover. Note: The digitizer always reads and digitizes the plate first, then erases it and transports it back into the cassette. - Page 67 CR 10-X, CR 12-X, CR 15-X | Operating CR 10-X, CR 12-X and CR 15-X | 67 7. Slide out the cassette unit with the cassette attached. WARNING: The cassette unit and/or the cassette falling down can cause injury of the operator.
- Page 68 68 | CR 10-X, CR 12-X, CR 15-X | Operating CR 10-X, CR 12-X and CR 15-X 2. Open the back of the device by turning the four fixation rings by 90 degrees: 3. Gently remove the image plate from the back of the digitizer.
- Page 69 CR 10-X, CR 12-X, CR 15-X | Operating CR 10-X, CR 12-X and CR 15-X | 69 Note: After removing a jammed image plate, erase the image plate before the next exposure. 2491E EN 20150409 1543...
-
Page 70: Behavior In Case Of Power Failure
70 | CR 10-X, CR 12-X, CR 15-X | Operating CR 10-X, CR 12-X and CR 15-X Behavior in Case of Power Failure Note: The description below is only applicable if an uninterruptible power supply (UPS) is put into the CR system configuration. -
Page 71: Cleaning The Optical Unit
CR 10-X, CR 12-X, CR 15-X | Operating CR 10-X, CR 12-X and CR 15-X | 71 Cleaning the Optical Unit The only maintenance action which you must perform is checking the image quality. Refer to the User Manual of the NX software. - Page 72 72 | CR 10-X, CR 12-X, CR 15-X | Operating CR 10-X, CR 12-X and CR 15-X Make sure to return the lever completely to the left, where it is locked in position. 3. Place back the cassette unit. Note that the protruding elements of the cassette unit should be...
-
Page 73: Technical Data
CR 10-X, CR 12-X, CR 15-X | Technical Data | 73 Technical Data Topics: • Specifications • Cassette formats 2491E EN 20150409 1543... -
Page 74: Specifications
74 | CR 10-X, CR 12-X, CR 15-X | Technical Data Specifications Labelling 93/42 EEC 'Medical Devices' (Europe), EN 60601-1 (applicable only for equipment made in Germany) c NRTL us NRTL us certified, UL 60601-1 (North America) (applicable only for... - Page 75 CR 10-X, CR 12-X, CR 15-X | Technical Data | 75 Mains fuse protection Europe: min. 10 A, max. 16 A USA & Japan: min. 10 A, max. 15 A Network connectivity Ethernet connector RJ45 female, 10/100 Mbit/s autosensing, shielding CAT5...
- Page 76 76 | CR 10-X, CR 12-X, CR 15-X | Technical Data Temperature -25 °C - +55 °C Environmental conditions (during transport) In line with IEC721-3-2 (1997): class 2K2 and 2M3, with following restrictions: Temperature -25 °C - +55 °C Vibration...
- Page 77 CR 10-X, CR 12-X, CR 15-X | Technical Data | 77 150 µm 70 s (not applicable for CR HD5.0S General image plate) 118 s 100 µm 88 s End of Life Estimated product life 7 yrs. (if regularly serviced...
-
Page 78: Cassette Formats
78 | CR 10-X, CR 12-X, CR 15-X | Technical Data Cassette formats Table 2: Supported cassette formats Cassette format CR 10-X, CR 12-X CR 15-X 35 cm x 43 cm 24 cm x 30 cm yes, using the cassette adapter... -
Page 79: Remarks For Hf-Emission And Immunity
CR 10-X, CR 12-X, CR 15-X | Remarks for HF-emission and immunity | 79 Remarks for HF-emission and immunity Remarks for HF-emission and immunity It is hereby certified that the digitizer has interference suppression according to the EN 55011 Class A as well as the FCC Rules CR47 Part 15 Class A. - Page 80 80 | CR 10-X, CR 12-X, CR 15-X | Remarks for HF-emission and immunity RF emissions in accordance Class A The device is suitable for use in with CISPR 11 all establishments other than domestic, and may be used in...
- Page 81 CR 10-X, CR 12-X, CR 15-X | Remarks for HF-emission and immunity | 81 Voltage The quality of the • < 5% U • < 5% U breakthrough voltage supply should (> 95% (> 95% s, short term correspond to that of...
- Page 82 82 | CR 10-X, CR 12-X, CR 15-X | Remarks for HF-emission and immunity Recommended protective distance: Conducted d = 1.2 high frequency 150 kHz to disturbance 80 MHz variables in accordance with IEC 61000-4-6 Radiated high 3 V/m 3 V/m d = 1.2...
- Page 83 CR 10-X, CR 12-X, CR 15-X | Remarks for HF-emission and immunity | 83 investigation of the location is recommended, to ascertain the electromagnetic environment as a result of stationary high frequency transmitters. If the field strength of the device exceeds the level of agreement given above, the device must be observed with regard to its normal operation at each place of use.
- Page 84 84 | CR 10-X, CR 12-X, CR 15-X | Remarks for HF-emission and immunity The distance can be determined through the equation for each respective column. P is the rated power of the transmitter in watts (W) according to the manufacturer information on the transmitter, only for transmitters where the rated power is not mentioned in the above table.