Table of Contents
Advertisement
Quick Links
Advertisement
Table of Contents

Related Manuals for HELIX HR3500


Summary of Contents for HELIX HR3500
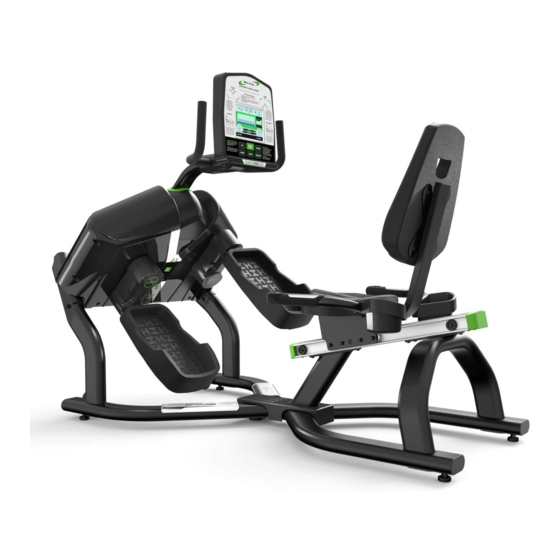
- Page 1 Helix Recumbent 3500 HR3500 manual.indd 1 20/09/2017 18:46...
-
Page 2: Table Of Contents
Step 1: Assemble Front and Rear Frame Step 2: Assemble Base Cover Step 3: Assemble Seat Bottom and Backrest Step 4: Assemble Pedal Step 5: Assemble Upright Step 6: Assemble Dome-Shaped Cover and Gasket Step 7: Assemble Handlebar Step 8: Assemble Console Step 9: Assemble Upright Cover CONSOLE 16-20 Console Operating Instructions 16-20 CUSTOMER INFORMATION Customer Service back cover HR3500 manual.indd 2 20/09/2017 18:46... -
Page 3: Important Safety Information
Inspect your exercise machine prior to exercising to ensure that all nuts and Bolt are fully tightened before each use. Most exercise equipment is not recommended for small children. Children should not use the machine unless they are under adult supervision. Exercise equipment has moving parts. In the interest of safety, keep others, especially children, at a safe distance while exercising. Warm up 5 to 10 minutes before each workout and cool down 5 to 10 minutes afterward. This allows your heart rate to gradually increase and decrease and will help prevent straining muscles. Never hold your breath while exercising. Breathing should remain at a normal rate in conjunction with the level of exercise being performed. Rest adequately between workouts. Muscles tone and develop during these rest periods. Beginners should work out twice a week and increase gradually to 4 or 5 times per week. Remove all jewelry, including rings, chains and pins before commencing exercise. Always wear suitable clothing and footwear during exercise. Do not wear loose fitting clothing that could become entangled with the moving parts of your exercise machine. IMPORTANT ! THE MAXIMUM USER WEIGHT CAPACITY FOR YOUR HELIX IS 158KG (350 LBS.) WARNING: Before commencing with any exercise program, please consult your family physician. If at any time during exercise you feel faint, dizzy or experience pain, stop and consult your family physician. In the event any of the above mentioned warnings are breached by the consumer, the manufacturer may use same as a defense to any claim for injuries, damage or loss. The above warnings are in no way intended to limit or modify the consumer’s remedies for breach of warranties pursuant to applicable Federal and State Laws or Regulations. They are being supplied strictly to ensure the safety of the individuals using this product. HR3500 manual.indd 3 20/09/2017 18:46... -
Page 4: Exploded View Drawing
PAGE 4 EXPLODED VIEW DRAWING HR3500 manual.indd 4 20/09/2017 18:46... -
Page 5: Parts List
Item # Description Front Frame Rear Frame Center Upright Post Left Handlebar Right Handlebar Electronic Console Display Console Mounting Plate Upright Top Cover Upright Bottom Cover Rubber Gasket for Upright Dome-Shaped Cover Pedal Frames and Covers Base Cover Backrest Seat Bottom M10x65 Bolt M10 Washer M6x15 Bolt M8x19 Bolt M8 Washer M8x20 Bolt M8x15 Bolt M8x58 Bolt M8 Locknut M8x92 Bolt M5x15 Bolt ST4x20 Bolt S10 S17 32 S10 S13 S14 S17 HR3500 manual.indd 5 20/09/2017 18:46... -
Page 6: Pre-Assembly Checklist
(#23) M8x58 Bolt x 2 (#20) M8 Washer x 4 (#24) M8 (#20) M8 Locknut x 2 (#28) S4 x1 Washer x 2 (#29) S5 x1 (#24) M8 (#30) S6 x 1 STEP 9 Locknut x 1 (#25) M8x92 (#27) ST4x20 Bolt x 1 (#31) S10, S17 x1 Bolt x 1 (#32) S10, S13, S14, S17 x 1 HR3500 manual.indd 6 20/09/2017 18:46... -
Page 7: M10X65 Bolt
PAGE 7 ASSEMBLY INSTRUCTIONS STEP 1: ASSEMBLE FRONT AND REAR FRAME Align the front and rear frames close enough to be able to connect the two sets of wires. Slide the rear section tube into the front section tube while tucking the wires in carefully as you proceed. Once the sections are completely together, install the 4 M10 bolt and M10 Washer from the STEP 1 parts bag. (#16) M10x65 Bolt x 4 (#17) M10 Washer x 4 (#31) S10, S17 x1 HR3500 manual.indd 7 20/09/2017 18:46... -
Page 8: Assembly Instructions
ASSEMBLY INSTRUCTIONS PAGE 8 STEP 2: ASSEMBLE BASE COVER Spread the split area of the base cover to allow it to be placed around the base frame as shown. Then slide the base cover down. The base cover has internal magnets to secure it in place. No other securing method is required. HR3500 manual.indd 8 20/09/2017 18:47... -
Page 9: Hr3500 Manual.indd
PAGE 9 ASSEMBLY INSTRUCTIONS STEP 3: ASSEMBLE SEAT BOTTOM AND SEAT BACKREST Using the 8 Bolts in the Step 3 parts bag, install the seat bottom and backrest as shown above. Firmly tighten the Bolts but do not use excessive force. (#18) M6x15 Bolt x 8 (#28) S4 x1 HR3500 manual.indd 9 20/09/2017 18:47... -
Page 10: Step 4: Assemble Pedal
IT IS CRITICAL THAT A FULL VISUAL INSPECTION BE COMPLETED TO ENSURE THAT THE PEDAL FRAME ROUND FLANGE & THE CRANK ASSEMBLY ROUND FLANGE ARE FLUSH TOGETHER AND THAT ALL FOUR BOLT ARE COMPLETELY & FIRMLY INSTALLED. Failure to ensure that the two flanges are firmly in contact will result in failure of the pedal frame Bolts. HR3500 manual.indd 10 20/09/2017 18:47... -
Page 11: Step 5: Assemble Upright
PAGE 11 ASSEMBLY INSTRUCTIONS STEP 5: ASSEMBLE UPRIGHT Place the upright onto the main frame as shown and install 4 bolts from the Step 5 parts bag. After all 4 bolts are installed, firmly tighten each bolt. Do not firmly tighten any bolt until all the bolts are installed. Fully securing one bolt before the others are in place may result in the post being tilted or misaligned. Next, connect the wires from the main body to the wires from the upright. (#21) M8x20 Bolt x 4 (#30) S6 x 1 HR3500 manual.indd 11 20/09/2017 18:47... - Page 12 ASSEMBLY INSTRUCTIONS PAGE 12 STEP 6: ASSEMBLE DOME-SHAPED COVER AND RUBBER GASKET Slide the dome-shaped cover over the upright tube noting that the hole in the dome-shaped cover is positioned closer to one side. That side should face the rear of the machine, away from the user, as the dome-shaped cover is installed. Apply only gentle pressure to fit the tabs (shown in Figure #1) in place by squeezing the dome-shaped cover slightly and sliding the tabs into the holes in the lower plastic housing. Release the gentle pressure to snap the tabs into place. The dome- shaped cover is shown installed in Figure #2. Slide the rubber gasket down the center upright tube and push it into place as shown, noting that the slightly V-shaped side of the gasket faces the rear. See Figure #2 and Figure #3. HR3500 manual.indd 12 20/09/2017 18:47...
-
Page 13: M8X15 Bolt
NOTE: FOR EASE OF INSTALLATION, FIRST INSTALL THE LONG BOLT TO HOLD THE HANDLEBARS IN PLACE. THIS WILL MAKE IT EASIER TO INSTALL THE SHORT BOLT. (#22) M8x15 Bolt x 4 (#29) S5 x1 (#20) M8 Washer x 6 (#23) M8x58 Bolt x 2 (#32) S10, S13, S14, S17 x 1 (#24) M8 Locknut x 2 HR3500 manual.indd 13 20/09/2017 18:47... - Page 14 ASSEMBLE CONSOLE Thread the wires from the console #6 through the hole Install the bolt and connect the four wires as shown in in the center of the console mounting bracket #7. Set the Figure #6. bracket into place on the console, and secure the 4 console mounting bolts #26, as shown in Figure #5. Do not over- Carefully feed the wires and their connectors back into the tighten these bolts. console or upright post to avoid pinching or pulling them. Note that enough slack must be left in the wires to allow the console position to be changed. PLEASE TAKE SPECIAL CARE NOT TO PINCH THE WIRES (#26) M5x15 Bolt x 4 (#25) M8x92 Bolt x 1 (#30) S6 x1 (#29) S5 x1 (#20) M8 Washer x 2 (#32) S10, S13, S14, S17 x 1 (#24) M8 Nut x 1 20 24 HR3500 manual.indd 14 20/09/2017 18:47...
-
Page 15: Step 9: Assemble Upright Cover
PAGE 15 ASSEMBLY INSTRUCTIONS STEP 9: ASSEMBLE UPRIGHT COVER Snap the top and bottom upright covers into place as shown and secure them with 1 ST4x20 screw. (#27) ST4x20 Bolt x 1 (#30) S6 x 1 HR3500 manual.indd 15 20/09/2017 18:47... - Page 16 The console on this product is easy to use. But you can put it to best use and get the greatest benefit by understanding the functions below. Touch screen Functional keys This console is equipped with institutive touch screen technology. Simply touch the key on the screen to select the desired function. The screen contents will vary according to the key that is touched. Home page – Engineering Setting Key Quick Start Key Information Program Key about Helix HR3500 manual.indd 16 20/09/2017 18:47...
- Page 17 PAGE 17 CONSOLE OPERATING INSTRUCTIONS Program selection page – Touch any program key to select the program. Program setting page – Enter the value for each area to complete the settings. You may press the “SAVE” key after inputting all the settings to save your data for future use. HR3500 manual.indd 17 20/09/2017 18:47...
- Page 18 Workout page – Contents of each window will vary depending on the program that is selected. Pedal Data direction Resistance level display Program and adjustment profile • Program profile window: This window shows the profile of the active program. Each program has its own profile. Black lines represent the resistance segments already completed. Red indicates the current resistance level. Blue indicates the upcoming workout. All the programs, except for the Heart Rate Control program, operate as follows. There are 32 columns representing 32 segments of time. The length of each segment is the total program time divided by 32. The height of each column represents the resistance level. The higher the resistance, the higher the column. There are 20 resistance levels to choose from. During a workout, the blinking column indicates the current segment of your workout. • Data display windows: These windows show workout information, including time, distance, calories, rpm, mets, watt, level and pulse. In a heart rate control program, the target heart rate is also displayed. • Pedal direction indicators: These indicators show pedal rotation direction. In some workout programs, a “change direction” prompt appears. Please follow these prompts to get the most out of the workout. HR3500 manual.indd 18 20/09/2017 18:47...
- Page 19 PAGE 19 CONSOLE OPERATING INSTRUCTIONS Keys There are two types of keys on this console: physical, hardware keys and virtual, touch keys. Both operate in the same way. Key functions are explained below. • Home: Press this key at any time to return to the home screen. • Engineering Setting: Press this key to enter the “engineering” settings page. This page is password protected. The default password is “2015”. Enter this password to access the product record or to change the units from miles to kilometers. • About Helix: Press this key to learn more about the company that made this product. • Quick Start & Start: By pressing the Quick Start key before you select a workout you can activate the Helix Interval program. If a workout program has been selected, press Quick Start or Start to activate the workout. • Up/Down (/) : Press these keys to adjust settings during workout setup. When a workout is activated, these keys can be used to adjust the resistance setting (or target heart rate in a heart rate program). • Enter: Press this key to confirm your selections. HR3500 manual.indd 19 20/09/2017 18:47...
-
Page 20: Console Operating Instructions
CONSOLE OPERATING INSTRUCTIONS PAGE 20 • Programs: These keys allow selection of workouts. • Results: If you press this key while a workout is progressing, the console will enter “cool down” mode. Cool down mode lasts three minutes, during which resistance can be adjusted from level 1 to 5. When the cool down period ends, or when the Results key is pressed twice during a workout, the workout summary will appear. You can always press and hold this key to reset console settings and return to idle mode. Basic Operation • Power up: This product is powered by a generator and back up battery. Please pedal to power up the console. • Pause a program: If a program is running and there is no RPM for 3 seconds, the console will pause and stop accumulating data. The pause time is 3 minutes. After that, the console will reset and the screen will turn off. During the pause mode, the workout will resume again if you resume pedaling. • Start a program: To begin a workout program, press the Quick Start or Start key to select a workout. Then follow on-screen instructions to key in personal data. When you finish entering personal data, press the Quick Start or Start key to begin the workout. (You may press the Start or Quick Start key at any time during the workout setup to skip the setting stage and immediately begin the workout.) HR3500 manual.indd 20 20/09/2017 18:47... - Page 21 Classic programs: This group of workouts includes manual, random, simple intervals, valley, rolling hills, mountain, olympian, and plateau programs. These preset workouts operate similarly. Activate a workout by pressing the desired program key and then press the Enter key to confirm your choice. Then follow the on-screen instructions to key in user data and start the workout. During a workout, you can adjust the resistance level by pressing up and down keys. The workout profile will update accordingly. • • MANUAL PROGRAM: RANDOM PROGRAM: The default resistance level for the Manual This computer-generated workout is program is L1. different each time the key is pressed. • • SIMPLE INTERVAL PROGRAM VALLEY PROGRAM PROFILE: PROFILE: • • ROLLING PROGRAM PROFILE: MOUNTAIN PROGRAM PROFILE: HR3500 manual.indd 21 20/09/2017 18:47...
- Page 22 CONSOLE OPERATING INSTRUCTIONS PAGE 22 • PLATEAU PROGRAM PROFILE: Interval Programs This group includes Helix intervals, Ramp intervals and Pyramid intervals These programs are designed to improve your cardiovascular system by allowing your body to alternate between high-intensity work periods and low-intensity rest periods. Research shows that interval training is the most effective training for fitness conditioning and burns more calories over a short period of time. These workouts include prompts to change the direction of your pedaling. Touch the desired program key and press the Enter key to confirm your choice. Then follow on- screen instructions to key in user information and start the workout. For your safety, these workouts begin with a warm up period of three minutes. During the warm up period, you may adjust the resistance from level 1 to 5 by pressing the Up/Down (/) keys. HR3500 manual.indd 22 20/09/2017 18:47...
- Page 23 You may press the physical Quick Start key to bypass the warm up and immediately begin the workout. Resistance can be adjusted during a workout by pressing the Up/Down (/) keys. Start pedaling in either direction. A message will appear during the workout to prompt you to change the direction of your workout. HELIX INTERVAL WORKOUT HEART RATE CONTROL WORKOUT This is our signature interval program and The Heart Rate Control program is is the default Quick Start program. designed to keep you training at your chosen heart rate level. This program will only work when there is a valid heart rate signal. The console will adjust the resistance level automatically to ensure your target heart rate is achieved and maintained during the entire program. RAMP INTERVAL WORKOUT PYRAMID INTERVAL WORKOUT In the heart rate control workout, you may press Up/Down (/) keys to adjust the target heart rate setting. The target heart rate zone (+, -5bpm) will be highlighted and your heart rate progress will be illustrated on the profile display. The pulse data display window will show the actual heart rate. HR3500 manual.indd 23 20/09/2017 18:47...
- Page 24 • An activity that uses large muscle groups, maintained continuously, and is rhythmical and aerobic in nature. • Duration: 20 to 60 minutes of continuous aerobic activity, including a warm-up and cool-down period for each exercise session. • Frequency: 3 to 5 times per week. • Intensity: 60% to 85% of maximum heart rate. • In addition to aerobic exercise, it is recommended that you add strength training of moderate intensity twice per week to your program. Get a smart start on exercising. Anyone over the age of 35, as well as younger persons whom are overweight, should check with his/ her physician before beginning any type of exercise program. People who have diabetes or high blood pressure, a family history of heart disease, high cholesterol or have lead a sedentary lifestyle should protect themselves with a medical check-up and a stress test, preferably administered during exercise by a healthcare professional. • Always stretch before your workout to loosen muscles, and afterwards to cool down. • The first few minutes of your workout should be devoted to warming up muscles before a vigorous workout, and building your heart rate slowly. • After your aerobic workout of about 24-32 minutes, spend 10 minutes gradually reducing your heart rate with a lower resistance level. Remember, to start slow, with intensity low, until you build endurance and strength. And always consult your physician before beginning any exercise program. HR3500 manual.indd 24 20/09/2017 18:47...
- Page 25 PAGE 25 CONSOLE OPERATING INSTRUCTIONS HR3500 manual.indd 25 20/09/2017 18:47...
- Page 26 PAGE 26 HR3500 manual.indd 26 20/09/2017 18:47...
- Page 27 PAGE 27 HR3500 manual.indd 27 20/09/2017 18:47...
- Page 28 For customer service, please contact the dealer from whom you purchased the product, or contact the Helix customer service department by phone at 888-435-4926 or by email at service@helixco.com. Thank you! Distributed under license from M & S Distribution, Inc by Helix Company, 572 Freeport Street, Unit A, Boston, Ma 02122 This product is patented in the US and other International Patents and patents pending. US Patent Number 7,108,638 Helix® is a registered trademark of M & S Distribution, Inc. All rights reserved. HR3500 manual.indd 28 20/09/2017 18:47...