Advertisement
Quick Links
Advertisement

Related Manuals for Life Fitness Elevation 95X-ALLXX-01


Summary of Contents for Life Fitness Elevation 95X-ALLXX-01
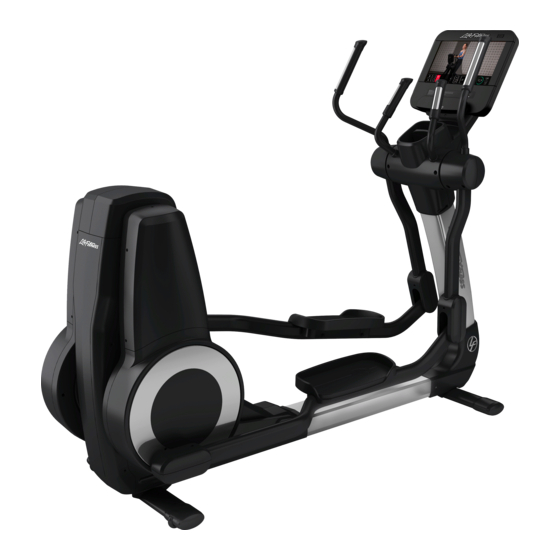
- Page 1 Elevation 95X-ALLXX-01 Commercial Cross-trainer HOW TO…...
- Page 3 Elevation 95X-ALLXX-01 Commercial Cross-trainer “How To…” HOW TO... REPLACE THE CONSOLE BACK COVER Tools required: Phillips screwdriver Estimated time required: 15 minutes 1. If the cross-trainer has line cords, unplug Console Back Cover them from the wall outlets. 2. Remove and save the six Phillips screws that secure the console back cover to the console support bracket and console.
- Page 4 Elevation 95X-ALLXX-01 Commercial Cross-trainer “How To…” HOW TO... REPLACE THE CONSOLE Tools required: Phillips screwdriver Estimated time required: 30 minutes 1. If the cross-trainer has line cords, unplug Console Support Bracket them from the wall outlets. 2. Disconnect all cables from the console.
-
Page 5: Media Tray
Elevation 95X-ALLXX-01 Commercial Cross-trainer “How To…” HOW TO... REPLACE THE MEDIA TRAY Tools required: none Estimated time required: 15 minutes 1. If the cross-trainer has line cords, unplug them from the wall outlets. 2. Press the tab on the inside of the media tray to release it and then pull it up and out of the top deadshaft cover. - Page 6 Elevation 95X-ALLXX-01 Commercial Cross-trainer “How To…” HOW TO... REPLACE THE DEADSHAFT END CAP COVERS Tools required: Phillips screwdriver Estimated time required: 20 minutes Front Dead Shaft 1. If the cross-trainer has line cords, unplug them from the End Cap Cover wall outlets.
- Page 7 Elevation 95X-ALLXX-01 Commercial Cross-trainer “How To…” HOW TO... REPLACE THE TOP DEADSHAFT COVER Tools required: Phillips screwdriver Estimated time required: 30 minutes Console Console (raised) 1. If the cross-trainer has line cords, unplug them from the wall outlets. 2. Remove the console back cover. (See the “How To…”...
-
Page 8: Console Support Assembly
Elevation 95X-ALLXX-01 Commercial Cross-trainer “How To…” HOW TO... REPLACE THE CONSOLE SUPPORT ASSEMBLY Tools required: Phillips screwdriver, 13mm socket wrench Estimated time required: 45 minutes Hex Bolts (2 1. nplug the line cord from the wall outlet. on each side) 2. - Page 9 Elevation 95X-ALLXX-01 Commercial Cross-trainer “How To…” HOW TO... REPLACE THE USER ARM HEART RATE HAND SENSORS Tools required: Phillips screwdriver Estimated time required: 20 minutes 1. If the cross-trainer has Heart Rate Hand line cords, unplug them Senor (front) from the wall outlets.
- Page 10 Elevation 95X-ALLXX-01 Commercial Cross-trainer “How To…” HOW TO... REPLACE THE FRONT OR REAR COLLAR DEADSHAFT COVERS Tools required: Phillips screwdriver Estimated time required: 20 minutes 1. If the cross-trainer has line cords, unplug them from the wall outlets. 2. Remove the deadshaft end cap covers.
- Page 11 Elevation 95X-ALLXX-01 Commercial Cross-trainer “How To…” HOW TO... REPLACE THE BULLHORNS Tools required: Phillips screwdriver, 12mm socket wrench Estimated time required: 30 minutes 1. If the cross-trainer has line cords, Right Bullhorn unplug them from the wall outlets. 2. Remove the deadshaft end cap covers.
- Page 12 Elevation 95X-ALLXX-01 Commercial Cross-trainer “How To…” HOW TO... REPLACE THE BULLHORN HEART RATE HAND SENSORS Tools required: Phillips screwdriver Estimated time required: 30 minutes 1. If the cross-trainer has line cords, unplug them from the wall outlets. 2. Remove and save the two...
- Page 13 Elevation 95X-ALLXX-01 Commercial Cross-trainer “How To…” HOW TO... REPLACE THE RIGHT BULLHORN BUTTON ASSEMBLY Tools required: Phillips screwdriver Estimated time required: 20 minutes 1. If the cross-trainer has line cords, unplug Button them from the wall outlets. Assembly 2. Remove the bullhorn heart rate hand sensors.
- Page 14 Elevation 95X-ALLXX-01 Commercial Cross-trainer “How To…” HOW TO... REPLACE HANDLEBARS Tools required: Phillips screwdriver, 5mm Allen wrench Estimated time required: 30 minutes 1. If the cross-trainer has line cords, unplug them from the wall outlets. 2. Remove the deadshaft end cap covers Washers (3) (See the “How To…”...
- Page 15 Elevation 95X-ALLXX-01 Commercial Cross-trainer “How To…” HOW TO... REPLACE THE SWOOSH COVERS Tools required: Phillips screwdriver Estimated time required: 20 minutes 1. If the cross-trainer has line cords, unplug them from the wall outlets. 2. Remove and save the three...
- Page 16 Elevation 95X-ALLXX-01 Commercial Cross-trainer “How To…” HOW TO... REPLACE THE FRONT CLEVIS COVERS Tools required: Phillips screwdriver Estimated time required: 15 minutes 1. If the cross-trainer has line cords, unplug them from the wall outlets. 2. Remove and save the two...
- Page 17 Elevation 95X-ALLXX-01 Commercial Cross-trainer “How To…” HOW TO... REPLACE THE ROCKER ARMS Tools required: Phillips screwdriver, 6mm Allen wrench, 17mm socket wrench, snap ring tool Estimated time required: 45 minutes 1. If the cross-trainer has line cords, unplug them from the wall outlets.
- Page 18 Elevation 95X-ALLXX-01 Commercial Cross-trainer “How To…” HOW TO... REPLACE THE REAR PEDAL LEVER CLEVIS COVERS Tools required: Phillips screwdriver Estimated time required: 20 minutes 1. If the cross-trainer has line Rear Pedal Lever cords, unplug them from Clevis Cover (top) Phillips Screws (2) the wall outlets.
- Page 19 Elevation 95X-ALLXX-01 Commercial Cross-trainer “How To…” HOW TO... REPLACE THE DEADSHAFT Tools required: Phillips screwdriver, 5mm and 6mm Allen wrench, 13mm and 17mm socket wrenches, snap ring tool Estimated time required: 45 minutes 1. If the cross-trainer has line cords, unplug them from the wall outlets.
- Page 20 Elevation 95X-ALLXX-01 Commercial Cross-trainer “How To…” HOW TO... REPLACE THE PEDALS Tools required: 5mm Allen Wrench Estimated time required: 20 minutes 1. If the cross-trainer has line Pedal Washers (4) cords, unplug them from the wall outlets. 2. Remove and save the four Allen bolts that secure the pedal to the pedal lever assembly.
- Page 21 Elevation 95X-ALLXX-01 Commercial Cross-trainer “How To…” HOW TO... REPLACE THE PEDAL LEVER ASSEMBLIES Tools required: Phillips screwdriver, 6mm Allen wrench, 17mm and 19mm socket wrenches Estimated time required: 45 minutes Rocker Arm 1. If the cross-trainer has line cords, unplug them from the wall Allen Bolt outlets.
- Page 22 Elevation 95X-ALLXX-01 Commercial Cross-trainer “How To…” HOW TO... REPLACE THE ROCKING LINK ASSEMBLIES Tools required: Phillips screwdriver, 13mm socket wrench Estimated time required: 30 minutes 1. If the cross-trainer has line Phillips cords, unplug them from the Screw wall outlets.
- Page 23 Elevation 95X-ALLXX-01 Commercial Cross-trainer “How To…” HOW TO... REPLACE THE TOP REAR TOWER COVER Tools required: Phillips screwdriver, 13mm socket wrench Estimated time required: 30 minutes Rocking 1. If the cross-trainer has line cords, unplug them from the wall outlets.
- Page 24 Elevation 95X-ALLXX-01 Commercial Cross-trainer “How To…” HOW TO... REPLACE THE REAR TOWER REAR COVER Tools required: Phillips screwdriver Estimated time required: 20 minutes 1. If the cross-trainer has line Phillips Screws (8) cords, unplug them from the wall outlets. 2. Remove and save the eight...
- Page 25 Elevation 95X-ALLXX-01 Commercial Cross-trainer “How To…” HOW TO... REPLACE THE UPPER ROCKER COVERS Tools required: Phillips screwdriver Estimated time required: 15 minutes 1. If the cross-trainer has line cords, unplug them from the wall outlets. 2. Remove and save the five Phillips screws that secure the upper rocker cover to the rocker assembly.
- Page 26 Elevation 95X-ALLXX-01 Commercial Cross-trainer “How To…” HOW TO... REPLACE THE OUTSIDE CRANK COVER Tools required: Phillips screwdriver, 4mm Allen wrench, 19mm socket wrench Estimated time required: 30 minutes 1. If the cross-trainer has line Washer cords, unplug them from the wall outlets.
- Page 27 Elevation 95X-ALLXX-01 Commercial Cross-trainer “How To…” HOW TO... REPLACE THE FRAME COVER Tools required: Phillips screwdriver, 13mm socket wrench Estimated time required: 45 minutes 1. If the cross-trainer has line cords, unplug them from the wall outlets. 2. Remove the swoosh covers.
- Page 28 Elevation 95X-ALLXX-01 Commercial Cross-trainer “How To…” HOW TO... REPLACE THE CRANKARM Tools required: Phillips screwdriver, 3mm and 4mm Allen wrenches, 13mm and 19mm socket wrenches, 13mm open- end wrench Estimated time required: 30 minutes 1. If the cross-trainer has line cords, unplug them from the wall outlets.
- Page 29 Elevation 95X-ALLXX-01 Commercial Cross-trainer “How To…” HOW TO... REPLACE THE LOWER ROCKER ASSEMBLY COVER Tools required: Phillips screwdriver, 4mm Allen wrench, 19mm socket wrench Estimated time required: 30 minutes 1. If the cross-trainer has line cords, Inner Rocker unplug them from Assembly Cover the wall outlets.
- Page 30 Elevation 95X-ALLXX-01 Commercial Cross-trainer “How To…” HOW TO... REPLACE THE ROCKER ASSEMBLY TIMING BELT Tools required: Phillips screwdriver, 13mm socket wrench, felt-tip marker Estimated time required: 45 minutes 1. If the cross-trainer has line cords, unplug them from the wall Timing outlets.
- Page 31 Elevation 95X-ALLXX-01 Commercial Cross-trainer “How To…” HOW TO... REPLACE THE IDLER PULLEY ASSEMBLY Tools required: Phillips screwdriver, 13mm socket wrench, felt-tip marker Estimated time required: 45 minutes 1. If the cross-trainer has line cords, unplug them from the wall outlets.
- Page 32 Elevation 95X-ALLXX-01 Commercial Cross-trainer “How To…” HOW TO... REPLACE THE INNER CRANK COVER Tools required: Phillips screwdriver, 4mm Allen wrench, 13mm socket wrench Estimated time required: 30 minutes 1. If the cross-trainer has line cords, unplug them from the wall outlets.
- Page 33 Elevation 95X-ALLXX-01 Commercial Cross-trainer “How To…” HOW TO... REPLACE THE INNER ROCKER ASSEMBLY COVER Tools required: Phillips screwdriver, 4mm Allen wrench, 13mm and 19mm socket wrenches Estimated time required: 60 minutes 1. If the cross-trainer has line cords, Inner Rocker Assembly unplug them from the wall outlets.
- Page 34 Elevation 95X-ALLXX-01 Commercial Cross-trainer “How To…” HOW TO... REPLACE THE SIX-VOLT BATTERY Tools required: Phillips screwdriver Estimated time required: 30 minutes Negative Terminal 1. If the cross-trainer has line (black wire) cords, unplug them from the Positive Terminal wall outlets.
- Page 35 Elevation 95X-ALLXX-01 Commercial Cross-trainer “How To…” HOW TO... REPLACE THE GENERATOR CONTROL BOARD Tools required: Phillips screwdriver Estimated time required: 30 minutes 1. If the cross-trainer has line cords, Phillips Screw unplug them from the wall outlets. 2. Remove the rear tower rear cover. (See the “How To…”...
- Page 36 Elevation 95X-ALLXX-01 Commercial Cross-trainer “How To…” HOW TO... REPLACE THE GENERATOR ASSEMBLY Tools required: Phillips screwdriver, 13mm socket wrench, wire cutters, felt-tip marker Estimated time required: 45 minutes 1. If the cross-trainer has line cords, mark the unplug them from the wall outlets.
- Page 37 Elevation 95X-ALLXX-01 Commercial Cross-trainer “How To…” HOW TO... REPLACE THE GENERATOR ASSEMBLY - CONTINUED 7. Remove the previously loosened generator mounting nuts. 8. Disconnect the generator cables. 9. Remove the grommet from the mounting bracket. The generator-bracket assembly weighs about 35 lbs. (16 kg).
- Page 38 Elevation 95X-ALLXX-01 Commercial Cross-trainer “How To…” HOW TO... REPLACE THE POLY-V BELT Tools required: Phillips screwdriver, 9/64 Allen wrench, 19mm open end wrench, 13mm and 19mm socket wrenches, felt-tip marker Estimated time required: 60 minutes mark the 1. If the cross-trainer has line cords, unplug them...
- Page 39 Elevation 95X-ALLXX-01 Commercial Cross-trainer “How To…” HOW TO... REPLACE THE POLY-V BELT - CONTINUED 15. Remove the bolt and keyed washer that secure the right rocker assembly to the shaft. Carefully slide the rocker assembly off the main shaft. 17. Loosen the shaft collar and slide it off the main shaft.
- Page 40 Elevation 95X-ALLXX-01 Commercial Cross-trainer “How To…” HOW TO... REPLACE THE MAIN CABLE Tools required: Phillips screwdriver Estimated time required: 40 minutes Old Main Cable (still 1. If the cross-trainer has line cords, unplug in the cross-trainer) them from the wall outlets.