Table of Contents
Advertisement
Advertisement
Chapters
Table of Contents

Related Manuals for Xerox WorkCentre 5022


Summary of Contents for Xerox WorkCentre 5022
-
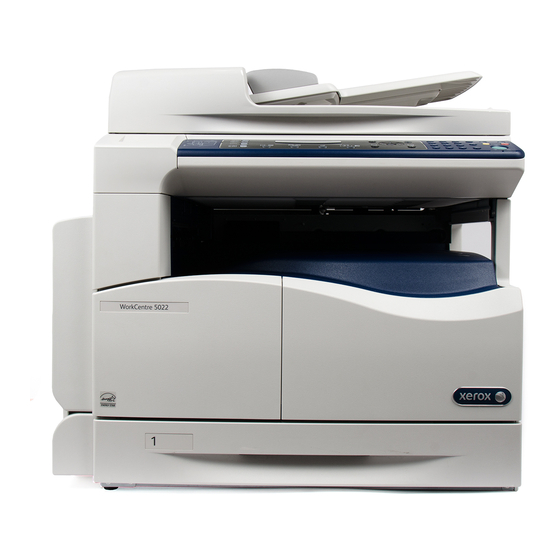
Page 1: Xerox Workcentre
February 2015 Xerox WorkCentre 5022/5024 ® ® Multifunction Printer User Guide... - Page 2 ® ® ® ® ©2014 Xerox Corporation. All rights reserved. Xerox , Xerox and Design , CentreWare , and WorkCentre are trademarks of Xerox Corporation in the United States and/or other countries. Microsoft, Windows, Windows Server, Windows XP, Windows Vista, and Windows 7 are trademarks or registered trademarks of Microsoft Corporation.
-
Page 3: Table Of Contents
Activating the Communication Port To Use ..........2-11 ® ® Xerox WorkCentre 5022/5024 Multifunction Printer... - Page 4 Starting Xerox® CentreWare® Internet Services ........
- Page 5 Canceling the Fax Being Received ...........6-11 ® ® Xerox WorkCentre 5022/5024 Multifunction Printer...
- Page 6 Stopping the Print Job ............. . . 8-3 ® ® Xerox WorkCentre 5022/5024 Multifunction Printer...
- Page 7 Recipient Confirmation .............9-33 ® ® Xerox WorkCentre 5022/5024 Multifunction Printer...
- Page 8 Reset Copied Impressions ............9-54 viii ® ® Xerox WorkCentre 5022/5024 Multifunction Printer User Guide...
- Page 9 Problems When Receiving Faxes ........... 13-18 ® ® Xerox WorkCentre 5022/5024 Multifunction Printer...
- Page 10 Problems Using TCP/IP (LPD/Port9100) ..........13-25 Problems Using Xerox® CentreWare® Internet Services ......13-26 Problems With E-mail Functions .
- Page 11 Index ............... .I-1 ® ® Xerox WorkCentre 5022/5024 Multifunction Printer...
- Page 12 Contents ® ® Xerox WorkCentre 5022/5024 Multifunction Printer User Guide...
-
Page 13: Before Using The Machine
Preface Thank you for selecting the WorkCentre 5022/5024 (hereafter referred to as "the machine"). This guide describes how to operate the machine and the precautions you should follow during operation. To get the most out of the machine and to use it effectively, be sure to read this guide before use. -
Page 14: Types Of Manuals
The manual describes installation and configuration procedures for print drivers and the printer environment. This manual is included in the Driver CD Kit. Print Driver Help The help describes print features and operations. ® ® Xerox WorkCentre 5022/5024 Multifunction Printer User Guide... -
Page 15: Using This Guide
3 Product Overview: Describes the names of the machine parts as well as basic operations, such as how ® to turn the machine on and off, how to use the energy saver feature, and how to use Xerox ® CentreWare Internet Services. - Page 16 Long Edge Feed (LEF) Loading the document or paper in landscape orientation when viewed from the front of the machine. Short Edge Feed (SEF): LEF Orientation SEF Orientation Feed direction Feed direction ® ® Xerox WorkCentre 5022/5024 Multifunction Printer User Guide...
-
Page 17: Safety Notes
Note Any unauthorized alteration including an addition of new functions or connection to external devices may not be covered by the product warranty. Contact your local Xerox representative for more information. Follow all warning instructions marked on this product. The following symbols are used to indicate... - Page 18 If the power cord is damaged or insulated wires are exposed, contact your local Xerox representative for a replacement. Do not use a damaged or uninsulated cord to avoid the risk of electric shock and fire.
-
Page 19: Machine Installation
Locate this product on a level and sturdy surface that can withstand its weight. Otherwise, if tilted, the product may fall over and cause injuries. • Locate this product in a well-ventilated area. Do not obstruct the ventilation openings of the product. ® ® Xerox WorkCentre 5022/5024 Multifunction Printer User Guide... - Page 20 Do not tilt the product at an angle of more than 10 degrees. Otherwise, it may fall over and cause injury. front left front back left right back right 10 ° 10 ° 10 ° 10 ° ® ® Xerox WorkCentre 5022/5024 Multifunction Printer User Guide...
-
Page 21: Operational Safety
• To avoid the risk of electric shock and fire, switch off and unplug the product promptly in the following conditions, then contact your local Xerox representative. The product emits smoke or its surface is unusually hot The product emits unusual noise or odor... -
Page 22: Consumables
Never throw a toner cartridge into an open flame. Remaining toner in the cartridge may catch fire and cause burn injury or explosion. If you have a used toner cartridge no longer needed, contact your local Xerox representative for its disposal. -
Page 23: Location Of Warning And Caution Labels
Always follow all warning instructions marked on or supplied with this product. WARNING: To avoid the risk of burn injury and electric shock, never touch the area with the "High Temperature" or "High Voltage" indicators. Caution label Warning label ® ® 1-11 Xerox WorkCentre 5022/5024 Multifunction Printer User Guide... -
Page 24: Regulations
Operation of this product in a residential area is likely to cause harmful interference in which case the user is required to correct the interference at their own expense. Changes and modifications to this product not specifically approved by Xerox may void the user's authority to operate this equipment. -
Page 25: Libcurl
Redistribution and use in source and binary forms, with or without modification, are permitted provided that the following conditions are met: Redistributions of source code must retain the above copyright notice, this list of conditions and the following disclaimer. ® ® 1-13 Xerox WorkCentre 5022/5024 Multifunction Printer User Guide... -
Page 26: Icc Profile (Little Cms)
This product includes software developed by WIDE Project and its contributors. Neither the name of WIDE Project nor the names of its contributors may be used to endorse or promote products derived from this software without specific prior written permission. 1-14 ® ® Xerox WorkCentre 5022/5024 Multifunction Printer User Guide... -
Page 27: Md5
It is provided "as is" without express or implied warranty of any kind. These notices must be retained in any copies of any part of this documentation and/or software. ® ® 1-15 Xerox WorkCentre 5022/5024 Multifunction Printer User Guide... -
Page 28: Legal Notice
Postage stamps and other negotiable instruments This list is not inclusive and no liability is assumed for either its completeness or accuracy. In case of doubt, contact your legal counsel. 1-16 ® ® Xerox WorkCentre 5022/5024 Multifunction Printer User Guide... -
Page 29: Environment Settings
For information on how to set TCP/IP, refer to Setting the Network Environment on page 2-6. For information on how to activate a communication port, refer to Activating the Communication Port To Use on page 2-11. ® ® Xerox WorkCentre 5022/5024 Multifunction Printer User Guide... -
Page 30: Scan Feature
Uses the SMB protocol to save the document scanned by the machine in a common folder created on a network PC. To save scanned data on a computer, you must activate the SMB port. ® ® Xerox WorkCentre 5022/5024 Multifunction Printer User Guide... -
Page 31: Fax Feature
This option is available when the Fax Kit is installed. For information on how to make the region setting, refer to Region on page 9-38. For information on how to make the clock settings, refer to Clock on page 9-43. ® ® Xerox WorkCentre 5022/5024 Multifunction Printer User Guide... -
Page 32: Interface Cables
Connect a USB cable to the USB 1.1/2.0 interface connector. Connect the other end of the USB cable to the computer. Press the power switch to the On position to turn the power on. ® ® Xerox WorkCentre 5022/5024 Multifunction Printer User Guide... -
Page 33: Using The Ethernet Interface
Prepare a network cable suitable for your network connection. When you replace the network cable, contact our Customer Support Center. Press the power switch to the On position to turn the power on. ® ® Xerox WorkCentre 5022/5024 Multifunction Printer User Guide... -
Page 34: Setting The Network Environment
10-5. For information on how to check using Tools, refer to TCP/IP on page 9-27. ® ® For information on how to check using Xerox CentreWare Internet Services, refer to TCP/IP (Connectivity > Protocols) on page 2-22. If the machine's IP address has not been set, set the IP address by using the Printer Setup Utility for Setting IP Address included in the Driver CD Kit or using the control panel to change the Get IP Address setting to Control Panel. -
Page 35: Setting The Machine's Ip Address (Ipv6)
Use Xerox CentreWare Internet Services to make the setting manually. Print the System ® Settings Report to check the address set automatically, and then use the address to access Xerox ® CentreWare Internet Services. From the Properties tab, select Connectivity > Protocols > TCP/IP > IP Mode. Set the IP Mode to IPv6 or Dual Stack. - Page 36 Make sure that the network cable is connected to the machine, and then click Next. As a list of available IP addresses and Mac addresses appears, select the machine and click Next. ® ® Xerox WorkCentre 5022/5024 Multifunction Printer User Guide...
- Page 37 If you already have the IP address of the machine, click Enter IP Address and directly enter the IP address on the displayed window. Make advanced settings if needed, and then click Next. After confirming information displayed, click Apply. The specified settings are applied. ® ® Xerox WorkCentre 5022/5024 Multifunction Printer User Guide...
- Page 38 10-5. For information on how to check using Tools, refer to TCP/IP on page 9-27. ® ® For information on how to check using Xerox CentreWare Internet Services, refer to TCP/IP (Connectivity > Protocols) on page 2-22. 2-10 ®...
-
Page 39: Activating The Communication Port To Use
Activate this port to print when using Port9100. Send E-mail Activate this port to send an e-mail. ® ® For information on how to make settings from Xerox CentreWare Internet Services, refer to Setting Items on Xerox® CentreWare® Internet Services on page 2-19. - Page 40 From the menu on the left, select Connectivity. Click Port Settings, and check the checkbox of the desired port. Click Apply. Note Restart the machine to enable the new settings. 2-12 ® ® Xerox WorkCentre 5022/5024 Multifunction Printer User Guide...
-
Page 41: Setting The Send E-Mail Function
Login Name, Password and Retype Password fields blank. To make the settings: ® ® Start Xerox CentreWare Internet Services. ® ® For information on how to start Xerox CentreWare Internet Services, refer to Starting Xerox® CentreWare® Internet Services on page 2-18. ® ® 2-13... -
Page 42: E-Mail Header And Body Settings
Click SMTP Server, and enter the settings. Click Apply. E-mail Header and Body Settings When sending a scanned document as an e-mail attachment, you can enter an e-mail header and body. 2-14 ® ® Xerox WorkCentre 5022/5024 Multifunction Printer User Guide... - Page 43 ® ® CentreWare Internet Services. Start Xerox ® ® For information on how to start Xerox CentreWare Internet Services, refer to Starting Xerox® CentreWare® Internet Services on page 2-18. Click the Properties tab. From the menu on the left, select Services > E-mail.
- Page 44 Environment Settings Click Defaults, and enter the Subject, Message, and Maximum Attachment Size. 2-16 ® ® Xerox WorkCentre 5022/5024 Multifunction Printer User Guide...
-
Page 45: Xerox® Centreware® Internet Services
For information on how to set the IP address, refer to Setting the Network Environment page 2-6. ® ® • When changing any settings using Xerox CentreWare Internet Services, the machine should be in standby status or energy saver mode. Supported Environments and Settings Operating Systems and Web Browsers ®... -
Page 46: Web Browser Settings
See your web browser's manual for how to make the setting. ® ® You will also need to make other web browser settings to make Xerox CentreWare Internet Services work properly. -
Page 47: Setting Items On Xerox® Centreware® Internet Services
CentreWare ® Internet Services ® ® The table below lists the menu items on the Xerox CentreWare Internet Services screens. Notes • You must have a user name and a passcode to change the settings. The user ID "admin" and the passcode "1111"... - Page 48 P. 2-30 Security IP Filtering P. 2-31 System Administrator Settings P. 2-32 Support P. 2-33 Support P. 2-33 Address Book P. 2-33 View All Names P. 2-33 Common Tasks P. 2-35 2-20 ® ® Xerox WorkCentre 5022/5024 Multifunction Printer User Guide...
-
Page 49: Properties Tab
You can enter the printer name (up to 32 ASCII code characters excluding colons (:), equal signs (=), at symbols (@), or asterisks (*), which are not valid). (Default: "WorkCentre 5022" or "WorkCentre 5024") Location You can enter the machine's location (up to 255 ASCII code characters). -
Page 50: Port Settings
You can set the method used to acquire the IP Address, Subnet Mask and Gateway Address. You can select from STATIC, DHCP, BOOTP, RARP, or DHCP/Autonet for the address acquisition method. (Default: DHCP/Autonet) 2-22 ® ® Xerox WorkCentre 5022/5024 Multifunction Printer User Guide... - Page 51 Alternate DNS Server 1-2: Used to enter alternate DNS server addresses manually. • IPv6 Obtain IPv6 DNS Server Address Automatically: Check this checkbox to set the DNS server address automatically using DHCP. ® ® 2-23 Xerox WorkCentre 5022/5024 Multifunction Printer User Guide...
-
Page 52: Snmp Configuration
You can make advanced SNMP v1/v2c settings by pressing this button. (Default: On) Community Name (Read Only): You can enter the community name to acquire (up to 32 ASCII code characters). (Default: blank (public)) 2-24 ® ® Xerox WorkCentre 5022/5024 Multifunction Printer User Guide... - Page 53 You can add a recipient address for UDP IPv6 trap notification by pressing this button. IP Address: You can enter the IP address for entry. UDP Port Number: You can set the UDP port No. for entry (a value between 1 and 65535). ® ® 2-25 Xerox WorkCentre 5022/5024 Multifunction Printer User Guide...
-
Page 54: Microsoft Networking
You can check this checkbox to acquire the WINS server address automatically using DHCP. When you set the WINS server address acquisition method to DHCP, you must also set the IP address acquisition method to DHCP. (Default: ON) 2-26 ® ® Xerox WorkCentre 5022/5024 Multifunction Printer User Guide... -
Page 55: Lpd
Note Reboot the machine to enable new settings. Port9100 (Connectivity > Protocols) You can set Port9100. General • Port9100 Port Status You can check Enabled to use Port9100. (Default: On) ® ® 2-27 Xerox WorkCentre 5022/5024 Multifunction Printer User Guide... -
Page 56: Smtp Server
For SMTP servers requiring authentication, enter the e-mail address of the authenticated SMTP user (between 1 to 64 ASCII code characters). This can be left blank if SMTP authentication is skipped. 2-28 ® ® Xerox WorkCentre 5022/5024 Multifunction Printer User Guide... -
Page 57: Http
Reboot the machine to enable new settings. Defaults (Services > E-mail) General • Subject (Default: Scan Data from "model name") You can enter the E-mail header (up to 128 ASCII code characters). ® ® 2-29 Xerox WorkCentre 5022/5024 Multifunction Printer User Guide... -
Page 58: Job Templates
When Color Mode is set to Color and 400x400dpi or 600x600dpi is selected for the resolution, the Color Mode is automatically set to Black & White. • Image Compression You can set the file compression from five levels. (Default: Standard) 2-30 ® ® Xerox WorkCentre 5022/5024 Multifunction Printer User Guide... -
Page 59: Ip Filtering
You can set the prefix length of the accessible IP address. (Default: 0) • Delete button You can delete the accessible IPv4 address. IPv6 Filtering • IP Filtering You can check Enabled to enable IP Filtering. (Default: Off) ® ® 2-31 Xerox WorkCentre 5022/5024 Multifunction Printer User Guide... -
Page 60: System Administrator Settings
You can set the system administrator's passcode (between 4 and 12 ASCII code characters or blank). (Default: 1111) • Retype Administrator's Passcode You need to re-enter the system administrator’s passcode. 2-32 ® ® Xerox WorkCentre 5022/5024 Multifunction Printer User Guide... -
Page 61: Support Tab
View All Names Address Number The registered numbers (4 digits) of the E-mail or Server addresses are displayed. Name The registered names of the E-mail or Server addresses are displayed. ® ® 2-33 Xerox WorkCentre 5022/5024 Multifunction Printer User Guide... - Page 62 UTF-8. Note The entered characters should match the language setting specified in the machine. Otherwise, the text will be garbled. Some characters may not be displayed correctly. 2-34 ® ® Xerox WorkCentre 5022/5024 Multifunction Printer User Guide...
-
Page 63: Common Tasks
If the imported data is modified, it will not be exported properly. • Address Book File Specify an Address Book file (*.dat) to import. Click the Browse... button to select the file (*.dat) to import in the dialog box displayed. ® ® 2-35 Xerox WorkCentre 5022/5024 Multifunction Printer User Guide... - Page 64 Environment Settings Export Data Downloads an Address Book file (*.dat). Delete All Names... Deletes all address data. Note Press this button to apply the entered settings. 2-36 ® ® Xerox WorkCentre 5022/5024 Multifunction Printer User Guide...
-
Page 65: Installing The Print Driver/Scan Driver
The CD-ROM contains the following print driver. Print Driver Name Description Click Print Driver in the Main menu of the Driver CD Kit to start ® Xerox WorkCentre the installation. 5022/5024 The standard print driver converts the data created by the application software to images before sending them to the printer. -
Page 66: Uninstalling
Address Book Editor and save it to the machine. You can also retrieve the fax recipient’s phone numbers ® ® Xerox CentreWare registered on a printer or using Internet Services. For more information on settings items, see the Address Book Editor's Help information. -
Page 67: Product Overview
This chapter lists the name of each machine component, and describes basic operations such as how to turn the power on/off and use the control panel. Machine Components This section describes the machine components and their features. ® ® Xerox WorkCentre 5022/5024 Multifunction Printer User Guide... -
Page 68: Front, Left Side
Locks the wheels of the machine. Lock these casters after moving the machine to its installation site. Two tray module cover C Open this cover to remove any jammed paper from Tray 3 or 4. ® ® Xerox WorkCentre 5022/5024 Multifunction Printer User Guide... - Page 69 Open this cover to remove any jammed paper. Note: When the machine works properly, this cover is locked. To open this cover, make sure to exit Sleep mode and turn the machine's power off. ® ® Xerox WorkCentre 5022/5024 Multifunction Printer User Guide...
-
Page 70: Right Side, Rear
Notes • LINE 1 and the TEL connectors are available when the Fax Kit is installed. • The 10BASE-T/100BASE-TX interface connectors are available when the Network Kit is installed. ® ® Xerox WorkCentre 5022/5024 Multifunction Printer User Guide... -
Page 71: Inside
Toner cartridge Contains toner (the powder used to form the image). Drum cartridge Contains photoconductors. Fusing unit Fuses toner on paper. CAUTION: Do not touch this unit as it is extremely hot. ® ® Xerox WorkCentre 5022/5024 Multifunction Printer User Guide... -
Page 72: Duplex Automatic Document Feeder (Optional)
Prevents outputs from falling off. Document output tray Outputs are delivered here. Narrow glass strip Scans the loaded documents. Note In this guide, the duplex automatic document feeder is referred to as the "document feeder." ® ® Xerox WorkCentre 5022/5024 Multifunction Printer User Guide... -
Page 73: Power Source
When switching the power off, wait 5 seconds after outputs have been delivered. • When powering the machine on after it has been switched off, wait 10 seconds after the display goes off. ® ® Xerox WorkCentre 5022/5024 Multifunction Printer User Guide... - Page 74 Before switching the power off, make sure that the machine has completed all copy or print jobs. Then, make sure that the Data indicator does not light up. Press the power switch to the Off position to switch the power off. ® ® Xerox WorkCentre 5022/5024 Multifunction Printer User Guide...
-
Page 75: Energy Saver Modes
Low Power mode is set to 1 min. and Sleep mode to 1 min. at the time of factory shipment. If the machine is left idle for 1 minute, it switches to Low Power mode and then to Sleep mode if left idle for another minute after that. ® ® Xerox WorkCentre 5022/5024 Multifunction Printer User Guide... -
Page 76: Exiting Energy Saver Modes
Opening or closing any cover of the machine • Placing a document in the document feeder Exiting Sleep Mode • Receiving a job • Pressing the Energy Saver button • Entering System Administration mode from a computer 3-10 ® ® Xerox WorkCentre 5022/5024 Multifunction Printer User Guide... -
Page 77: Control Panel
OK button Press this button and the arrow buttons to change settings. For more information, refer to Using Quick-Buttons on page 3-14. ® ® 3-11 Xerox WorkCentre 5022/5024 Multifunction Printer User Guide... - Page 78 Press this button to display the setting screen for the 2 Sided function that lets you select 2 sided printing for Copy and Scan features. (Quick-Button) This button lights up when this function is available. 3-12 ® ® Xerox WorkCentre 5022/5024 Multifunction Printer User Guide...
- Page 79 001 to 036. Note Some buttons are not available on some models. If you add certain options, you will be able to use them. For more information, contact our Customer Support Center. ® ® 3-13 Xerox WorkCentre 5022/5024 Multifunction Printer User Guide...
-
Page 80: Using Quick-Buttons
In Scan mode, when the Address Book button is pressed. You can also change the address by pressing the button continuously. Note The setting screen exits 2 seconds after a Quick-Button is released and the selected setting is applied. 3-14 ® ® Xerox WorkCentre 5022/5024 Multifunction Printer User Guide... - Page 81 New selection: Photo&Text 2 sec * Photo&Text is applied automatically New selection: Photo The setting screen exits 2 seconds after a Quick-Button is released, and the selected setting is applied. ® ® 3-15 Xerox WorkCentre 5022/5024 Multifunction Printer User Guide...
-
Page 82: About Icons On The Display
Pages per Side... ID Card Function Icon Item Copy Scan Copy Lighten/Darken Darken +2 Darken +1 Normal Lighten +1 Lighten +2 Toner Saver Original Type Photo Photo & Text Text 3-16 ® ® Xerox WorkCentre 5022/5024 Multifunction Printer User Guide... - Page 83 2 1 Sided 2 2 Sided Flip on Long Edge Flip on Short Edge Collated On (Rotate) Resolution 200 × 200 300 × 300 400 × 400 600 × 600 ® ® 3-17 Xerox WorkCentre 5022/5024 Multifunction Printer User Guide...
-
Page 84: About The Default Display Screen
Use the numeric keypad to enter the passcode, and then press the OK button. Note The Log In/Out button lights when the machine is in System Administration mode. System Admin. Passcode [* * * * * ] 3-18 ® ® Xerox WorkCentre 5022/5024 Multifunction Printer User Guide... - Page 85 Tools Custom Paper Size Setting... Control Panel Language... Default Display... Select the desired default display, and then press the OK button. Default Display Copy Scan ® ® 3-19 Xerox WorkCentre 5022/5024 Multifunction Printer User Guide...
-
Page 86: Account Modes
The following procedure describes how to log in to the machine when the machine is in Single Account Mode. For more information, refer to User Control on page 9-48. The passcode input screen appears. Enter Login Passcode 3-20 ® ® Xerox WorkCentre 5022/5024 Multifunction Printer User Guide... - Page 87 To log out, press the Log In/Out button again. Notes • You do not need to log in to the machine for a scan job or print job. • To log out, press the Log In/Out button again. ® ® 3-21 Xerox WorkCentre 5022/5024 Multifunction Printer User Guide...
-
Page 88: Logging In To The Machine In Multiple Account Mode
Administration mode from the control panel. For more information, refer to Entering System Administration Mode on page 9-1. Press the Start button to confirm the entered passcode. Start button If the entered passcode is correct, the machine enters Copy Mode. 3-22 ® ® Xerox WorkCentre 5022/5024 Multifunction Printer User Guide... - Page 89 Log In/Out button Notes • You do not need to log in to the machine for a scan job or print job. • To log out, press the Log In/Out button again. ® ® 3-23 Xerox WorkCentre 5022/5024 Multifunction Printer User Guide...
-
Page 90: Entering Text
^ | ` : ; ? , + - / = ( ) [ ] { } < > @ (Toggles back to start.) 3-24 ® ® Xerox WorkCentre 5022/5024 Multifunction Printer User Guide... - Page 91 A B C 2 back to A entered for Buttons 4 to 9 and 0.) D E F 3 back to D ® ® 3-25 Xerox WorkCentre 5022/5024 Multifunction Printer User Guide...
-
Page 92: Setting The Options Configuration
From your computer’s Start menu, select Printer and Faxes to display the property of your machine. Note Some operating systems display Printer or Devices and Printers instead of Printer and Faxes. Click the Configuration tab. 3-26 ® ® Xerox WorkCentre 5022/5024 Multifunction Printer User Guide... - Page 93 Click Get Information from Printer. If Printer Searching Method is displayed The machine's information is not loaded onto the print driver. Complete the following operations. Select Specify Address, and click Next. ® ® 3-27 Xerox WorkCentre 5022/5024 Multifunction Printer User Guide...
- Page 94 Product Overview Enter the printer name or IP Address in the Printer Name or IP Address field. Click Finish. Click OK. 3-28 ® ® Xerox WorkCentre 5022/5024 Multifunction Printer User Guide...
-
Page 95: Loading Paper
To achieve optimum machine performance, use only paper types recommended by Xerox. Use of non- recommended paper types may result in paper jams, lower print quality, malfunctions, or damage to the machine. If you wish to use paper other than the paper recommended by Xerox, contact our Customer Support Center. Notes •... -
Page 96: Supported Paper Weights And Sheet Counts
100 * sheets (Up to 10 mm) When using 80 gsm paper ® When using Xerox standard paper Notes • Paper jams may result if you attempt to print on a different paper type or size than the type or size selected in the print driver, or from a tray that does not support the loaded paper. -
Page 97: Unusable Paper
Heavyweight Not guaranteed; specified maximum is 216 gsm. Unusable Paper Using paper not recommended by Xerox may cause a paper jam or machine malfunction. Use paper recommended by Xerox. • Damp or wet paper • Paper pre-printed with other printer or copying machine •... -
Page 98: Storing And Handling Paper
Do not load paper above the maximum fill line in Trays 1 to 5. It may cause paper jams. • When Heavyweight Paper/Extra-HW Paper is supplied to Tray 5 and causes paper jams, reduce the paper quantity or turn over the paper in Tray 5. ® ® Xerox WorkCentre 5022/5024 Multifunction Printer User Guide... -
Page 99: Loading Paper
(Auto Paper Selection function). For more information on setting the Auto Paper Selection function, refer to Auto Paper Selection page 9-48. ® ® Xerox WorkCentre 5022/5024 Multifunction Printer User Guide... -
Page 100: Loading Paper In Trays 1 To 4 (Optional)
Pulling out all the trays at once could cause the machine to tilt or fall, causing injury. For Tray 1, push down the metal plate to the bottom of the tray. ® ® Xerox WorkCentre 5022/5024 Multifunction Printer User Guide... -
Page 101: Loading Paper In Tray 5 (Bypass)
For more information, refer to Paper Supply page 5-17. Open Tray 5 (bypass). Note If necessary, pull out the extension tray. Pull out the extension tray gently. ® ® Xerox WorkCentre 5022/5024 Multifunction Printer User Guide... - Page 102 The machine may not be able to feed or create the desired print quality for some types of heavyweight paper. Gently align the paper guides to the loaded paper. Execute the copy or print operation. ® ® Xerox WorkCentre 5022/5024 Multifunction Printer User Guide...
-
Page 103: Changing Paper Size
To prevent paper jams or loading errors, do not load different sizes or types of paper on top of any remaining paper in a tray. Remove any paper loaded in the tray. For Tray 1, push down the metal plate to the bottom of the tray. ® ® Xerox WorkCentre 5022/5024 Multifunction Printer User Guide... - Page 104 When pushing the tray in, do it slowly. Pushing the tray with too much force could cause machine malfunctions. • Affix the paper size label to the front of the tray. 4-10 ® ® Xerox WorkCentre 5022/5024 Multifunction Printer User Guide...
-
Page 105: Changing The Paper Settings
The Log In/Out button lights up when the machine is in System Administration mode. Select Tray Settings, and then press the OK button. Tools Default Settings... Device Information... Tray Settings... ® ® 4-11 Xerox WorkCentre 5022/5024 Multifunction Printer User Guide... - Page 106 Paper Type Plain 1 Plain 2 Lightweight Press the control panel's Log In/Out button. Note The Log In/Out button light goes out when the machine has exited System Administration mode. 4-12 ® ® Xerox WorkCentre 5022/5024 Multifunction Printer User Guide...
-
Page 107: Copy
Bound documents, such as book Note The document feeder is not available for some models. An optional component is required. Contact your local Xerox representative. Document Feeder Supported document sizes You can place documents of the standard sizes in the document feeder. - Page 108 Place the document in the center of the document feeder, with the side to copy (or the front surface of a 2-sided document) facing up. Align the document guides to each side of the document. ® ® Xerox WorkCentre 5022/5024 Multifunction Printer User Guide...
- Page 109 Do not apply excessive force to hold a thick document on the document glass. Doing so may break the glass and cause injuries. Follow the steps below to place a document on the document glass. ® ® Xerox WorkCentre 5022/5024 Multifunction Printer User Guide...
- Page 110 When using the document glass, make sure to close the document cover after finishing your copy job. Place the document face down and align it against the top left corner of the document glass. Close the document cover. ® ® Xerox WorkCentre 5022/5024 Multifunction Printer User Guide...
-
Page 111: Advanced Settings
Entering the Number of Copies You can enter a value between 1 and 999 for the number of copies. Use the numeric keypad to enter the desired number of copies. Numeric keypad ® ® Xerox WorkCentre 5022/5024 Multifunction Printer User Guide... -
Page 112: Starting The Copy Job
If the document is placed in the document feeder, do not press down on the document while it is being fed through the machine. • If a problem occurs, an error code appears on the screen. For information on error codes, refer to Error Codes on page 13-32 ® ® Xerox WorkCentre 5022/5024 Multifunction Printer User Guide... - Page 113 Repeat Steps 1 and 2 as many times as needed. If there is no other page, select Cancel, and then press the OK button. • Copy [Copying...] Qty. 3 Load your next original Continue Cancel ® ® Xerox WorkCentre 5022/5024 Multifunction Printer User Guide...
-
Page 114: About Auto Rotation
The Pages per Side function is used. • If none of the above conditions applied when copying, the machine does not perform Auto Rotation, which may result in a part of the image to be missing. ® ® Xerox WorkCentre 5022/5024 Multifunction Printer User Guide... -
Page 115: Operations Performed While Copying
11-3. Press the Job Status button. Job Statusbutton Check the job status. Active Jobs [Stop]:Delete Print Print Scan 01 PC1 After checking the job status, press the Job Status button again. ® ® Xerox WorkCentre 5022/5024 Multifunction Printer User Guide... -
Page 116: Id Card Copy
Place an ID card face down at least 5mm away from the top left corner of the document glass, and then close the document cover. Placing the ID card too close to the corner of the document glass may not copy the edge of the ID card properly. 5-10 ® ® Xerox WorkCentre 5022/5024 Multifunction Printer User Guide... - Page 117 To finish scanning to print only one side of the ID card, select Cancel, and then press the OK button. ID Card Copy [Copying...] Qty. 1 Load your next original? Continue Cancel ® ® 5-11 Xerox WorkCentre 5022/5024 Multifunction Printer User Guide...
- Page 118 Select Continue, and then press the OK button to start printing two sides of the ID card. ID Card Copy [Copying...] Qty. 1 Load your next original? Continue Cancel 5-12 ® ® Xerox WorkCentre 5022/5024 Multifunction Printer User Guide...
-
Page 119: Advanced Copy Settings
You can change the default value of the ID Card Copy functions. For more information on defaults that can be changed, and how to change them, refer to Default Settings on page 9-8. Press the Copy button. Copy button ® ® 5-13 Xerox WorkCentre 5022/5024 Multifunction Printer User Guide... -
Page 120: Lighten/Darken
Normal Creates copies with the same density as the document. Light +1 Creates copies with a fairly light density. Use this setting to scan documents containing fairly dark objects. 5-14 ® ® Xerox WorkCentre 5022/5024 Multifunction Printer User Guide... -
Page 121: Original Type
Select this option when the document contains sharp black and white objects such as text. Photo & Text Select this option when the document contains both text and photos. Photo Select this option when the document contains only photos. ® ® 5-15 Xerox WorkCentre 5022/5024 Multifunction Printer User Guide... -
Page 122: Sided
Copies a 2-sided document to one side of the paper. 2→2 Sided Copies a 2-sided document to both sides of the paper. The copy appears the same as the original. 5-16 ® ® Xerox WorkCentre 5022/5024 Multifunction Printer User Guide... -
Page 123: Collate
Use A4, B5, Letter, or 16K paper size with the document oriented in the same direction. Paper Supply Select Paper Supply, and then press the OK button. Copy Paper Supply... Auto Auto Reduce/Enlarge... Pages per Side... ® ® 5-17 Xerox WorkCentre 5022/5024 Multifunction Printer User Guide... - Page 124 Select Custom Size to set a non-standard paper size. You can set a Y direction (vertical) between 127 and 297 mm (in 1 mm increments), and X direction (horizontal) between 98 and 432 mm (in 1 mm increments). Custom Size Qty. Y: 127-297mm X: 98-432mm 297 mm 5-18 ® ® Xerox WorkCentre 5022/5024 Multifunction Printer User Guide...
-
Page 125: Reduce/Enlarge
When you make enlarged or reduced copies from standard size documents on standard size paper, the following copy ratios will apply. Copy / Documents 100% 122% 141% 174% 200% 100% 115% 141% 163% 100% 122% 141% ® ® 5-19 Xerox WorkCentre 5022/5024 Multifunction Printer User Guide... -
Page 126: Pages Per Side
Copies 2 pages of a document to a single sheet of paper. 4 Pages Copies 4 pages of a document to a single sheet of paper. Original Size You can set the document size and orientation. 5-20 ® ® Xerox WorkCentre 5022/5024 Multifunction Printer User Guide... - Page 127 Select Custom Size to set a non-standard document size. You can set a Y direction (vertical) between 86 and 297 mm (in 1 mm increments), and X direction (horizontal) between 86 and 432 mm (in 1 mm increments). ® ® 5-21 Xerox WorkCentre 5022/5024 Multifunction Printer User Guide...
-
Page 128: Original - Binding Position
Flip on Short Edge Flip on Long Edge Binds the long edge of document in portrait orientation. Flip on Short Edge Binds the short edge of document in landscape orientation. 5-22 ® ® Xerox WorkCentre 5022/5024 Multifunction Printer User Guide... -
Page 129: Edge Erase
Flip on Long Output-Binding P... Flip on Long Edge Erase... Use the numeric keypad to enter a value, and then press the OK button. Edge Erase Qty. [0 - 50] ® ® 5-23 Xerox WorkCentre 5022/5024 Multifunction Printer User Guide... -
Page 130: Managing The Copy Paper With Accounting
The machine can display the total number of impressions each user has copied and the maximum number of impressions each user is permitted to copy. This function can be used when managing the copy paper. For more information, refer to User Management on page 9-52. 5-24 ® ® Xerox WorkCentre 5022/5024 Multifunction Printer User Guide... -
Page 131: Fax
Document feeder • Single sheet • Multiple sheets Note The document feeder is not available for some models. An optional component is required. Contact your local Xerox representative. Document glass • Single sheet • Bound documents, such as books Document Feeder Supported document sizes You can place standard size document in the document feeder. - Page 132 Place the document in the center of the document feeder, with the side to be scanned (or the front surface of a 2 Sided document) facing up. Align the document guides to each side of document. ® ® Xerox WorkCentre 5022/5024 Multifunction Printer User Guide...
- Page 133 Do not apply excessive force to hold thick document on the document glass. It may break the glass and cause injuries. Follow the steps below to place a document on the document glass. ® ® Xerox WorkCentre 5022/5024 Multifunction Printer User Guide...
- Page 134 When using the document glass, make sure to close the document cover after finishing your copy job. Place document face down, and align it against the top left corner of the document glass. Close the document cover. ® ® Xerox WorkCentre 5022/5024 Multifunction Printer User Guide...
-
Page 135: Specifying The Recipient
Select how you want to specify the fax recipient. Recipient Keypad... Speed Dial... Phone Book... Using the numeric keypad To use the numeric keypad to enter the fax recipient's number directly: Select Keypad, and then press the OK button. ® ® Xerox WorkCentre 5022/5024 Multifunction Printer User Guide... - Page 136 Select the desired fax recipient. You can press the # button to check the fax number. Press the Back button to return the Note display to the previous screen. Press the OK button. ® ® Xerox WorkCentre 5022/5024 Multifunction Printer User Guide...
-
Page 137: Making Advanced Settings
Make advanced settings as needed. Example: Screen for selecting the fax recipient from among the Speed Dial entries For more information on advanced settings, refer to Advanced Fax Settings on page 6-17. ® ® Xerox WorkCentre 5022/5024 Multifunction Printer User Guide... -
Page 138: Starting The Fax Job
Original Type... Text Lighten/Darken... Normal Original Size... Auto Note Depending on the selected document size, the printout may be too large for the paper or may have shadows at the edges. ® ® Xerox WorkCentre 5022/5024 Multifunction Printer User Guide... - Page 139 If there is no other page, select Cancel, and then press the OK button. When you completed scanning all the documents, select No when Next original? appears, and then click the OK button. [Scanning...] Next original? ® ® Xerox WorkCentre 5022/5024 Multifunction Printer User Guide...
-
Page 140: Operations During Faxing (Sending)
Select Fax (Send), and then press the OK button. Active Jobs Active Jobs [Stop]:Delete Fax(Send)... Check the job status. After checking the job status, press the Job Status button again. 6-10 ® ® Xerox WorkCentre 5022/5024 Multifunction Printer User Guide... -
Page 141: Operations During Faxing (Receiving)
Note You can also cancel the received fax from the Active Jobs screen. For more information on the Active Jobs screen, refer to Canceling the Current Job on page 11-3. ® ® 6-11 Xerox WorkCentre 5022/5024 Multifunction Printer User Guide... -
Page 142: Using The Control Panel Buttons To Specify The Fax Recipient
You can specify the fax recipient using the One Touch panel. The fax numbers registered for each One Touch button are the same as the fax numbers registered for Speed Dial entries 001 to 036. 6-12 ® ® Xerox WorkCentre 5022/5024 Multifunction Printer User Guide... - Page 143 Example: Screen displayed when the One Touch button 1 is pressed to select 001 John Smith. Note To specify a Speed Dial number higher than 013, turn over the panel. Press the OK button. ® ® 6-13 Xerox WorkCentre 5022/5024 Multifunction Printer User Guide...
-
Page 144: Using The Address Book Button
Select the desired fax recipient. Sending a fax to a recipient registered as a Speed Dial entry Select All Entries, and then press the OK button. Recipient All Entries... Group... 6-14 ® ® Xerox WorkCentre 5022/5024 Multifunction Printer User Guide... - Page 145 03 Group03 Note You can press the # button to check the recipients registered in the selected group. Press the Back button to return the display to the previous screen. ® ® 6-15 Xerox WorkCentre 5022/5024 Multifunction Printer User Guide...
-
Page 146: Using The Speed Dial Button
Use the numeric keypad to enter the desired Speed Dial number. Speed Dial (001-099) [_ ] Example: The screen appears when the Speed Dial 001 is entered. Press the OK button. 6-16 ® ® Xerox WorkCentre 5022/5024 Multifunction Printer User Guide... -
Page 147: Advanced Fax Settings
* You can change the default value of the functions. For more information on changing the default settings, refer to Default Settings on page 9-8. Press the Fax button. Fax button ® ® 6-17 Xerox WorkCentre 5022/5024 Multifunction Printer User Guide... -
Page 148: Resolution
Ultra-high picture quality mode. The machine scans at a resolution of 400 × 400 dpi. Original Type You can set the type of document to optimize scans. Select Original Type, and then press the OK button. 6-18 ® ® Xerox WorkCentre 5022/5024 Multifunction Printer User Guide... -
Page 149: Lighten/Darken
Creates copies with a fairly light density. Use this setting to scan document containing fairly dark objects. Lighten +2 Creates copies with the lightest density. Use this setting to scan document containing dark objects. ® ® 6-19 Xerox WorkCentre 5022/5024 Multifunction Printer User Guide... -
Page 150: Original Size
The document feeder does not support the non-standard document sizes. Fixed document size (Preset) You can set the document size of the placed document by selecting from the preset document sizes. 6-20 ® ® Xerox WorkCentre 5022/5024 Multifunction Printer User Guide... -
Page 151: Send Priority
Only one recipient can be specified for single remote polling. • It redials if the other party does not respond. Select Polling, and then click the OK button. Ready to Fax: 0123457890 Original Size... Auto Send Priority... Polling... ® ® 6-21 Xerox WorkCentre 5022/5024 Multifunction Printer User Guide... -
Page 152: Sided
This function is available when the document feeder and the Duplex Output Unit are installed on the machine. Select 2 Sided, and then press the OK button. Ready to Fax: 0123457890 Send Priority... Polling... 2 Sided... 6-22 ® ® Xerox WorkCentre 5022/5024 Multifunction Printer User Guide... -
Page 153: Edge Erase
Used to resend pages for which transmission failed due to transmission errors or other problems. Select ECM, and then press the OK button. Ready to Fax: 0123457890 2 Sided... Edge Erase... ECM... ® ® 6-23 Xerox WorkCentre 5022/5024 Multifunction Printer User Guide... -
Page 154: Off Hook
6-26. Select Off Hook, and then press the OK button. Ready to Fax: 0123457890 Edge Erase... ECM... Off Hook... Select On, and then press the OK button. Off Hook 6-24 ® ® Xerox WorkCentre 5022/5024 Multifunction Printer User Guide... -
Page 155: Delayed Fax
Delayed Fax On... Select Off to disable this function. Note Use the numeric keypad to enter the time, and then press the OK button. Delayed Fax (0:00 - 23:59) : 00 ® ® 6-25 Xerox WorkCentre 5022/5024 Multifunction Printer User Guide... -
Page 156: Sending/Receiving Faxes Manually
The machine starts to scan the document. It scans and then sends each page repeatedly. To receive a fax Wait until you hear the sender's fax machine on the phone's receiver. 6-26 ® ® Xerox WorkCentre 5022/5024 Multifunction Printer User Guide... - Page 157 Select Receive (Manual). Fax:OffHook Send Manual ... Receive Manual Press the Start button. Start button Receive the document. Replace the receiver to end the call. ® ® 6-27 Xerox WorkCentre 5022/5024 Multifunction Printer User Guide...
-
Page 158: Receipt Of Faxes
You can restrict the paper size on which incoming faxes are received. For more information, refer to Receive Size on page 9-37. The paper type for the received fax is always set to Plain 1, regardless of the paper type setting specified for each tray. 6-28 ® ® Xerox WorkCentre 5022/5024 Multifunction Printer User Guide... -
Page 159: Sending A Fax Directly From Your Computer
The procedure used for Direct Fax will vary according to the application you are using. See your application's manual for the specific procedure. The steps below are the operation used in the WorkCentre 5022/5024 print driver screen. Note You can send a fax up to 250 pages in one transmission. If it exceeds the 250 pages, send it as a separate file. - Page 160 Help Information. Also, you can select the recipient registered in the Address Book Editor. For information on the installation of Address Book Editor, refer to Installing the Scan Driver page 2-37. Click Start Sending. 6-30 ® ® Xerox WorkCentre 5022/5024 Multifunction Printer User Guide...
-
Page 161: Scan
Bound documents, such as books Note The document feeder is not available for some models. An optional component is required. Contact your local Xerox representative. Document Feeder Supported document sizes You can place documents of the standard sizes in the document feeder. - Page 162 Place the document in the center of the document feeder, with the side to scan (or the front surface of a 2 Sided document) facing up. Align the document guides to each side of the document. ® ® Xerox WorkCentre 5022/5024 Multifunction Printer User Guide...
- Page 163 8.5 × 11", 8.5 × 14", 11 × 17", 7.25 × 10.5", and Custom. CAUTION: Do not apply excessive force to hold thick document on the document glass. It may break the glass and cause injuries. ® ® Xerox WorkCentre 5022/5024 Multifunction Printer User Guide...
- Page 164 When using the document glass, make sure to close the document cover after finishing your scan job. Place the document face down, and align it against the top left corner of the document glass. Close the document cover. ® ® Xerox WorkCentre 5022/5024 Multifunction Printer User Guide...
-
Page 165: Using The Scan Feature
Minutes (2 digits), and SS = Seconds (2 digits). • The size of the scanned image may be slightly larger than the document size in some cases. This is due to the margin of error introduced with processing. ® ® Xerox WorkCentre 5022/5024 Multifunction Printer User Guide... -
Page 166: Using An Application To Load Scan Data From The Machine Via Usb
7-1. Start an application to load the scanned data. Select the menu item for selecting a scanner (source). Select WorkCentre 5022/5024. Make advanced settings as needed. Note For information on the scan functions, click Help in the screen to display the help information. -
Page 167: Sending Scan Data To Pc As E-Mail Attachment - E-Mail
Xerox CentreWare Internet Services in advance. Up to 30 e-mail addresses and SMB servers in total can be registered. ® ® For more information on Xerox CentreWare Internet Services, refer to Using Xerox® CentreWare® Internet Services on page 2-17. Notes •... - Page 168 When you have checked the address, press the OK button. Make advanced settings as needed. Scan to [02] Color Mode... Color File Format... Original Size... For more information on advanced settings, refer to Advanced Scanner Settings on page 7-15. ® ® Xerox WorkCentre 5022/5024 Multifunction Printer User Guide...
- Page 169 If the recipient is not specified, the Address Book screen is displayed. Note You can also set to display the screen to confirm recipient. For more information, refer to Recipient Confirmation on page 9-33. Confirm Recipient 02 Smith Smith@xxx.com E-mail ® ® Xerox WorkCentre 5022/5024 Multifunction Printer User Guide...
-
Page 170: Sending Scan Data To Pc Over Network - Pc (Network)
Xerox CentreWare Internet Services in advance. Up to 30 e-mail addresses and SMB servers in total can be registered. ® ® For more information on Xerox CentreWare Internet Services, refer to Using Xerox® CentreWare® Internet Services on page 2-17. - Page 171 OK button. Make advanced settings as needed. Scan to [01] Color Mode... Color File Format... Original Size... For more information on advanced settings, refer to Advanced Scanner Settings on page 7-15. ® ® 7-11 Xerox WorkCentre 5022/5024 Multifunction Printer User Guide...
- Page 172 If the address of computer is not specified, the Address Book screen appears. Note You can also set to display the screen to confirm recipient. For more information, refer to Recipient Confirmation on page 9-33. 7-12 ® ® Xerox WorkCentre 5022/5024 Multifunction Printer User Guide...
-
Page 173: Operations During Scanning
You can cancel the currently executing scan job. For more information on operation in job screen, refer to Canceling the Current Job on page 11-3. Press the Job Status button. Job Status button ® ® 7-13 Xerox WorkCentre 5022/5024 Multifunction Printer User Guide... - Page 174 Scan Check the job status. Active Jobs [Stop]:Delete Fax (Print) Print Print To exit the screen, press the OK button. 7-14 ® ® Xerox WorkCentre 5022/5024 Multifunction Printer User Guide...
-
Page 175: Advanced Scanner Settings
Sending Scan Data to PC as E-mail Attachment - E-mail on page 7-7. For information on specifying an address of computer, refer to Sending Scan Data to PC over Network - PC (Network) on page 7-10. ® ® 7-15 Xerox WorkCentre 5022/5024 Multifunction Printer User Guide... -
Page 176: Lighten/Darken
Scans with a fairly light density. Use this setting to scan document containing fairly dark objects. Lighten +2 Scans with the lightest density. Use this setting to scan document containing dark objects. 7-16 ® ® Xerox WorkCentre 5022/5024 Multifunction Printer User Guide... -
Page 177: Original Type
Select this item when document contains sharp black and white objects such as text. Photo & Text Select this item when document contains both text and photos. Photo Select this item when document contains only photos. ® ® 7-17 Xerox WorkCentre 5022/5024 Multifunction Printer User Guide... -
Page 178: Sided
Select Off for a one-sided document. Flip on Long Edge Scans document in portrait orientation to be turned side-to-side. Flip on Short Edge Scans document in landscape orientation to be turned side-to-side. 7-18 ® ® Xerox WorkCentre 5022/5024 Multifunction Printer User Guide... -
Page 179: Resolution
You can change the displayed time length of the setting screen. For more information on changing the displayed time length of the setting screen, refer to Quick- Button Selection Timer on page 10-12. ® ® 7-19 Xerox WorkCentre 5022/5024 Multifunction Printer User Guide... -
Page 180: Color Mode
Sets the file format of the scanned data. The file name is saved in the form of "YYMMDDHHMMSS". Select File Format, and then press the OK button. Scan to [01] Color Mode... Color File Format... Original Size... 7-20 ® ® Xerox WorkCentre 5022/5024 Multifunction Printer User Guide... -
Page 181: Original Size
The machine automatically detects the document size from the supported standard sizes. Fixed document size Select the size of the placed document. (Preset) Note Original Size is automatically set to Auto when document is placed in the document feeder. ® ® 7-21 Xerox WorkCentre 5022/5024 Multifunction Printer User Guide... - Page 182 Scan 7-22 ® ® Xerox WorkCentre 5022/5024 Multifunction Printer User Guide...
-
Page 183: Print
Watermarks Prints 'Confidential' or another preset character string on top of print data. Mixed Document Prints documents containing both vertical and horizontal pages, or pages of different sizes. ® ® Xerox WorkCentre 5022/5024 Multifunction Printer User Guide... -
Page 184: Printing
The procedure used to print varies according to the application you are using. See your application's manual for the specific procedure. ® The steps below are used in the Xerox WorkCentre 5022/5024 print driver screen. Select Print from the application's File menu. -
Page 185: Operations During Printing
Select the document name that you desired to cancel, and then press the Delete key. If there is no document within the window, cancel it manually on the machine. ® ® Xerox WorkCentre 5022/5024 Multifunction Printer User Guide... - Page 186 Print ® ® Xerox WorkCentre 5022/5024 Multifunction Printer User Guide...
-
Page 187: Tools
While in System Administration mode you cannot receive a print job or start a print or scan job. Entering System Administration Mode Press and hold the Log In/Out button for at least 4 seconds. Log In/Out button ® ® Xerox WorkCentre 5022/5024 Multifunction Printer User Guide... -
Page 188: Changing The Settings
Back or s button. Repeat Steps 1 and 2 as needed to set all the desired functions. Note Some setting items require input of numerical values using the numeric keypad. ® ® Xerox WorkCentre 5022/5024 Multifunction Printer User Guide... -
Page 189: Exiting System Administration Mode
If any settings that require to reboot the machine for the new settings to be applied, reboot the machine as the message appear. The Log In/Out button light goes off when the machine exits System Administration mode. ® ® Xerox WorkCentre 5022/5024 Multifunction Printer User Guide... -
Page 190: List Of Tools Menu Items Displayed In System Administration Mode
Used to set the Ethernet environment to use. P. 9-27 TCP/IP Used to set TCP/IP. P. 9-27 IP Filter Used to restrict the IP addresses that can access the P. 9-29 machine. ® ® Xerox WorkCentre 5022/5024 Multifunction Printer User Guide... - Page 191 Used to set the number of times the machine redials. P. 9-36 Redial Interval Used to set the amount of time the machine waits between P. 9-36 redials. Junk Filter Used to block junk faxes. P. 9-36 ® ® Xerox WorkCentre 5022/5024 Multifunction Printer User Guide...
- Page 192 Job Cancel Used to set whether to automatically cancel the job when a P. 9-43 job error occurs. Clock Used to set the time on the machine's system clock. P. 9-43 ® ® Xerox WorkCentre 5022/5024 Multifunction Printer User Guide...
- Page 193 Used to set whether to reset the total number of copied P. 9-52 impressions or not. Reset Copied Impressions Used to set user passcodes and the maximum number of P. 9-54 impressions permitted for copying. ® ® Xerox WorkCentre 5022/5024 Multifunction Printer User Guide...
-
Page 194: Default Settings
Settings. • When Auto is set, the machine reduces or enlarges the document to fit the specified paper size when copying. 2 Sided Set the default value displayed for 2 Sided. ® ® Xerox WorkCentre 5022/5024 Multifunction Printer User Guide... - Page 195 You can set values between 0 and 50 mm (in 1 mm increments). 2 mm is set at the time of factory shipment. ® ® Xerox WorkCentre 5022/5024 Multifunction Printer User Guide...
-
Page 196: Id Card Copy
Sets the default advanced scan settings displayed when the control panel's Scan button is pressed. Color Mode Sets the default color mode used for scanning (the item displayed for Color Mode). Black & White is set at the time of factory shipment. 9-10 ® ® Xerox WorkCentre 5022/5024 Multifunction Printer User Guide... - Page 197 (148 x 210mm), 11 x 17" , 8.5 x 14" , 8.5 x 13" , 8.5 x 11" , or 8.5 x 11" . A4 (297 x 210mm) is set at the time of factory shipment. ® ® 9-11 Xerox WorkCentre 5022/5024 Multifunction Printer User Guide...
-
Page 198: Fax
Fine Scans faxes at the resolution of 200 x 200 dpi (7.9 x 7.9 dots/mm). Superfine Scans faxes at the resolution of 400 x 400 dpi (15.7 x 15.7 dots/mm). 9-12 ® ® Xerox WorkCentre 5022/5024 Multifunction Printer User Guide... - Page 199 2 mm is set at the time of factory shipment. Sets the default value displayed for ECM. This setting resends the fax if an error resulting in transmission failure occurs. You can select On or Off. ® ® 9-13 Xerox WorkCentre 5022/5024 Multifunction Printer User Guide...
- Page 200 0:00 and 23:59 (in 1 minute increments). When 12-hour clock display has been set, you can set any time between 1:00 and 12:59 (in 1 minute increments). The time is set to 21:00 at the time of factory shipment. 9-14 ® ® Xerox WorkCentre 5022/5024 Multifunction Printer User Guide...
-
Page 201: Device Information
For information on how to display the Device Information screen, refer to System Settings Procedure on page 9-1. Device Information Product Name... Serial Number... Printer Name... Press the OK button. ® ® 9-15 Xerox WorkCentre 5022/5024 Multifunction Printer User Guide... -
Page 202: Tray Settings
If you select Custom Size and press the OK button, you can set a non-standard paper size (X (horizontal) 98 to 432 mm, Y (vertical) 127 to 297 mm). A4 (297 x 210mm) is set at the time of factory shipment. 9-16 ® ® Xerox WorkCentre 5022/5024 Multifunction Printer User Guide... - Page 203 Sets the type (quality) of the paper in Tray 5 (bypass). You can select Plain 1, Plain 2, Heavyweight, Extra-HW, or Lightweight. Plain 1 is set at the time of factory shipment. ® ® 9-17 Xerox WorkCentre 5022/5024 Multifunction Printer User Guide...
-
Page 204: Custom Paper Size Settings
You can set the non-standard paper sizes to the Customs (1 to 5) for the Tray 5 (bypass) (X (horizontal) 98 to 432 mm, Y (vertical) 127 to 297 mm). The registered Customs can be selected in Original Size for the Copy feature. 9-18 ® ® Xerox WorkCentre 5022/5024 Multifunction Printer User Guide... -
Page 205: Control Panel Language
Select the language that you want to display from the Control Panel Language screen. For information on how to display the Control Panel Language screen, refer to System Settings Procedure on page 9-1. Press the OK button. ® ® 9-19 Xerox WorkCentre 5022/5024 Multifunction Printer User Guide... -
Page 206: Default Display
In the Default Display screen, select the screen to use as the default display screen. For information on how to display the Default Display screen, refer to System Settings Procedure on page 9-1. Default Display Copy Scan Press the OK button. 9-20 ® ® Xerox WorkCentre 5022/5024 Multifunction Printer User Guide... -
Page 207: Phone Book
To register a new entry, select an unregistered Speed Dial number, and then click the OK button. Note To edit an existing Speed Dial number, select the number to edit. ® ® 9-21 Xerox WorkCentre 5022/5024 Multifunction Printer User Guide... - Page 208 (#), asterisk (*), and underscore (_)). 001:Enter Phone No. Select Apply Settings, and then press the OK button. Select Yes, and then press the OK button. Apply Settings [Are You Sure?] 9-22 ® ® Xerox WorkCentre 5022/5024 Multifunction Printer User Guide...
- Page 209 Select the speed dial number that you wish to delete on the Speed Dial screen, and then press the OK button. Press the C (Clear) button. C (Clear) button Select Yes, and then press the OK button. Delete Dial [Are You Sure?] ® ® 9-23 Xerox WorkCentre 5022/5024 Multifunction Printer User Guide...
-
Page 210: Group
Names can be up to 32 single-byte alphanumeric characters in length. 01:Enter Name Select Speed Dial Number, and then press the OK button. Group 01 [C]:Delete Name... Group01 Speed Dial Number... Apply Settings... 9-24 ® ® Xerox WorkCentre 5022/5024 Multifunction Printer User Guide... - Page 211 Select Apply Settings, and then press the OK button. Group 01 [C]:Delete Name... Group01 Speed Dial Number... 002,010 Apply Settings... 10. Select Yes, and then press the OK button. Apply Settings [Are You Sure?] ® ® 9-25 Xerox WorkCentre 5022/5024 Multifunction Printer User Guide...
-
Page 212: Deleting A Group
[C]:Delete Name... Group02 Speed Dial Number... 005,009 Apply Settings... Press the C (Clear) button. C (Clear) button Select Yes, and then press the OK button. Delete Group [Are You Sure?] 9-26 ® ® Xerox WorkCentre 5022/5024 Multifunction Printer User Guide... -
Page 213: Wired Network
Select this setting when using the machine in an environment using both IPv4 and IPv6. IPv4 Select this setting when using the machine in an IPv4 environment. IPv6 Select this setting when using the machine in an IPv6 environment. ® ® 9-27 Xerox WorkCentre 5022/5024 Multifunction Printer User Guide... - Page 214 Sets whether to use IPv6. You can select Disable or Enable. Disable is set at the time of factory shipment. IP Address Use the numeric keypad to enter the IP address. 9-28 ® ® Xerox WorkCentre 5022/5024 Multifunction Printer User Guide...
-
Page 215: Ip Filter
10 IP addresses/subnet masks to support. IPv6 Sets whether to restrict the IPv6 addresses that can access the machine. When this setting is enabled, you can register up to 10 IP addresses/subnet masks to support. ® ® 9-29 Xerox WorkCentre 5022/5024 Multifunction Printer User Guide... -
Page 216: Copy Settings
You can set a value between 25 and 400% (in 1% increments). 400% is set at the time of factory shipment. For more information, refer to Default Settings > Copy > Reduce/Enlarge on page 9-8. 9-30 ® ® Xerox WorkCentre 5022/5024 Multifunction Printer User Guide... -
Page 217: Auto Collate
Sets to rotate for the Collated function when document is placed in the document feeder. You can select Do Not Rotate or Rotate. Do Not Rotate is set at the time of factory shipment. ® ® 9-31 Xerox WorkCentre 5022/5024 Multifunction Printer User Guide... -
Page 218: Scan Settings
Lower -2 is the lowest compression ratio. Normal is set at the time of factory shipment. Selecting Higher+2 reduces file size, but also reduces image resolution. Sharpness Sets the default sharpness value displayed for Sharpness. 9-32 ® ® Xerox WorkCentre 5022/5024 Multifunction Printer User Guide... -
Page 219: Edge Erase
20 MB is set at the time of factory shipment. Recipient Confirmation Sets whether to confirm the recipient information before sending data. You can select On or Off. Off is set at the time of factory shipment. ® ® 9-33 Xerox WorkCentre 5022/5024 Multifunction Printer User Guide... -
Page 220: Fax Settings
You can set a value between 1 and 15 rings (in increments of 1). The time is set to 2 times at the time of factory shipment. The default value varies by region. The default value is set when Region is set. 9-34 ® ® Xerox WorkCentre 5022/5024 Multifunction Printer User Guide... -
Page 221: Line Volume
Sets the number of times the automatic redial operation is performed when the recipient is busy or does not answer. The default value varies by region. The default value is set when Region is set. Note ® ® 9-35 Xerox WorkCentre 5022/5024 Multifunction Printer User Guide... -
Page 222: Redial Interval
You can enter up to 20 digits, including numbers (0 to 9). Forward Sets whether or not to forward a fax document received on this machine to another fax number. 9-36 ® ® Xerox WorkCentre 5022/5024 Multifunction Printer User Guide... -
Page 223: Auto Reduce On Receipt
Auto The machine prints incoming faxes by selecting the tray containing the paper of the correct size. The machine restricts incoming faxes to A4 size (210 mm width). ® ® 9-37 Xerox WorkCentre 5022/5024 Multifunction Printer User Guide... -
Page 224: Print Size (Received Letter)
10 volts is set at the time of factory shipment. Region Sets the machine's region of use. You can select from Unknown, India, Russia, South Africa, Central Africa, Emirates, Saudi Arabia, Egypt, Mexico, or Turkey. 9-38 ® ® Xerox WorkCentre 5022/5024 Multifunction Printer User Guide... -
Page 225: Activity Report
Yes (Restart Required) Activity Report Sets whether the machine automatically prints transmission results (Activity Reports) after sending and receiving faxes. Enable Auto Print is set at the time of factory shipment. ® ® 9-39 Xerox WorkCentre 5022/5024 Multifunction Printer User Guide... -
Page 226: Transmission Report
Sets the operation to print machine's transmission result after sending a fax "broadcast" (the same fax sent to multiple recipients at once). Always Print is set at the time of factory shipment. Note The Broadcast Report cannot be printed manually. 9-40 ® ® Xerox WorkCentre 5022/5024 Multifunction Printer User Guide... -
Page 227: Protocol Report
The machine doesn't print the transmission result regardless of whether fax transmission succeeded or failed. For information on how to print a Protocol Report manually, refer to Printing Reports/Lists on page 10- ® ® 9-41 Xerox WorkCentre 5022/5024 Multifunction Printer User Guide... -
Page 228: System Settings
Used to set the amount of time the machine waits after operating the control panel, loading paper on the document feeder, or closing a tray until starting to print automatically. 9-42 ® ® Xerox WorkCentre 5022/5024 Multifunction Printer User Guide... -
Page 229: Idle Timeout
When setting the time for the first time, first set the Date Format and Time Format. Follow the steps below to make the settings. Date & Time Set the current date and time. You can select from UTC -12:00 to +13:00. ® ® 9-43 Xerox WorkCentre 5022/5024 Multifunction Printer User Guide... - Page 230 Notes Enter the date in the display format set in Date Format. Press the buttons to move the cursor. Date [OK]:Next Screen 2013 / 1 / Press the OK button. 9-44 ® ® Xerox WorkCentre 5022/5024 Multifunction Printer User Guide...
-
Page 231: Date Format
Time Format... Select the date display format, and then press the OK button. Date Format yy/mm/dd mm/dd/yy dd/mm/yy Time Format Set the time format. You can select from 12H or 24H. ® ® 9-45 Xerox WorkCentre 5022/5024 Multifunction Printer User Guide... -
Page 232: Audio Tones
Off is set at the time of factory shipment. Machine Ready Sets the volume of the tone that sounds at power on and at other times to indicate the machine is ready for copying or printing. 9-46 ® ® Xerox WorkCentre 5022/5024 Multifunction Printer User Guide... -
Page 233: Job Complete
Normal is set at the time of factory shipment. Auto Clear Sets the volume of the tone that sounds 5 seconds before the display will automatically return to the Default Display screen when Auto Reset has been set. ® ® 9-47 Xerox WorkCentre 5022/5024 Multifunction Printer User Guide... -
Page 234: Job History Verbose
When this setting is enabled, users must enter a passcode to use the Copy feature. Off is set at the time of factory shipment. Users are permitted to use the Copy feature without entering a passcode. 9-48 ® ® Xerox WorkCentre 5022/5024 Multifunction Printer User Guide... -
Page 235: Paper Size Settings
Used to set how frequently to display messages on the screen when the drum cartridge life is ended. You can select from Off, At Startup, or At Auto Clear. At Auto Clear is set at the time of factory shipment. ® ® 9-49 Xerox WorkCentre 5022/5024 Multifunction Printer User Guide... -
Page 236: Maintenance
Tools Maintenance Used to clear the counter of the consumables/periodic replacement parts when directed by your local Xerox representative. Note Do not use this function except as necessary. 9-50 ® ® Xerox WorkCentre 5022/5024 Multifunction Printer User Guide... -
Page 237: Security Settings
Enter the desired passcode in the New Passcode field. Note The entered passcode is displayed as asterisks (*). System Admin. Passcode New Passcode [* * * * * ] Press the OK button. ® ® 9-51 Xerox WorkCentre 5022/5024 Multifunction Printer User Guide... -
Page 238: User Management
Select Confirm/Edit, and then press the OK button. User Management Confirm/Edit... Reset Copied Impressions... Select the user to display or set, and then press the OK button. Confirm/Edit User 01... User 02... User 03... 9-52 ® ® Xerox WorkCentre 5022/5024 Multifunction Printer User Guide... - Page 239 Displays the total number of impressions the user has currently copied. Press Copied Impressions. User 01 Login Passcode... Copied Impressions... Copy Limit (Unit: Impressions...) Check the value, and then press the Back button. Copied Impressions ® ® 9-53 Xerox WorkCentre 5022/5024 Multifunction Printer User Guide...
-
Page 240: Reset Copied Impressions
In the Tools screen, select User Management, and then press the OK button. For information on how to display the Tools screen, refer to System Settings Procedure on page 9- Tools System Settings... Security Settings... User Management... 9-54 ® ® Xerox WorkCentre 5022/5024 Multifunction Printer User Guide... - Page 241 Tools Select Reset Copied Impressions, and then press the OK button. User Management Confirm/Edit... Reset Copied Impressions... Select Yes, and then press the OK button. Reset Copied Impressions ® ® 9-55 Xerox WorkCentre 5022/5024 Multifunction Printer User Guide...
- Page 242 Tools 9-56 ® ® Xerox WorkCentre 5022/5024 Multifunction Printer User Guide...
-
Page 243: Machine Status
Replacement is not currently needed, but the cartridge will need to be replaced soon. Make sure to have a new toner cartridge on hand. Replace Soon Replacement is needed soon. ® ® 10-1 Xerox WorkCentre 5022/5024 Multifunction Printer User Guide... - Page 244 Replacement is not currently needed, but the cartridge will need to be replaced soon. Make sure to have a new drum cartridge on hand. Replace Soon Replacement is needed soon. Replace Now Replacement is needed now. Error A drum cartridge error occurred. 10-2 ® ® Xerox WorkCentre 5022/5024 Multifunction Printer User Guide...
-
Page 245: Selecting Language
Follow the steps below to select the language. Press the Machine Status button. Machine Status button In the Machine Status screen, select Language. Machine Status Toner Status: Language... Drum Status: IP Address... Billing Informat... ® ® 10-3 Xerox WorkCentre 5022/5024 Multifunction Printer User Guide... - Page 246 Machine Status Select the display language from the Language screen. Press the OK button. 10-4 ® ® Xerox WorkCentre 5022/5024 Multifunction Printer User Guide...
-
Page 247: Checking The Machine's Ip Address
In the Machine Status screen, select IP Address. Machine Status Toner Status: Language... Drum Status: IP Address... Billing Informat... The IP address of your machine is displayed. IP Address IPv4 xxx.xxx.xxx.xxx IPv6 xxxx:xxxx:xxxx:xxxx:xxxx: xxxx:xxxx:xxxx ® ® 10-5 Xerox WorkCentre 5022/5024 Multifunction Printer User Guide... -
Page 248: Checking The Meter
Select BillingInformation, and then press the OK button. Machine Status Toner Status: Language... Drum Status: IP Address... Billing Informat... Select the items to be verified. Billing Information Product Code XXXXXXXX Serial Number XXXXXXXX Meter1 5678 10-6 ® ® Xerox WorkCentre 5022/5024 Multifunction Printer User Guide... -
Page 249: Printing Reports/Lists
Prints the machine's hardware configuration, version information, number of pages printed by each function, status of consumables, the items that can be ® ® set by Xerox CentreWare Internet Service, and their values. Service Settings Report Prints the items that can be set from the control panel in System Administration mode. - Page 250 9- The Network Kit is required to use this feature. Follow the steps below to print a report or list. Press the Machine Status button. Machine Status button 10-8 ® ® Xerox WorkCentre 5022/5024 Multifunction Printer User Guide...
- Page 251 Select the report or list to print, and then press the OK button. Note To cancel printing while a job is printing, press the Stop button, and select Yes on the confirmation screen. Print Report [OK]:Print System Settings Service Settings Job History ® ® 10-9 Xerox WorkCentre 5022/5024 Multifunction Printer User Guide...
-
Page 252: Notification Display
Select Notification Display, and then press the OK button. Machine Status Toner Status: Billing Informa... Drum Status: Print Report... Notification Dis... To disable the guidance, select Off, and then press the OK button. Notification Display 10-10 ® ® Xerox WorkCentre 5022/5024 Multifunction Printer User Guide... -
Page 253: Id Card Guidance Display
ID Card Guidance Display - Sample of guidance for ID Card Copy - ID Card Copy and place it 5 mm away from the top left corner of the Document Glass. ® ® 10-11 Xerox WorkCentre 5022/5024 Multifunction Printer User Guide... -
Page 254: Quick-Button Selection Timer
Notification Di... Drum Status: ID Card Guidance... Quick-Button Se... Select the desired time, and then press the OK button. Quick-Button Selection Timer 4 seconds 2 seconds 3 seconds 4 seconds 10-12 ® ® Xerox WorkCentre 5022/5024 Multifunction Printer User Guide... -
Page 255: Job Status
Scroll to check the jobs. Active Jobs [Stop]:Delete Fax (Print) Print Print Checking Reserved Fax Jobs If any outgoing faxes have been reserved, you can check them in the Fax (Send) List screen. ® ® 11-1 Xerox WorkCentre 5022/5024 Multifunction Printer User Guide... - Page 256 Job Status In the Active Jobs screen, select Fax (Send), and then press the OK button. Active Jobs Active Jobs [Stop]:Delete Fax(Send)... The Fax (Send) List screen appears. 11-2 ® ® Xerox WorkCentre 5022/5024 Multifunction Printer User Guide...
-
Page 257: Canceling The Current Job
You may not be able to cancel a job depending on the status of the job processing. • If the machine is being used as a local printer, it may take some time to cancel the job depending on the type of print job being executed. ® ® 11-3 Xerox WorkCentre 5022/5024 Multifunction Printer User Guide... -
Page 258: Canceling A Pending Fax Job
Fax(Send)... Select a reserved fax job. Press the Stop button. Stop button Note You may not be able to cancel a job depending on the status of the job processing. 11-4 ® ® Xerox WorkCentre 5022/5024 Multifunction Printer User Guide... -
Page 259: Maintenance
Use a broom or a wet cloth to wipe off spilled toner. Never use a vacuum cleaner for the spills. It may catch fire by electric sparks inside the vacuum cleaner and cause explosion. If you spill a large volume of toner, contact your local Xerox representative. WARNING: Never throw a toner cartridge into an open flame. - Page 260 When calling our Customer Support Center to order consumables/periodical replacement parts, have the product codes ready. • The use of consumables/periodic replacement parts not recommended by Xerox could impair machine quality and performance. Use only consumables/periodic replacement parts recommended by Xerox.
-
Page 261: Replacing The Toner Cartridge
When you replace a toner cartridge, toner may spill and soil the floor. We recommend laying paper on the floor beforehand. • The use of toner cartridges not recommended by Xerox may degrade image quality and performance. Use only toner cartridges recommended by Xerox. •... - Page 262 Never throw a toner cartridge into an open flame. Remaining toner in the cartridge may catch fire and cause burn injuries or explosion. If you have a used toner cartridge no longer needed, contact your local Xerox representative for its disposal.
- Page 263 Maintenance Unpack a new toner cartridge, and shake it lightly up/down, and left/right 10 times. Note Do not touch the shutter. ® ® 12-5 Xerox WorkCentre 5022/5024 Multifunction Printer User Guide...
- Page 264 Orient the toner cartridge with the arrow () facing up, and insert it as far as it will go. Close the front cover. Note If the front cover is not completely closed, an error code will appear and the machine will remain paused. 12-6 ® ® Xerox WorkCentre 5022/5024 Multifunction Printer User Guide...
-
Page 265: Replacing The Drum Cartridge
Use the figures above only as a guideline. Notes • The use of drum cartridges not recommended by Xerox may degrade image quality and performance. Use only drum cartridges recommended by Xerox. •... - Page 266 Open the left cover and the front cover. Unscrew the two mounting screws and remove the drum. Remove the protective cover from the new drum. CAUTION: .Take care to not touch the drum surface. 12-8 ® ® Xerox WorkCentre 5022/5024 Multifunction Printer User Guide...
- Page 267 Tighten the two screws finger tight. Remove the tape. Close the left cover and the front cover. Note If the front cover is not completely closed, an error code will appear. ® ® 12-9 Xerox WorkCentre 5022/5024 Multifunction Printer User Guide...
-
Page 268: To Initialize The Counter
Back or s button. Select Maintenance from the System Settings screen. Press the OK button Enter the passcode 950807 on the Maintenance screen using the numeric keypad. Press the Start button. Start button 12-10 ® ® Xerox WorkCentre 5022/5024 Multifunction Printer User Guide... - Page 269 When the Drum Cartridge screen appears, if the Drum Cartridge has been replaced with a new one, press Start button again to initialize the NVM counter. Otherwise, press Clear All to cancel this action. ® ® 12-11 Xerox WorkCentre 5022/5024 Multifunction Printer User Guide...
-
Page 270: Cleaning The Machine
Cleaning the Document Cover and the Document Glass If the document cover and document glass become soiled, smudges may appear on copies, or scanned documents and the machine may not properly detect document sizes. 12-12 ® ® Xerox WorkCentre 5022/5024 Multifunction Printer User Guide... -
Page 271: Cleaning The Document Presser And The Narrow Glass Strip
Cleaning the Document Presser and the Narrow Glass Strip If the document presser or narrow glass strip becomes soiled, smudges may appear on copies, or scanned documents and the machine may not properly detect document sizes. ® ® 12-13 Xerox WorkCentre 5022/5024 Multifunction Printer User Guide... - Page 272 Do not use cleaning agents other than water or neutral detergent. • If you cannot remove dirt easily, gently wipe the narrow glass strip with a soft cloth moistened with a small amount of neutral detergent. 12-14 ® ® Xerox WorkCentre 5022/5024 Multifunction Printer User Guide...
-
Page 273: Cleaning The Document Feeder Rollers
Close the document feeder top cover until it clicks into place, and confirm that there is no space between either side of the cover and the document feeder. ® ® 12-15 Xerox WorkCentre 5022/5024 Multifunction Printer User Guide... - Page 274 Maintenance 12-16 ® ® Xerox WorkCentre 5022/5024 Multifunction Printer User Guide...
-
Page 275: Problem Solving
13-20. Network problems Refer to Network Related Problems on page 13- If the error is not resolved even after following the above procedure, contact our Customer Support Center. ® ® 13-1 Xerox WorkCentre 5022/5024 Multifunction Printer User Guide... -
Page 276: Machine Problems
Refer to Error Codes on page 13-32. Tray 5 (bypass). Refer to Loading Paper in Tray 5 (Bypass) on page 4-7. 13-2 ® ® Xerox WorkCentre 5022/5024 Multifunction Printer User Guide... - Page 277 Placing the Document on page 5-1. set in the correct positions? Is the document folded? Smooth out the document and place it again correctly. Refer to Placing the Document on page 5-1. ® ® 13-3 Xerox WorkCentre 5022/5024 Multifunction Printer User Guide...
- Page 278 Refer to Error Codes on page 13-32. paper is loaded in tray. Refer to Loading Paper in Tray 5 (Bypass) on page 4-7. Bypass tray and the Start button is pressed. 13-4 ® ® Xerox WorkCentre 5022/5024 Multifunction Printer User Guide...
- Page 279 Refer to Document Jams on page 13-55. feeder? An edge of the Is the document curled? Flatten the curl and load the document again. document is folded. ® ® 13-5 Xerox WorkCentre 5022/5024 Multifunction Printer User Guide...
-
Page 280: Image Quality Problems
Refer to Loading Paper in Trays 1 to 4 (Optional) drifted away from the on page 4-6. corners of the tray? Refer to Loading Paper in Tray 5 (Bypass) page 4-7. 13-6 ® ® Xerox WorkCentre 5022/5024 Multifunction Printer User Guide... - Page 281 Adjust the copy enlargement factor. large an enlargement Refer to Reduce/Enlarge on page 5-19. factor? ® ® 13-7 Xerox WorkCentre 5022/5024 Multifunction Printer User Guide...
- Page 282 Replacing the Drum Cartridge printouts. damaged. page 12-7. The narrow glass strip is Clean the narrow glass strip. dirty. Refer to Cleaning the Document Presser and the Narrow Glass Strip on page 12-13. 13-8 ® ® Xerox WorkCentre 5022/5024 Multifunction Printer User Guide...
- Page 283 Replace the paper with new paper. comes off on the The paper is unsuitable. Load the correct type of paper. fingers. The toner is not fused to the paper. The paper is contaminated with toner. ® ® 13-9 Xerox WorkCentre 5022/5024 Multifunction Printer User Guide...
- Page 284 4-7. size of the paper actually loaded. Multiple pages were fed Riffle through the stack of paper thoroughly through the machine at before loading it. once. 13-10 ® ® Xerox WorkCentre 5022/5024 Multifunction Printer User Guide...
- Page 285 Refer to Loading Paper in Trays 1 to 4 (Optional) on page 4-6. Refer to Loading Paper in Tray 5 (Bypass) page 4-7. ® ® 13-11 Xerox WorkCentre 5022/5024 Multifunction Printer User Guide...
-
Page 286: Copying Problems
Refer to Document Jams on page 13-55. You have placed a document You cannot place documents with different containing pages of different size pages. sizes. 13-12 ® ® Xerox WorkCentre 5022/5024 Multifunction Printer User Guide... -
Page 287: Copy Output Problems
Place a stack of white paper on top of the document to bring it into proper contact with the document glass. ® ® 13-13 Xerox WorkCentre 5022/5024 Multifunction Printer User Guide... - Page 288 Refer to Placing the Document on page 5-1. The edges of The document exceeds the Adjust the reduction/enlargement factor to copies are cut printable area. reduce the copy slightly. off. 13-14 ® ® Xerox WorkCentre 5022/5024 Multifunction Printer User Guide...
-
Page 289: Printer Problems
An error has occurred in the Check the error information, and take the required machine. action. Job execution has been paused. Use the screen to select whether to cancel the job. ® ® 13-15 Xerox WorkCentre 5022/5024 Multifunction Printer User Guide... -
Page 290: Print Output Problems
(is Operation is not guaranteed if another company's using another print driver is used. company's print driver). 13-16 ® ® Xerox WorkCentre 5022/5024 Multifunction Printer User Guide... -
Page 291: Fax Problems
Transmission Report - Job Undelivered. You are using a function that the Check whether the recipient's fax machine recipient's fax machine doesn't supports the function. support. ® ® 13-17 Xerox WorkCentre 5022/5024 Multifunction Printer User Guide... -
Page 292: Problems When Receiving Faxes
Check on the problem with the sender. document correctly. Note: Fax transmission problems can occur only due to problems with the machine, but also due to problems with the sender fax machine. 13-18 ® ® Xerox WorkCentre 5022/5024 Multifunction Printer User Guide... - Page 293 Check on the problem with the sender. resolution. Note: Image quality problems can occur during fax transmission not only due to problems with the machine, but also due to problems with the sender fax machine. ® ® 13-19 Xerox WorkCentre 5022/5024 Multifunction Printer User Guide...
-
Page 294: Scan Problems
Refer to Using the USB Interface on page 2-4. The machine's USB cable is Reconnect the machine's disconnected USB cable. disconnected. Refer to Using the USB Interface on page 2-4. 13-20 ® ® Xerox WorkCentre 5022/5024 Multifunction Printer User Guide... -
Page 295: Unable To Send Scan Data In E-Mail
SMTP Server (Connectivity > Protocols) page 2-28. The registered password for the Check the registered password for the SMTP server is incorrect. authenticated user. Refer to SMTP Server (Connectivity > Protocols) page 2-28. ® ® 13-21 Xerox WorkCentre 5022/5024 Multifunction Printer User Guide... -
Page 296: Unable To Forward A Scan Document On The Network (Smb)
> Administrative Tools > Local Security data using SMB? Policy. Select Security Settings > Local Policies > Security Options. Set Account: Limit local account use of blank passcodes to console logon only to Disabled. 13-22 ® ® Xerox WorkCentre 5022/5024 Multifunction Printer User Guide... -
Page 297: Scan Image Quality Problems
Place a stack of white paper on top of the document to bring it into proper contact with the document glass. ® ® 13-23 Xerox WorkCentre 5022/5024 Multifunction Printer User Guide... - Page 298 Smooth out the document and place it again correctly. The image is A low resolution is set. Set a higher resolution. grainy. Refer to Placing the Document on page 5-1. 13-24 ® ® Xerox WorkCentre 5022/5024 Multifunction Printer User Guide...
-
Page 299: Network Related Problems
If the print driver is not listed for company's print driver). selection, install the print driver and then select it. Operation is not guaranteed if another company's print driver is used. ® ® 13-25 Xerox WorkCentre 5022/5024 Multifunction Printer User Guide... - Page 300 Problem Solving ® ® Problems Using Xerox CentreWare Internet Services ® The table below lists possible solutions to problems you may encounter when using Xerox ® CentreWare Internet Services. Symptom Remedy Is the machine operating normally? ® Unable to connect to Xerox Check whether the machine's power is on.
-
Page 301: Problems With E-Mail Functions
Is the system administrator's e-mail address set? Internet/Intranet Connection Problems The table below lists possible causes and solutions for problems that may occur when connecting to the Internet or an intranet. ® ® 13-27 Xerox WorkCentre 5022/5024 Multifunction Printer User Guide... -
Page 302: Unable To Connect To The Internet Or An Intranet
Unable to communicate due to Wait a while, and then access the server again. the load on the server application. 13-28 ® ® Xerox WorkCentre 5022/5024 Multifunction Printer User Guide... -
Page 303: Ipv4 Or Ipv6 Connection Problems
IPv4 or IPv6 Connection Problems The table below lists possible solutions to problems that may occur when connecting to an IPv4 or IPv6 address. ® ® 13-29 Xerox WorkCentre 5022/5024 Multifunction Printer User Guide... -
Page 304: Unable To Connect To An Ipv4 Address
Windows operating Windows operating system supporting IPv6. system supporting IPv6 in an IPv6 Example: network environment without a Register the name in the file DNS server. C:\Windows\system32\driver\etc\hosts. 13-30 ® ® Xerox WorkCentre 5022/5024 Multifunction Printer User Guide... -
Page 305: Other Ipv6 Problems
IPv6 address to specify an e-mail address for an e-mail service. Example: csw@[ipv6:2001:db8::1] Other IPv6 Problems Symptom Remedy IPv6 addresses are not entered Use IPv4. correctly in output Job Logs. ® ® 13-31 Xerox WorkCentre 5022/5024 Multifunction Printer User Guide... -
Page 306: Error Codes
Take one of the following measures. enlarging/reducing a scanned document that • Reduce the magnification with does not match the orientation of paper. Reduce/Enlarge. • Change the orientation of paper or document. 13-32 ® ® Xerox WorkCentre 5022/5024 Multifunction Printer User Guide... - Page 307 If the same message is displayed again, contact our Customer Support Center. You can use a tray other than Tray 1. ® ® 13-33 Xerox WorkCentre 5022/5024 Multifunction Printer User Guide...
- Page 308 Switch off the machine power, make sure that the display is blank, and then switch on 016-744 the machine power. 016-749 An error occurred. Press the control panel's Stop button, and cancel the job. 13-34 ® ® Xerox WorkCentre 5022/5024 Multifunction Printer User Guide...
- Page 309 The paper size set for Tray 2 and the paper size specified for the job are not the same. cancel the job or change the paper to the specified paper size. ® ® 13-35 Xerox WorkCentre 5022/5024 Multifunction Printer User Guide...
- Page 310 024-966 Attempted to select a tray automatically Press the control panel's Stop button, and although all trays except the Tray 5 (bypass) are try again. not selectable for auto selection. 13-36 ® ® Xerox WorkCentre 5022/5024 Multifunction Printer User Guide...
- Page 311 033-503 An error occurred during fax transmission. The machine will automatically recover. Wait for a while, and try again. 033-504 033-505 033-506 033-507 033-509 033-510 033-517 033-526 033-529 033-531 033-532 ® ® 13-37 Xerox WorkCentre 5022/5024 Multifunction Printer User Guide...
- Page 312 The line is not connected correctly. Press the control panel's Stop button, and cancel the job. 034-752 The recipient`s line is busy. Press the control panel's Stop button, and cancel the job. 13-38 ® ® Xerox WorkCentre 5022/5024 Multifunction Printer User Guide...
- Page 313 Switch off the machine power, make sure that the display is blank, and then switch on 041-211 the machine power. If the same message is displayed again, contact our Customer Support Center. ® ® 13-39 Xerox WorkCentre 5022/5024 Multifunction Printer User Guide...
- Page 314 Paper Jams on page 13-46. An error occurred in the one tray module cover B 072-102 Remove the jammed paper. or Tray 2. Refer to Paper Jams on page 13-46. 13-40 ® ® Xerox WorkCentre 5022/5024 Multifunction Printer User Guide...
- Page 315 Switch off the machine power, make sure that the display is blank, and then switch on the machine power. If the same message is displayed again, contact our Customer Support Center. ® ® 13-41 Xerox WorkCentre 5022/5024 Multifunction Printer User Guide...
- Page 316 The drum cartridge life is over. Replace the drum cartridge. Call the Customer Support Center to order replacement consumables/periodic replacement parts. Have product codes ready. Refer to Replacing the Drum Cartridge page 12-7. 13-42 ® ® Xerox WorkCentre 5022/5024 Multifunction Printer User Guide...
- Page 317 092-661 Temperature SNR (in CRU) value is out of range. Switch off the machine power, make sure that the display is blank, and then switch on the machine power. ® ® 13-43 Xerox WorkCentre 5022/5024 Multifunction Printer User Guide...
- Page 318 Switch off the machine power, make sure that the display is blank, and then switch on 117-327 the machine power. If the same message is 123-314 displayed again, contact our Customer Support Center. 13-44 ® ® Xerox WorkCentre 5022/5024 Multifunction Printer User Guide...
- Page 319 134-211 display is blank, and then switch on the machine power. If the same message is displayed again, contact our Customer Support Center. ® ® 13-45 Xerox WorkCentre 5022/5024 Multifunction Printer User Guide...
-
Page 320: Paper Jams
Start button again to allow the document feeder to feed and scan the rest of the loaded documents. WARNING: If you need to pull out a tray to remove paper jam, contact your local Xerox representative. Do not pull out a tray, otherwise it may cause injuries. CAUTION: Do not attempt to remove a paper deeply jammed inside the product, particularly a paper wrapped around the fusing unit or the heat roller. - Page 321 Open Cover B and remove paper. 075-135 Paper Jam in Tray 5 1. Left cover A P. 13-49 Remove paper from Tray 5 and remove 2. Tray 5 P. 13-54 paper. ® ® 13-47 Xerox WorkCentre 5022/5024 Multifunction Printer User Guide...
- Page 322 When clearing paper jams, leave the machine's power on. Switching the power off erases information stored in the machine's memory. • Do not touch parts inside the machine. Printing errors may result. 13-48 ® ® Xerox WorkCentre 5022/5024 Multifunction Printer User Guide...
-
Page 323: Paper Jam In Left Cover A
If the paper is jammed around the fusing unit Pull down the latch. Remove the jammed paper. Note Do not leave any torn pieces of paper inside the machine. Return the latch back to its position. ® ® 13-49 Xerox WorkCentre 5022/5024 Multifunction Printer User Guide... - Page 324 If the paper is jammed in the location shown in the diagram, remove the jammed paper pulling upwards. Push on the center of the left cover, close it slowly, and raise Tray 5 (bypass). 13-50 ® ® Xerox WorkCentre 5022/5024 Multifunction Printer User Guide...
-
Page 325: Paper Jam In One Tray Module Cover B
The paper may be jammed in the upper part where it is difficult to see. Check thoroughly for jammed paper. • If the paper tears, check to make sure there are no remaining shreds in the machine. Close the one tray module cover gently. ® ® 13-51 Xerox WorkCentre 5022/5024 Multifunction Printer User Guide... -
Page 326: Paper Jam In Two Tray Module Cover C
The paper may be jammed in the upper part where it is difficult to see. Check thoroughly for jammed paper. If the paper tears, check to make sure there are no remaining shreds in the machine. Close the two tray module cover gently. 13-52 ® ® Xerox WorkCentre 5022/5024 Multifunction Printer User Guide... -
Page 327: Paper Jams In Tray 1 To 4
Remove the jammed paper. Note If the paper tears, check to make sure there are no remaining shreds in the machine. Push the tray in gently until it stops. ® ® 13-53 Xerox WorkCentre 5022/5024 Multifunction Printer User Guide... -
Page 328: Paper Jams In The Tray 5 (Bypass)
If multiple sheets of paper were loaded, align the corners of the removed paper. Insert the paper with the side to print on facing down, aligning it so that its leading edge lightly contacts the paper feed entrance. 13-54 ® ® Xerox WorkCentre 5022/5024 Multifunction Printer User Guide... -
Page 329: Document Jams
Pull up the front handle of the document feeder cover, and open the document feeder cover completely. Note The cover will remain fixed in position when fully opened. Open the cover slowly. ® ® 13-55 Xerox WorkCentre 5022/5024 Multifunction Printer User Guide... - Page 330 If you cannot find the document in Step 6, lift up the document feeder tray and remove the document. Carefully move the document feeder tray back into position. 13-56 ® ® Xerox WorkCentre 5022/5024 Multifunction Printer User Guide...
- Page 331 Note Torn, wrinkled or folded document pages can cause document jams or damage. Always copy torn, wrinkled or folded documents by placing them directly on the document glass. ® ® 13-57 Xerox WorkCentre 5022/5024 Multifunction Printer User Guide...
- Page 332 Problem Solving 13-58 ® ® Xerox WorkCentre 5022/5024 Multifunction Printer User Guide...
-
Page 333: Appendix
This chapter describes the machine specifications, optional components, and notes and restrictions. Specifications This section lists the main specifications of the machine. Note that the specifications and the appearance of the product may change without prior notice. ® ® 14-1 Xerox WorkCentre 5022/5024 Multifunction Printer User Guide... -
Page 334: Basic Functions/Copy Functions
Tray 2 to 4 (optional): 60 - 216 gsm Tray 5 (bypass): 60 - 216 gsm Note: Use paper recommended by Xerox. Copying may not be performed correctly depending on the conditions. First Copy Output Time Document glass: 7.2 sec. or less (A4 Document feeder: 11 sec. - Page 335 Continuous 2 Sided copy/same magnification , B5 17 sheets/minute 8.7 sheets/minute 7.2 pages/minute 7.9 sheets/minute 8.6 sheets/minute WorkCentre 5022 Paper Trays 1 to 4: Continuous 1 Sided copy/same magnification , B5 22 sheets/minute 15 sheets/minute A3, B4, B5: 12 sheets/minute...
- Page 336 37 kg (with document feeder) Note: Toner cartridge is not included. Space Requirement Width 947 mm × Depth 573 mm (with document feeder) Note: When Tray 5 (bypass) is fully extended. 14-4 ® ® Xerox WorkCentre 5022/5024 Multifunction Printer User Guide...
-
Page 337: Print Functions
Microsoft Windows ® ® Microsoft Windows Server 2012 x64 Edition For information about the latest supported OS, refer to the Xerox Web site. Connectivity Standard: USB 1.1/2.0, TWAIN, Optional: Ethernet 100BASE-TX/10BASE-T Scan Functions (Local) Type Color Scanner Original Paper Size... - Page 338 8-bit input / 8-bit output for each RGB color Monochrome: 1-bit output Monochrome: 18 sheets/minute Scanning Speed* Color: 4 sheets/minute With a standard Xerox document (A4 ), at 200 dpi, using TWAIN driver (USB) Scan to PC Driver TWAIN/WIA (TWAIN/ Operating ® ®...
-
Page 339: Scan Functions (Network)*1 (Optional)
8-bit input / 8-bit output for each RGB color Monochrome: 1-bit output Monochrome: 18 sheets/minute Scanning Speed Color: 4 sheets/minute With a standard Xerox document (A4 ), at 200 dpi, using TWAIN driver (USB) Connectivity Standard: Ethernet 100BASE-TX/10BASE-T Scan to PC Protocol TCP/IP (SMB) (Network: Operating ®... -
Page 340: Fax Functions (Optional)
Feeding Speed WorkCentre 5024 24 sheets/minute (A4 , 1 Sided) 13 pages/minute (A4 , 2 Sided) WorkCentre 5022 22 sheets/minute (A4 , 1 Sided) 13 pages/minute (A4 , 2 Sided) Dimensions/Weight Width 540 × Depth 492 × Height 115 mm, 7 kg 14-8 ®... -
Page 341: Duplex Output Unit (Optional)
Same as the Basic Functions/Copy Functions Paper Weight 500 sheets x 2 trays Note: When using 80 gsm paper. Dimensions/ Width 540 × Depth 523 × Height 290 mm, 31 kg Weight ® ® 14-9 Xerox WorkCentre 5022/5024 Multifunction Printer User Guide... -
Page 342: Printable Area
The actual printable area may vary depending on the printer (plotter) and control language. 4 mm Unprintable area Printable area/ 4 mm 4 mm Guaranteed print area 4 mm Paper feed direction 14-10 ® ® Xerox WorkCentre 5022/5024 Multifunction Printer User Guide... -
Page 343: Optional Components
Tray Module is installed. Tray Lock Locks the trays on the machine. Notes • The optional components are subject to change without notice. • For the latest information, contact our Customer Support Center. ® ® 14-11 Xerox WorkCentre 5022/5024 Multifunction Printer User Guide... -
Page 344: Notes And Restrictions
Depending on the type of used media, pinch roller marks and minute scratches may form in the scanning direction. • Line unevenness may occur along the scanning direction in high-volume printing in low-humidity environments. 14-12 ® ® Xerox WorkCentre 5022/5024 Multifunction Printer User Guide... -
Page 345: Notes And Restrictions On The Use Of The Copy Feature
When the print results differ from the settings As in the following cases, insufficient memory for the print page buffer may cause print result in not printing as specified. ® ® 14-13 Xerox WorkCentre 5022/5024 Multifunction Printer User Guide... -
Page 346: Notes And Restrictions On The Use Of The Scan Feature
• Network settings (such as the workgroup names, server names and shared names) displayed in lists may not be displayed alphabetically. 14-14 ® ® Xerox WorkCentre 5022/5024 Multifunction Printer User Guide... -
Page 347: Notes And Restrictions On The Use Of The Fax Feature
Address Book ® ® • When registering addresses using Xerox CentreWare Internet Services, we recommend using an Ethernet crossover cable to connect the machine to your computer to protect your e-mail address might be intercepted on the network since the machine does not support SSL. -
Page 348: Notes And Restrictions When Connecting To Internet Or Intranet
It is required to match the both language settings. ® • The tabs may not be displayed correctly when there are several browsers to access to Xerox ® CentreWare Internet Services at the same time or condition of the network. In this case, refresh the display. -
Page 349: Notes And Restrictions For Using Tcp/Ip (Lpd/Port9100)
In this case, specify the fixed IPv4/IPv6 address on the host and set the same address on the machine as the address to be permitted the communication. ® ® 14-17 Xerox WorkCentre 5022/5024 Multifunction Printer User Guide... -
Page 350: Notes And Restrictions For Ipv6 Connection
In an IPv6 network environment without a DNS server, authentication fails when a computer name is specified in the SMB server settings for SMB authentication. Specify an IPv6 address directly as the authentication server's computer name. 14-18 ® ® Xerox WorkCentre 5022/5024 Multifunction Printer User Guide... -
Page 351: Fax Activity Report
For information on how to print the fax activity report, refer to Printing Reports/Lists on page 10-7. ® ® 14-19 Xerox WorkCentre 5022/5024 Multifunction Printer User Guide... -
Page 352: Sent
"Cancelled" indicates that the user cancelled the job. • The Remote ID is the phone number sent by the recipient. • "XXX-XXX" indicates an error code. Total The total number of pages sent. 14-20 ® ® Xerox WorkCentre 5022/5024 Multifunction Printer User Guide... -
Page 353: Received
Polling (incoming Remote Polling), Forward (forwarded fax), [blank] (normal transmission) Result The transmission result. Done (normal end), XXX-XXX (transmission error) "XXX-XXX" indicates an error code. Total The total number of pages received. ® ® 14-21 Xerox WorkCentre 5022/5024 Multifunction Printer User Guide... - Page 354 Appendix 14-22 ® ® Xerox WorkCentre 5022/5024 Multifunction Printer User Guide...
- Page 355 14-3 fax functions, 14-8 continuous copy speed, 14-3 fax kit, 14-11 continuous print speed, 14-5 feeding speed, 14-8 control panel, 3-2, 3-11 file format, 7-20 control panel language, 9-4 ® ® Xerox WorkCentre 5022/5024 Multifunction Printer User Guide...
- Page 356 2-35 power switch, 3-4 managing the copy paper with accounting, 5-24 print driver, 2-37 memory, 14-2 installing, 2-37 Multiple Account mode, 3-20 uninstalling, 2-38 print functions, 14-5 print resolution, 14-5 ® ® Xerox WorkCentre 5022/5024 Multifunction Printer User Guide...
- Page 357 Single Account mode, 3-20 Sleep mode, 3-9 SMB, 2-11 warm-up time, 14-2 SMTP server, 2-28 SMTP server settings, 2-13 SNMP, 2-11 SNMP configuration, 2-24 Xerox® CentreWare® Internet Services, 2-19 space requirement, 14-4 specifications, 14-1 ® ® Xerox WorkCentre 5022/5024 Multifunction Printer...
-
Page 358: Index
Index ® ® Xerox WorkCentre 5022/5024 Multifunction Printer User Guide...