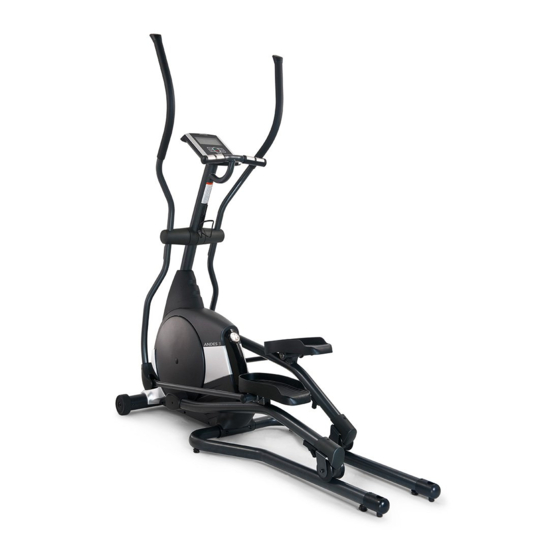
Horizon Fitness andes 3 Assembly Manual
Hide thumbs
Also See for andes 3:
- Operation manual (116 pages) ,
- Assembly manual (24 pages) ,
- Owner's manual (22 pages)
Table of Contents
Advertisement
Available languages
Available languages
Advertisement
Table of Contents

Related Manuals for Horizon Fitness andes 3


Summary of Contents for Horizon Fitness andes 3
- Page 1 ANDES 3 ASSEMBLY GUIDE AUFBAUANLEITUNG GUIDE DE MONTAGE MONTAGEHANDLEIDING...
- Page 2 ENGLISH DEutScH fraNçaIS NEDErLaNDS...
- Page 3 aSSEMBLY WARNING there are several areas during the assembly process that special attention must be paid. It is very important to follow the assembly instructions correctly and to make sure all parts are firmly tightened. If the assembly instructions are not followed correctly, the elliptical could have frame parts that are not tightened and will seem loose and may cause irritating noises.
- Page 4 CONSOLE HANDLEBAR SET PULSE GRiPS WARNING ANDES 3 BOTTLE HOLDER Consult a physician prior to using any exercise equipment. Possibility of serious injury if SHOWN equipment is used improperly. Heart rate monitoring systems may be inaccurate. Over exercise may result in serious injury or death.
-
Page 5: Tools Included
Please do not wipe this off. If you have difficulty, a light application of lithium bike grease is recommended. 1 Power cord 1 Bottle Holder (only andes 3) NEED HELP? If you have questions or if there are any missing parts, contact customer tech Support. -
Page 6: Assembly Step
(2) using 4 PRE-INSTALLED WASHERS (A) , 4 SPRING WASHERS (M) and SCREWS (B). remove the 2 PRE-INSTALLED SCREW (L) from the CONSOLE MAST (1). (Only andes 3) attached BOTTLE HOLDER (7) to cONSOLE MaSt (1) using 2 PrE-INStaLLED ScrEW (L). - Page 7 STEP 2 HARDWARE FOR PACKAGE 2 PART TYPE DESCRIPTION Φ16.0xΦ26.2x11.5T rING ANDES 3 Φ16.0xΦ25.0x1.5T WaSHEr SHOWN Φ8.2xΦ25.0x1.5T WaSHEr Φ8.2xΦ15.4x2.0T SPrING WaSHEr M8x1.25Px20L ScrEW cOVEr attach HANDLEBAR SET (3) onto CONSOLE MAST (1) using 1 RING (C), 2 WASHERS (D), 1 WASHER (E), 1 SPRING WASHER (F) and 1 SCREW (G), 1 COVER (H).
-
Page 8: Spring Washer
STEP 3 HARDWARE FOR PACKAGE 3 PART TYPE DESCRIPTION Φ8.2xΦ15.4x2.0T SPrING WaSHEr ANDES 3 M8x1.25Px70L-12L ScrEW SHOWN Φ8.2xΦ20.0x1.5T WaSHEr M8X1.25P attach the PEDAL ARM (6) onto HANDLEBAR SET (3) with 1 SCREW (I), 1 WASHER (J), 1 SPRING WASHER (F) and 1 NUT (K). -
Page 9: Folding Instruction
FOLDING INSTRUCTION FOLD UP INSTRUCTION to position the footpad wheel in the proper position. for ease of folding, position right or left footpad wheel located in the Ideal folding area (see below picture 1). rotate the pedal arm and place footpad wheel like picture 2 or picture 3. to grip the handle (picture 4). - Page 10 UNFOLDING INSTRUCTION FOLD DOWN INSTRUCTION to grip the handle, push forward gently. Pull up on the handle to release. Pull back to fold down. HANDLE...
- Page 11 MOVING THE ELLIPTICAL WARNING! Our ellipticals are heavy, use care and additional help if necessary when moving. failure to follow instructions could result in injury.
- Page 12 DEutScH...
-
Page 13: Montage
MONtaGE WARNUNG Es gibt mehrere Bereiche, auf die während des Montagevorgangs besonders geachtet werden muss. Das korrekte Befolgen der Montageanleitung ist sehr wichtig und es muss sichergestellt werden, dass alle teile sicher befestigt wurden. Wenn die Montageanleitung nicht korrekt befolgt wird, sitzen rahmenteile des Elliptical trainers ggf. nicht fest, erscheinen lose und führen unter umständen zu irritierenden Geräuschen. - Page 14 KONSOLE HANDGRIFFSATZ PULSGRIFFE WARNING BOTTLE HOLDER Consult a physician prior to using ANDES 3 any exercise equipment. Possibility of serious injury if aBGEBILDEt equipment is used improperly. Heart rate monitoring systems may be inaccurate. Over exercise may result in serious injury or death.
-
Page 15: Wichtige Hinweise
1 Bedienungsanleitung vorgeschmiert. Wischen Sie dieses Schmiermittel nicht ab. Wenn 1 Netzkabel Probleme auftreten, wird das auftragen von etwas Lithiumfett 1 flaschenhalter (nur andes 3) empfohlen. BRAUCHEN SIE HILFE? Wenden Sie sich bei fragen oder fehlenden teilen an den technischen Kundendienst (customer tech Support). - Page 16 4 VORINSTALLIERTEN UNTERLEGSCHEIBEN (A), 4 FEDERSCHEIBES (M) und 4 SCHRAUBEN (B). Entfernen Sie die 2 VORINSTALLIERTEN SCHRAUBEN (L) vom KONSOLENMAST (1). (Nur andes 3) Befestigen Sie den FLASCHENHALTER (7) mit 2 VOrINStaLLIErtEN ScHrauBEN (L) am KONSOLENMaSt (1). (Nur andes 3)
- Page 17 MONtaGESCHRITT 2 BESCHLAGTEILE FÜR PAKET 2 TEIL BESCHREIBUNG MENGE Φ16,0xΦ26,2x11,5T rING Φ16,0xΦ25,0x1,5T ANDES 3 uNtErLEGScHEIBE aBGEBILDEt Φ8,2xΦ25,0x1,5t uNtErLEGScHEIBE Φ8,2xΦ15,4x2,0T fEDErScHEIBE M8x1,25Px20L ScHrauBE aBDEcKuNG Befestigen Sie den ARMSTANGENSATZ (3) auf dem KONSOLENMAST (1), und verwenden Sie hierzu 1 RING (C), 2 UNTERLEGSCHEIBEN (D), 1 UNTERLEGSCHEIBE (E), 1 FEDERSCHEIBE (F) und 1 SCHRAUBE (G), 1 ABDECKUNG (H).
- Page 18 MONtaGESCHRITT 3 BESCHLAGTEILE FÜR PAKET 3 TEIL BESCHREIBUNG MENGE Φ8,2xΦ15,4x2,0T fEDErScHEIBE ANDES 3 M8x1,25Px70L-12L ScHrauBE aBGEBILDEt Φ8,2xΦ20,0x1,5T uNtErLEGScHEIBE MuttEr M8X1,25P Befestigen Sie den PEDALARM (6) an dem ARMSTANGENSATZ (3), verwenden Sie hierzu 1 SCHRAUBE (I), 1 UNTERLEGSCHEIBE (J), 1 FEDERSCHEIBE (F) und 1 MUTTER (K).
- Page 19 ZUSAMMENKLAPPANWEISUNG ZUSAMMENKLAPPANWEISUNG Zur Positionierung des Pedalrads in der richtigen Position. Positionieren Sie das rechte oder linke Pedalrad für ein einfaches Klappen im idealen Klappbereich (siehe nachstehende abbildung 1). Drehen Sie den Pedalarm und bringen Sie das Pedalrad in eine Stellung wie in abbildung 2 oder 3 gezeigt. Zum umfassen des Griffs (abbildung 4).
- Page 20 AUFKLAPPANWEISUNG AUFKLAPPANWEISUNG Drücken Sie zum Greifen des Griffs leicht nach vorn. Zum freigeben den Griff nach oben ziehen. Zum Herunterklappen den Griff nach hinten ziehen. GRIFF...
- Page 21 TRANSPORT DES ELLIPTICAL TRAINERS WARNUNG! unsere Elliptical trainer sind schwer; gehen Sie beim transport vorsichtig vor und holen Sie bei Bedarf Hilfe hinzu. Eine Nichtbeachtung dieser anweisungen kann Verletzungen zur folge haben.
- Page 22 fraNçaIS...
- Page 23 MONtaGE AVERTISSEMENT Le processus de montage comporte certaines étapes au cours desquelles il faut faire particulièrement attention. Il est indispensable de respecter scrupuleusement les instructions de montage et de s’assurer que toutes les pièces sont bien serrées. En cas de non-respect des instructions, certaines parties du châssis du vélo elliptique pourraient être mal serrées, bouger et causer des bruits gênants.
- Page 24 CONSOLE GUIDON CAPTEURS TACTILES WARNING ANDES 3 BOTTLE HOLDER Consult a physician prior to using any exercise equipment. Possibility of serious injury if equipment is used improperly. Heart rate monitoring systems D’ENSEMBLE may be inaccurate. Over exercise may result in serious injury or death.
-
Page 25: Avant Le Montage
N’essuyez pas ces pièces pour essayer d’ôter le 1 porte-bouteille (disponible uniquement lubrifiant. En cas de difficulté, appliquez une fine couche de graisse sur andes 3) au lithium pour vélos. BESOIN D’AIDE ? Pour toute question ou si une pièce est manquante, contactez l’assistance technique. - Page 26 (A), 4 RONDELLE ÉLASTIQUES (M) et 4 VIS PRÉMONTÉES (B). retirez les 2 VIS PRÉMONTÉES (L) du SUPPORT DE LA CONSOLE (1) (disponible uniquement sur andes 3). fixez le PORTE-BOUTEILLE (7) au SuPPOrt DE La cONSOLE (1) au moyen des 2 VIS PrÉMONtÉES (L) (disponible uniquement...
- Page 27 SACHET DE VISSERIE POUR ÉTAPE DE MONTAGE 2 PIÈCE TYPE DESCRIPTION QTÉ Φ16,0 x Φ26,2 x 11,5 T BaGuE ANDES 3 Φ16,0 x Φ25,0 x 1,5 T rONDELLE D’ENSEMBLE Φ8,2xΦ25,0x1,5t rONDELLE rONDELLE ÉLaStIQuE Φ8,2 x Φ15,4 x 2,0 T M8 x 1,25 P x 20 L...
- Page 28 SACHET DE VISSERIE POUR ÉTAPE DE MONTAGE 3 PIÈCE TYPE DESCRIPTION QTÉ rONDELLE ÉLaStIQuE Φ8,2 x Φ15,4 x 2,0 T ANDES 3 M8 x 1,25 P x 70 L - 12 L D’ENSEMBLE Φ8,2 x Φ20,0 x 1,5 T rONDELLE ÉcrOu M8 X 1,25 P fixez le BRAS DE LA PÉDALE (6) au GUIDON (3)
- Page 29 PLIAGE DU VÉLO ELLIPTIQUE PLIER LE VÉLO ELLIPTIQUE comment plier la roue de la pédale correctement. Pour faciliter le pliage du vélo, placez la roue de la pédale droite ou gauche dans la zone de pliage idéale (voir figure 1 ci-dessous). tournez le bras de la pédale et placez la roue de la pédale comme illustré...
- Page 30 DÉPLIAGE DU VÉLO ELLIPTIQUE DÉPLIER LE VÉLO ELLIPTIQUE Poussez doucement la poignée vers l’avant et saisissez-la. tirez la poignée vers le haut pour la déverrouiller. tirez la poignée vers l’arrière et dépliez le vélo. POIGNÉE...
- Page 31 TRANSPORT DU VÉLO ELLIPTIQUE ATTENTION ! Les vélos elliptiques sont très lourds, soyez prudent et appelez quelqu’un pour vous aider à transporter votre appareil si nécessaire. Le non-respect de ces instructions peut provoquer des blessures.
- Page 32 NEDErLaNDS...
- Page 33 MONtaGE WAARSCHUWING Er zijn enkele bijzondere aandachtspunten waarmee u tijdens het monteren van dit product rekening moet houden. Het is erg belangrijk dat u de montage-instructies nauwkeurig opvolgt en ervoor zorgt dat alle onderdelen stevig aangespannen zijn. als u de montage-instructies niet correct volgt, kan het zijn dat niet alle frameonderdelen van de elliptical trainer aangespannen zijn, waardoor ze los lijken te zitten en irriterende geluiden kunnen veroorzaken.
- Page 34 CONSOLE HANDGREEPSET HANDGREPEN MET SENSOR WARNING BOTTLE HOLDER Consult a physician prior to using ANDES 3 any exercise equipment. Possibility of serious injury if afGEBEELD equipment is used improperly. Heart rate monitoring systems may be inaccurate. Over exercise may result in serious injury or death.
-
Page 35: Belangrijke Opmerkingen
Veeg deze onderdelen niet 1 netsnoer schoon. Indien u moeilijkheden ondervindt bij het ineenzetten van het 1 bidonhouder (alleen bij andes 3) toestel, raden we u aan om fietsolie op lithiumbasis aan te brengen. HULP NODIG? Hebt u vragen of ontbreken er onderdelen, neem dan contact op met onze technische klantendienst. - Page 36 GEÏNSTALLEERDE SLUITRINGEN (A), 4 VEERRING (M) EN 4 SCHROEVEN (B). Verwijder de 2 VOORAF GEÏNSTALLEERDE SCHROEVEN (L) van de CONSOLEMAST (1). (alleen bij andes 3) Monteer de BIDONHOUDER (7) op de cONSOLEMaSt (1) met behulp van de 2 VOOraf GEÏNStaLLEErDE ScHrOEVEN (L).
- Page 37 MONtaGESTAP 2 GEREEDSCHAP VOOR PAKKET 2 ONDERDEEL TYPE BESCHRIJVING AANTAL Φ16,0xΦ26,2x11,5T rING ANDES 3 Φ16,0xΦ25,0x1,5T SLuItrING afGEBEELD Φ8,2xΦ25,0x1,5 SLuItrING Φ8,2xΦ15,4x2,0T VEErrING M8x1,25Px20L ScHrOEf Bevestig de HANDGREEPSET (3) op de CONSOLEMAST (1) met behulp van de 1 RING (C), 2 SLUITRINGEN (D), 1 SLUITRING (E), 1 VEERRING (F), 1 SCHROEF (G) en 1 KAP (H).
- Page 38 MONtaGESTAP 3 GEREEDSCHAP VOOR PAKKET 3 ONDERDEEL TYPE BESCHRIJVING AANTAL Φ8,2xΦ15,4x2,0T VEErrING ANDES 3 M8x1,25Px70L-12L ScHrOEf afGEBEELD Φ8,2xΦ20,0x1,5T SLuItrING MOEr M8X1,25P Bevestig de PEDAALARM (6) op de HANDGREEPSET (3) met behulp van 1 SCHROEF (I), 1 SLUITRING (J), 1 VEERRING (F) en 1 MOER (K).
- Page 39 HET TOESTEL DICHTKLAPPEN HET TOESTEL DICHTKLAPPEN Zet het voetsteunwiel in de juiste stand. Plaats het linker- of het rechterwiel van de voetsteun in de 'ideale opbergplek' (zie onderstaande afbeelding 1). Draai de pedaalarm en plaats het wiel van de voetsteun zoals weergegeven in afbeelding 2 of 3. Grijp de handgreep vast (afbeelding 4).
- Page 40 HET TOESTEL OPENKLAPPEN HET TOESTEL OPENKLAPPEN Grijp de handgreep vast en duw voorzichtig naar voren. trek aan de handgreep om het toestel te ontgrendelen. trek de handgreep naar achteren om het toestel open te klappen. HANDGREEP...
- Page 41 DE ELLIPTICAL TRAINER VERPLAATSEN WAARSCHUWING! Onze elliptical trainers zijn zwaar; wees voorzichtig en vraag indien nodig hulp bij het verplaatsen van het toestel. Doet u dit niet, dan kan dit verwondingen veroorzaken.
- Page 42 ANDES 3 EXPLODED VIEW R12 R09 J04x2 R18x2 B38x4 P05x4 B44x4 B37x4 Q05x6 Q05x2 S03x4 Q06x3 P07x3 B30 B31 B39x2 B36x2 J08 J09 B26x2 B43x2 B45x2...
- Page 43 ANDES 3 PARTS LIST DEScrIPtION DEScrIPtION WASHER;FLAT;Φ8.2xΦ20.0x1.5T;BL ZN;RO cONSOLE MaSt SEt;SEMI-aSSY;EP593-2KM; WASHER;FLT;Φ12.0xΦ25.0x1.5T;TFN; fraME SEt;SEMI-aSSY;BacK;EP593-2KM;Sa SCREW;SPECIAL;M8x10L/Φ10x41L;MACHINE THR PEDaL arM SEt;SEMI-aSSY;LEft;EP593-2KM COVER;HAND ARM;ABS/PA757K;Q520-7-3;EP5 PEDaL arM SEt;SEMI-aSSY;rIGHt;EP593-2K COVER;CRANK;HIPS;Q520-7-3;EP580-2KM; arM rESt SEt;SEMI-aSSY;LEft;EP593-2KM; SCREW;BH;M5x0.8Px8L;CT;PH;BZN; arM rESt SEt;SEMI-aSSY;rIGHt;EP593-2KM SCREW;SH;M10x60L-22L;HS;BED;G12.9; LINK arM SEt;SEMI-aSSY;LEft;EP593-2KM; NUT;M10x1.5P;G10;BLACK ANNODIZED; PEDaL arM SEt;SEMI-aSSY;rIGHt;EP593-2K WASHER;FLAT;Φ10.2xΦ15.0x1.5T;BL ZN;ROH...
- Page 44 DEScrIPtION DEScrIPtION CLIP;STANDARD;WUSN-4039; RING;Rubber;Φ26.2xΦ16.20x11.50; Screw;BH;M8x70L-12L;HS;G8.8;BZN;BP; BracKEt SIDE cOVEr SCREW;TRHW;Φ4x15L;TC;PH;BED;POT;GRE Washer;Flat;Φ8.2xΦ20.0x1.5T;BL Zn;Ro Washer;Spring Lock;Φ10.2xΦ18.4x2.5T; Black Oxide fIXING PILLar;JHt;tM81; COVER;CONSOEL MAST;FRONT;HIPS;Q520-7-3; COVER;CONSOEL MAST;BACK;HIPS;Q520-7-3;E SCREW;BH;£P4x20L;TC;PH;BZN;F-T/FLT;G4. BELT;POLY-V;420-J8;GATES; SCREW;EB;1/4-20UNCx55L;BZN; NUT;HEx;M12x1.75Px10T;SS41;BLACK ZINC;G8 NUT;NLK;1/4''-20UNC;BZN; FIx PLATE;EYE BOLT;SPC;1.3T;AB01 SCREW;BH;M6x1.0Px15L;MT;HS;G8.8;BAN;BP; WASHER;FLAT;Φ6.2xΦ30.0x1.5T;BL ZN;RO ECB CONTROLLER;INTERNAL;6.5KG/10V;BOTHWA WASHER;FLAT;Φ12.5xΦ20.0x2.0T; ECB SET;INTERNAL;ERP 0.5W; STEEL ROPE;160 L1+L2=65;EP525; SCREW;BH;Φ4x12L;TC;PH;BAN;POT SafEtY LaBEL;cE;EP593-2KM Nut;NYLON;M8X1.25P;BLacK ZINc;...
- Page 46 Andes 3 Montageanleitung Ver. 1.2 | © 2015 Johnson Health Tech Hergestellt in China Andes 3 Guide de montage Rév. 1.2 | © 2015 Johnson Health Tech Fabriqué en Chine Montagehandleiding Andes 3 revisie 1.2 | © 2015 Johnson Health Tech Made in Chin...
- Page 47 ANDES 3 OPERATION GUIDE BEDIENUNGSANLEITUNG GUIDE DE FONCTIONNEMENT GEBRUIKERSHANDLEIDING...
- Page 48 ENGLISH DEutScH fraNçaIS NEDErLaNDS...
-
Page 49: Elliptical Operation
ELLIPtIcaL OPEratION this section explains how to use your elliptical’s console and programming. the BaSIc OPEratION section in the ELLIPtIcaL GuIDE has instructions for the following: • LOCATION OF THE ELLIPTICAL • POWER/GROUNDING INSTRUCTIONS • FOOT POSITIONING • MOVING THE ELLIPTICAL •... - Page 50 ANDES 3...
- Page 51 ANDES 3 CONSOLE OPERATION Note: there is a thin protective sheet of clear plastic on the overlay of the console that should be removed before use. LCD DISPLAy WINDOWS: time, Distance, Speed, rPM, resistance Level, Heart rate, calories, Watts, Hr Wheel, resistance Profile.
- Page 52 ANDES 3 ANDES 3 DISPLAy WINDOWS • TIME: Shown as minutes : seconds. View the time rate. the change Display button switches between your remaining or the time elapsed in your workout. MaXIMuM HEart ratE and your current HEart ratE. the MaXIMuM HEart ratE is calculated as (220-age).
-
Page 53: Getting Started
GETTING STARTED QUICK START 1) Make sure the power is on. 2) Press Start / StOP to start exercise in MaNuaL mode. 3) Press to adjust resistance level during the workout. START yOUR WORKOUT 1) Select guest / user1 / user2 / user3 / user4. 2) Select your weight. -
Page 54: Program Information
PROGRAM INFORMATION Andes 3: 10 programs (Manual, Intervals, Game, Weight Loss, rolling, reverse train, random, constant Watts, tHr Zone, custom) 1) MANUAL: allows you to adjust the resistance level to your preference, without a preset program. adjust your resistance manually during your workout. user sets time and resistance using (up/down arrow) and ENtEr. -
Page 55: Heart Rate Training
9) THR ZONE: Simulate the intensity of your favorite sport as the program resistance automatically adjusts to maintain a set target Heart rate range. (Suggest to use chest belt with this program. You may purchase chest belt separately from your dealer) 1) Select tHr Zone program using and press ENtEr. -
Page 56: Program Charts
PROGRAM CHARTS Intervals Warm up Program Segments - repeat cool Down Seconds Level Weight Loss Warm up Program Segments - repeat cool down Seconds Level... - Page 57 Rolling Warm up Program segments - repeat cool Down Seconds Level Reverse Train Seconds Warm up cool down Level...
- Page 58 Random Warm up Program Segments - repeat cool Down Seconds Level target Heart Workout Example tHr Your recommended for rate Zone Duration Zone (age 30) tHr Zone VErY HarD fit persons and for athletic < – 100% training – HarD Shorter workouts –...
-
Page 59: Using Your Media Player
USING yOUR MEDIA PLAyER 1) connect the included auDIO aDaPtOr caBLE to the auDIO IN JacK on the console and the headphone jack on your media player. 2) use your media player buttons to adjust song settings. 3) remove the auDIO aDaPtOr caBLE when not in use. ENERGy SAVER MODE this machine is equipped with Energy Saver mode. - Page 60 DEutScH...
- Page 61 ELLIPtIcaL traINEr BEDIENuNG In diesem Kapitel wird beschrieben wie Sie die Konsole Ihres Elliptical trainers bedienen und das Gerät programmieren. Das Kapitel GruNDLEGENDEr BEtrIEB in der ELLIPtIcaL traINEr-aNLEItuNG enthält anweisungen für folgendes: • AUFSTELLORT DES ELLIPTICAL TRAINERS • ANWEISUNGEN ZU NETZANSCHLUSS/ERDUNG •...
- Page 62 ANDES 3...
- Page 63 BEDIENUNG DER ANDES 3-KONSOLE Hinweis: an der Oberseite der Konsole befindet sich eine dünne Schutzschicht aus durchsichtigem Kunststoff, die vor der Benutzung entfernt werden muss. LCD-ANZEIGEFENSTER: Zeit, Entfernung, Geschwindigkeit, uPM (umdrehung pro Minute), Widerstandsstufe, Herzfrequenz, Kalorien, Watt, Hr-rad, Widerstandsprofil. ENERGIESPARMODUS: Zur Minimierung des Energieverbrauchs wechselt Ihr Gerät automatisch in den...
- Page 64 ANDES 3 ANDES 3 DISPLAy-FENSTER • • ZEIT: angezeigt in Minuten : Sekunden. Sie können die verbleibende HERZFREQUENZRAD: Zeigt Ihren aktuellen aktivitätsbereich oder vergangene Zeit für Ihr training anzeigen. während des trainings an. Mit dem Herzfrequenzrad können Sie kontrollieren, dass Ihr Übungsniveau Ihrem trainingsziel entspricht.
- Page 65 AUFNEHMEN DES TRAININGS SCHNELLSTART 1) Vergewissern Sie sich, dass das Gerät eingeschaltet ist. 2) Drücken Sie Start/StOP , um Ihr training im MaNuELLEN Modus zu beginnen. 3) Drücken Sie , um das Widerstandsniveau während des trainings einzustellen. BEGINNEN IHRES TRAININGS 1) Wählen Sie guest / user1 / user2 / user3 / user4.
- Page 66 PROGRAMM-INFORMATIONEN Andes 3: 10 Programme (Manuell, Intervall, Spiel, Gewichtsreduzierung, ausdauer, reverse training, Zufall, Watt, Zielherzfrequenzbereich, Benutzerdefiniert) 1) MANUELL: Ermöglicht Ihnen die Einstellung des Widerstandsniveaus nach Ihren Wünschen ohne voreingestelltes Programm. Passen Sie Ihren Widerstand während des trainings manuell an. Der Benutzer stellt Zeit und Widerstand mittels der (Pfeiltasten auf/ab) und ENtEr ein.
- Page 67 9) ZIELHERZFREQUENZBEREICH: Simulieren Sie die Intensität Ihres Lieblingssports bei automatischer anpassung des Programmwiderstands zur Beibehaltung eines festgelegten Zielherzfrequenzbereichs. (Es wird empfohlen, bei diesem Programm einen Brustgurt zu verwenden. Der Brustgurt ist separat bei Ihrem Händler erhältlich.) 1) Wählen Sie mittels und durch Drücken von ENtEr das Programm Zielherzfrequenz-Bereich.
- Page 68 PROGRAMMTABELLEN Intervall aufwärmen Programmsegmente – Wiederholen abkühlen Sekunden 60 Level Gewichtsreduzierung aufwärmen Programmsegmente – Wiederholen abkühlen Sekunden 60 Level...
- Page 69 Ausdauer aufwärmen Programmsegmente – Wiederholen abkühlen Sekunden 60 Level Reverse Training Sekunden 60 aufwärmen abkühlen Level...
- Page 70 Zufall aufwärmen Programmsegmente – Wiederholen abkühlen Sekunden 60 Level Beispiel für Zielherzfrequenz- training Zielherzfrequenzbereich Zielherzfrequenz- Empfohlen für Bereich Dauer (alter 30) Bereich SEHr ScHWEr fitte Personen und für < – 100 % athletisches training – ScHWEr Kürzere trainingseinheiten – – –...
- Page 71 VERWENDUNG IHRES WIEDERGABEGERÄTS 1) Schließen Sie das mitgelieferte auDIOaDaPtErKaBEL an die auDIOEINGaNGSBucHSE an der Konsole und die Kopfhörerbuchse an Ihr Wiedergabegerät an. 2) Stellen Sie die gewünschten Songeinstellungen über die tasten Ihres Wiedergabegeräts ein. 3) Entfernen Sie das auDIOaDaPtErKaBEL, wenn dieses nicht verwendet wird. ENERGIESPARMODUS Dieses Gerät verfügt über einen Energiesparmodus.
- Page 72 fraNçaIS...
- Page 73 GuIDE D'utILISatION VÉLO ELLIPtIQuE cette section explique comment utiliser la console et la programmation de votre vélo elliptique. La section fONctIONNEMENt DE BaSE du GuIDE D’utILISatION Du VÉLO ELLIPtIQuE fournit les instructions suivantes : • EMPLACEMENT DE VOTRE VÉLO ELLIPTIQUE •...
- Page 74 ANDES 3...
- Page 75 ANDES 3 FONCTIONNEMENT DE LA CONSOLE remarque : avant utilisation, il faut enlever la fine pellicule protectrice en plastique transparente qui recouvre la console. FENêTRES D’AFFICHAGE À CRISTAUX LIQUIDES : time (Durée), Distance, Speed (Vitesse), rPM (tPM), Niveau de résistance, Heart rate (fréquence cardiaque), calories, Watts, affichage de la fréquence cardiaque dans un cercle, Profil de résistance.
- Page 76 ANDES 3 ANDES 3 FENêTRES D’AFFICHAGE • • TIME (DURÉE) : indiquée en minutes : secondes. affiche le temps CERCLE DE FRÉQUENCE CARDIAQUE : indique dans quel niveau d’entraînement écoulé ou restant. d’activité vous vous situez durant l’exercice. Vous pouvez vérifier si votre niveau d’exercice correspond à...
-
Page 77: Fin De L'entraînement
DÉMARRAGE DÉMARRAGE RAPIDE 1) Vérifiez que l’appareil est sous tension. 2) appuyez sur Start (DÉMarrEr)/StOP afin de débuter vos exercices en mode MaNuEL. 3) appuyez sur les touches pour régler le niveau de résistance durant l’entraînement. DÉMARRAGE DE L’ENTRAÎNEMENT 1) Sélectionnez Guest (Invité)/user (utilisateur) 1/2/3/4. 2) Sélectionnez votre poids. - Page 78 PROGRAMMES DISPONIBLES Andes 3 : 10 programmes : Manual (Manuel), Intervals (Intervalles), Game (Jeu), Weight Loss (Perte de poids), rolling (alternance), reverse train (Marche arrière), random (aléatoire), constant Watts (Watts constants), tHr Zone (Zone fcc), custom (Personnalisé). 1) MANUAL (MANUEL) : permet de régler le niveau de performance souhaité, sans préréglage du programme. adaptez votre résistance manuellement durant l’exercice.
- Page 79 9) THR ZONE (ZONE FCC) : permet de simuler le degré d’intensité de votre sport favori ; le programme règle automatiquement le niveau de résistance pour vous maintenir dans la plage de fréquence cardiaque cible. (une sangle thoracique peut être utilisée pour ce programme. Vous pouvez acheter séparément la sangle thoracique chez votre revendeur.) 1) Sélectionnez le programme tHr Zone (Zone fcc) à...
- Page 80 TABLEAUX DES PROGRAMMES Intervalles Échauffement Segments du programme - répétition récupération Secondes 60 Niveau Perte de poids Échauffement Segments du programme - répétition récupération Secondes 60 Niveau...
- Page 81 Alternance Échauffement Segments du programme - répétition récupération Secondes 60 Niveau Marche arrière Secondes 60 Échauffement récupération Niveau...
- Page 82 Aléatoire Échauffement Segments du programme- répétition récupération Secondes 60 Niveau Zone de Exemple de Durée de Votre fréquence zone de fcc recommandé pour l’entraînement zone de fcc cardiaque cible (âge : 30) trèS INtENSE Personnes en bonne condition < – 100 % physique et entraînements athlétiques –...
-
Page 83: Mode Économie D'énergie
UTILISATION DE VOTRE LECTEUR MULTIMÉDIA 1) connectez le cÂBLE D’aDaPtatEur auDIO fourni à la PrISE auDIO JacK située sur le côté gauche de la console et la prise jack du casque à votre lecteur. 2) Vous pouvez maintenant régler les paramètres de votre liste de lecture à l’aide des différents boutons de votre lecteur multimédia. 3) retirez le cÂBLE D’aDaPtatEur auDIO lorsque vous n’utilisez plus le lecteur. - Page 84 NEDErLaNDS...
- Page 85 uW ELLIPtIcaL traINEr GEBruIKEN In dit hoofdstuk leert u hoe u de console en programma's van uw elliptical trainer moet gebruiken. Het hoofdstuk BaSISGEBruIK van de HaNDLEIDING VOOr ELLIPtIcaL traINErS bevat instructies voor het volgende: • PLAATSING VAN DE ELLIPTICAL TRAINER •...
- Page 86 ANDES 3...
- Page 87 ANDES 3: DE CONSOLE GEBRUIKEN Opmerking: de console wordt geleverd met een dunne beschermfolie erop, die moet worden verwijderd vóór gebruik. LCD-BEELDSCHERM: met de velden time (tijd), Distance (afstand), Speed (snelheid), rPM (omwentelingen per minuut), resistance Level (weerstandsniveau), Heart rate (hartslag), calories (calorieën), Watts (watt), Hr-wiel (hartslagwiel), resistance Profile (weerstandsprofiel).
- Page 88 ANDES 3 ANDES 5 ANDES 3: BEELDSCHERM • TIME: wordt weergegeven als minuten: seconden. Geeft de uw MaXIMuM HEart ratE (maximale hartslag) en uw resterende tijd of de verlopen tijd van uw training weer. huidige HEart ratE (hartslag). De MaXIMuM HEart ratE wordt berekend als (220 min leeftijd).
- Page 89 AAN DE SLAG SNELLE START 1) controleer of de aan/uit-schakelaar op ON staat. 2) Druk op Start/StOP om te beginnen trainen in de MaNuaL-modus. 3) Druk op om tijdens de training het weerstandsniveau aan te passen. MET UW TRAINING VAN START GAAN 1) Selecteer guest / user1 / user2 / user3 / user4.
- Page 90 PROGRAMMAGEGEVENS Andes 3: 10 programma's (Manual, Intervals, Game, Weight Loss, rolling, reverse train, random, constant Watts, tHr Zone, custom) 1) MANUAL: hiermee kunt u zelf de weerstand van de training instellen, zonder gebruik te maken van een vooraf ingesteld programma. Pas tijdens uw training uw weerstand handmatig aan. Stel met behulp van de pijlen omhoog/omlaag de tijd en weerstand in en druk op ENtEr.
- Page 91 9) THR ZONE: simuleer de intensiteit van uw favoriete sport: dit programma past automatisch de weerstand aan om een vooraf ingesteld hartslagbereik te behouden. (We raden aan bij dit programma een borstriem te gebruiken. De borstriem is apart beschikbaar bij uw winkelier). 1) Selecteer met behulp van het tHr Zone-programma en druk op ENtEr.
- Page 92 PROGRAMMAGRAFIEKEN Intervallen Opwarming Programmasegmenten: aantal herhalingen afkoeling Seconden 60 Niveau Gewichtsverlies Opwarming Programmasegmenten: aantal herhalingen afkoeling Seconden 60 Niveau...
- Page 93 Rolling Opwarming Programmasegmenten: herhaling afkoeling Seconden 60 Niveau Reverse Train Seconden 60 Opwarming afkoeling Niveau...
- Page 94 Random Opwarming Programmasegmenten: aantal herhalingen afkoeling Seconden 60 Niveau Voorbeeld Duur Doelhartslagzone doelhartslagzone aanbevolen voor training doelhartslagzone (30-jarige) HEEL MOEILIJK Voor fitte personen en voor < Slagen per minuut 100% atletiektraining MOEILIJK Kortere trainingen – – Slagen per minuut GEMIDDELD Enigszins lange trainingen –...
- Page 95 UW MEDIASPELER GEBRUIKEN 1) Sluit de meegeleverde auDIO-aDaPtErKaBEL aan op de auDIO-INGaNG van de console en op de koptelefooningang van uw mediaspeler. 2) Gebruik de knoppen van uw mediaspeler om de instellingen van de muziek aan te passen. 3) Verwijder de auDIO-aDaPtErKaBEL wanneer niet in gebruik. ENERGy SAVER-MODUS Dit toestel is voorzien van een energiebesparende modus.
- Page 96 3 Bedienungsanleitung Ver. 1.3 | © 2015 Johnson Health tech Hergestellt in china andes 3 Guide de fonctionnement rév. 1.3 | © 2015 Johnson Health tech fabriqué en chine Gebruikershandleiding andes 3 revisie 1.3 | © 2015 Johnson Health tech Made in china...