Table of Contents
Advertisement
Quick Links
Advertisement
Table of Contents

Related Manuals for E-FLITE LR-1A Pogo 15e


Summary of Contents for E-FLITE LR-1A Pogo 15e
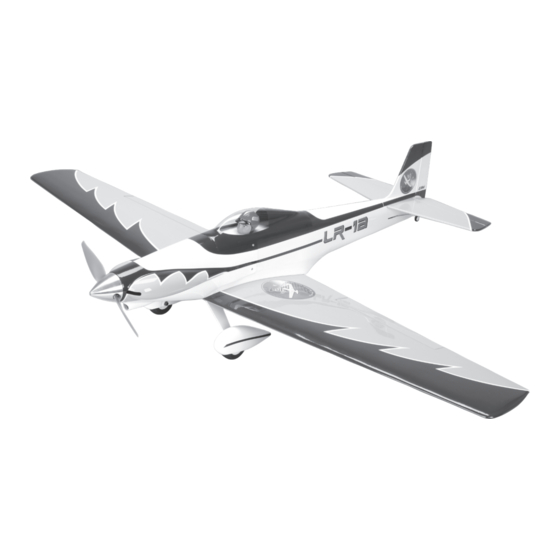
- Page 1 LR-1A Pogo 15e Assembly Manual...
-
Page 2: Table Of Contents
Preflight ............... 34 Do not attempt disassemble, use with incompatible Flying Your LR-1A Pogo 15e ......... 34 components or augment product in any way without For technical assistance with this product, please Range Test Your Radio .......... -
Page 3: Specifications
Mishandling of Li-Po batteries can result in fire and explosion causing serious injury and damage. SMALL PARTS This kit includes small parts and should not be left unattended near children as choking and serious injury could result. E-flite LR-1A Pogo 15e ARF Assembly Manual... -
Page 4: Important Information Regarding Warranty Information
Extension (2) ESC (EFLA1040) Battery: 3200mAh 3S 11.1V 30C Li-Po Battery (EFLB32003S30) Spinner: 2-inch Aluminum Spinner (EFLSP200) Propeller: 10 x 10E (APC10010E) The Spektrum trademark is used with permission of Bachmann Industries, Inc. E-flite LR-1A Pogo 15e ARF Assembly Manual... -
Page 5: Recommended Racing Setup
4. Place a T-pin in the center of each of the three hinges. This will center the hinges when installed in the aileron. 2. Remove the aileron from the wing panel. E-flite LR-1A Pogo 15e ARF Assembly Manual... - Page 6 8. Once the CA has fully cured. Gently pull on the aileron to make sure the hinges are secure. If any hinges are loose, reapply CA to the hinge. 10. Repeat Steps 1 through 9 to hinge the remaining aileron. E-flite LR-1A Pogo 15e ARF Assembly Manual...
-
Page 7: Joining The Wing Panels
If you have used epoxy to join the panels, use a paper towel and rubbing alcohol to remove any excess epoxy from the wing. Set the wing aside until the epoxy fully cures. E-flite LR-1A Pogo 15e ARF Assembly Manual... -
Page 8: Installing The Aileron Servo
Use low-tack tape to hold the mount to 1. Use a hobby knife with a #11 blade to remove the wing. the covering from the inside of the aileron servo mount as shown. E-flite LR-1A Pogo 15e ARF Assembly Manual... - Page 9 Use care not to drill holes through the bottom of the wing. When using a computer radio, it is recommended to start with a new model that has been reset to remove any sub-trims or programming. E-flite LR-1A Pogo 15e ARF Assembly Manual...
- Page 10 15. Use a piece of low-tack tape to keep the aileron centered when installing the linkage. E-flite LR-1A Pogo 15e ARF Assembly Manual...
- Page 11 Slide the silicone keepers over the forks of the clevis to keep them from accidentally opening in flight. 24. Disconnect the power and servo from the receiver and turn the transmitter off at this time. E-flite LR-1A Pogo 15e ARF Assembly Manual...
-
Page 12: Hinging The Elevators
3. Use sandpaper to roughen the ends of the joiner wire. This provides a surface for the epoxy to bond to when the joiner is installed. E-flite LR-1A Pogo 15e ARF Assembly Manual... - Page 13 9. Place the hinges in the stabilizer as shown. 7. Place a T-pin in the center of each of the four hinges. This will center the hinges when installed in the stabilizer. E-flite LR-1A Pogo 15e ARF Assembly Manual...
-
Page 14: Tail Wheel Installation And Hinging The Rudder
1. Separate the rudder from the fin. Set the hinges elevator to make sure the hinges are secure. If any aside at this time. hinges are loose, reapply CA to the hinge. E-flite LR-1A Pogo 15e ARF Assembly Manual... - Page 15 12mm sheet metal screw that holds the bracket in the tail wheel bracket in the slot. step. Make the holes 1/4-inch (6mm) deep. position. E-flite LR-1A Pogo 15e ARF Assembly Manual...
- Page 16 If any creates a tunnel for the CA to wick into, making hinges are loose, reapply CA to the hinge. a better bond between the hinge and surrounding wood. E-flite LR-1A Pogo 15e ARF Assembly Manual...
-
Page 17: Motor And Speed Control Installation
Do not glue the hinge at this time. aluminum spacers between the mount and firewall and use the 3mm x 18mm socket head bolts to provide the correct spacing for the cowling. E-flite LR-1A Pogo 15e ARF Assembly Manual... - Page 18 8. Tuck the wires neatly in the fuselage so they don’t interfere with the operation of the motor or installation of the cowling. 4. Slide the speed control into the fuselage with the battery wires going in first. E-flite LR-1A Pogo 15e ARF Assembly Manual...
-
Page 19: Cowling Installation
2. Slide the cowl on the fuselage. You will need to backplate on the motor shaft. flex the cowl to fit it over the wing fairing on the bottom of the fuselage. E-flite LR-1A Pogo 15e ARF Assembly Manual... - Page 20 2mm x 6mm sheet metal screws. (1.5mm) drill bit to drill through the top two holes Tighten the screws using a #1 Phillips screwdriver. in the cowl and into the fuselage. E-flite LR-1A Pogo 15e ARF Assembly Manual...
-
Page 21: Propeller And Spinner Installation
Use a 3/32-inch hex wrench or ball driver to tighten the screw that secures the spinner 1. Slide the spinner backplate and adapter on cone. the motor shaft. Then position the propeller on the adapter as shown. E-flite LR-1A Pogo 15e ARF Assembly Manual... - Page 22 exactly for the stabilizer to be in alignment. Remove the outline of the fuselage on the bottom of the the tape and move the stabilizer if necessary. stabilizer using a felt-tipped pen. E-flite LR-1A Pogo 15e ARF Assembly Manual...
-
Page 23: Rudder And Fin Installation
2. The fin keys into the fuselage at the front. It fits tightly against the stabilizer when installed. 11. Once the epoxy has fully cured, remove the wing from the fusealge. E-flite LR-1A Pogo 15e ARF Assembly Manual... - Page 24 4. Use a hobby knife with a new #11 blade to trim the covering 1/16-inch (1.5mm) inside the line drawn in the previous step. E-flite LR-1A Pogo 15e ARF Assembly Manual...
-
Page 25: Servo And Receiver Installation
2. Remove the servo from the fuselage. Use a pin vise and 1/16-inch (1.5mm) drill bit to drill the four holes for the servo mounting screws. E-flite LR-1A Pogo 15e ARF Assembly Manual... -
Page 26: Rudder And Elevator Linkage Connections
Plug the lead from the speed control into the 3-inch (76mm) servo extension. Route the servo leads so they are neatly tucked under the servo tray and won’t interfere with the operation of the aileron servo. E-flite LR-1A Pogo 15e ARF Assembly Manual... - Page 27 Tighten the screws using a #1 Phillips screwdriver. 7. Remove the horn and use a side cutter to remove the arms from the servo horn that will not be used. E-flite LR-1A Pogo 15e ARF Assembly Manual...
- Page 28 11. Remove the rudder pushrod from the fuselage. wire to the servo horn. Remove the nut and clevis from the pushrod wire. Set the nut and clevis aside for now. E-flite LR-1A Pogo 15e ARF Assembly Manual...
- Page 29 #1 Phillips screwdriver. 17 Repeat Steps 1 through 16 to connect the elevator pushrod wire. The positions and measurements for the elevator connections are the same as the rudder. E-flite LR-1A Pogo 15e ARF Assembly Manual...
-
Page 30: Battery And Wing Installation
3. Plug the aileron servo lead into the servo extension. Mount the wing following the procedure described earlier in this manual. E-flite LR-1A Pogo 15e ARF Assembly Manual... - Page 31 Always use threadlock on metal-to-metal fasteners location for the screw that secures the wheel pant to prevent them from vibrating loose. and wheel to the landing gear. 3. Slide the axle into the wheel. E-flite LR-1A Pogo 15e ARF Assembly Manual...
-
Page 32: Center Of Gravity
9. Repeat Steps 2 through 8 to install the remaining wheel and wheel pant on the landing gear. E-flite LR-1A Pogo 15e ARF Assembly Manual... -
Page 33: Control Throws
1/4-inch (6mm) 20% Exponential Down 1/4-inch (6mm) 20% Exponential Aileron high Rate 1/4-inch (6mm) 15% Exponential Down 3/16-inch (4.5mm) 15% Exponential Aileron Low Rate 3/16-inch (4.5mm) 15% Exponential Down 5/32-inch (4mm) 15% Exponential E-flite LR-1A Pogo 15e ARF Assembly Manual... -
Page 34: Preflight
Get used to using a lot of stick movement on your transmitter (on all axis’) and your ability to make smooth corrections and fly a faster line through the air will increase tremendously. E-flite LR-1A Pogo 15e ARF Assembly Manual... -
Page 35: Range Test Your Radio
6. Check that all trim levers are in the proper location. 7. All servo pigtails and switch harness plugs should be secured in the receiver. Make sure the switch harness moves freely in both directions. E-flite LR-1A Pogo 15e ARF Assembly Manual... -
Page 36: Warranty And Repair Policy
Horizon. Return of charge. Repair or replacement decisions are at the sole any goods by Purchaser must be approved in writing by discretion of Horizon Hobby. Horizon before shipment. E-flite LR-1A Pogo 15e ARF Assembly Manual... -
Page 37: Compliance Information For The European Union
Please call +33 (0) 1 60 47 44 70 with any questions 4105 Fieldstone Road or concerns regarding this product or warranty. Champaign, Illinois 61822 Please call 877-504-0233 or e-mail us at productsupport@horizonhobby.com with any questions or concerns regarding this product or warranty. E-flite LR-1A Pogo 15e ARF Assembly Manual... -
Page 38: 2010 Official Academy Of Model Aeronautics Safety Code
I will have completed a successful radio equipment air), nor will I operate model aircraft with fuels ground-range check before the first flight of a new containing tetranitromethane or hydrazine. or repaired model aircraft. E-flite LR-1A Pogo 15e ARF Assembly Manual... - Page 39 No model aircraft shall be equipped with devices which allow it to be flown to a selected location which is beyond the visual range of the pilot. E-flite LR-1A Pogo 15e ARF Assembly Manual...
- Page 40 © 2010 Horizon Hobby, Inc. horizonhobby.com www.e-fliterc.com 17619 Created 02/2010...