Table of Contents

Related Manuals for E-FLITE Conscendo Evolution 1.5m


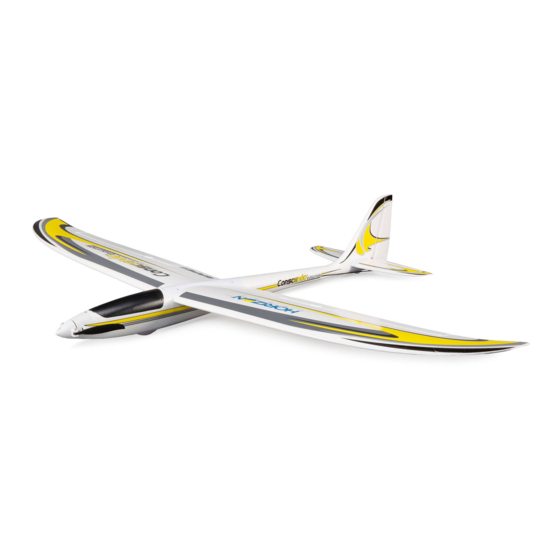
Summary of Contents for E-FLITE Conscendo Evolution 1.5m
- Page 1 Conscendo Evolution 1.5m ® Instruction Manual Bedienungsanleitung Manuel d’utilisation Manuale di Istruzioni Visit www.horizonhobby.com for any product and instruction manual updates. SAFE ® Select Technology, Optional Flight Envelope Protection...
- Page 2 NOTICE All instructions, warranties and other collateral documents are subject to change at the sole discretion of Horizon Hobby, LLC. For up-to-date product literature, visit horizonhobby.com or towerhobbies.com and click on the support or resources tab for this product. MEANING OF SPECIAL LANGUAGE The following terms are used throughout the product literature to indicate various levels of potential harm when operating this product: WARNING: Procedures, which if not properly followed, create the probability of property damage, collateral damage, and serious injury OR create a high probability of superficial injury.
-
Page 3: Table Of Contents
Box Contents Quick Start Information 1. Blank (Acro) Model 2. Wing Type: Normal Transmitter Setup 3. Servo Reversing: All Channels Normal 4. Travel Adjust (All Surfaces): 100% High Rate Low Rate p = 15mm p = 10mm Aileron q = 15mm q = 10mm Dual Rates* p = 10mm... -
Page 4: Preflight
Preflight 1 Remove and inspect contents. 9 Make sure all linkages move freely. 2 Read this instruction manual thoroughly. 10 Perform the control direction test with the transmitter. 3 Charge the flight battery. 11 Perform the AS3X reaction test with the aircraft 4 Setup Transmitter using transmitter setup chart 12 Adjust the flight controls and transmitter as needed. -
Page 5: Model Assembly
tooltip tooltip Model Assembly tooltip Control Horn and Servo Arm Settings The illustration shows recommended hole settings in the servo arms tooltip tooltip and control horns. Elevator Ailerons Rudder Connect the clevises to the control horns as shown... -
Page 6: Model Assembly (Continued)
Model Assembly (Continued) Wing Installation continued 1. Slide the wing halves together on the wing tube. 2. Install the plastic center cap on the center of the wing. 3. Connect the aileron servos to the Y-harness. The left and right aileron servos can be connected to either side of the Y-harness. -
Page 7: Battery Installation And Esc Arming
Battery Installation and ESC Arming CAUTION: Always disconnect the Li-Po flight battery from the aircraft receiver when not flying to avoid over-discharging the battery. Batteries discharged to a voltage lower than the lowest approved voltage may become damaged, resulting in loss of performance and potential fire when batteries are charged. CAUTION: Always keep hands away from the propeller. -
Page 8: Transmitter And Receiver Binding / Enabling And Disabling Safe Select
Transmitter and Receiver Binding / Enabling and Disabling SAFE Select General Binding Tips • The included receiver has been specifically programmed for operation of this • Once bound, the receiver will retain its bind settings for that transmitter until aircraft. Refer to the receiver manual for correct setup if the receiver is replaced. you re-bind. -
Page 9: Safe Select Switch Designation
SAFE Select Switch Designation Assigning a Switch Once SAFE Select is enabled, you can choose to fly in SAFE mode full-time, or assign a switch. Any switch on any channel between 5 and 9 can be used on your 1. Power on the transmitter. transmitter. -
Page 10: Control Surface Direction
Control Surface Direction Switch on the transmitter and connect the battery. Use the transmitter to operate Stick Surface the aileron and elevator controls. View the aircraft from the rear when checking the Movement Movement control directions. Ailerons 1. Move the aileron stick to the left. The right aileron should move down and the left aileron up, which will cause the aircraft to bank left. -
Page 11: Dual Rates And Control Throws
Dual Rates and Control Throws Program your transmitter to set the rates and control throws to the values given. High Rate Low Rate These values have been tested and are a good starting point to achieve successful p = 15mm p = 10mm Aileron flight. -
Page 12: Safe Select Flying Tips
SAFE Select Flying Tips Differences between SAFE Select and AS3X modes When flying in SAFE Select mode the aircraft will return to level flight any time the aileron and elevator controls are at neutral. Applying aileron or elevator control This section is generally accurate but does not take into account flight speed, bat- will cause the airplane to bank, climb or dive. -
Page 13: Troubleshooting Guide As3X
Troubleshooting Guide AS3X Problem Possible Cause Solution Damaged propeller or spinner Replace propeller assembly Motor vibration Replace parts or correctly align all parts and tighten fasteners as needed Loose receiver Align and secure receiver in fuselage Oscillation Loose aircraft controls Tighten or otherwise secure parts (servo, arm, linkage, horn and control surface) Worn parts Replace worn parts (especially propeller, spinner or servo) -
Page 14: Replacement Parts
Problem Possible Cause Solution Control surface, control horn, linkage or servo damage Replace or repair damaged parts and adjust controls Wire damaged or connections loose Do a check of wires and connections, connect or replace as needed Control surface does Transmitter is not bound correctly or the incorrect Re-bind or select correct airplanes in transmitter not move... -
Page 15: Ama National Model Aircraft Safety Code
AMA National Model Aircraft Safety Code Effective January 1, 2014 A. GENERAL B. RADIO CONTROL A model aircraft is a non-human-carrying aircraft capable of sustained flight in the 1. All pilots shall avoid flying directly over unprotected people, vessels, vehicles or atmosphere. -
Page 16: Limited Warranty
Limited Warranty What this Warranty Covers answer your questions and service you in the event that you may need any assistance. Horizon Hobby, LLC, (Horizon) warrants to the original purchaser that the product For questions or assistance, please visit our website at www.horizonhobby.com, purchased (the “Product”) will be free from defects in materials and workmanship at submit a Product Support Inquiry, or call the toll free telephone number referenced in the date of purchase. -
Page 17: Fcc Information
FCC Information FCC ID: BRWTIARLGTNG1 This device complies with part 15 of the FCC rules. Operation is subject to the following two conditions: (1) This device may not cause harmful interference, and (2) this device must accept any interference received, including interference that may cause undesired operation. CAUTION: Changes or modifications not expressly approved by the party responsible for compliance could void the user’s authority to operate the equipment. - Page 18 ©2020 Horizon Hobby, LLC. E-Flite, Plug-N-Play, Bind-N-Fly, BNF, the BNF logo, DSM, DSM2, DSMX, Spektrum AirWare, EC5, IC5, AS3X, SAFE, the SAFE logo, ModelMatch, and the Horizon Hobby logo are trademarks or registered trademarks of Horizon Hobby, LLC. The Spektrum trademark is used with permission of Bachmann Industries, Inc. All other trademarks, service marks and logos are property of their respective owners.