Table of Contents

Related Manuals for E-FLITE Piper L-4 Grasshopper ARF


Summary of Contents for E-FLITE Piper L-4 Grasshopper ARF
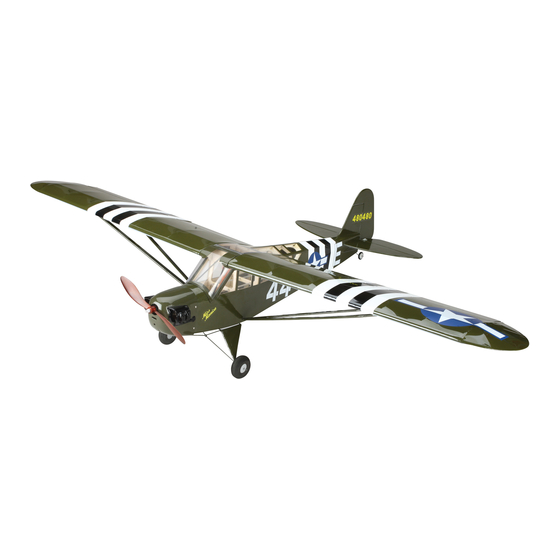
- Page 1 Piper L-4 Grasshopper ARF Assembly Manual Specifications Wingspan: 38.2 in (970mm) Length: 23.7 in (600mm) Wing Area: 210 sq in (13.5 sq dm) Weight w/o Battery: 8.00–8.70 oz (227–247 g) Weight w/Battery: 9.00–9.70 oz (255–275 g)
-
Page 2: Table Of Contents
2009 Official Academy of Age Recommendation: 14 years or over. This is not Model Aeronautics Safety Code ....... 22 a toy. This product is not intended for use by children without direct adult supervision. E-flite Piper L-4 Grasshopper ARF Assembly Manual... -
Page 3: Recommended Radio Equipment
Li-Po batteries can result in fire. Always transportation to keep from damaging it accidentally. follow the manufacturer’s instructions when disposing of Lithium Polymer batteries. The Spektrum trademark is used with permission of Bachmann Industries, Inc. E-flite Piper L-4 Grasshopper ARF Assembly Manual... -
Page 4: Landing Gear Installation
2. Use the tab on the battery hatch to remove it from the fuselage. Set the battery hatch aside in a safe place for later. Use care not to damage the fuselage when installing the landing gear. E-flite Piper L-4 Grasshopper ARF Assembly Manual... -
Page 5: Receiver And Speed Control Installation
2. Plug the rudder and elevator servos into their respective ports of the receiver. E-flite Piper L-4 Grasshopper ARF Assembly Manual... - Page 6 5. Insert the receiver into the fuselage. It will fit above the motor box and battery tray as shown in the photo. Route the Y-harness up through the fuselage so that it can be accessed later. E-flite Piper L-4 Grasshopper ARF Assembly Manual...
-
Page 7: Linkage Installation
2. Insert the bend in the pushrod wire through the 7. Insert a micro brass pushrod connector into the outer hole of the rudder control horn. hole made in the previous step. E-flite Piper L-4 Grasshopper ARF Assembly Manual... - Page 8 Secure the servo horn Remember to unplug the motor battery and on the rudder servo so it is perpendicular to the turn off the radio system before proceeding. rudder servo. E-flite Piper L-4 Grasshopper ARF Assembly Manual...
-
Page 9: Motor And Cowling Installation For Use With Prop Saver
Drill bit: 1/16-inch (1.5mm) Flat blade screwdriver: 1.5mm Note: The following steps are for the use If you use all E-flite components in the of the prop saver on the park 250. If you power system, you can connect the ESC and... - Page 10 (1.5mm) drill bit to drill the four holes for the Use a brown sharpie marker to go over the cowl mounting screws. orange prop in a smooth curved pattern to get a simulated wood finish on the propeller. E-flite Piper L-4 Grasshopper ARF Assembly Manual...
-
Page 11: Motor And Cowling Installation For Use With Prop Adapter
1. Attach the motor mount to the firewall using the screws provided with the motor. A #0 Phillips If you use all E-flite components in the screwdriver will be required to tighten the two power system, you can connect the ESC and screws. - Page 12 1.5mm x 7mm sheet metal screws that secure the Use a brown sharpie marker to go over the cowl to the fuselage. orange prop in a smooth curved pattern to get a simulated wood finish on the propeller. E-flite Piper L-4 Grasshopper ARF Assembly Manual...
-
Page 13: Battery Installation
Magnets will keep the hatch in position 2. Use medium CA to glue the windscreen supports during flight. in position. Make sure to center the supports at the top as shown. E-flite Piper L-4 Grasshopper ARF Assembly Manual... -
Page 14: Aileron Servo Installation
Place the aileron servo on the cover so the servo arm is aligned with the edge of the cover and centered in the slot as shown. Make sure the servo does not hang over the edges of the servo cover. E-flite Piper L-4 Grasshopper ARF Assembly Manual... - Page 15 7/16-inch (11mm) from the center of the servo horn. 6. Use a pin vise and 1/16-inch drill bit to drill the holes in the servo mounting block for the servo mounting screws. E-flite Piper L-4 Grasshopper ARF Assembly Manual...
- Page 16 Secure the pushrod wire to the brass connector using a 2mm x 4mm machine screw and a #0 Phillips screwdriver. 17. Repeat Steps 1 through 16 to install the remaining aileron servo and linkage. E-flite Piper L-4 Grasshopper ARF Assembly Manual...
-
Page 17: Wing Attachment, Struts And Top Windscreen Installation
The strut should naturally align with the fittings on the wing. If not, you will need to use the opposite strut. 2. Slide the tube into the socket in the fuselage. E-flite Piper L-4 Grasshopper ARF Assembly Manual... -
Page 18: Control Throws
4. Use a ruler to adjust the throw of the elevator, ailerons and rudder. 8. Repeat Steps 3 through 7 to install the remaining wing panel and strut. E-flite Piper L-4 Grasshopper ARF Assembly Manual... -
Page 19: Center Of Gravity
Travel Adjust, Sub-Trim and Dual Rates are not listed and should be adjusted according After the first flights, the CG position can be adjusted to each individual model and preference. for your personal preference. E-flite Piper L-4 Grasshopper ARF Assembly Manual... -
Page 20: Flying Your L-4 Grasshopper
Safety can never be taken lightly. maintenance, or attempted repair by anyone other • Do not fly near power lines. than Horizon. Return of any goods by Purchaser must be approved in writing by Horizon before shipment. E-flite Piper L-4 Grasshopper ARF Assembly Manual... - Page 21 Product will be repaired or replaced free of productsupport@horizonhobby.com with any questions charge. Repair or replacement decisions are at the sole or concerns regarding this product or warranty. discretion of Horizon Hobby. E-flite Piper L-4 Grasshopper ARF Assembly Manual...
-
Page 22: Ce Compliance Information For The European Union
This does not apply to model aircraft flown indoors. I will not operate model aircraft with metal-blade propellers or with gaseous boosts (other than air), nor will I operate model aircraft with fuels containing tetranitromethane or hydrazine. E-flite Piper L-4 Grasshopper ARF Assembly Manual... - Page 23 25 feet to any individual, except for the pilot and located at the flightline. I will have completed a successful radio equipment ground-range check before the first flight of a new or repaired model aircraft. E-flite Piper L-4 Grasshopper ARF Assembly Manual...
- Page 24 © 2009 Horizon Hobby, Inc. 4105 Fieldstone Road Champaign, Illinois 61822 (877) 504-0233 horizonhobby.com E-fliteRC.com Printed 08/09 16025...