Sign In
Upload
Manuals
Brands
Sony Manuals
Camcorder
DCR-PC330
Sony DCR-PC330 Manuals
Manuals and User Guides for Sony DCR-PC330. We have
6
Sony DCR-PC330 manuals available for free PDF download: Operation Manual, Service Manual, Application Manual, Function Manual, Supplementary Manual
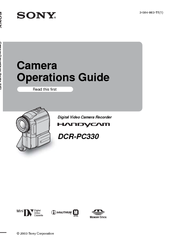
Sony DCR-PC330 Operation Manual (136 pages)
Digital Video Camera Recorder
Brand:
Sony
| Category:
Camcorder
| Size: 4.13 MB
Table of Contents
Read this First
2
Notes on Use
3
Table of Contents
5
Quick Start Guide
8
Recording Movies on a Tape
8
Recording Still Images on a "Memory Stick
10
Start Recording While Checking the Subject on the Lcd Screen
11
View the Recorded Picture on the Lcd Screen
11
Getting Started
12
Step 1: Checking Supplied Items
12
Step 2: Charging the Battery Pack
13
Using an Outside Power Source
16
Step 3: Turning the Power on
16
Step 4: Adjusting the LCD Panel and Viewfinder
17
Adjusting the LCD Panel
17
Adjusting the Viewfinder
17
Step 5: Setting the Date and Time
18
Step 6: Inserting the Recording Media
20
Inserting a Cassette Tape
20
Inserting a "Memory Stick
21
Step 7: Setting the Screen Language
22
Recording
23
Recording Movies
23
Recording for a Longer Time
25
Using Zoom
25
Recording in Mirror Mode
26
Using the Self-Timer
26
Recording Movies Fit for Breaking into Still Images - Progressive Recording Mode
27
Recording Still Images
28
Memory Photo Recording
28
Recording Still Images – Memory Photo Recording
28
Selecting Image Quality or Size
29
Using the Flash
30
Using the Self-Timer
31
Recording a Still Image on a "Memory Stick" While Recording Movies on a Tape
32
Adjusting the Exposure
32
Adjusting the Exposure for Backlit Subjects
32
Fixing the Exposure for the Selected Subject - Flexible Spot Meter
33
Adjusting the Exposure Manually
33
Recording in Dark Places - Nightshot, Etc
34
Adjusting the Focus
35
Adjusting the Focus for an Off-Center Subject - SPOT FOCUS
35
Adjusting the Focus Manually
36
Using Supplementary Light to Focus on a Still Image - HOLOGRAM AF
37
Adjusting the Frame and Focus When Recording a Still Image in Darkness - Nightframing
38
Recording a Picture Using Various Effects
38
Fading in and out of a Scene - FADER
38
Using Special Effects - Digital Effect
40
Overlaying Still Images on Movies on a Tape - MEMORY MIX
41
Searching for the Starting Point
43
Searching for the Last Scene of the most Recent Recording - END SEARCH
43
Searching Manually - EDIT SEARCH
44
Reviewing the most Recently Recorded Scenes - Rec Review
44
Playback
45
Viewing Movies Recorded on a Tape
45
Playing Back in Various Modes
46
Viewing Recordings with Added Effects - Digital Effect
47
Viewing Recordings on a "Memory Stick
48
Playing Back in Various Modes from a "Memory Stick
49
Various Playback Functions
50
Magnifying Pictures - Tape Playback Zoom/Memory Playback Zoom
50
Displaying the Screen Indicators
51
Displaying the Date/Time and Camera Settings Data - Data Code
51
Playing the Picture on a TV
53
Locating a Scene on a Tape for Playback
54
Searching Quickly for a Desired Scene - Zero Set Memory
54
Searching for a Scene Using Cassette Memory - Title Search
54
Searching for a Scene by Date of Recording - Date Search
55
Advanced Operations
56
Using the Menu
56
Selecting Menu Items
56
Using the (CAMERA SET) Menu
58
PROGRAM AE/WHITE BAL./16:9 WIDE, Etc
58
Spot Meter
59
White Bal
59
Using the (MEMORY SET) Menu
64
BURST/QUALITY/IMAGE SIZE/ALL ERASE/NEW FOLDER, Etc
64
Using the
64
Movie Set
65
New Folder
66
Etc
68
Memory MIX
69
Slide Show
69
Demo Mode
72
Etc
73
(PICT. APPLI.) Menu
77
Using the (EDIT/PLAY) Menu
77
Using the (STANDARD SET) Menu
77
REC MODE/MULTI-SOUND/ AUDIO MIX/USB-CAMERA, Etc
77
Using the
77
Audio MIX
78
Video Input
79
Data Code
80
Remote Ctrl
80
Etc
82
(TIME/LANGU.) Menu
83
Customizing Personal Menu
83
Dubbing/Editing
86
Connecting to a VCR or TV
86
Dubbing to Another Tape
87
Recording Pictures from a VCR or TV
87
Dubbing Pictures from a Tape to a "Memory Stick
89
Dubbing Still Images from a "Memory
90
Stick" to a Tape
90
Dubbing Selected Scenes from a Tape
91
Digital Program Editing
91
Dubbing Sound to a Recorded Tape
97
Deleting Recorded Pictures
99
Changing the Image Size
100
Resize
100
Marking Recorded Images with Specific Information
101
Image Protection/Print Mark
101
Troubleshooting
103
Cassette Tapes
104
Warning Indicators and Messages
111
Warning Messages
113
Additional Information
115
Using Your Camcorder Abroad
115
Usable Cassette Tapes
116
About the "Memory Stick
117
About the "Infolithium" Battery Pack
119
About I.link
121
Maintenance and Precautions
122
Specification
125
Quick Reference
127
Identifying Parts and Controls
127
Indicators for the Lcd Screen and Viewfinder
133
Index
134
Advertisement
Sony DCR-PC330 Operation Manual (136 pages)
Digital Video Camera Recorder
Brand:
Sony
| Category:
Camcorder
| Size: 11.9 MB
Table of Contents
Read this First
2
Notes on Use
3
Table of Contents
5
Quick Start Guide
8
Recording Movies on a Tape
8
Recording Still Images on a "Memory Stick
10
Getting Started
12
Step 1: Checking Supplied Items
12
Step 2: Charging the Battery Pack
13
Using an Outside Power Source
16
Step 3: Turning the Power on
16
Step 4: Adjusting the LCD Panel and Viewfinder
17
Adjusting the LCD Panel
17
Adjusting the Viewfinder
17
Step 5: Setting the Date and Time
18
Step 6: Inserting the Recording Media
20
Inserting a Cassette Tape
20
Inserting a "Memory Stick
21
Step 7: Setting the Screen Language
22
Recording
23
Recording Movies
23
Recording for a Longer Time
25
Using Zoom
25
Recording in Mirror Mode
26
Using the Self-Timer
26
Recording Movies Fit for Breaking into Still Images - Progressive Recording Mode
27
Recording Still Images
28
Memory Photo Recording
28
Selecting Image Quality or Size
29
Using the Flash
30
Using the Self-Timer
31
Recording a Still Image on a "Memory Stick" While Recording Movies on a Tape
32
Adjusting the Exposure
32
Adjusting the Exposure for Backlit Subjects
32
Fixing the Exposure for the Selected Subject - Flexible Spot Meter
33
Adjusting the Exposure Manually
33
Recording in Dark Places - Nightshot, Etc
34
Adjusting the Focus
35
Adjusting the Focus for an Off-Center Subject - SPOT FOCUS
35
Adjusting the Focus Manually
36
Using Supplementary Light to Focus on a Still Image - HOLOGRAM AF
37
Adjusting the Frame and Focus When Recording a Still Image in Darkness - Nightframing
38
Recording a Picture Using Various Effects
38
Fading in and out of a Scene - FADER
38
Using Special Effects - Digital Effect
40
Overlaying Still Images on Movies on a Tape - MEMORY MIX
41
Searching for the Starting Point
43
Searching for the Last Scene of the most Recent Recording - END SEARCH
43
Searching Manually - EDIT SEARCH
44
Reviewing the most Recently Recorded Scenes - Rec Review
44
Playback
45
Viewing Movies Recorded on a Tape
45
Playing Back in Various Modes
46
Viewing Recordings with Added Effects - Digital Effect
47
Viewing Recordings on a "Memory Stick
48
Playing Back in Various Modes from a "Memory Stick
49
Various Playback Functions
50
Magnifying Pictures - Tape Playback Zoom/Memory Playback Zoom
50
Displaying the Screen Indicators
51
Displaying the Date/Time and Camera Settings Data - Data Code
51
Playing the Picture on a TV
53
Locating a Scene on a Tape for Playback
54
Searching Quickly for a Desired Scene - Zero Set Memory
54
Searching for a Scene Using Cassette Memory - Title Search
54
Searching for a Scene by Date of Recording - Date Search
55
Advanced Operations
56
Using the Menu
56
Selecting Menu Items
56
Using the (CAMERA SET) Menu
58
Program Ae/White Bal./16:9
58
WIDE, Etc
58
Spot Meter
59
White Bal
59
Using the (MEMORY SET) Menu
64
BURST/QUALITY/IMAGE SIZE/ALL ERASE/NEW FOLDER, Etc
64
Using the
64
Movie Set
65
New Folder
66
Etc
68
Memory MIX
69
Etc
73
(PICT. APPLI.) Menu
77
Using the (EDIT/PLAY) Menu
77
Using the (STANDARD SET) Menu
77
REC MODE/MULTI-SOUND/ AUDIO MIX/USB-CAMERA, Etc
77
Using the
77
Standard Set
77
Audio MIX
78
Video Input
79
Data Code
80
Remote Ctrl
80
Etc
82
(TIME/LANGU.) Menu
83
Customizing Personal Menu
83
Dubbing/Editing
86
Connecting to a VCR or TV
86
Dubbing to Another Tape
87
Recording Pictures from a VCR or TV
87
Dubbing Pictures from a Tape to a "Memory Stick
89
Dubbing Still Images from a "Memory
90
Stick" to a Tape
90
Dubbing Selected Scenes from a Tape
91
Digital Program Editing
91
Dubbing Sound to a Recorded Tape
97
Deleting Recorded Pictures
99
Changing the Image Size
100
Resize
100
Marking Recorded Images with Specific Information
101
Image Protection/Print Mark
101
Troubleshooting
103
Overall Operations
103
Cassette Tapes
104
Warning Indicators and Messages
111
Warning Messages
113
Additional Information
115
Using Your Camcorder Abroad
115
Usable Cassette Tapes
116
About the "Memory Stick
117
About the "Infolithium" Battery Pack
119
About I.link
121
Maintenance and Precautions
122
Specification
125
Quick Reference
127
Identifying Parts and Controls
127
Indicators for the Lcd Screen and Viewfinder
133
Index
134
Sony DCR-PC330 Service Manual (98 pages)
Brand:
Sony
| Category:
Camcorder
| Size: 5.37 MB
Table of Contents
Specifications
2
Table of Contents
5
4-3. Printed Wiring Boards
5
1 Servece Note
7
How to Open the Flash When the Flash
7
Dosen't Open
7
Power Supply During Repairs
7
Service Note
7
To Take out a Cassette When Not Eject
7
Discharging of the Flashlight Power
8
Supply Capacitor
8
NOTES on HANDLING the LASER DIODE [LASER UNIT (D7609 of FP-706 Flexible)]
9
Self-Diagnosis Display
10
Self-Diagnosis Function
10
Self-Diagnosis Code Table
11
Disassembly
12
Lcd Cabinet (R) Assembly
13
Cabinet (F) Section
14
Cabinet (Rear) Section
14
Control Switch Block (Ps5000)
15
Cabinet (R) Section
15
Tripod Screw
16
Board
17
Board, Lithium Battery
17
Stick Connector
18
Hinge Blind Assembly
19
Lcd Unit
19
Board
20
Hinge Assembly
21
Evf Section
22
Board
24
Stroboscope Section
24
Board
25
Stroboscope Luminous Unit (St5000)
25
Lens Section
26
Board - (1)
28
Gmr (M) Sensor
28
Iris (Ir870), Stepping Motor Z870A
29
Mechanism Deck
30
Control Switch Block (Fk5000)
32
Cabinet (L) Assembly
33
Cabinet (G) Assembly
34
Circuit Boards Location
35
Flexible Boards Location
36
HELP (List of Caution Points Is Shown Here.)
37
Block Diagrams
39
Overall Block Diagram (1/4)
39
Overall Block Diagram (2/4)
39
Overall Block Diagram (3/4)
39
Overall Block Diagram (4/4)
39
Power Block Diagram (1/2)
39
Power Block Diagram (2/2)
39
Printed Wiring Boards and Schematic Diagrams
46
Frame Schematic Diagram (1/4)
46
Dcr-Pc330/Pc330E
46
4-3. Printed Wiring Boards
47
Frame Schematic Diagram (2/4)
47
4-3. Printed Wiring Boards
48
Frame Schematic Diagram (3/4)
48
Frame Schematic Diagram (4/4)
49
Schematic Diagram
49
4-3. Printed Wiring Boards
49
Schematic Diagram
50
Av Multi)
50
Control Switch Block (Fk5000)
50
Control Switch Block (Ps5000)
50
DC/Usb/DV Jack)
50
Flash Unit (St5000)
50
Flexible (Ms Connector)
50
Flexible (Remocon Sensor, Mf Sw)
50
Fp-467/468/228 Flexible (MD Block)
50
Fp-702/Fp-707 Flexible (Flash Drive)
50
4-3. Printed Wiring Boards
62
4-3. Printed Wiring Boards
63
4-3. Printed Wiring Boards
64
4-3. Printed Wiring Boards
65
4-3. Printed Wiring Boards
66
Printed Wiring Board of the CD-452
67
Mounted Parts Location
76
Mounted Parts Location of the CD-452, VC-325
76
Cabinet (L) Section-1
77
Cabinet (L) Section-2
77
Cabinet (R) Section-1
77
Cabinet (R) Section-2
77
Evf Section
77
Lens Section
77
Overall
77
Overall (Mechanism Deck-Z101)
77
Repair Parts List
77
Stroboscope Section
77
Exploded Views
79
Revision History
98
Advertisement
Sony DCR-PC330 Application Manual (48 pages)
Computer Application guide Digital Video Camera Recorder
Brand:
Sony
| Category:
Camcorder
| Size: 2.09 MB
Table of Contents
Read this First
2
Table of Contents
4
Connecting to a Windows Computer
6
Introduction to Editing Pictures on a Computer
6
Features
6
Overview of the Preparation
7
Step 1: Installing the USB Driver on a Computer
8
Step 2: Installing the Image Editor Software (Imagemixer Ver.1.5 for Sony)
9
Step 3: Installing the Image Exchange Software (Image Transfer)
11
Step 4: Connecting Your Camcorder to a Computer
13
Connecting with the USB Cable (Supplied)
14
Connecting with an I.link Cable (Optional) (DV Format Models Only)
16
Step 5: Checking the Connection
17
Playing Pictures Recorded on a Tape on Your Computer
17
Viewing Pictures Recorded on a "Memory Stick" on Your Computer
18
Managing Pictures on a Windows Computer
19
Copying and Viewing Pictures Recorded on a Tape
19
Copying Movies Onto Your Computer
19
Copying Still Images Extracted from a Movie on Your Computer
20
Editing Pictures on Your Computer
21
Viewing Pictures on Your Computer Via the USB Port - USB Streaming
23
Creating Video Cds
24
Copying and Viewing Pictures Recorded on a "Memory Stick
26
Editing Still Images on Your Computer
28
Copying Pictures Edited on Imagemixer Ver.1.5 for Sony to a "Memory Stick
29
Connecting to a Macintosh Computer ("Memory Stick" Only)
31
Stick” Only)
31
Step 1: Installing the USB Driver on a Computer
31
Step 2: Connecting Your Camcorder to a Computer
32
Copying Pictures Recorded on a "Memory Stick
33
Other Functions
34
Creating Dvds (on Sony VAIO Series Computers Only)
34
Connecting an Analog VCR to the Computer Via Your Camcorder
37
(DV Format Models Only) - Signal Convert Function
37
Additional Information
40
Troubleshooting
40
Index
46
Sony DCR-PC330 Function Manual (2 pages)
Connecting to a PictBridge compatible printer
Brand:
Sony
| Category:
Camcorder
| Size: 0.97 MB
Sony DCR-PC330 Supplementary Manual (2 pages)
Using the supplied lens hood
Brand:
Sony
| Category:
Camcorder
| Size: 0.16 MB
Advertisement
Related Products
Sony Handycam DCR-PC350E
Sony Handycam DCR-PC330E
Sony DCR-PC350 - Digital Handycam Camcorder
Sony Handycam DCR-PC3E
Sony Handycam DCR-PC3
Sony Handycam DCR-PC1000E
Sony DCR-PC101
Sony DCR-PC109 - Digital Handycam Camcorder
Sony Handycam DCR-PC9E
Sony Handycam DCR-PC6E
Sony Categories
Laptop
TV
CD Player
Camcorder
Digital Camera
More Sony Manuals
Login
Sign In
OR
Sign in with Facebook
Sign in with Google
Upload manual
Upload from disk
Upload from URL