Sign In
Upload
Manuals
Brands
Sanyo Manuals
DVR
DSR-3716PA
Sanyo DSR-3716PA Manuals
Manuals and User Guides for Sanyo DSR-3716PA. We have
2
Sanyo DSR-3716PA manuals available for free PDF download: Instruction Manual, Manual For Remote Operation
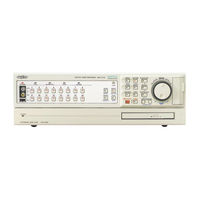
Sanyo DSR-3716PA Instruction Manual (92 pages)
Digital Video Recorder with Multiplexer Function
Brand:
Sanyo
| Category:
DVR
| Size: 2.71 MB
Table of Contents
Table of Contents
2
Foreword
4
Safety Precautions
4
These Must be Followed for Safety Reasons
4
Follow the Points Outlined below for Proper Use
6
Accessories
8
Main Features
8
Names and Functions of Parts (Front Panel)
9
Names and Functions of Parts (Rear Panel)
11
Basic Connections
11
Alarm and RS-485 Connections
12
Network Connection Terminals (LAN)
12
Control Terminals (CONTROL)
13
How to Use
14
Preparing for Use
14
Turn on the Power of the DVR
14
Language, Clock Settings
14
Operation Display
15
Viewing Live Video Using Various Multi Screens
16
Switching to Another Full-Screen Video
16
Quad-Screen Display Switching
16
Multi-Screen Display Switching
16
Enlarging an Image in Multi-Screen Mode
16
Automatic Screen Scrolling
17
Viewing on the Monitor Connected to the MON2 Terminal16
17
Recording Video to the Hard Disk
18
Recording Format Verification
18
Normal Recording (Normal Recording Area)
18
Viewing Recorded Video
19
Playback
19
Full-Screen Viewing
19
Fast-Forward/Fast-Reverse During Playback
19
Changing the Playback Speed
20
Viewing Still Images
20
Frame Advance (Forward and Reverse)
20
Enlarged Viewing
21
Quad-Screen Viewing
21
Multi-Screen (9/16) Viewing
21
Searching for Recorded Video
22
A Alarm Search
23
B Alarm Thumbnail Search
23
Viewing Pre-Alarm Video
23
C Date/Time Search
24
Viewing the Preview Screen
24
D Archive Area Search
25
E Motion Detection Search
25
Motion Sensor Settings Verification Using the Preview Screen
27
Full-Screen Viewing of Video Detected by the Motion Sensor
27
Copying Recorded Video to Media
28
A Copying Video (Example: 10 Seconds) from the Normal or Alarm Recording Area to the Archive Area
29
B Copying Video (Example: 10 Pictures) from the Internal Hard Disk to the CD-R/RW Drive
30
C Copying Video (Example: 10 Pictures) from the Internal Hard Disk to Media such as a Compactflash Card
31
D Printing Images Directly from the Compactflash Card or the Microdrive
32
Compactflash Cards or CD-RW Formats
33
Compactflash Format
33
CD-RW Format
33
Viewing Images Copied to a Compactflash Card on a PC
33
How to Set
34
Main Menu Configuration
34
Basic Settings
35
Menu Configuration
35
Displaying the Basic Settings Screen
35
A Daylight Saving Setting
36
External Clock Setting (EXT. CLOCK SET)
36
B Camera Detection
36
C Title Setting
37
Holiday Setting
37
E Time Period Setting
38
Changing the Time Period of Operations
39
Setting the Times for the Time Periods
39
Recording Settings
40
Menu Configuration
40
Displaying the Recording Settings Screen
40
A Easy Recording Menu Description
41
Easy Recording Settings 1
42
Easy Recording Settings 2
43
B Recording Area Menu Description
44
Verifying the Capacity of the Recording Areas
44
Changing the Normal Recording Area and the Alarm Recording Area
45
Archive Area Full Reset
46
C Recording Conditions Menu Description
47
Remaining Hard Disk Capacity Warning
47
Overwrite Setting for the Recording Areas
48
Setting Series Recording
48
Series Recording
49
Setting the Storage Period (AUTO DELETE) for Videos Recorded in the Recording Areas
49
D Normal Recording Area Menu Description
50
Normal Recording Area Settings
50
E Programmed Recording Menu Description
51
Programmed Recording Settings
51
F Timer Setting Menu Description
52
Timer-Controlled Recording
52
If the Timer Settings Are Overlapping
52
If the Day of the Week and Daily Settings Are Overlapping
52
Cancelling Timer-Controlled Operations
52
F-1 Day of the Week Timer-Controlled
52
Day of the Week Timer-Controlled Recording (same Time, same Recording Rate Every Week for the Specified Day)
53
Overlapping Timer-Controlled Recording
54
External Timer-Controlled Recording
55
G Alarm Recording Settings Menu Description
56
Alarm Recording Settings
57
Alarm Trigger Setting
58
Input Signals Used as External Alarms
58
Pre-Alarm Recording Settings
58
Motion Sensor Screen Description
59
Motion Sensor Setting
60
H Alarm Operation Settings Menu Description
61
Alarm Display Settings
62
Alarm Cancellation
62
Alarm Operation Settings
62
General Settings
63
Menu Configuration
63
Displaying the General Settings Screen
63
A Data Display Settings/Video LOSS Settings
64
B Buzzer Settings
65
C Security Lock Menu Description
66
Turn on the ADMIN and USER Security Locks and Set Passwords for the DVR
66
Activating the Security Lock
67
Cancelling the Security Lock
67
List of Permitted Operations after Setting the Passwords
68
D Hard Disk Settings Menu Description
69
Hard Disk Initialization
69
E Network Settings
70
Network Password Modification
70
Settings
70
F RS-485 Settings
71
G Camera Control Settings
72
Alarm Recording Trigger Settings
73
Camera Control from the DVR
74
Screen Setting
75
Menu Configuration
75
Displaying the Screen Settings
75
A Changing the Multi-Screen Sequence
76
Automatic Scrolling of Live Video of the Main Monitor and the Monitor 2 at Identical Intervals (Example: 5 Seconds)
77
Automatic Scrolling of Live Video of the Main Monitor and the Monitor 2 at Individual Intervals (Example: 5 Seconds)
77
Automatic Sequence of Live Video of the Main Monitor (Full-Screen) at Individual Intervals, and of the Monitor 2 at Identical Intervals (Example: 3 Seconds)
78
Turning off Display of Specified Cameras During Timer-Controlled Periods
78
C Masking Specific Camera Images
79
D Adjusting Color Tones of the Live Video
80
Power Loss Information/Used Time
81
A Power Loss/Used Time Menu Description
81
Viewing the Information
81
Initialization Log
82
A Initialization Log Menu Description
82
Viewing the Log
82
Menu Copy
83
A Menu Copy Screen Description
83
Save the Menu Content in the CF Card
83
Load Menu Content Saved to the CF Card Onto Other Dvrs of the same Model
84
Other
84
Interface (RS-485) Specifications
85
Specifications
86
List of Recording Rate and Recording Times
87
List of Record Rate Setting/Pre-Alarm Recording Times
89
Push-Lock Terminal Specifications
90
List of Camera Addresses
91
Advertisement
Sanyo DSR-3716PA Manual For Remote Operation (43 pages)
manual for remote operations using a network connection
Brand:
Sanyo
| Category:
DVR
| Size: 2.68 MB
Table of Contents
Table of Contents
2
Introduction
3
Features of Network Operation
3
Operating Environment
3
Network Connection Procedure
4
NETWORK SET Settings of DVR
4
TCP/IP Settings of the Computer
4
Network Operation Screen Display
6
Network Connection Restrictions
7
Change to DVR Operation
7
Organization of the Main Screen and Functions of each Part
8
Organization of Main Screen
8
Functions of Operation Panel and Operation Authority
9
Operating Mode Display Panel
10
View Live Video
11
Change Display Pattern of Live Video
11
Set the Display Mode for Images
12
Playback Audio
12
Recording Monitored Images
13
Normal Recording (Normal Recording Area)
13
Other Recording Methods
13
View Recorded Images
14
Playback Recorded Images
14
Basic Playback Operations
14
Search Recorded Images
15
Search Screen Selection
15
Alarm Search
15
Alarm Thumbnail Search
15
Time/Date Search
16
Archive Area Search
16
Motion Detection Search
17
Saving Images
18
A Saving Live Video on the Computer
18
B Copying Recorded Images to the Dvr's Archive Area
19
C Downloading Recorded Images to the Computer
20
D Saving Format for Image Files
21
Operating a Dome Camera
22
Setting up the Basic Menu Using Network Operations
23
Basic Settings Menu Outline
23
Basic Menu Setting Procedure
24
Initial Setting
25
Aclock Set
25
Bsummer Time Set/Ext. Clock Set
25
Choliday Set
25
Recording Settings
26
A Arecording Area Set
26
Brecording Conditions Set
27
Cnormal Rec Mode Set
28
Dprogram Rec Set
29
Etimer Set
29
Falarm Rec Mode Set
31
General Settings
33
Adisplay Set
33
Bbuzzer Set
33
Chdd Set
34
Dnetwork Set
35
Ers-485 Set
35
Screen Settings and DVR Information
36
Amask Set
36
Bpower Loss/Used Time
36
C Intialization Log
36
DVR Viewer2
37
Operating Environment
37
Installing the Viewer Software
37
Internet Option Settings
37
Running and Quitting Viewer
37
Structure of the Screen and the Function of each Section
38
Opening Iimage Files
39
Switching the Display Pattern of the Screen
40
Selecting the Channel Displayed on the Screen
40
Functions of the Viewer Operating Panel
41
Saving and Printing Images
42
Setting the Date and Time Display Format
42
Advertisement
Related Products
Sanyo DSR-3709P
Sanyo DSR-3716P
Sanyo DSR-3706PA
Sanyo DSR-3716
Sanyo DSR-3709
Sanyo DSR-3709PA
Sanyo DSR-3016
Sanyo DSR-3000P
Sanyo DSR-3000
Sanyo DSR-3506
Sanyo Categories
Projector
TV
Air Conditioner
Security Camera
LCD TV
More Sanyo Manuals
Login
Sign In
OR
Sign in with Facebook
Sign in with Google
Upload manual
Upload from disk
Upload from URL