Sign In
Upload
Manuals
Brands
Renesas Manuals
Motherboard
DA16200 PMOD
Renesas DA16200 PMOD Manuals
Manuals and User Guides for Renesas DA16200 PMOD. We have
16
Renesas DA16200 PMOD manuals available for free PDF download: User Manual, Getting Started Manual, Quick Start Manual
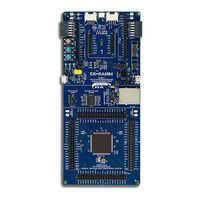
Renesas DA16200 PMOD User Manual (108 pages)
Brand:
Renesas
| Category:
Computer Hardware
| Size: 6 MB
Table of Contents
Table of Contents
2
Terms and Definitions
7
References
7
Overview
8
Evaluation Kit
9
Introduction
9
Da16200 Evb V11.0
9
Figure 1: DA16200 EVB Hardware Configuration
9
Table 1: Components on DA16200 EVB
9
Table 2: DA16200 EVB Switch Description
11
Da16600 Evb V6.0
12
Figure 2: DA16600 EVB Hardware Configuration
12
Table 3: Components on DA16600 EVB
12
Table 4: DA16600 EVB Switch Description
14
Setting up EVB
15
Configuring DA16200/DA16600 Serial Debug Interface
15
Figure 3: Windows - COM Ports
15
Configuring DA14531 Serial Debug Interface
16
Table 5: Serial Port Configuration Values
16
Programming Firmware Images
17
Table 6: Debug Switch Settings
17
Table 7: Debug Console Settings
17
Table 8: Serial Flash Memory Map
18
Using Uart_Program_Da16200 in Console Terminal
18
Using Macro Script of Tera Term
21
Figure 4: Serial Port Setup in Tera Term
22
Figure 5: Open Macro File
22
Figure 6: Programming FBOOT Image
23
Figure 7: Programming FRTOS Image
23
Using Multi-Download Tool
23
Changing Boot Index
24
Provisioning Wi-Fi
24
Setup for Station Mode
24
Setup for Soft AP Mode
26
Setup for Wi-Fi Provisioning Using Bluetooth le
28
Configuring UART/SPI as at Command Interface
28
Figure 8: Diagram of Provisioning Via Bluetooth le
28
Configuration for Testing at Command with EVB Only
29
Figure 9: Configure DA16200 EVB for at Command - UART to FT2232H
29
Table 10: Configure DA16200 EVB Switch for at Command - UART to FT2232H
29
Table 9: Default GPIO Pin Settings of UART and SPI
29
Configuration for Testing at Command with External MCU
30
Figure 10: Configure DA16600 EVB for at Command - UART to FT2232H
30
Figure 11: Configure DA16200 EVB for at Command - UART/SPI to External MCU
30
Table 11: DA16600 EVB Switch Configuration for at Command - UART to FT2232H
30
Figure 12: Configure DA16600 EVB for at Command - UART/SPI with External MCU
31
Table 12: Configure DA16200 EVB Switch for at Command - UART/SPI with External MCU
31
Table 13: Configure DA16200 EVB Connector for at Command - UART/SPI with External MCU
31
Table 14: Configure DA16600 EVB Switch for at Command - UART/SPI with External MCU
31
Table 15: Configure DA16600 EVB Connector for at Command - UART/SPI with External MCU
32
Software Development Kit
33
Introduction
33
System Requirements
33
Installing E Studio IDE
33
Figure 13: Download E2Studio Installer
33
Figure 14: Run E Studio Installer
34
Figure 15: E 2 Studio Setup
34
Importing DA16200 Freertos SDK Project into E
35
Studio
35
Figure 16: Install GNU Arm Embedded Toolchain
35
Figure 17: Import SDK Project to E
35
Figure 18: Select Folder to Import SDK Project into E
36
Figure 19: Import DA16200/DA16600 Project to E
37
Figure 20: Import Sdkjflash Project to E
37
Figure 21: Dialog SDK Project
38
Building Projects
39
Figure 22: E 2 Studio Project Explorer
39
Figure 23: Build Project
39
Figure 24: Generate Configuration
40
Figure 25: Generate Configuration Warning Pop-Up
40
Build Configurations
41
Figure 26: Location of Firmware Image Files
41
Figure 27: DA16200 Build Configurations
42
Change Flash Configuration
43
Figure 28: DA16600 Build Configurations
43
Figure 29: Import Launch Configuration
43
Figure 30: Import Generate Configuration
44
Figure 31: Run Generate Configuration
44
How to Move Project Location
45
Debugging with J-Link Debug Probe
45
Install J-Link
45
Figure 32: SDK Root Path Variables
45
Connect J-Link
46
Figure 33: Download J-Link Software
46
Figure 34: J-Link 9-Pin Cortex-M Adapter
46
Figure 35: Configure Built-In JTAG for DA16200
47
Run Debug Mode
48
Figure 36: Run Debug Mode
48
Figure 37: Select Debug Configuration
48
Programming Firmware Images in E
49
Studio
49
Importing Launches for Programming Firmware Images
49
Figure 38: Import Launches
49
Figure 39: Browse Folder
49
Figure 40: Select Launch Configurations
50
Figure 41: Launch Configurations for Programming Firmware Images
50
Programming Firmware Images over Serial Interface
51
Figure 42: Select Number from Serial Interface List
51
Figure 43: Programming Firmware Image over Serial Interface
52
Figure 44: Emergency Mode for Programming Firmware Image
52
Programming Firmware Images Using SEGGER J-Link
53
Figure 45: Run J-Link Launch
53
Migrating IDE from Eclipse to E
54
Studio for Old Sdks
54
Advertisement
Renesas DA16200 PMOD Getting Started Manual (106 pages)
Highly integrated ultra-low power Wi-Fi system
Brand:
Renesas
| Category:
Computer Hardware
| Size: 6 MB
Table of Contents
Table of Contents
1
Terms and Definitions
6
References
6
Overview
7
Evaluation Kit
8
Introduction
8
Da16200 Evb V11.0
8
Figure 1. DA16200 EVB Hardware Configuration
8
Table 1. Components on DA16200 EVB
8
Table 2. DA16200 EVB Switch Description
10
Da16600 Evb V6.0
11
Figure 2. DA16600 EVB Hardware Configuration
11
Table 3. Components on DA16600 EVB
11
Setting up EVB
13
Configuring DA16200/DA16600 Serial Debug Interface
13
Table 4. DA16600 EVB Switch Description
13
Figure 3. Windows - COM Ports
14
Table 5. Serial Port Configuration Values
14
Configuring DA14531 Serial Debug Interface
15
Table 6. Debug Switch Settings
15
Programming Firmware Images
16
Table 7. Debug Console Settings
16
Using Uart_Program_Da16200 in Console Terminal
17
Table 8. Serial Flash Memory Map
17
Using Macro Script of Tera Term
20
Figure 4. Serial Port Setup in Tera Term
20
Figure 5. Open Macro File
21
Figure 6. Programming FBOOT Image
21
Using Multi-Download Tool
22
Changing Boot Index
22
Figure 7. Programming FRTOS Image
22
Provisioning Wi-Fi
23
Station Mode Setup
23
Soft AP Mode Setup
25
Wi-Fi Provisioning Setup Using Bluetooth
27
Configuring UART/SPI as at Command Interface
27
Configuration for Testing at Command with EVB Only
27
Figure 8. Diagram of Provisioning through Bluetooth le
27
Table 9. Default GPIO Pin Settings of UART and SPI
27
Configuration for Testing at Command with External MCU
28
Figure 9. Configure DA16200 EVB for at Command - UART to FT2232H
28
Figure 10. Configure DA16600 EVB for at Command - UART to FT2232H
28
Table 10. Configure DA16200 EVB Switch for at Command - UART to FT2232H
28
Table 11. DA16600 EVB Switch Configuration for at Command - UART to FT2232H
28
Figure 11. Configure DA16200 EVB for at Command - UART/SPI to External MCU
29
Table 12. Configure DA16200 EVB Switch for at Command - UART/SPI with External MCU
29
Table 13. Configure DA16200 EVB Connector for at Command - UART/SPI with External MCU
29
Figure 12. Configure DA16600 EVB for at Command - UART/SPI with External MCU
30
Table 14. Configure DA16600 EVB Switch for at Command - UART/SPI with External MCU
30
Table 15. Configure DA16600 EVB Connector for at Command - UART/SPI with External MCU
30
Software Development Kit
31
Introduction
31
System Requirements
31
Installing E Studio IDE
31
Figure 13. Download E Studio Installer
31
Figure 14. Run E
32
Figure 15. E 2 Studio Setup
32
Importing DA16200 Freertos SDK Project into E
33
Studio
33
Figure 16. Install GNU Arm
33
Figure 17. Import SDK Project to E
33
Studio IDE
33
Figure 18. Select Folder to Import SDK Project into E Studio IDE
34
Figure 19. Import DA16200/DA16600 Project to E Studio IDE
35
Figure 20. Import Sdkjflash Project to E Studio IDE
35
Figure 21. Dialog SDK Project
36
Building Projects
37
Figure 22. E 2 Studio Project Explorer
37
Figure 23. Build Project
37
Figure 24. Generate Configuration
38
Figure 25. Generate Configuration Warning Pop-Up
38
Build Configurations
39
Figure 26. Location of Firmware Image Files
39
Figure 27. DA16200 Build Configurations
40
Change Flash Configuration
41
Figure 28. DA16600 Build Configurations
41
Figure 29. Import Launch Configuration
41
How to Move Project Location
42
Figure 30. Import Generate Configuration
42
Figure 31. Run Generate Configuration
42
Debugging with J-Link Debug Probe
43
Install J-Link
43
Figure 32. SDK Root Path Variables
43
Figure 33. Download J-Link Software
43
Connect J-Link
44
Figure 34. J-Link 9-Pin Cortex-M Adapter
44
Run Debug Mode
45
Figure 35. Configure Built-In JTAG for DA16200
45
Figure 36. Run Debug Mode
45
Programming Firmware Images in E Studio
46
Importing Launches for Programming Firmware Images
46
Figure 37. Select Debug Configuration
46
Figure 38. Import Launches
46
Figure 39. Browse Folder
47
Figure 40. Select Launch Configurations
47
Renesas DA16200 PMOD Getting Started Manual (99 pages)
FreeRTOS
Brand:
Renesas
| Category:
Control Unit
| Size: 5 MB
Table of Contents
Table of Contents
2
Terms and Definitions
6
References
6
Overview
7
Evaluation Kits
8
Introduction
8
DA16200 Module EVK Ver 10.0
8
Figure 1: DA16200 Module EVK Hardware Configuration
8
Table 1: Components on DA16200 EVK
8
Table 2: DA16200 EVK Switch Description
10
DA16600 Module EVK Ver 4.0_201116
11
Figure 2: DA16600 Module EVK Hardware Configuration
11
Table 3: Components on DA16600 EVB
11
Table 4: DA16600 EVK Switch Description
13
Connecting to the Evks
14
Configuring the DA16200/600 Serial Debug Interface
14
Figure 3: Windows - COM Ports
14
Configuring the DA14531 Serial Debug Interface (DA16600 EVK Only)
15
Table 5: Serial Port Configuration Values
15
Updating the Firmware
16
Table 6: Serial Flash Memory Map
17
Firmware Update Using Commands (Windows/Linux)
18
Table 7: FW Image Loady Commands
18
Firmware Update Using the Terra Term Script (Windows Only)
20
Figure 4: Open the Macro File
20
Figure 5: Download Bootloader
20
Multi-Download Tool
21
Changing the Boot Index
21
Figure 6: Download RTOS Image
21
Provisioning Wi-Fi
22
Setup for Station Mode
22
Setup for Soft-AP Mode
24
Le (Da16600)
26
Configuring UART or SPI as an at Command Interface
26
Figure 7: Diagram of Provisioning Via Bluetooth ® le
26
Table 8: Default GPIO Pin Setting of UART and SPI
26
AT Command Testing with EVK Only
27
Figure 8: DA16200 EVK Configuration for AT-CMD over UART to FT2232H
27
Figure 9: DA16600 EVK Configuration for AT-CMD over UART to FT2232H
27
Table 9: DA16200 EVK Switch Configuration for AT-CMD over UART of FT2232H
27
Table 10: DA16600 EVK Switch Configuration for AT-CMD over UART of FT2232H
27
AT Command Testing with External MCU
28
Figure 10: DA16200 EVK Configuration for AT-CMD over UART or SPI to an External MCU
28
Table 11: DA16200 EVK Switch Configuration for AT-CMD over UART or SPI to an External MCU
28
Table 12: DA16200 EVK Connector Configuration for AT-CMD over UART or SPI to External MCU
28
Figure 11: DA16600 EVK Configuration for AT-CMD over UART or SPI to an External MCU
29
Table 13: DA16600 EVK Switch Configuration for AT-CMD over UART or SPI to an External MCU
29
Table 14: DA16600 EVK Connector Configuration for AT-CMD over UART or SPI to External MCU
29
Software Development Kit
30
Introduction
30
System Requirements
30
Installing the GNU Arm GCC Cross Compiler
30
Installation Using Batch/Shell Script
30
Figure 12 Toolchain Package V1.X.X for Freertos SDK
30
Manual Installation
31
Figure 13 Installation Using Batch Script for Windows
31
Installing the Eclipse IDE
32
Figure 14: Eclipse Installer Download
32
Figure 15: Eclipse Installer Run
32
Configuring the Eclipse IDE
33
Figure 16: Eclipse Open Preferences Dialog Box
33
Figure 17: [MCU] Global Arm Toolchains Path
33
Importing the DA16200 Freertos SDK into Eclipse
34
Figure 18: Xpack Selection Dialog Box
34
Figure 19: Windows 10 [MCU] Global Build Tools Path
34
Figure 20: Import SDK to the Eclipse IDE
35
Figure 21: Select Folder to Import the SDK into the Eclipse IDE
36
Figure 22: Import SDK to the Eclipse IDE
37
Figure 23: Eclipse Project Explorer
37
Import and Build a Project
38
Figure 24: Import Sdkjflash
38
Figure 25: Import a Project
39
Figure 26: Build a Project
39
Figure 27: Build Configurations
40
Figure 28: Generate Configuration Window
40
Figure 29: Generate Configuration Warning Pop-Up
41
Figure 30: Location of Firmware Image Files
41
Changing the Flash Configuration
42
Figure 31: Run Generate Configuration Window
42
How to Move Project Location
43
Downloading the Firmware Images (Firmware Update)
43
Debugging with J-Link Debug Probe
43
Installing J-Link
43
Figure 32: SDK Root Path Variables
43
Connect J-Link
44
Figure 33: Download J-Link Software
44
Figure 34: J-Link 9-Pin Cortex-M Adapter
44
Run Debug Mode
45
Advertisement
Renesas DA16200 PMOD User Manual (83 pages)
Brand:
Renesas
| Category:
Computer Hardware
| Size: 7 MB
Table of Contents
Abstract
1
Table of Contents
2
Contents
2
Figures
4
Terms and Definitions
6
References
6
Azure Iot Hub
7
Azure Services
7
Azure Iot Hub Setup
7
Create Azure Account
7
Figure 1: Azure Services
7
Figure 2: Azure Iot Service Configuration
7
Create Resource Group
8
Figure 3: Create a Resource
8
Figure 4: Resource Group
8
Figure 5: New Resource Group
9
Figure 6: Adding Data for Resource Group
9
Figure 7: Create Resource Group
10
Figure 8: Go to Resource Group
10
Create Iot Hub
11
Figure 9: Created Resource Group
11
Figure 10: Create Resources
11
Figure 11: Select Iot Hub
12
Figure 12: Create Iot Hub
12
Figure 13: Next Networking
13
Figure 14: Next Management
13
Figure 15: Iot Hub Management
14
Figure 16: Review Iot Hub Configuration
14
Register Devices
15
Figure 17: Completed Iot Hub Deployment
15
Figure 18: Generated Iot Hub Web Page
15
Figure 19: Add Devices
16
Figure 20: Add Devices (Continued)
16
Configure Azure Iot Hub
17
Figure 21: Save Devices
17
Figure 22: Device Registered in Azure Iot Server
17
Figure 23: Device ID Registered in Azure Iot Hub
18
Figure 24: Primary Key with Device ID
18
Figure 25: Hostname in Azure Iot Hub
19
Figure 26: Connection String for Azure Iot Hub
19
Verify Connection between Azure Iot Hub and DA16200/DA16600
20
Figure 27: Azure Iot Hub
22
Figure 28: Select Device ID
23
Figure 29: Device Twin in Azure Iot Hub
23
Figure 30: Items in Azure Device Twin
24
Door Lock Reference Application
25
Reference Application in DA16200/DA16600
25
Figure 31: Structure of Azure Iot
25
Open Door
26
Figure 32: Open Azure Iot on Mobile Device
26
Figure 33: Azure Iot on Mobile Device
26
Figure 34: Message Flows of Opening Door
27
Figure 35: Opening Door on Mobile App
27
Close Door
28
Figure 36: Device Twin When Door Is Open
28
Figure 37: Message Flows of Closing Door
28
Figure 38: Closing Door on Mobile App
29
Figure 39: Device Twin When Door Is Closed
29
Reference Application in Host MCU
30
Download Package for Door Lock Reference Application in Host MCU
30
Figure 40: Azure Iot Using Firmware Images for at Commands and Host MCU
30
Hardware Connections between DA16200/DA16600 and Host MCU
31
Figure 41: Hardware Configuration
31
Figure 42: Default UART HW Connection
32
Figure 43: Sample Example of UART1 Connection
33
Figure 44: HW Connection for Waking up DA16200/DA16600
33
Figure 45: Default Pin Configuration for Waking up Host MCU
34
Figure 46: Another Pin Configuration for Waking up Host MCU
34
Programming Firmware Images for DA16200/DA16600
35
Figure 47: Factory Reset Button on DA16200 EVB
35
Figure 48: Factory Reset Button on DA16600 EVB
35
Configure Components for Testing
36
Test Without Host MCU
38
Test with Host MCU
38
Figure 49: E 2 Studio Project File
39
Figure 50: FSP Configuration
39
Figure 51: Thingname/Primarykey/Hostname/Iothub Connection String
40
Figure 52: Build Project
40
Figure 53: Debug Configurations
41
Figure 54: Set Debug Configurations
41
Renesas DA16200 PMOD User Manual (79 pages)
FreeRTOS SDK Programmer Guide
Brand:
Renesas
| Category:
Measuring Instruments
| Size: 1 MB
Table of Contents
Abstract
1
Table of Contents
2
Contents
2
Figures
5
Tables
6
Terms and Definitions
7
References
7
Introduction
8
Overview
8
Development Environment
9
Startup Main()
9
Figure 1: Eclipse Project Configuration
9
Figure 2: Startup Files on DA16200 (DA16600) Project
9
Startup System Applications
12
Figure 3: Applications on Eclipse Project
12
Startup User Applications
14
Write User Application
15
Figure 4: Results of Running the 'Hello World' Applications
15
Figure 5: Customer Project in Eclipse IDE
16
Figure 6: Location of User Codes
17
SDK Compilation
18
Figure 7: Add User Files to the Eclipse Project
18
Figure 8: Compile SDK on Eclipse IDE
18
Make Fccsp RTOS Image
19
Figure 9: Build Success on Eclipse IDE
19
Figure 10: Boot Logo with Fccsp-LP RTOS Image
20
Memory Map
21
Memory Types
21
SRAM Memory Map
21
Figure 11: SRAM Memory Map
21
Figure 12: Memory_Map Command
21
Serial Flash Memory Map
22
Da16200
22
Table 1: 4 MB SFLASH Map for the DA16200
22
Da16600
23
Table 2: 4 MB SFLASH Map for the DA16600
23
Peripheral Driver
24
SPI Master
24
Introduction
24
Application Programming Interface
24
Table 3: SPI Master Pin Configuration
24
Table 4: SPI Interface API Elements
24
Sample Code
26
SPI Slave
26
Introduction
26
Table 5: SPI Interface API Elements
27
Application Programming Interface
28
Sample Code
28
SDIO Master
28
SDIO Introduction
28
Table 6: SPI Slave Interface API Elements
28
Table 7: SDIO Interface API Elements
28
Example Code
30
SDIO Slave
30
Introduction
30
Application Programmer Interface
30
Table 8: SDIO Slave Pin Configuration
30
Table 9: SDIO Interface API Elements
30
Sample Code
31
I2C Master
31
I2C Slave
31
Table 10: I2C Master Pin Configuration
31
Application Programming Interface
32
Table 11: I2C Slave Pin Configuration
32
Table 12: I2C Interface API Elements
32
Sample Code
33
Sd/Emmc
34
Introduction
34
Application Programming Interface
34
Table 13: Sd/Emmc Master Pin Configuration
34
Table 14: Sd/Emmc Interface API Elements
34
Renesas DA16200 PMOD User Manual (58 pages)
ThreadX Evaluation Kit
Brand:
Renesas
| Category:
Motherboard
| Size: 2 MB
Table of Contents
Abstract
1
Table of Contents
2
Contents
2
Figures
3
Tables
4
Terms and Definitions
5
References
5
DA16200 Module EVK
6
Figure 1: Hardware Configuration
6
Figure 2: JTAG Pin Connection
6
Test Sequence
7
Figure 3: Test Point for Current Measurement
7
Table 1: GPIO, SPI Selective Switch
7
Wi-Fi Mode Setup
8
DA16200 Connecting the Board
8
Configure the Serial Port for UART
8
Figure 4: Check COM Ports on Device Manager
8
Setup for Station Mode
9
Figure 5: Serial Port Setup
9
Figure 6: Easy Setup Start
9
Figure 7: Country Selection
10
Figure 8: Station Mode Selection
10
Figure 9: AP Selection
10
Setup for Soft-AP Mode
11
Figure 10: Check Wi-Fi Configuration
11
Figure 11: Wi-Fi Configuration Completed
11
Figure 12: Soft-AP Mode Selection
12
Figure 13: Setup AP
12
Figure 14: AP Mode Selection
13
Figure 15: AP Setup Completed
13
DPM Setup
14
What Is DPM
14
Enable DPM Mode
14
Figure 16: Setting DPM Factor with Default
14
Hold DPM Mode
15
Figure 17: Setting DPM Factor with User Defined
15
Figure 18: DPM Mode Running after Reboot
15
Disable DPM Mode
16
Figure 19: DPM Mode Hold
16
Figure 20: DPM Mode off
17
Current Measurement
18
Test Setup
18
Sleep 1
18
Sleep 2
18
Sleep 3
18
Figure 21: Current Test Environment
18
Figure 22: Current Measurement with DPM
19
Ping Test
20
Test Setup
20
Figure 23: Ping Test Environment
20
Figure 24: Ethernet IP Address Assign
20
Figure 25: DA16200 IP Address Assign
20
Add ARP Record
21
Figure 26: Check ARP Record
21
Figure 27: Interface Name for ARP Record
21
Perform Ping Test
22
Figure 28: Success ARP Record for DA16200
22
Figure 29: Ping Test with DPM
22
Throughput Test
23
Test Setup
23
Figure 30: Iperf Test Environment
23
Figure 31: Iperf Test Command
23
Iperf Test with Client Mode
24
Figure 32: Check IP Address
24
Renesas DA16200 PMOD User Manual (57 pages)
Brand:
Renesas
| Category:
Computer Hardware
| Size: 2 MB
Table of Contents
Abstract
1
Table of Contents
2
Contents
2
Figures
4
Tables
4
Terms and Definitions
6
References
6
Introduction
7
Guidelines of Schematic Design
7
DA16200 and DA16200MOD
8
48-Pin QFN
8
Figure 1: DA16200 QFN48 Pinout Diagram (Top View)
8
72-Pin Fccsp
9
Figure 2: DA16200 Fccsp72 Pinout Diagram (Top View)
9
Pin Description
10
Table 1: Pin Description
10
Table 2: Pin Type Definition
11
Power Supply
12
Power Management
12
Figure 3: Power Management Block Diagram
12
Figure 4: Power on Sequence
13
Table 3: Power on Sequence Timing Requirements
13
Table 4: Power Pin Descriptions
13
Vbat
14
Internal DC-DC (DCDC_LX and DCDC_FB)
14
VDD_DA and VDD_PA
14
Figure 5: High/Low TX Power Mode Connection
14
Vdd_Ana
15
Vdd_Dig
15
VDD_FDIO and FDIO_LDO_OUT
15
VDD_DIO1 and VDD_DIO2
15
Rbias
15
Antenna
16
Antenna Information of DA16200MOD
16
Figure 6: Tested Antenna Dimension
16
Figure 7: Tested Antenna Usage
17
Figure 8: Tested Antenna Radiation Pattern
17
RF Input Requirements
18
Clock
18
RF Main Clock (40 Mhz)
18
Figure 9: LC Filter Circuit
18
Figure 10: LC Filter Layout
18
Table 5: WLAN Crystal Clock Requirements
18
40 Mhz RF XTAL Trimming
19
Table 6: Selected Main RF XTAL Specification
19
Figure 11: Setup for Transmitting CW Tx Power
20
Figure 12: Read XTAL Value
20
RTC Clock (32.768 Khz)
21
RTC Clock Using Crystal
21
Figure 13: Write New XTAL Value
21
Figure 14: RTC Clock
21
Table 7: RTC Crystal Requirements
21
RTC Clock Using an External Clock
22
Serial Flash
22
Serial Flash Interface
22
Figure 15: RTC for External Connection
22
Figure 16: Serial Flash Application Schematic
22
Table 8: RTC Crystal Requirements
22
Serial Flash Selection Guide
23
Table 9: Connections between DA16200 and Serial Flash
23
Table 10: Recommended Serial Flash List
24
Figure 17: Part Name Description
25
Table 11: New Flash Verification Process
25
External Control Pins
26
Renesas DA16200 PMOD User Manual (58 pages)
Brand:
Renesas
| Category:
Computer Hardware
| Size: 3 MB
Table of Contents
Abstract
1
Table of Contents
2
Contents
2
Figures
3
Tables
4
Terms and Definitions
5
References
5
Demonstration Environment
6
Demonstration Prerequisites
6
Figure 1: Architecture of Azure for Iot
6
Azure Iot Hub Setup
7
Azure Account and Portal
7
Azure Services
7
Figure 2: Azure Portal Services
7
Azure Service Configuration for Iot
8
Creating a Resource Group
8
Figure 3: Azure Iot Service Configuration
8
Figure 4: Create a Resource
8
Figure 5: Resource Group
9
Figure 6: New Resource Group
9
Figure 7: Adding Data for Resource Group
10
Figure 8: Create Resource Group
10
Create Iot Hub
11
Figure 9: Go to Resource Group
11
Figure 10: Created Resource Group
11
Figure 11: Create Resources
12
Figure 12: Iot Hub
12
Figure 13: Create in Iot Hub
13
Figure 14: Next Networking
13
Figure 15: Next Management
14
Figure 16: Iot Hub Management Menu
14
Figure 17: Created Iot Hub Configuration
15
Figure 18: Completed Iot Hub Deployment
15
Create Devices
16
Figure 19: Generated Iot Hub Web Page
16
Figure 20: Devices
16
Figure 21: Add Devices
17
Figure 22: Save Devices
17
Figure 23: Device Registered in the Azure Iot Server
18
Symbols Configuration in Eclipse for the DA16200 SDK
19
Figure 24: Da16200_Azure SDK Properties
19
Figure 25: Paths and Symbols
20
Figure 26: Apply Symbols
20
Table 1: Feature Option Map
21
Table 2: DPM Thread Feature
21
Table 3: Sleep 2 Mode Feature
21
Table 4: DPS Feature
21
Configuring the Azure Iot Hub and the DA16200
22
Figure 27: Azure Iot Hub Device ID
22
Figure 28: Azure Iot Hub Device Primary Key
22
Figure 29: Azure Iot Hub Hostname
23
Figure 30: Azure Iot Hub Connection-String
23
Verify the Connection between Azure Iot Hub and DA16200
25
Figure 31: Azure Iot Hub
26
Figure 32: Azure Iot Hub Device ID
26
Figure 33: Azure Iot Hub Device Twin
27
Figure 34: Items in Azure Device Twin
27
Testing the DA16200 Door-Lock
28
Open Door
28
Renesas DA16200 PMOD User Manual (56 pages)
Brand:
Renesas
| Category:
Wireless Router
| Size: 4 MB
Table of Contents
Abstract
1
Table of Contents
2
Contents
2
Figures
3
Terms and Definitions
5
References
5
Demonstration Environment
6
Demonstration Prerequisites
6
Figure 1: Architecture of Azure for Iot
6
Azure Iot Hub Setup
7
Azure Account and Portal
7
Azure Services
7
Figure 2: Azure Portal Services
7
Azure Service Configuration for Iot
8
Creating a Resource Group
8
Figure 3: Azure Iot Service Configuration
8
Figure 4: Create a Resource
8
Figure 5: Resource Group
9
Figure 6: New Resource Group
9
Figure 7: Adding Data for Resource Group
10
Figure 8: Create Resource Group
10
Create Iot Hub
11
Figure 9: Go to Resource Group
11
Figure 10: Created Resource Group
11
Figure 11: Create Resources
12
Figure 12: Iot Hub
12
Figure 13: Create in Iot Hub
13
Figure 14: Next Networking
13
Figure 15: Next Management
14
Figure 16: Iot Hub Management Menu
14
Figure 17: Created Iot Hub Configuration
15
Figure 18: Completed Iot Hub Deployment
15
Create Devices
16
Figure 19: Generated Iot Hub Web Page
16
Figure 20: Devices
16
Figure 21: Add Devices
17
Figure 22: Save Devices
17
Figure 23: Device Registered in the Azure Iot Server
18
Configuring the Azure Iot Hub and the DA16200(DA16600)
19
Figure 24: Azure Iot Hub Device ID
19
Figure 25: Azure Iot Hub Device Primary Key
19
Figure 26: Azure Iot Hub Hostname
20
Figure 27: Azure Iot Hub Connection-String
20
Verify the Connection between Azure Iot Hub and DA16200(DA16600)
22
Figure 28: Azure Iot Hub
24
Figure 29: Azure Iot Hub Device ID
24
Figure 30: Azure Iot Hub Device Twin
25
Figure 31: Items in Azure Device Twin
25
Testing the DA16200(DA16600) Door-Lock
26
Open Door
26
Renesas DA16200 PMOD User Manual (40 pages)
Brand:
Renesas
| Category:
Computer Hardware
| Size: 3 MB
Table of Contents
Abstract
1
Table of Contents
2
Contents
2
Figures
3
Tables
3
Abstract
4
Terms and Definitions
4
References
4
What Is AT-Command for Azure-Iot
5
Figure 1: Overview of AT-CMD with Azure-Iot
5
Release Package
6
Demonstration Hardware Description
7
Figure 2: Hardware Configuration
7
Configuring Hardware
8
UART Connection
8
Table 1: Pin Connection
8
Figure 3: Default UART HW Connection
9
Figure 4: User Example of Custom UART1 HW Connection
9
Table 2: UART1 Pin Configuration
9
DA16200/DA16600 Wake up Connection
10
External Host Wake up Connection
10
The DA16200/DA16600
10
Figure 5: DA16200/DA16600 Wake up HW Connection
10
Figure 6: Default Wake up Pin HW Connection
11
Figure 7: User Example for External Host Wake up Pin HW Connection
11
Table 3: GPIO Pin Configuration
11
Software Setting Guide
13
How to Connect with Tera Term
13
Figure 8: Tera Term
13
Figure 9: Serial Port Setup
13
How to Download Firmware Image to DA16200/DA16600
14
Figure 10: DA16200/DA16600 Image Download
14
Figure 11: Reset Button
15
Configuration Items for Testing
16
Stand-Alone Mode
17
MCU Setting
18
Figure 12: E2Studio Project File
18
Figure 13: FSP Configuration
19
Figure 14: Device ID (THINGNAME), Primary Key, Hostname and Primary Connection String in MCU Source Code
19
Figure 15: Build Project
20
Figure 16: Debug Conf Igurations Menu
20
Figure 17: Set Debug Configurations
21
Mobile App
24
Overview
24
Open Door
24
Figure 18: Block Diagram for Opening a Door
24
Figure 19: Open Door in the App
25
Figure 20: Device Twin When Door Is Opened
25
Close Door
27
Figure 21: Block Diagram for Closing a Door
27
Renesas DA16200 PMOD User Manual (40 pages)
Brand:
Renesas
| Category:
Computer Hardware
| Size: 2 MB
Table of Contents
Abstract
1
Table of Contents
2
Contents
2
Figures
3
Tables
3
Abstract
4
Terms and Definitions
4
References
4
What Is AT-Command for AWS-Iot
5
Release Package
5
Figure 1: Overview of AWS-Iot with AT-Command
5
Hardware Configuration
6
Figure 2: Hardware Configuration
6
Table 1: Pin Connection
6
How to Configure Hardware
7
UART Connection
7
Table 2: Serial Port Configuration Values
7
Figure 3: Default UART HW Connection
8
Figure 4: Sample Example of UART1 HW Connection
8
Table 3: UART1 Pin Configuration
8
DA16200 (DA16600) Wake up Connection
9
External Host Wake up Connection
9
Figure 5: DA16200 (DA16600) Wake up HW Connection
9
Figure 6: HW Connection of Default Wake up Pin
10
Figure 7: Example HW Connection for External Host Wake up Pin
10
Table 4: GPIO Pin Configuration
10
Software Configuration
12
The DA16200 (DA16600)
12
How to Connect with Tera Term
12
Figure 8: Tera Term
12
Figure 9: Serial Port Setup
12
How to Download a Firmware Image to the DA16200 (DA16600)
13
Figure 10: Download DA16200 (DA16600) Image
13
Figure 11: Reset Button
14
Thing Name for Testing
15
Stand-Alone Mode
16
MCU Setting
16
Figure 12: E2Studio Project File
17
Figure 13: Thing Name in MCU Source Code
17
Figure 14: Build Project
18
Figure 15: Debug Configuration
18
Mobile App
21
Overview
21
Open Door
22
Figure 16: Block Diagram of Opening a Door
22
Figure 17: Open Door in the App
22
Figure 18: Shadow State When Door Opened
23
Close Door
24
Figure 19: Block Diagram of Closing a Door
25
Figure 20: Close Door in the App
25
Renesas DA16200 PMOD User Manual (39 pages)
Brand:
Renesas
| Category:
Computer Hardware
| Size: 2 MB
Table of Contents
Abstract
1
Table of Contents
2
Contents
2
Figures
3
Tables
3
Abstract
4
Terms and Definitions
4
References
4
What Is AT-Command for Azure-Iot
5
Release Package
5
Figure 1: Overview of AT-CMD with Azure-Iot
5
Demonstration Hardware Description
6
Figure 2: Hardware Configuration
6
Configuring the Hardware
7
UART Connection
7
Table 1: Pin Connection
7
Figure 3: Default UART HW Connection
8
Figure 4: User Example of Custom UART1 HW Connection
8
Table 2: UART1 Pin Configuration
8
DA16200 Wake up Connection
9
External Host Wake up Connection
9
Figure 5: DA16200 Wake up HW Connection
9
Figure 6: Default Wake up Pin HW Connection
9
Figure 7: User Example for External Host Wake up Pin HW Connection
10
Table 3: GPIO Pin Configuration
10
Software Setting Guide
11
The DA16200
11
How to Connect with Tera Term
11
Figure 8: Tera Term
11
Figure 9: Serial Port Setup
11
How to Download a Firmware Image to the DA16200
12
Figure 10: DA16200 Image Download
12
Figure 11: Reset Button
13
Configuration Items for Testing
14
Stand-Alone Mode
15
MCU Setting
16
Figure 12: Cubeide Project File
16
Figure 13: Device ID(THINGNAME), Primary Key, Hostname and Primary Connection String in MCU Source Code
17
Figure 14: Build Project
17
Figure 15: Debug Configurations Menu
18
Figure 16: Set Debug Configurations
18
Figure 17: Set Perspective Switch
19
Mobile App
22
Overview
22
Open Door
23
Figure 18: Block Diagram for Opening a Door
23
Figure 19: Open Door in the App
23
Figure 20: Device Twin When Door Is Opened
24
Close Door
25
Figure 21: Block Diagram for Closing a Door
25
Renesas DA16200 PMOD User Manual (34 pages)
Brand:
Renesas
| Category:
Computer Hardware
| Size: 1 MB
Table of Contents
Table of Contents
2
Figures
4
Tables
4
Terms and Definitions
5
References
5
Overview
6
Linux Driver for Wi-Fi
7
Required Preparations
7
How to Erase Flash
7
Figure 1: Example of Erasing Flash
7
RZ/G2L Linux System
8
SD Card
8
Nfs
8
Kernel Config
9
SD Card
9
Figure 2: RFKILL Configuration
9
Figure 3: Wireless Configuration
9
Nfs
10
U-Boot Environment
11
SD Card
11
Nfs
11
DA16200 Driver Module
12
How to Compile Module (Optional)
12
Installing the Driver as a Linux Module
13
SPI Pin Connection for Wi-Fi
16
How to Set Interrupt Pin in the Device Tree
16
Table 1: SPI Pin Connection for Wi-Fi
16
SDIO Pin Connection for Wi-Fi
17
BT COEX Configuration
17
MAC Address
17
Table 2: SDIO Pin Connection for Wi-Fi
17
Table 3: Pin Configuration of Bluetooth® le Coexistence
17
4.10 Architecture
18
4.11 H/W Reset
18
Figure 4: Linux Driver Architecture
18
Table 4: PIN Configuration of HW Reset
18
4.12 Throughput Test
19
Test Setup
19
Iperf3 Test with Client Mode
19
Figure 5: Check IP Address
19
Figure 6: Disable Firewall for Iperf3 Test
19
Figure 7: Run Iperf3 Server on PC
20
Figure 8: Result of Iperf3 TCP Tx
20
Iperf3 Test with Server Mode
21
Figure 9: Result of Iperf3 UDP Tx
21
Figure 10: TCP Iperf3 Rx Result
21
4.13 Supported Commands for RF Tests
22
Figure 11: UDP Iperf3 Rx Result
22
Table 5: Common Command List
22
Table 6: RF Test Command List
23
Renesas DA16200 PMOD User Manual (46 pages)
Brand:
Renesas
| Category:
Computer Hardware
| Size: 1 MB
Table of Contents
Abstract
1
Table of Contents
2
Contents
2
Figures
3
Tables
3
Terms and Definitions
4
References
4
Overview
5
SDK Build
5
Figure 1: MQTT Messaging Concept
5
Application Programming Interface
6
Operation Apis
6
Table 1: MQTT API List
6
Configuration Apis
7
Table 2: Configuration API
7
Table 3: MQTT Messaging Configuration (String Type)
8
Table 4: MQTT Messaging Configuration (Integer Type)
9
Example Code
11
MQTT Publisher
11
MQTT Subscriber
12
Receiving/Processing Message (from MQTT Publisher)
12
Periodic Message Publishing
13
Running Sub and Pub at the same Time (with DPM)
13
MQTT Client Sample
14
Test
15
Test Environment
15
Setup
15
Publisher
16
Non-Qos Message
16
Figure 2: Publish Non-Qos Message
16
Qos Message
17
Figure 3: Publish Qos 1 Message
17
Figure 4: Publish Qos 2 Message
18
Figure 5: Configure Parameters and Publish a Message
18
MQTT over TLS
19
Figure 6: Publish Secure Message
19
Username and Password
20
Figure 7: User Login
20
Subscriber
21
Setup
21
MQTT over TLS
21
Username and Password
21
Will
22
MQTT Pub/Sub Test with DPM and TLS
22
Figure 8: DPM Sleep after MQTT Connection
23
Figure 9: MQTT UC Wakeup
23
MQTT Reconnection Scheme
24
DPM Power Profile
24
Figure 10: MQTT Wakeup for Sending Message
24
MQTT Cleansession=0 Test Guide
25
Renesas DA16200 PMOD User Manual (29 pages)
Brand:
Renesas
| Category:
Computer Hardware
| Size: 0 MB
Table of Contents
Table of Contents
2
Contents
2
Figures
3
Terms and Definitions
4
References
4
Introduction
5
Certification Mode
5
Network Mode
5
OTP Mode
5
Figure 1: DA16200 EVK GUI
5
How to Connect
6
USB to Serial Driver
6
DA16200 SDK or Firmware Selection
6
How to Run GUI with DA16200 EVK
7
Connection and Running
7
Figure 2: Development Kit Connections
7
Figure 3: at GUI
8
COM Port and Baud Rate Configuration
9
Figure 4: RS232 Setup - Disconnected
9
Figure 5: RS232 Setup - Connected
9
Figure 6: Debug Console - Connected
9
RF Certification Mode
10
Figure 7: Certification Mode Configuration
10
TX Test Mode
11
Figure 8: Tx Test Mode Configuration
11
Figure 9: Debug Console - TX Mode
11
RX Test Mode
12
Figure 10: Start and Stop TX
12
Figure 11: Debug Console - Sart TX
12
Figure 12: Debug Console - Stop TX
12
Figure 13: Rx Configuration
13
Network Mode
14
Figure 14: Network Mode Configuration
14
Station Mode
15
Figure 15: Setup Window - Station Mode
15
Figure 16: Station Mode - SCAN
15
Figure 17: Station Mode - Choose AP and Connect
16
Figure 18: Debug Console - C Onnect to AP
16
AP Mode
17
Figure 19: Setup Window - AP Mode
17
Figure 20: AP Configuration
17
Data Transfer (TCP/UDP)
18
Figure 21: Debug Console - AP Configuration
18
Figure 22: DHCP Configuration
18
Figure 23: Debug Console - DHCP Configuration
18
TCP Server
19
Figure 24: Data Transfer Tab
19
Figure 25: TCP Server Open
19
Figure 26: TCP Server Connection with a Client
19
TCP Client
20
Renesas DA16200 PMOD Quick Start Manual (10 pages)
Wi-Fi Enabled Cloud IoT Solution Kit
Brand:
Renesas
| Category:
Motherboard
| Size: 0 MB
Table of Contents
Table of Contents
1
1 Kit Contents
2
Hardware Components
2
Software Components
2
2 Features
3
3 Set up the Demo
3
Download Code to EK-RA6M4
3
Connect the Solution Kit
4
Run the Solution
5
Debug the Project
7
4 Revision History
7
Appendix
8
Advertisement
Related Products
Renesas DA9061
Renesas DA9062
Renesas DA728 Series
Renesas DA9063L
Renesas DA9066
Renesas DA9068
Renesas DA7210
Renesas DA7211
Renesas DA9313
Renesas DA7280
Renesas Categories
Computer Hardware
Motherboard
Microcontrollers
Adapter
Switch
More Renesas Manuals
Login
Sign In
OR
Sign in with Facebook
Sign in with Google
Upload manual
Upload from disk
Upload from URL