Sign In
Upload
Manuals
Brands
NTI Manuals
Switch
SERIMUX-S-x
NTI SERIMUX-S-x Manuals
Manuals and User Guides for NTI SERIMUX-S-x. We have
1
NTI SERIMUX-S-x manual available for free PDF download: Installation And Operation Manual
NTI SERIMUX-S-x Installation And Operation Manual (100 pages)
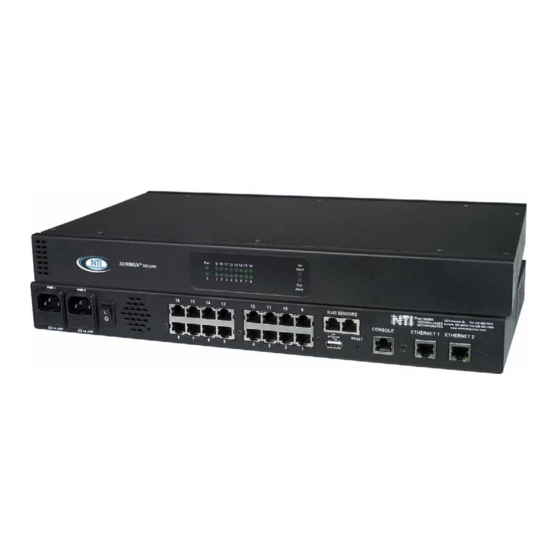
SERIMUX Series SECURE SSH CONSOLE SERIAL SWITCH
Brand:
NTI
| Category:
Switch
| Size: 3 MB
Table of Contents
Typographic Conventions
2
Table of Contents
3
Introduction
9
Serial Interface Specifications
9
Network Interface
9
RJ45 Sensor Ports
9
Protocols
10
Supported Web Browsers
10
Definitions
10
Materials
11
Default User Name and Password
12
Features and Functions
13
Installation
14
To Mount to a Rack
14
Figure 1- Secure Rack Mount Ears to Switch
14
Figure 2- Secure Switch to a Rack
14
Cable Connections
15
Connect to the Ethernet
15
Figure 3- Connect Terminals and Devices to SERIMUX Console Switch
15
Figure 4- Connect the LAN to the SERIMUX
15
Dual Power Option
16
DC Power Option
16
Figure 5- Power Connections for SERIMUX with Dual Power Option
16
Figure 6- Power Connections for SERIMUX with DC Power Option
16
Connect Sensors
17
Figure 7- Connect Sensors to the SERIMUX
17
Initial Startup
18
Figure 8- SERIMUX Secure Configuration Menu Via Serial Connection
18
Figure 10- Port Connection Menu
19
Figure 9- Submenu for Port Connect or Sensor Monitoring
19
Figure 11- Sensor Monitoring
20
Connect Direct to Serial Port from Command Line
21
Connect Via Telnet
21
Connect Via SSH
21
Using the SERIMUX Console Switch
22
Serial Control- Administrator
22
Login as the Administrator
23
Figure 12- Serimux Secure Configuration Menu
23
Port Management
24
Figure 13- Port Management- Complete Ports List
24
Figure 14- Port Management Selections for Port 1
24
Common Settings
25
Figure 15- Port Management- Configure Common Settings for most Ports
25
Figure 16- Port Management- Port Settings for Port 1
25
Port Settings
25
Figure 17- Port Management-Serial Settings for Port 1
26
Serial Settings
26
Figure 18- Port Management-Port Logging for Port 1
27
Port Logging
27
Authentication
28
Figure 19- Port Management-Modem Setting for Port 1
28
Figure 20- Port Management-Authentication for Port 1
28
Modem Setting
28
Event Notification
29
Figure 21- Authentication Server Configuration
29
Figure 22- Port Management- Event Notification for Port 1
29
Figure 23- Port Management-Port Access List for Port 1
30
Figure 24- Port Management-Add Users to Access List
30
Figure 25- Port Management-Add Group to Access List
30
Port Access List
30
Figure 26- Port Management- Remove Group from Access List
31
Figure 27- Port Management- Disconnect Port 1
31
Port Disconnect
31
Apply Common Settings
32
Figure 28- Port Management- Apply Common Settings to Port 1
32
Device Management
33
Add a Contact Sensor
33
Figure 29- Device Management Menu
33
Figure 30- Adding a Sensor
33
Remove a Sensor
34
Configure a Sensor
34
Figure 31- Remove a Sensor
34
Figure 32- Sensor Configuration Topics
34
Figure 33- Sensor Settings for Temperature Sensor
35
Figure 34- Sensor Settings for Water Sensor
35
Sensor Settings
35
Alert Settings
36
Figure 35- Sensor Alert Settings
36
Data Logging
37
Figure 36- Sensor Data Logging
37
Figure 37- Sensor Access List
37
Sensor Access List
37
Figure 38- Sensor User Authentication
38
Sensor Authentication
38
Network Management
39
IP Configuration
39
Figure 39-Network Management Menu
39
Figure 40- Network Management-IP Configuration
39
Figure 41- Network Management-Ipv4 Settings
39
Figure 42- Network Management- Ipv6 Settings
40
Figure 43- Network Management-Ipv6 Manual IP Assignment
40
Server Configuration
41
Figure 44-Network Management- Server Configuration
41
Figure 45- Network Management- Web Server Settings
41
Figure 46- Network Management- SMTP Server Settings
41
Figure 47- Network Management- NFS Server Configuration
42
Figure 48- Network Management-SNMP Configuration
42
Snmp
43
TCP Setting
43
Figure 49- Network Management-TCP Settings
43
Administration Settings
44
Unit Settings
44
Unit Setting->Change Admin Password
44
Figure 50- Administration Settings
44
Figure 51- Administration Settings-Unit Settings
44
Unit Settings->Date Time Settings
45
Figure 52-Unit Settings-Change Password
45
Figure 53- Unit Settings-Manual Date and Time
45
Figure 54-Unit Settings-NTP Server Settings
46
Figure 55- Unit Settings-Daylight Savings
46
Security Settings
47
Figure 56- Administration Settings-Security Setting
47
Figure 57- Administration Settings-CLI Authentication Types
47
Syslog
48
Figure 58- Administration Settings-Security-CLI Authentication
48
Figure 59- Administrative Settings-Syslog
48
Figure 60- Administration Settings-System Log Settings
49
Figure 61- Administration Settings-Syslog-Ng Configuration
49
Firmware Update
50
Figure 62- Administration Settings-Firmware Update
50
Figure 63- Change Path from Tftp Source to Flash Drive
50
Figure 64- Firmware Update- Confirm to Perform Update
51
Figure 65- Firmware Update- Completed
51
User Management
52
System Users
52
Figure 66- User Management Menu
52
Figure 67- User Management- System Users
52
Figure 68- User Management-Configure User
52
Access Group
53
Figure 69- User Management-Access Groups
53
Figure 70- User Management- Group User List
53
Administrative Info
54
System Log
54
Figure 71- Administrative Info Menu
54
Figure 72- Administrative Info-System Log
54
System Information
55
Network Information
55
Figure 73- Administrative Info-System Information
55
Figure 74- Administrative Info-Network Information
55
Port List
56
Reboot
56
Figure 75- Administrative Info-Port List
56
Figure 76- Reboot the SERIMUX from the Shell
56
Serial Control-Users
57
User Initial Selection Menu
57
Figure 77- Initial Menu for Users
57
Figure 78- a User with Limited Host Port Access
57
Figure 79- Sensor List with Current Readings
58
Device Discovery Tool
59
Figure 80- Device Discovered
59
Web Interface
60
Enter the Password
60
Figure 81- Web Interface Login Page
60
Menu Overview
61
Main Menu and Port List
62
Connect to a Port
62
Figure 82- Connect Port/Port List Page
62
Figure 83- SSH Port Connection Via Java Applet
63
Figure 84- SSH Port Connected
63
Figure 85- Serial Connection-"Offline"-Properly Exited
64
Port Management
65
Port Configuration
65
Port Configuration->Port Settings
65
Figure 86- Port Configuration Page
65
Figure 87- Port Settings
65
Port Configuration->Serial Settings
66
Port Configuration->Port Logging
66
Figure 88- Serial Settings
66
Figure 89- Port Logging Settings
66
Port Configuration->View Port Log
67
Port Configuration->Modem Settings
67
Port Configuration->Authentication
67
Figure 90- View or Clear Port Log
67
Figure 91- Modem Settings
67
Figure 92- Authentication Method Options
67
Port Configuration->Event Notification
68
Port Configuration->Port Access List
68
Port Configuration->Apply Common Settings
68
Figure 93- Port Event Notifications
68
Figure 94- Port Access List
68
Figure 95- Apply Common Settings to Port
68
Port Configuration->Disconnect Port
69
Common Port Configuration Page
69
Figure 96- Disconnect Port Button
69
Figure 97- Common Port Configuration Page
69
Copy Paste Port
70
Base TCP Port
70
Figure 98- Copy Paste Port Page
70
Sensor Management
71
Internal Sensors
71
External Sensors
71
RS485 Sensors
71
RS485 Sensor Management
71
Sensor Summary
71
Figure 99- Sensor Summary Page
71
Figure 100- Sensor Status Details
72
Figure 101- Sensor Configuration Page
72
Adding a Sensor
73
Figure 102-Add a Sensor
73
Figure 103- Wiring Method for Contact Sensor
73
Configure a Sensor
74
Figure 104- Common Sensor Configuration Page
74
Sensor Alert Settings
75
Sensor Settings
75
Sensor Access List
76
Sensor Authentication
76
Sensor Log Settings
76
Network Management
77
IP Configuration
77
Figure 105- IP Configuration Page
77
Server Configuration
78
Figure 106- Server Configuration Page
78
Snmp
79
TCP Settings
79
Figure 107- NFS Configuration Settings
79
Figure 108- TCP Settings Page
79
Administrative Settings
80
Unit Settings
80
Unit Settings->Admin Password
80
Figure 109- Unit Settings Page
80
Figure 110- Change Password for User "Root
80
Unit Settings->Date and Time Settings
81
Figure 111- Unit Settings Page, Date and Time
81
Security Settings
82
Figure 112- Security Settings Page
82
Syslog
83
Figure 113- Syslog Page
83
Firmware Update
84
Figure 114- Firmware Update Page
84
Figure 115- Firmware Update- File Selected
84
Figure 116- Firmware Update Done
84
User Management
85
System Users
85
Figure 117- Firmware Update Failure
85
Figure 118- System User Page
85
Figure 119- User Configuration
86
Access Groups
87
Figure 120- Access Groups Page
87
Figure 121- Edit User Names Listed in Access Group
87
Administrative Information
88
System Log
88
System Information
88
Figure 122- System Log Displayed
88
Figure 123- System Information Page
88
Network Information
89
Support
89
Figure 124- Network Information Page
89
Figure 125- Support Links
89
Reboot
90
Logout
90
Figure 126- Reboot Page
90
Figure 127- Logout Screen
90
Telnet or SSH Connection
91
Telnet Via Hyperterminal
91
Telnet Via Command Prompt
91
Figure 128- Telnet Connection Via Hyperterminal
91
RESET Button
92
Change Console Port Baud Rate
92
Figure 129- Location of RESET Button
92
Interconnection Cable Wiring Method
93
Troubleshooting
93
Figure 130- View Looking into RJ45 Female
93
Appendix A - SERIMUX Port Characteristics
94
Appendix B-Serimux User and Administrator Characteristics
94
Appendix C- Cable Adapters
95
Appendix D- Common Commands from Shell Command Line
97
Appendix E- SERIMUX-S-X Default Paths
97
Appendix F- SERIMUX-S-X Default Network Settings
97
Specifications
98
Index
99
Warranty Information
100
Advertisement
Advertisement
Related Products
NTI SERIMUX-SECURE-x
NTI SERIMUX-CS-x
NTI SERIMUX-CS-4
NTI SERIMUX-CS-8
NTI SERIMUX-CS-16
NTI SERIMUX-CS-24
NTI SERIMUX-CS-32
NTI SE-4K18GB-4RS
NTI SE-15V-4-RS
NTI SE-15V-16-L
NTI Categories
Extender
Boiler
Switch
Media Converter
Measuring Instruments
More NTI Manuals
Login
Sign In
OR
Sign in with Facebook
Sign in with Google
Upload manual
Upload from disk
Upload from URL