Sign In
Upload
Manuals
Brands
Minolta Manuals
Scanner
DiMAGE Scan Multi PRO AF-5000
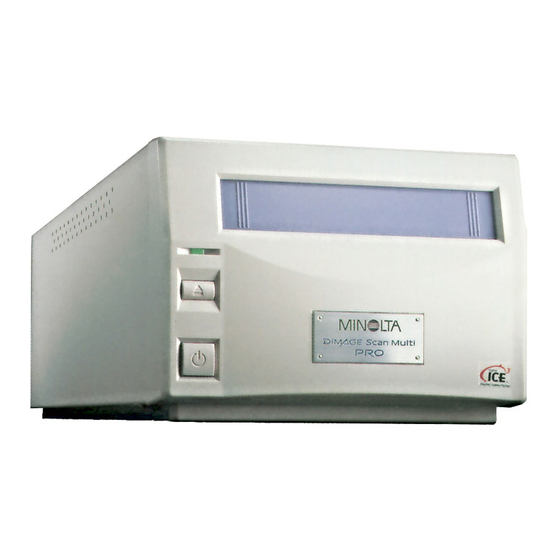
Minolta DiMAGE Scan Multi PRO AF-5000 Manuals
Manuals and User Guides for Minolta DiMAGE Scan Multi PRO AF-5000. We have
2
Minolta DiMAGE Scan Multi PRO AF-5000 manuals available for free PDF download: Instruction Manual
Minolta DiMAGE Scan Multi PRO AF-5000 Instruction Manual (130 pages)
Multiple format film scanner
Brand:
Minolta
| Category:
Scanner
| Size: 2.24 MB
Table of Contents
For Proper and Safe Use
3
Software Registration
3
Package Contents
4
The Following Contents Should be Included in this Package
4
Index Scan
5
Preview Scan
5
Table of Contents
6
System Requirements - Pc / at
10
System Requirements - Macintosh
11
Scanner - Names of Parts
12
Scanner Setup
13
Removing the Optics Locking Screw
14
Connecting the Hardware
15
Setting the DIP Switch
15
Using the Scsi Interface
16
Using the Ieee 1394 Interface
19
Installing the Software - Windows
20
Windows
20
2000 Professional / WINDOWS
20
Me / WINDOWS NT
20
Installing the Software - Macintosh
23
Launching the Software - Window
26
Launching the TWAIN Drivers
26
Launching the Utility Software
26
Launching the Software - Macintosh
27
Launching the Plug-In
27
Launching the Utility Software
27
Main Window
28
Setting the Preferences
29
Loading the Film Holder
31
35Mm Film Holder FH-P1
31
Slide Mount Holder SH-P1
32
Loading the Universal Holder UH-P1
33
120/220 (6X4.5, 6X6, 6X7, 6X8, 6X9) Film Attachment with Glass (HA-P1)
33
120/220 (6X4.5, 6X6, 6X7, 6X8, 6X9) Film Attachment with Glassless (HA-P2)
35
Multi-Format Attachment (Sold Separately, HS-P1)
36
Inserting the Film Holder
38
Setting the Film Format/Film Type
39
Selecting the Film Format
39
Selecting the Film Type
40
List of Usable Films
40
Index Scan
41
Index Scan Window
42
The Index Tab Part - Names of Parts
42
Making an Index Scan
43
Changing the Window Size
43
Scanning the Image
44
Selecting the Frames
44
Rotating or Flipping the Index Frames
45
Reversing the Frame Order
45
Full Scale View
45
Saving the Index Scan Image
46
Saving the Index Image File
47
Loading the Index Image File
48
Preview Scan
49
Prescan Window
50
The Prescan Tab Part - Names of Parts
50
Making a Prescan
51
Rotating the Image
52
Flipping the Image
53
Full Screen Viewing, Magnifying or Reducing the View
54
Full Screen View
54
Magnifying or Reducing the View
54
Scrolling the Image
55
Auto-Exposure Lock
56
Setting the AE-Lock
56
Cancelling the AE-Lock
56
Ae Area Lock
57
Cropping the Image
58
Auto Cropping
58
Cropping
58
Cropping the Prescan Image
59
Focus
60
Point AF
60
Manual Focus
61
Displaying Frame Number
62
RGB/CMY Information
62
Image Correction
63
Image Correction Window
64
The Image Correction Tab Part - Names of Parts
64
Tone Curves and Histogram
65
The Tone Curves and Histogram Dialog Box - Names of Parts
65
Correcting the Tone Curves
66
Changing the Tone Curves by Freehand
66
Setting the White, Black or Gray Points
67
Viewing the Histogram of Images after Making Corrections
68
Auto Setting
68
Reset
68
Correcting the Histogram
69
Brightness / Contrast / Color Balance
70
The Brightness, Contrast and Color Balance Correction Dialog Box
70
Names of Parts
70
Auto Setting
71
Reset
71
Hue / Saturation / Lightness
72
The Hue, Saturation, Lightness Correction Dialog Box - Names of Parts
72
Auto Setting
73
Reset
73
Variation Correction
74
The Variation Dialog Box - Names of Parts
74
Selecting the Correction Item
74
Changing the Amount of Correction Step
74
Color Balance Correction
75
Brightness & Contrast Correction
75
Saturation Correction
76
Reset
76
Selective Color Correction
77
The Selective Color Correction Dialog Box - Names of Parts
77
Reset
77
Unsharp Mask
78
The Unsharp Mask Dialog Box - Names of Parts
78
Reset
79
Snapshot
80
Storing in the Snapshot Display Area Temporarily
80
Displaying the Image Stored Temporarily as a Prescan Image
80
Cancelling the Image Correction
81
Redo the Correction
81
Delete the Image Correction
81
Full-Screen View
82
Checking the Correction Result While Lining up Images
82
Job Save / Job Load
83
Saving an Image Correction Job
83
Loading Image Correction Job
84
Digital Ice / Digital Roc / Digital Gem
85
Before Using the Digital ICE/ROC/GEM Function
85
Digital Ice
87
Digital Roc
88
Digital Gem
89
Final Scan
91
Scan Settings
92
The Scan Settings Part Window - Names of Parts
92
Creating / Deleting Job Files
95
Creating a Job
95
Deleting a Job
95
What a Job
96
Scan Job Type
97
Final Scan
98
Twain Driver / Plug-In Software
98
Utility Software
99
Custom Wizard
100
When Starting a Registered Setting
104
Appendix
105
Ieee 1394 Interface
106
Color Matching
107
Output Color Space Setting
108
ICC Profile Setting
108
SCAN JOB FILE LIST - 35 MM
110
Scan Job File List - 120/220 (6X4.5)
112
Scan Job File List - 120/220 (6X6)
114
Scan Job File List - 120/220 (6X7)
116
Scan Job File List - 120/220 (6X8)
118
Scan Job File List - 120/220 (6X9)
120
SCAN JOB FILE LIST - MULTI FORMAT 35 MM
122
Glossary
124
Trouble Shooting
126
User Technical Support
127
Specifications
128
Advertisement
Minolta DiMAGE Scan Multi PRO AF-5000 Instruction Manual (129 pages)
Minolta DiMAGE Scan Multi Pro Instruction Manual
Brand:
Minolta
| Category:
Scanner
| Size: 2.29 MB
Table of Contents
For Proper and Safe Use
3
Software Registration
3
Package Contents
4
The Following Contents Should be Included in this Package
4
Table of Contents
6
System Requirements - Pc / at
10
System Requirements - Macintosh
11
Scanner - Names of Parts
12
Scanner Setup
13
Removing the Optics Locking Screw
14
Connecting the Hardware
15
Setting the DIP Switches
15
Using the Scsi Interface
16
Using the Ieee 1394 Interface
19
Installing the Software - Windows
20
Windows
20
2000 Professional / WINDOWS
20
Me / WINDOWS NT
20
Installing the Software - Macintosh
23
Launching the Software - Windows
26
Launching the TWAIN Drivers
26
Launching the Utility Software
26
Launching the Software - Macintosh
27
Launching the Plug-In
27
Launching the Utility Software
27
Main Window
28
The Main Window Part - Names of Parts
28
Setting the Preferences
29
Loading the Film Holder
31
35Mm Film Holder FH-P1
31
Slide Mount Holder SH-P1
32
Loading the Universal Holder UH-P1
33
120/220 (6X4.5, 6X6, 6X7, 6X8, 6X9) Film Attachment with Glass (HA-P1)
33
120/220 (6X4.5, 6X6, 6X7, 6X8, 6X9) Glassless Film Attachment (HA-P2)
35
Multi-Format Attachment (Sold Separately, HS-P1)
36
Inserting the Film Holder
38
Setting the Film Format/Film Type
39
Selecting the Film Format
39
Selecting the Film Type
40
List of Usable Films
40
Index Scan
41
Index Scan Window
42
The Index Tab Part - Names of Parts
42
Making an Index Scan
43
Changing the Window Size
43
Scanning the Image
44
Selecting the Frames
44
Rotating or Flipping the Index Frames
45
Reversing the Frame Order
45
Full Scale View
45
Saving the Index Scan Image
46
Saving the Index Image File
47
Loading the Index Image File
48
Preview Scan
49
Prescan Window
50
The Prescan Tab Part - Names of Parts
50
Making a Prescan
51
Rotating the Image
52
Flipping the Image
53
Full Screen Viewing, Magnifying or Reducing the View
54
Full Screen View
54
Magnifying or Reducing the View
54
Scrolling the Image
55
Auto-Exposure Lock
56
Setting the AE-Lock
56
Cancelling the AE-Lock
56
Ae Area Lock
57
Cropping the Image
58
Auto Cropping
58
Cropping
58
Cropping the Prescan Image
59
Focus
60
Point AF
60
Manual Focus
61
Displaying Frame Number
62
RGB/CMY Information
62
Image Correction
63
Image Correction Window
64
The Image Correction Tab Part - Names of Parts
64
Tone Curves and Histogram
65
The Tone Curves and Histogram Dialog Box - Names of Parts
65
Correcting the Tone Curves
66
Changing the Tone Curves by Freehand
66
Setting the White, Black or Grey Points
67
Viewing the Histogram of Images after Making Corrections
68
Auto Setting
68
Reset
68
Correcting the Histogram
69
Brightness / Contrast / Colour Balance
70
The Brightness, Contrast and Colour Balance Correction Dialog Box - Names of Parts
70
Auto Setting
71
Reset
71
Hue / Saturation / Lightness
72
The Hue, Saturation, Lightness Correction Dialog Box - Names of Parts
72
Auto Setting
73
Reset
73
Variation Correction
74
The Variation Dialog Box - Names of Parts
74
Selecting the Correction Item
74
Changing the Correction Increments
74
Colour Balance Correction
75
Brightness & Contrast Correction
75
Saturation Correction
76
Reset
76
Selective Colour Correction
77
The Selective Colour Correction Dialog Box - Names of Parts
77
Reset
77
Unsharp Mask
78
The Unsharp Mask Dialog Box - Names of Parts
78
Reset
79
Snapshot
80
Storing in the Snapshot Display Area Temporarily
80
Displaying the Image Stored Temporarily as a Prescan Image
80
Cancelling the Image Correction
81
Redo the Correction
81
Delete the Image Correction
81
Full-Screen View
82
Checking the Correction Result While Lining up Images
82
Job Save / Job Load
83
Saving an Image Correction Job
83
Loading Image Correction Job
84
Digital Ice / Digital Roc / Digital Gem
85
Before Using the Digital ICE/ROC/GEM Function
85
Digital Ice
87
Digital Roc
88
Digital Gem
89
Final Scan
91
Scan Settings
92
The Scan Settings Part Window - Names of Parts
92
Creating / Deleting Job Files
95
Creating a Job
95
Deleting a Job
95
What Is a Job
96
Scan Job Type
97
Final Scan
98
Twain Driver / Plug-In Software
98
Utility Software
99
Custom Wizard
100
When Starting a Registered Setting
104
Appendix
106
Ieee 1394 Interface
106
Colour Matching
107
Output Colour Space Setting
108
ICC Profile Setting
108
SCAN JOB FILE LIST - 35 MM
110
Scan Job File List - 120/220 (6X4.5)
112
Scan Job File List - 120/220 (6X6)
114
Scan Job File List - 120/220 (6X7)
116
Scan Job File List - 120/220 (6X8)
118
Scan Job File List - 120/220 (6X9)
120
SCAN JOB FILE LIST - MULTI FORMAT 35 MM
122
Glossary
124
Trouble Shooting
126
User Technical Support
127
Specifications
128
Advertisement
Related Products
Minolta DiMAGE Scan Multi PROAF-5000
Minolta PS7000
Minolta QuickScan 35 Plus QS-2800
Minolta DIMAGE SCAN MULTI PRO
Minolta Dimage Scan Multi II
Minolta Dimage Scan Multi2
Minolta DiMAGE DiMAGE Scan Multi PRO
Minolta PageWorks Pro 18
Minolta PageWorks Pro 18L
Minolta PageWorks Pro 20
Minolta Categories
Digital Camera
Film Camera
Printer
Copier
All in One Printer
More Minolta Manuals
Login
Sign In
OR
Sign in with Facebook
Sign in with Google
Upload manual
Upload from disk
Upload from URL