Sign In
Upload
Manuals
Brands
Konica Minolta Manuals
All in One Printer
bizhub PRESS C1100
Konica Minolta bizhub PRESS C1100 Manuals
Manuals and User Guides for Konica Minolta bizhub PRESS C1100. We have
4
Konica Minolta bizhub PRESS C1100 manuals available for free PDF download: User Manual, Quick Manual, Daily Maintenance Manual
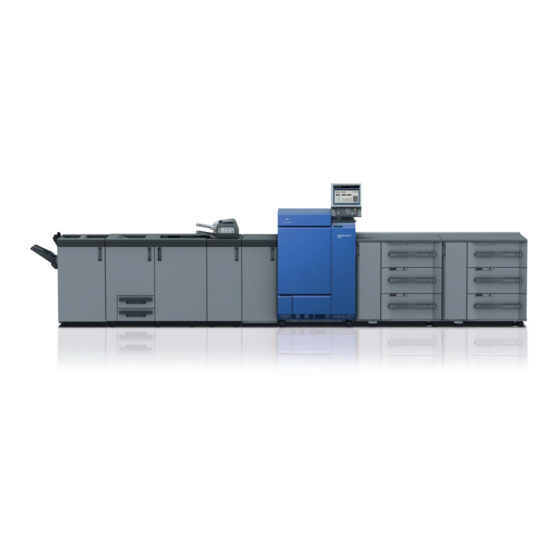
Konica Minolta bizhub PRESS C1100 User Manual (202 pages)
Brand:
Konica Minolta
| Category:
Printer
| Size: 7 MB
Table of Contents
Table of Contents
2
1 Introduction
6
Intended Use of this Machine
7
Users of this Machine
8
Objectives of this Manual
9
2 Preparation for Use
10
Machine Configuration
11
Warning Label and Caution Label
16
Optional Devices
20
Paper Information
21
Available Paper Weights
21
Exit Tray Capacity
22
Paper Size
26
Machine Screen
27
Screen with SD-513 Installed
27
Setting Screen with SD-513 Installed
28
3 Supplies and Disposals
30
Replenishing Staple Supply
31
Replenishing Staple Supply in Saddle Stitcher SD-513
31
Disposing Trimmings
33
Emptying Trim Scrap Box of Saddle Stitcher SD-513
33
Emptying Slit Scrap Box of Saddle Stitcher SD-513
35
4 Using Saddle Stitcher
38
Basic Functions of Saddle Stitcher SD-513
39
Additional Functions of Saddle Stitcher SD-513
42
Creaser Unit CR-101
42
Trimmer Unit TU-503
47
Combination of Creaser Unit CR-101 and Trimmer Unit TU-503
52
Folding Unit FD-504
56
Combination of Basic Functions and Additional Functions
58
Making Folded Booklets: Fold & Staple/Multi Half-Fold
59
Functional Overview
59
Settings on the Copy Screen
60
Settings in Printer Driver
63
Folding Copies in Three: Multi Tri-Fold
64
Functional Overview
64
Settings on the Copy Screen
65
Settings in Printer Driver
66
Adding Fold Lines (Creases) on Paper
67
Functional Overview
67
Settings on the Copy Screen
69
Settings in Printer Driver
72
Adding Fold Lines (Creases) for Fold & Stapled/Multi Half-Folded Cover
73
Functional Overview
73
Settings on the Copy Screen
74
Settings in Printer Driver
78
Adding Fold Lines (Creases) for Multi Tri-Folded Paper
79
Functional Overview
79
Settings on the Copy Screen
80
Settings in Printer Driver
81
Performing 2-Side Slitting
82
Functional Overview
82
Settings on the Copy Screen
83
Settings in Printer Driver
84
Performing 2-Side Slitting on Fold & Stapled/Multi Half-Folded Paper
85
Functional Overview
85
Settings on the Copy Screen
87
Settings in Printer Driver
92
Performing 2-Side Slitting on Multi Tri-Folded Paper
93
Functional Overview
93
Settings on the Copy Screen
94
Settings in Printer Driver
96
Forming Spine Corners on Fold & Stapled Sets
97
Functional Overview
97
Settings on the Copy Screen
98
Settings in Printer Driver
101
Manually Using Folding Unit FD-503 or Saddle Stitcher SD-513
102
Combining Perfect Binder PB-503
105
Making Perfect-Bound Booklets
105
Functions of Printer Driver
110
PS Plug-In Driver (Windows/Mac os X)
110
PPD Driver (Windows)
117
PPD Driver (Mac os X)
119
PCL Driver (Windows)
121
Job Operations
128
Operating Prior Print
128
Printing a Sample During Output and Checking It: Sample Print
128
5 Various Settings and Adjustment
130
Tray Setting
131
PI-PFU Tray Setting (Bizhub PRESS 1250/1250P/1052)
131
Tray Setting for PI Trays: Post Inserter of Folding Unit FD-503
138
Saddle Stitcher Adjustment] - [Staple Center Adjustment]
145
Center Position of 2 Position Staples
145
Center Position of Front 2 Positions of 4 Position Staple
146
Center Position of Rear 2 Positions of 4 Position Staple
148
Saddle Stitcher Adjustment] - [Staple Paper Width Adj.]
150
Saddle Stitcher Adjustment] - [Staple Pitch Adjustment]
152
Staple Pitch of 2 Position Staple
152
Staple Pitch of Front 2 Positions of 4 Position Staple
153
Staple Pitch of Rear 2 Positions of 4 Position Staple
155
Saddle Stitcher Adjustment] - [Tri-Fold Position Adj.]
157
Saddle Stitcher Adjustment] - [Fold Skew Adjustment]
159
Saddle Stitcher Adjustment] - [Half-Fold Position Adjustment]
161
Saddle Stitcher Adjustment] - [Fold Paper Width Adjustment]
163
Saddle Stitcher Adjustment] - [Fore-Edge Trimming Adjustment]
165
Saddle Stitcher Adjustment] - [Parallel Trimming Adjustment]
167
Saddle Stitcher Adjustment] - [2-Side Slitting Adjustment]
169
Saddle Stitcher Adjustment] - [Crease Position Adjustment]
171
Half-Fold Crease Position
171
Tri-Fold Crease Position
173
Perfect Bind Cover Crease Position
175
Saddle Stitcher Adjustment] - [Flattening a Fold (Strength)]
177
Saddle Stitcher Adjustment] - [Flattening a Fold (Frequency)]
178
Saddle Stitcher Adjustment] - [Staple Offset Adjustment]
179
Saddle Stitcher Adjustment] - [Staple Tip Adjustment]
180
Saddle Stitcher Adjustment] - [2-Side Slitting Finishing Adj.]
181
Saddle Stitcher Adjustment] - [Trimmer Receiver Adjustment]
182
Count Select for Move
182
Moving Pitch Select
183
Forcibly Move
184
6 Troubleshooting
186
If [Mishandled Paper] Message Is Displayed
187
Troubleshooting Tips
188
7 Cleaning
190
Cleaning the Conveyance Belt of the Bundle Exit Tray
191
8 Appendix
194
Typical Specifications
195
Creaser Unit CR-101 (Equipped in Saddle Stitcher SD-513)
197
Trimmer Unit TU-503 (Equipped in Saddle Stitcher SD-513)
198
Folding Unit FD-504 (Equipped in Saddle Stitcher SD-513 as Option)
199
Advertisement
Konica Minolta bizhub PRESS C1100 Quick Manual (131 pages)
Brand:
Konica Minolta
| Category:
All in One Printer
| Size: 9 MB
Table of Contents
Notations and Symbols Used in this Manual
2
Exclusion of Liability
3
Impermissible Operating Conditions
3
Intended Use
3
Target Groups
3
Configuration and Usage of this Guide
4
Display Resolution
5
How to Display the Top Page of the HTML User's Guide
5
HTML User's Guide Operating Environment
5
In a Macintosh Environment
5
In a Windows Environment
5
Supported Operating Systems/Browsers
5
Conventions Used in this Guide
6
Table of Contents
7
Checking the Mounted Optional Devices
7
Make a Note about this Machine Information
7
Checking Network Information
8
Contents
10
Before Getting Started
13
Power Supply
13
Turning the Power on
13
Turning the Power ON/OFF
13
Turning the Power off
14
Power-Saving Function
15
Available Operations in this Machine
17
Copy Functions
17
Major Functions of this Machine
17
Print Functions
17
Device Control Function (Pagescope Web Connection)
18
Hold Function of Print Jobs Using the HDD
18
Scan Functions
18
Application Functions
19
Color Management Function (Color Centro)
19
Job Management Function (Job Centro)
19
Other Applications
19
Let's Make Prints
20
Printing Flow
20
Step 1: Prepare the Printer Driver and Applications
20
Step 2: Load Paper into a Tray
20
Step 3: Configure Information of the Paper Loaded into a Tray in this Machine
21
Step 4: Use the Printer Driver to Print Data
21
Step 5: Check the Finishing
22
Characteristics of Printer Driver
23
In a Macintosh Environment
23
In a Windows Environment
23
Installing Software
23
Installing the Printer Driver
23
Operating Environment
23
In a Windows Environment
24
Installation
24
Default Setting
26
In a Macintosh Environment
27
Installation
27
Default Setting
30
Color Centro
31
Installing Applications
31
Job Centro
31
Operating Environment
31
Color Centro Setup
32
Function Overview
32
Installation
33
Start
34
Function Overview
35
Job Centro Setup
35
Installation
36
Start
37
Basic Operations
38
Loading Paper
38
Loading Paper in Post Inserter of Folding Unit FD-503
39
Paper Setting
40
Specifying Paper Information for a Tray
40
Printer Driver Functions
45
Printer Driver Setting
45
[Color Mode]: Select an Output Color
45
[Color Mode]: 2-Color Printing
46
[Management]: Color Configuration
47
[Management]: Manual Setting of a Color Conversion
48
Adjustment Flow
49
Both Sides Adjustment
49
Maintaining the Finishing Quality
49
Gap Adjustment
50
Making the both Sides Adjustment for each Tray
50
Chart Adjustment
55
Zoom and Image Shift Adjustment
61
Image Quality Adjustment
65
To Manage the Daily Image Quality
65
To Specify the Reference Image Quality
65
Daily Image Quality Management (Calibration)
66
Calibration Timing
67
Maximum Density Auto Adjustment (RU)
69
Auto Setting of Color Density Control
71
Color Density Control
71
Manual Setting of Color Density Manual Control
74
Executing Calibration Using the Image Controller
76
Working Table
79
Specifying the Reference Image Quality
82
Adjusting the Finisher and Saddle Stitcher
83
Opening the Screen to be Adjusted
83
Adjustable Settings
84
Troubleshooting
85
Replenish and Replace Consumables
85
Replacing a Toner Bottle
85
Replacing a Staple Cartridge
87
Replacing a Waste Toner Box
89
Clearing Paper Jams
91
How to View the Animation Guide
91
[JAM Position] Screen
91
Illustration Screen for Jam Handling
92
If the Specified Paper Is Not Found
94
Replacing with the Specified Paper
94
Forcibly Printing Using the Loaded Paper
96
If an Error Has Been Displayed During Scanning
97
HDD Space Insufficiency
97
Hue Adjustment
98
When Calibration Is Executed for Daily Management
98
When Calibration Is Not Executed
98
Image Position Adjustment
99
Appendix
100
Good Use of the HTML User's Guide
100
Let's Master the Search Function
100
Confirm the Setting Required for the Target Finishing in an Operation Example
100
Name of each Component
101
External Components
101
Internal Components
103
Control Panel Layout
105
Convenient Use of Scan Function (Scan to SMB)
107
Step 1: Prepare the Destination Computer
107
In a Windows Environment
107
In a Macintosh Environment
109
Step 2: Connect this Machine to the Network
109
Step 3: Prepare the Operating Environment for SMB Transmission
109
Step 4: Configure Settings According to Your Environment
109
Step 5: Send Scan Data to a Public Folder
110
Major Specifications
111
Machine
111
Feeding-Related Optional Devices
111
Paper Feeder Unit PF-708
112
Post Inserter (Folding Unit FD-503)
113
Post Inserter PI-502
114
Output-Related Optional Devices
115
Relay Unit RU-510
116
Large Capacity Stacker LS-506
118
Perfect Binder PB-503
120
Finisher FS-532
121
Multi Puncher GP-501
124
Electronic Optional Devices
125
Auto Ring Binder GP-502
125
Original-Related Optional Devices
126
Reverse Automatic Document Feeder (ADF)
126
Image Controller IC-310
126
Weight for each Size
127
Maximum Paper Size and Printing Area
128
Konica Minolta bizhub PRESS C1100 Quick Manual (127 pages)
Brand:
Konica Minolta
| Category:
All in One Printer
| Size: 9 MB
Table of Contents
Notations and Symbols Used in this Manual
2
Exclusion of Liability
3
Impermissible Operating Conditions
3
Intended Use
3
Target Groups
3
Configuration and Usage of this Guide
4
Display Resolution
5
How to Display the Top Page of the HTML User's Guide
5
HTML User's Guide Operating Environment
5
In a Macintosh Environment
5
In a Windows Environment
5
Supported Operating Systems/Browsers
5
Conventions Used in this Guide
6
Table of Contents
7
Checking the Mounted Optional Devices
7
Make a Note about this Machine Information
7
Checking Network Information
8
Contents
10
Before Getting Started
13
Power Supply
13
Turning the Power on
13
Turning the Power ON/OFF
13
Turning the Power off
15
Power-Saving Function
17
Available Operations in this Machine
18
Copy Functions
18
Major Functions of this Machine
18
Print Functions
18
Device Control Function (Webtools)
19
Hold Function of Print Jobs Using the HDD
19
Scan Functions
19
Application Functions
20
Fiery Command Workstation
20
Fiery Hot Folders
21
Fiery Remote Scan
21
Printer Delete Utility
21
Let's Make Prints
22
Printing Flow
22
Step 1: Prepare the Printer Driver and Applications
22
Step 2: Load Paper into a Tray
22
Step 3: Configure Information of the Paper Loaded into a Tray in this Machine
23
Step 4: Use the Printer Driver to Print Data
23
Step 5: Check the Finishing
24
Characteristics of Printer Driver
25
In a Macintosh Environment
25
In a Windows Environment
25
Installing Software
25
Installing the Printer Driver
25
Operating Environment
25
In a Windows Environment
26
Installation
26
Default Setting
29
In a Macintosh Environment
30
Installation
30
Default Setting
34
Fiery Utility
35
Fiery Utility Setup
35
Function Overview
35
Installing Applications
35
Operating Environment
35
In a Windows Environment
36
Installation
36
In a Macintosh Environment
37
Installation
37
Starting Applications
39
Starting Fiery Command Workstation
39
Starting Fiery Hot Folders
40
Starting Fiery Remote Scan
40
Basic Operations
41
Loading Paper
41
Loading Paper in Post Inserter of Folding Unit FD-503
42
Paper Setting
43
Specifying Paper Information for a Tray
43
Printer Driver Functions
48
Printer Driver Setting
48
[Color Mode]: Select an Output Color
48
[Color Mode]: General
49
[Color Mode]: Expert Setting
50
Adjustment Flow
51
Both Sides Adjustment
51
Maintaining the Finishing Quality
51
Gap Adjustment
52
Making the both Sides Adjustment for each Tray
52
Chart Adjustment
57
Zoom and Image Shift Adjustment
63
Image Quality Adjustment
67
To Manage the Daily Image Quality
67
To Specify the Reference Image Quality
67
Daily Image Quality Management (Calibration)
68
Calibration Timing
69
Maximum Density Auto Adjustment (RU)
71
Auto Setting of Color Density Control
73
Color Density Control
73
Manual Setting of Color Density Manual Control
76
Executing Calibration Using the Image Controller
78
Specifying the Reference Image Quality
81
Adjusting the Finisher and Saddle Stitcher
82
Opening the Screen to be Adjusted
82
Adjustable Settings
83
Replacing a Toner Bottle
84
Replenish and Replace Consumables
84
Troubleshooting
84
Replacing a Staple Cartridge
86
Replacing a Waste Toner Box
88
Clearing Paper Jams
90
How to View the Animation Guide
90
[JAM Position] Screen
90
Illustration Screen for Jam Handling
91
If the Specified Paper Is Not Found
93
HDD Space Insufficiency
95
If an Error Has Been Displayed During Scanning
95
Hue Adjustment
96
When Calibration Is Executed for Daily Management
96
When Calibration Is Not Executed
96
Image Position Adjustment
97
Appendix
98
Confirm the Setting Required for the Target Finishing in an Operation Example
98
Good Use of the HTML User's Guide
98
Let's Master the Search Function
98
External Components
99
Name of each Component
99
Internal Components
101
Control Panel Layout
103
Convenient Use of Scan Function (Scan to SMB)
105
In a Windows Environment
105
Step 1: Prepare the Destination Computer
105
In a Macintosh Environment
107
Step 2: Connect this Machine to the Network
107
Step 3: Prepare the Operating Environment for SMB Transmission
107
Step 4: Configure Settings According to Your Environment
107
Step 5: Send Scan Data to a Public Folder
108
Feeding-Related Optional Devices
109
Machine
109
Major Specifications
109
Paper Feeder Unit PF-708
110
Post Inserter (Folding Unit FD-503)
111
Post Inserter PI-502
112
Output-Related Optional Devices
113
Relay Unit RU-510
114
Large Capacity Stacker LS-506
116
Perfect Binder PB-503
118
Finisher FS-532
119
Multi Puncher GP-501
122
Electronic Optional Devices
123
Auto Ring Binder GP-502
123
Original-Related Optional Devices
124
Reverse Automatic Document Feeder (ADF)
124
Image Controller IC-310
124
Weight for each Size
125
Maximum Paper Size and Printing Area
126
Advertisement
Konica Minolta bizhub PRESS C1100 Daily Maintenance Manual (114 pages)
Brand:
Konica Minolta
| Category:
All in One Printer
| Size: 4 MB
Table of Contents
Notations and Symbols Used in this Manual
2
Exclusion of Liability
3
Impermissible Operating Conditions
3
Intended Use
3
Target Groups
3
Table of Contents
4
1 Daily Care
6
About Daily Care
6
Cleaning Timing
6
Cleaning the Duplex Section
7
Cleaning Section of the Duplex Section
7
Cleaning Procedure
7
Cleaning the Centering Sensor (Paper Feeder Unit PF-707/PF-708)
11
Cleaning the Roller of the Humidification Section (Relay Conveyance Unit RU-511)
12
2 Both Sides Adjustment
13
About both Sides Adjustment
13
Adjustment Flow
13
When Using a New Paper Brand, a New Paper Weight, or a New Paper Size
13
Adjustment Timing
14
Adjustment Order
14
Regular Adjustment Flow
14
Adjustment Flow for each Job
14
Contents of both Sides Adjustment Items
15
Front Side Adjustment
18
Gap Adjustment (When Not Using PF-708 Scanner)
23
Scan Measurement Adjustment (When Using PF-708 Scanner)
28
Registering the Paper Profile
36
Back Side Fine Adjustment
38
3 Image Quality Adjustment
42
About Quality Adjustment
42
Regular Adjustment Flow (High Accuracy)
42
Adjustment Timing
42
Adjustment Order
43
Adjustment Flow When Changing the Screen
44
Adjustment Timing
44
Adjustment Order
44
Contents of the Image Quality Adjustment Items
45
Change Setting of Custom Screen
45
Gamma Automatic Adjustment
47
Maximum Density Auto Adjustment (RU)
67
Check Setting of Color Density Control
69
Color Density Manual Control
72
Exact Color (for I1Pro/I1Pro2/Es-1000/ES-2000, or FD-5BT)
74
G7 Calibration (for I1Pro/I1Pro2/Es-1000/ES-2000, or FD-5BT)
80
About Quality Adjustment
86
Regular Adjustment Flow (High Accuracy)
86
Adjustment Timing
86
Adjustment Order
86
Contents of the Image Quality Adjustment Items
86
Image Quality Adjustment for Image Controller IC-308/IC-310
86
Change Setting of Custom Screen
87
Gamma Automatic Adjustment
90
Density Balance Adjustment (for I1Pro/I1Pro2/Es-1000/ES-2000)
91
Density Balance Adjustment (for FD-5BT)
100
Added Procedures of Density Balance Adjustment (Registration of Color Measurement Data Using a USB Memory)
100
Maximum Density Auto Adjustment (RU)
102
Check Setting of Color Density Control
104
Color Density Manual Control
107
Controller Calibration (IC-308/IC-310)
109
Advertisement
Related Products
Konica Minolta bizhub press c1070p
Konica Minolta bizhub press c1060
Konica Minolta bizhub press c1070
Konica Minolta bizhub PRESS C1085
Konica Minolta bizhub C3100P
Konica Minolta bizhub press c71hc
Konica Minolta bizhub c3852fs
Konica Minolta bizhub C558
Konica Minolta bizhub C227
Konica Minolta bizhub C750i
Konica Minolta Categories
All in One Printer
Printer
Digital Camera
Measuring Instruments
Copier
More Konica Minolta Manuals
Login
Sign In
OR
Sign in with Facebook
Sign in with Google
Upload manual
Upload from disk
Upload from URL