Sign In
Upload
Manuals
Brands
Canon Manuals
All in One Printer
varioPrint 115
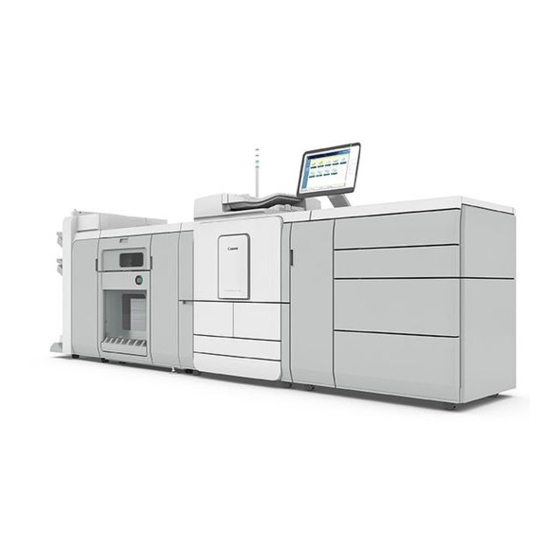
Canon varioPrint 115 Production Printer Manuals
Manuals and User Guides for Canon varioPrint 115 Production Printer. We have
2
Canon varioPrint 115 Production Printer manuals available for free PDF download: Operation Manual
Canon varioPrint 115 Operation Manual (560 pages)
Brand:
Canon
| Category:
All in One Printer
| Size: 41 MB
Table of Contents
Copyright and Trademarks
2
Data Security
3
Regulation Notices
3
Source Code
4
Table of Contents
5
Chapter 1 Introduction
11
About the Varioprint 140 Series
12
Notes for the Reader
14
Users of the Print System
15
Information in this Operation Guide
16
Explore the Print System
17
Main Hardware Parts
18
Printer Only Configuration
21
Copy Tray
22
The Paper Modules
23
Dual Paper Tray
24
Finishers
26
Removable Hard Disk (Optional)
29
Introduction to the Removable Hard Disk
29
Main Parts
30
Remove the Removable Hard Disk
31
Insert the Removable Hard Disk
33
Troubleshooting
35
Explore the Ease of Operation
37
Interfaces to Access the Printer
38
Control Panel
38
Settings Editor
40
Media-Based Workflow
44
Learn about the Document Printing Workflow
45
Transaction Printing Workflow
46
Image Adjustment
47
Start the Print System
49
Power Buttons and Power Modes
50
Turn on the System
52
Shut down the System
53
Restart the System
54
Log In, Log Out, and Change Passwords
55
Log in to the Printer
55
Log out or Switch Roles
58
Change Password
60
Recover Password
62
Prepare the Print System
65
Adjust the Control Panel
66
Adjust the Readability of the Control Panel
67
Define the Handling of Media Attributes in JDF Ticket
69
Work with Workflow Profiles
70
Work with Automated Workflows
75
Learn about Automated Workflows
75
Define a New Automated Workflow
77
Define the Settings of an Automated Workflow
78
Restore the Default Automated Workflow
83
Edit with Automated Workflow in Job Destination
84
[Layout] Settings
88
[Print Quality] Settings
91
[Workflow] Settings
92
Submit Jobs Via LPR
94
Hotfolders
95
Introduction to Hotfolders
95
Activate the Hotfolder Function
96
Create a Hotfolder
97
Submit Jobs Via Hotfolders
98
Use a JDF Ticket
100
Accounting
102
General Information
102
The Basics of Accounting
102
The Accounting Related Settings in the Settings Editor
103
The Account Log File
104
Download an Account Log File
111
Configure Orange Alert Light for Consumables and Waste Locations
112
Chapter 6 Prepare the Jobs
113
Prepare Print Jobs
114
Where to Define Print Job Settings
114
Prepare Print Jobs with Remote Printer Driver
116
Print a Job Using Prismaprepare (Option)
117
Drag & Drop Print Files on Hotfolders
118
Print a File from a USB Drive
119
Print a Page Number Via Prismasync
121
Prepare Copy Jobs and Scan Jobs
122
Introduction to the Copy Function
122
Introduction to the Scan Function
124
Scanning Information
126
Copy or Scan Originals and Books Using the Glass Plate
128
Copy or Scan Originals Using the ADF
132
Access Other Functions During a Copy Job or Scan Job
133
Plan the Jobs
135
Manage the Jobs in the Queues
136
Learn about Job Management in the Queues
136
Scheduled Jobs
137
Search, Filter and Select Jobs
139
Select Function
140
Move Jobs to Another Destination
142
Schedule a Waiting Job for Printing
147
Print an Urgent Job Immediately
148
Give Priority to a Print Job
149
Print a Scheduled Job Later
150
Combine Jobs in the List of [Waiting Jobs] (Bundle Function)
151
Define Default Use of Special Pages
153
Create a Note for the Operator
158
Use the Docbox (Option)
160
The Docbox Function
160
Introduction to the Docbox Function
160
Create a New Docbox
162
Handle the Jobs in a Docbox
163
Overview of the Available Settings for Docbox Jobs
163
Finishing Settings
175
Edit a Job in a Docbox
179
Combine Jobs in a Docbox (Build Function)
180
Split a Combined Job in the Docbox
182
Lock a Job in a Docbox
183
Unlock a Job in a Docbox
184
Move a Job from One Docbox to Another Docbox
185
Print the Jobs in a Docbox
186
Print a Non-Urgent Job from the Docbox
186
Print an Urgent Job from the Docbox Immediately
187
Carry out Print Jobs
189
Change the Print Job Settings on the Control Panel
190
Learn about the Print Job Settings
190
Change the Job Settings
207
Change the Number of Sets
207
Check the First Set
208
Change the Page Range You Want to Print
209
Change the Use of Separator Sheets
210
Change the Print Job Settings on Page Level
211
Change the Output Settings
212
Change 2-Sided into 1-Sided and Vice Versa
212
Change the Binding Edge
213
Select Another Media for a Job
214
Change the Settings for Covers
215
Shift the Image Roughly to Create Binding Space
216
Shift the Image Precisely to Create Binding Space or Correct the Layout
217
Change the Print Delivery Settings
218
Change the Stacking Method Per Job
221
Change the Print Quality Settings
222
Basic Settings
222
Advanced Settings
222
Define the Finishing for Print Jobs
224
Advanced Impositioning
225
Print Your Jobs Using the Control Panel
234
Reprint a Job
234
Select more than One Job for Printing
235
Print a Job Ticket
236
Make a Proof
237
Stop the Printer
238
Duplicate Jobs
240
Delete Print Jobs
241
Variable Data Printing
243
Convert a Job to a Variable Data Job
244
Print a Variable Data Job
246
Transaction Printing (Optional)
247
Introduction to the Transaction Section
247
Activate Transaction Printing
250
Define the General Transaction Printing Settings
251
Deactivate Transaction Printing
252
Shift the Image in the Transaction Printing Mode
253
Print in Transaction Printing Mode
254
Transaction Setups
256
Create a New Transaction Setup
256
Edit a Transaction Setup
257
Activate a Transaction Setup
258
Import, Export, or Restore Transaction Setups
259
Validate a Transaction Setup
260
Validate All Transaction Setups
261
Ipds
262
Media Information (IPDS)
262
Output Recovery in Case of an Error (IPDS)
263
Pcl
266
Media Messages (PCL)
266
Handle the Media Messages in the Tray-To-Media Mode (PCL)
267
Handle the Media Messages in the Tray-To-Tray Mode (PCL)
268
Chapter 9 Carry out Copy Jobs
269
Learn about Copy Job Templates and Settings
270
Make an Easy Copy
289
Copy to Docbox
290
Create Templates to Use for Recurring Jobs
291
Copy Non-Standard Size Originals
292
The Zoom Behavior
293
Staple, Punch, Fold, or Trim the Output
295
Rename a Copy Job
296
Combining Subsets into One Document
297
Insert Tab Sheets to Divide Your Document
298
Scan Now and Print Later
299
Carry out Scan Jobs
301
Configure the Scan Function
302
Configure the Settings for Scan to File
302
Configure the Settings for Scan to SMB
303
Configure the Settings for Scan to Webdav
304
Configure the Settings for Scan to Email
305
Configure the Settings for the LDAP Server
307
Scan Your Documents
308
Description of the Scan Job Settings
308
Scan to File
317
Scan to Email
318
Use an Address Book for Scan to Email
319
Scan to USB
321
Scan to SMB
323
Scan to Webdav
324
PDF Scan Job
325
Create Templates to Use for Recurring Jobs
326
Combine Subsets into One File
327
Optimize the Scan Quality
328
Problems and Solutions
328
Chapter 11 Use Uniflow (Optional)
331
Configure the Settings for Uniflow
332
Print Your Job Via Uniflow
334
Copy or Scan Your Documents Via Uniflow
336
Delete Print Jobs in Uniflow
340
Keep the System Printing
345
Use the Schedule (Option)
346
Introduction to the [Schedule] View
346
Load Media Via the [Schedule] View
349
The Dashboard
351
The Operator Attention Light
353
Status Indicators
354
Chapter 13 Media Handling
359
Introduction
360
Introduction to Media Handling
360
Introduction to the [Trays] View
362
Introduction to the [Media] Section
365
Media Related Actions
367
Open a Tray and Load Media Using the Paper Tray Button
367
Load and Assign Media Using the [Trays] Softkey
368
Validate Media Assignment
370
Add Media to the Media Catalog
371
Add Temporary Media to the Media Catalog
372
Use the Separation Enhancer
373
Adjust the Size of the Bulk Tray
375
Adjust the Size of the Optional Bulk Tray for Small Format
381
Use the JIS B5 Adapter (Option)
383
Process Special Media
385
Process Pre-Printed Media and Use of the [Pre-Printed Mode] Setting
385
Process Wax Paper and Use of the [Wax Mode] Setting
387
Deal with Paper Dust and Use of the [Paper Quality] Setting
389
Media Registration
391
When to Perform a Media Registration
391
Examples of When to Perform Media Registration
391
How to Perform a Media Registration
395
Media Registration Quick Start
395
Order of the Media Registration Actions
398
Print the Verification Chart for Media Registration
399
Option 1 - Automatic Media Registration Adjustment
403
Option 2 - Manual Media Registration Adjustment (Only Needed in Incidental Cases)
408
Via the Control Panel
409
Shifted Image
415
Skewed Image
423
Media Registration: Troubleshooting
430
Registration of Preprinted Media Fails
430
Automatic Media Registration of Long Sheets Is Not Satisfactory
431
Shifted Image after Paper Path Registration (Only if POC Is Applicable)
432
Media Registration: Frequently Asked Questions
433
Maintain the Print System
435
System Configuration
436
System Configuration and Maintenance
436
Change a Number of Settings in the Settings Editor Via the Control Panel
438
Introduction to the [Setup] Section
443
Backup and Restore
445
Counters
446
Introduction to the Counters
446
Reset the Day Counters
447
Print the Billing Counters Report
448
Software Updates
449
Printer Operation Care (POC)
450
Introduction to Printer Operation Care (POC)
450
Perform a Paper Path Registration
452
Replace the Separation Rollers
454
Replace the Heat Exchanger Foils
462
Replace the Spiral Cleaner
472
Required Tools
472
Remove Paper from the TTF
481
Remove Paper from the Heat Exchanger
490
Advanced Maintenance Actions for High Capacity Stacker-G1 and High Capacity Stacker-H1
491
Replace the Flip Rings in the Flip Unit
491
Clear a Paper Jam in the Lower Input Paper Path of the Registration Unit
495
Clear a Paper Jam in the Registration Unit
497
Add Toner and Staples
503
Consumables
503
Recommended Paper
503
Check the Status of the Toner Reservoir
506
Add Toner
507
Check the Status of the Staple Cartridges
509
Replace the Staple Cartridge in the Staple Unit of the Stacker/Stapler (Staple Finisher-AG and Booklet Finisher-AG)
511
Replace the Staple Cartridge in the Saddle-Stitch Unit of the Stacker/Stapler (Booklet Finisher-AG)
514
Add Toner and Staples
519
Remove the Staple Waste
519
Remove the Punch Waste in the Stacker/Stapler (Staple Finisher-AG and Booklet Finisher-AG)
521
Cleaning
523
Clean the Scanner Rollers and Sensors
523
Clean the Z Sensor
526
Manually Start a Drum Cleaning
529
Automatic Drum Cleaning
530
Chapter 15 Troubleshooting
533
Solving Errors
534
Use Remote Assistance
536
Store the Logging in Case of Software Errors
537
Create and Download a Log File
538
Cancel the Creation of Log Files
544
Appendix A Specifications
545
General
546
Environmental
547
Printer Speed
548
Paper Modules
549
Finishing and Delivery Specifications
550
Media Specifications
553
Media Types
553
Media Weights
553
Printing, Copying and Scanning
554
Prismasync Controller
556
Printer Driver Support
557
Advertisement
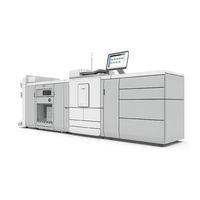
Canon varioPrint 115 Operation Manual (473 pages)
Brand:
Canon
| Category:
All in One Printer
| Size: 37 MB
Table of Contents
Table of Contents
4
Chapter 1 Introduction
10
Notes for the Reader
11
Users of the Print System
12
Information in this Operation Guide
13
Chapter 2 Explore the Print System
14
Overview of the Varioprint DP Line Including Accessories
15
Printer Only Configuration
17
Naming Conventions for Accessories (Generic Naming in User Interfaces)
18
The Paper Modules
19
Professional Stacker / Stapler
20
Copy Tray
22
Removable Hard Disk (Option)
23
Introduction to the Removable Hard Disk
23
Main Parts
24
Remove the Removable Hard Disk
25
Insert the Removable Hard Disk
27
Troubleshooting
29
Chapter 3 Explore the Ease of Operation
30
What the Print System Can Do for You
31
Control Panel
32
Settings Editor
35
Remote Manager
37
Media-Based Workflow
38
Document Printing Workflow
39
Transaction Printing Workflow
40
Chapter 4 Start the Print System
42
Power Buttons and Power Modes
43
Turn on the System
45
Shut down the System
46
Restart the System
47
Chapter 5 Prepare the Print System
48
Adjust the Control Panel
49
Work with the Workflow Profiles
53
Automated Workflows
59
Introduction to Automated Workflows
59
Add an Automated Workflow
63
Edit an Automated Workflow
64
Delete an Automated Workflow
65
Restore the Factory Default Workflow
66
Hotfolders
67
Introduction to Hotfolders
67
Activate the Hotfolder Function
68
Create a Hotfolder
69
Create a Shared Network Folder on a Workstation
70
Create a Hotfolder Default Ticket ('Default_Ticket.jdf')
71
Accounting
72
General Information
72
Introduction to the Accounting Function
72
The Accounting Related Settings in the Settings Editor
73
Enable the Identification and Verification of Account Ids
74
The Account ID File
75
Download, Edit and Upload the Account ID File
76
The Account Log File
77
Save an Account Log File
83
Use Accounting
84
Select an Accounting Mode
84
Enter an Account ID Per Job
86
Enter an Account ID in the Printer Driver
87
Chapter 6 Prepare the Jobs
88
Prepare Print Jobs
89
Where to Define Print Job Settings
89
Prepare Print Jobs with Remote Printer Driver
91
Print a Job Using Prismaprepare (Option)
93
Print a File from a USB Drive
95
Print a Page Number Via Prismasync
97
Prepare Copy Jobs and Scan Jobs
98
Introduction to the Copy Function
98
Introduction to the Scan Function
100
Scanning Information
102
Copy or Scan Originals and Books Using the Glass Plate
104
Copy or Scan Originals Using the ADF
108
Access Other Functions During a Copy Job or Scan Job
109
Chapter 7 Plan the Workload Remotely
110
Prismasync Remote Manager (Option)
111
Use the Remote Control App to Monitor Printing
112
Chapter 8 Plan the Jobs
114
Manage the Jobs in the Queue
115
Schedule a Waiting Job for Printing
115
Print an Urgent Job Immediately
116
Give Priority to a Print Job
117
Print a Scheduled Job Later
118
Send a Job to Another Printer
119
Bundle Jobs in the List of [Waiting Jobs]
120
Add Extra Sheets to a Job
122
Use the Docbox (Option)
123
The Docbox Function
123
Introduction to the Docbox Function
123
Create a New Docbox
125
Handle the Jobs in a Docbox
126
Overview of the Available Settings for Docbox Jobs
126
Edit a Job in a Docbox
143
Combine Jobs in a Docbox (Build Function)
144
Split a Combined Job in the Docbox
145
Lock a Job in a Docbox
146
Unlock a Job in a Docbox
147
Move a Job from One Docbox to Another
148
Print the Jobs in a Docbox
149
Print a Non-Urgent Job from the Docbox
149
Print an Urgent Job from the Docbox Immediately
150
Select and Print Multiple Jobs from the Docbox
151
Chapter 9 Carry out Print Jobs
154
Change the Print Job Settings on the Control Panel
155
Description of the Print Job Settings that You Can Change on the Control Panel
155
Change the [Output] Settings
171
Change Two-Sided into One-Sided and Vice Versa
171
Change the Binding Edge
172
Select Another Media for a Job
173
Change the Settings for Covers
174
Shift the Image Roughly to Create Binding Space
175
Shift the Image Precisely to Create Binding Space or Correct the Layout
176
Change the Print Delivery Settings
177
Change the Stacking Method Per Job
178
Change the Print Quality Settings
179
Change the Finishing Method
181
Define the Finishing for Print Jobs
182
Change the [Job] Settings
183
Change the Number of Sets
183
Check the First Set
184
Change the Page Range You Want to Print
185
Change the Use of Separator Sheets
186
Change the Print Job Settings on Page Level
187
Print Your Jobs Using the Control Panel
188
Reprint a Job
188
Select more than One Job for Printing
189
Print a Job Ticket
190
Make a Proof
191
Stop the Printer
192
Delete Print Jobs
194
Variable Data Printing
195
Convert a Job to a Variable Data Job
196
Transaction Printing (Option)
197
Introduction to the [Transaction] Section
197
Activate Transaction Printing
200
Deactivate Transaction Printing
201
Shift the Image in the Transaction Printing Mode
202
Transaction Setups
203
Create a New Transaction Setup
203
Edit a Transaction Setup
204
Activate a Transaction Setup
205
Exchange All Setups between Printers
206
Ipds
207
Media Information (IPDS)
207
Output Recovery in Case of an Error (IPDS)
208
Pcl
211
Media Messages (PCL)
211
Handle the Media Messages in the Tray-To-Media Mode (PCL)
212
Handle the Media Messages in the Tray-To-Tray Mode (PCL)
213
Chapter 10 Carry out Copy Jobs
214
Copy Your Documents
215
Description of the Copy Job Settings
215
Make an Easy Copy
232
Create Templates to Use for Recurring Jobs
233
Copy Non-Standard Size Originals
234
The Zoom Behavior
235
Staple, Punch, Fold, or Trim the Output
237
Rename a Copy Job
238
Combining Subsets into One Document
239
Insert Tab Sheets to Divide Your Document
240
Scan Now and Print Later
242
Chapter 11 Carry out Scan Jobs
244
Configure the Scan Function
245
Configure the Settings for Scan to File
245
Configure the Settings for Scan to SMB
246
Configure the Settings for Scan to Email
247
Configure the Settings for the LDAP Server
248
Use the Address List File (Ral.csv)
249
Scan Your Documents
250
Description of the Scan Job Settings
250
Scan to File
258
Scan to Email
259
Use an Address Book for Scan to Email
260
Scan to USB
262
Scan to Docbox
263
Scan to SMB
264
PDF Scan Job
265
Create Templates to Use for Recurring Jobs
266
Combine Subsets into One File
267
Optimize the Scan Quality
268
Chapter 12 Keep the System Printing
270
Use the Schedule (Option)
271
Introduction to the [Schedule] View
271
Load Media Via the [Schedule] View
274
The Dashboard
275
The Operator Attention Light
277
Remote Monitor
278
Chapter 13 Media Handling
280
Introduction
281
Introduction to the Media Handling
281
Introduction to the [Trays] View
283
Introduction to the [Media] Section
285
Media Related Actions
288
Open a Tray and Load Media Using the Paper Tray Button
288
Load and Assign Media Using the [Trays] Softkey
289
Add Media to the Media Catalog
291
Add Temporary Media to the Media Catalog
292
Media Indicators Black & White
293
Use the Separation Enhancer
294
Adjust the Size of the Bulk Tray
296
Adjust the Size of the Optional Bulk Tray for Small Format
302
Use the JIS B5 Adapter (Option)
304
Process Special Media
306
Process Pre-Printed Media and Use of the [Pre-Printed Mode] Setting
306
Process Wax Paper and Use of the [Wax Mode] Setting
308
Deal with Paper Dust and Use of the [Paper Quality] Setting
310
Media Registration
312
When to Perform a Media Registration
312
Examples of When to Perform Media Registration
312
How to Perform a Media Registration
316
Media Registration Quick Start
316
Order of the Media Registration Actions
319
Print the Verification Chart for Media Registration
320
Option 1 - Automatic Media Registration Adjustment
322
Option 2 - Manual Media Registration Adjustment (Only Needed in Incidental Cases)
326
Media Registration: Troubleshooting
348
Registration of Preprinted Media Fails
348
Automatic Media Registration of Long Sheets Is Not Satisfactory
349
Shifted Image after Paper Path Registration (Only if POC Is Applicable)
350
Media Registration: Frequently Asked Questions
351
Chapter 14 Maintain the Print System
352
System Configuration
353
System Configuration and Maintenance
353
Change a Number of Settings in the Settings Editor Via the Control Panel
355
Introduction to the [Setup] Section
360
Backup and Restore
362
Counters
363
Introduction to the Counters
363
Reset the Day Counters
364
Print the Billing Counters Report
365
Software Upgrade
366
Upgrade Prismasync from Server
366
Upgrade Prismasync
367
Upgrade Microsoft Windows
368
Install Software from a USB Installation Drive
369
Printer Operation Care (POC)
370
Introduction to Printer Operation Care (POC)
370
Perform a Paper Path Registration
372
Replace the Separation Rollers
374
Replace the Heat Exchanger Foils
382
Replace the Spiral Cleaner
391
Remove Paper from the TTF
400
Remove Paper from the Heat Exchanger
409
Advanced Maintenance Actions for High Capacity Stacker-G1 and High Capacity Stacker-H1
410
Replace the Flip Rings in the Flip Unit
410
Clear a Paper Jam in the Lower Input Paper Path of the Registration Unit
414
Clear a Paper Jam in the Registration Unit
416
Remote Service (ORS) (Option)
421
Remote Service
421
Add Toner and Staples
423
Check the Status of the Toner Reservoir
423
Add Toner
424
Check the Status of the Staple Cartridges
426
Replace the Staple Cartridge of the Stapler Unit
428
Replace the Staple Cartridge of the Saddle Stitch Unit
430
Cleaning
433
Clean the Scanner Sensors
433
Clean the Z Sensor
436
Manually Start a Drum Cleaning
439
Automatic Drum Cleaning
440
Chapter 15 Troubleshooting
444
Solving Errors
445
Store the Logging in Case of Software Errors
447
Appendix A Specifications
448
General
449
Environmental
450
Printer Speed
451
Paper Modules
452
Finishing and Delivery Specifications
453
Media Specifications
455
Printing, Copying and Scanning
456
Prismasync Controller
458
Printer Driver Support
459
Index
460
Advertisement
Related Products
Canon imageCLASS 1100
Canon IMAGE RUNNER 110
Canon imageRunner 1133
Canon imageRunner 1133A
Canon imageRunner 1133iF
Canon ImagePress 1125P
Canon 1454B002
Canon imageRUNNER 1435P+
Canon varioPrint 140
Canon SmartBase 1210D
Canon Categories
Printer
Digital Camera
All in One Printer
Camcorder
Scanner
More Canon Manuals
Login
Sign In
OR
Sign in with Facebook
Sign in with Google
Upload manual
Upload from disk
Upload from URL