Sign In
Upload
Manuals
Brands
Brother Manuals
All in One Printer
DCP-750CW
Brother DCP-750CW Manuals
Manuals and User Guides for Brother DCP-750CW. We have
4
Brother DCP-750CW manuals available for free PDF download: Service Manual, Network User's Manual, User Manual, Quick Setup Manual
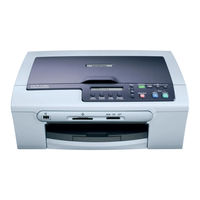
Brother DCP-750CW Service Manual (383 pages)
Brand:
Brother
| Category:
All in One Printer
| Size: 17 MB
Table of Contents
Chapter 2 Specifications
22
Service Manual
1
How this Manual Is Organized
4
Outline
12
Specifications
21
Table of Contents
22
General
23
General Specifications
23
Paper Specifications
25
Printable Area
28
Specifications List
29
Post Card
32
Theory of Operation
39
Chapter 3 Theory of Operation
40
Overview
41
Mechanical Components
42
Scanner Mechanism
44
Printing Mechanism
44
Ink Supply and Ink Jet Mechanism
44
1 ] Overview
49
2 ] Features
50
3 ] Head/Carriage Unit
51
4 ] Ink Cartridges
58
5 ] Ink Refill Assembly
60
Ink Supply Tubes
61
Head Maintenance Mechanism
62
Maintenance Unit Components
62
Overview
62
3 ] Mechanisms Constituting the Head Maintenance Mechanism
64
4 ] Purge Mechanism Details
69
Carriage Drive Mechanism
74
Paper Pulling-In, Registration, Feeding and Ejecting Mechanisms
78
Sensors and Actuators
84
Control Electronics
87
Components
87
Chapter 4 Error Indication and Troubleshooting
89
Error Indication
91
Equipment Errors
91
Error Messages Appearing on the LCD
91
Error Codes Contained in "MACHINE ERROR X X" Messages
94
Troubleshooting
108
Introduction
108
Precautions
108
Checking Prior to Troubleshooting
108
Troubleshooting Based on Problem Type
109
Control Panel and LCD Problems
109
2 ] Paper/Document Feeding Problems
110
3 ] Print-Image Problems
111
4 ] PC-Driven Printing Problems
116
5 ] Printing from Memory Cards--Compact Flash, Memory Stick, SD Memory Card, or XD-Picture Card
116
Others
117
Wireless LAN (WLAN)
117
Problems Encountered Frequently in the Past
118
1 ] Paper Jams
118
Ink-Related Problems
119
MACHINE ERROR 4F" Error Message
119
Auto Document Feeder (ADF) Malfunction (for Models with ADF)
120
Possible Component Defects and Resulting Problems
122
ADF Mechanism (for Models with ADF)
122
2 ] Scanner Mechanism
123
3 ] Head/Carriage Unit Drive and Purge Mechanisms
124
Print Head Mechanism
125
Paper Feeding Mechanism
126
Sheet Feeder (SF) Mechanism
126
Control Panel and LCD
127
Pcbs
127
9 ] Adjustments/Data in the Memories
128
Chapter 6 Disassembly/Reassembly and Lubrication
132
Disassembly/Reassembly
134
Safety Precautions
134
Tightening Torque
135
How to Access the Target Component
136
Preparation
136
Disassembly Flowchart
137
Jam Clear Cover
138
Scanner Cover (Scanner Unit)
139
Document Cover (ADF & Document Cover ASSY*)
145
Disassembly of ADF & Document Cover ASSY (Only for Models with ADF)
148
Control Panel ASSY, Scanner Cover Sensor Actuator, Ink Cartridge Cover Sensor Actuator, and Cover Sensor PCB
156
Components of Control Panel ASSY
158
Upper Cover
162
Ink Cartridge Cover, Media Module Cover, Front Cover, and WLAN PCB
163
Main PCB
165
MJ/PS Shield Box and Power Supply PCB
170
Head/Carriage Unit and Ink Refill ASSY
173
Ink Absorber Box, Ink Absorber Felt, and PF Encoder Disk
185
Engine Unit and Flushing Box
187
Components on the Engine Unit
191
Paper Pull-In Roller Holder
195
Paper Tray ASSY
197
Chapter 7 Adjustments and Updating of Settings, Required after Parts Replacement
210
Preparation
212
Requirements
212
Loading the Programs to the Machine
213
If You Replace the Head/Carriage Unit or Engine Unit
217
1 ] Update the Head Property Information Stored in the EEPROM
217
On the Main PCB
219
2 ] Clean the New Head/Carriage Unit (Function Code 76)
220
3 ] Print out a Test Pattern (Function Code 09)
220
4 ] Correct the Positioning Error of the Head/Carriage Unit
221
5 ] Update the Paper Feeding Correction Value (Function Code 58)
224
6 ] Align Vertical Print Lines (Function Code 65)
228
7 ] Margin Adjustment in Borderless Printing (Function Code 66)
230
8 ] Print out a Total Check Pattern
233
9 ] Switch Back to Standby
235
10 ] Replace the Ink Cartridges with the Protective Part
235
If You Replace the Main Pcb
236
1 ] Load Programs
236
2 ] Initialize the EEPROM on the Main PCB (Function Code 01)
236
3 ] Specify the CIS Type (Function Code 59)
236
4 ] Customize the EEPROM on the Main PCB (Function Code 74)
236
5 ] Check the Control Panel PCB for Normal Operation (Function Code 13)
236
6 ] Check the Sensor Operation (Function Code 32)
236
7 ] Acquire White Level Data and Set CIS Scanner Area (Function Code 55)
237
8 ] Set an ID Code and Update the Head Property Information
237
9 ] Update the Paper Feeding Correction Value (Function Code 58)
239
10 ] Align Vertical Print Lines (Function Code 65)
239
11 ] Margin Adjustment in Borderless Printing (Function Code 66)
239
12 ] Switch Back to Standby
239
If You Replace the Ink Absorber Box or Flushing Box
240
Scanner Unit
240
Maintenance Mode
245
Chapter 9 Maintenance Mode
246
Entry into the Maintenance Mode
248
List of Maintenance-Mode Functions
249
User-Access to the Maintenance Mode
250
Detailed Description of Maintenance-Mode Functions
251
EEPROM Parameter Initialization (Function Code 01, 91)
251
Printout of Scanning Compensation Data (Function Code 05)
252
ADF Performance Test (Function Code 08)
254
Test Pattern (Function Code 09)
255
Firmware Switch Setting and Printout (Function Codes 10 and 11)
257
Operational Check of LCD (Function Code 12)
262
Operational Check of Control Panel PCB (Function Code 13)
263
Sensor Operational Check (Function Code 32)
264
Fine Adjustment of Scanning Start/End Position (Function Code 54)
265
Acquisition of White Level Data and CIS Scanner Area Setting (Function Code 55)
266
Updating of Paper Feeding Correction Value (Function Code 58)
267
Checking of CIS Travel and Specifying of CIS Type (Function Code 59)
271
Travel Check of the Head/Carriage Unit and Initial Setup Mode (Function Code 63)
273
Alignment of Vertical Print Lines in Monochrome (Function Code 65)
274
Margin Adjustment in Borderless Printing (Function Code 66)
276
Updating of Property Data (Function Code 68)
279
Head/Carriage Unit Traveling Speed Check (Function Code 69)
280
EEPROM Customizing (Function Code 74)
281
Travel of Head/Carriage Unit (for Removing Paper Particles and Dust Accumulated on the Maintenance Unit) (Function Code 75)
283
Purging Operation (Function Code 76)
284
Display of the Equipment's Log (Function Code 80)
287
Equipment Error Code Indication (Function Code 82)
289
Assurance Mode Switch Setting (Function Code 88)
290
Advertisement
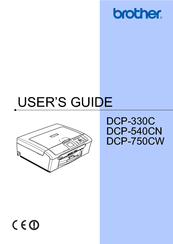
Brother DCP-750CW User Manual (113 pages)
Brother Printer/Fax/Scanner/Copier User's Guide
Brand:
Brother
| Category:
All in One Printer
| Size: 3.84 MB
Table of Contents
Compilation and Publication Notice
3
Table of Contents
5
Section I General
9
1 General Information
10
Using the Documentation
10
Symbols and Conventions Used in the Documentation
10
(DCP-540CN and DCP-750CW Only)
11
Viewing Documentation
11
Viewing Documentation
12
Accessing the Software User's Guide and Network User's Guide
11
Control Panel Overview
14
Basic Operations
16
LCD Display Indications
16
Printing Reports
17
Warning LED Indications
17
2 Loading Documents and Paper
18
Loading Documents
18
Using the ADF (DCP-540CN Only)
18
Using the Scanner Glass
18
Scanning Area
19
Acceptable Paper and Other Media
20
Recommended Media
20
Handling and Using Media
21
Choosing the Right Media
22
Loading Paper, Envelopes and Other Media
24
Loading Paper and Other Media
24
Loading Envelopes, Post Cards and Photo Paper
26
Printable Area
30
3 General Setup
31
Paper Settings
31
Paper Size
31
Paper Type
31
LCD Display
32
LCD Contrast
32
Setting the Backlight Brightness
32
Setting the DIM Timer for the Backlight
33
Setting the off Timer
33
4 Making Copies
36
How to Copy
36
Making a Single Copy
36
Making Multiple Copies
36
Stop Copying
36
Copy Options
36
Changing Copy Speed and Quality
37
Enlarging or Reducing the Image Copied
37
Making N in 1 Copies or a Poster
38
Sorting Copies Using the ADF (DCP-540CN Only)
39
Adjusting Brightness, Contrast and Colour
39
Paper Options
40
Setting Your Changes as a New Default
41
Restoring All Settings to the Factory Settings
41
Section III Direct Photo Printing
43
5 Printing Photos from a Memory Card
44
Photocapture Center™ Operations
44
Printing from a Memory Card Without a PC
44
Scanning to a Memory Card Without a PC
44
Using Photocapture Center™ from Your Computer
44
Using Memory Cards
44
Memory Card Folder Structure
45
Getting Started
46
Entering Photocapture Mode
46
Print Images
47
View Photo(S)
47
Print Index (Thumbnails)
47
Print All Photos
48
Print Photos
48
DPOF Printing
49
Photocapture Center™ Print Settings
50
Print Quality
51
Paper Options
51
Adjusting Brightness, Contrast and Colour
52
Cropping
53
Borderless Printing
53
Setting Your Changes as a New Default
53
Restoring All Settings to the Factory Settings
53
Scan to Card
54
Entering Scan Mode
54
How to Scan to Card
54
Understanding the Error Messages
55
6 Printing Photos from a Camera with Pictbridge
56
Before Using Pictbridge
56
Pictbridge Requirements
56
Using Pictbridge
56
Setting Your Digital Camera
56
Printing Images
57
DPOF Printing
57
Understanding the Error Messages
58
Section IV Software
59
7 Software and Network Features
60
Safety and Legal
62
Choosing a Location
62
To Use the Machine Safely
63
Important Safety Instructions
66
IMPORTANT - for Your Safety
67
LAN Connection (DCP-540CN and DCP-750CW Only)
67
EU Directive 2002/96/EC and EN50419
68
Legal Limitations for Copying
68
Trademarks
69
B Troubleshooting and Routine Maintenance
70
Troubleshooting
70
If You Are Having Difficulty with Your Machine
70
Network Difficulties
73
Error Messages
74
Changing LCD Language
76
Document Jam (DCP-540CN Only)
76
Printer Jam or Paper Jam
77
Replacing the Ink Cartridges
78
Routine Maintenance
78
Cleaning the Outside of the Machine
80
Cleaning the Scanner
81
Cleaning the Machine Printer Platen
82
Cleaning the Paper Pick-Up Roller
82
Checking the Print Quality
83
Cleaning the Print Head
83
Checking the Ink Volume
84
Checking the Printing Alignment
84
Checking the Serial Number
85
Machine Information
85
Packing and Shipping the Machine
85
C Menu and Features
87
On-Screen Programming
87
Menu Table
87
Menu Keys
87
Menu Table
88
Print Settings
93
Specifications
98
General
98
Print Media
100
Copy
101
Photocapture Center
102
Pictbridge
102
Scanner
103
Printer
104
Interfaces
105
Computer Requirements
106
Consumable Items
107
Network (LAN) (DCP-540CN and DCP-750CW Only)
108
Glossary
109
Index
110
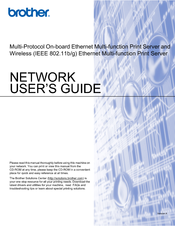
Brother DCP-750CW Network User's Manual (122 pages)
Multi-Protocol On-board Ethernet Multi-function Print Server and Wireless (IEEE 802.11b/g) Ethernet Multi-function Print Server
Brand:
Brother
| Category:
Print Server
| Size: 4.61 MB
Table of Contents
Compilation and Publication Notice
2
Important Note
3
Table of Contents
5
1 Introduction
8
Overview
8
Network Function Features
9
Network Printing
9
Network Scanning
9
Network PC-FAX (Not Available for DCP Models)
9
Network Photocapture Center
9
Management Utility
10
Types of Network Connections
11
Network Connection Example
11
Network Shared Printing
12
Wireless Network Connection Example
13
Protocols
14
TCP/IP Protocols and Functions
14
2 Configuring Your Machine for a Network with an Ethernet Cable Connection
16
Overview
16
IP Addresses, Subnet Masks and Gateways
16
IP Address
16
Subnet Mask: 255.255.255.0
17
Gateway (and Router)
17
Setting the IP Address and Subnet Mask
18
Using the Bradmin Professional Utility and the TCP/IP Protocol to Configure Your Network Printer (for Windows ® )
18
Using the Control Panel to Configure Your Machine for a Network
19
Using Other Methods to Configure Your Machine for a Network
19
Changing the Print Server Settings
20
Using the Bradmin Professional Utility to Change the Print Server Settings (for Windows Only)
20
Using the Control Panel to Change the Print Server Settings
20
Using the Remote Setup to Change the Print Server Settings (for Windows ® and Mac os ® X 10.2.4 or Greater) (Not Available for DCP Models)
20
3 Configuring Your Machine for a Wireless Network
22
Overview
22
Confirm Your Network Environment
22
Wireless Network Connection Example
22
Confirm Your Network Environment
24
Wireless Network Terms and Concepts
25
SSID (Service Set Identifier) and Channels
25
Authentication and Encryption
25
Authentication Methods
26
Encryption Methods
26
Configuring Your Machine for a Wireless Network
27
Using the Setup Wizard from the Control Panel
27
Using the Secureeasysetup™ Software to Configure Your Machine for a Wireless Network
29
Using the Brother Automatic Installer Application in the CD-ROM to Configure Your Machine for a Wireless Network
29
Changing the Print Server Settings
30
Using the Bradmin Professional Utility to Change
30
The Wireless Settings (for Windows )
30
Using the Control Panel to Change the Print Server Settings
31
Using Other Methods to Configure Your Machine for a Wireless Network
31
Using the Remote Setup to Change the Print Server Settings (Not Available for DCP Models)
32
4 Wireless Configuration for Windows
33
Configuration in Infrastructure Mode
33
For Windows 98/98Se/Me/2000 Professional/Xp/Xp Professional X64 Edition
33
Configuration with an Access Point that Supports Secureeasysetup
44
For Windows ® 98/98Se/Me/2000/Xp/Xp Professional X64 Edition
44
Configuration in Ad-Hoc Mode
48
For Windows 98/98Se/Me/2000 Professional/Xp
48
5 Wireless Configuration for Macintosh
57
Configuration in Infrastructure Mode
57
For Mac os ® X 10.2.4 or Greater
57
Configuration with an Access Point that Supports Secureeasysetup
66
For Mac os ® X 10.2.4 or Greater
66
Configuration in Ad-Hoc Mode
69
For Mac os ® X 10.2.4 or Greater
69
6 Control Panel Setup
77
LAN Menu
77
TCP/IP (Wired) / TCP/IP (WLAN)
77
Setup WLAN (for Wireless Network Only)
85
WLAN Status (for Wireless Network Only)
85
Setup Misc
87
Network I/F
88
Printing the Network Configuration List
88
Restoring the Network Settings to Factory Default
88
7 Driver Deployment Wizard (Windows ® Only)
90
Connection Methods
90
Using the Driver Deployment Wizard Software for the First Time
91
Creating an Executable File
93
8 Network Printing from Windows ® Basic TCP/IP Peer-To-Peer Printing
94
Overview
94
For Windows 98/Me/2000/Xp/Xp Professional X64 Edition Users
94
Configuring the Standard TCP/IP Port
94
Other Sources of Information
95
9 Network Printing from a Macintosh
96
How to Select the Print Server (TCP/IP)
96
Changing the Print Server Settings
98
Changing the Configuration Using the Remote Setup
98
(Not Available for DCP Models)
98
Using the Bradmin Light Utility to Change the Print Server Settings
98
Other Sources of Information
98
10 Troubleshooting
99
Overview
99
General Problems
99
Network Print Software Installation Problems
100
Printing Problems
103
Scanning and PC-FAX Problems
105
Wireless Network Troubleshooting
106
Wireless Setup Problems
106
Wireless Connection Problem
106
A Appendix A
107
Using Services
107
Other Ways to Set the IP Address (for Advanced Users and Administrators)
107
Using DHCP to Configure the IP Address
107
Using BOOTP to Configure the IP Address
107
Using RARP to Configure the IP Address
108
Using APIPA to Configure the IP Address
108
Using ARP to Configure the IP Address
109
Using the TELNET Console to Configure the IP Address
109
Installation When Using a Network Print Queue or Share (Printer Driver Only)
111
B Appendix B
112
Print Server Specifications
112
Ethernet Wired Network
112
Ethernet Wireless Network
114
Function Table and Default Factory Settings
116
Entering Text
119
For MFC Models
119
For DCP Models
120
Advertisement
Brother DCP-750CW Quick Setup Manual (51 pages)
Brother DCP-750CW: Quick Start
Brand:
Brother
| Category:
All in One Printer
| Size: 4.27 MB
Table of Contents
Symbols Used in this Guide
2
Table of Contents
3
Getting Started
4
Carton Components
4
Control Panel
5
STEP1 Setting up the Machine
6
Removing the Protective Parts
6
Loading Paper
6
Connecting the Power Cord
8
Choosing Your Language
8
Installing the Ink Cartridges
9
Print Quality Check
11
Setting the LCD Contrast
12
Setting the Date and Time
12
STEP2 - Installing the Driver & Software
16
Windows
16
For USB Interface Users
16
(For Windows ® 98/98Se/Me/2000 Professional/Xp/Xp Professional X64 Edition)
16
For Wired Network Interface Users (for Windows ® 98/98Se/Me/2000 Professional/Xp/Xp Professional X64 Edition)
19
For Wireless Network Users
23
In Infrastructure Mode)
23
Wireless Network
25
Network Configuration
27
Macintosh
32
For USB Interface Users
32
(For Mac os ® X 10.2.4 or Greater)
32
For Wired Network Interface Users
35
(For Mac os ® X 10.2.4 or Greater)
35
For Wireless Network Users (for Mac os ® X 10.2.4 or Greater in Infrastructure Mode)
38
Confirm Your Network Environment
39
For Network Users
45
Bradmin Professional Configuration Utility (for Windows ® Users)
45
Installing the Bradmin Professional Configuration Utility
45
Setting Your IP Address, Subnet Mask and Gateway Using Bradmin Professional
45
Bradmin Light Configuration Utility (for Mac os ® X Users)
46
Setting Your IP Address, Subnet Mask and Gateway Using Bradmin Light
46
How to Set the Machine's Network Settings to Wireless LAN or Wired LAN
47
Restoring the Network Settings to Factory Default
47
Entering Text
48
Consumables
49
Replacement Consumables
49
Ink Cartridge
49
Advertisement
Related Products
Brother DCP-770W
Brother DCP-7010L
Brother DCP-7057
Brother DCP-7070DW
Brother DCP-7060D
Brother DCP-7030
Brother DCP-7045N
Brother DCP-7180DN
Brother DCP-7060DN
Brother DCP-7057R
Brother Categories
Sewing Machine
All in One Printer
Printer
Label Maker
Fax Machine
More Brother Manuals
Login
Sign In
OR
Sign in with Facebook
Sign in with Google
Upload manual
Upload from disk
Upload from URL