Sign In
Upload
Manuals
Brands
Avaya Manuals
Server
S8400
Avaya S8400 Manuals
Manuals and User Guides for Avaya S8400. We have
6
Avaya S8400 manuals available for free PDF download: Manual, Installing And Configuring, Installing & Configuring, Quick Start Manual
Avaya S8400 Manual (1262 pages)
Media Servers and Gateways
Brand:
Avaya
| Category:
Server
| Size: 10 MB
Table of Contents
Table of Contents
3
Backing up Translations
26
Changing the IP600 Control Chassis to a Port Network
26
Installing TN771 Maintenance/Test Circuit Pack
26
Replacing the Processor Circuit Pack
26
Replacing the TN799C C-LAN Circuit Pack
26
Busying out Previously Busied out Trunks
27
Checking the Link Status
27
Returning Replaced Equipment
27
Testing the Installation
27
Troubleshooting the Migration
27
Upgrading Firmware
27
Verifying Circuit Pack Insertion
27
Verifying the IP Addresses
27
Changing the Ip600 Control Chassis to a Port Network/Busying out Previously Busied out Trunks
28
Chapter 1: Introduction
51
Port Network Connectivity
51
Reliability and Availability
52
Resources
54
How this Book Is Designed and Organized
56
Upgrades
63
Additional Documentation
64
Firmware Upgrades
64
Chapter 2: Upgrading Software on Media Servers
65
Upgrades that Can Affect Service
66
Common Prerequisites for All Upgrades
67
Checklist of Tasks to Perform before You Go on Site
68
Generating and Retrieving License and Authentication Files
70
License and Avaya Authentication Files
70
Caution about Platform/Pnc License Settings for the S8700-Series Media Server
71
Logins and Passwords
71
Upgrade Modules
73
Upgrading Communication Manager from 1.X to 3.1
75
Introduction
75
On an S8300 Media Server
75
Pre-Requisites
76
Pre-Upgrade Service Pack Requirements
77
Tasks Checklist
78
Upgrading Communication Manager from 2.X to 3.1
83
Introduction
83
On an S8300 Media Server
83
Prerequisites
84
Tasks
85
Upgrading Communication Manager on Avaya S8500
89
Media Server or S8500 ESS Using Maintenance Web Interface
89
Prerequisites
90
The Need to Restore IP Telephone Files
90
Busying out Previously Busied out Trunks
115
Enabling Scheduled Maintenance with SAT
115
Post-Upgrade Tasks
115
Restoring the 4600-Series IP Telephone Configuration File, if any (Main Server Only)
115
Backing up Recovery System Files
116
Checking for Translation Corruption
116
Resolving Alarms
116
Releasing Alarm Suppression (Optional)
117
Starting Call Processing on the Lsps and Esss, if any (Main Server Only)
117
Logging off All Administration Applications
118
Registering Avaya Communication Manager
118
Media Server from R2.X/R3.0 to R3.1 or from R3.1 to R3.1.X Using the Upgrade Tool
119
Upgrading Communication Manager on Avaya S8500
119
About Use of the Upgrade Tool
120
Prerequisites
121
SAMP Card Boot Timeout if Upgrading with Remastering Program
121
Which Devices the Upgrade Tool Can Upgrade
121
Overview of the Upgrade Process
122
Preupgrade Service Pack for Upgrades Starting from R2.X Only
122
TN2312AP/BP IPSI Circuit Pack Upgrades
122
The Need to Restore IP Phone Files
124
Upgrade Tasks
124
Connecting to the Media Server
126
Preupgrade Tasks
126
Starting a SAT Session
126
Upgrading the SAMP Firmware (S8500B Only)
126
Checking Link Status with SAT (Main Server Only)
127
Checking Synchronization with the SAT (Main Server Only)
127
Recording All Busyouts
127
Checking for Translation Corruption
128
Disabling Scheduled Maintenance with the SAT (Main Server Only)
128
Saving a Copy of the 4600-Series Telephone Configuration File, if any (Main Server Only)
128
Accessing the Media Server Maintenance Web Interface
129
Copying the Service Pack Files to the Media Server, Only if Starting from R2.X
129
Installing the Preupgrade Software Service Pack Only if Starting from R2
130
Copying Files to the Media Server
131
Resolving Alarms
131
Backing up Recovery System Files
132
Suppressing Alarming
132
Verifying the Backup
132
Inserting the Communication Manager CD-ROM into the Media Server
133
Copying Communication Manager to the Media Server
134
Removing the CD-ROM from the CD-ROM Drive
135
Upgrade Tasks
135
Starting the Upgrade Tool
136
Installing Avaya Authentication Files (if Required)
137
Verifying Software Operation
137
Checking System Status
138
Setting the Processor Ethernet
138
Copying IP Telephone Firmware to the Media Server, if Necessary (Main Server Only)
139
Post-Upgrade Tasks
139
Restoring the 4600-Series IP Telephone Configuration File, if any (Main Server Only)
139
Busying out Previously Busied out Trunks
140
Checking for Translation Corruption
140
Enabling Scheduled Maintenance with SAT
140
Resolving Alarms
140
Backing up Recovery System Files
141
Logging off All Administration Applications
141
Releasing Alarm Suppression (Optional)
141
Postrequisites
142
Registering Avaya Communication Manager
142
Upgrading the G150 Media Gateways, if Used
142
Media Server from R1.X to R3.1
143
Upgrading Communication Manager on Avaya S8700
143
Prerequisites
144
Preupgrade Service Pack
144
TN2312AP/BP IPSI Circuit Pack Upgrades
144
Upgrade of Lsps and Media Gateways, if Being Used
145
Upgrade Tasks
147
Upgrading Firmware on Media Gateways and Media Modules
147
Connecting to the Active Media Server
151
Preupgrade Tasks
151
Stopping Call Processing on the Lsps or Esss if Being Used (Main Server Only)
151
Checking Link Status with SAT (Main Server Only)
152
Starting a SAT Session
152
Checking Synchronization with the SAT (Main Server Only)
153
Disabling Scheduled Maintenance with the SAT (Main Server Only)
153
Recording All Busyouts
153
Accessing the Media Server Maintenance Web Interface
154
Busying out MMI Circuit Packs with SAT for a Duplicated Control Network Only (Main Server Only)
154
Checking for Translation Corruption
154
Backing up Recovery System Files on the Active Server
155
Resolving Alarms
155
Disconnecting from the Active Media Server
156
Suppressing Alarming
156
Verifying the Backup
156
Accessing the Media Server Maintenance Web Interface
157
Clearing the ARP Cache on the Laptop Computer
157
Connecting to the Standby Media Server
157
Backing up Files on the Standby Media Server
158
Copying Preupgrade Service Pack(S) to the Standby Media Server
158
Verifying the Backup
158
Suppressing Alarming
159
Upgrade Tasks (First Media Server)
159
Busying out the Standby Media Server
159
Checking the Software Release on the Standby Media Server
160
Installing the Preupgrade Service Pack
160
Backing up the System Files with Linux Migration-Backup
161
Verifying Connectivity to Customer Network Server
161
Setting Telnet Parameters
163
Erasing the MBR on the Media Server
164
Inserting the Communication Manager CD-ROM into the Media Server
164
Rebooting the Standby Media Server
165
Verifying Reboot Progress
165
Installing Communication Manager
166
Accessing the Media Server Maintenance Web Interface
167
Copying Files to the Media Server
168
Verifying Software Operation
168
Configuring the Network Parameters (Optional)
169
Selecting Media Server Type
169
Installing Postupgrade Service Pack, if Any, on Media Server
171
Verifying Connectivity to the Network Server (Optional)
171
Verifying Installation of the Service Pack
172
Restoring the Linux Migration Backup Files
173
Verifying Date and Time
174
Checking System Status
175
Interchanging the Media Servers
175
Releasing the Standby Media Server
175
Verifying Software Operation
175
Installing the New License and Avaya Authentication Files on Newly Active Media Server
176
Disconnecting from the Active Media Server
177
Upgrade Tasks (Second Media Server)
177
Busying out the Standby Media Server
177
Connecting to the Standby Media Server
177
Copying Preupgrade Service Pack(S) to the Standby Media Server
177
Installing the Preupgrade Service Pack
178
Verifying Software Operation
178
Backing up the System Files Using Linux Migration-Backup
179
Verifying Connectivity to Customer Network Server (Optional)
179
Erasing the MBR on the Standby Media Server
181
Inserting the Communication Manager CD-ROM into the Media Server
182
Rebooting the Standby Media Server
182
Verifying Reboot Progress
182
Installing Communication Manager
183
Accessing the Media Server Maintenance Web Interface
184
Copying Files to the Media Server
185
Selecting Media Server Type
185
Verifying Software Operation
185
Configuring the Network Parameters (Optional)
186
Installing Postupgrade Service Pack, if Any, on Media Server
188
Verifying Connectivity from the Network Server
188
Verifying Connectivity to the Network Server (Optional)
188
Verifying Service Pack Installation
189
Restoring the Linux Migration Backup Files
190
Verifying Date and Time
191
Verifying Software Operation
191
Checking System Status
192
Disconnecting from the Standby Media Server
192
Releasing the Standby Media Server
192
Checking for Translation Corruption
212
Accessing the Media Server Maintenance Web Interface
213
Saving a Copy of the 4600-Series Telephone Configuration File, if any (Main Server Only)
213
Backing up Recovery System Files
214
Copying Files to the Media Server
214
Resolving Alarms
214
Suppressing Alarming
215
Verifying the Backup
215
Clearing the ARP Cache on the Laptop Computer
216
Connecting to the Standby Media Server
216
Disconnecting from the Active Media Server
216
Accessing the Media Server Maintenance Web Interface
217
Copying Files to the Media Server
217
Backing up Files on the Standby Media Server
218
Suppressing Alarming
218
Verifying the Backup
218
Tasks to Preserve Connections When Starting from R3.0.1 Only (Main Server Only)
219
Accessing the Media Server Maintenance Web Interface
219
Connecting to the Active Media Server
219
Disconnecting from the Standby Media Server
219
Selecting the Preupgrade Step to Preserve Calls
220
Disconnecting from the Active Media Server
221
Upgrade Tasks for the First Media Server
221
Busying out the Standby Media Server
221
Checking the Software Release on the Media Server, if Starting from R2.X Only
221
Connecting to the Standby Media Server
221
Activating the Preupgrade Service Pack on the Media Server (R2.X Only)
222
Copying Communication Manager to the Media Server
223
Inserting the Communication Manager CD-ROM into the Media Server
223
Installing Communication Manager on the Media Server
225
Rebooting the Media Server
227
Verifying Reboot Progress
228
Checking System Status
229
Making the Upgrade Permanent on the Media Server
229
Verifying Software Operation
229
Installing Postupgrade Service Pack, if Any, on Media Server
230
Releasing the Standby Media Server
230
Interchanging the Media Servers
231
Disconnecting from the Newly Active Media Server
232
Installing the New License and Avaya Authentication Files on Newly Active Media Server
232
Upgrade Tasks for the New Standby Media Server (Second Server)
233
Accessing the Media Server Maintenance Web Interface
233
Busying out the Standby Media Server
233
Connecting to the Standby Media Server
233
Activating the Preupgrade Service Pack on the Media Server (R2.X Only)
234
Checking the Software Release on the Media Server (R2.X Only)
234
Copying Communication Manager to the Media Server
235
Inserting the Communication Manager CD-ROM into the Media Server
235
Installing Communication Manager on the Media Server
236
Rebooting the Media Server
239
Verifying Reboot Progress
240
Checking System Status
241
Making the Upgrade Permanent on the Media Server
241
Verifying Software Operation
241
Installing Postupgrade Service Pack, if Any, on Media Server
242
Releasing the Standby Media Server
242
Connecting to the Active Media Server
243
Copying IP Telephone Firmware to the Media Server, if Necessary (Main Server Only)
243
Disconnecting from the Standby Media Server
243
Verifying the Operation of the Media Servers
243
Post-Upgrade Tasks
244
Restoring the 4600-Series IP Telephone Configuration File, if any (Main Server Only)
244
Busying out Previously Busied out Trunks
245
Checking for Translation Corruption with SAT (Main Server Only)
245
Enabling Scheduled Maintenance with SAT
245
Releasing MMI Circuit Packs in Duplicated Control Network Using SAT, (Main Server Only)
245
Backing up Translations
246
Resolving Alarms
246
Connecting to the Standby Media Server
247
Disconnecting from the Active Media Server
247
Logging off All Administration Applications on the Active Media Server
247
Releasing Alarm Suppression (Optional)
247
Backing up Files on the Standby Media Server
248
Releasing Alarm Suppression (Optional)
248
Starting Call Processing on the Lsps and Esss, if any (Main Server Only)
248
Logging off All Administration Applications
249
Registering Avaya Communication Manager
249
Using the Upgrade Tool to Upgrade Communication Manager on Avaya S8700-Series Media Server
251
About Use of the Upgrade Tool
252
Upgrade Using the Upgrade Tool
253
The Need to Restore IP Telephone Files
255
Prerequisites
255
Preupgrade Service Pack for Upgrades Starting from R2.X Only
255
TN2312AP/BP IPSI Circuit Pack Upgrades
255
Overview of the Upgrade Process
256
Upgrade Tasks
257
Current Configuration Tasks
259
Connecting to the Active Media Server
259
Starting a SAT Session
259
Checking Link Status with SAT (Main Server Only)
260
Checking Synchronization with the SAT (Main Server Only)
260
Recording All Busyouts Using SAT
260
Busying out MMI Circuit Packs with SAT for a Duplicated Control Network Only (Main Server Only)
261
Disabling Scheduled Maintenance with the SAT (Main Server Only)
261
Checking for Translation Corruption with SAT (Main Server Only)
262
Saving a Copy of the 4600-Series Telephone Configuration File, if any (Main Server Only)
262
Accessing the Media Server Maintenance Web Interface
263
Backing up Recovery System Files on the Active Server
263
Resolving Alarms
263
Suppressing Alarming
264
Verifying the Backup
264
Accessing the Media Server Maintenance Web Interface
265
Backing up Files on the Standby Media Server
265
Connecting to the Standby Media Server
265
Disconnecting from the Active Media Server
265
Disconnecting from the Standby Media Server
266
Suppressing Alarming
266
Verifying the Backup
266
Accessing the Media Server Maintenance Web Interface
267
Connecting to the Active Media Server
267
Advertisement
Avaya S8400 Installing And Configuring (88 pages)
Media Server
Brand:
Avaya
| Category:
Server
| Size: 0 MB
Table of Contents
Table of Contents
3
Chapter 1: Introduction
7
Audience
7
How to Use this Documentation
8
Pre-Installation: before Going on Site
9
Documentation
9
Verifying Site Readiness
9
Laptop Preparation, Software, and System Information
10
Copying Files to the Laptop
10
About ASG and the Unique On-Site Password
11
Obtaining License and Avaya Authentication Files
11
Pre-Installation: at the Site
13
Equipment Specifications
13
About Media Server Port Connections
14
Ethernet Ports
14
Media Server Cable Adapter
15
Ethernet Connectivity with the TN8412AP Circuit Pack
16
Services Access Port
19
About Modem Connections
20
About Media Gateways
20
About Processor Ethernet
21
About SSH
22
High Level Overview of Installation Process
23
Installing and Cabling the Media Gateways
23
Installing Avaya Communication Manager
23
Configuring the MPC
23
Configuring the Media Server
23
Translating the SIPI
24
Completing the Installation Administration
24
Testing the Finished Installation
24
Chapter 2: SNMP Configuration
25
Configuration of the SNMP Modules in the UPS
25
Default UPS IP Addresses
26
Preparing to Configure the SNMP Module
26
Administering the SNMP Module
27
Setting Selected Traps (Alarming)
28
Chapter 3: Communication Manager Installation
29
Clearing the ARP Cache on the Laptop
29
Connecting the CD/DVD Drive to the Media Server
30
Powering up the Media Server
30
Accessing the Media Server
30
Configuring Telnet for Windows 2000/XP
31
Installing Avaya Communication Manager
32
Installing IA 770 INTUITY AUDIX Messaging
33
Chapter 4: Media Server Configuration
35
Opening the Maintenance Web Interface
35
Copying Files to the Media Server
36
Enabling Network Time Servers
37
Using the Installation Wizard
38
Verifying MPC IP Information
39
Installing MPC Firmware
39
Verifying Media Server Connection to the Customer's LAN (if Provided)
40
Enabling Firewall Settings
40
Configuring the Modem
41
Chapter 5: IP Interface Translations
43
Starting SAT Terminal Emulation
44
Inputting Initial System Translations
44
Adding Media Gateways
44
Enabling SIPI
45
Adding the SIPI to the System
46
Setting Alarm Activation Level
47
Saving Translations
47
Chapter 6: IP Interface Configuration
49
SIPI Address Configuration
49
Programming the SIPI for Static Addressing
50
Setting the VLAN and Diffserv Parameters
52
Resetting the SIPI
53
Verifying Connectivity to Media Server
54
Verifying that SIPI Is Translated
54
Upgrading the SIPI Firmware Version (if Necessary)
54
Enabling Control of SIPI
55
Verifying License Status
55
Installing and Configuring the Avaya S8400 Media Server February
56
Chapter 7: Post-Installation Administration
57
Verifying Translations
57
Setting Daylight Savings Time Rules
58
Setting Locations (if Necessary)
59
Verifying Date and Time
60
Clearing and Resolving Alarms
60
Backing up Files to the Compact Flash Media
61
Enabling Alarms to INADS Via Modem
61
Enabling Alarms to INADS Via SNMP
62
Before Leaving the Site
62
Chapter 8: Installation Verification
63
Testing the SIPI Circuit Pack
64
Testing the License File
64
TN8400AP Media Server Leds
65
Faceplate Interfaces
66
LED Descriptions
67
UPS Leds
68
TN8412AP SIPI Leds
69
Appendix A: Media Server Access
73
Accessing the Server's Command Line Interface with SSH
73
Connecting to the Media Server Directly
75
Connecting to the Media Server Remotely over the Network
76
Connecting to the Media Server Remotely over a Modem
77
Accessing the Maintenance Web Interface
78
Using the SAT Command Line Prompt
78
Logins for Avaya Technicians and Business Partners
79
Configuring the Network for Windows 2000/XP
80
Setting Browser Options for Internet Explorer 6.0
81
Appendix B: Installation Troubleshooting
83
Troubleshooting Media Server Hardware Installation
83
Troubleshooting Configuring the Media Server Hardware
84
Troubleshooting the Installation of License Files and Avaya Authentication Files
86
Index
87
Avaya S8400 Installing & Configuring (86 pages)
Brand:
Avaya
| Category:
Server
| Size: 0 MB
Table of Contents
Table of Contents
3
Chapter 1: Introduction
7
Audience
7
How to Use Avaya Installation Documents
8
Pre-Installation Requirements
9
Preinstallation Tasks to Complete at the Customer Site
9
Verifying that All the Required Equipment Is on Site
9
Ensuring that the Preinstallation Tasks Are Complete
9
Equipment Specifications
10
About Server Port Connections
11
Ethernet Ports
11
Server Cable Adapter
11
Ethernet Connectivity with the TN8412AP Circuit Pack
13
Services Access Port
16
About Modem Connections
18
Modem Options
18
About Media Gateways
18
About Processor Ethernet
18
About SSH
19
Chapter 2: SNMP Configuration
21
Configuring the SNMP Modules in the UPS
21
Prerequisites for Configuring the SNMP Module
22
Administering the SNMP Module
23
Setting Selected Traps (Alarming)
23
Chapter 3: Communication Manager Installation
25
Clearing the ARP Cache on the Laptop
25
Connecting the CD/DVD-ROM Drive to the Server
26
Applying Power to the Server
27
Accessing the Server
27
Configuring Telnet for Windows 2000 and Windows XP
27
Installing Avaya Communication Manager
27
Chapter 4: Server Configuration
29
Opening the Maintenance Web Interface
29
Copying Files to the Server
29
Creating a Super-User Login
30
Methods of Configuring a Server
31
Configuring the Server Manually
31
Setting the Date, Time, and Time Zone
31
Maintenance Web Pages Configuration Screens
32
Ethernet Interface Assignments
33
Performing the Manual Configuration
33
Avaya Installation Wizard
34
About the Avaya Installation Wizard
34
Running the Avaya Installation Wizard
35
Verifying the MPC IP Information
35
Installing MPC Firmware
35
Verifying the Server Connection to the Customer LAN (if Provided)
36
Configuring the Modem
37
Enabling Firewall Settings
37
Enabling Network Time Servers
38
Release the Server
39
Administering IA 770 Embedded Messaging
39
Chapter 5: IP Interface Translations
41
Inputting Initial System Translations
41
Adding Media Gateways
42
Enabling the SIPI
43
Adding the SIPI to the System
43
Setting the Alarm Activation Level
44
Saving Translations
44
Chapter 6: IP Interface Configuration
45
SIPI Address Configuration
45
Programming the SIPI for Static Addressing
45
Setting the VLAN and Diffserv Parameters
48
Verifying Connectivity to the Server
49
Verifying that the SIPI Is Translated
50
Upgrading the SIPI Firmware Version (if Necessary)
50
Enabling Control of the SIPI
50
Verifying the License Status
50
Chapter 7: Postinstallation Administration
51
Verifying Translations
51
Setting Rules for Daylight Savings Time
52
Installing and Configuring the Avaya S8400 Server January
52
Setting Locations (if Necessary)
53
Verifying the Date and the Time (Main Server Only)
54
Clearing and Resolving Alarms
55
Enabling Alarms to INADS by Way of a Modem
55
Enabling Alarms to INADS by Way of the SNMP Module
55
Backing up Files to the Compact Flash Media
56
Before Leaving the Site
56
Chapter 8: Installation Verification
59
Testing the SIPI Circuit Pack
59
Testing the License File
59
Additional Server LED Information
60
TN8400AP Server Leds
61
Faceplate Interfaces
62
LED Descriptions
63
UPS Leds
64
TN8412AP SIPI Leds
65
Appendix A: Server Access
69
Accessing the Command Line Interface of the Server with SSH
69
Connecting to the Server Directly
71
Connecting to the Server Remotely over the Network
73
Connecting to the Server Remotely over a Modem
73
Accessing the Maintenance Web Interface
74
Using the SAT Command Line Prompt
75
Logins for Avaya Technicians and Businesspartners
75
Configuring the Network for Windows 2000 and XP
76
Setting the Browser Options for Internet Explorer 6.0
77
Appendix B: Installation Troubleshooting
79
Troubleshooting the Installation of the Server Hardware
79
Troubleshooting the Configuration of the Server Hardware
80
Troubleshooting the Installation of the License File and the Avaya Authentication File
82
Index
83
Advertisement
Avaya S8400 Installing And Configuring (80 pages)
Brand:
Avaya
| Category:
Server
| Size: 0 MB
Table of Contents
Table of Contents
3
Chapter 1: Introduction
7
Audience
7
How to Use Avaya Installation Documents
8
Pre-Installation Requirements
9
Preinstallation Tasks to Complete at the Customer Site
9
Verifying that All the Required Equipment Is on Site
9
Ensuring that the Preinstallation Tasks Are Complete
9
Equipment Specifications
10
About Media Server Port Connections
11
Ethernet Ports
11
Media Server Cable Adapter
11
Ethernet Connectivity with the TN8412AP Circuit Pack
13
Services Access Port
16
About Modem Connections
18
Modem Options
18
About Media Gateways
18
About Processor Ethernet
18
About SSH
19
Chapter 2: SNMP Configuration
21
Configuring the SNMP Modules in the UPS
21
Prerequisites for Configuring the SNMP Module
22
Administering the SNMP Module
23
Setting Selected Traps (Alarming)
23
Chapter 3: Communication Manager Installation
25
Clearing the ARP Cache on the Laptop
25
Connecting the CD/DVD-ROM Drive to the Media Server
26
Applying Power to the Media Server
26
Accessing the Media Server
26
Configuring Telnet for Windows 2000 and Windows XP
27
Installing Avaya Communication Manager
27
Installing INTUITY AUDIX Embedded Messaging
28
Chapter 4: Media Server Configuration
29
Opening the Maintenance Web Interface
29
Copying Files to the Media Server
29
Creating a Super-User Login
30
About the Avaya Installation Wizard
31
Running the Avaya Installation Wizard
31
Verifying the MPC IP Information
32
Installing MPC Firmware
32
Verifying the Media Server Connection to the Customer LAN (if Provided)
33
Configuring the Modem
33
Enabling Firewall Settings
34
Enabling Network Time Servers
34
Disconnecting from the Media Server
35
Chapter 5: IP Interface Translations
37
Inputting Initial System Translations
37
Adding Media Gateways
38
Enabling the SIPI
39
Adding the SIPI to the System
39
Setting the Alarm Activation Level
40
Saving Translations
40
Chapter 6: IP Interface Configuration
41
SIPI Address Configuration
41
Programming the SIPI for Static Addressing
42
Setting the VLAN and Diffserv Parameters
44
Verifying Connectivity to the Media Server
45
Verifying that the SIPI Is Translated
46
Upgrading the SIPI Firmware Version (if Necessary)
46
Enabling Control of the SIPI
46
Verifying the License Status
46
Chapter 7: Postinstallation Administration
47
Verifying Translations
47
Setting Rules for Daylight Savings Time
48
Setting Locations (if Necessary)
49
Verifying the Date and the Time
50
Clearing and Resolving Alarms
50
Backing up Files to the Compact Flash Media
51
Enabling Alarms to INADS by Way of a Modem
51
Enabling Alarms to INADS by Way of the SNMP Module
52
Before Leaving the Site
52
Chapter 8: Installation Verification
53
Testing the SIPI Circuit Pack
53
Testing the License File
53
Additional Media Server LED Information
54
TN8400AP Media Server Leds
55
Faceplate Interfaces
56
LED Descriptions
57
UPS Leds
58
TN8412AP SIPI Leds
59
Appendix A: Media Server Access
63
Accessing the Command Line Interface of the Server with SSH
63
Connecting to the Media Server Directly
65
Connecting to the Media Server Remotely over the Network
67
Connecting to the Media Server Remotely over a Modem
67
Accessing the Maintenance Web Interface
68
Using the SAT Command Line Prompt
69
Logins for Avaya Technicians and Businesspartners
69
Configuring the Network for Windows 2000 and XP
70
Setting the Browser Options for Internet Explorer 6.0
71
Appendix B: Installation Troubleshooting
73
Troubleshooting the Installation of the Media Server Hardware
73
Troubleshooting the Configuration of the Media Server Hardware
74
Troubleshooting the Installation of the License File and the Avaya Authentication File
76
Index
77
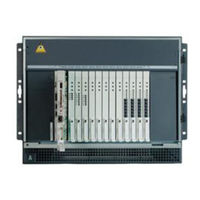
Avaya S8400 Quick Start Manual (22 pages)
for Hardware Migration Media Server in an Media Gateway
Brand:
Avaya
| Category:
Server
| Size: 0 MB
Table of Contents
Process and Specifications
3
Verifying the Equipment
5
Installing the Hardware: SNMP Module
10
Installing the Hardware: Mounting Brackets
10
Configuring the UPS
18
Powering up the System
21
Troubleshooting
22
Avaya S8400 Quick Start Manual (19 pages)
Media server in gateway
Brand:
Avaya
| Category:
Server
| Size: 1 MB
Table of Contents
Quick Start
1
Avaya G650 Media Gateway
1
Process and Specifications
3
Verifying the Equipment
5
Installing the Hardware: SNMP Module
6
Installing the Hardware: Mounting Brackets
6
Installing the Hardware: Rack Installation
9
Installing the Adapters
12
Connecting the Cables
13
Troubleshooting
17
Advertisement
Related Products
Avaya S8700 Series
Avaya S8700-Series
Avaya S8300 Series
Avaya S8710
Avaya S8300D
Avaya S8300B
Avaya Aura S8800
Avaya S8500C
Avaya S8 0 Series
Avaya S8 Series
Avaya Categories
IP Phone
Telephone
Server
Switch
Gateway
More Avaya Manuals
Login
Sign In
OR
Sign in with Facebook
Sign in with Google
Upload manual
Upload from disk
Upload from URL