Table of Contents
Advertisement
Advertisement
Table of Contents

Related Manuals for Telstra T-VOICE502

Summary of Contents for Telstra T-VOICE502
- Page 1 TELSTRA T-VOICE 502 HANDSET ® USER MANUAL...
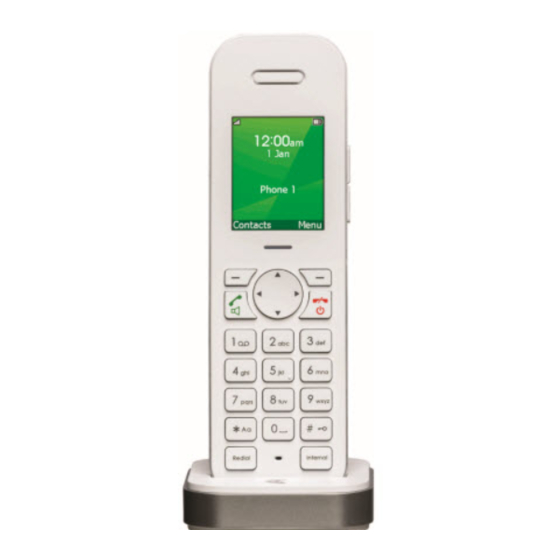
- Page 2 GETTING TO KNOW YOUR HANDSET Handset keys Earpiece Display Volume keys LED indicator Navigation key Dialled calls Softkey (multi- Softkey (multi- functional key) functional key) Talk key / speaker phone “End Call” / Power key Calls list Call Voicemail Space key pqrs wxyz Switch ringer on/off,...
- Page 3 Space key When entering name, insert space. While dialling, insert a dialling pause. Redial Internal Voicemail Press and hold down for direct access to Telstra’s voice message service. pqrs wxyz pqrs Asterisk key For entering asterisks. In idle mode: Press and hold down to switch handset ringer on/off.
-
Page 4: Led Indicator
Home Messages 101 service activated to access your voice messages. LED indicator Your TELSTRA T-VOICE 502 handset has a LED indicator allowing you to know the status of your phone. Solid green - Batteries near to fully charged. Flashing green on dock - Batteries charging. -
Page 5: Table Of Contents
ADVICE After successful registration of your handset, the following signposts may help you to find important functions quickly. Information about on page Link Handset to Telstra Gateway Wiring your gateway Add a new contact Voicemail setup Modify ringtones Set alarm clock... - Page 6 WHAT’S INSIDE Getting to know your handset Telstra Broadband (ADSL) with Existing Phone Handset keys Telstra Fixed Wireless Customers Handset display symbols Telstra Fixed Wireless Customers with Existing Phone LED indicator About the user guide / menus Practical advice User guide fonts and symbols What’s inside...
- Page 7 Call Features Voicemail (Network answer machine) Call forwarding Call waiting Call return Audio Ringtones Sounds Clock Appointments Set alarm Time/Date format Time zone Settings Handset settings Handset names Language Registration Deregister a handset Reset Software version Faults and trouble-shooting Appendix Care Disposing of the rechargeable battery Software update...
- Page 8 SAFETY PRECAUTIONS Your new Telstra T-VOICE 502 handset is intended for use within Australia for connection to the public telephone network and Telstra’s NBN or ADSL Service, paired with a compatible Telstra gateway (T-Gateway or Telstra Gateway Max™). Please read the safety precautions ®...
- Page 9 Small Metal Objects Small metal objects may stick to the handset due to the presence of magnetic fields on the handset. Exercise caution when used where metal objects can be picked up. Environmental impact At the end of the product’s life cycle, the telephone must not be disposed of in normal domestic waste.
-
Page 10: Contents Of The Package
PREPARING THE HANDSET Contents of the package T-Voice Power Charging Telephone 2xAAA Quick 502 handset cradle cord batteries start guide Power up the handset Inserting the rechargeable batteries The bottom part of the handset contains a battery compartment for housing two type AAA batteries. Removing the battery compartment cover Slide the battery compartment cover downwards and lift it up. -
Page 11: Charging The Batteries
Charging the batteries The batteries will take approximately 14 hours to fully charge, before the handset is ready for first use. • For proper operation of the handset the batteries must be fully charged initially. • Do not insert the handset in the charger without batteries. •... -
Page 12: Link Handset To Telstra Gateway
4. When your handset is linked, you will now see the main handset screen. To start making and receiving calls on your handset, ensure your gateway is wired correctly. Refer to “Wiring your Telstra gateway” located on page 14 of this user manual. -
Page 13: Wiring Your Gateway
Telstra on 132200 to arrange for a Telstra Technician to set up your phone service. Additional technician callout charges may apply. Prior to using the T-Voice 502 handset you need to ensure that your compatible Telstra gateway is set up to make and receive phone calls. - Page 14 D) Telstra Broadband (ADSL) with Existing Phone If you would like to continue to use an existing phone in your home, insert the phone cable of the existing phone into one of the green Phone sockets on the back of the Telstra gateway, as shown below.
- Page 15 If you have a Telstra Fixed Wireless Broadband service that includes a Telstra Fixed Home phone service, ensure that there is a phone cable connected to the black PSTN socket on the gateway and the wall socket as shown below.
- Page 16 A) Telstra NBN Customers • If you have had a Telstra Broadband (NBN) service installed at your premise you will not be required to perform any additional wiring on the T-Gateway. Once you have linked your T-Voice 502 to the gateway you will be able to make and receive calls.
- Page 17 3. Connect a phone cable between the wall socket on the ADSL Filter and the wall outlet, as shown below D) Telstra Broadband (ADSL) with Existing Phone If you would like to continue to use an existing phone in your home you will need a phone double adaptor as...
- Page 18 If you have a Telstra Fixed Wireless Broadband service that includes a Telstra Fixed Home phone service, ensure that there is a phone cable connected to the black PSTN socket on the gateway and the wall socket as shown below.
-
Page 19: Main Menu
ABOUT THE USER GUIDE/MENUS User guide fonts and symbols Redial Uppercase bold characters indicate softkey functions. These pictograms indicate the keys to be pressed. Uppercase bold italic characters indicate texts appearing on your handset display. Main menu The available menu icons appear on the display: Contacts Calls list Call Features... -
Page 20: Activate Handsfree Operation
Press to accept the call. To check the status of your CND, or to activate this service, order online at www.telstra.com or call 132200. Handsfree operation You can use the handsfree function to conduct calls without holding the handset in your hand and allow others present in the room to take part in the call. -
Page 21: Dialled Calls
Earpiece/handsfree volume You can adjust the earpiece and handsfree loudspeaker volume by pressing or the side volume key during a call. The selected setting is saved after the end of the call. The earpiece and handsfree loudspeaker volumes are independent but the setting procedure is identical. Mute During a call you can mute the microphone. -
Page 22: Turn On Keypad Lock
• Press the left softkey under TOGGLE to switch between callers. To be able to answer a call waiting, you must have Caller Number Display (CND) activated. To check the status of your CND, or to activate this service, order online at www.telstra.com or call 132200. - Page 23 1. Press the softkey under OPTIONS, CONFERENCE to connect all callers with each other. Each caller can leave the conference call by ending the call on their handset. 2. Press the softkey under OPTIONS, END CONFERENCE to end the conference. Up to 5 callers can be included in the conference for Telstra NBN customers.
-
Page 24: Add A New Contact
Contacts deleted will no longer be accessible from any handset or smart device using the T-Voice app registered to the gateway. Order contacts You can set your TELSTRA T-VOICE 502 handset to show your Contacts ordered alphabetically by first name or by last name. 1. Press the softkey under CONTACTS. Press the softkey under OPTIONS. - Page 25 Dialling numbers from the contacts 1. Press the softkey under CONTACTS. All contacts are displayed in alphabetical order. 2. Scroll to the desired contact and press . If you have stored more than one number for a contact (e.g. mobile and office), both numbers are displayed. Select the number you want to call (e.g. mobile) and press to call the number.
-
Page 26: Calls List
CALLS LIST Missed, answered and dialled calls Missed, answered and dialled calls are saved in the calls list in the gateway. If you have received new missed calls, a message to this effect appears in the display. If the list is full, the oldest entry is overwritten by the most recent entry. Icons in the call list Missed calls Answered calls... - Page 27 3. Press the softkey under OPTIONS, SAVE NUMBER to create a new contact. 4. Enter the associated name and save the contact. This contact will now be shared across all T-Voice 502 handsets and smartphones/tablets with T-Voice installed and registered to the Telstra gateway...
-
Page 28: Voicemail Setup
FEATURES Voicemail MessageBank® and Telstra Home Messages 101 are voicemail services offered by Telstra that provide a personal answering service if your phone line is busy or you can’t get to the phone. You don’t need extra equipment like an answering machine, and you also get greater flexibility on Call Waiting – if you don’t want to interrupt your call, let MessageBank®... -
Page 29: Call Return
Call return If you miss a call and want to know who it was, Call return will let you find out the number quickly and easily (unless it was a blocked number). To retrieve the number of your last unanswered call: 1. -
Page 30: Modify Ringtones
AUDIO 1. Press the softkey under MENU. Scroll to AUDIO using and confirm with OK. 2. You have then the following options: Ringtones You can select from 15 ringtones for incoming external/internal calls. Set the ringtone melodies and associated volume for external/internal calls (when you select RINGER OFF, the ringer is switched off). -
Page 31: Set Alarm Clock
CLOCK 1. Press the softkey under MENU. Scroll to CLOCK using and confirm with OK. 2. You have then the following options: Appointments Your handset also acts as an appointments reminder: You can set 5 different appointment reminders. Enter an appointment title, date and time and the desired melody (choose from 15 ringtones). The selected melody is heard on the handset at the defined time. -
Page 32: Handset Settings
Set the preferred display language. Display texts will appear in the selected language. Registration You can register additional handsets with the Telstra gateway. The Telstra gateway must be within range. If you purchase additional handsets • you must have a compatible Telstra gateway available for this handset. -
Page 33: Deregister A Handset
Deregister a handset To deregister a handset 1. Press the softkey under MENU. Scroll to SETTINGS using the and press OK to confirm. 2. Scroll to REGISTRATION using and press OK to confirm. 3. Select DEREGISTER HANDSET and press OK to confirm 4. -
Page 34: Trouble-Shooting
The other party cannot • For Telstra ADSL customers: If you cannot hear dial tone when you pick up the hear me phone and attempt to make a call, check that there is a phone line plugged from the ADSL Filter to the black PSTN hole on the back of the gateway. -
Page 35: Software Update
Do NOT disconnect your phone from power supply during the update, your equipment may get damaged! Warranty conditions Your Telstra T-Voice 502 handset comes with a manufacturer’s warranty of 24 months from the date of purchase. Our goods come with guarantees that cannot be excluded under the Australian Consumer Law. You are entitled to a replacement or refund for a major failure and compensation for any other reasonably foreseeable loss or damage. - Page 36 13 22 00...
Need help?
Do you have a question about the T-VOICE502 and is the answer not in the manual?
Questions and answers