Aristel AV series User Manual
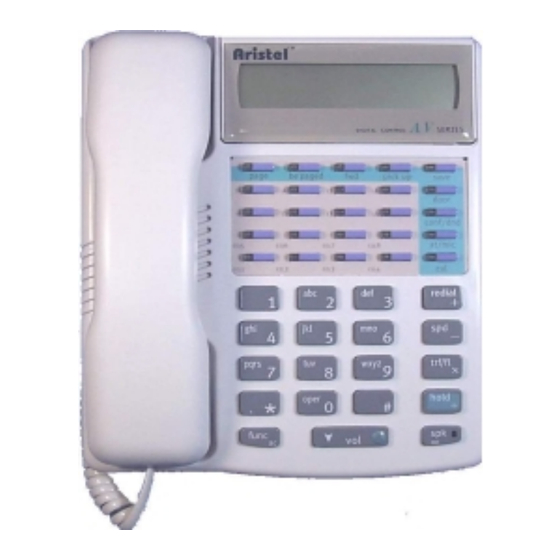
25 button keyphone
Hide thumbs
Also See for AV series:
- User manual (18 pages) ,
- User manual (18 pages) ,
- Programming manual (67 pages)

Related Manuals for Aristel AV series


Summary of Contents for Aristel AV series
-
Page 1: User Guide
SERIES Aristel 25 Button model Keyphone Aristel Aristel Aristel KP10LBW/KP10DBW SYSTEM ADMINISTRATOR’S USER GUIDE Aristel networks System Administrator’s Manual Issued May 2002 Page 1... -
Page 2: Table Of Contents
MANUAL INDEX Icons Used ....................... 5,6 Specifications ..................... 7 Key Telephone – Station Operation ............8-31 Answering Calls ..................8 Automatic Answer ................. 8 External Call ..................8 Other Calls ..................... 8 Baby Listening ..................8 Background Music Listening ..............9 Call Forward Functions ................ - Page 3 Headset Operation .................. 15 Programming ..................15 Enable Headset Mode ................ 15 Disable Headset Mode ................. 15 Answering a Call in Headset Mode ..........15 Disconnecting from a Call in Headset Mode ........15 Hold Calls ....................15 Normal Hold ..................
- Page 4 Over-Ride .................... 22 Cancel Over-Ride or Monitor ............22 Paging ....................... 22 All Internal and External ..............22 All External ..................22 All Internal ..................22 Answer Paging ..................22 External Zone ..................22 Internal Zone ..................22 Incoming DISA Paging ..............
-
Page 5: Icons Used
! ! ! ! Icons Used in this Manual: Dial pad symbols : Press digit [1]. : Press digit [2]. : Press digit [3]. : Press digit [4]. : Press digit [5]. : Press digit [6]. : Press digit [7]. : Press digit [8]. -
Page 6: Dss Keys
DSS keys : Press [DSS Function] Key. : Press [DSS CO line] Key : Press [DSS Station] Key. :Microphone On/Off. :FAC Button : Forward Button Press [SAVE] Key. :Calculator Start/Cancel : Press Page Key. : Press Be Paged Key toAnswer a Page Call : Press MW Key. -
Page 7: A Specifications
Key Telephone Layout and Parts List System Administrator’s Manual Issued May 2002 Page 7... -
Page 8: Key Telephone Station Operation
Key Telephone Station Operation 01. Automatic Answer to enable Automatic Answer. The LED will be on. to disable Automatic Answer. The LED will be off. External Call During incoming ringing, press on the ringing Station.., or press the flashing DSS button assigned for the incoming line, or + 01 ~ 08 for the line number. -
Page 9: Background Music Listening
03. Background Music Listening Cancel Background Music Listening 04. Call Forward NOTE! can be replaced by pressing in all Modes. To Cancel All Call Forward Modes own station number. Call Forward All destination station number. Call Forward Busy destination station number. Call Forward No Answer destination station number. -
Page 10: Call Forward Busy/No Answer
Call Forward Busy/No Answer destination station number Call Follow Me destination station number. Call Forward to External Number DSS set for Individual Speed Dial digit set for Individ Spd Dial. 05. Call Signal Changing call signal from Ring to Voice or from Voice to Ring. 06. -
Page 11: Call Transfer Functions
07. Call Transfer Announced Transfer required station number. Talk to station, announce call + Unannounced Transfer (Camp On) required station number. + Quick Transfer by DSS key Quick Transfer by Page key + make Page announcement and wait for answer. Paged station answers page by then paging party 08. -
Page 12: Answer Call Waiting
Answer Call Waiting (AV System) will flash and display will show Message Wait by ….. Press and call will be made to station that left message signal. Busy C.O. line queuing and C.O. line is busy. Press The C.O. line will be placed in the queue. When the C.O. -
Page 13: Do Not Disturb
10. Do Not Disturb Set Do Not Disturb Reset Do Not Disturb 11. Door Phone Call Door Phone for Door 1 for Door 2 Note: To operate the door latch, press during a door call. 12. Environment Monitoring on listening ext. Press ext number to be listened to Note: The Environment Monitor ability is set in Zone506-ST-Item 07 for each station and the monitor level is set in Zone 506 Item 07. -
Page 14: Forced & Non-Forced Account Codes
14. Forced Account Codes the Forced Account Code. The system will automatically seize a free C.O.line. the Forced Account Code. The system will automatically seize a free C.O. line. Non-Forced Account Codes (Display phones only) During a call: account code + 15. -
Page 15: Headset Operation
17. Headset Operation Programming An eight digit max. Password can be programmed into Zone 301 Set 08 Item 01. This is not necessary for operation. Enable Headset mode Step 1. Connect Headset to Key Telephone Step 2. Step 3. Leave handset Disable Headset mode As above Answer a Call in Headset mode... -
Page 16: Retrieving External Call From Exclusive Hold
Retrieve External Call from Exclusive Hold At Holding Station: , + and the two digit number of the C.O. line (01, 02, 03, etc) At any other Station: + and the two digit number of the C.O. line (01, 02, 03, etc) + 19. -
Page 17: Own Station Alarm
Own Station Alarm or if a Console + enter alarm time and duration + 12 0800 01 example is for extension 12, alarm is set for 8:00 AM, to sound for 1 minute. This alarm will sound every day at the set time. A duration of 99 gives a “once only” alarm sounding for 1 minute 20. -
Page 18: Lock And Unlock Telephone
21. Lock / Unlock Telephone. Normal Lock and Unlock enter the password to lock/unlock then press Temporary (once off) Lock and Unlock enter the password to lock/unlock 22. Lock / Unlock RS232 (SMDR) port. Lock and Unlock RS232 Port/SMDR (Console Only) each operation toggles the lock/unlock 23. -
Page 19: Mute
24. Mute During a Handset Call Press again to resume talking. Press again to resume talking. During a Handfree Call Press again to resume talking. 25. Message Text Selecting and displaying a message + press 1 ~ 6 to select the required message to be displayed + Removing the Message Note: These are the six available messages... -
Page 20: Morning Call
26. Morning Call Individual Station Morning Call Station number to be called. + enter the Alarm time. The duration must be Own Station Morning Call (for a Console enter the Alarm time. The duration must be 27. Night Switching Automatic switching: Day Mode/Night Mode Toggle Note: This will toggle the system from Auto to Manual Night Switching Mode and visa versa Manual switching: Day Mode/Night Mode Toggle Note: When the system is in Manual Mode, this will toggle the system from Night Mode to... -
Page 21: Outgoing Calls
29. Outgoing Calls Automatic C.O. line access dial the C.O. access code (usually 9 or 0) + dial the required Telephone number. Hot Call + Talk to Operator or outside Speed Number. Manual C.O. line access dial the required number + enter the two digit number of the desired C.O. -
Page 22: Over-Ride
Over-Ride dial busy Station number OR to select a busy C.O. line + Note: An Over-Ride tone will be heard by the parties and a conference call is set up with all parties connected. Cancel Monitor or Over-Ride 31. Paging All Internal and External All External All Internal... -
Page 23: Incoming Disa Paging
Incoming DISA Paging to All Internal Zone Step 1. Set a password DISA Paging Step 2. Call in on a C.O. line set for Auto-Attendant answer. Step 3. On answer, enter password + Make announcement 32. Pick Up All Pick Up + Your Station Other Station Group Pick Up... -
Page 24: Redial
34. Redial Auto-Redial Step 1. Call Busy external Telephone Number + Step 2. Note: During Redial, the LED will flash. Last Number Redial The system will select a free C.O. line and redial the last number that was dialed. 35. Releasing Calls Handset Handsfree Press... -
Page 25: Speed Dial Programming And Operation
38. Speed Dial Programming and operation Individual Speed Dial Programming 0 ~ 9 + telephone number to be stored + if using a Console + 0 ~ 99 + telephone number to be stored + Individual Speed Dial Operation 0 ~ 9 0 ~ 9 System Administrator’s Manual Issued May 2002... -
Page 26: System Speed Dial Programming (Console Only)
System Speed Dial Programming (Console Only) Step 1. Step 2. enter the Speed Dial Code and the Item = Step 3. enter the Telephone Number for this Speed Dial Code + (15 button) (25 button) or System Speed Dial Operation Step 1. -
Page 27: System Name Speed Dial Programming (Console Only)
System Name Speed Dial Programming (Console Only) Step 1. Name Speed Dial must be enabled in programming. Step 2. = System Step 3. enter the Speed Dial Code (100~Max) Step 4. Item = Step 5. enter the Tel n (15 button) (25 button) or enter the Name + (15 button) -
Page 28: Station Name Speed Dial Programming (Console Only)
Station Name Speed Dial Programming (Console Only) Step 1. Name Speed Dial must be enabled in programming. Step 2. = Station Step 3. enter the Station number + (15 button) Step 4. enter the Station Name + (15 button) Name Speed Dial Operation Step 1. -
Page 29: Toll Code
40. Toll Code any C.O. line to be used for the call. Step 1. Step 2. Step 3. enter the Toll Password (Max. 8 digits) + the required Telephone number Step 4. Step 5. Note: If zone 253 is enabled, the full Toll Code used will be printed in the SMDR output. 41. -
Page 30: Message Recording (Av64/256)
Message Recording FOR AV64/256 Step 1. enter the station number of the Voice Card port. Step 2. The LCD will display the following instructions:- = R = Record message(s) = P = Playback the message(s) = N = Go to the next message = B = Go to previous message the system will immediately commence recording the message. -
Page 31: Volume Control
42. Volume Control For the call in progress only (does not affect future calls) During a call change to speech volume as required During Ringing change the Ring volume as required For all future calls (sets the default levels) To set the Ring volume level: To set the Speaker volume level: To set the Hand piece volume level: To set the Ring frequency (tone):... -
Page 32: Power Fail Warning Notice
1. An emergency Power-Fail backup battery can be installed (at initial installation or at a later date). The Aristel battery backup set will allow the telephone system to operate with full capability and functions for approximately 4~8 hours.
Need help?
Do you have a question about the AV series and is the answer not in the manual?
Questions and answers