
Related Manuals for Thermo Scientific 25LCEETSA


Summary of Contents for Thermo Scientific 25LCEETSA
-
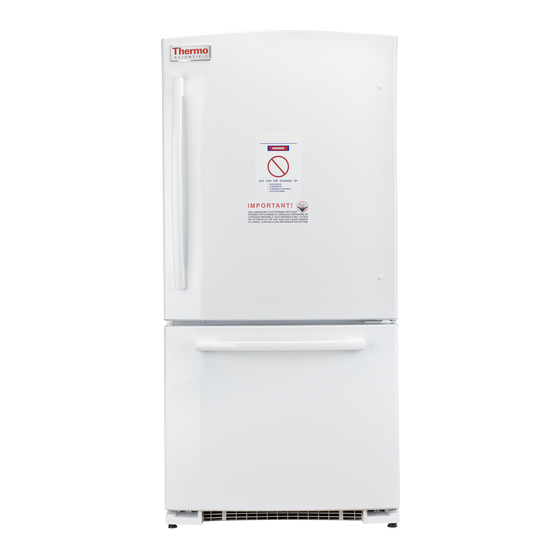
Page 1: Refrigerators And Freezers
Refrigerators and Freezers Installation and Operation Manual 25LCEETSA 327202H01 Rev B... - Page 2 © 2015 Thermo Fisher Scientific. All rights reserved.
-
Page 3: Table Of Contents
Table of Contents ..............................Introduction Safety Information..........................................................Alert Signals Intended Use............................................................Unpacking ........................Performance Characteristics ..........................Temperature Ranges ..........................Electrical Requirements Environmental Operating Conditions...................................................... Installation ..............................Location ................................ Wiring ..............................Leveling ..............................Door Seal Rearranging the Shelves........................................................ -
Page 4: Introduction
Introduction This manual provides installation and operation instructions for Thermo Scienific Refrigerator/Freezer. The model features: Large Capacity – approximately 16.3 cu. ft in the refrigerator compartment. 6.9 cu. ft in the freezer • compartment. Cooling by forced air circulation • Automatic defrost •... -
Page 5: Safety Information
Safety Information Thank you for selecting Thermo Scientific Health products for your equipment needs. These instructions contain important operating and safety information. The user must carefully read and understand these instructions before using the unit. Your unit has been designed to optimize function, reliability, safety and ease of use. It is the user’s responsibility to install the unit in conformance with local electrical codes. -
Page 6: Intended Use
Intended Use The Refrigerators/Freezers described in this manual are for professional use only. These products are intended for use in research for the storage of samples or inventory in the following temperature ranges: Refrigerators +1°C to +12°C Freezers -12°C to -20°C Warning Only Explosion Proof Units or These are not considered medical devices and have therefore... -
Page 7: Unpacking
Unpacking At delivery, examine the exterior for physical damage while the carrier's representative is present. If exterior damage is present, carefully unpack and inspect the unit and all accessories for damage. If there is no exterior damage, unpack and inspect the equipment within five days of delivery. -
Page 8: Performance Characteristics
Performance Characteristics Temperature Ranges Refrigerator: 1° to 12°C (34° to 54°F) Freezer: -12° to -20°C (-4° to 11°F) Electrical Requirements 120 Volts ±10%, 60 Hz, 11.6 Amps Environmental Operating Conditions POLLUTION DEGREE* INSTALLATION CATEGORY* 2000 Meters MSL (Mean Sea Level) ALTITUDE HUMIDITY 80% maximum, non-condensing... -
Page 9: Installation
Installation Location Caution Improper operation of the equipment could result dangerous Install the unit in a level area free from vibration with a conditions . To preclude hazard and minimum of 1/8th inch on sides, 2 inches at the rear and 1 inch on the top. -
Page 10: Rearranging The Shelves
Rearranging the Shelves Shelves in the refrigerator compartment are adjustable. Refrigerator Compartment To Remove: 1. Remove all items from the shelf. 2. Tilt the shelf up at the front. 3. Lift the shelf up at the back and bring the shelf out. To Replace: 1. - Page 11 Adjustable Bins on the Door Adjustable bins can easily be carried from refrigerator to work area. To Remove: Lift bin straight up, then pull out. To replace or relocate: Slide in the bin just above the molded door supports, and push down.
- Page 12 To replace or relocate: Engage the bin in the molded supports on the door and push down. It will lock in place. Basket Removal To remove the deep full-width basket on freezer drawer models: 1. Open the freezer drawer until it stops. 2.
- Page 13 To remove the half-width basket: 1. Pull the basket out to the stop location. 2. Lift the basket up at the front to release it from the slides. 3. Lift the back up and out of the slide. When replacing the basket, make sure that the wire tabs and wire hooks on the sides of the basket go into the slots in the top of the upper basket slides.
-
Page 14: Operation
Operation NOTE: The refrigerator is shipped with protective film covering the temperature controls. If this film was not removed during installation, remove it now. The temperature control can be adjusted between 0 to 9, 0 being OFF and 9 being the coldest temperatures by tapping the colder and warmer buttons on the temperature control. -
Page 15: Changing The Temperature
Defrosting This freezer defrosts automatically and there should be no significant frost build up in the freezer compartment. An automatic 45 minute defrosting period is initiated every 12 hours of compressor run time. During a defrost period, a thermostat will turn the defrost heater off when all the ice has melted from the evaporator. -
Page 16: Replacing The Light Bulbs
Replacing the Light Bulbs Caution Light bulbs may be hot. Turning the control to the 0 (off) position does not remove power to the light circuit. Refrigerator Lights 1. Unplug the refrigerator. 2. To remove the light shield, grasp the shield at the back and pull out to release the tabs at the back. -
Page 17: Cleaning
Cleaning Cleaning the Outside The door handles and trim. Clean with a cloth dampened with soapy water. Dry with a soft cloth. Do not use wax on the door handles and trim. Keep the outside clean. Wipe with a clean cloth lightly dampened with kitchen appliance wax or mild liquid dish detergent. -
Page 18: Troubleshooting
Troubleshooting Problem Cause Solution 1. Check that the cord is securely plugged-in. 2. Plug another appliance into the Unit does not operate Power Supply outlet to see if it is live. 3. If the outlet is dead, check the circuit breaker or fuses. Make sure that the cold control is Cold control set correctly... -
Page 19: Warranty
Canada This Thermo Scientific product is warranted to be free of defects in materials and workmanship for 13 months from the first to occur of (i) the date the product is sold by the manufacturer or (ii) the date the product is purchased by the original retail customer (the “Commencement Date”). -
Page 20: Weee Compliance
Further information on Thermo Fisher Scientific compliance with these Directives, the recyclers in your country, and information on Thermo Scientific products which may assist the detection of substances subject to the RoHS Directive are available at www.thermo.com/ WEEE Konformittät. -
Page 21: If You Need Assistance
Important For your future reference and when contacting the factory, please have the following information readily available: Model Number: Serial Number: Date Purchased: The above information can be found on the dataplate attached to the equipment. If available, please provide the date purchased, the source of purchase (manufacturer or specific agent/rep organization), and purchase order number. - Page 22 Thermo Fisher Scientific Inc. 275 Aiken Road Asheville, NC 28804 United States www.thermofisher.com 327202H01 Rev. B...
Need help?
Do you have a question about the 25LCEETSA and is the answer not in the manual?
Questions and answers