
Related Manuals for Thermo Scientific 151R-AEV-TS


Summary of Contents for Thermo Scientific 151R-AEV-TS
- Page 1 ES Series Laboratory Refrigerators User's Manual Laboratory Refrigerator Range Applicable models: 151R-AEV-TS 151R-AEW-TS 288R-AEV-TS 288R-AEW-TS...
-
Page 2: Table Of Contents
Contents Intended Use and Special Warning Before first use Positioning of refrigerator Transportation and moving of refrigerator Energy saving tips Important information Product information Product details Controller overview Viewing and resetting minimum and maximum temperatures Changing the factory set point Changing the temperature scale Changing the remote alarm contacts Alarms... -
Page 3: Intended Use And Special Warning
Intended Use and Special Warning This equipment is tested in compliance with established regulations and then shipped ready for use. This equipment is intended for general purpose cold storage and is not to be used in the presence of explosive gases or mixtures and / or close to sources with high magnetic or electric fields. -
Page 4: Transportation And Moving Of Refrigerator
Transporting and moving your ES series refrigerator The refrigerator must always be moved in the vertical position. The cabinet must not be tilted anymore than 10°. In the event that the cabinet is tilted more than 10°, the power supply must not be connected until the equipment has stood upright for at least 24 hours. -
Page 5: Product Details
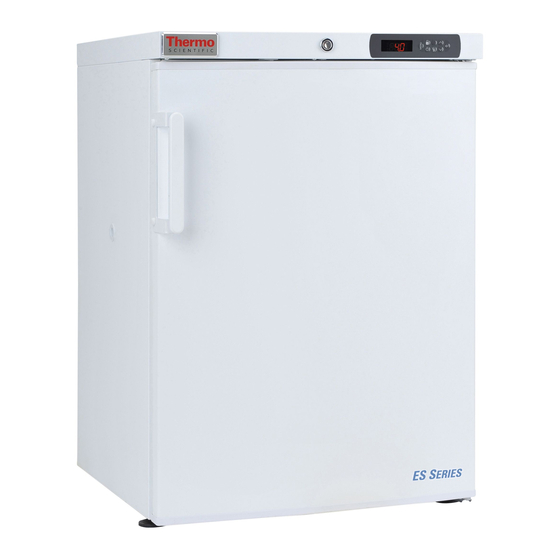
Product details 1. Lock 2. Electronic Controller 3. Door Handle 4. Wire Shelf 5. Wire Basket 6. Adjustable foot (2 at front of equipment) 7. Door furniture There are also 2 roller castors at the rear of the equipment to ease product movement. Please contact your local representative for information on spare parts... -
Page 6: Controller Overview
Controller overview and operation 1. Menu 2. Lock keypad 3. Maximum temperature / Up 4. Power 5. Mute 6. Minimum temperature / Down 7. Set / Enter... -
Page 7: Viewing And Resetting Minimum And Maximum Temperatures
Viewing & resetting minimum and maximum temperatures... -
Page 8: Changing The Factory Set Point
Changing the factory set point (the set point is the point at which the refrigerator normally holds the temperature at; in rare circumstances such as high/low room temperatures it may be necessary to adjust this slightly. Changing the factory setting is not recommended.) Hold button(s) ... -
Page 9: Changing The Remote Alarm Contacts
Changing the remote alarm contacts Hold button(s) Function Press Example screen down for To change the alarm contact state 3 seconds followed by Three times followed by 1 second (current state) followed by Once followed by 1 second Note: NO = Normally Open, NC = Normally Closed... -
Page 10: Alarms
Warning Alarms This refrigerator has been designed to provide both an audible and visual alarm should any of the following situations occur: • Door is left open for a set period • Internal air temperature goes outside the set parameters, either too high or too low •... - Page 11 Please note that the contacts supplied are voltage free. A voltage of between 12V DC and 230V AC can be connected at the contacts. The maximum load must not exceed 2A. The minimum power rating is 500mA / 12V AC. In a normal condition (i.e.
-
Page 12: Maintenance And Servicing
Maintenance and Service of your Thermo Refrigerator Defrosting All laboratory refrigerators feature automatic defrosting and, in normal conditions, means that no manual defrosting is required. However, in certain conditions (e.g. when the refrigerator is very full or when any new items of are stored in the refrigerator) frost may form on the rear wall of the equipment as the compressor must run for long periods of time. -
Page 13: Reversing The Door
Reversing the door In order to reverse the door please follow the below instructions. This should be carried out by 2 people for safety purposes. 1. Tilt the refrigerator backwards by 45° and lean on a vertical, hard surface such as a wall. 2. -
Page 14: Storage
8. Insert the door into the top, left hand hinge (figure 8). 9. Install the bottom, left hand hinge (figure 9) and screw in the feet. Figure 9 Figure 8 10. Add the feet and base plate to the bottom, right hand side. 11. -
Page 15: Electrical Connection
Electrical Connection The equipment is intended for connection to alternating current. The connection values for voltage (V) and frequency (Hz) are declared on the name plate in the cabinet. Power must be connected via a wall socket with a switch. It is strongly recommended that the wall socket is easily accessible. -
Page 16: Disposal
Disposal of your refrigerator When disposing your refrigerator do not take it to regular municipal waste containers. Instead, take it to an electrical/electronic waste recycling and re-use centre. A relevant label has been placed on the refrigerators packaging (see below). The product has been manufactured of recyclable materials. -
Page 17: Troubleshooting
Troubleshooting PROBLEM REASON SOLUTION 1. Make sure the plug is properly inserted into the socket A gap in the electric 2. Make sure the socket is not faulty The equipment does system circuit 3. Make sure the power supply cord is not work not damaged The compressor hardly... -
Page 18: Warranty
Refrigerators and Freezers European Warranty Policy Thermo Scientific ES Series Refrigerators • European Warranty • 12 Months Full Warranty Parts and Labor During the first twelve (12) months from shipment, Thermo Fisher Scientific Inc, through its authorized Dealer or service organizations, will at its option and expense repair or replace any part found to be non-conforming in material or workmanship. - Page 19 Laborkühlschränke der ES-Reihe - Benutzerhandbuch Laborkühlschrankmodelle Zutreffende Modelle: 151R-AEV-TS 151R-AEW-TS 288R-AEV-TS 288R-AEW-TS...
- Page 20 Inhalt Vorgesehene Nutzung und besondere Warnhinweise Vor der ersten Nutzung Positionierung des Kühlschranks Transport und Bewegen des Kühlschranks Energiespartipps Wichtige Informationen Produktinformationen Einzelheiten zum Produkt Regler-Übersicht Anzeige und Neueinstellung der Mindest- und Höchsttemperatur Ändern der Werksvoreinstellung des Sollwerts Ändern der Temperaturskala Ändern der Fernalarmkontakte Alarme Fernalarmkontakte...
-
Page 21: Vorgesehene Nutzung Und Besondere Warnhinweise
Vorgesehene Nutzung und besondere Warnhinweise Dieses Gerät wurde gemäß den festgelegten Regeln geprüft und dann einsatzbereit versandt. Dieses Gerät ist für eine allgemeine Kühllagerung vorgesehen und darf nicht bei Vorhandensein von explosiven Gasen oder Mischungen und / oder in der Nähe von Quellen mit hohen magnetischen oder elektrischen Feldern verwendet werden. -
Page 22: Transport Und Bewegen Des Kühlschranks
• Verwenden KEINE zweiadrigen Verlängerungskabel. Wenn Verlängerungskabel benötigt wird, verwenden Sie unbedingt ein Verlängerungskabel mit einem Schutz-Sicherheitszertifikat. • Falls das Hauptzuleitungskabel beschädigt ist, sollte es von einem qualifizierten Servicetechniker ausgetauscht werden. • Versuchen Sie NICHT, irgendwelche Reparaturen an dem Gerät selbst durchzuführen (außer den im Wartungs- und Service-Abschnitt angegebenen Arbeiten). -
Page 23: Produktinformationen
– WARNUNG: Verwenden Sie außer den vom Hersteller empfohlenen keine anderen mechanischen Geräte oder anderen Mittel, um den Abtauvorgang zu beschleunigen. – WARNUNG: Beschädigen Sie den Kühlkreislauf nicht. Produktinformationen Dieser Kühlschrank wurde für die in einem Labor verwendeten Produkte konzipiert und gebaut, so dass der Inhalt bei Temperaturen zwischen +1°C bis +10°C gelagert werden kann. -
Page 24: Regler-Übersicht
1. Verriegeln 2. Elektronischer Regler 3. Türgriff 4. Drahtregalboden 5. Drahtkorb 6. Stellfuß (2 vorne am Gerät) 7. Türbeschläge Es befinden sich zusätzlich 2 Laufrollen hinten am Gerät, um die Produktbewegung zu erleichtern. Bitte nehmen Sie für Informationen zu Ersatzteilen Kontakt mit Ihrem örtlichen Vertreter auf. -
Page 25: Anzeige Und Neueinstellung Der Mindest- Und Höchsttemperatur
Anzeige & Neueinstellung der Mindest- und Höchsttemperatur Taste(n) Funktion Drücken gedrückt halten Anzeige-Beispiel für Zur Anzeige der maximalen Lufttemperatur 3 Sekunden Zeigt Maximum seit dem letzten Reset an Zur Anzeige der Mindest-Lufttemperatur 3 Sekunden Zeigt Minimum seit dem letzten Reset an Zum Zurücksetzen der Lufttemperatur 3 Sekunden Löscht alle vorherigen Werte... -
Page 26: Ändern Der Werksvoreinstellung Des Sollwerts
Ändern der Werksvoreinstellung des Sollwerts (Der Sollwert ist der Wert, bei dem die Temperatur des Kühlschranks normalerweise gehalten wird; in seltenen Fällen, wie hohen/niedrigen Raumtemperaturen, kann es notwendig sein, diesen Wert geringfügig anzupassen. Eine Änderung der werkseitigen Voreinstellung wird nicht empfohlen.) Taste(n) Funktion Drücken... -
Page 27: Ändern Der Temperaturskala
Ändern der Temperaturskala von Celsius (°C) auf Fahrenheit (°F) Taste(n) Funktion Drücken gedrückt Anzeige-Beispiel halten für Zur Änderung der Temperaturskala 3 Sekunden Und danach Zweimal Und danach 1 Sekunde (Aktuelle Skala) Und danach Einmal Und danach 1 Sekunde Ändern der Fernalarmkontakte Taste(n) Funktion Drücken... -
Page 28: Alarme
Warnalarme Dieser Kühlschrank wurde so konzipiert, dass sowohl ein akustischer als auch ein visueller Alarm ausgegeben wird, wenn folgende Situationen auftreten: • Die Tür bleibt für einen voreingestellten Zeitraum geöffnet. • Die Lufttemperatur im Innern des Geräts liegt außerhalb der eingestellten Parameter, d.h. - Page 29 Falls ein Alarm Tür geöffnet, Hohe oder Niedrige Temperatur oder Stromausfall ausgegeben wird, erzeugt die Schaltung eines Fernrelais im Regler einen elektrischen Schaltkreis. Bitte beachten Sie, dass die gelieferten Kontakte potentialfrei sind. Eine Spannung zwischen 12V DC und 230V AC kann an die Kontakte angeschlossen werden. Die maximale Last darf 2A nicht überschreiten.
-
Page 30: Wartung Und Service
Wartung und Service Ihres Thermo-Kühlschranks Abtauen Alle Laborkühlschränke sind mit einer Abtauautomatik ausgestattet, was bedeutet, dass unter normalen Bedingungen kein manuelles Abtauen notwendig ist. Unter bestimmten Bedingungen (z.B. wenn der Kühlschrank sehr voll ist oder wenn neue Teile im Kühlschrank gelagert werden), kann sich jedoch an der hinteren Wand Frost bilden, weil der Kompressor längere Zeit laufen muss. -
Page 31: Türanschlag Umsetzen
Türanschlag umsetzen Bitte befolgen Sie die nachfolgenden Anweisungen, um den Türanschlag umzusetzen. Aus Sicherheitsgründen sollte diese Arbeit von 2 Personen ausgeführt werden. 15. Kippen Sie den Kühlschrank um 45° nach hinten und lehnen Sie ihn an eine vertikale, harte Oberfläche, z.B. eine Wand. 16. -
Page 32: Lagerung
22. Setzen Sie die Tür in das obere linke Scharnier ein (Abb. 8). 23. Installieren Sie das untere linke Scharnier (Abb. 9) und drehen Sie die Stellfüße ein. Abb. 9 Abb. 8 24. Setzen Sie die Stellfüße und die Trägerplatte an der unteren rechten Seite ein. 25. -
Page 33: Elektrischer Anschluss
Elektrischer Anschluss Das Gerät ist für einen Anschluss an Wechselstrom vorgesehen. Die Anschlusswerte für Stromspannung (V) und Frequenz (Hz) finden Sie auf dem Typenschild im Schrank. Der Stromanschluss muss über eine Wandsteckdose mit Schalter erfolgen. Ein leichter Zugang zu der Wandsteckdose wird dringend empfohlen. Alle Anforderungen in Bezug auf Erdung des örtlichen Elektrizitätswerks sind zu befolgen. -
Page 34: Entsorgung
Entsorgung Ihres Kühlschranks Ihr Kühlschrank darf nicht in den normalen städtischen Abfallbehältern entsorgt werden. Er muss bei einem Recycling- und Wiederverwendungszentrum für elektrische und elektronische Altgeräte abgegeben werden. Ein entsprechender Aufkleber wurde auf der Verpackung des Kühlschranks angebracht (siehe unten). Das Produkt wurde aus recyclebaren Materialien hergestellt. -
Page 35: Fehlerbehebung
Fehlerbehebung PROBLEM URSACHE LÖSUNG 4. Vergewissern Sie sich, dass der Stecker ordnungsgemäß in der Steckdose sitzt Eine Lücke im 5. Überprüfen Sie, ob die Steckdose Stromkreissystem schadhaft ist Das Gerät funktioniert nicht 6. Überprüfen Sie, ob das Netzkabel beschädigt ist 2. -
Page 36: Garantie
Gefrierschränke der ES-Reihe Europäische Garantiebestimmungen Thermo Scientific Kühlschränke der ES-Reihe • Europäische Garantie • Vollumfängliche Garantie auf Teile und Verarbeitung für 12 Monate Während der ersten zwölf (12) Monate nach Lieferung wird Thermo Fisher Scientific Inc., über ihre autorisierten Vertriebshändler oder Service-Firmen, nach eigenem Ermessen und auf eigene Kosten alle Teile reparieren oder ersetzen, die in Bezug auf Material oder Verarbeitung fehlerhaft sind. - Page 37 Réfrigérateurs de laboratoire série ES - Guide de l'utilisateur Réfrigérateurs de laboratoire Modèles applicables: 151R-AEV-TS 151R-AEW-TS 288R-AEV-TS 288R-AEW-TS...
- Page 38 Sommaire Utilisation prévue et avertissement spécial Avant la première utilisation Positionnement du réfrigérateur Transport et déplacement du réfrigérateur Conseils pour économiser l'énergie Informations importantes Informations sur le produit Détails sur le produit Vue d'ensemble du contrôleur Affichage et réinitialisation des températures maximale et minimale Modification du point de consigne défini en usine Modification de l'échelle de température Modification des contacts d'alarme à...
-
Page 39: Utilisation Prévue Et Avertissement Spécial
Utilisation prévue et avertissement spécial Cet équipement a été testé conformément aux réglementations établies, puis livré en vue d'une utilisation immédiate. Il est destiné à l'entreposage frigorifique à usage général et ne peut être utilisé en présence de gaz ou de mélanges explosifs et / ou à proximité de sources de champs hautement magnétiques ou électriques. -
Page 40: Transport Et Déplacement Du Réfrigérateur
• NE PAS tenter d'effectuer vous-même des réparations sur l'équipement (hormis celles qui sont mises en évidence dans la section Maintenance et entretien). Toute personne n'ayant par reçu la formation adéquate qui procède à des réparations met sa sécurité personnelle en danger et la garantie risque d'être invalidée. •... -
Page 41: Détails Sur Le Produit
Pour les informations relatives au produit, voir ci-dessous : Modèl Hauteu Largeu Profondeu Poid Type de Températur Nbre de Type r (mm) r (mm) réfrigéran clayette (mm) (Kg) ambiante/de porte la pièce 151R Solid +10°C à R600a 288R 1565 +32°C Solid Détails sur le produit 1. -
Page 42: Vue D'ensemble Du Contrôleur
Il existe également 2 roulettes à l'arrière de l'équipement pour faciliter son déplacement. Pour plus d'informations sur les pièces de rechange, contacter le représentant local Vue d'ensemble et fonctionnement du contrôleur 1. Menu 2. Verrouillage des touches 3. Température maximale / Haute 4. -
Page 43: Affichage Et Réinitialisation Des Températures Maximale Et Minimale
Affichage et réinitialisation des températures maximale et minimale Enfoncer le(s) Fonction Appuyer sur bouton(s) Exemple d'écran pendant Pour afficher la température maximale de l'air 3 secondes Remarque : Affiche la température maximale depuis la dernière réinitialisation Pour afficher la température minimale de l'air 3 secondes Remarque : Affiche la température minimale depuis... -
Page 44: Modification Du Point De Consigne Défini En Usine
Modification du point de consigne défini en usine (le point de consigne est le point auquel le réfrigérateur maintient normalement la température ; dans quelques cas comme les températures ambiantes élevée/basses, il peut être nécessaire de les régler légèrement. Il n'est pas recommandé de modifier le réglage effectué en usine) Enfoncer le(s) Fonction Appuyer sur... -
Page 45: Modification De L'échelle De Température
Modification de l'échelle de température entre Celsius (°C) et Fahrenheit (°F) Enfoncer le(s) Fonction Appuyer sur bouton(s) Exemple d'écran pendant Pour modifier l'échelle de 3 secondes température suivi de 2 fois suivi de 1 seconde (échelle actuelle) suivi de Une fois suivi de 1 seconde Modification des contacts d'alarme à... -
Page 46: Alarmes
Alarmes d'avertissement Ce réfrigérateur a été conçu pour émettre une alarme audible et visuelle dans les cas suivants : • La porte est ouverte pendant une période définie • La température de l'air interne se situe au-dessus ou en dessous des paramètres définis. - Page 47 En cas d'alarme de porte ouverte, d'alarme de température élevée ou basse ou de panne de courant, un relais distant va basculer dans le contrôleur pour créer un circuit électrique. Les contacts fournis sont sans tension. Une tension comprise entre 12 Vcc et 230 Vca peut être connectée aux contacts.
-
Page 48: Maintenance Et Entretien
Maintenance et entretien de réfrigérateur Thermo Dégivrage Tous les réfrigérateurs de laboratoire sont dotés du dégivrage automatique, et dans des conditions normales, cela signifie qu'aucun dégivrage manuel n'est requis. Cependant, dans certaines conditions (par exemple, lorsque le réfrigérateur est plein ou lorsque de nouveaux éléments sont stockés dans le réfrigérateur), du givre peut se former sur la paroi arrière étant donné... -
Page 49: Inversion De La Porte
• Les détergents contenant des produits abrasifs ou des acides ne sont pas adaptés au nettoyage. • Lorsque le nettoyage est terminé et que les accessoires ont été replacés, rebrancher la fiche en ayant les mains sèches. Inversion de la porte Pour inverser la porte, suivre les instructions suivantes. -
Page 50: Stockage
Figure 6 Figure 7 36. Insérer la porte sur la charnière supérieure gauche (figure 8). 37. Installer la charnière gauche du bas (figure 9) et visser sur les pieds. Figure 8 Figure 9 38. Ajouter les pieds et la plaque de base en bas à droite. 39. -
Page 51: Connexion Électrique
Connexion électrique L'équipement est destiné à fonctionner à l'aide de courant alternatif. Les valeurs de connexion de la tension (V) et de la fréquence (Hz) sont déclarées sur la plage signalétique de l'armoire. L'alimentation doit être connectée à l'aide d'une prise murale dotée d'un interrupteur. Il est vivement recommandé... -
Page 52: Élimination
Élimination du réfrigérateur Lors de l'élimination du congélateur, ne pas le déposer dans les conteneurs à déchets municipaux ordinaires. Il faut le porter dans un centre de recyclage et de réutilisation des déchets électriques/électroniques. Une étiquette a été placée sur l'emballage des réfrigérateurs (voir ci-dessous). -
Page 53: Dépannage
Dépannage PROBLÈME RAISON SOLUTION 7. S'assurer que la fiche est correctement insérée dans la prise Un entrefer dans le circuit 8. S'assurer que la prise n'est pas L'équipement ne électrique défectueuse fonctionne pas 9. S'assurer que le cordon d'alimentation n'est pas endommagé Le compresseur s'active 3. -
Page 54: Garantie
Conditions générales de garantie européenne Réfrigérateurs série ES Thermo Scientific • Garantie européenne • Période de garantie de 12 mois pour les pièces et la main d'œuvre Pendant les douze (12) premiers mois à compter de la livraison, Thermo Fisher Scientific Inc, par l'intermédiaire de son revendeur agréé ou des organisations de services, réparera ou remplacera, à... - Page 55 Manual del usuario de los frigoríficos de laboratorio de la serie ES Gama de frigoríficos de laboratorio Modelos cubiertos por el manual: 151R-AEV-TS 151R-AEW-TS 288R-AEV-TS 288R-AEW-TS...
- Page 56 Índice Aplicación y advertencia especial Antes de la primera utilización Colocación del frigorífico Transporte y desplazamiento del frigorífico Consejos para ahorrar energía Información importante Información sobre el producto Detalles del producto Descripción general del controlador Visualización y reinicialización de temperaturas mínimas y máximas Cambio del punto de referencia ajustado en fábrica Cambio de la escala de temperaturas Cambio de los contactos de alarma remota...
-
Page 57: Aplicación Y Advertencia Especial
Aplicación y advertencia especial Este equipo se probó en cumplimiento con las reglamentaciones establecidas y a continuación se expidió para su uso. Este equipo tiene como aplicación el almacenamiento en frío de carácter general y no se debe utilizar en presencia de gases explosivos o mezclas, o cerca de fuentes con campos magnéticos o eléctricos importantes. -
Page 58: Transporte Y Desplazamiento Del Frigorífico
reparaciones realizadas por una persona sin la formación relevante constituyen un riesgo para el personal y anularán su garantía. • ADVERTENCIA: este equipo solo se debe utilizar por personal autorizado o por personal que posea los conocimientos correctos sobre el funcionamiento del equipo. Transporte y desplazamiento de su frigorífico de la serie ES El frigorífico se debe transportar siempre en posición vertical. -
Page 59: Detalles Del Producto
Consulte abajo para obtener información específica del producto. Model Altur Anchur Profun Tipo de Temperatur Nº de Tipo didad refrigerant a de trabajo estantería (mm) (mm) (mm) ambiente/ puerta habitación 151R Sólid +10ºC R600a hasta 288R 1565 Sólid +32ºC Detalles del producto 1. -
Page 60: Descripción General Del Controlador
Existen también dos ruedecillas pivotantes en la parte posterior del equipo para facilitar el movimiento del producto. Póngase en contacto con su distribuidor local para obtener información sobre piezas de repuesto Descripción general del controlador y funcionamiento 1. Menú 2. Bloqueo de teclado 3. -
Page 61: Visualización Y Reinicialización De Temperaturas Mínimas Y Máximas
Visualización y reinicialización de temperaturas mínimas y máximas Mantener Pantalla de Función Pulsar pulsado el botón ejemplo durante Para visualizar la temperatura máxima de aire 3 segunds Nota: Visualiza el valor máximo desde la última reinicialización Para visualizar la temperatura mínima de aire Nota: Visualiza el valor mínimo desde la última 3 segunds reinicialización... -
Page 62: Cambio Del Punto De Referencia Ajustado En Fábrica
Cambio del punto de referencia ajustado en fábrica (el punto de referencia es el punto en el que el frigorífico mantiene normalmente la temperatura. En circunstancias muy poco frecuentes, debido principalmente a temperaturas altas/bajas, puede que sea necesario ajustar este punto ligeramente. No se recomienda el cambio de la configuración en fábrica) Mantener Pantalla de Función... -
Page 63: Cambio De La Escala De Temperaturas
Cambio de la escala de temperatura entre Celsius (°C) y Fahrenheit (°F) Mantener Pantalla de Función Pulsar pulsado el ejemplo botón durante Para cambiar la escala de temperatura 3 segundos dos veces Seguido por Seguido por 1 segundo (corriente escala) Seguido por Una vez Seguido por... -
Page 64: Alarmas
Alarmas de advertencia Este congelador se diseñó para proporcionar tanto una alarma audible como visual en caso de que se produzcan cualquiera de las siguientes situaciones: • La puerta se deja abierta durante un periodo determinado. • La temperatura interna del aire excede los parámetros configurados, es demasiado alta o demasiado baja •... - Page 65 En el caso de que se produzca una alarma de puerta abierta, temperatura alta o baja o de interrupción del fluido eléctrico, se conmutará un relé remoto dentro del controlador para formar un circuito eléctrico. Es necesario indicar que los contactos que se incluyen no están bajo tensión. En los contactos se puede conectar una tensión situada entre 23V CC y 230 CA.
-
Page 66: Mantenimiento Y Servicio Técnico
Mantenimiento y servicio técnico de su frigorífico Termo Descongelación Todos los frigoríficos de laboratorio incluyen descongelación automática y, en condiciones normales, no exigen la descongelación manual. No obstante, bajo ciertas condiciones (ejemplo; cuando el frigorífico está muy lleno o cuando se almacenan nuevos elementos en el congelador) se puede formar escarcha en la pared posterior del equipo ya que el compresor debe funcionar durante largos periodos de tiempo. -
Page 67: Inversión De La Puerta
Inversión de la puerta Para invertir la puerta, siga las instrucciones que aparecen abajo. Por motivos de seguridad, esta operación debe ser realizada por 2 personas. 43. Incline el frigorífico hacia atrás 45° y haga que repose sobre una superficie dura y vertical como por ejemplo, una pared. -
Page 68: Almacenamiento
50. Instale la puerta dentro de la bisagra superior a mano izquierda (figura 8). 51. Instale la bisagra inferior a mano izquierda (figura 9) y atornille los pies. Figura 9 Figura 8 52. Agregue los pies y la placa a la parte inferior situada a mano derecha. 53. -
Page 69: Conexión Eléctrica
Conexión eléctrica El equipo se diseñó para su conexión a corriente alterna. Los valores de alimentación para tensión (V) y frecuencia (Hz) aparecen en la placa de identificación del armario. La alimentación se debe conectar a través de una toma mural con interruptor. Se recomienda enfáticamente que la toma eléctrica mural sea de fácil acceso. -
Page 70: Desecho
Desecho de su frigorífico Cuando deseche su frigorífico, no lo lleve a los contenedores de basura municipales normales. En vez de esto, deberá llevarlo a un centro de reciclaje de residuos eléctricos/electrónicos. En el embalaje de los frigoríficos se colocó una etiqueta informativa sobre este tema (consultar abajo). -
Page 71: Solución De Problemas
Resolución de problemas PROBLEMA RAZÓN SOLUCIÓN 10. Asegúrese de que el enchufe está insertado correctamente dentro de la toma eléctrica. Una separación en el circuito del sistema 11. Asegúrese de que la toma eléctrica eléctrico. no es defectuosa. El equipo no funciona 12. -
Page 72: Garantía
GARANTÍA Frigoríficos y congeladores de la serie ES de Thermo Scientific Póliza de garantía europea Frigoríficos de la serie ES de Termo Scientific • Garantía europea • Garantía completa de 12 meses con cobertura de componentes y mano de obra Durante los doce (12) primeros meses a partir de su envío, Termo Fisher Scientific Inc, a través de su concesionario autorizado u... - Page 73 Manuale utente frigoriferi da laboratorio serie ES Gamma frigoriferi da laboratorio Modelli interessati: 151R-AEV-TS 151R-AEW-TS 288R-AEV-TS 288R-AEW-TS...
- Page 74 Sommario Destinazione d'uso e avvertenze speciali Prima del primo utilizzo Posizionamento del frigorifero Trasporto e spostamento del frigorifero Suggerimenti per il risparmio energetico Informazioni importanti Informazioni sul prodotto Dettagli del prodotto Panoramica del programmatore Visualizzazione e reimpostazione delle temperature minime e massime Modifica del set point di fabbrica Cambio della scala della temperatura Cambio del contatti dell'allarme a distanza...
-
Page 75: Destinazione D'uso E Avvertenze Speciali
Destinazione d'uso e avvertenze speciali Questa apparecchiatura è collaudata in conformità a normative consolidate e quindi consegnata pronta all'uso. Questa apparecchiatura è destinata alla conservazione al freddo per scopi generali e non deve essere utilizzata in presenza di gas o miscele esplosivi e/o in vicinanza di forti campi magnetici o elettrici. -
Page 76: Trasporto E Spostamento Del Frigorifero
Trasporto e spostamento del frigorifero serie ES Il frigorifero deve sempre essere spostato in posizione verticale. L'armadio non deve mai essere inclinato più di 10°. Se l'armadio viene inclinato oltre 10°, l'alimentazione non deve essere collegata finché l'apparecchio non è stato lasciato in verticale per almeno 24 ore. Suggerimenti per il risparmio energetico Questo apparecchio è... -
Page 77: Dettagli Del Prodotto
Dettagli del prodotto 1. Blocca 2. Programmatore elettronico 3. Maniglia portello 4. Ripiano cablaggi 5. Raccoglitore cavi 6. Piedino regolabile (2 sulla parte anteriore) 7. Accessori portello Ci sono anche 2 rulli sul retro dell'apparecchio per facilitare gli spostamenti. Contattare il proprio rappresentante commerciale per informazioni sui ricambi... -
Page 78: Panoramica Del Programmatore
Panoramica e funzionamento del programmatore 1. Menu 2. Blocca tastiera 3. Temperatura massima / Su 4. Alimentazione 5. Muto 6. Temperatura minima / Giù 7. Imposta / Invio... -
Page 79: Visualizzazione E Reimpostazione Delle Temperature Minime E Massime
Visualizzazione e reimpostazione delle temperature minime e massime Tenere Visualizzazione Funzione Premere premuto per di esempio Visualizzare la temperatura massima dell’aria 3 secondi NB – viene visualizzato il valore massimo dall’ultima reimpostazione Visualizzare la temperatura minima dell’aria 3 secondi NB – viene visualizzato il valore minimo dall’ultima reimpostazione Reimpostare la temperatura dell’aria 3 secondi... -
Page 80: Modifica Del Set Point Di Fabbrica
Modifica del set point di fabbrica (il set point è il valore della temperatura normalmente mantenuta dal frigorifero; in rare circostanze, come nel caso di temperature ambientali molto alte/basse, potrebbe essere necessario apportarvi dei leggeri aggiustamenti. Non è consigliabile modificare l'impostazione di fabbrica) Tenere Visualizzazione Funzione... -
Page 81: Cambio Della Scala Della Temperatura
Modifica della scala di temperatura da Celsius (°C) a Fahrenheit (°F) e viceversa Tenere Visualizzazione Funzione Premere premuto per di esempio Modificare la scala della 3 secondi temperatura Seguito da Due volte Seguito da 1 secondo (scala attuale) Seguito da Una volta Seguito da 1 secondo... -
Page 82: Allarmi
Allarmi di segnalazione Questo frigorifero è progettato per fornire un allarme visivo e acustico al verificarsi delle seguenti situazioni: • Portello lasciato aperto per un determinato tempo • Temperatura interna dell'aria al di fuori di determinati parametri, troppo alta o troppo bassa •... - Page 83 Notare che i contatti forniti sono privi di tensione. Ai contatti è possibile collegare una tensione compresa tra 12V CC e 230V CA. Il carico massimo non deve superare 2 A. L'alimentazione minima nominale è 500mA / 12V CA. In condizioni normali (assenza di allarmi) il relè APRE il contatto per l'impianto di allarme a distanza.
-
Page 84: Manutenzione E Assistenza
Manutenzione e assistenza del frigorifero Thermo Sbrinamento Tutti i frigoriferi da laboratorio comprendono lo sbrinamento automatico e, in condizioni normali, non richiedono sbrinamento manuale. Tuttavia, in alcune condizioni (per es. nel caso il frigorifero sia molto pieno o quando vengono inseriti nuovi elementi nel frigorifero) si potrebbe formare del ghiaccio sulla parete posteriore, a seguito di un funzionamento prolungato del compressore. -
Page 85: Inversione Della Porta
Inversione della porta Per invertire il portello seguire le istruzioni riportate sotto. Per motivi di sicurezza, l'operazione deve essere eseguita da 2 persone. 57. Inclinare indietro il frigorifero di 45° e appoggiarlo su una superficie verticale rigida come una parete. 58. -
Page 86: Magazzinaggio
64. Installare il portello sulla cerniera superiore sinistra (Figura 8). 65. Installare la cerniera inferiore sinistra (Figura 9) e avvitare i piedini. Figura 9 Figura 8 66. Aggiungere i piedini e la piastra base al lato inferiore destro. 67. Rimuovere i cappucci dalle viti che trattengono la maniglia in posizione. 68. -
Page 87: Collegamenti Elettrici
Collegamenti elettrici L'apparecchiatura è progettata per essere collegata alla corrente alternata. I valori di collegamento per tensione (V) e frequenza (Hz) sono dichiarati sulla targhetta dell'armadietto. L'alimentazione deve essere collegata tramite una presa a muro con interruttore. Si consiglia vivamente di utilizzare prese a muro facilmente accessibili. Tutti i requisiti di messa a terra devono essere conformi a quanto previsto dalle autorità... -
Page 88: Smaltimento
Smaltimento del frigorifero Per smaltire il frigorifero, non utilizzare i normali bidoni per i rifiuti urbani. Portarlo invece ad un centro per il riciclaggio dei rifiuti elettrici ed elettronici. Sull'imballaggio del frigorifero è presente un'apposita etichetta in merito (vedere sotto). Il prodotto è stato costruito utilizzando materiali riciclabili. -
Page 89: Problemi E Soluzioni
Problemi e soluzioni PROBLEMA CAUSA SOLUZIONE 13. Assicurarsi che la spina sia correttamente inserita nella presa Problema nel circuito 14. Verificare che la presa non sia L'apparecchiatura elettrico difettosa non funziona 15. Controllare che il cavo di alimentazione non sia danneggiato Il compressore non si 5. -
Page 90: Garanzia
Thermo Scientific Serie ES Politica di garanzia europea Frigoriferi Thermo Scientific Serie ES • Garanzia europea • Garanzia completa 12 mesi ricambi e manodopera Durante i primi dodici (12) mesi dalla spedizione, Thermo Fisher Scientific Inc, tramite il proprio rivenditore autorizzato o le proprie organizzazioni di assistenza, provvederà...
Need help?
Do you have a question about the 151R-AEV-TS and is the answer not in the manual?
Questions and answers