
Related Manuals for Thermo Scientific 18LCEETSA


Summary of Contents for Thermo Scientific 18LCEETSA
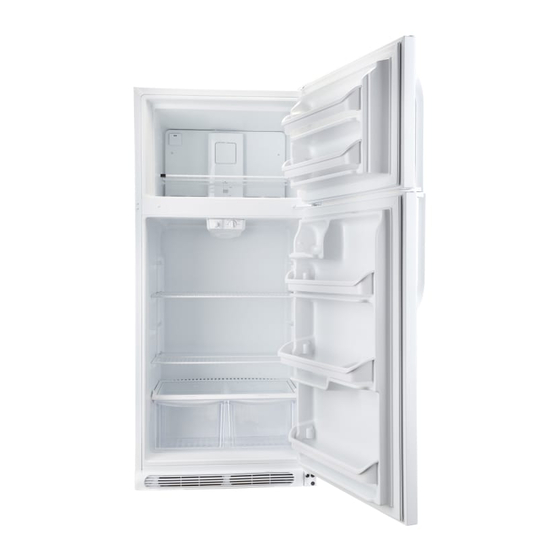
- Page 1 General Purpose Refrigerators and Freezers Installation and Operation Manual Model # 18LCEETSA 326702H05 Rev B...
-
Page 2: Table Of Contents
Table of Contents Safety Information ..............................3 Alert Signals ................................3 Intended Use Statement ............................4 General Purpose Laboratory Refrigerators and Freezers ..................5 Overview ................................5 Unpacking and Installation ........................... .6 Shipping Carton ..............................6 Unpacking ................................6 Location .................................6 Clearance ................................ -
Page 3: Safety Information
Safety Information Thank you for selecting Thermo Scientific products for your equipment needs. These instructions contain important operating and safety information. The user must carefully read and understand these instructions before using the unit. Your unit has been designed to optimize function, reliability, safety and ease of use. It is the user’s responsibility to install the unit in conformance with local electrical codes. -
Page 4: Intended Use Statement
Intended Use Statement The Refrigerators/Freezers described in this manual are for professional use only. These products are intended for use in research for the storage of samples or inventory in the following temperature ranges : Refrigerators 0°C to 8°C Freezers -6°C to -20°C Only Explosion Proof Units or Flammable Material Storage Units, are to be used for the storage of flammable inventory/samples. -
Page 5: General Purpose Laboratory Refrigerators And Freezers
General-Purpose Laboratory Refrigerators/Freezers Overview These are general-purpose units available in all refrigerator, freezer combination refrigerator/freezer models. These units intended for basic laboratory use only. Storage of high-value, life science materials clinical biological may require alarm, monitoring, back-up and temperature performance features. The need to add these features should be determined by your industrial hygienist or safety officer. -
Page 6: Unpacking And Installation
Unpacking and Installation Shipping Carton This should be inspected upon delivery. When received, carefully examine for any shipping damage before unpacking. If damage is discovered, the delivering carrier should both specify and sign for the damage on your copy of the delivery receipt. -
Page 7: Installation
INSTALLATION Electrical Caution DO NOT REMOVE, under General Purpose units must be connected to a grounded circumstance, outlet matching the name plate and/or the information grounding prongs from the 3- furnished in this manual. If you are not sure about the outlet, prong power cord supplied you should contact a qualified electrician for assistance. -
Page 8: To Install The Toe Grille
INSTALLATION To Install the Toe Grille: Attach toe grille support bracket to cabinet using 3 bolts supplied. Install left toe grille cover onto slot on left side of toe grille. 3. Attach toe grille to cabinet. -
Page 9: Door Removal And Reversal Instruction
INSTALLATION Door Removal and Reversal Instructions: 1. Remove toe grille. Remove top hinge cover. Trace around the hinge with a soft lead pencil. This makes reinstallation easier. Remove top hinge and lift door off center hinge pin. Set door aside. 3. - Page 10 INSTALLATION 4. Lift refrigerator door off of bottom hinge and set aside. 5. Remove center hinge and shim by removing inside screw and loosening two outside screws enough to allow hinge and shim to slide out. Tighten screws. 6. Loosen two outside screws on opposite side of refrigerator, remove inside screw and install center hinge.
- Page 11 INSTALLATION 10. Reverse door handles (see Handle Installation section). 11. Move freezer and refrigerator door stops to opposite side. Before starting screws, use an awl to puncture the foam. Position refrigerator door onto bottom hinge pin and screw center hinge pin through center hinge into top of door.
-
Page 12: Operation
Operation Environmental Operating Conditions POLLUTION DEGREE*: INSTALLATION CATEGORY*: 2000 Meters MSL (Mean Sea Level) ALTITUDE: 80% maximum, non-condensing HUMIDITY: 115V/60Hz ELECTRICAL SUPPLY: ±10% of normal rated line VOLTAGE TOLERANCE: AMBIENT OPERATING 15ºC to 32ºC TEMPERATURE: PRODUCT USAGE: This product is intended for use indoors only *Refer to IEC 664-1 Start-Up Procedure Rotate the control knob clockwise to lower the... -
Page 13: How To Save Energy
PERATION How to Save Energy • Be sure to follow location suggestions as mentioned in the previous INSTALLATION section. • Wipe moisture from glassware or other materials before placing them in a unit. • Don’t overcrowd the unit. Too many items can increase electrical energy demand in order to keep everything cool. -
Page 14: Troubleshooting
Troubleshooting In the event that your unit is not operating properly, check the following before calling for service assistance—this may save you the cost of unnecessary service calls. Symptom Possible Cause of Problem Make certain that the unit is connected to a grounded outlet. Make Unit not operating. -
Page 15: Maintenance
Maintenance Cleaning of Units Note Make no attempt to service or repair • Disconnect power cord from its outlet. product under warranty before consulting your dealer. After the • Set the temperature control to the OFF position. warranty period, such consultation is still advised, especially when the repair technically... -
Page 16: Replacement Parts
Replacement Parts To obtain replacement parts information and pricing, please call Customer Service Department at 800.438.4851 and have the unit’s model, serial and code numbers available. This information is located on data plates in the interior of the unit. -
Page 17: Ordering Procedures
Ordering Procedures Please refer to the Specification Plate for the complete model number, serial number and series number when requesting service, replacement parts or in any correspondence concerning this unit. All parts listed herein may be ordered from the dealer from whom you purchased this unit or can be obtained promptly from the factory. -
Page 18: Warranty
United States and Canada This Thermo Scientific product is warranted to be free of defects in materials and workmanship for 13 months from the first to occur of (i) the date the product is sold by the manufacturer or (ii) the date the product is purchased by the original retail customer (the “Commencement Date”). -
Page 19: Weee Compliance
Further information on our compliance with these Directives, the recyclers in your country, and information on Thermo Scientific products which may assist the detection of substances subject to the RoHS Directive are available at www.thermo.com/... - Page 20 Important For your future reference and when contacting the factory, please have the following information readily available: Model Number: Serial Number: Date Purchased: The above information can be found on the dataplate attached to the equipment. If available, please provide the date purchased, the source of purchase (manufacturer or specific agent/rep organization), and purchase order number.
- Page 21 Thermo Fisher Scientific Inc. 275 Aiken Road Asheville, NC 28804 United States www.thermofisher.com 326702H05 Rev. B...
Need help?
Do you have a question about the 18LCEETSA and is the answer not in the manual?
Questions and answers