Table of Contents
Advertisement
Available languages
Available languages
Quick Links
I5TMH6AG/NL
I5TMH2AG/NL
Français
FR
Mode d'emploi
CUISINIERE ET FOUR
Sommaire
Mode d'emploi,1
Assistance,18
Nederland
NL
Gebruiksaanwijzing
FORNUIS EN OVEN
Inhoud
Gebruiksaanwijzing,1
WAARSCHUWING,2
Beschrijving van het apparaat-Aanzichttekening,4
Beschrijving van het apparaat-Bedieningspaneel,5
Installatie, 19
English
GB
Operating Instructions
COOKER AND OVEN
Contents
Operating Instructions,1
WARNING,3
Description of the appliance-Overall view,4
Description of the appliance-Control Panel,5
Installation,33
Assistance,46
Advertisement
Table of Contents

Related Manuals for Indesit I5TMH6AG


Summary of Contents for Indesit I5TMH6AG
-
Page 1: Table Of Contents
I5TMH6AG/NL I5TMH2AG/NL Français Mode d’emploi CUISINIERE ET FOUR Sommaire Mode d’emploi,1 AVERTISSEMENT,2 Description de l’appareil-Vue d’ensemble, 4 Description de l’appareil-Tableau de bord, 5 Installation,6 Mise en marche et utilisation,11 Précautions et conseils, 16 Nettoyage et entretien,17 Assistance,18 Nederland Gebruiksaanwijzing FORNUIS EN OVEN... -
Page 2: Avertissement
AVERTISSEMENT y en a un) tant que les brûleurs gaz ou la plaque électrique sont chauds. ATTENTION : cet appareil ainsi que ATTENTION : s’assurer que l’appareil ses parties accessibles deviennent très est éteint avant de procéder au chauds pendant leur fonctionnement. remplacement de l’ampoule, afin d’éviter Il faut faire attention de ne pas toucher tout risque d’électrocution. - Page 3 schakelen en de vlam te bedekken met been given supervision or instruction bijvoorbeeld een (blus)deken. concerning use of the appliance in a Gebruik geen schurende producten, safe way and understand the hazards noch snijdende metalen spatels om de involved. Children shall not play with glazen deur van de oven te reinigen, the appliance.
-
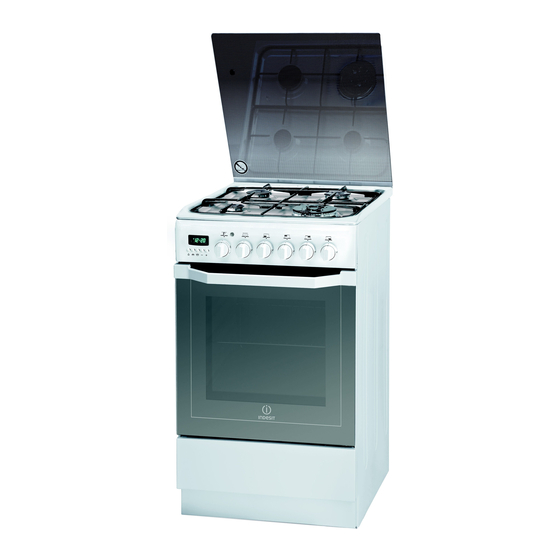
Page 4: Description De L'appareil-Vue D'ensemble
Description of the appliance Overall view 1. Hob burner 2.Hob Grid 3.Control panel 4.Sliding grill rack 5.DRIPPING pan 6.Adjustable foot 7.Containment surface for spills 8.GUIDE RAILS for the sliding racks 9.position 5 10.position 4 11.position 3 12.position 2 13.position 1 14.Glass Cover Description de l’appareil Vue d’ensemble... -
Page 5: Description De L'appareil-Tableau De Bord
Description de l’appareil Tableau de bord MINUTEUR ELECTRONIQUE* Allumage électronique des brûleurs du plan de cuisson* Voyant lumineux thermostat *N’existe que sur certains modèles Aanzichttekening Bedieningspaneel 1.ELEK TRONISCHE TIMER* 3. Elektronische ontsteking* ... -
Page 6: Installation
Installation ! Conservez ce mode d’emploi pour pouvoir le consulter de locaux à risque d’incendie – équipées d’un conduit à tout moment. En cas de vente, de cession ou de d’aération avec l’extérieur comme décrit plus haut. déménagement, veillez à ce qu’il suive l’appareil. ! Lisez attentivement les instructions : elles contiennent Local adjacent Local à... - Page 7 Positionnement et nivellement entre l’appareil et le réseau un interrupteur à coupure omnipolaire ayant au moins 3 mm d’écartement entre ! L’appareil peut être installé à côté de meubles dont la les contacts, dimensionné à la charge et conforme hauteur ne dépasse pas celle du plan de cuisson. aux normes NFC 15-100 (le fil de terre ne doit pas être interrompu par l’interrupteur).
- Page 8 Raccordement gaz par tuyau flexible en caoutchouc Adaptation aux différents types de gaz Assurez-vous que le tuyau est bien conforme aux normes L’appareil peut être adapté à un type de gaz autre que applicables dans le pays d’installation. Le tuyau doit avoir celui pour le quel il a été...
- Page 9 Remplacement des injecteurs du brûleur Triple ! En cas de gaz liquides, il faut visser à fond la vis de couronne réglage. 1. retirer les grilles et sortir les brûleurs de leurs ! En fin d’opération remplacez la vieille étiquette par celle logements.
- Page 10 Naturel G25 P.C.S. = 32,49 MJ/m Dime nsi ons du 340x391x424 mm four Hx Lx P l 57 Vo lu me I5TMH6AG/NL largeur 42 cm Dime nsi ons I5TMH2AG/NL profondeur 44 cm utiles du tiro ir hauteur 23 cm chau ffe -p la ts Tensi on et voir plaquette signalétique...
-
Page 11: Mise En Marche Et Utilisation
Mise en marche et utilisation Utilisation du plan de cuisson ! Pour les modèles équipés d’une grille de réduction, n’utilisez cette dernière que pour le brûleur auxiliaire quand vous utilisez des casseroles ayant moins de 12 Allumage des brûleurs cm de diamètre. Un petit cercle plein près de chaque bouton BRULEUR indique le brûleur associé... - Page 12 chaleur ne suffit pas à le cuire. Eclairage du four Programme FOUR PIZZA Pour l’allumer, amenez le bouton PROGRAMMES sur une Mise en marche de la résistance de sole et de la résistance position autre que la position “0”. Il reste allumé tant que circulaire ainsi que du ventilateur.
- Page 13 PIZZA Programme INFERIEUR VENTILATED • Utilisez un plat en aluminium léger et enfournez-le sur la grille du four. L’élément de chauffage de fond et le ventilateur est Si vous utilisez la lèchefrite, vous prolongerez le temps activé, qui permet la distribution de la chaleur dans de cuisson et obtiendrez difficilement une pizza l’ensemble la cavité...
- Page 14 Minuteur électronique* ATTENTION ! Le four est équipé d’un Permet d’afficher l’heure et de faire fonctionner la minuterie système d’arrêts de au compte à rebours. grilles qui permet ! Toutes les fonctions sont activées environ 7 secondes de les retirer sans après leur sélection.
- Page 15 Tableau de cuisson Programmes Aliments Poids (Kg) Niveau Préchauffage Température Durée enfournement (minutes) préconisée cuisson (minutes) Canard 65-75 Roast-beef 70-75 Statique Rôti de porc 70-80 Biscuits 15-20 Tartes 30-35 Pizza (sur 2 niveaux) 2 e 4 15-20 Lasagnes 30-35 Agneau 40-45 Poulet rôti + pommes de terre 2 e 4...
-
Page 16: Précautions Et Conseils
Précautions et conseils • Ne tirez surtout pas sur le câble pour débrancher la ! Cet appareil a été conçu et fabriqué conformément aux fiche de la prise de courant. normes internationales de sécurité. • N’effectuez aucune opération de nettoyage ou Ces conseils sont fournis pour des raisons de sécurité... -
Page 17: Nettoyage Et Entretien
Nettoyage et entretien • Faites cuire vos aliments dans des casseroles ou des ! Evitez de refermer le couvercle si les brûleurs sont poêles à couvercle et utilisez le moins d’eau possible. allumés ou encore chauds. Faire cuire les aliments dans des casseroles ouvertes augmente considérablement la consommation Contrôler les joints du four d’énergie. - Page 18 Démontage et remontage de la porte: verre insérer le panneau de verre correctement, de sorte que le texte écrit sur le panneau n’est 1. Ouvrir la porte pas inversée et peuvent être facilement lisibles. 2. Faire pivoter à l'arrière les crochets des charnières 7.
-
Page 19: Installatie
Installatie Afvoer van de verbrandingsgassen ! Bewaar dit instructieboekje zorgvuldig voor eventuele raadpleging in de toekomst. In het geval u het apparaat De afvoer van de verbrandingsgassen moet plaatsvinden verkoopt, weggeeft of wanneer u verhuist, moet het door middel van een afzuigkap die is aangesloten op een boekje bij het apparaat bewaard worden. - Page 20 • als het fornuis onder een keukenkastje wordt ! Wanneer het apparaat geïnstalleerd is, moeten de geïnstalleerd, moet de afstand tussen de twee elektrische kabel en de contactdoos gemakkelijk te minstens 420 mm zijn. bereiken zijn. Deze afstand moet 700 mm zijn als de keukenkastjes zijn ! De kabel mag niet gebogen of samengedrukt worden.
- Page 21 in of naast de spil van het kraantje totdat u een kleine HEET OPPERVLAK Verbindingspunt regelmatige vlam krijgt. Isolatiekraan Verbindingspunt Isolatiekraan ! Bij vloeibaar gas moet het regelschroefje geheel worden Complete slang Complete slang vastgeschroefd; 3. controleer of door de kraan snel van maximum naar minimum te draaien de branders niet uitgaan.
- Page 22 • Het regelen van de minimumstand (voor België) Als de kop van de schroef een kleinere diameter dan 9 mm heeft, moet een sluitring worden gebruikt. Op een betonnen 1. Zet het kraantje op de minimumstand; muur moet een schroef met een diameter van minstens 8mm en 60mm lengte gebruikt worden.
- Page 23 Kenmerken van de branders en straalpijpen A 15°C en 1013 mbar-droog gas P.C.S. Natuurlijk gas G25 = 32,49 MJ/m I5TMH6AG/NL I5TMH2AG/NL...
-
Page 24: Starten En Gebruik
Starten en gebruik Gebruik van de kookplaat ! Op modellen die voorzien zijn van een vlamverspreider moet deze alleen worden gebruikt op de extra brander Aansteken van de branders wanneer men pannen gebruikt die een doorsnede Naast elke BRANDER knop wordt met een vol rondje hebben van minder dan 12 cm. - Page 25 Ovenverlichting temperatuur aan de buitenkant nodig hebben: kalfs- en runderbiefstuk, entrecôte, filet, hamburger etc... U vindt De verlichting gaat aan door de PROGRAMMAKNOP enkele voorbeelden in het hoofdstuk “Praktische kooktips”. in een willekeurige stand (behalve “0”) te zetten. Hij zal Kook met de ovendeur dicht.
- Page 26 Gebruik de timer Einde Kooktijd* Programma BODEMVENTILATIE 1. U moet allereerst het geluidssignaal opwinden door Het verwarmingselement op de bodem en de ventilator de knop TIMER EINDE KOOKTIJD bijna helemaal met de worden geactiveerd, waardoor de hitte door de klok mee te draaien. hele binnenzijde van de oven wordt verspreid.
- Page 27 De elektronische timer* Hierop ziet u de juiste tijd en de functie van de terugtelelnde timer. N.B.: alle functies beginnen te werken na ongeveer 7 seconden vanaf het instellen. Het gelijk zetten van de klok Na het aansluiten aan het net of na uitvallen van de stroom knippert op de display 0 00 •...
- Page 28 Kooktabel oven Gewicht Voorverwarming Aangeraden Kooktijd Programma’s Gerechten Roosterstanden (kg) (minuten) temperatuur (minuten) Eend 65-75 Braadstuk 70-75 Traditionele Varkensrollade 70-80 oven Koekjes (kruimeldeeg) 15-20 Taarten 30-35 Pizza (op 2 roosters) 2 en 4 15-20 Lasagne 30-35 Lamsvlees 40-45 Kip + gebakken aardappels 2 en 4 60-70 Makreel...
-
Page 29: Voorzorgsmaatregelen En Advies
Voorzorgsmaatregelen en advies ! Dit apparaat is ontworpen en vervaardigd volgens de • Probeer in geval van storingen nooit zelf de interne geldende internationale veiligheidsvoorschriften. mechanismen van het apparaat te repareren. Neem contact op met de Technische Dienst. Deze aanwijzingen zijn geschreven voor uw veiligheid en u dient ze derhalve goed door te nemen. -
Page 30: Onderhoud En Verzorging
Onderhoud en verzorging te besparen door de bereidingen te verplaatsen naar de goedkopere daluren. • De accessoires kunnen gewoon worden afgewassen • De basis van uw pot of pan moet de ovenplaat (eventueel ook in de vaatwasser). afdekken. Als ze kleiner zijn, gaat kostbare energie verloren en potten die overkoken laten ingebakken •... - Page 31 Demonteren en weer monteren van de 6. Plaats de glazen plaat weer terug. ovendeur WAARSCHUWING! De oven mag niet worden gebruikt als de glazen plaat aan de binnenzijde is verwijderd! 1. Open de deur WAARSCHUWING! Als u de glazen plaat aan 2.
-
Page 32: Servicedienst
Reiniging van de oven m.b.v. stoom: Deze reinigingsmethode wordt aangeraden na het koken van vette gerechten (gebraden gerechten, vlees). Deze reinigingsprocedure kan het verwijderen van vuil van de ovenwanden vergemakkelijken door het creëren van stoom in de oven. Op deze manier zal de binnenzijde van de oven makkelijker kunnen worden gereinigd. -
Page 33: Installation
Installation ! Before operating your new appliance please read Disposing of combustion fumes this instruction booklet carefully. It contains important The disposal of combustion fumes should be guaranteed information concerning the safe installation and operation using a hood connected to a safe and efficient natural of the appliance. -
Page 34: Gas Connection
! Once the appliance has been installed, the power • Any hoods must be supply cable and the electrical socket must be easily installed according to HOOD accessible. the instructions listed in Min. the relevant operating ! The cable must not be bent or compressed. manual. - Page 35 ! If the appliance is connected to a liquid gas supply, the regulatory screw must be fastened as tightly as possible. 3. While the burner is alight, quickly change the position of the knob from minimum to maximum and vice versa several times, checking that the flame is not extinguished.
- Page 36 Replacing the Triple ring burner nozzles Safety Chain 1. Remove the pan supports and lift the burners out of their housing. The burner consists of two separate parts (see pictures). 2. Unscrew the nozzles using a 7 mm socket spanner. Replace the nozzles with models that are configured for use with the new type of gas (see Table 1).
- Page 37 TECHNICAL DATA P.C.S. = 32,49 MJ/m Oven dimensions 340x391x424 mm (LxDxH ) 57 l Volume Useful width 42 cm I5TMH6AG/NL measur ement s depth 44 cm I5TMH2AG/NL relating to the oven height 23 cm compartm ent Power supply see data plate...
-
Page 38: Start-Up And Use
Start-up and use Using the hob Using the oven Lighting the burners ! The first time you use your appliance, heat the empty For each BURNER knob there is a complete ring showing oven with its door closed at its maximum temperature the strength of the flame for the relevant burner. -
Page 39: Cooking Modes
Cooking modes rack at a time, switch the position of the dishes halfway through the cooking process. ! A temperature value can be set for all cooking modes between 50°C and Max, except for the following modes mode DOUBLE GRILL •... -
Page 40: Practical Cooking Advice
BARBECUE BOTTOM VENTILATED mode • Insert the rack in position 3 or 4. Place the food in the centre of the rack. The bottom heating element and the fan is activated, • We recommend that you set the maximum power level. which allows for the heat distribution within the whole The top heating element is regulated by a thermostat cavity of the oven. - Page 41 Electronic timer* The electronic timer displays the time and the timer function with countdown. Note: all the functions are operative approximately 7 seconds after they are stet. How to reset the clock After the appliance has been connected to the power supply, or when the power has gone out, the clock display will automatically reset to 0:00 and begin to blink.
- Page 42 Oven cooking advice table Cooking Cooking Weight Preheating Recommended modes Foods Rack position time (in kg) time (min) Temperature (°C) (minutes) Duck 65-75 Roast veal or beef 70-75 Static- Roast pork 70-80 Traditional Biscuits (shortcrust pastry) 15-20 Tarts 30-35 Pizza (on 2 racks) 2 and 4 15-20 Lasagne...
-
Page 43: Precautions And Tips,43
Precautions and tips • Never perform any cleaning or maintenance work ! This appliance has been designed and manufactured without having disconnected the appliance from the in compliance with international safety standards. electricity mains. The following warnings are provided for safety reasons •... -
Page 44: Care And Maintenance
Care and maintenance • If you have a timed tariff electricity contract, the “delay • The accessories can be washed like everyday cooking” option will make it easier to save money by crockery, and are even dishwasher safe. moving operation to cheaper time periods. •... - Page 45 Removing and fitting the oven door: 6.Replace the glass. 1.Open the door WARNING! Oven must not be operated with inner 2.Make the hinge clamps of the oven door rotate door glass removed! backwards completely (see photo) WARNING! When reassembling the inner door glass insert the glass panel correctly so that the text written on the panel is not reversed and can be easily legible.
-
Page 46: Assistance
Steam-Assisted Oven Cleaning This method of cleaning is recommended especially after cooking very fatty (roasted)meats. This cleaning process allows to facilitate the removal of dirt of the walls of the oven by the generation of steam that is created inside the oven cavity for easier cleaning. ! Important! Before you start steam -cleaning: -Remove any food residue and grease from the bottom of the oven. - Page 48 XEROX FABRIANO 04/2014 - 195122535.00 Indesit Company S.P.A. Viale Aristide Merloni,47 60044 Fabriano (AN) www.indesit.com...
Need help?
Do you have a question about the I5TMH6AG and is the answer not in the manual?
Questions and answers