Table of Contents
Advertisement
Available languages
Available languages
Quick Links
I5ESH1E/ I
Italiano
IT
Istruzioni per l'uso
CUCINA E FORNO
Sommario
Istruzioni per l'uso,1
Descrizione dell'apparecchio- Vista d'insieme,5
Descrizione dell'apparecchio- Pannello di controllo,6
English
GB
Operating Instructions
COOKER AND OVEN
Contents
Operating Instructions,1
Warnings,2
Description of the appliance-Overall view,5
Description of the appliance-Control Panel,6
Installation,15
PT
Português
Instruções para a utilização
FOGÃO E FORNO
Índice
Instruções para a utilização,1
ADVERTÊNCIA,2
Descrição do aparelho-Vista de conjunto,5
Descrição do aparelho-Painel de comandos,6
Instalação,23
Utilização do plano de cozedura,27
Nederland
NL
Gebruiksaanwijzing
FORNUIS EN OVEN
Inhoud
Gebruiksaanwijzing,1
WAARSCHUWING,2
Beschrijving van het apparaat-Aanzichttekening,5
Beschrijving van het apparaat-Bedieningspaneel,6
Installatie, 31
De kookzones,36
Deutsch
DE
Bedienungsanleitungen
HERD UND OFEN
Inhalt
Bedienungsanleitungen,1
HINEISART,2
Beschreibung des Geräts-Übersicht,5
Beschreibung des Geräts-Schalttafel,6
Installation,39
Inbetriebnahme und Benutzung,41
Gebrauch des Ofens,41
Vorsichtsmaßnahmen und Tipps,44
Hilfe,45
BG
Български
Инструкции за употреба
ЕЛЕКТРИЧЕСКА ПЕЧКА И ФУРНА
Резюме
Инструкции за употреба,1
ПРЕПОРЪКА,2
Описание на уреда-Общ преглед,5
Описание на уреда- Управляващ панел,6
Инсталиране,47
Пуск и експлоатация, 49
Използване на фурната,50
Kотлони,52
Предпазни мерки и препоръки,53
Поддръжка и почистване,54
Техническо обслужване,54
Advertisement
Table of Contents

Subscribe to Our Youtube Channel
Related Manuals for Indesit I5ESH1E/ I


Summary of Contents for Indesit I5ESH1E/ I
-
Page 1: Table Of Contents
I5ESH1E/ I Nederland Italiano Gebruiksaanwijzing Istruzioni per l’uso FORNUIS EN OVEN CUCINA E FORNO Inhoud Sommario Gebruiksaanwijzing,1 Istruzioni per l’uso,1 WAARSCHUWING,2 AVVERTENZA,2 Beschrijving van het apparaat-Aanzichttekening,5 Descrizione dell’apparecchio- Vista d’insieme,5 Beschrijving van het apparaat-Bedieningspaneel,6 Descrizione dell’apparecchio- Pannello di controllo,6 Installatie, 31... -
Page 2: Avvertenza
AVVERTENZA Warnings ATTENZIONE: Questo apparecchio e le WARNING: The appliance and its sue par accessibili diventano molto caldi accessible parts become hot during use. durante l’uso. Care should be taken to avoid touching Bisogna fare a enzione ed evitare di hea ng elements. -
Page 3: Advertência
ADVERTÊNCIA WAARSCHUWING ATENÇÃO: Este aparelho e as suas partes PAS OP: Dit apparaat en zijn bereikbare acessíveis aquecem muito durante a onderdelen worden jdens gebruik zeer u lização. heet. É preciso ter atenção e evitar tocar os Zorg ervoor de verwarmende elementen elementos que aquecem. - Page 4 ПРЕПОРЪКА HINEISART ВНИМАНИЕ: Уредът и неговите ZUR BEACHTUNG: Bei Gebrauch wird dieses открити части се нагряват много при Gerät und alle zugänglichen Teile sehr heiß. употреба. Es ist darauf zu achten, dass die Бъдете особено внимателни и Heizelemente nicht berührt werden. не...
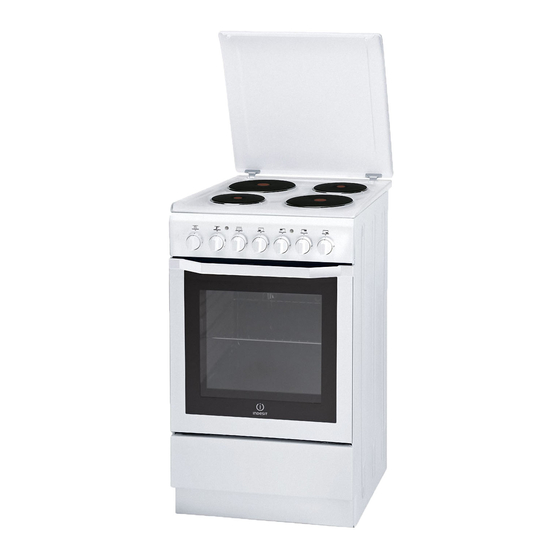
- Page 5 Aanzichttekening Aanzichttekening 1. Elektrische kookplaat 2. Bedieningspaneel Ovenrek 4. Lekplaat of bakplaat 5. Plaat voor opvangen van overkooksel 6. Geleidersvan de roosters 7. stand 5 8. stand 4 Descrizione dell’apparecchio 9. stand 3 Vista d’insieme 10. stand 2 11. stand 1 1.PIASTRE ELETTRICHE 12.
- Page 6 Aanzichttekening Descrizione dell’apparecchio Bedieningspaneel Panello di controllo 1.Manopola Contaminati 2.La spia termostato forno 3.Manopola termostato 4.Manopola di selezione forno 5.La spia di funzionamento delle piastre elettriche 6.Manopole di comando delle piastre elettriche Beschreibung des Gerätes Description of the appliance Bedienfeld Control panel...
-
Page 7: Installazione
Installazione ! È importante conservare questo libretto per poterlo Le gambe* fornite in dotazione si montano a incastro sotto la consultare in ogni momento. In caso di vendita, di base della cucina. cessione o di trasloco, assicurarsi che resti insieme all’apparecchio. - Page 8 fermacavo. 6. chiudere il coperchio della morsettiera avvitando la 34,0x39,1x45,5 cm vite V. Allacciamento del cavo di alimentazione alla rete Montare sul cavo una spina normalizzata per il carico indicato nella targhetta caratteristiche posta sull’apparecchio. In caso di collegamento diretto alla rete è necessario interporre tra l’apparecchio e la rete un interruttore onnipolare con apertura minima fra i contatti di 3 mm, dimensionato al carico e rispondente alle norme...
-
Page 9: Avvio E Utilizzo
Avvio e utilizzo Uso del forno Programmi di cottura ! Alla prima accensione fare funzionare il forno a vuoto ! Per tutti i programmi è impostabile una temperatura per almeno un’ora con il termostato al massimo e a tra 50°C e MAX, tranne per il programma GRILL, per il porta chiusa. -
Page 10: Utilizzo Del Piano Cottura,10
Utilizzo del piano cottura vetroceramica Accendere e spegnere le zone di cottura Vano inferiore Per accendere una zona di cottura ruotare in senso orario la manopola corrispondente. Sotto al forno è presente un vano che Per spegnere, ruotare la manopola in senso antiorario puo essere utilizzato per il deposito fi... - Page 11 Tabella cottura in forno...
-
Page 12: Precauzioni E Consigli
Precauzioni e consigli ! L’apparecchio è stato progettato e costruito in conformità • In caso di guasto, in nessun caso accedere ai alle norme internazionali di sicurezza. meccanismi interni per tentare una riparazione. Queste avvertenze sono fornite per ragioni di sicurezza e Contattare l’Assistenza. -
Page 13: Manutenzione E Cura
Manutenzione e cura Escludere la corrente elettrica • L’acciaio inox può rimanere macchiato se a contatto per lungo tempo con acqua fortemente calcarea o con detergenti aggressivi (contenenti fosforo). Prima di ogni operazione isolare l’apparecchio dalla Si consiglia di sciacquare abbondantemente ed rete di alimentazione elettrica. - Page 14 AVVERTENZA! Il forno non va usato senza il vetro Rimozione e inserimento della porta del nternodella porta! forno: AVVERTENZA! Quando viene rimontato il vetro nterno della porta, inserirlo correttamente, di modo che 1.Aprire la porta. il testo scritto sul vetro non sia invertito e possa essere 2.
-
Page 15: Installation
Installation ! Before operating your new appliance please read Levelling this instruction booklet carefully. It contains important If it is necessary to level the information concerning the safe installation and appliance, screw the adjustable operation of the appliance. feet into the places provided on each corner of the base of the ! Please keep these operating instructions for future cooker (see figure). - Page 16 N and as shown in the diagram (see figure) and proceed with the connection process, tightening the 34,0 x 39,1 x 45,5 cm terminal screws as far as possible. 61 l 4. Position the remaining wires on terminals 1-2-3 and tighten the screws.
-
Page 17: Start-Up And Use
Start-up and use Using the oven THERMOSTAT indicator light When this is illuminated, the oven is generating heat. ! The first time you use your appliance, heat the empty It switches off when the inside of the oven reaches oven with its door closed at its maximum temperature the selected temperature. -
Page 18: Cooking Modes
Cooking modes Lower compartment There is a compartment underneath ! A temperature value can be set for all cooking the oven that may be used to store modes between 50°C and MAX, except for the GRILL oven accessories or deep dishes. To programme, for which only the MAX power level is open the door pull it downwards (see recommended. -
Page 19: Using The Hob,19
Using the electric hob Practical advice on using the hob Practical advice on using the electric • Use pans with a thick, flat base to ensure that they hotplates adhere perfectly to the cooking zone. To avoid heat loss and damage to the hotplates use pans with a flat base, whose diameter is no less than that of the hotplate itself. -
Page 20: Precautions And Tips
Precautions and tips Assistance. ! The appliance was designed and manufactured in • Do not rest heavy objects on the open oven door. compliance with international safety standards. • If the cooker is placed on a pedestal, take the necessary The following warnings are provided for safety reasons and precautions to prevent the same from sliding off the must be read carefully. -
Page 21: Care And Maintenance
Care and maintenance Switching the appliance off has been left on the surface for a long time, or by aggressive detergents containing phosphorus. After cleaning, rinse well and dry thoroughly. Any Disconnect your appliance from the electricity supply remaining drops of water should also be dried. before carrying out any work on it. - Page 22 WARNING! Oven must not be operated with inner Removing and fitting the oven door: door glass removed! WARNING! When reassembling the inner door 1.Open the door glass insert the glass panel correctly so that the 2.Make the hinge clamps of the oven door rotate text written on the panel is not reversed and backwards completely (see photo) can be easily legible.
-
Page 23: Instalação
Instalação ! É importante guardar este folheto para poder consultá-lo a qualquer momento. No caso de venda, cessão ou mudança, assegure-se que o mesmo permaneça com o aparelho. ! Leia com atenção as instruções: nas quais há informações importantes sobre a instalação, a Ligação eléctrica utilização e a segurança. - Page 24 A correia de segurança ! Para evitar a Ligação do cabo de alimentação à rede eléctrica. queda acidental do aparelho, por exemplo, por uma Monte no cabo uma fi cha em conformidade com criança subir as normas para a carga indicada na placa de para a porta do forno, DEVE ser identifi...
-
Page 25: Início E Utilização
Início e utilização Utilização do forno Se estiver ligado signifi ca que o forno está a funcionar. Desliga-se quando no interior do forno for alcançada a temperatura seleccionada. A esta altura, o indicador ! Quando o acender pela primeira vez, aconselhamos começa a piscar indicando que o termostato está... - Page 26 aconselhada para os pratos que necessitarem de alta Programas de cozedura temperatura na superfície: bifes de vitela ou vaca, Forno Estático entrecôte, fi lés, hambúrgueres et, ... Alguns exemplos de utilização estão apresentados na Posição do botão do termostato: Entre 60°C e Max. parágrafo “Conselhos práticos para a cozedura”.
-
Page 27: Utilização Do Plano De Cozedura
Utilização do plano de cozedura eléctrico Conselhos práticos para utilização do plano de Ligar e desligar as zonas de cozedura cozedura Para ligar uma zona de cozedura, rodar no sentido • Empregue panelas com fundo chato e elevada horário o selector correspondente. espessura, para ter a certeza que haverá... -
Page 28: Precauções E Conselhos
Precauções e conselhos mecanismos internos para tentar repará-las. Contactar a Assistência. ! Este aparelho foi projectado e fabricado em • Não coloque objectos pesados sobre a porta do conformidade com as normas internacionais de forno aberta. segurança. Estas advertências são fornecidas por •... -
Page 29: Manutenção E Cuidados
Manutenção e cuidados Desligar a corrente eléctrica Verifi que periodicamente o estado da guarnição ao redor da porta do forno. Se houver danos, contacte o Centro de Assistência Técnica mais perto. É Antes de realizar qualquer operação, desligue o aconselhável não usar o forno antes do mesmo ter sido aparelho da alimentação eléctrica. - Page 30 6. Volte a montar o vidro. ATENÇÃO! Forno não deve ser operado com interior Desmontagem e montagem da porta do porta de vidro removido! forno: ATENÇÃO! Ao remontar a porta interna vidro inserir o painel de vidro correctamente para que o texto por 1.
-
Page 31: Installatie
Installatie ! Bewaar dit instructieboekje zorgvuldig voor Waterpas zetten Indien het nodig is het apparaat eventuele raadpleging in de toekomst. In het geval u te nivelleren, kunnen de het apparaat verkoopt, weggeeft of wanneer u verhuist, bijgeleverde stelvoetjes in de moet het boekje bij het apparaat bewaard worden. - Page 32 zich aan de onderkant van de klemmenstrook. 45,5 cm 34,0 cm 3. Plaats de geleiders N en zoals aangegeven in 39,1 cm het schema (zie afbeelding) en stel een verbinding tot stand door de schroeven van de klemmetjes goed vast te draaien.
-
Page 33: Starten En Gebruik
Starten en gebruik werk: Gebruik van de oven 1. draai de TIMERKNOP bijna 360° rechtsom om de wekker op te laden; ! Wij raden u aan bij het eerste gebruik de oven 2. draai de TIMERKNOP linksom en stel de minstens een uur leeg te laten functioneren, op gewenste tijd in. - Page 34 Praktische kooktips van het vlees onmiddellijk zodat er geen vocht verloren ! Bij de functie GRILL raden wij u aan de lekplaat op gaat en de binnenkant mals blijft. Het koken onder de stand 1 te zetten om eventueel vet of jus op te vangen. grill is vooral aan te raden voor gerechten die een hoge temperatuur aan de buitenkant nodig hebben: biefstuk, GRILL...
- Page 35 Gebruik van de glaskeramische kookplaat De kookzones in- en uitschakelen Voor het inschakelen van een kookzone drukt u de bijbehorende knop rechtsom. Om hem uit te schakelen draait u de knop linksom tot aan “0”. Het aangaan van het controlelampje van de ELEKTRISCHE KOOKPLATEN geeft aan dat minstens één elektrische kookplaat aan is.
-
Page 36: Voorzorgsmaatregelen En Advies
Voorzorgsmaatregelen en advies ! Dit apparaat is ontworpen en vervaardigd volgens de • • Controleer altijd dat de knoppen in de stand staan geldende internationale veiligheidsvoorschriften. als het apparaat niet gebruikt wordt. Deze aanwijzingen zijn geschreven voor uw veiligheid en u dient ze derhalve goed door te nemen. •... -
Page 37: Onderhoud En Verzorging
Onderhoud en verzorging De elektrische stroom afsluiten Het controleren van de afdichtingen van de oven Controleer regelmatig de staat van de afdichtingen Sluit altijd eerst de stroom af voordat u tot enige rondom de ovendeur. In het geval de afdichting handeling overgaat. - Page 38 Demonteren en weer monteren van de WAARSCHUWING! De oven mag niet worden gebruikt ovendeur als de glazen plaat aan de binnenzijde is verwijderd! WAARSCHUWING! Als u de glazen plaat aan 1. Open de deur de binnenzijde weer in elkaar zet, dient u het 2.
-
Page 39: Installation
Installation Ausrichtung ! Bewahren Sie diese Bedienungsanleitung bitte sorgfältig auf, damit Sie sie jederzeit zu Rate ziehen Muss das Gerät ausgerichtet können. Sorgen Sie dafür, dass sie im Falle eines werden, nehmen Sie Verkaufs, einer Übergabe oder eines Umzugs dem die mitgelieferten, Gerät stets beiliegen. - Page 40 2. Die Brücke A (siehe ! Das Netzkabel darf nicht geknickt oder eingeklemmt Abbildung) gemäß oben aufgeführtem werden. Anschlussschema ! Das Netzkabel muss regelmäßig kontrolliert werden positionieren. Das Klemmengehäuse ist und darf nur durch autorisiertes Fachpersonal werkseitig für einen ausgetauscht werden. ! Der Hersteller weist jegliche Verantwortung zurück, falls diese Vorschriften nicht eingehalten werden sollten.
- Page 41 Inbetriebsetzung und Gebrauch Garprogramme ! Bei erstmaliger Inbetriebnahme sollte der leere Backofen für etwa eine Stunde bei Höchsttemperatur und geschlossener Backofentür in Betrieb genommen ! Für alle Programme kann eine Gartemperatur von werden. Schalten Sie das Gerät dann aus, öffnen 60°...
- Page 42 Der Kurzzeitwecker • Es empfiehlt sich, die höchste Energiestufe zu Zur Inbetriebnahme des Kurzzeitweckers muss das verwenden. Im Übrigen ist es bei dieser Funktion Läutewerk durch eine fast vollständige Umdrehung völlig normal, dass das obere Heizelement nicht ständig rot glüht: Es wird durch einen Thermostaten ...
-
Page 43: Gebrauch Des Kochfeldes
Anleitungen zum Einsatz des Elektrisches Kochfeldes Kochzonenschalter Praktische Hinweise zum Gebrauch des Kochfeldes • Verwenden Sie Kochgeschirr mit dickem und ebenem Boden, um sicher zu sein, dass dieser Die Herde können mit Standard-, Schnellaufheiz- perfekt auf der Kochzone aufliegt; und Automatik-Kochzonen in unterschiedlichen Kombinationen, bestückt sein (die Schnellaufheizkochzone ist durch einen roten Punkt gekennzeichnet, die Automatik-Kochzone durch eine... - Page 44 Vorsichtsmaßregeln und Hinweise keinem Fall, Innenteile selbst zu reparieren. Wenden ! Das Gerät wurde entsprechend den internationalen Sicherheitsvorschriften entworfen und gebaut. Sie sich an den Kundendienst. • Stellen Sie bitte keine schweren Gegenstände auf Nachstehende Hinweise werden aus Sicherheitsgründen geliefert und sollten aufmerksam der geöffneten Backofentür ab.
- Page 45 Reinigung und Pflege Abschalten des Gerätes vom Stromnetz Kontrolle der Backofendichtungen Kontrollieren Sie in regelmäßigen Abständen den Vor jeder Reinigung und Pflege ist das Gerät vom Zustand der Dichtung rund um die Backofentür. Stromnetz zu trennen. Wenden Sie sich im Falle einer Beschädigung dieser Dichtung an die nächstgelegene Kundendienststelle.
-
Page 46: Pflege Und Wartung
Aus- und Einbau der Ofentür: ACHTUNG! Der Ofen darf nicht ohne das innere Türglas betrieben werden! 1.Öffnen Sie die Tür ACHTUNG! Wenn Sie die innere Glastür wieder einbauen, 2. Drehen Sie die Scharnierklammern der Ofentür fügen Sie die Glasplatte korrekt ein, so das der auf der vollständig nach hinten (siehe Foto) Platte geschriebene Text nicht verdreht ist und leicht 3. - Page 47 ! ! ! ! ! ! 400V 3N~ H05RR-F 5x2.5 CEI-UNEL 35363 ...
- Page 48 45,5 34,0 39,1 , ...
- Page 49 ! ! ! ...
- Page 50 ...
- Page 51 ВНИМАНИЕ! Фурната е снабдена със система за застопоряване на решетките, която позволява тяхното изваждане, без те да излизат извън фурната.(1) За да извадите напълно решетките, както е показано на картинката, е достатъчно да ги повдигнете, като ги хванете откъм предната част, и...
- Page 52 ...
- Page 53 ! ...
- Page 54 ! . ...
- Page 55 ПРЕДУПРЕЖДЕНИЕ! Фурната не трябва да се Демонтаж и монтаж на вратата на използва при свалено вътрешно стъкло! фурната: ПРЕДУПРЕЖДЕНИЕ! При повторно монтиране на вътрешното стъкло на вратата, поставете 1.Отворете вратата правилно стъкления панел, така че текстът върху 2.Напълно завъртете назад шарнирните скоби на панела...
- Page 56 03/2014- 195118598.00 XEROX FABRIANO...
Need help?
Do you have a question about the I5ESH1E/ I and is the answer not in the manual?
Questions and answers