Table of Contents
Advertisement
Quick Links
Installation
and Operating
Instructions
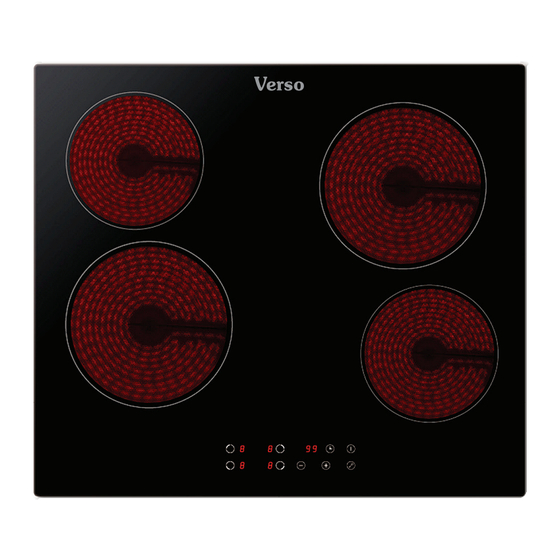
Model:
VERSO 4C Hob
For your convenience, we recommend to attach
the serial number label HERE.
As part of Parmco Appliances commitment to improving and updating product ranges,
we reserve the right to alter, change and update technical specifications and appearance
attributes of all Parmco Appliances products. E&OE
727626112014
Advertisement
Table of Contents

Related Manuals for Parmco VERSO 4C


Summary of Contents for Parmco VERSO 4C
- Page 1 For your convenience, we recommend to attach the serial number label HERE. As part of Parmco Appliances commitment to improving and updating product ranges, we reserve the right to alter, change and update technical specifications and appearance attributes of all Parmco Appliances products. E&OE...
- Page 2 Parmco Appliances before any installation is carried out. We hope you enjoy your new appliance. If you would like to nd out more about this product or any other products in Parmco’s extensive range, visit us on the web at www.parmco.co.nz. Regards,...
- Page 3 11. Metallic objects such as knives, forks, spoons and lids should not be placed on the hotplate since they will get hot. 12. If the surface is cracked, switch off the appliance and contact Parmco Appliances. To avoid the possibility of electric shock do not continue to use a damaged hob.
- Page 4 15. WARNING: Accessible parts may become hot during use. Young children should be kept away. 16. This appliance is not intended to be operated by means of an external timer or separate remote-control system. 17. After use switch off the hob element at its control. Other Safety Precautions Your safety is important to us.
-
Page 5: General Precautions
burns. • Do not let your body, clothing or any item other than suitable cookware contact the glass until the surface is cool. • Never leave metal objects (such as kitchen utensils) or empty pans on the cooktop as they can become hot very quickly. •... -
Page 6: Product Overview
Product Overview Top View 1. max. 1800 W zone 2. max. 1200 W zone 3. max. 1800 W zone 4. max. 1200 W zone 5. Glass plate 6. Control panel Control Panel 1. Heating zone selection controls 2. Power/Timer controls 3. -
Page 7: Using The Touch Controls
Before using your New Ceramic Hob • Read this guide, taking special note of the ‘Safety Warnings’ section. • Remove any protective film that may still be on your ceramic hob. Using the Touch Controls • The controls respond to touch, so you do not need to apply any pressure. •... -
Page 8: Using Your Ceramic Hob
Using your Ceramic Hob To start cooking 1. Touch the ON/OFF control. All the indicators show “-“ • Once powered on, the buzzer beeps once, all indicators light up for 1 second then go out, indicating that the ceramic hob is now on. 2. -
Page 9: When You Have Finished Cooking
When you have finished cooking 1. Touch the heating zone selection control that you wish to switch off. (e.g. zone 3#) 2. Turn the cooking zone off by scrolling down to “0 “ or touching “-“ and ”+” controls together. 3. - Page 10 Locking the Controls • You can lock the controls to prevent unintended use (for example children accidentally turning the cooking zones on). • When this function is activated, all controls except the ON/OFF control are disabled. To lock the controls Touch the keylock symbol.
-
Page 11: Using The Timer
Using the Timer You can use the timer in two different ways: • As a minute minder; in this case, it will not turn any cooking zone off when the set time is up. • To turn one or more cooking zones off after the set time is up. Note: The timer can be set for up to 99 minutes. -
Page 12: Setting The Timer To Turn One Cooking Zone Off
4. Touching the”-“ and “+” together will cancel the timer, showing ”--“ in the minute display. 5. When the selected cooking time is up, the buzzer will sound and will display “- - “symbol. Setting the timer to turn one cooking zone off 1. - Page 13 If the setting time exceeds 99 minutes, the timer will automatically return to 0 minutes. 4. Touching the”-“ and “+” together will cancel the timer, showing ”--“ in the minute display. NOTE: The red dot next to power level indicator will illuminate indicating that zone is selected.
-
Page 14: Cooking Guidelines
2. When the selected cooking time is reached, the corresponding cooking zone will be switched off automatically. NOTE: If you want to change the time after the timer is set, you have to start again from step 1. Cooking Guidelines Cooking Tips •... -
Page 15: Heat Settings
between 2 – 8 minutes per each side. Press the steak to gauge how cooked it is – the firmer it feels the more ‘well done’ it will be. 5. Leave the steak to rest on a warm plate for a few minutes before serving. Stir-frying 1. -
Page 16: Care And Cleaning
Care and Cleaning What? How? Important! Everyday soiling on 1. Switch the power to the • When the power to the cooktop glass (fingerprints, cooktop off. is switched off, there will be no marks, stains left 2. Apply a cooktop cleaner ‘hot surface’... -
Page 17: Hints And Tips
(layers of different metals vibrating differently). Technical Specification Model VERSO 4C HOB Cooking Zones 4 Zones Supply Voltage 220-240V~ Installed Electric Power (max) 6600W Product Size L×W×H(mm) - Page 18 Installation Dear Installer: Please affix data label provided on the adjacent cupboard near the appliance for future reference. Thank you. Selection of installation equipment Cut out the work surface according to the sizes shown in the drawing. For the purpose of installation and use, a minimum of 50mm space shall be preserved around the hole.
- Page 19 Note: The safety distance between the ceramic hob and the cupboard above it or rangehood should be at least 650mm. A(mm) B(mm) C(mm) 50 min 30 min Air intake Air exit 10 mm Before locating the fixing brackets The unit should be placed on a stable, smooth surface (use the packaging). Do not apply force onto the controls protruding from the hob.
-
Page 20: Connecting The Hob To The Mains Power Supply
Adjust the bracket position to suit for different work surface’s thickness. Cautions 1. The hob must be installed by qualified personnel. Never conduct the operation by yourself. 2. The hob shall not be mounted to cooling equipment, dishwashers and rotary dryers. - Page 21 1. If the cable is damaged or needs replacing, the operation must be carried out by a qualified technician with dedicated tools to avoid any accidents. 2. If the appliance is being connected directly to the mains, an omnipolar circuit breaker must be installed with a minimum gap of 3mm between the contacts.
- Page 22 09 573 5678 f: 09 573 5699 e: sales@parmco.co.nz w: www.parmco.co.nz Parmco Appliances 2 year warranty The Warranty: The Warranty is not valid: • If the product is not installed and operated in accordance with the operating • Subject to the terms and conditions contained within this instructions. warranty, if the product is not of Acceptable Quality (as • If the product is not installed to comply with the electrical, gas, plumbing defined in the Consumer Guarantees Act) within 2 years of and other Regulations and Codes of Practice in New Zealand. the date of original purchase, then Parmco Sales undertakes • If the product is operated on voltages or frequencies outside the normal range for domestic appliances in New Zealand. to repair or, at it’s sole discretion, replace the product. • If the product is not used in normal domestic use, or if it is used in a • The warranty does not cover the costs of transport, mileage...
- Page 23 VERSO 5F OVEN For your convenience, we recommend to attach the serial number label HERE. As part of Parmco Appliances commitment to improving and updating product ranges, we reserve the right to alter, change and update technical specifications and appearance attributes of all Parmco Appliances products.
- Page 24 Parmco Appliances before any installation is carried out. We hope you enjoy your new appliance. If you would like to find out more about this product or any other products in Parmco’s extensive range, visit us on the web at www.parmco.co.nz. Regards,...
-
Page 25: Table Of Contents
Standards and Regulatory Requirements with particular reference to the New Zealand Electrical Standards. Any attempt to install this or any other Parmco product without an authorised person could result in damage to the product and a possible health hazard. Not having an authorised person install this appliance may result in all associated warranties from Parmco Appliances being null and void. -
Page 26: Important Safety Information Page
IMPORTANT SAFETY INFORMATION We recommend that for best performance and to extend the life of your appliance you read the instructions in this owner's manual thoroughly before using your new appliance. It will provide you with all the information you need to ensure its safe installation, proper use and maintenance. - Page 27 NEVER line the oven with aluminium sheets as doing so may damage the enamel and elements. WARNING: Accessible parts may become hot during use. To avoid burns young children should be kept away. Do not use harsh abrasive cleaners or sharp metal scrapers to clean the oven door glass since they can scratch the surface, which may result in shattering of the glass.
-
Page 28: Product Description
PRODUCT DESCRIPTION It is important to remember that this oven may perform differently to the way your previous appliance worked. To obtain the best cooking results, please experiment with temperature, rack height and cooking times. Positioning the Oven Trays & Shelves The deep tray and wire shelves can be located in any of five height positions. -
Page 29: Oven Functions
OVEN FUNCTIONS Symbol Function description Oven light: Turns on the oven light. Please note this function does no cooking. Defrost: The air circulation at room temperature enables quicker thawing of the frozen food without using any heat. It's a gentle but quick way to speed up the defrost time. -
Page 30: Cooking Guide
3. SETTING THE TEMPERATURE To set the temperature, turn the temperature knob located on the right hand side of the control panel to the desired temperature (min. 50° C - 250° C max.) When the oven is not in use, the temperature knob should always be set to "0". Note: ... -
Page 31: Maintenance
There is a rubber seal surrounding the oven. Check the condition of the seal on a regular basis. If necessary, clean it but avoid using abrasive products or objects to do so. Should it becomes damaged please contact Parmco Appliances service department. We recommend you avoid using the oven until it has been repaired. -
Page 32: Important Note
New Zealand Electrical Standards. Any attempt to install this or any other Parmco product without an authorised person could result in damage to the product and possible health hazard. Not having an authorised person install this appliance... -
Page 33: Installation Instructions
Before any procedure, it is important to check that the appliance is DISCONNECTED from the electrical mains. Parmco declines all responsibility for any damage deriving from installations that are in breach of the regulations in force or from failure to comply with these installation instructions. - Page 34 After connection of the appliance to the mains, ensure the cord does not come into contact with any parts of this appliance subject to heating. Never use reductions, shunts, adaptors which can cause overheating or burning. When handling this oven it is essential that you always use the purpose provided handles recessed into the sides of the oven.
- Page 35 Installation Please note the rear panel of the cabinetry must be removed to ensure adequate ventilation. The power switch or socket that connects to the appliance should not be located in the installation housing, but rather in an adjacent cabinet or above the worktop. In order to ensure adequate ventilation, the back of the cabinet unit must be removed.
-
Page 36: Accessories
ACCESSORIES Wire shelves: For grilling dishes, to support cake pans or roasting dishes. Drip pan: To be used for grilling and to collect fat/spillage of meat juices. Note: Correct placement of the shelves between the side rails is imperative for safety operation. - Page 37 09 573 5678 f: 09 573 5699 e: sales@parmco.co.nz w: www.parmco.co.nz Parmco Appliances 2 year warranty The Warranty: The Warranty is not valid: • If the product is not installed and operated in accordance with the operating • Subject to the terms and conditions contained within this instructions. warranty, if the product is not of Acceptable Quality (as • If the product is not installed to comply with the electrical, gas, plumbing defined in the Consumer Guarantees Act) within 2 years of and other Regulations and Codes of Practice in New Zealand. the date of original purchase, then Parmco Sales undertakes • If the product is operated on voltages or frequencies outside the normal range for domestic appliances in New Zealand. to repair or, at it’s sole discretion, replace the product. • If the product is not used in normal domestic use, or if it is used in a • The warranty does not cover the costs of transport, mileage...
Need help?
Do you have a question about the VERSO 4C and is the answer not in the manual?
Questions and answers
How to increase the temperature on one hob
To increase the temperature on the Parmco VERSO 4C, turn the temperature knob located on the right-hand side of the control panel to a higher temperature setting (between 50°C and 250°C).
This answer is automatically generated