Table of Contents
Advertisement
Quick Links
Installation
and Operating
Instructions
Model:
HO-4-2NF-CER-T
For your convenience, we recommend to attach
the serial number label HERE.
As part of Parmco Appliances commitment to improving and updating product ranges,
we reserve the right to alter, change and update technical specifications and appearance
attributes of all Parmco Appliances products. E&OE
727626122014
Advertisement
Table of Contents

Related Manuals for Parmco HO-4-2NF-CER-T


Summary of Contents for Parmco HO-4-2NF-CER-T
- Page 1 For your convenience, we recommend to attach the serial number label HERE. As part of Parmco Appliances commitment to improving and updating product ranges, we reserve the right to alter, change and update technical specifications and appearance attributes of all Parmco Appliances products. E&OE...
- Page 2 Parmco Appliances before any installation is carried out. We hope you enjoy your new appliance. If you would like to find out more about this product or any other products in Parmco’s extensive range, visit us at www.parmco.co.nz. Regards,...
-
Page 3: Important Safety Warnings
11. Metallic objects such as knives, forks, spoons and lids should not be placed on the hotplate since they will get hot. 12. If the surface is cracked, switch off the appliance and contact Parmco Appliances. To avoid the possibility of an electric shock do not continue to use a damaged hob. -
Page 4: Other Safety Precautions
15. WARNING: Accessible parts may become hot during use. Young children should be kept away. 16. This appliance is not intended to be operated by means of an external timer or separate remote-control system. 17. After use switch off the hob element at its control. Other Safety Precautions Your safety is important to us. - Page 5 Operation and maintenance precautions Hot Surface • During use, accessible parts of this appliance may become hot enough to cause burns. • Do not let your body, clothing or any item other than suitable cookware contact the glass until the surface is cool. •...
-
Page 6: Product Overview
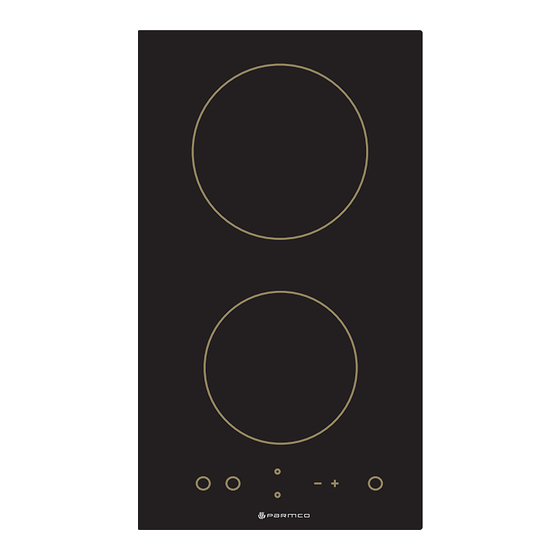
Product Overview Top View 1. max. 1800 W zone 2. max. 1200 W zone 3. Glass plate 4. ON/OFF control 5. Control panel Control Panel 1. ON/OFF control 2. Timer/ Heat setting control 3. Heating zone selection control 4. Timer control 5. -
Page 7: Before Using Your New Ceramic Hob
Before using your New Ceramic Hob • Read this guide, taking special note of the ‘Safety Warnings’ section. • Remove any protective film that may still be on your ceramic hob. Using the Touch Controls • The controls respond to touch, so you do not need to apply any pressure. •... -
Page 8: Using Your Ceramic Hob
Using your Ceramic Hob To start cooking 1. Touch the ON/OFF control. All the indicators show “-“ • Once powered on, the buzzer beeps once, all indicators light up for 1 second then go out, indicating that the ceramic hob is now on. 2. -
Page 9: When You Have Finished Cooking
When you have finished cooking 1. Touch the heating zone selection control that you wish to switch off. 2. Turn the cooking zone off by scrolling down to “0 “or touching “-“and ”+” controls together. 3. Turn the whole cooktop off by touching the ON/OFF control. -
Page 10: Locking The Controls
Locking the Controls • You can lock the controls to prevent unintended use (for example children accidentally turning the cooking zones on). • When this function is activated, all controls except the ON/OFF control are disabled. To lock the controls Touch the keylock symbol. -
Page 11: Using The Timer
Using the Timer You can use the timer in two different ways: • As a minute minder; in this case, it will not turn any cooking zone off when the set time is up. • To turn one or more cooking zones off after the set time is up. Note: The timer can be set for up to 99 minutes. -
Page 12: Setting The Timer To Turn One Cooking Zone Off
4. Touching the”-“ and “+” together will cancel the timer, showing ”--“ in the minute display. 5. When the selected cooking time is up, the buzzer will sound and will display “- - “symbol. Setting the timer to turn one cooking zone off 1. -
Page 13: Cooking Guidelines
or increase by 10 minutes. If the setting time exceeds 99 minutes, the timer will automatically return to 0 minutes. 4. Touching the”-“ and “+” together will cancel the timer, showing ”--“ in the minute display. NOTE: The red dot next to power level indicator will illuminate indicating that zone is selected. -
Page 14: Searing Steak
• Some items, including cooking rice by the absorption method, may require a setting higher than the lowest setting to ensure the food is cooked properly in the time recommended. Searing steak To cook juicy steaks: 1. Stand the meat at room temperature for about 20 minutes before cooking. 2. -
Page 15: Heat Settings
Heat Settings The settings below are guidelines only. The exact setting will depend on several factors, including your cookware and the amount you are cooking. Experiment with the cooktop to find the settings that best suit you. Heat setting Suitability •... -
Page 16: Care And Cleaning
Care and Cleaning What? How? Important! Everyday soiling on 1. Switch the power to the • When the power to the cooktop glass (fingerprints, cooktop off. is switched off, there will be no marks, stains left 2. Apply a cooktop cleaner ‘hot surface’ indication but the by food or while the glass is still cooking zone may still be hot! non‐sugary warm (but not hot!) Take extreme care. spillovers on the 3. Rinse and wipe dry with a • Heavy‐duty scourers, some nylon glass) clean cloth or paper scourers and harsh/abrasive towel. cleaning agents may scratch the 4. Switch the power to the glass. Always read the label to cooktop back on. check if your cleaner or scourer is suitable. • Never leave cleaning residue on the cooktop: the glass may become stained. Boilovers, melts, Remove these immediately ... -
Page 17: Hints And Tips
This may be caused by the This is normal for cookware and crackling or clicking construction of your does not indicate a fault. noises. cookware (layers of different metals vibrating differently). Technical Specification Model HO-4-2NF-CER-T Cooking Zones 2 Zones Supply Voltage 220-240V~ 50/60Hz Installed Electric Power (max) 3000W Product Size L×W×H(mm) 288X520X67 Cut-out Dimensions A×B (mm) 268X500 Dimensions are approximate. Because we continually strive to improve our... -
Page 18: Selection Of Installation Equipment
Installation Dear Installer: Please affix data label provided on the adjacent cupboard near the appliance for future reference. Thank you. Selection of installation equipment Cut out the work surface according to the sizes shown in the drawing. For the purpose of installation and use, a minimum of 50mm space shall be preserved around the hole. ... -
Page 19: Before Locating The Fixing Brackets
When installing a rangehood above an appliance, all relevant New Zealand building, installation and regulation standards including NZS 5261 must be adhered to. Note: The safety distance between the ceramic hob and the cupboard above it or rangehood should be at least 650mm. A(mm) B(mm) C(mm) 50 min 30 min Air intake Air exit 10 mm Before locating the fixing brackets ... -
Page 20: Connecting The Hob To The Mains Power Supply
Cautions 1. The hob must be installed by qualified personnel. Never conduct the operation by yourself. 2. The hob shall not be mounted to cooling equipment, dishwashers and rotary dryers. 3. The wall and induced heating zone above the work surface shall withstand heat. 4. - Page 21 4. The cable must not be bent or compressed. 5. The cable must be checked regularly and only replaced by a properly qualified person. 6. The installer must use the supplied power cord. This appliance is labeled in compliance with European directive 2002/96/EC for Waste Electrical and Electronic Equipment (WEEE).
-
Page 22: Warranty
Please retain this Warranty card together with receipt or other proof of purchase date when seeking service during the warranty period • Normal or scheduled maintenance including blocked filters or ducting. • Consumable items such as light bulbs. • Any damage to ceramic glass hobs caused by spills when cooking. • Any breakage or damage of glass items. Please contact Parmco at 09 573 5678 if your • Any damage caused by non recommended product used for cleaning, appliance needs servicing under warranty. Please maintaining, lubricating or similar. have your model number and proof of purchase ready. • Any aspect relating to the installation of the product, or damage caused Warranty repairs must be authorized by Parmco. during installation including blocked access for repair. • Any third party (including reseller) or consequential loss or damage (direct or indirect) however arising. Subject to updates without prior notice, please visit www.parmco.co.nz for E & O.E. 727626112014 the latest version.
Need help?
Do you have a question about the HO-4-2NF-CER-T and is the answer not in the manual?
Questions and answers