Table of Contents
Advertisement
Quick Links
Advertisement
Table of Contents

Subscribe to Our Youtube Channel
Related Manuals for Parmco Verso 4G


Summary of Contents for Parmco Verso 4G
- Page 1 Operating Instructions Models: Verso 4G Hob As part of Parmco Appliances commitment to improving and updating product ranges, we reserve the right to alter, change and update technical specifications and appearance attributes of all Parmco Appliances products. E&OE. 727626062016...
-
Page 2: Table Of Contents
Contents User Instructions For your safety ............................. 2 Description of the hob ........................4 Instructions for use ..........................4 Cleaning and maintenance ........................6 Installation Instructions Technical data............................8 Instructions for the installation technician ..................9 Electrical connection .......................... 11 Adapting to the different types of gas .................... -
Page 3: For Your Safety
For Your Safety This manual includes important safety instructions. We recommend to read this manual carefully before installing and using the appliance. Keep this manual for future reference. If the appliance is moved, make sure the manual is handed over to the new user. Installation Prior to installation, ensure that the local distribution conditions (nature of the gas and gas •... - Page 4 If you do not find the necessary information, contact a service agent or the Parmco's Service Department. Servicing work on this appliance must be carried out by a qualified technician only. Always request the use of original spare parts.
-
Page 5: Description Of The Hob
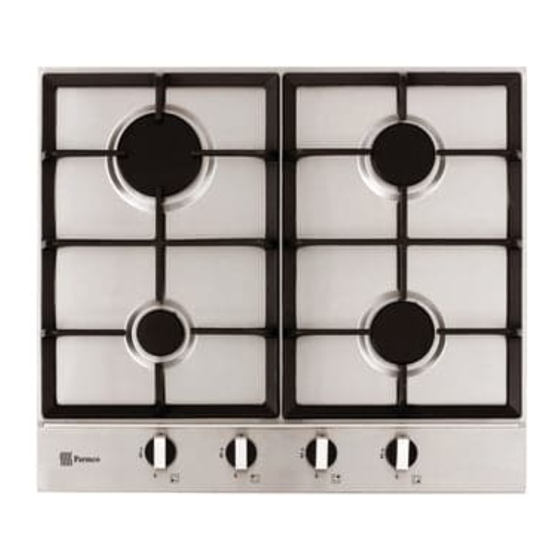
Description of the hob 1. Hob 2. Auxiliary burner 3. Semi-rapid burner 4. Rapid burner 5. Burner control knobs Instructions for use The hob control knobs The symbols on the control knobs mean the following: ● no gas flow maximum gas flow minimum gas flow All operating positions must be set between the maximum and minimum flow settings, and never... - Page 6 Lighting the burners To obtain a flame more easily, light the burner before placing a cooking utensil on the pan stand. To light a burner, proceed as follow: for versions with lighting integrated in the control knob: push the knob of the burner fully down and turn it anti-clockwise to the “maximum flow” setting symbol, or press the button if the appliance has individual lighting.
-
Page 7: Cleaning And Maintenance
Cleaning and maintenance Before each operation, disconnect the appliance from the electrical mains and allow it to cool down. General cleaning Wash enameled parts with lukewarm water and detergent: do not use abrasive products that • might damage them. Wash the flame caps and burner caps often with boiling water and detergent, taking care to •... - Page 8 For this reason, we strongly advise you always to contact the Dealer who sold you the appliance or Parmco Service Department, specifying the nature of the problem, the model of the equipment (Mod.), the product number (Prod. No.), and the serial number (Ser. No.). These data are provided in the plate on the cover of this manual.
-
Page 9: Technical Data
Technical data Model: Verso 4G Hob General Product LPG (G30/G31) 2.75kPa Natural Gas (G20) 2kPa No. of burners x Injector size No. of burners x Injector size Product Code Product Code Auxiliary Semi-Rapid Rapid Auxiliary Semi-Rapid Rapid Verso 4G Hob 1 x 0.72... -
Page 10: Instructions For The Installation Technician
Installation Instructions Dear Installer: Please affix data label provided on the adjacent cupboard near the appliance for future reference. Thank you. CAUTION: This appliance must only be installed and used in rooms with permanent ventilation to local standards. Installation of the appliance and its connection to the electrical mains must only be carried out by QUALIFIED PERSONNEL. - Page 11 Discharge of flue gases Gas cooking appliances must discharge their flue gases through hoods connected directly to flues or the outdoors. If it is not possible to install the hood (fig. B), an electric fan must be installed on the outside wall or the window of the room, provided it is possible for the ventilation opening to be increased in proportion to the delivery rate of the fan (fig.
-
Page 12: Electrical Connection
Electrical connection The appliance is designed to operate with a power supply voltage of 220-240 V single-phase. The connection must be made in accordance with the regulations and laws in force. Before making the connection, make sure that: 1) The safety circuit-breaker and the electrical system are able to withstand the load of the appliance (see nameplate). -
Page 13: Adapting To The Different Types Of Gas
Adapting to the different types of gas Changing the nozzles 1. Remove the pan stands. 2. Remove the burner caps and flame caps from the burners. 3. Use a size 7 socket wrench to unscrew and remove the nozzles, replacing them with those corresponding to the type of gas to be used (see “Technical data”). -
Page 14: Building Into Fitted Kitchen Units
Building into fitted kitchen units These hobs are designed for installation in fitted kitchen units up to 600mm deep with suitable characteristics. Please refer to the New Zealand Gas standards for minimum clearances of the installation of gas appliances. The dimensions of the hob and the installation opening are shown in the illustration. Insertions and fixing Before inserting the hob in the installation opening, place the special gasket around the bottom edge of the hob. -
Page 15: Installation Options
850mm between the gas hob and the kitchen cabinet. When installing a rangehood above a gas appliance, all relevant New Zealand building, installation and regulation standards must be adhered to. Cutout Dimensions Model Dimensions (w x h) mm Verso 4G Hob 560x495...
Need help?
Do you have a question about the Verso 4G and is the answer not in the manual?
Questions and answers