Table of Contents
Advertisement
Advertisement
Table of Contents

Related Manuals for Christie CAPTIVA DUW350S


Summary of Contents for Christie CAPTIVA DUW350S
- Page 1 USER MANUAL 020-000816-01 CAPTIVA DUW350S/DHD400S...
- Page 2 The CD included with this printed manual contains an electronic copy in English. Please read all instructions before using or servicing this product. Le DC fourni avec ce manuel imprimé contient une copie électronique en français. S'il vous plaît lire toutes les instructions avant d'utiliser ou de réparer ce produit.
-
Page 3: Table Of Contents
6.1 Installing and Cleaning the Optional Dust Filter ............51 6.2 Compatibility Modes .....................52 6.2.1 VGA Analog ......................52 6.2.2 HDMI Digital ......................54 6.3 RS232 Commands and Protocol Function List .............56 6.3.1 RS232 Port Setting ...................56 CAPTIVA DUW350S/CAPTIVA DHD400S User Manual 020-000816-01 Rev. 1 (07-2015) - Page 4 Table of Contents 6.3.2 RS232 Signals Connection ................56 6.3.3 Commands Set List ...................57 6.4 Regulation & Safety Notices ..................60 6.5 Ceiling Mount Installation .....................63 CAPTIVA DUW350S/CAPTIVA DHD400S User Manual 020-000816-01 Rev. 1 (07-2015)
-
Page 5: Usage Notice
Section 1: USage NoTiCe USAGE NOTICE COPYRIGHT AND TRADEMARKS Copyright ©2015 Christie Digital Systems USA, Inc. All rights reserved. All brand names and product names are trademarks, registered trademarks or trade names of their respective holders. Safety Information The lightning flash with arrow head within an equilateral triangle is intended to alert the user to the presence of uninsulated “dangerous voltage” within the product’s enclosure that may be of sufficient... - Page 6 Section 1: USage NoTiCe Do not let objects or liquids enter the projector. They may touch dangerous voltage points and short out parts that could result in fire or electric shock. See projector enclosure for safety related markings. The unit should only be repaired by appropriate service personnel. CAPTIVA DUW350S/CAPTIVA DHD400S User Manual 020-000816-01 Rev. 1 (07-2015)
-
Page 7: Precautions
Do not look into the projector�s lens when the lamp is on. The bright light may hurt and damage your eyes. To reduce the risk of fire or electric shock, do not expose this projector to rain or moisture. Do not open or disassemble the projector as this may cause electric shock. CAPTIVA DUW350S/CAPTIVA DHD400S User Manual 020-000816-01 Rev. 1 (07-2015) - Page 8 Extremely hot: > 30°C Extremely cool: < 5°C Extremely humid: > 70% R.H. (Relative Humidity) In areas susceptible to excessive dust and dirt. Near any appliance generating a strong magnetic field. In direct sunlight. CAPTIVA DUW350S/CAPTIVA DHD400S User Manual 020-000816-01 Rev. 1 (07-2015)
-
Page 9: Introduction
Projector Power Cord VGA Cable Documentation : U ser�s Manual & Quick Start Guide NOTE: ™ Due to different applications in each country, some regions may have different accessories. CAPTIVA DUW350S/CAPTIVA DHD400S User Manual 020-000816-01 Rev. 1 (07-2015) -
Page 10: Product Overview
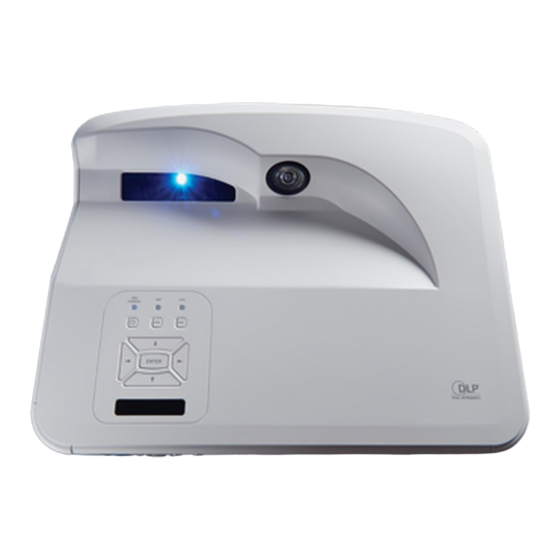
Ind. Part Name Ind. Part Name Control Panel Speaker Focus switch Power Socket Ventilation (inlet) Input/Output Connections IR Receiver Lens Ventilation (outlet) NOTE: The interface is subject to model’s specifications. ™ CAPTIVA DUW350S/CAPTIVA DHD400S User Manual 020-000816-01 Rev. 1 (07-2015) -
Page 11: Control Panel
Section 2: iNTRodUCTioN 2.2.2 Control Panel Ind. Part Name Power LED Enter Temp LED Lamp LED Menu Input Four Directional Select keys Power/Standby button IR Receiver CAPTIVA DUW350S/CAPTIVA DHD400S User Manual 020-000816-01 Rev. 1 (07-2015) -
Page 12: Output Connections
USB Type A Connector jack) Power Socket 16 Audio Input Connector (microphone) Interactive Connector (3.5 mm mini 17 KensingtonTM Lock Port jack) VGA-Out/VGA2-In Connector NOTE: ™ Monitor loop through only support in VGA1-In/YPbPr. CAPTIVA DUW350S/CAPTIVA DHD400S User Manual 020-000816-01 Rev. 1 (07-2015) -
Page 13: Remote Control
11 Input 12 Zoom out 13 Volume +/- 14 Keystone +/- 15 Image 16 Picture mute 17 Aspect ratio 18 VGA1 19 HDMI1 20 VGA2 21 HDMI2 22 Video 23 Screen freeze CAPTIVA DUW350S/CAPTIVA DHD400S User Manual 020-000816-01 Rev. 1 (07-2015) -
Page 14: Installation
Connector Name RS232 Cable Power Cord VGA Cable VGA Output Cable HDMI Cable DC to DC Cable USB Cable 10 Audio Output Cable Audio Cable/RCA 11 Audio Input Cable RJ45 Cable CAPTIVA DUW350S/CAPTIVA DHD400S User Manual 020-000816-01 Rev. 1 (07-2015) -
Page 15: Connect To Video Sources
Microphone Audio Output Ind. Connector Name Ind. Connector Name 15-Pin to 3 RCA Component/HDTV Power Cord Adaptor HDMI Cable Composite Video Cable Audio Cable Audio Cable/RCA Audio Cable/RCA Audio Input Cable CAPTIVA DUW350S/CAPTIVA DHD400S User Manual 020-000816-01 Rev. 1 (07-2015) -
Page 16: Powering The Projector On/Off
™ When the power mode is in standby mode (power consumption < 0.5W), the VGA output/input and audio are deactivated when the projector is in standby. POWER/STANDBY CAPTIVA DUW350S/CAPTIVA DHD400S User Manual 020-000816-01 Rev. 1 (07-2015) -
Page 17: Powering Off The Projector
“TEMP” LED indicator flashes red and if “POWER/STANDBY” indicator flashes amber. Unplug the power cord from the projector, wait for 30 seconds and try again. If the warning indicator light up again, contact your service center for assistance. CAPTIVA DUW350S/CAPTIVA DHD400S User Manual 020-000816-01 Rev. 1 (07-2015) -
Page 18: Adjusting The Projected Image
Locate the adjustable foot you want to modify on the underside of the projector. Rotate the adjustable ring clockwise to raise the projector or counter clockwise to lower it. Repeat with the remaining feet as needed. Tilt-Adjustment Feet Tilt-Adjustment Ring CAPTIVA DUW350S/CAPTIVA DHD400S User Manual 020-000816-01 Rev. 1 (07-2015) -
Page 19: Adjusting The Projector�S Focus
1080p series: The projector will focus at distances from 1.443 to 1.887 feet (0.437 to 0.572 meters). Ultra Wide series: The projector will focus at distances from 1.413 to 1.884 feet (0.428 to 0.571 meters). Focus switch CAPTIVA DUW350S/CAPTIVA DHD400S User Manual 020-000816-01 Rev. 1 (07-2015) -
Page 20: Adjusting Projection Image Size (Diagonal)
199.2 112.1 78.4 44.1 24.9 29.6 11.7 210.3 118.3 82.8 46.6 27.7 10.9 30.9 12.2 221.4 124.5 87.2 49.0 30.5 12.0 32.2 12.7 225.8 127.0 88.9 50.0 31.6 12.4 32.7 12.9 CAPTIVA DUW350S/CAPTIVA DHD400S User Manual 020-000816-01 Rev. 1 (07-2015) - Page 21 121.7 45.6 52.6 20.7 39.5 15.6 321.1 120.4 126.4 47.4 55.6 21.9 40.8 16.1 333.0 124.9 131.1 49.2 58.6 23.1 42.0 16.5 NOTE: ™ This table is for user’s reference only. CAPTIVA DUW350S/CAPTIVA DHD400S User Manual 020-000816-01 Rev. 1 (07-2015)
-
Page 22: User Controls
Refer to the LED indicator of the projector light LAMP LED source status. Refer to the LED indicator of the projector TEMP LED temperature status. Refer to the LED indicator of the projector power ON/STANDBY LED status. CAPTIVA DUW350S/CAPTIVA DHD400S User Manual 020-000816-01 Rev. 1 (07-2015) -
Page 23: Remote Control
Adjust to increase/decrease the Volume +/- volume. Use this function to choose your re- Aspect ratio quired aspect ratio. Press “Menu” to launch the on-screen Menu display (OSD) menu. To exit OSD, press “Menu” again. CAPTIVA DUW350S/CAPTIVA DHD400S User Manual 020-000816-01 Rev. 1 (07-2015) - Page 24 Press “Video” to choose Composite Video video source. Pause the screen image. Press again Screen freeze to resume the screen image. Select the display mode from Bright, Image PC, Movie, Game, and User. CAPTIVA DUW350S/CAPTIVA DHD400S User Manual 020-000816-01 Rev. 1 (07-2015)
-
Page 25: On-Screen Display Menus
To exit, press “Menu” again. The OSD menu will close and the projector will automatically save the new settings. image Color Mode Main Menu Wall Color White Brightness Contrast Sharpness Saturation Gamma Select Enter Back Sub Menu Settings CAPTIVA DUW350S/CAPTIVA DHD400S User Manual 020-000816-01 Rev. 1 (07-2015) -
Page 26: Image
The Contrast controls the difference between the lightest and darkest parts of the picture. Adjusting the contrast changes the amount of black and white in the image. • Press the ◄ button to decrease the contrast. • Press the ► button to increase the contrast. CAPTIVA DUW350S/CAPTIVA DHD400S User Manual 020-000816-01 Rev. 1 (07-2015) - Page 27 Gamma This allows you to adjust the gamma value to obtain the better image contrast for the input. NOTE: ™ Sharpness, Saturation and Hue functions are only supported under video mode. CAPTIVA DUW350S/CAPTIVA DHD400S User Manual 020-000816-01 Rev. 1 (07-2015)
-
Page 28: Configuration
16:6 ratio (only for DUW350S). Phase Synchronize the signal timing of the display with the graphic card. If the image appears unstable or flickers, use this function to correct it. Clock Adjust to achieve an optimal image when there is a vertical flicker in the image. H. Position • Press the ◄ button to move the image left. • Press the ► button to move the image right. CAPTIVA DUW350S/CAPTIVA DHD400S User Manual 020-000816-01 Rev. 1 (07-2015) - Page 29 Rear: When selected, the image will appear reversed. • Rear Ceiling: When selected, the image will appear reversed in upside down position. NOTE: ™ H. Position and V. Position ranges will depend on input source. CAPTIVA DUW350S/CAPTIVA DHD400S User Manual 020-000816-01 Rev. 1 (07-2015)
-
Page 30: Settings
Closed Caption Use this function to enable close caption menu. Select an appropriate closed captions option: Off, CC1, CC2, CC3, and CC4. VGA Output (Standby) Choose “On” to enable VGA OUT connection. CAPTIVA DUW350S/CAPTIVA DHD400S User Manual 020-000816-01 Rev. 1 (07-2015) - Page 31 Output: Choose “Output” to enable the VGA Out function once the projector is powered on. Test Pattern Display a test pattern. Factory Reset Choose “Yes” to return the parameters on all menus to the factory default settings. CAPTIVA DUW350S/CAPTIVA DHD400S User Manual 020-000816-01 Rev. 1 (07-2015)
-
Page 32: Audio
Choose “Off” to disable the microphone. Mute • Choose “On” to turn mute on. • Choose “Off” to turn mute off. Volume • Press the ◄ button to decrease the volume. • Press the ► button to increase the volume. Microphone Volume • Press the ◄ button to decrease the microphone volume. • Press the ► button to increase the microphone volume. CAPTIVA DUW350S/CAPTIVA DHD400S User Manual 020-000816-01 Rev. 1 (07-2015) -
Page 33: Options
Before active this function, it is recommended that “Aspect Ratio” is set to the “Auto”. Auto Source • On: The projector will search for other signals if the current input signal is lost. • Off: The projector will only search current input connection. CAPTIVA DUW350S/CAPTIVA DHD400S User Manual 020-000816-01 Rev. 1 (07-2015) - Page 34 Cleaning Up Reminder: Select “Yes” to reset the dust filter hour counter after replacing or cleaning the dust filter. Information Display the projector information for model name, SNID, source, resolution, software version, and aspect ratio on the screen. CAPTIVA DUW350S/CAPTIVA DHD400S User Manual 020-000816-01 Rev. 1 (07-2015)
-
Page 35: Options | Laser Settings
Display the projection time of ECO mode. Laser Power Mode • Normal: Normal mode. • ECO: Use this function to dim the projector lamp which will lower power consumption and extend the lamp life. CAPTIVA DUW350S/CAPTIVA DHD400S User Manual 020-000816-01 Rev. 1 (07-2015) - Page 36 ™ “Frame Sequential”/“Field Sequential” are supported the HQFS 3D input signals from Video connector. ™ “Frame Packing”/“Side by Side(Half)” / “Top and Bottom” are supported from HDMI 1.4a 3D input signals. CAPTIVA DUW350S/CAPTIVA DHD400S User Manual 020-000816-01 Rev. 1 (07-2015)
-
Page 37: Interactive
You must to unplug the Mini USB cable that connects NB/desktop with the projector before using the Interactive function. After you complete the Interactive Settings in OSD, use Mini USB cable to connect NB/desktop with the projector. CAPTIVA DUW350S/CAPTIVA DHD400S User Manual 020-000816-01 Rev. 1 (07-2015) -
Page 38: Lan
Display an IP address. Subnet Mask Display the subnet mask number. Gateway Display the default gateway of the network connected to the projector. Display the DNS number. MAC Address Display the MAC address. CAPTIVA DUW350S/CAPTIVA DHD400S User Manual 020-000816-01 Rev. 1 (07-2015) - Page 39 Section 4: USeR CoNTRolS Group Name Display the group name. Projector Name Display the projector name. Location Display the projector location. Contact Display the contact information. CAPTIVA DUW350S/CAPTIVA DHD400S User Manual 020-000816-01 Rev. 1 (07-2015)
-
Page 40: How To Use Web Browser To Control Your Projector
(N/A) New Password User Password Confirm Enabled (N/A) New Password Admin Password Confirm NOTE: ™ When you used the projector IP address, you will can not link to your service server. CAPTIVA DUW350S/CAPTIVA DHD400S User Manual 020-000816-01 Rev. 1 (07-2015) - Page 41 1) IP address: 192.168.0.100 2) Subnet mask: 255.255.255.0 3) Default gateway:192.168.0.254 Step 8: Open Internet Explorer and type the IP address 192.168.0.100 in the address box. Press Enter. CAPTIVA DUW350S/CAPTIVA DHD400S User Manual 020-000816-01 Rev. 1 (07-2015)
-
Page 42: Crestron Roomview Control Tool
(Operation UI as following image) 1. Main Screen 2. Edit Room NOTE: Crestron RoomView’s function is set according to the products’ models and specifications. ™ CAPTIVA DUW350S/CAPTIVA DHD400S User Manual 020-000816-01 Rev. 1 (07-2015) - Page 43 Section 4: USeR CoNTRolS 3. Edit Attribute 4. Edit Event For further information, please visit: http://www.crestron.com & www.crestron.com/getroomview. CAPTIVA DUW350S/CAPTIVA DHD400S User Manual 020-000816-01 Rev. 1 (07-2015)
-
Page 44: Multimedia
When the Input menu appears, press the keys to select “Multimedia” and the “Enter” key to confirm. NOTE: ™ Suggest to have the WIFI dongle with Realtek RTL8192CU chipset. The recommended WIFI dongles are WL-7200-V1, Abocom WU5508, EDUP EP-N1528. CAPTIVA DUW350S/CAPTIVA DHD400S User Manual 020-000816-01 Rev. 1 (07-2015) - Page 45 Launch “EZview” application and enter the PCTOOL password. Wait until the connection is established. The media files on your mobile device or tablet PC can be accessed using the projector. CAPTIVA DUW350S/CAPTIVA DHD400S User Manual 020-000816-01 Rev. 1 (07-2015)
- Page 46 Launch “EZview” application and enter the control code shown on the right- bottom side of the screen. Wait until the connection is established. The media files on your laptop/ notebook can be accessed using the projector. CAPTIVA DUW350S/CAPTIVA DHD400S User Manual 020-000816-01 Rev. 1 (07-2015)
- Page 47 Launch “EZview” application and type the control code shown on the right- bottom side of the screen. Wait until the connection is established. The media files on your desktop can be accessed using the projector. CAPTIVA DUW350S/CAPTIVA DHD400S User Manual 020-000816-01 Rev. 1 (07-2015)
- Page 48 MKV, VOB, and WMV Document WORD, EXCEL, PPT, PDF Multimedia menu, select USB disk. Multimedia Desktop USB Disk Settings Use the keys to select the file category and press the “Enter” key. CAPTIVA DUW350S/CAPTIVA DHD400S User Manual 020-000816-01 Rev. 1 (07-2015)
- Page 49 To change the settings, do the folllowing: Multimedia menu, select Settings. Multimedia USB Disk Settings Use the keys to select the desired menu option and press the “Enter” key to enter the submenu. CAPTIVA DUW350S/CAPTIVA DHD400S User Manual 020-000816-01 Rev. 1 (07-2015)
- Page 50 Music: Select this option to set the repeat mode . • WiFi: Select this option to configure the Wi-Fi connection. Use the keys to select the adjust/select the setting and press the “Enter” key to confirm. CAPTIVA DUW350S/CAPTIVA DHD400S User Manual 020-000816-01 Rev. 1 (07-2015)
-
Page 51: Appendices
The specific interfaces are selected in terms of the specifications of types. ™ Air Filter Cleaning Procedure: 1. Power off the projector by pressing the “ ” button and unplug the power cord. 2. Pull out the dust filter, as shown in the illustration (1). 3. Carefully remove the dust filter. Then clean or change the filter in illustration (2). To install the filter, reverse the previous steps. 4. Turn on the projector and reset the filter usage counter after the dust filter is replaced. CAPTIVA DUW350S/CAPTIVA DHD400S User Manual 020-000816-01 Rev. 1 (07-2015) -
Page 52: Compatibility Modes
1024x768 56.5 1024x768 60.0 1024x768 68.7 1024x768 99.0 Apple, MAC II 1152x870 68.7 1280x1024 64.0 SXGA 1280x1024 77.0 1280x1024 80.0 1280x960 60.0 QuadVGA 1280x960 75.2 SXGA+ 1400x1050 65.3 UXGA 1600x1200 75.0 CAPTIVA DUW350S/CAPTIVA DHD400S User Manual 020-000816-01 Rev. 1 (07-2015) - Page 53 576i 50(25) 15.6 (1440x576) 480p 720x480 59.94 31.5 576p 720x576 31.3 1280x720 45.0 720p 1280x720 37.5 1920x1080 60(30) 33.8 1080i 1920x1080 50(25) 28.1 1920x1080 23.98/24 27.0 1080p 1920x1080 67.5 1920x1080 56.3 CAPTIVA DUW350S/CAPTIVA DHD400S User Manual 020-000816-01 Rev. 1 (07-2015)
-
Page 54: Hdmi Digital
1024x768 56.5 1024x768 60.0 1024x768 68.7 1024x768 99.0 Apple, MAC II 1152x870 68.7 1280x1024 64.0 SXGA 1280x1024 77.0 1280x1024 80.0 1280x960 60.0 QuadVGA 1280x960 75.2 SXGA+ 1400x1050 65.3 UXGA 1600x1200 75.0 CAPTIVA DUW350S/CAPTIVA DHD400S User Manual 020-000816-01 Rev. 1 (07-2015) - Page 55 H. Frequency [Hz] Modes Resolution 720p 31.5 Frame 720p 59.94/60 15.7 Packing 1080p 23.98/24 15.6 1080i 31.5 Side-by- Side(Half) 1080i 59.94/60 31.3 720p 45.0 Top and 720p 59.94/60 37.5 Bottom 1080p 23.98/24 33.8 CAPTIVA DUW350S/CAPTIVA DHD400S User Manual 020-000816-01 Rev. 1 (07-2015)
-
Page 56: Rs232 Commands And Protocol Function List
8 bits Parity None Stop bits Flow control None 6.3.2 RS232 Signals Connection Computer COM Port Projector COM Port (D-Sub 9pin connector) (D-Sub 9pin connector) NOTE: ™ RS232 shell is grounded. CAPTIVA DUW350S/CAPTIVA DHD400S User Manual 020-000816-01 Rev. 1 (07-2015) -
Page 57: Commands Set List
(BRT n) Pass : P Value: 0~100 Fail : F Contrast (CON n) Pass : P Value: 0~100 Fail : F Sharpness (SHA n) Pass : P Video only Fail : F CAPTIVA DUW350S/CAPTIVA DHD400S User Manual 020-000816-01 Rev. 1 (07-2015) - Page 58 Pass : P Fail : F Mute (MUT n) Pass : P 0 : Off 1 : On Fail : F Volume (VOL n) Pass : P Value: 0~30 Fail : F CAPTIVA DUW350S/CAPTIVA DHD400S User Manual 020-000816-01 Rev. 1 (07-2015)
- Page 59 Fail : F Status (SST ?) Pass: a = Power Status Okabbbbbccdddee b = LD Hour Fail : F c = Input Source d = Firmware Version e = Color mode CAPTIVA DUW350S/CAPTIVA DHD400S User Manual 020-000816-01 Rev. 1 (07-2015)
-
Page 60: Regulation & Safety Notices
All connections to other computing devices must be made using shielded cables to maintain compliance with FCC regulations. Caution Changes or modifications not expressly approved by the manufacturer could void the user�s authority, which is granted by the Federal Communications Commission, to operate this projector. CAPTIVA DUW350S/CAPTIVA DHD400S User Manual 020-000816-01 Rev. 1 (07-2015) -
Page 61: Operation Conditions
R & TTE Directive 1999/5/EC (if product has RF function) Disposal instructions Do not throw this electronic device into the trash when discarding. To minimize pollution and ensure utmost protection of the global environment, please recycle it. CAPTIVA DUW350S/CAPTIVA DHD400S User Manual 020-000816-01 Rev. 1 (07-2015) - Page 62 Adequate instructions for assembly, operation, and maintenance, including clear warnings concerning precautions to avoid possible exposure to laser and collateral radiation in excess of the acces- sible emission limits in Class 2. CAPTIVA DUW350S/CAPTIVA DHD400S User Manual 020-000816-01 Rev. 1 (07-2015)
-
Page 63: Ceiling Mount Installation
• Be sure to keep at least 10 cm gap between the ceiling and the bottom of the projector. • Avoid installing the projector near a heat source. CAPTIVA DUW350S/CAPTIVA DHD400S User Manual 020-000816-01 Rev. 1 (07-2015)
Need help?
Do you have a question about the CAPTIVA DUW350S and is the answer not in the manual?
Questions and answers