
Related Manuals for Digisol DG-GS4652S


Summary of Contents for Digisol DG-GS4652S
- Page 1 DG‐GS4600S SERIES 24/48 Port Access Layer 3 Switch with 10G Uplinks INSTALLATION GUIDE V1.1 2012‐06‐15 As our products undergo continuous development the specifications are subject to change without prior notice...
-
Page 2: Table Of Contents
Installation Guide Content 1.1 O ..................1-1 VERVIEW 1.2 I ..............1-1 NTRODUCTION TO RODUCT 1.2.1 Product Overview ................. 1-1 1.2.2 Features and Benefits ................1-2 1.3 P ..............1-3 HYSICAL PECIFICATIONS 1.4 D ...............1-4 ESCRIPTION OF ARDWARE 1.4.1 Front Panel .................... 1-4 1.4.2 Back Panel..................... -
Page 3: Overview
DG-GS4652S, DG-GS4652SP, DG-GS4628S and DG-GS4628SP switches. The difference is DG-GS4652S implements 48V DC input, DG-GS4652SP supplies 48 ports for exporting PoE power supply, and the max output power of each port is 15W. DG-GS4628S and DG-GS4628SP supply the consistent signal interface, the difference is DG-GS4628S implements 48V DC input,... -
Page 4: Features And Benefits
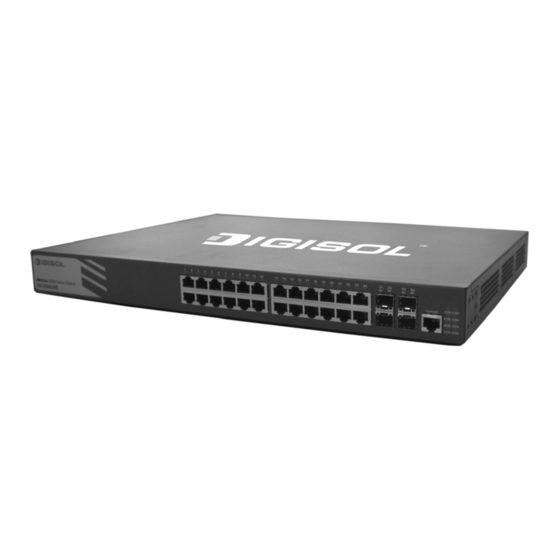
15W. 1.2.2 Features and Benefits Various Interfaces DG-GS4652S and DG-GS4652SP provide 44 fixed 1000Mb fiber ports, 4 1000Mb COMBO ports (1000Mb fiber SFP ports/1000Mb copper ports) and 2 10Gb slots with 2 ports. DG-GS4628S and DG-GS4628SP provide 20 fixed 1000Mb copper ports, 4 1000Mb COMBO ports (1000Mb fiber SFP ports/1000Mb copper ports) and 2 10Gb slots with 2 ports. -
Page 5: Physical Specifications
WEB interface and RMON. It can mail the correlative sensitive information to the administrator abide by SMTP protocol. DG-GS4600S series support SSH protocol, ensure the configuration management security of the switch. 1.3 Physical Specifications Item DG-GS4628S/ DG-GS4652S / DG-GS4652SP DG-GS4628SP Dimension 440×324×44 (W * H * D) (mm)... -
Page 6: Description Of Hardware
Introduction System DG-GS4600S series support AC/DC power input: power AC input: The rating voltage range: 100V~240V AC; 50/60HZ The max voltage range: 90V~264V AC; 47HZ~63HZ DC input: 48V DC input, -48V~-60V/DC; 2.5A Output Support Support power supply of PoE 35W (without PoE) 65W (without PoE) Power... -
Page 7: Back Panel
Fig 1-8 Back Panel of DG-GS4628S Fig 1-9 Back Panel of DG-GS4628SP Back Panel of DG-GS4652S is same with DG-GS4628S, it supplies 2 plug-in interfaces, 1 48V input power interface, 1 input power interface of PoE and 1 220V input... -
Page 8: Dc Power/Poe Power Input
Introduction Fig 1-11 Back Panel of DG-GS4652S Fig 1-12 Back Panel of DG-GS4652SP 1.4.3 DC Power/PoE Power Input DG-GS4600S supports AC/DC input power backup and PoE output power. pin-outs signal of DC power and PoE power are distributed as below:... -
Page 9: Status Leds
1.4.4 Status LEDs LEDs of DG-GS4600S show the corresponding state. In mainboard of DG-GS4628S/ DG-GS4628SP/ DG-GS4652S/ DG-GS4652S/ DG-GS4652SP the LEDs include two parts, one is 24/48 1000M interface LEDs, they show each port state at RJ45 plug-in, each port corresponds a LED with double colors. -
Page 10: Front Panel Interface Description
Introduction On (Green) Port2 of M1 is at link state M1-2 (Green, Port2 of M1 is receiving or sending the data Blink) Port2 of M1 is not at link state Port2 of M1 is not at link state, but M1 is in On (Orange) place On (Green) -
Page 11: Dg-Sa-Gs4600-Em-2Xfp/ Dg-Sa-Gs4600-Em-2Sfp
Introduction SFP-SX-L transceiver 1000Base-SX SFP(850nm,MMF,550m) SFP-LX-L transceiver 1000Base-LX SFP(1310nm, SMF, 10km or MMF, 550m) SFP-LX-20-L transcever 1310nm lightwave, 9/125um single mode fiber: 20km SFP-LX-40 transceiver 9/125um single mode fiber: 40km SFP-LH-70-L transceiver 9/125um single mode fiber: 70km ... - Page 12 Figure 1-15 panel diagram of DG-SA-GS4600-EM-2XFP Figure 1-16 panel diagram of DG-SA-GS4600-EM-2SFP+ Figure 1-17 panel diagram of DG-SA-GS4600-EM-2SFP Back panel diagram of the switch with extended modules is shown in the following: Figure 1-19 The back panel with extended modules for DG-GS4628S / DG-GS4652S 1-10...
- Page 13 Introduction Figure 1-20 The back panel with extended modules for DG-GS4628SP / DG-GS4652SP Extended module‘s LED description is the following: Table 1-5 10Gb extended module LED description Status Description Green Ports are at the link state of 10G Link/Activity Blink(Green) Ports are at the active state of 10G No link or the link is failure DG-GS4600S series switch supports the following XFP, SFP+ transceivers:...
-
Page 14: Installation Notice
Hardware Installation Chapter 2 Hardware Installation 2.1 Installation Notice To ensure the proper operation of DG-GS4600S series and your physical security, please read carefully the following installation guide. 2.1.1 Environmental Requirements The switch must be installed in a clean area. Otherwise, the switch may be damaged by electrostatic adherence. - Page 15 Hardware Installation In addition, salt, acid and sulfide in the air are also harmful to the switch. Such harmful gases will aggravate metal corrosion and the aging of some parts. The site should avoid harmful gases, such as SO S, NO , NH and Cl , etc.
- Page 16 Hardware Installation continued operation and an annual cumulative total of less than 15 days. Formidable operation conditions refers to the ambient temperature and relative humidity value that may occur during an air-conditioning system failure, and normal operation conditions should be recovered within 5 hours. 2.1.1.3 Power Supply Before powering on the power supply, please check the power input to ensure proper grounding of the power supply system.
-
Page 17: Installation Notice
Hardware Installation 2.1.1.6 Rack Configuration The dimensions of the DG-GS4600S series is designed to be mounted on a standard 19’’ rack, please ensure good ventilation for the rack. Every device in the rack will generate heat during operation, therefore vent and fans ... -
Page 18: Installation Preparation
Hardware Installation Do not configure the switch alone in a dangerous situation, Use standard power sockets which have overload and leakage protection. Inspect and maintain the site and the switch regularly. Have the emergence power switch on the site. In case of emergence, switch off the power immediately. -
Page 19: Installation Guide
2.3.1 Installing the Switch Fig 2-1 DG-GS4628S series installation sketch map on the rack Fig 2-2 DG-GS4652S series installation sketch map on the rack Please mount DG-GS4600S series on the 19’’ rack as below: 1. Attach the 2 brackets on the DG-GS4600S series with screws provided in the accessory kit. -
Page 20: Connecting Console
Hardware Installation Caution! The brackets are used to fix the switch on the rack. They can’t serve as a bearing. Please place a rack shelf under the switch. Do not place anything on top of the switch. Do not block the blowholes on the switch to ensure the proper operation of the switch. 2.3.2 Connecting Console DG-GS4600S series provides a Mini-USB serial console port. -
Page 21: Dg-Sa-Gs4600-Em-2Xfp Extended Module Installation
Hardware Installation Step 3: Push the SFP transceiver along the guide rail gently until you feel the transceiver snap into place at the bottom of the line card. Note: the SFP transceiver is hot swappable. Caution! Do not stare directly at the 2 fiber bore in the SFP transceiver when the switch is in operation, otherwise the laser may hurt your eyes. -
Page 22: Copper Cable/Fiber Cable Connection
Hardware Installation with the DG-SA-GS4600-EM-2SFP+. Note: 2SFP+ extended module does support swappable. DG-SA-GS4600-EM-2SFP+ extended module can insert SFP+ fiber transceiver. 2.3.6 DG-SA-GS4600-EM-2SFP Extended module Installation DG-GS4600S series provide 10Gb slots. The procedure for installing the DG-SA-GS4600-EM-2SFP module and the SFP 1Gb fiber transceiver is shown below: Step 1: Put on an ESD wrist strap (or antistatic gloves). -
Page 23: Ac Power Supply Connection
Hardware Installation Caution! Please verify the sign above the port to ensure using the right port. Connecting to wrong ports might damage the switch. Fiber cables should be connected as below: Step 1: Remove the protective plug from the SFP/XFP/SFP+ fiber transceiver bore; Remove the protective cap from one end of the fiber cable. -
Page 24: Dc Power Supply Connection
Hardware Installation Caution! The input voltage must be within the required range, otherwise the switch can be damaged or malfunction. Do not open the switch shell without permission. It can cause physical injury. 2.3.9 DC Power Supply Connection Please read the power input specification for the detailed information. Connection procedure is described as below: 1. -
Page 25: Poe Power Supply Connection
If there is any problem, do not open the switch shell without permission. It can cause physical injury. This product comes with Life time warranty. For further details about warranty policy and Product Registration, please visit support section of www.digisol.com 2-12...
Need help?
Do you have a question about the DG-GS4652S and is the answer not in the manual?
Questions and answers