
Related Manuals for Model Shipways Bluenose


Summary of Contents for Model Shipways Bluenose
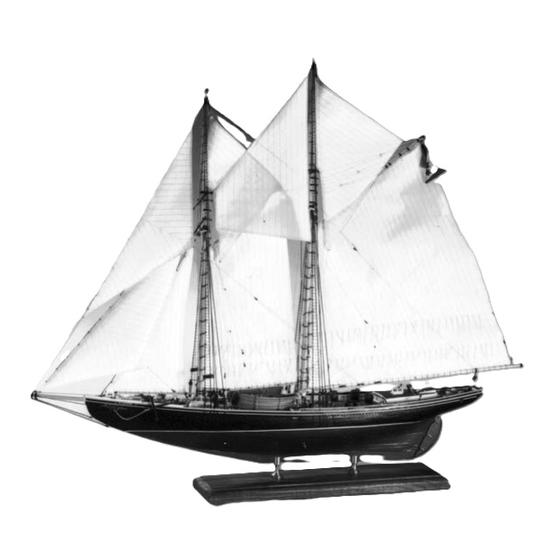
- Page 1 INSTRUCTION MANUAL Bluenose • CANADIAN FISHING SCHOONER 1921 • TECHNICAL CHARACTERISTICS SCALE: 3/16" = 1’0" (1:64) Overall length: 32-3/4" Overall height: 27" Overall width: 5-1/4" . 2130 ODEL HIPWAYS...
-
Page 2: Introduction And Credits
Dennis Cup. No more international regattas were Rhuland Shipyard in Lunenburg, Nova Scotia. Launched held until 1938, and that was the last one. Bluenose retained 26 March 1921, she was 143 feet long, 112 feet at the her supremacy over Thebaud and kept the Dennis Cup in waterline, with a beam of 27 feet, and displacement Canada forever. -
Page 3: Table Of Contents
NTENTS NTENTS 9. Main Boom Crutch Introduction and Credits 10. Fife Rail & Fore Boom Crutch Brief History Before You Begin 11. Galley Stack Tools needed to Start Construction 12. Bilge Pumps How to Work With Plans & Parts 13. Windlass & Hoisting Machinery Painting &... -
Page 4: Brief History
MODEL PLANS AND INSTRUCTIONS BY BEN LANKFORD ASSISTED BY ERIK A.R. RONNBERG, JR. Model Shipways developed the Bluenose kit in 1996. The model is based on several sources. In 1961, John R. Stevens prepared plans for the Fisheries Museum of the Atlantic in Lunenburg, Nova Scotia. -
Page 5: Before You Begin
Before You Begin Tools needed to start Construction A. Knives and saws 4. Miniature pliers Bluenose is a beautiful, inter- a. round nose esting ship and makes a 1. Hobby knife b. flat nose 2. No.11 blades splendid model. Assembling 5. -
Page 6: How To Work With Plans & Parts
It is often called basswood in Europe. examine the kit and study the plans. has a conversion table giving equiva- Based on Bluenose’s 3/16” = 1’0” scale, First, determine if all the listed parts are lent real ship sizes in inches, decimals, 1/64”... - Page 7 a pair of small pliers and pull in Solder: Until recently, modelers used Next, cut a small piece of solder and lay opposite directions. Thin brass sheets pure silver solder to avoid the corrosive it on the joint before heating. can be scored with a utility knife and qualities of lead in soft solder.
-
Page 8: Painting & Staining The Model
Painting & Staining the Model Beginning with directions on applying the completed model with a flat, clear designs bypass the body and bring paint finishes may seem strange, but it isn’t. coat. It provides durability and seals directly to the nozzle. These clean by sim- Much time and effort can be saved and any decals or rub-on lettering. - Page 9 Those with shaky hands should first apply masking tape to the waterline. 2. Bluenose Color Scheme The color scheme is shown on the plans. Model Shipways’ paint kit approximates the required colors. Purchase it separately.
-
Page 10: Stage 1: Framing The Plank-On-Bulkhead Hull
Fig. 1-1 Center Keel Assembly Stage 1 Framing the Building Board Plank-on-Bulkhead Hull 1. Bending Wood Building a P-O-B hull requires bending Straight Edge some wood without distorting its desired position (doing so stresses glue joints and fasteners). Although the term steam bent is used to identify the Wax Paper or Plastic Wrap process, there are three ways to do it. -
Page 11: Center Keel Assembly
2. Center Keel Assembly Fig. 1-4 Forming Bulwark Fig. 1-5 Gluing Bulkheads The first step in constructing the hull is Stanchions to Center Keel to assemble the laser-cut center keel. Pin or Tape With a sharp pencil, mark the reference line and bulkhead stations on both sides Temporary of the center keel. -
Page 12: Installing The Stern Blocks & Transom Framing
every bulkhead. It should feather out Fig. 1-7 Correcting Bulkheads at Bearding Line and lie precisely on the bearding line. If not, trim until it does. Also check that the top of each bulkhead at the Flush centerline is flush with the top of the center keel. -
Page 13: Installing The Knightheads & Hawse Timbers
The waterway on the quarter deck is fit- Fig. 1-10 Horn Timbers ted similarly, except it is flush with the 1/16” thick deck planks 11. Installing the Knightheads & Hawse Timbers Knightheads and hawse timbers are 1/8” thick. On the real ship, hawse timbers angle forward. -
Page 14: Installing The Great Beam & Deck Beam
Sheer strake: Upper line of planking on a hull. Wale: Heavy layer of strakes below the sheer strake. Bluenose has no wale. Belts: Group of planks along the hull. Belts are laid out using battens (tempo- rary strips of flexible wood). A ribband is also a batten. -
Page 15: Getting Started
While these alterations are accept- able and employed on many ships, the best run of planking limits their number. (Figure 2-1 illustrates some inserts.) Bluenose requires no stealers. Cut Out Plank Sheet 2 shows the planking layout. Fore and aft views plus a profile view pro- vide a complete picture. -
Page 16: Spiling
3. Planking Butts Fig. 2-4 Hull & Transom Plank Intersections Few trees grow as tall as ships are long. Consequently, real planks were generally 20 or 30 feet in length. Some builders Hull think a plank as long as the model is easi- Transom er to use. -
Page 17: Planking The Outer Hull
Narrow small scupper slots in the plank at deck mum plank width, at Bulkhead H, is planks are used on Bluenose, but wider level (even slightly oversize ones will still roughly 1/8” on the model (8” on the ones are a modeling option. -
Page 18: Planking Inboard (Ceiling Planks)
Navy Board contains the garboard strake (next to the The recommended approach (follows models. Even though Bluenose should be keel) and contains only seven strakes. shipwright practice) is to glue the coam- painted, its hull can be double planked... -
Page 19: Stage 3: Completing The Basic Hull Structure
Because supplied. Another approach to dis- planks feathered instead (Figure 2-10). Bluenose has a slight drag to her keel, playing the model is on a launching the forward pedestal is a little taller ways. Scratch build the platform or than the aft one. -
Page 20: Stage 5: Adding The Hull Details
Fig. 5-1 Deck Structure Details Stage 5 Optional Tabs to Secure Sides of Coamings Side Groove Adding the Hull Details Optional Rabbet in Coaming 1. Fishing & Racing Gear Optional Corner Deck Post with Rabbets On the plans are symbols of a fish and pennant. -
Page 21: Hatches
4. Hatches Fig. 5-4 Bowsprit Bitts & Samson Post Make hatch covers as either planked Support Blocks for structures or from 1/32” thick sheet. Windlass Brake Beam Dip lifting ring shafts in cyano, then insert in two diagonal corners on each Platform cover. -
Page 22: Fife Rail & Fore Boom Crutch
10. Fife Rail & Fig.5-7 Mainmast Fife Rail Fore Boom Crutch Slot for Boom Crutch Drill Holes For Belaying Pin The main fife rail, rail bar, knees, fore Drill Hole for Belaying Pin boom crutch, and crutch pad are laser-cut parts. -
Page 23: Catheads & Anchors
(Figure 5-10). Gudgeon During a race, catheads were removed and anchors stowed below as ballast. Model Shipways’ Grand Banks’ anchors have Britannia shanks, but make their stocks from stripwood. The plans show Pintle, Brass Strip how to stow the anchors, and the type and amount of cable required. -
Page 24: Eyebolts & Cleats
Depending on side on each spar with a pencil mark at Make frames, thwarts, and oars from how Bluenose is presented, racing pen- both ends. Taper the dowel with a file. stripwood. Since the number of dories... -
Page 25: Building And Installing The Bowsprit
Trestle Trees and Spreaders: Fashion trestle Fig. 6-1 Mast Head Fig. 6-2 Topmast Heal trees and spreaders from stripwood. Between the spreaders is a brass rod (Figure 6-3). Tenon for Cap Pin Saddle (foremast) and Boom Rest (main mast): These are laser-cut, port and star- board halves. -
Page 26: Building The Booms & Gaffs
Fig. 6-6 Gaff Jaws nomenclature. Old salts can skip this part and grab a mug of grog. Because Bluenose has no square sails, many terms don’t apply, but may come in handy on your next project. Each edge and corner of a sail has a name. - Page 27 Bobstays: Support the bowsprit from upward loads. Bowsprit guys, some- times called bowsprit shrouds, support jibbooms and bowsprits from side forces. Bowsprits occasionally have a vertical strut below the jibboom cap to increase the stays’ downward pulling force back to the hull. This strut is the martingale or dolphin striker.
-
Page 28: Rigging Options
Use fine silk or linen thread. Avoid cotton. It’s too fuzzy. 4. Treating the Lines Use every available diameter to enhance the Note: Standing rigging on Bluenose was model’s scalelike appearance. Additional wire, but the kit substitutes thread. sizes are commercially available. Some... -
Page 29: Belaying Pins
Because no belaying plan exists for Wonder-Under comes in sheets with a and on the plans show some details. Bluenose, general fishing schooner prac- thin, paper backing on one side. This tices were followed. material is useful for bonding letters and numbers to a scale sailboat’s sail. -
Page 30: Stage 8: Standing Rigging
Figure 8-3 also shows the sequence for Fig. 8-1 Lower Chain Plates reeving lanyards. When looking out- Wire board at any deadeye, always start with a knot in the upper left-hand deadeye hole. Consequently, port deadeyes have Deadeye Strop the knot aft and starboard deadeyes have it forward. -
Page 31: Fore And Aft Stays
It belays to the bails. Topmast Flying Backstays: During races, a port and starboard main topmast flying backstay was rigged. Those who are building Bluenose in this configuration can install one backstay tight and the other slack. 3. Bowsprit Rigging Backropes, guys, and bobstays are tight- ened with turnbuckles. -
Page 32: Jumbo Jib, Jib & Balloon Jib
Attach as many lines as possible to sails or spars before mounting on the model. Play out enough line for reev- ing, handling, and belaying. Don’t be in a hurry to snip them flush. They may need retensioning as rigging progresses. Sheet 6 contains the belaying plan. -
Page 33: Fore And Main Sails
Congratulations No sail: Lower the gaff, set the boom in FINAL TOUCHES Bluenose is finished! Take a moment to its crutch, and add the crutch’s port and revel in your accomplishment. You’ve starboard tackle. Note: The plans show... -
Page 34: Bibliography
Church. New York: W. W. Norton, 1940. Backman. Toronto: McClelland and 10mm (.004") Stewart, 1965. Many photos of Bluenose in races with .20mm (.008") Probably the best book on Bluenose Gloucester fishermen and closeup bow and a major reference for Model and stern views. -
Page 35: Modelers Log
MODELER'S LOG Date Time Notes... - Page 36 MODELER'S LOG Date Time Notes...
- Page 37 MODELER'S LOG Date Time Notes...
- Page 38 MODELER'S LOG Date Time Notes...
- Page 39 MODELER'S LOG Date Time Notes...
-
Page 40: Modelers Log
MODELER'S LOG Date Time Notes MODEL SHIPWAYS A Division of Model Expo Inc. P.O. Box 229140, Hollywood, FL 33020... - Page 41 Treat this with beeswax. Keep white When racing, Bluenose’s mainsail car- glue at the ready for dabbing on a seiz- ried an arabic “1” or “2” near its head. ing if necessary. Usually sewing through the shroud followed by a half hitch will prevent a seizing from unraveling.
- Page 42 Those who are 1. Jumbo Jib, Jib & Balloon Jib building Bluenose in this configuration can install one backstay tight and the Installing sails: Substitute split rings for Shrouds for the fore and main topmast other slack.
- Page 43 No sail: Rest the boom in its crutch. Lower the gaff on top of the boom and Congratulations - Bluenose is finished! stack the mast hoops in a pile. Lash the Take a moment to revel in your accom- gaff to the boom with short lines.
Need help?
Do you have a question about the Bluenose and is the answer not in the manual?
Questions and answers